LEGO 8850 Update


After updating 8640, I wanted to update another set with a Technic Fig. There was only one option, 8850 Rally Support Truck.

Free instructions are available at Rebrickable.com.

8850 Update Side

Every once and a while I return to an old LEGO set, and try to modify and improve what was offered by The Lego Group when the set was released. I like to harken back to some of these influential sets because it helps me take stock of all the improvements that have happened in parts and design in LEGO Technic. 8850 was one of the first sets to use the, then new, cylinder and piston parts that have been used ever since. The set also had a driver, steering, and a robust design. When I set to work on this MOD, I placed the following constraints: keep the size, keep the engine, keep the steering, add suspension, update the bodywork, and keep the driver. Make it yellow.
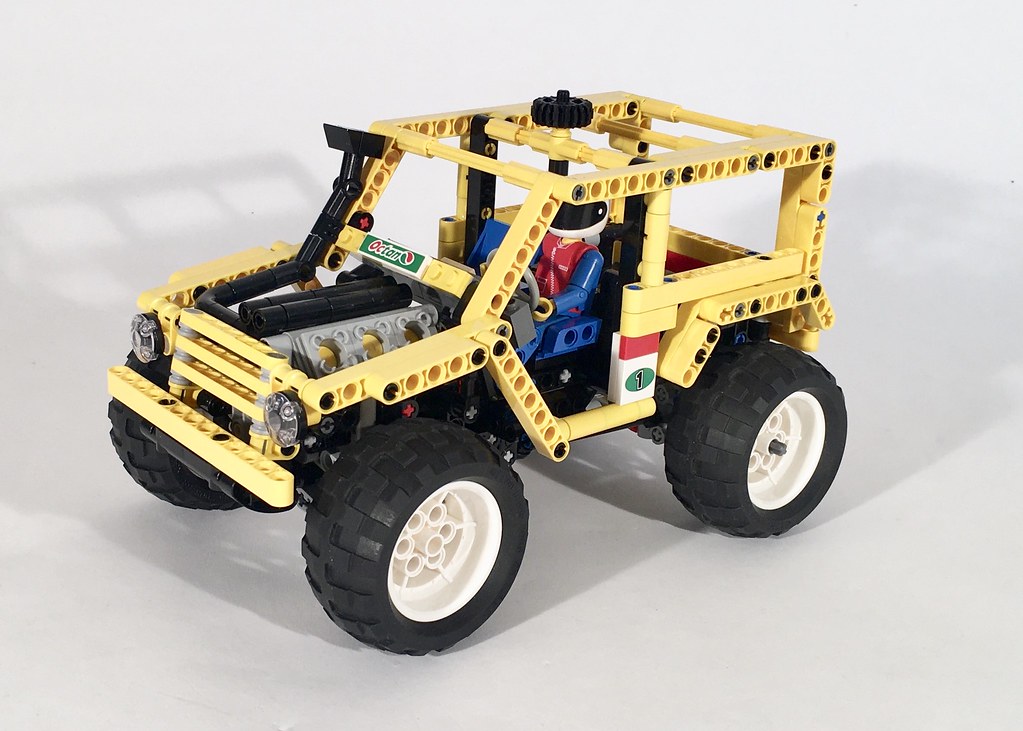
8850 Rally Support Truck Update

The chassis came together quickly, as it is not too complicated, and utilized features I have used before. The rear live axle is simple, and linked forward by two links, and laterally by a Panhard rod. I used the new differential to increase the final engine speed. The front suspension is another simple design; double A-arms with a rear steering link. The steering mechanism travels under the engine, through an idler gear, and moves upward towards the HOG gear on the top of the truck.
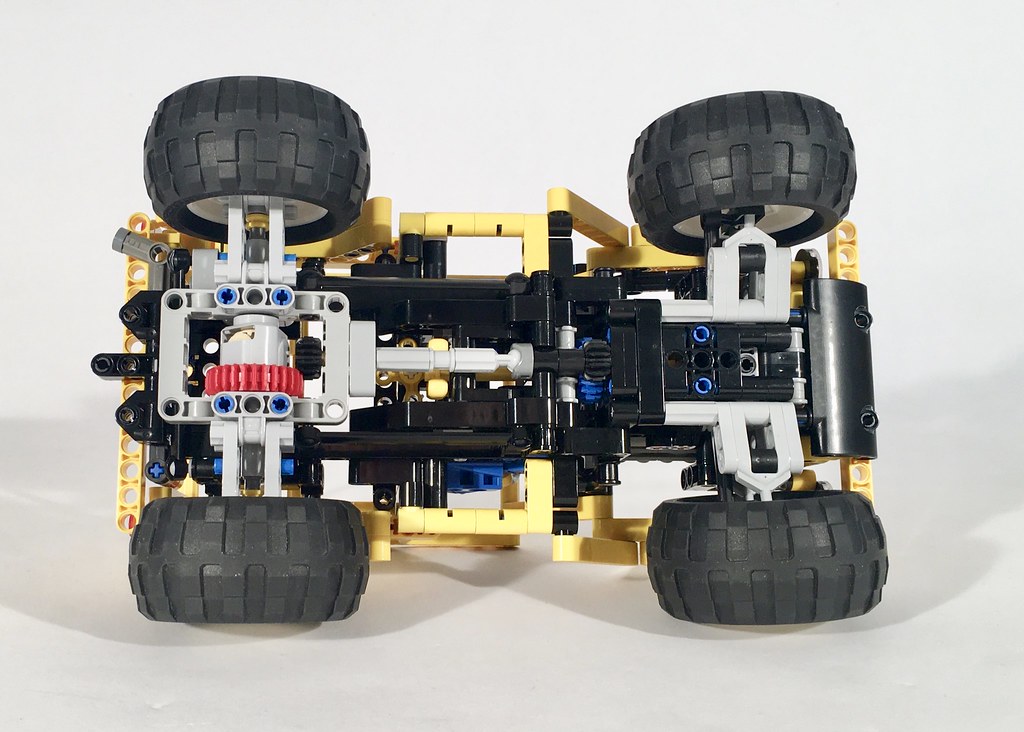
8850 Update Chassis

The body work was quick as well, though I needed to slow down to be conscientious to the original design. Liftarms replaced Technic bricks, and the lines were kept. I added some engine detail including a intake, and gave a new grill design. I removed the headlights on top of the A-pillar, because they look silly to my eyes. I played with some ideas for the front bumper including a bull-bar, and other colors, but this simple design ended up being the one I like the most. I gave a little tailgate on the rear with some color, and a little exhaust pipe. Finally, I gave a little OCTAN coloring to highlight the race focus of the truck.

In my effort to improve access to my builds, I have created this MOD in Bricklink Studio, and have made instructions that are a little more clear than the photo sequence instructions I have done in the past. You may find a partlist and download the instructions PDF at rebricklable.com. Send me a photo if you enjoy the build.

Sample of the Instructions

8850 is a tricky set to update, because it has some defining features that I find unattractive, such as the front bumper, the rear, and the upper A pillar headlights. With this in mind, I think I carried the themes through to this build well. The OCTAN livery while keeping the main yellow with white highlights worked very well for my eyes. Functionally, keeping what 8850 had, and adding suspension was a fun project. I am already thinking about how to convert this build into an overland version with 4×4 and more bodywork. Stay tuned…

Until then, Happy building.
Compact Loader


It was time for me to learn how to do Bricklink Studio, and my Atmos Tractor needed a friend to load all of the trailers.

Free instructions can be found at Rebrickable.com.

This small loader came together rather quickly. I decided to use rear wheel steering rather than articulation as this would keep the mechanics of the bucket/fork simple. Additionally, I wanted to use the new tires from LEGO 42122, and they take up a little more room while turning. Finally, I wanted to allow the tractor to switch easily from forks and a bucket, so this simple feature was the second part to figure out.

The next part of the build required a little more trial and error. End Loaders are tricky in that they have a wide range of motion, and have to fit within a little given space due to the front wheels, cab, and ground. It become clear that at this scale, a mini linear actuator was not going to work. So I used a worm gear and 24z gear with a small linkage to the boom. This gave a wide range of motion, including a very high lift height. The motion was controlled by a 20z gear at the rear of the loader.

The bucket/fork tilt was a little more tricky. A 8z gear and worm gear control the movement. I add this mechanism in many of my builds because it works well for many needs; and it is small. In this build, I needed to redesign the frame for this mechanism as the standard build would not allow for the bucket and fork to fully tilt at ground level. But with a little modification, I was able to get it to work. At the high end, the bucket tilt can bind, which is not great. The tilt stays consistent as the boom lifts, which was a requirement for me as the fork was going to be a center part of the build. Control for the tilt is at the rear of the tractor. Pulling two axles allows for quick change between the bucket and the forks.

Finally, I built this MOC with the singular focus of developing my skills with Bricklink Studio; with the goal of improving the instructions that I make available. I have made photo sequencing instructions for years, but with the 800 pound gorilla that is Rebrickable.com, more and more people are contacting me directly saying some form of “I am confused when I try to build ______.” So, after trying a couple of 100-200 part builds, I launched into this Compact Loader, and built the file in Studio. Studio takes a little time to get used to, but it is slick. And the instructions that are generated are very slick.

But it does take time. Many of my instructions have been free, and I continue to value this for many reasons, but I’ll be reevaluating this the deeper I get into this transition. Either way, enjoy the many MOCs of mine that you can build for free.

I am pleased with how this MOC turned out, and what it taught me about building in Bricklink Studio has been valuable. The model fits my design language, and functions as I expect my models to function. And now, you can clearly figure out how to build it as well. I hope you will enjoy the build as well.

Happy building!