When I do an update, I like to add features, but keep the look and feel of the original in a way that you see the build and know what it is referencing. It’s is easy to see the old studded design and have the impulse to recreate the set with studless beams. But there are a lot of new parts that have been released since those old sets were released and many of the new parts allow for a lot of new functions.
For this set, I started first with the bodywork. Once the bodywork was where I wanted, I would fit in as many new functions as I could. It turned out that not many functions were added. But at least the bodywork was a nice update to the original.
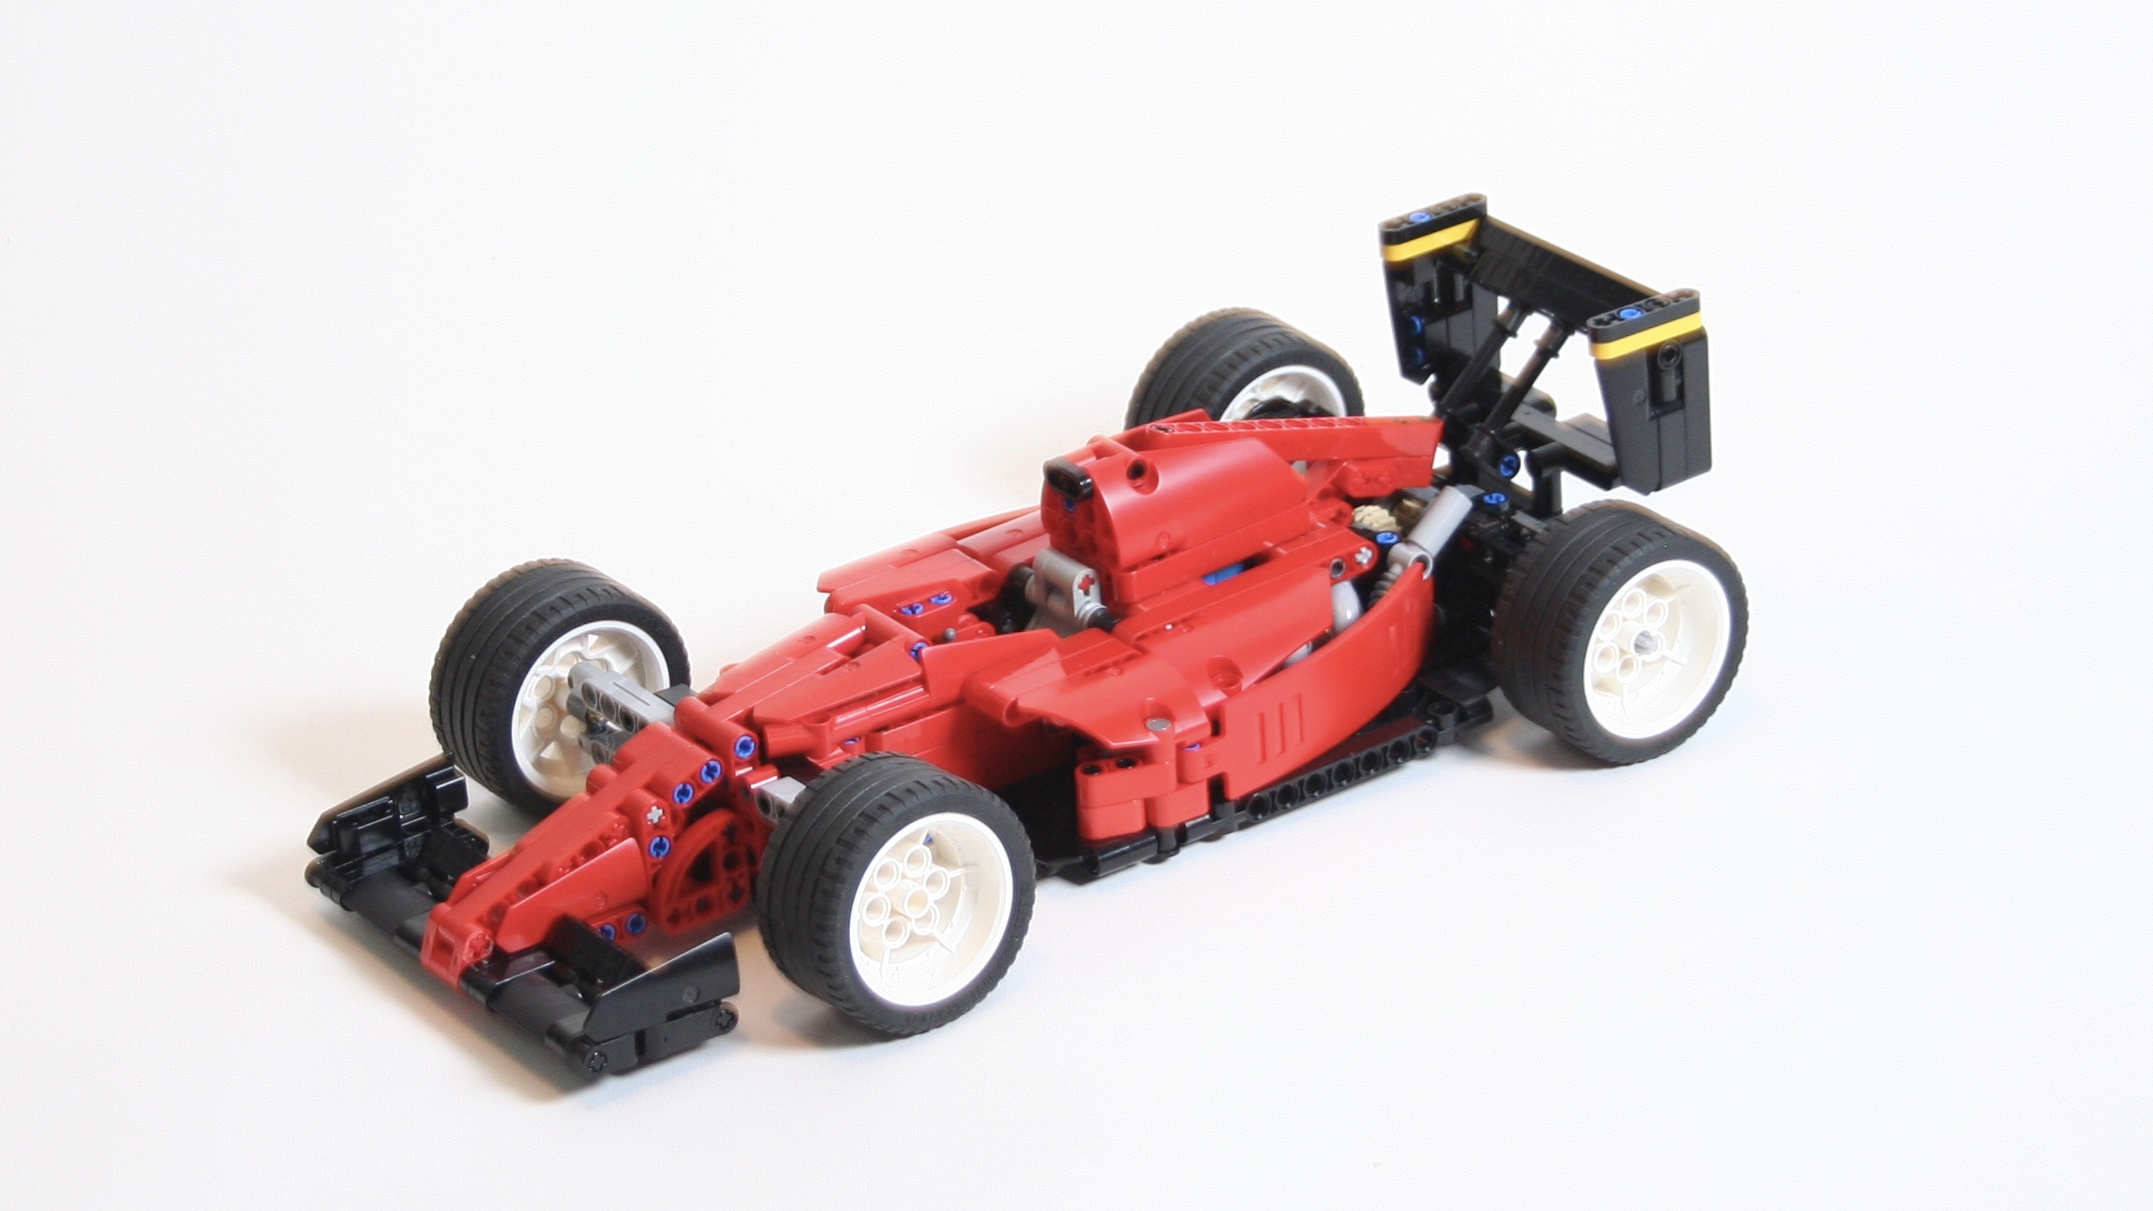
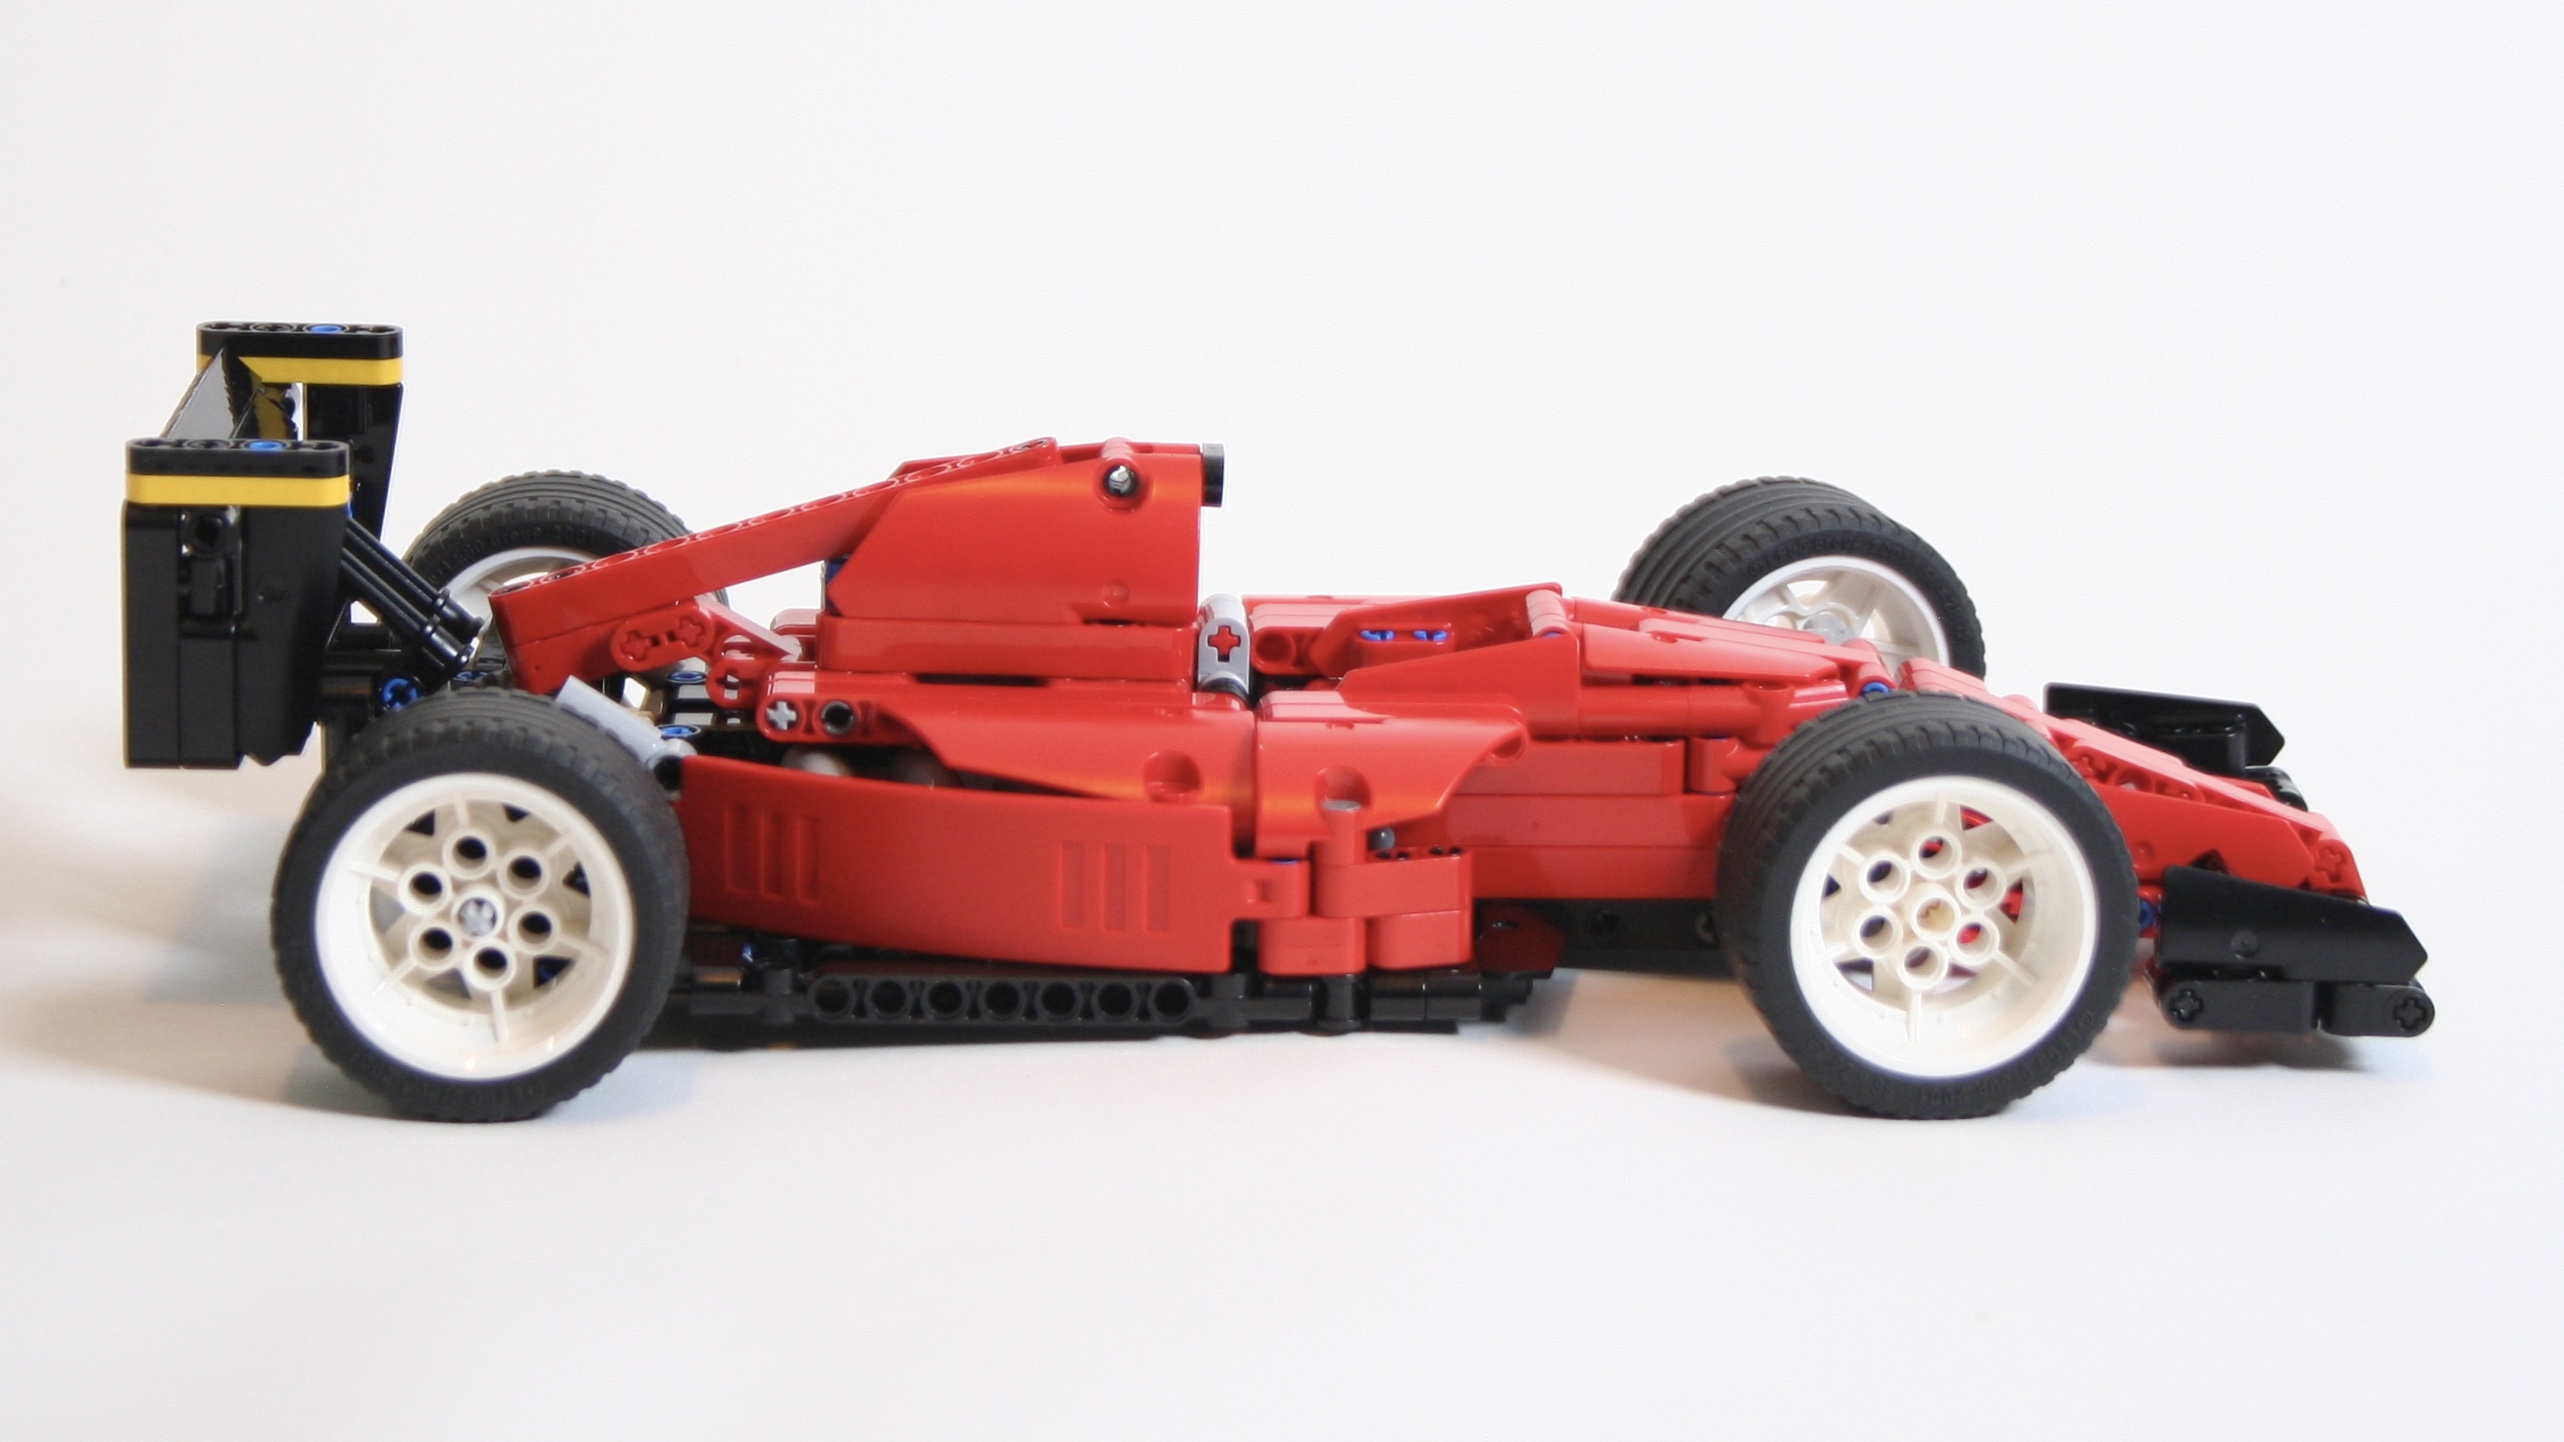
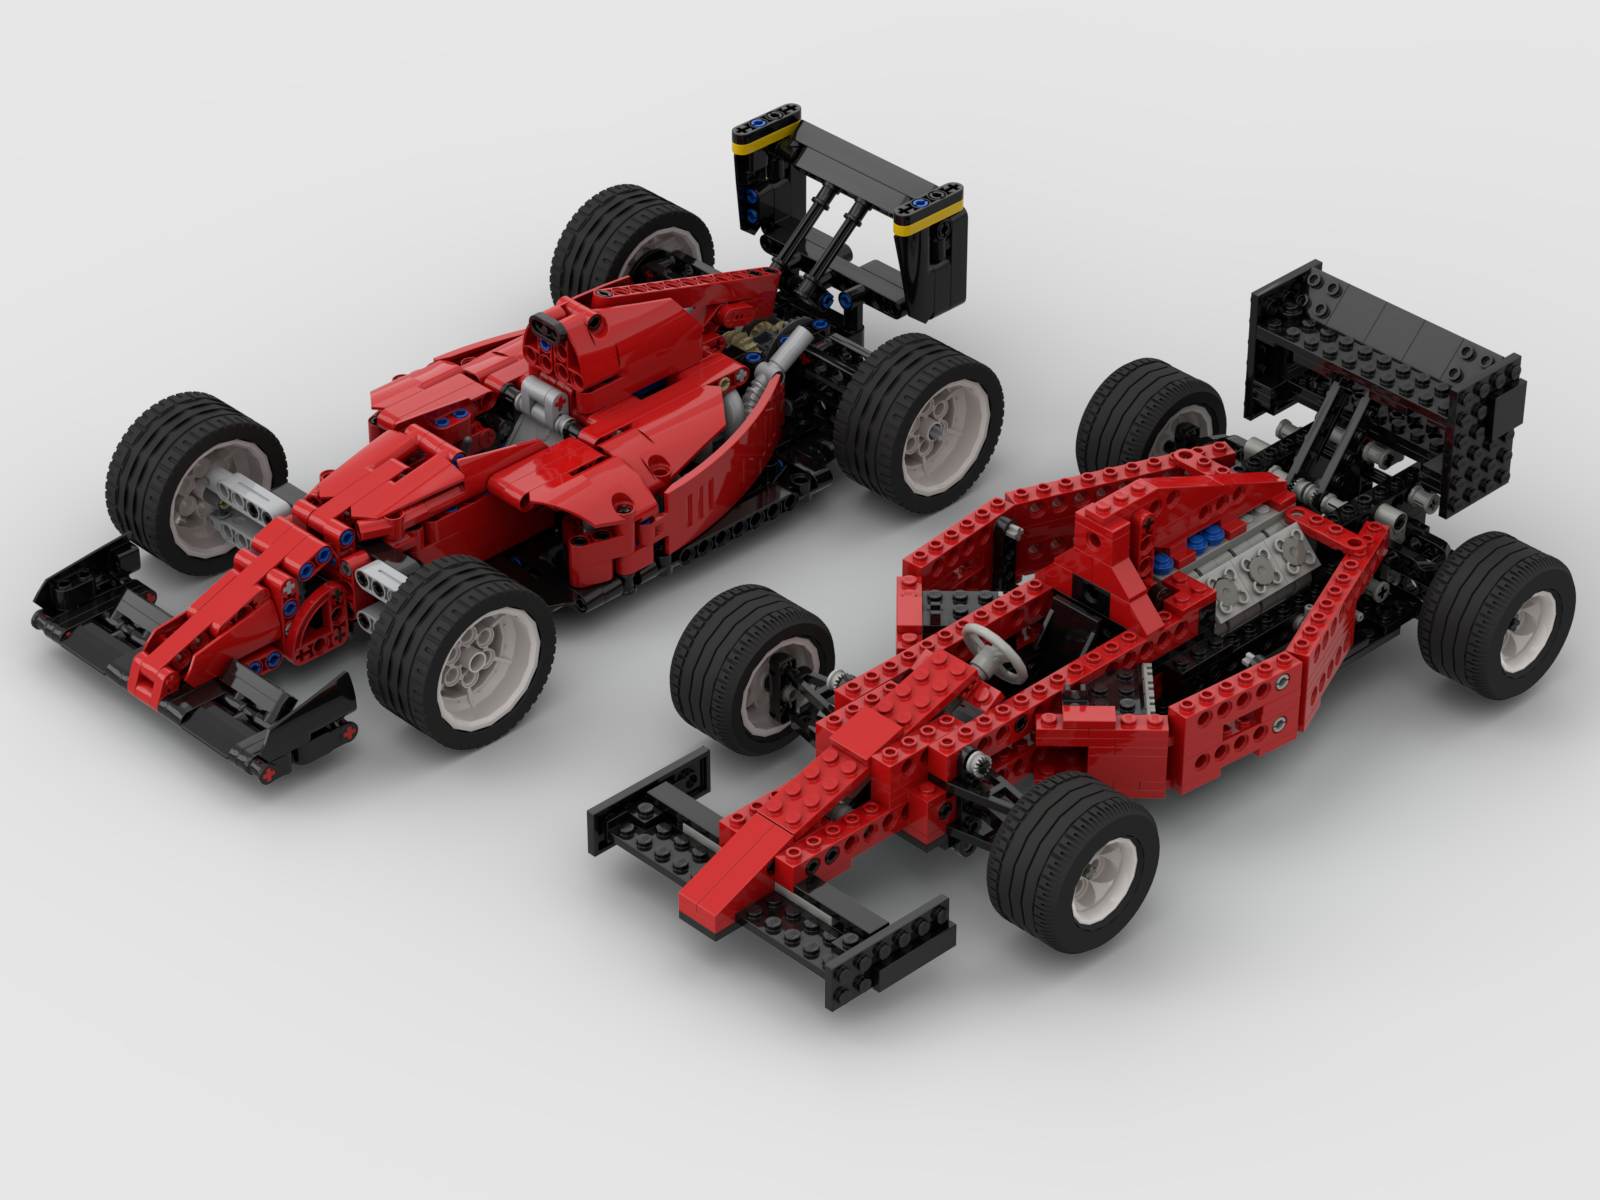
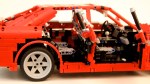
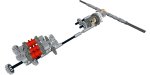
Updated 8440 (red) over original 8440 (light trans-blue)
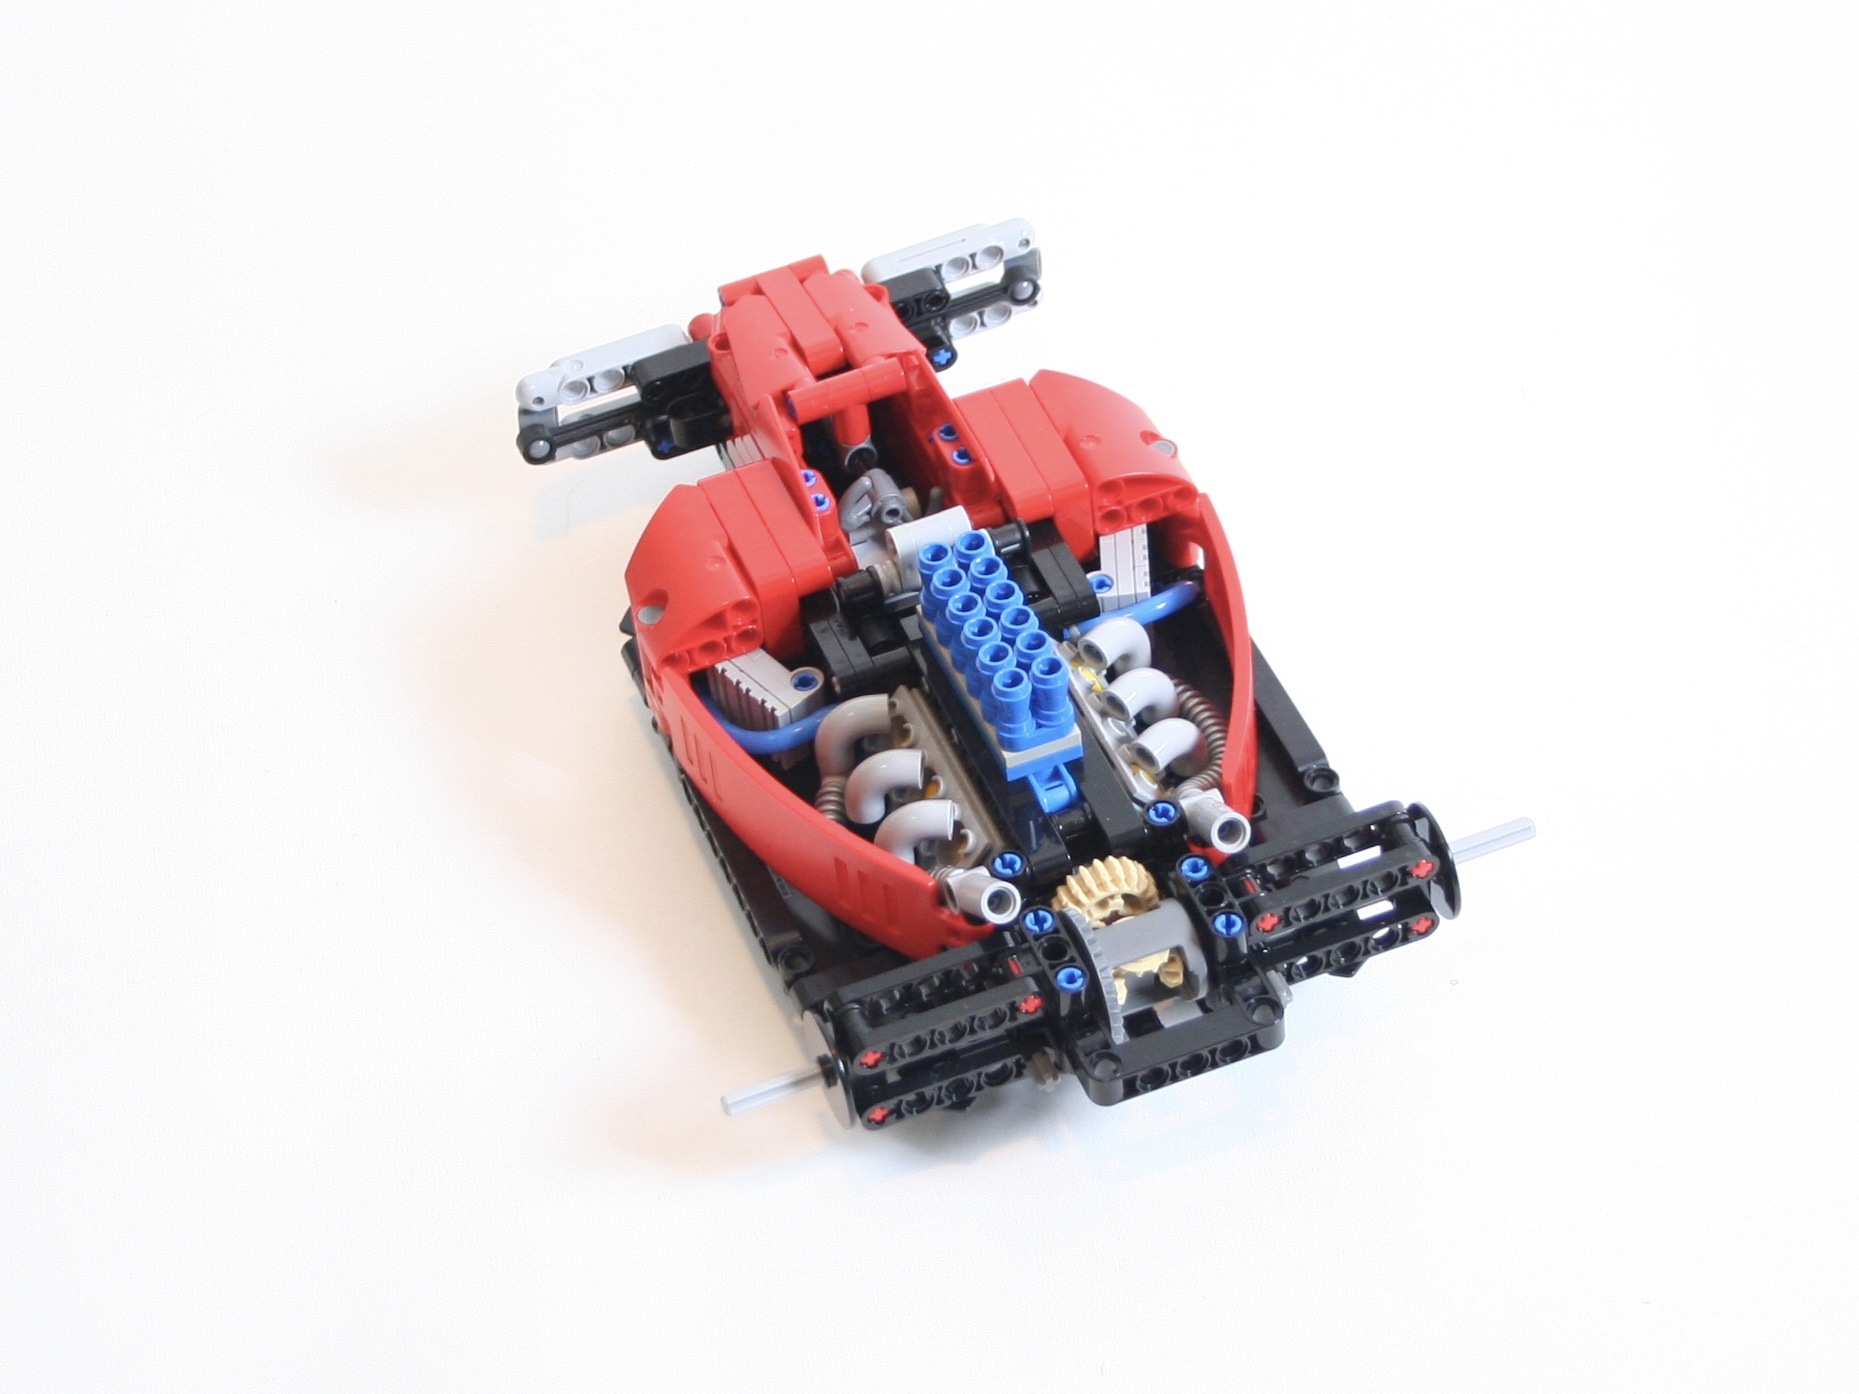
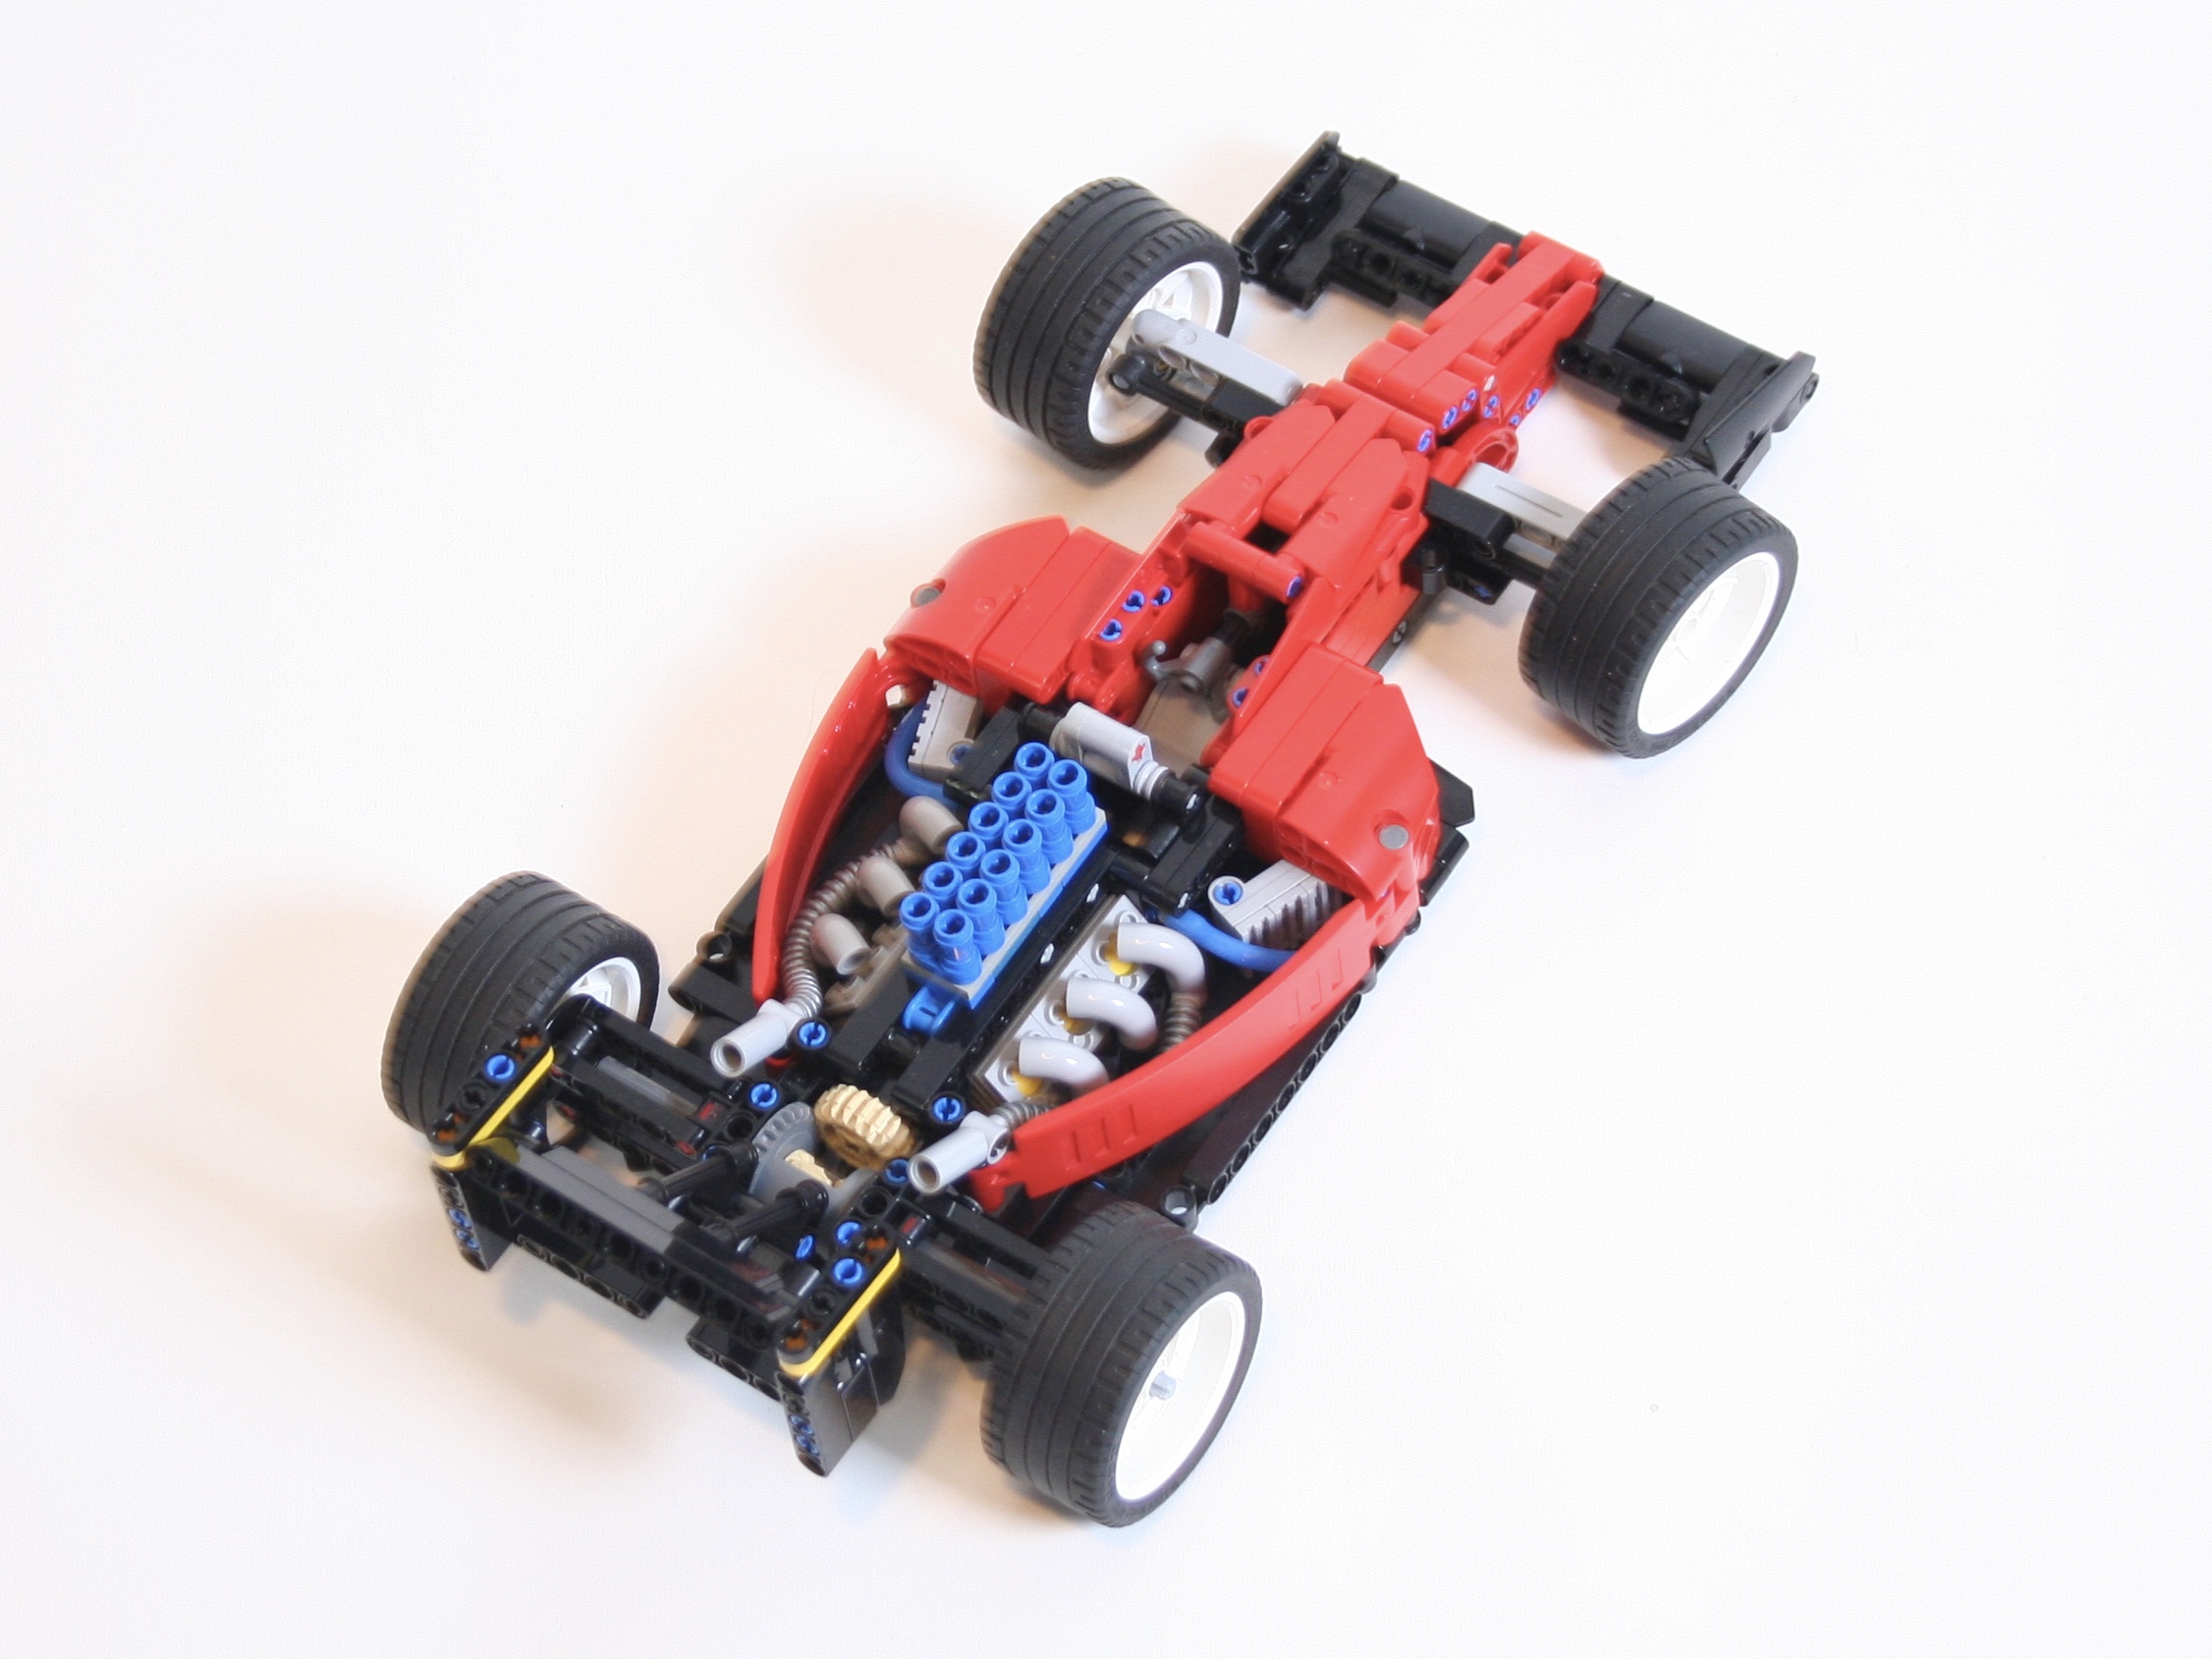
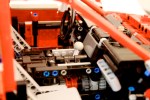
I kept the V6 that 8440 had, and devised a new rear transmission to the rear wheels. It is single speed, but it is geared up in a way that the engine spins faster than it does in the original. I then started adding details to the engine that would fit under the engine cover. I had to keep some exhaust pipes, and cooling radiators, but it took a little time to get those to look the way I wanted. I finally found a solution that was a step up from the old pneumatic tubes.
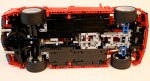
8440 Update Chassis
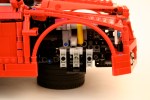
Keeping the front steering was simple, but fitting it into the narrow nose was a little bit of a trick. The final result is not too interesting but works well, and allows for a removable nose. A simple rear wing was added as well, and can be easily removed.
The remake did not add as many new functions as I originally wanted to add. True, the design stayed faithful to the original, but a wanted a little more than that. Everything worked well, and looked great, but it was a little too simple. Maybe the next update I do will have a little more opportunity to make some updates. Until then, happy building.
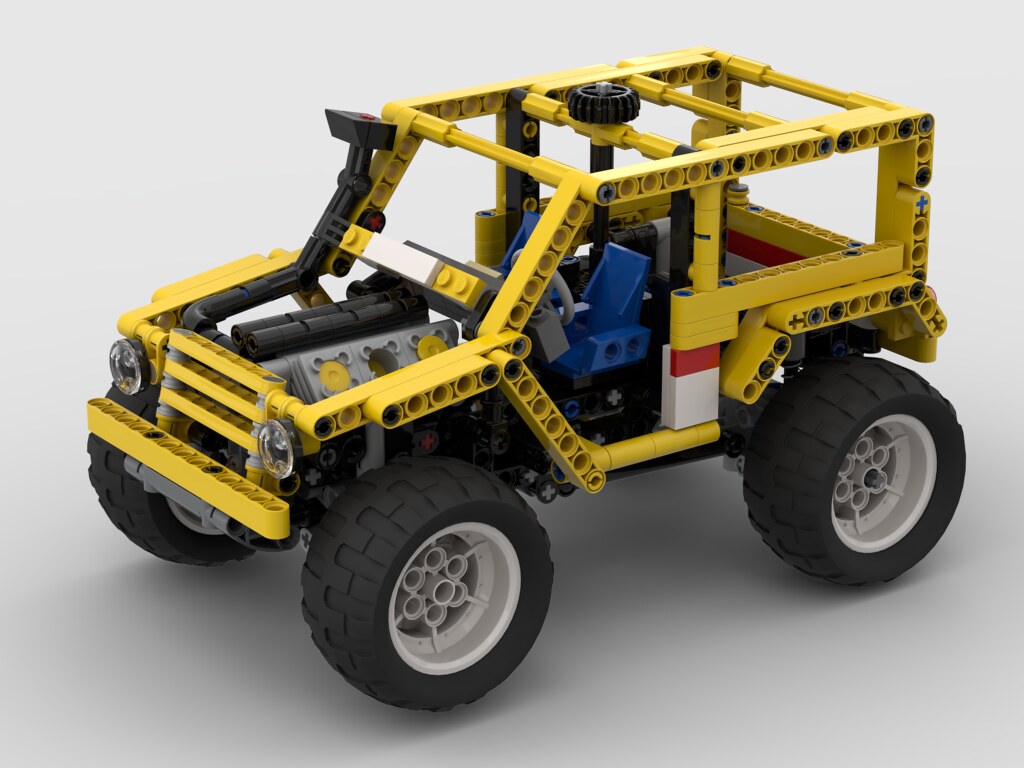
Every once and a while I return to an old LEGO set, and try to modify and improve what was offered by The Lego Group when the set was released. I like to harken back to some of these influential sets because it helps me take stock of all the improvements that have happened in parts and design in LEGO Technic. 8850 was one of the first sets to use the, then new, cylinder and piston parts that have been used ever since. The set also had a driver, steering, and a robust design. When I set to work on this MOD, I placed the following constraints: keep the size, keep the engine, keep the steering, add suspension, update the bodywork, and keep the driver. Make it yellow.
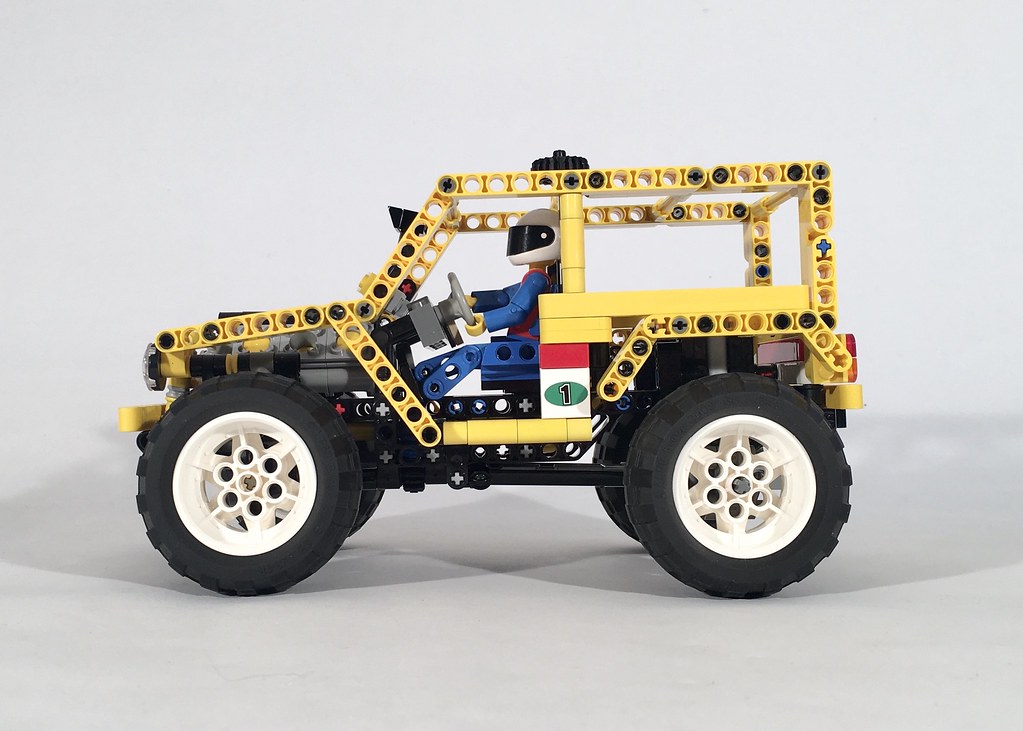
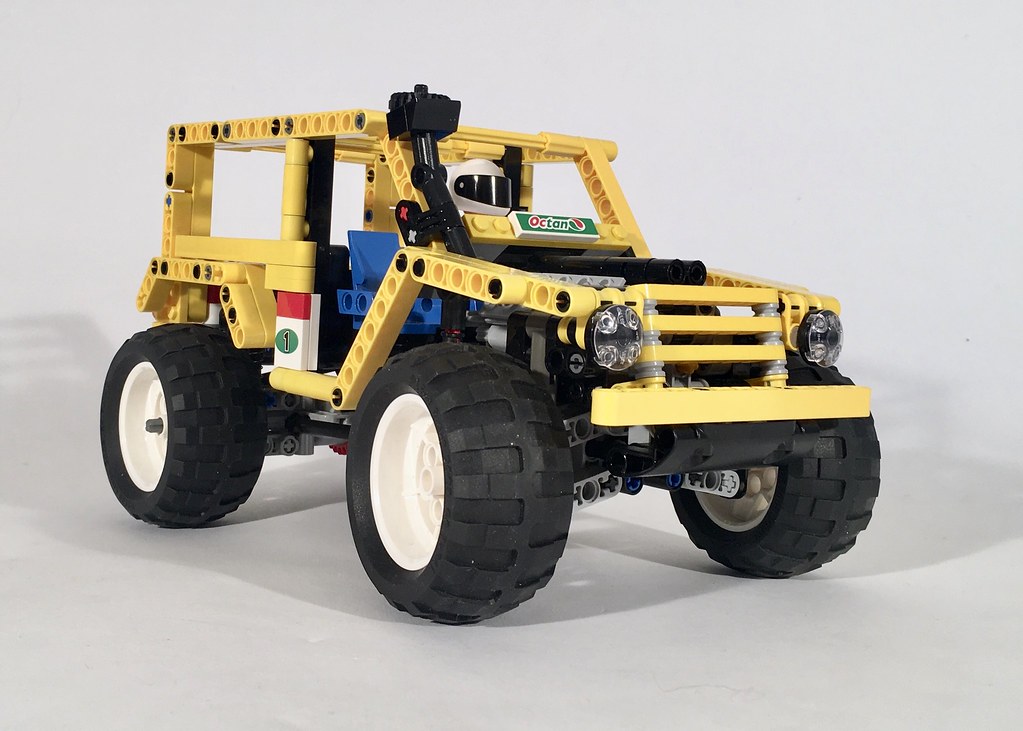
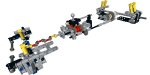
8850 Rally Support Truck Update
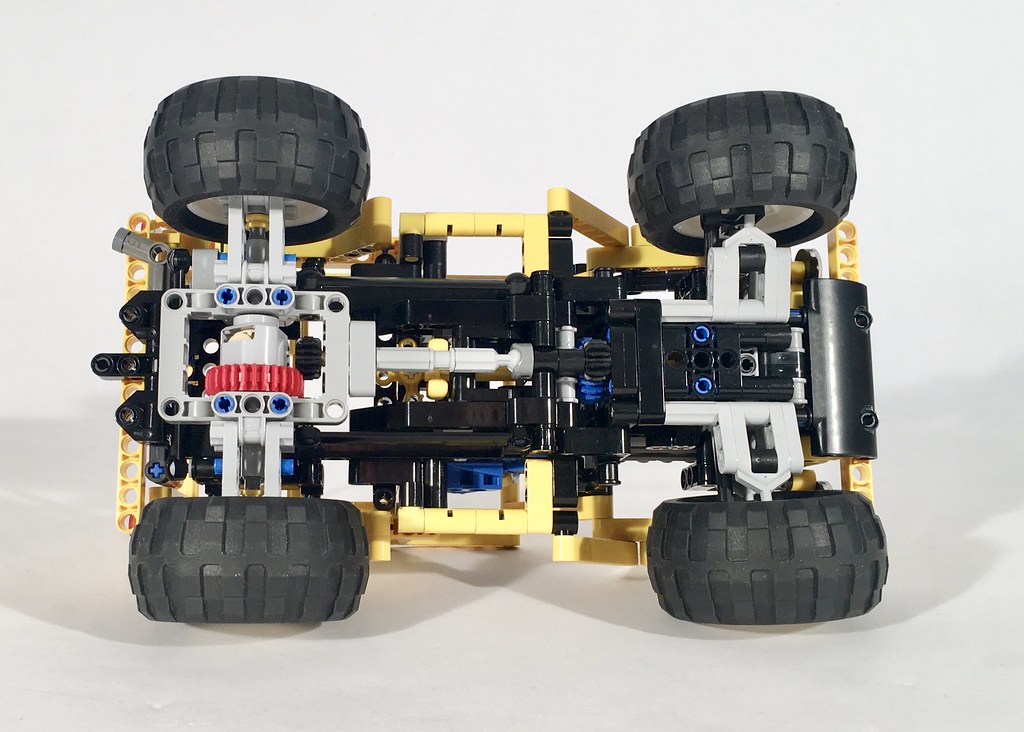
The chassis came together quickly, as it is not too complicated, and utilized features I have used before. The rear live axle is simple, and linked forward by two links, and laterally by a Panhard rod. I used the new differential to increase the final engine speed. The front suspension is another simple design; double A-arms with a rear steering link. The steering mechanism travels under the engine, through an idler gear, and moves upward towards the HOG gear on the top of the truck.
8850 Update Chassis
The body work was quick as well, though I needed to slow down to be conscientious to the original design. Liftarms replaced Technic bricks, and the lines were kept. I added some engine detail including a intake, and gave a new grill design. I removed the headlights on top of the A-pillar, because they look silly to my eyes. I played with some ideas for the front bumper including a bull-bar, and other colors, but this simple design ended up being the one I like the most. I gave a little tailgate on the rear with some color, and a little exhaust pipe. Finally, I gave a little OCTAN coloring to highlight the race focus of the truck.
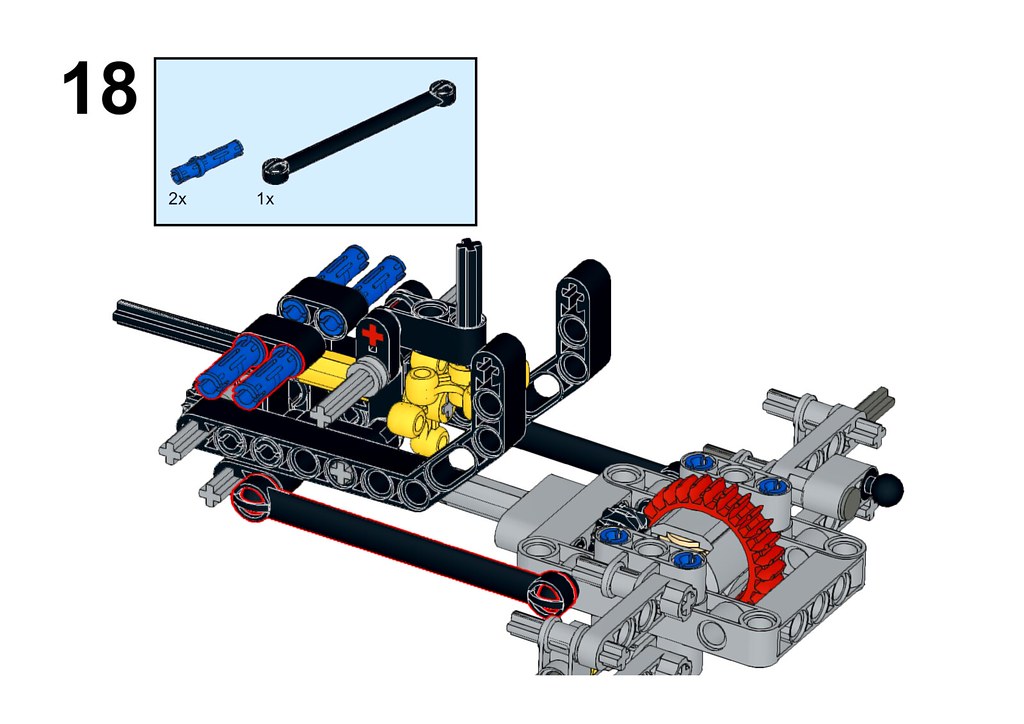
In my effort to improve access to my builds, I have created this MOD in Bricklink Studio, and have made instructions that are a little more clear than the photo sequence instructions I have done in the past. You may find a partlist and download the instructions PDF at rebricklable.com. Send me a photo if you enjoy the build.
Sample of the Instructions
8850 is a tricky set to update, because it has some defining features that I find unattractive, such as the front bumper, the rear, and the upper A pillar headlights. With this in mind, I think I carried the themes through to this build well. The OCTAN livery while keeping the main yellow with white highlights worked very well for my eyes. Functionally, keeping what 8850 had, and adding suspension was a fun project. I am already thinking about how to convert this build into an overland version with 4×4 and more bodywork. Stay tuned…
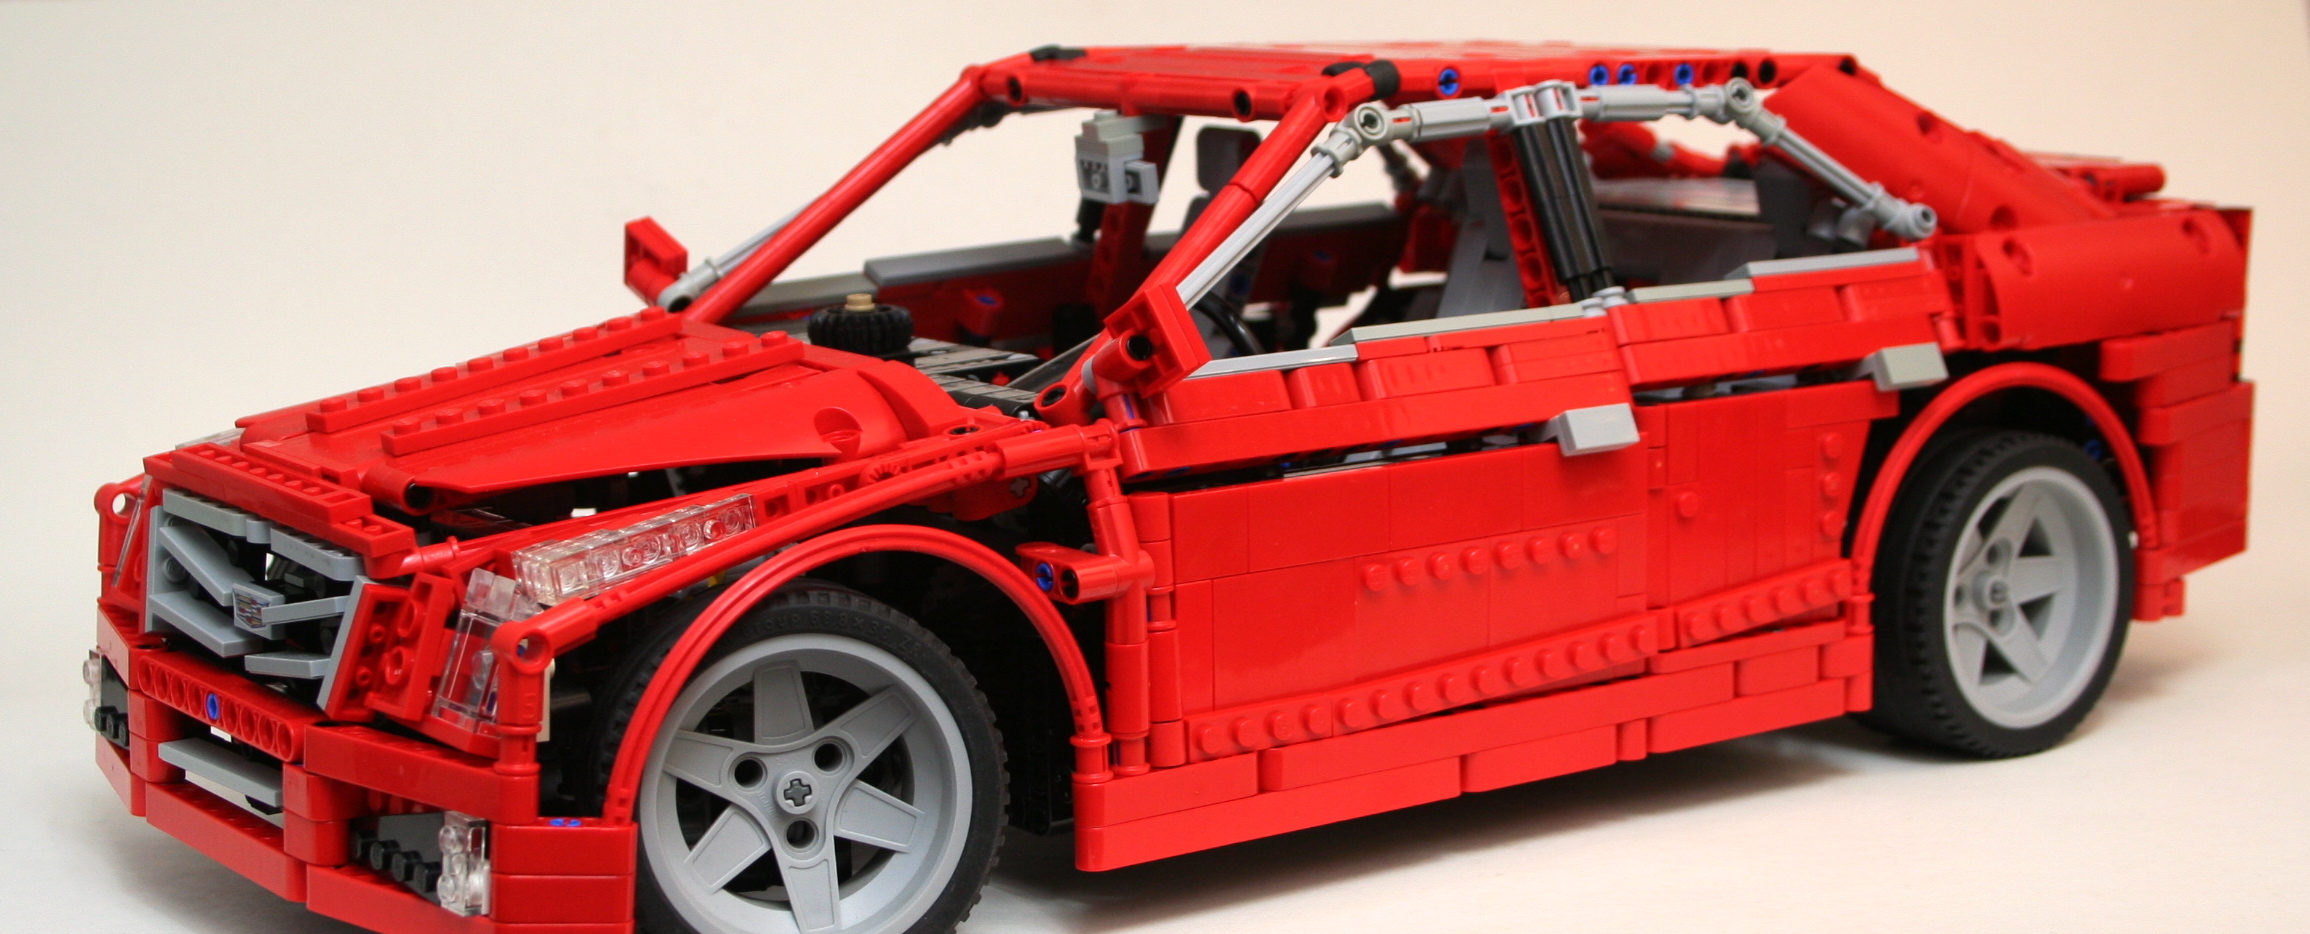
A while ago I decided I was going to do a proper new school supercar. Something with all the features that are to be expected in the LEGO Technic Community. You know what they are; suspension, a gearbox, opening doors, a working engine, steering, and something fast looking. Probably red. It was time to test my chops and throw my hat into the ring.
The full gallery can be viewed here, and instructions may be purchased for $9 USD. Partlist
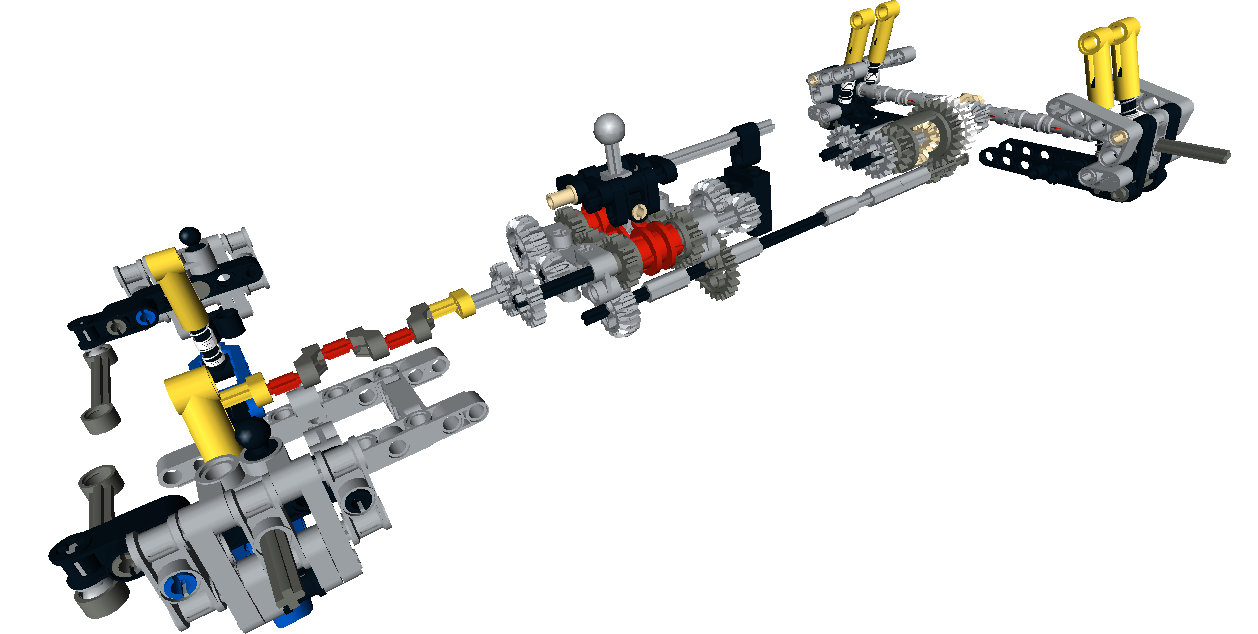
It has been a long time since I have built a supercar. While I enjoy many of the cars others make, I long for exceptional creativity in suspension design, gearboxes, and body style. It was time for me to build another one and contribute to these areas. About two years ago I set out to create a six speed gearbox that would have a more realistic gear change movement. I tried linkages, springs, and so many gears. In a bit of a breakthrough, I offset the two outside changeovers vertically by 1/2 stud. This allowed for the changeover lever to connect all three changeovers as it rotated from a single center pivot point. Once this design was completed, it needed a home.
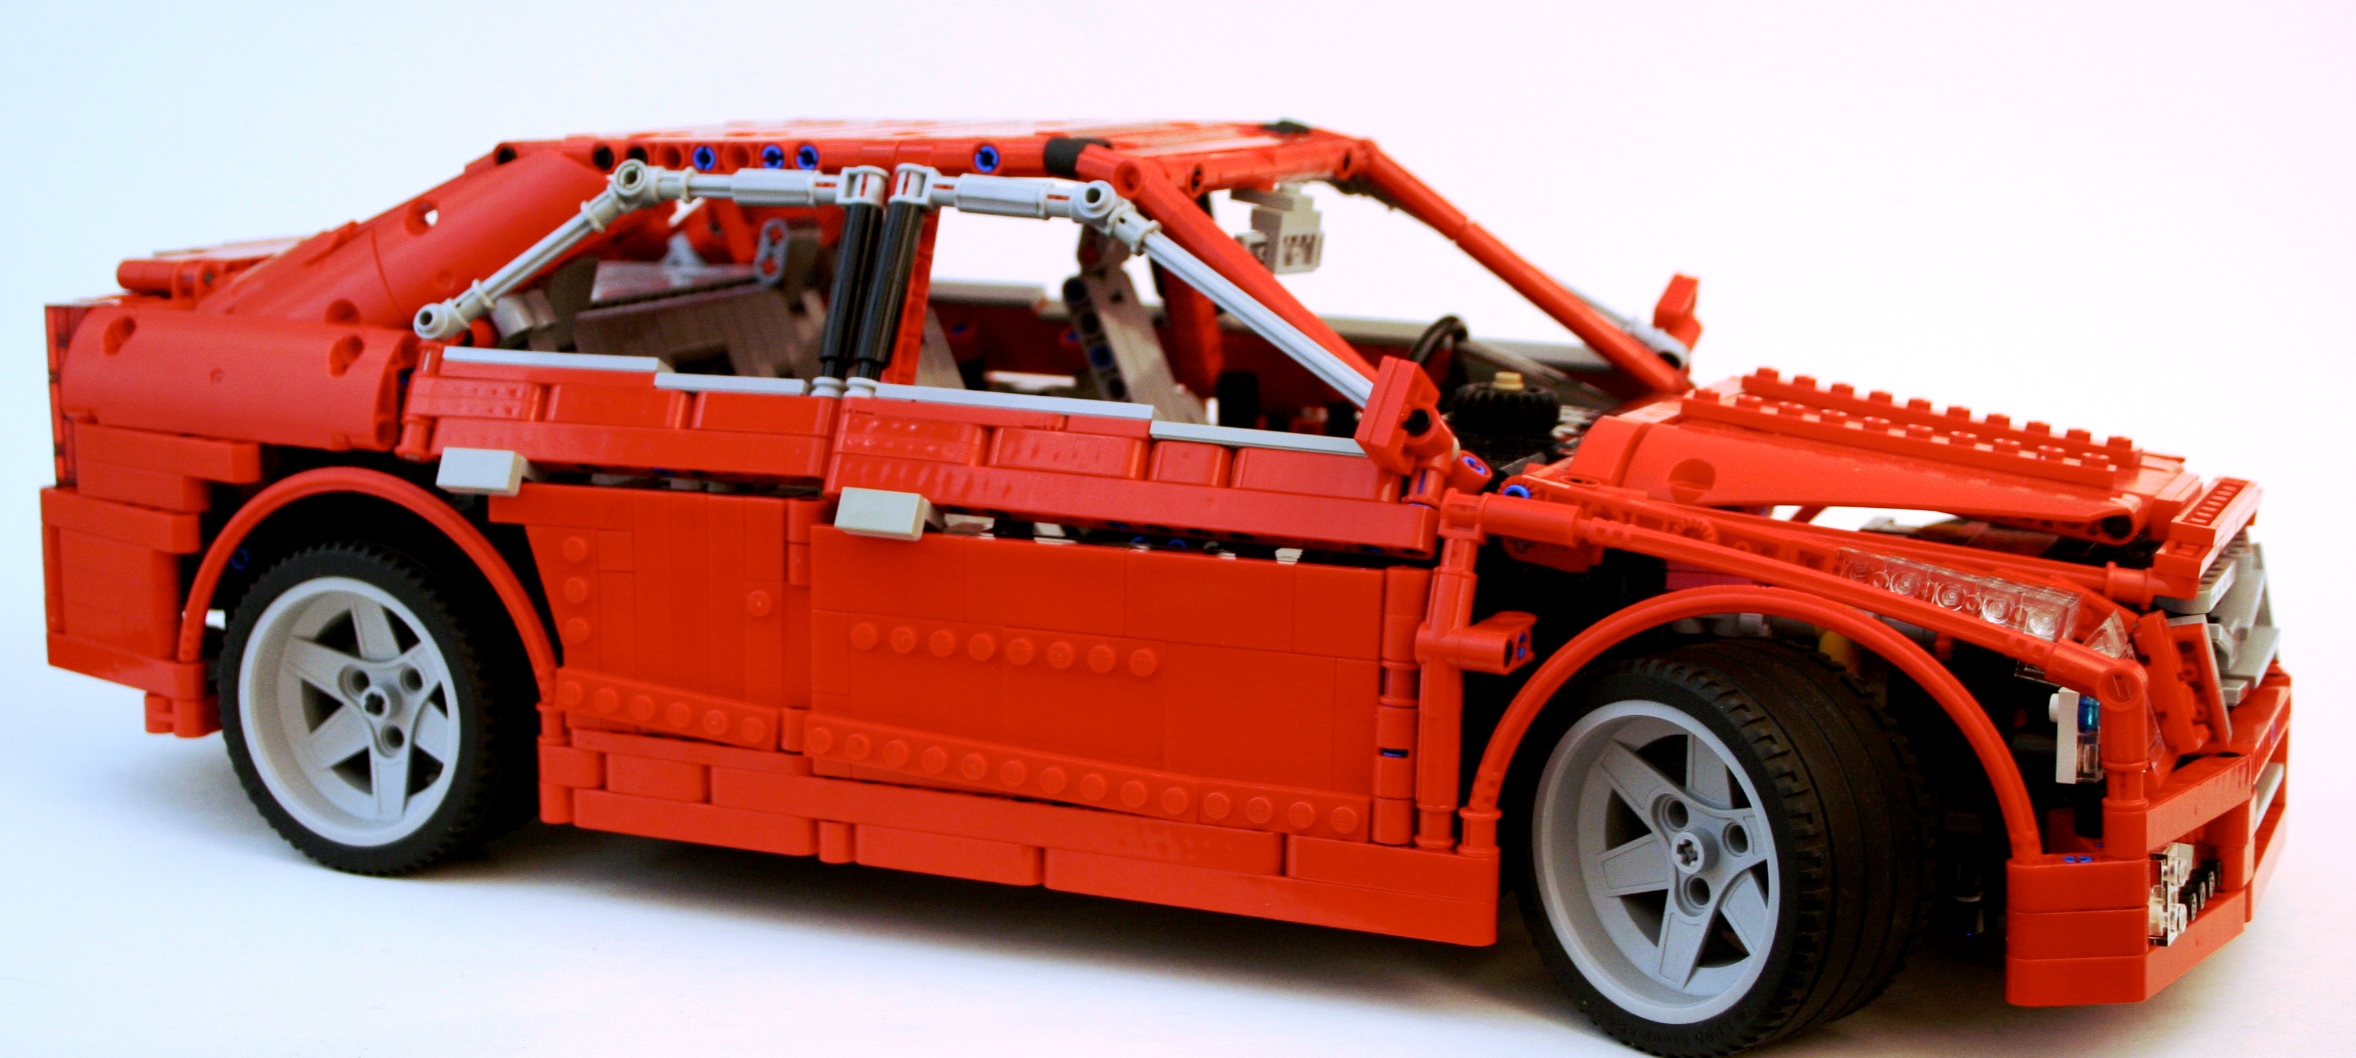
I have a preference for sedans rather than coupes. Plus too many two-door supercars have been created. Forgive the slight nationalism, but I thought it would be fun to do an American sports sedan, so a Cadillac was the best choice since the demise of my beloved Lincoln LS. The ATS was new, and at the scale would be a little more manageable than the CTS. I worked a little on the scale of the car. Some parts would be a challenge to convey the look, but I was ready to start building.
I started with the front suspension. The new suspension arms allowed for a short/long arm setup. The two different arm designs allowed for a increasing negative camber as the suspension moved through its travel. Additionally, the pivot points on the steering hub allowed for a kingpin inclination to provide an improved caster angle. Finally, I added Ackerman geometry to the steering link. After some work mounting the suspension, and the rack and pinon steering, I had the front suspension done.
The rear suspension was more simple, but still had some unique features. While the real ATS uses a 5 link setup in the rear, I was not too impressed with the results I came up with as too much flex was found at the wheel. I started with a transversely mounted limited slip differential that I have used before. This connected directly to the two half-shafts for the rear wheels. I applied a short/long arm setup for the rear suspension so the tires would keep their contact patch as the body would roll through a corner. Like the front, this created increasing negative camber as the suspension moved through its travel. Normal in real cars, not often replicated in LEGO.
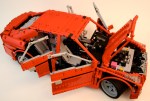
Tying all of these parts together was a little bit of a challenge. I wanted the steering wheel to be connected to the steering as well as a HOG knob on the dashboard. In addition, the doors, trunk, and hood should all open. Naturally, the car had to have a spare tire, and various engine options which could be easily removed. The chassis had to be stiff enough for the suspension to function well. Packing this all together took some time. About 9 months, but who is counting?
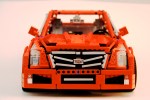
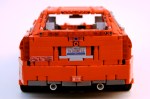
But what took the most time was the body work. This is the part for which I have little motivation, and the important part that would identify the car as an ATS. I had a lot of work to do. And my palmares have not trained me well for this task. After major parts were placed, and the dimension were set (37 stud Wheelbase, 60 stud Length, 25 stud Width), I worked on one section at a time. As the front bumper was part of the chassis, this part was developed early. As did the rear bumper. The headlights are unique for the ATS, so this was done early as well. After the roof was placed I worked on the trunk, which came together rather easily. I worked on the hood of the car, and after two designs I was happy with the result. I then worked on the grill, and after tinkering with a couple of SNOT techniques, I was able to get most of the distinctive Cadillac grill in my design.
Then off to the doors. I made seven designs. Most sedans these days have various creases that identify their sedan as different than any other sedan. You will notice the ATS has two, one on the bottom that rises slowly to the rear, and one midway up to the windows that moves along the length of the car from the hood to the trunk. The top line was accomplished by having the angle for the windows start a little lower on the front door and higher by a 1/2 stud on the rear door. The bottom crease was added by attaching some angled plates to the bottom of both doors, which cant slightly inward. Finally, both doors have an upper pivot point that is 1/2 stud inboard to bring the upper part of the doors toward the center of the car. Once I got a design I liked, I had to bring it all together to make sure everything fit well. I adjusted the roof, modified the hood, tightened up the dashboard connection to the doors, and made some changes to the rear quarter panels. There were still some areas where improvement could be made, but I was running out of ideas. I was pleased with the result. Pleased enough to say I was done.
All in all, I was pleased with the result of the car. As this is my first studless supercar, I was happy with how it turned out. The functions were up to my standards, and nothing was compromised as the car came together. While I was overwhelmed with the bodywork, I was pleased with how it turned out. Because it took me a long time to get it to work, it may be a long time before I do another one. I was happy I did a sedan, and hopefully a new moniker can begin in the LEGO community. #supersedan.