John Deere Axron


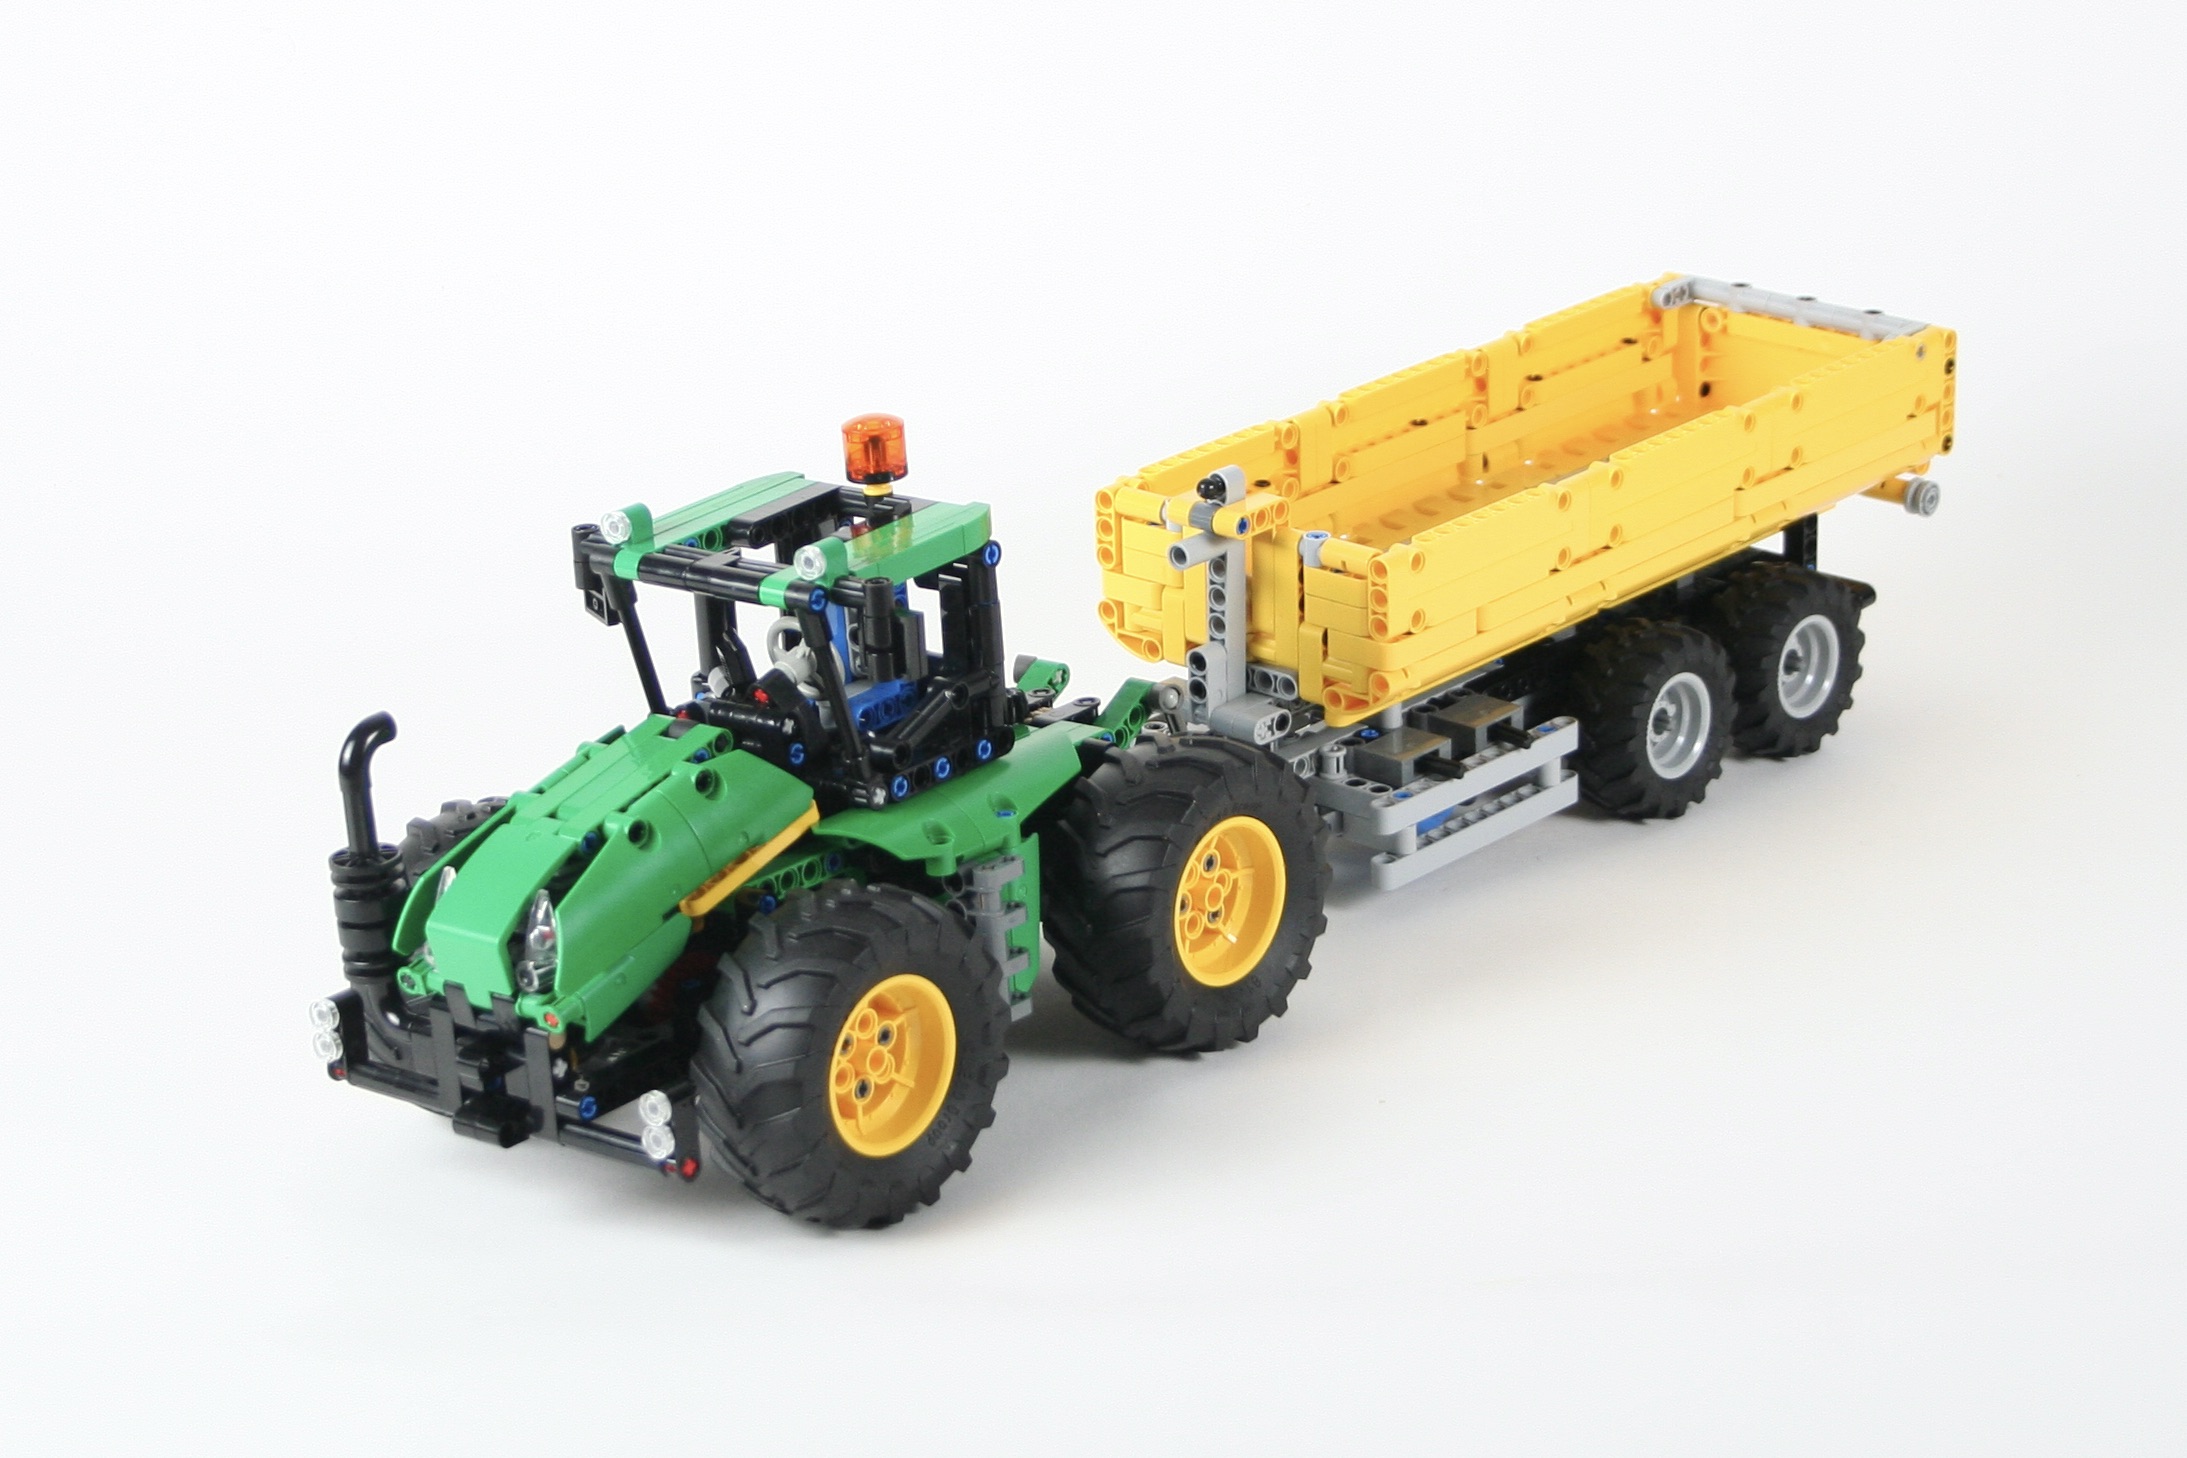
What started out as a little tractor and trailer has grown into the Thirdwigg Farm! And it needed a bigger tractor.

Free instructions are available at Rebrickable.com.

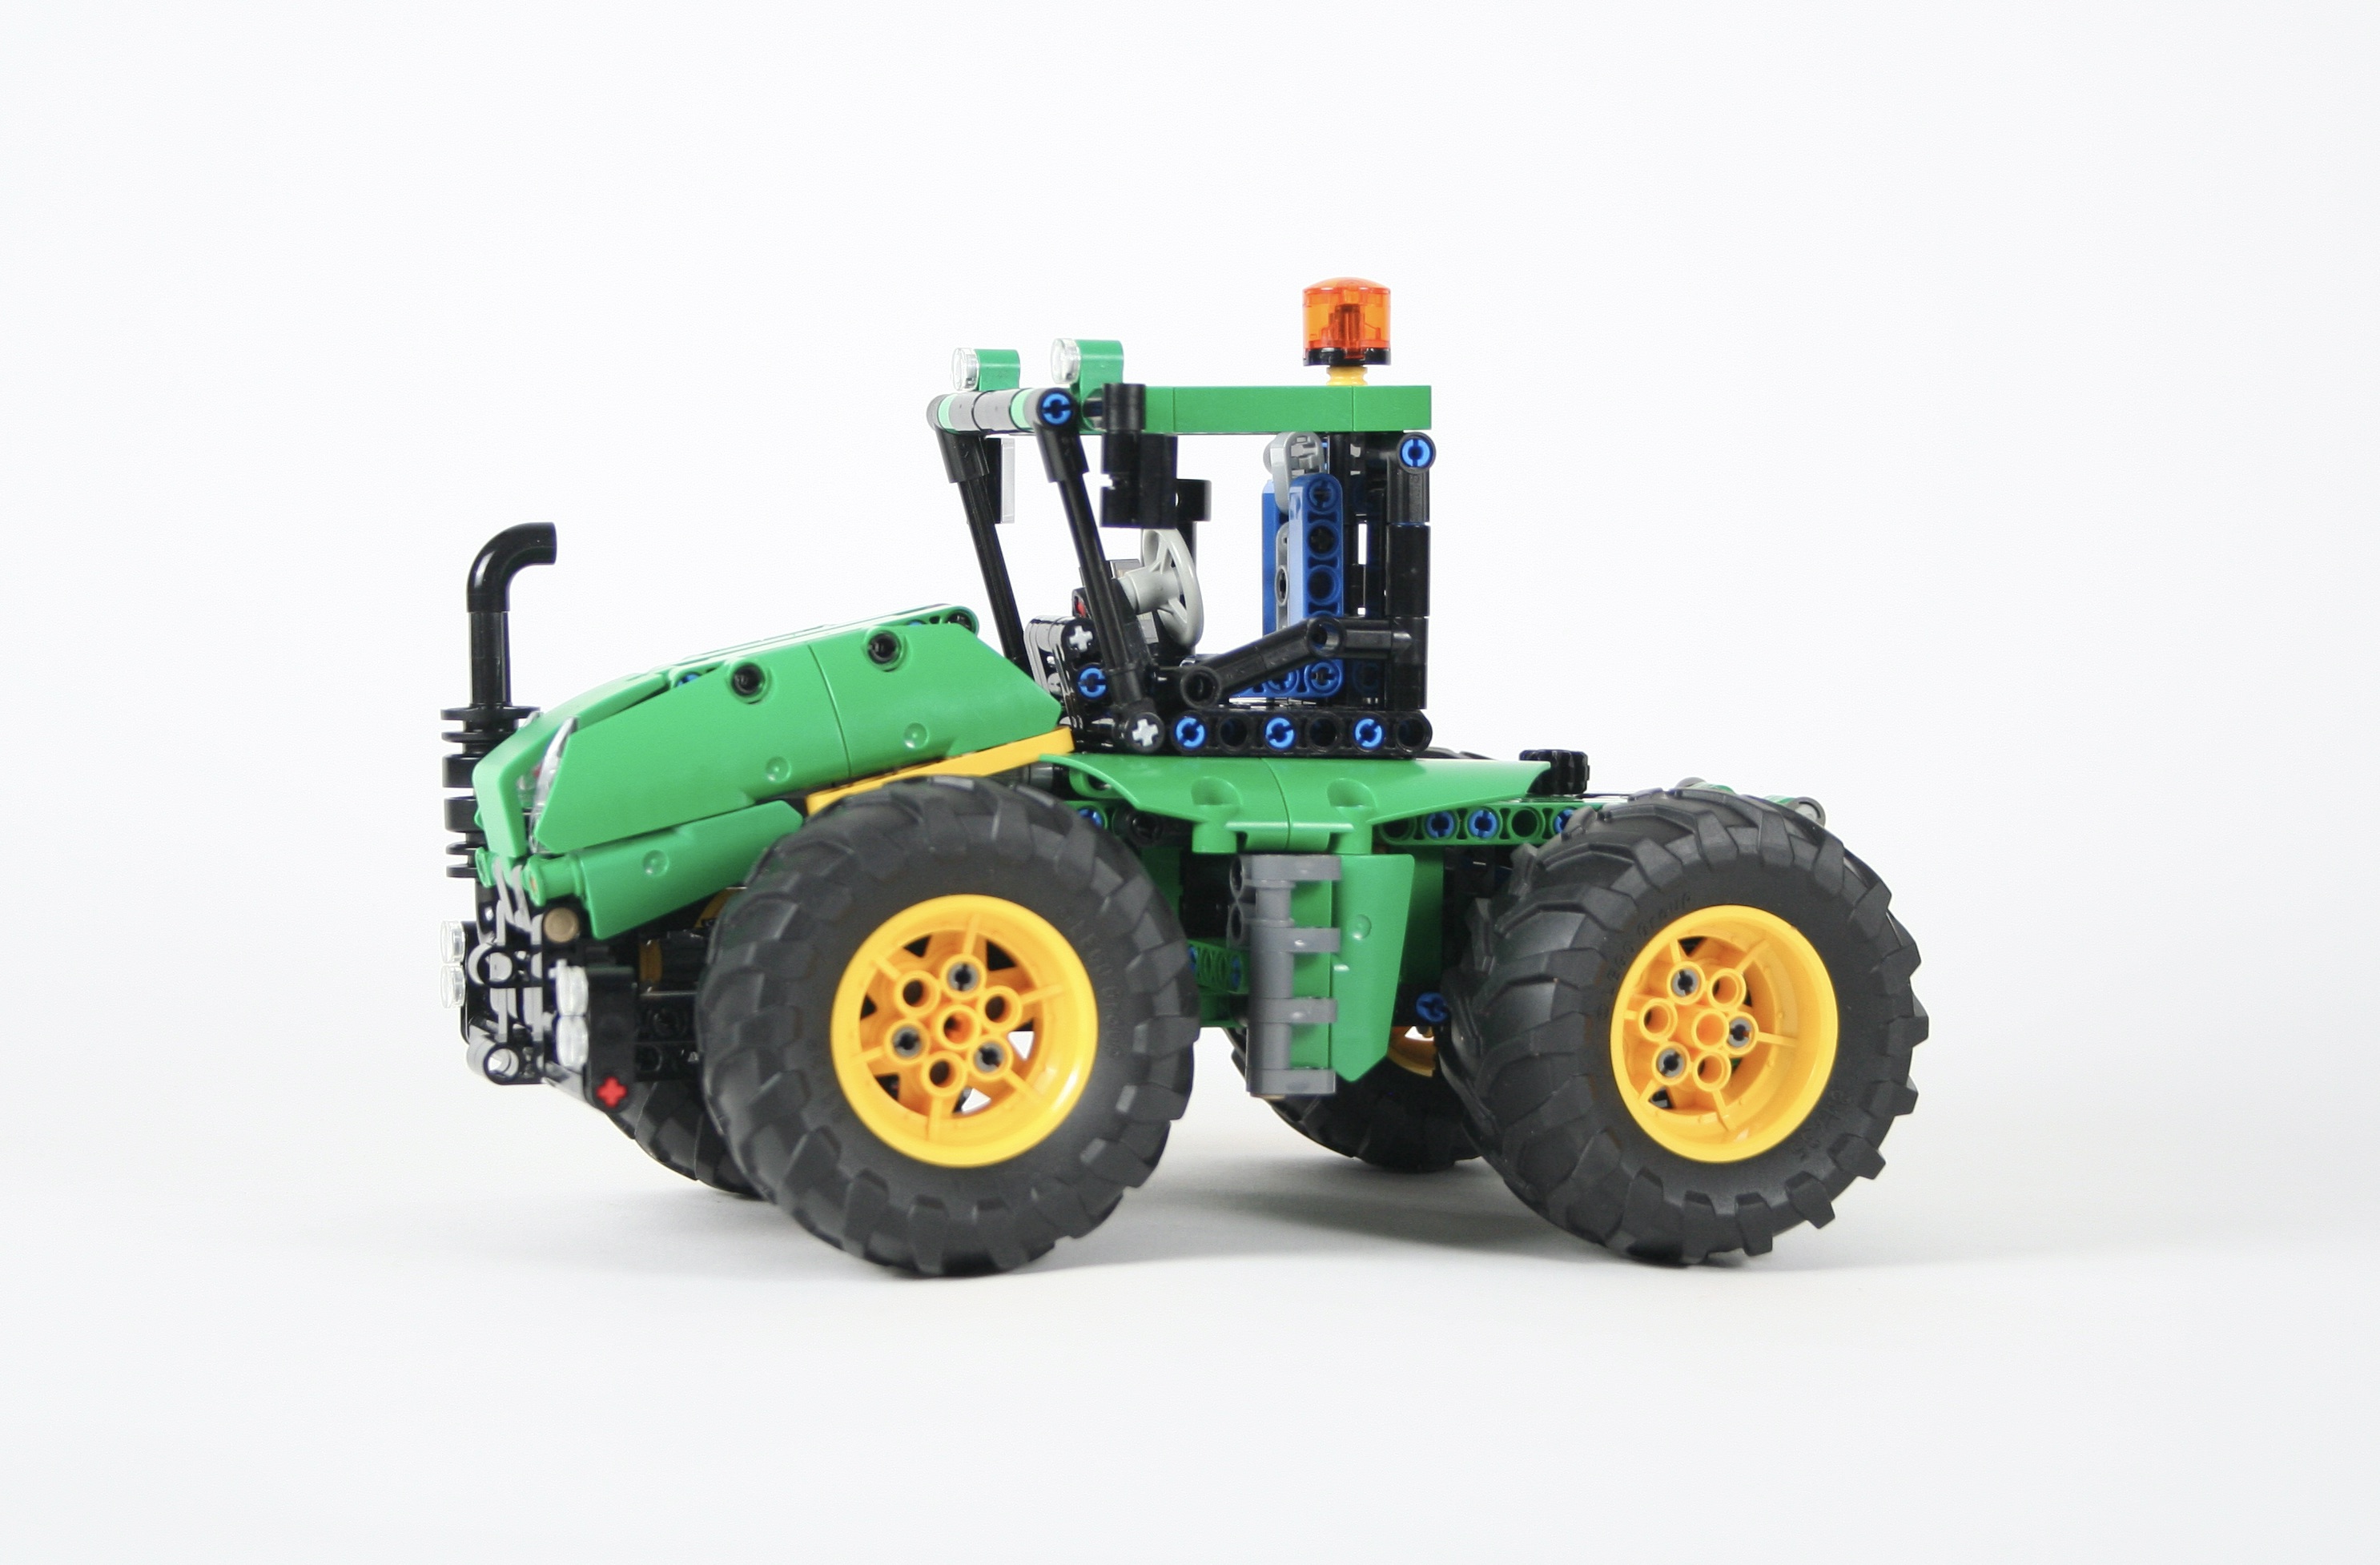
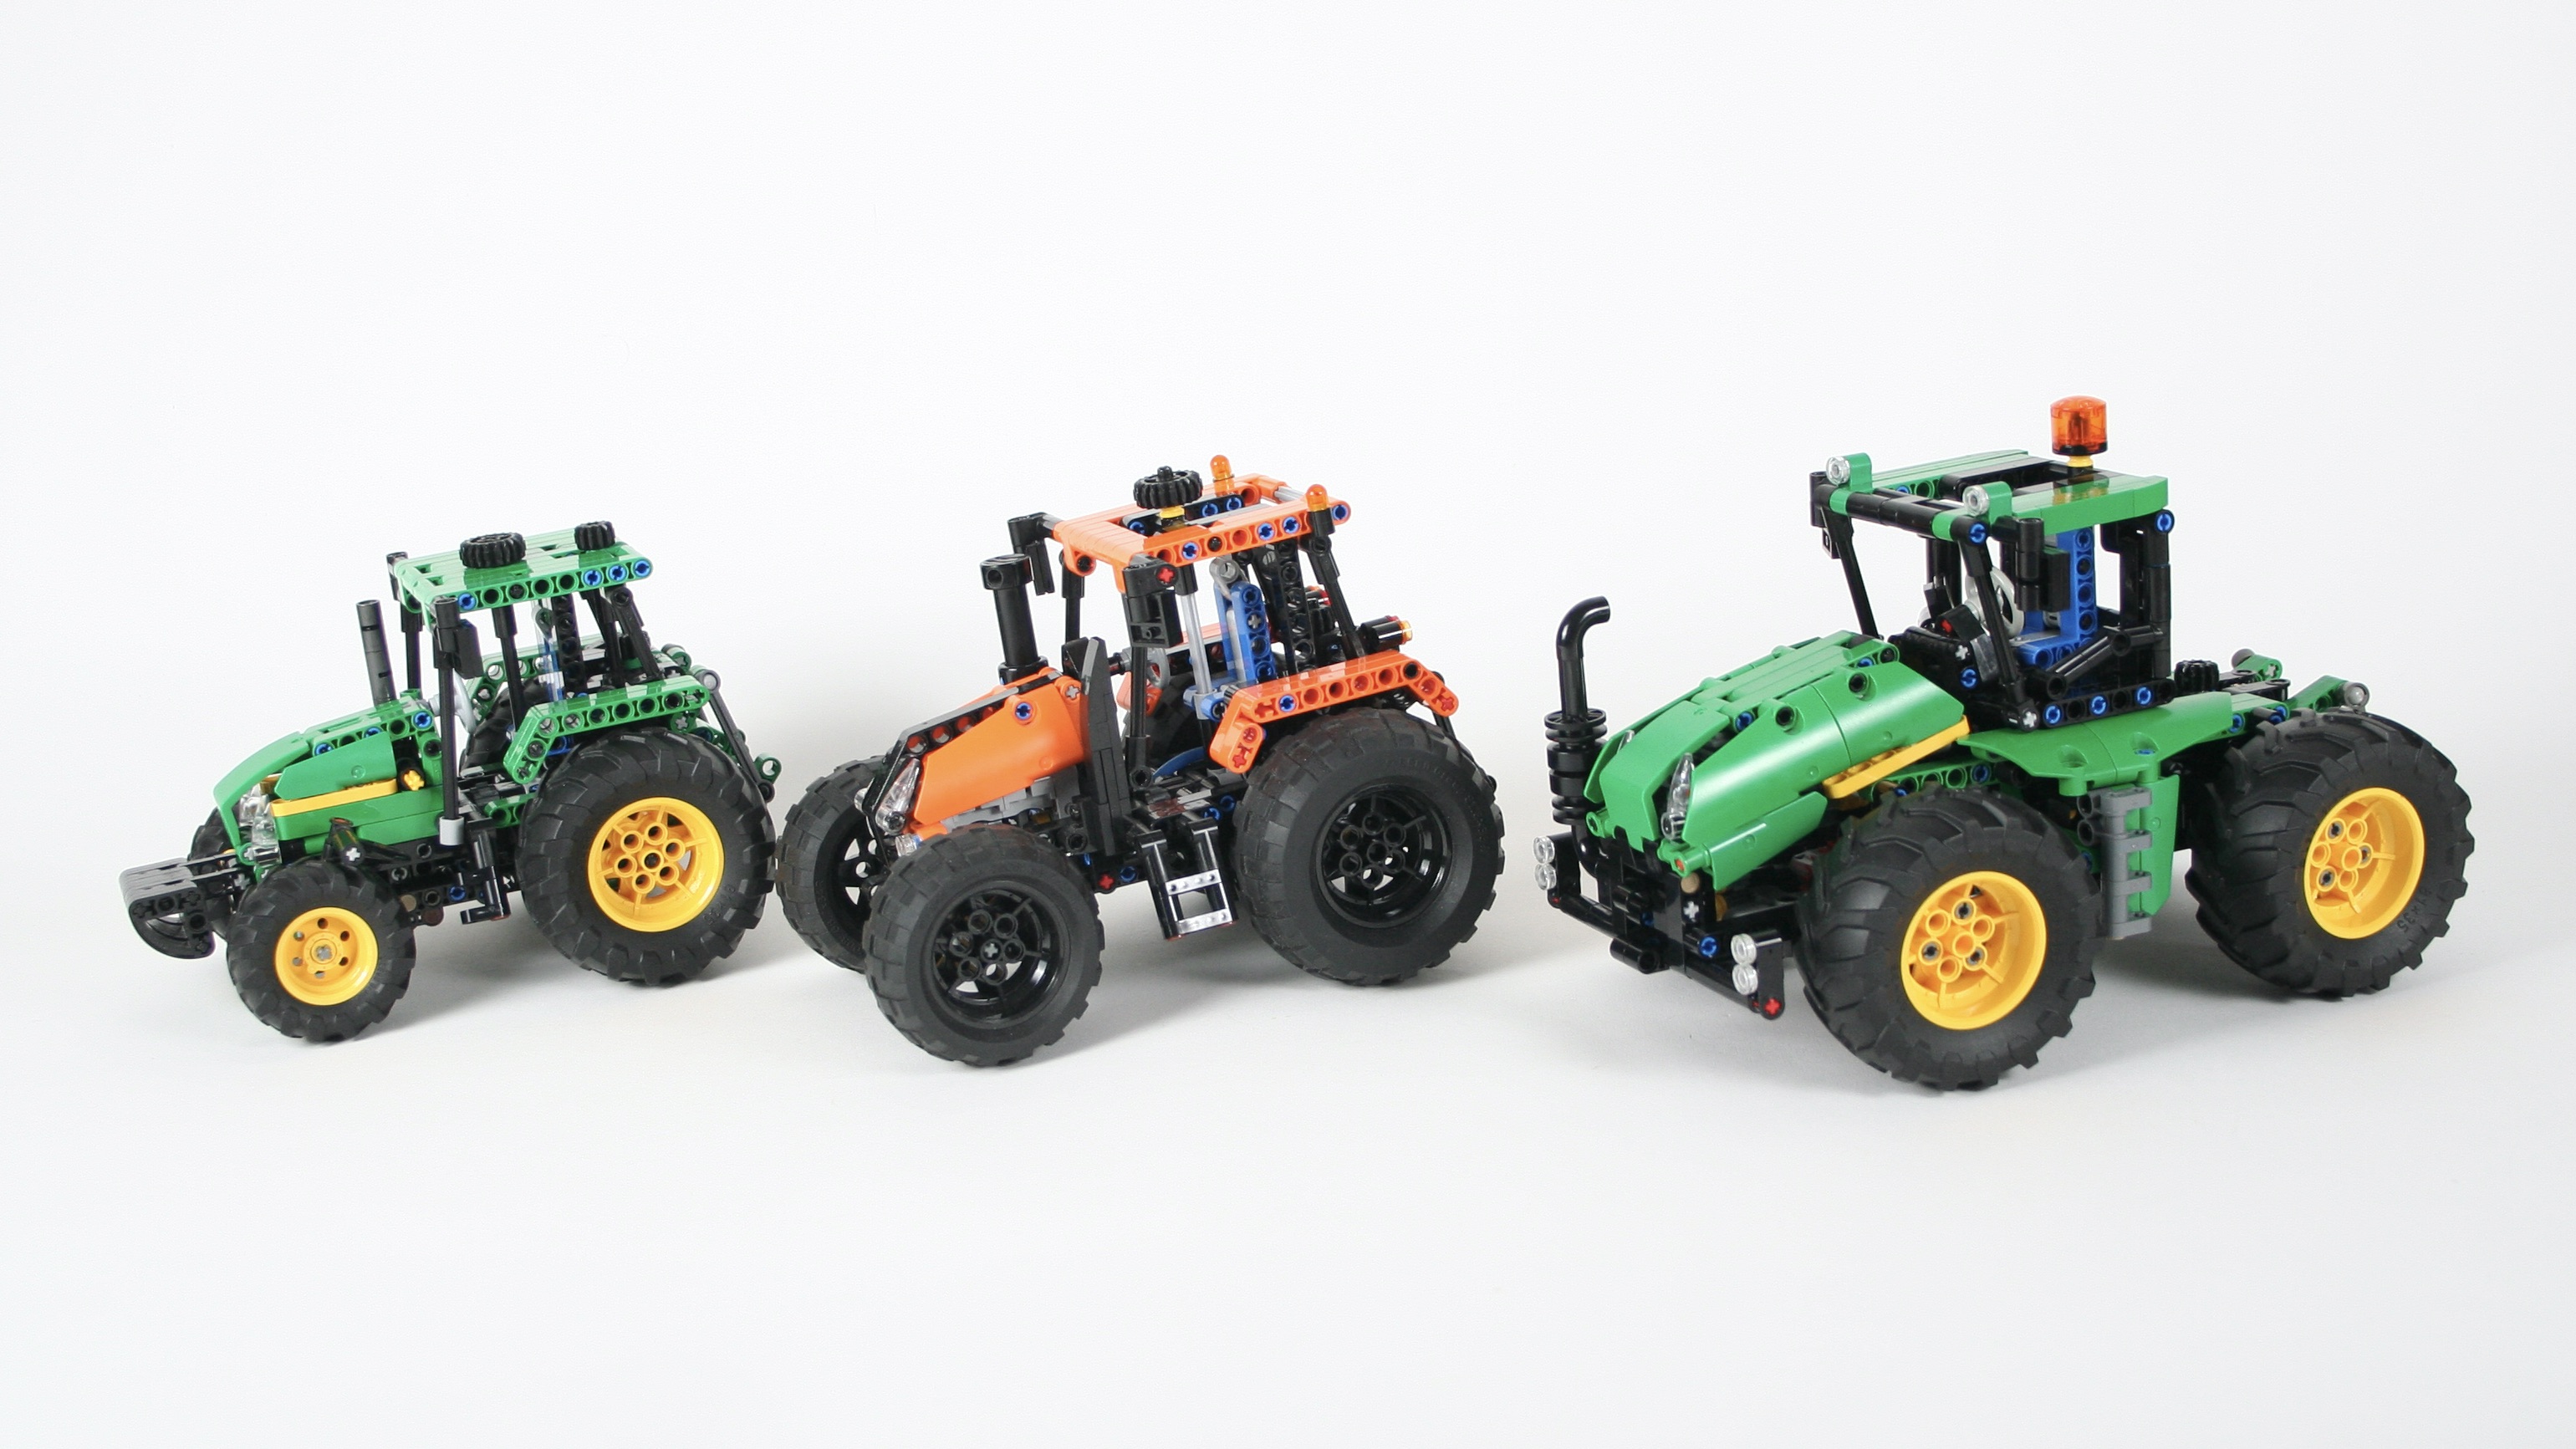
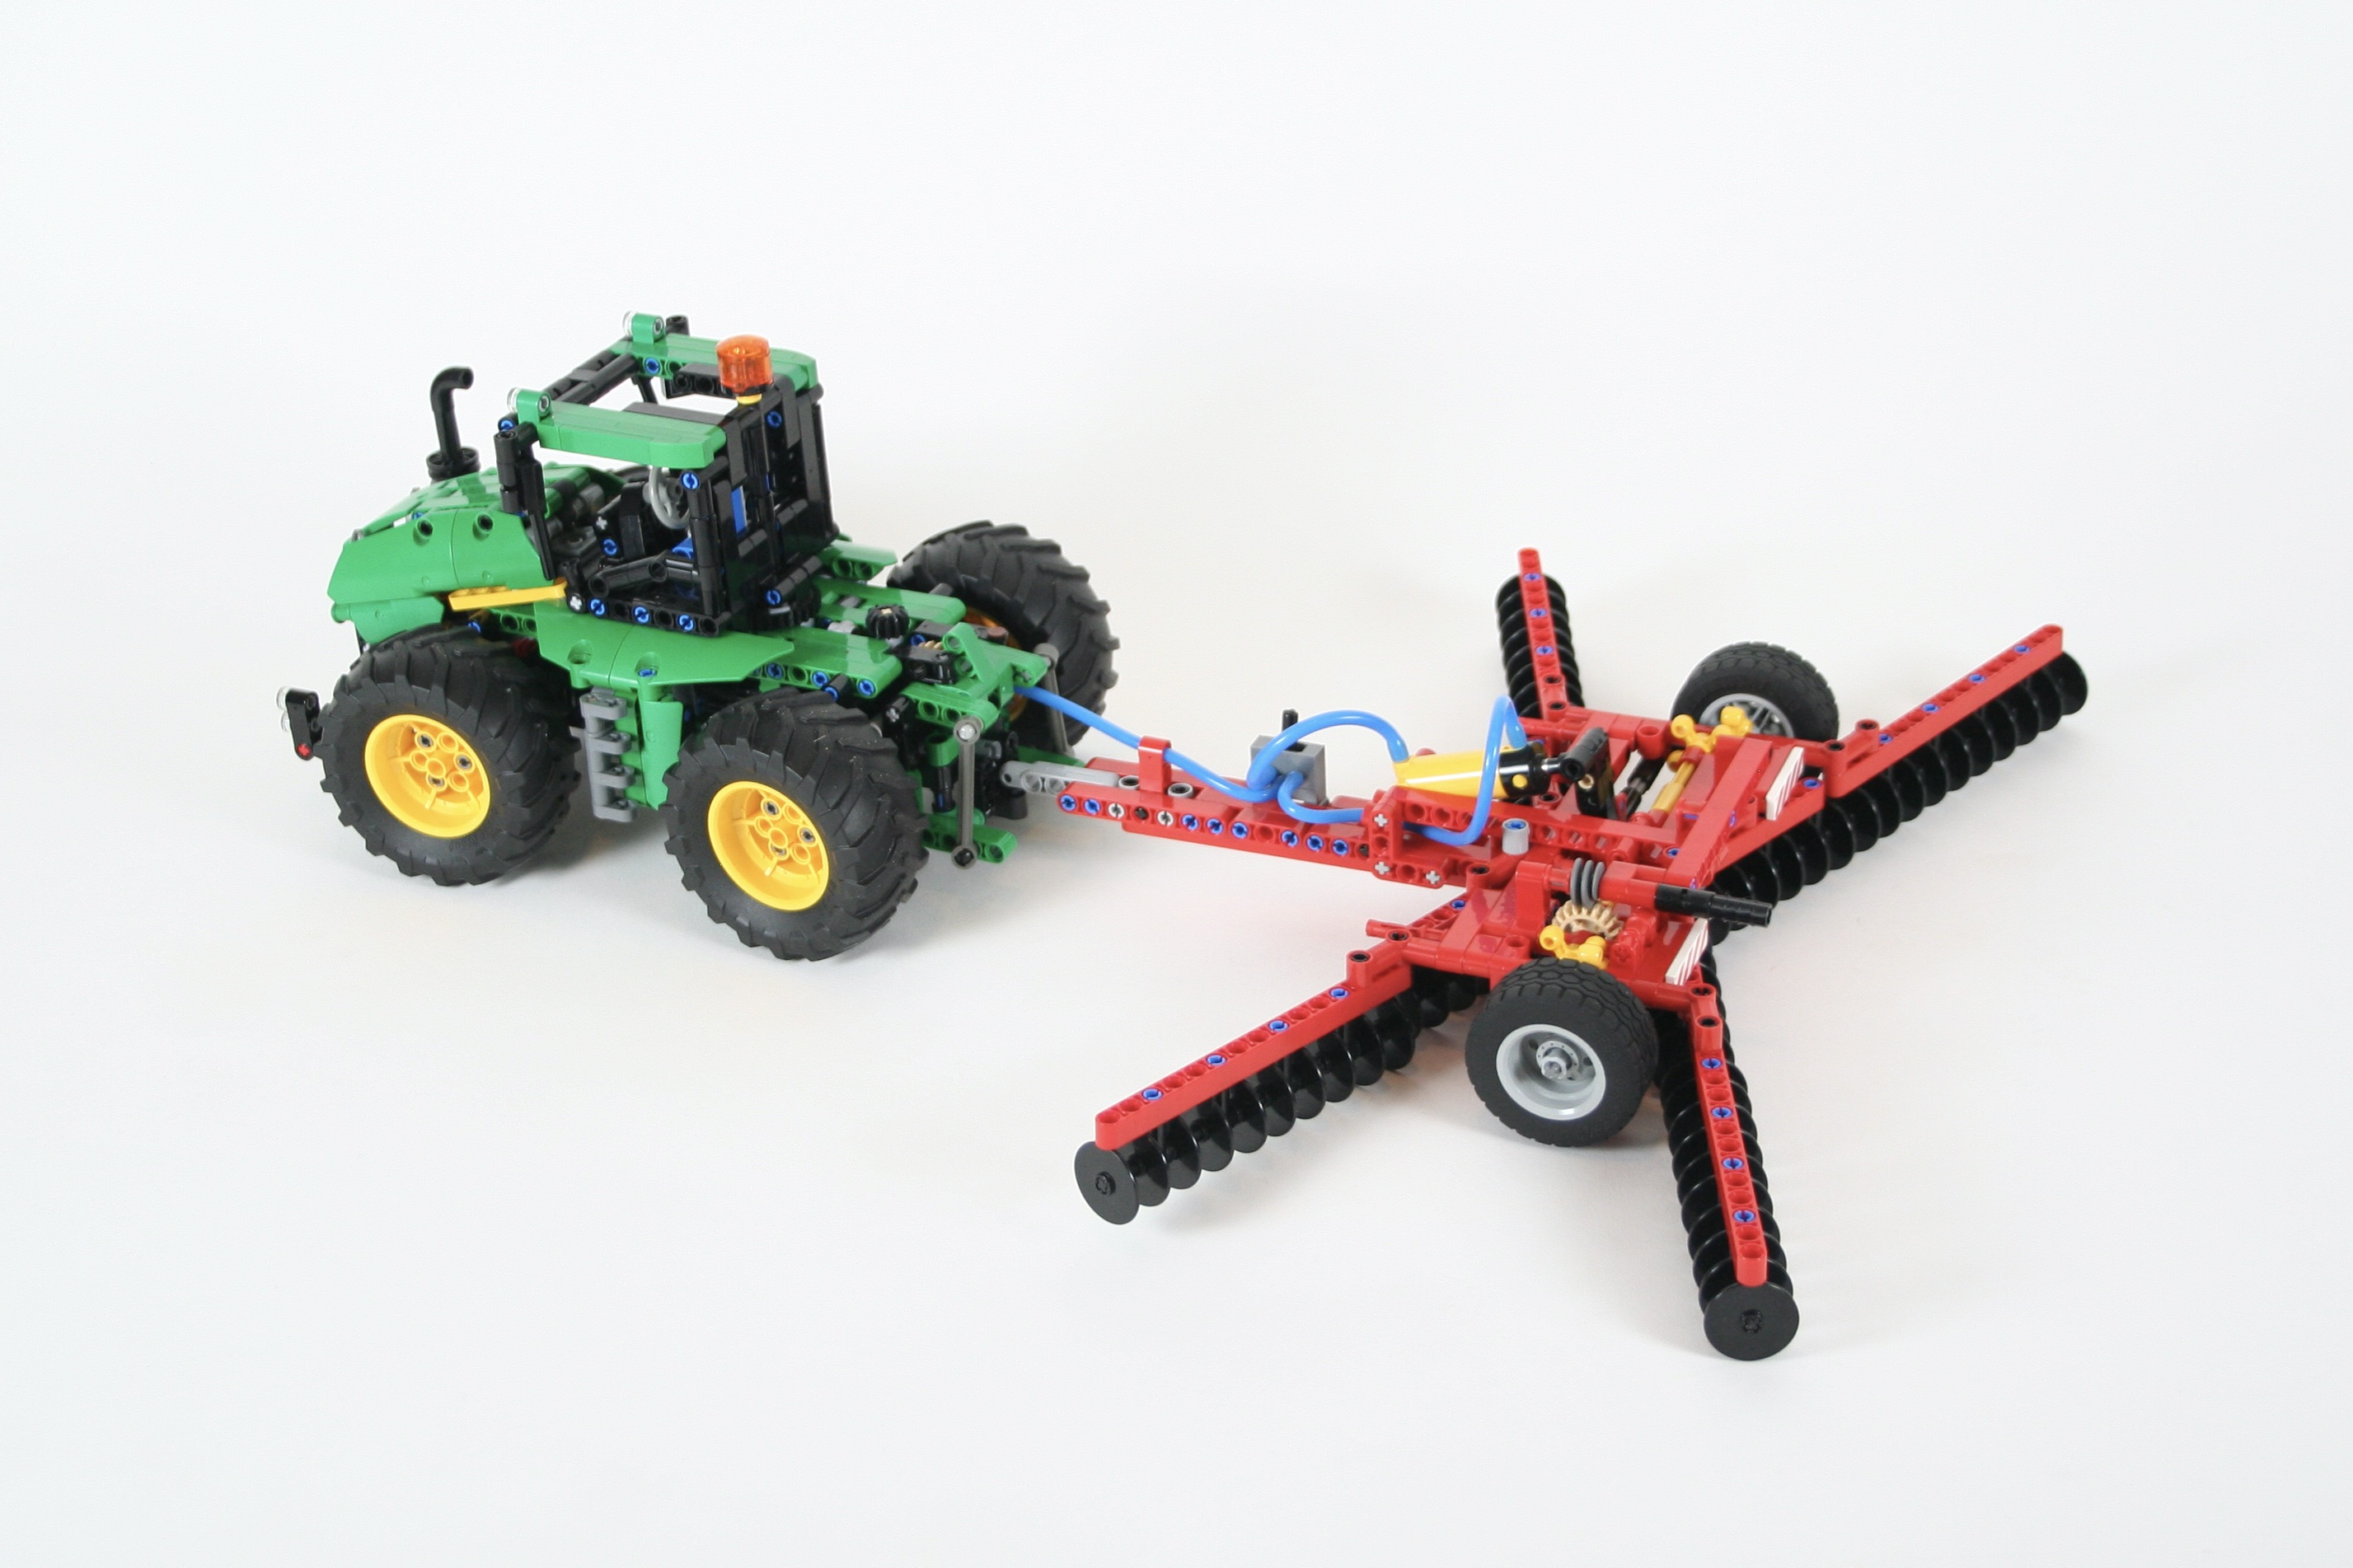
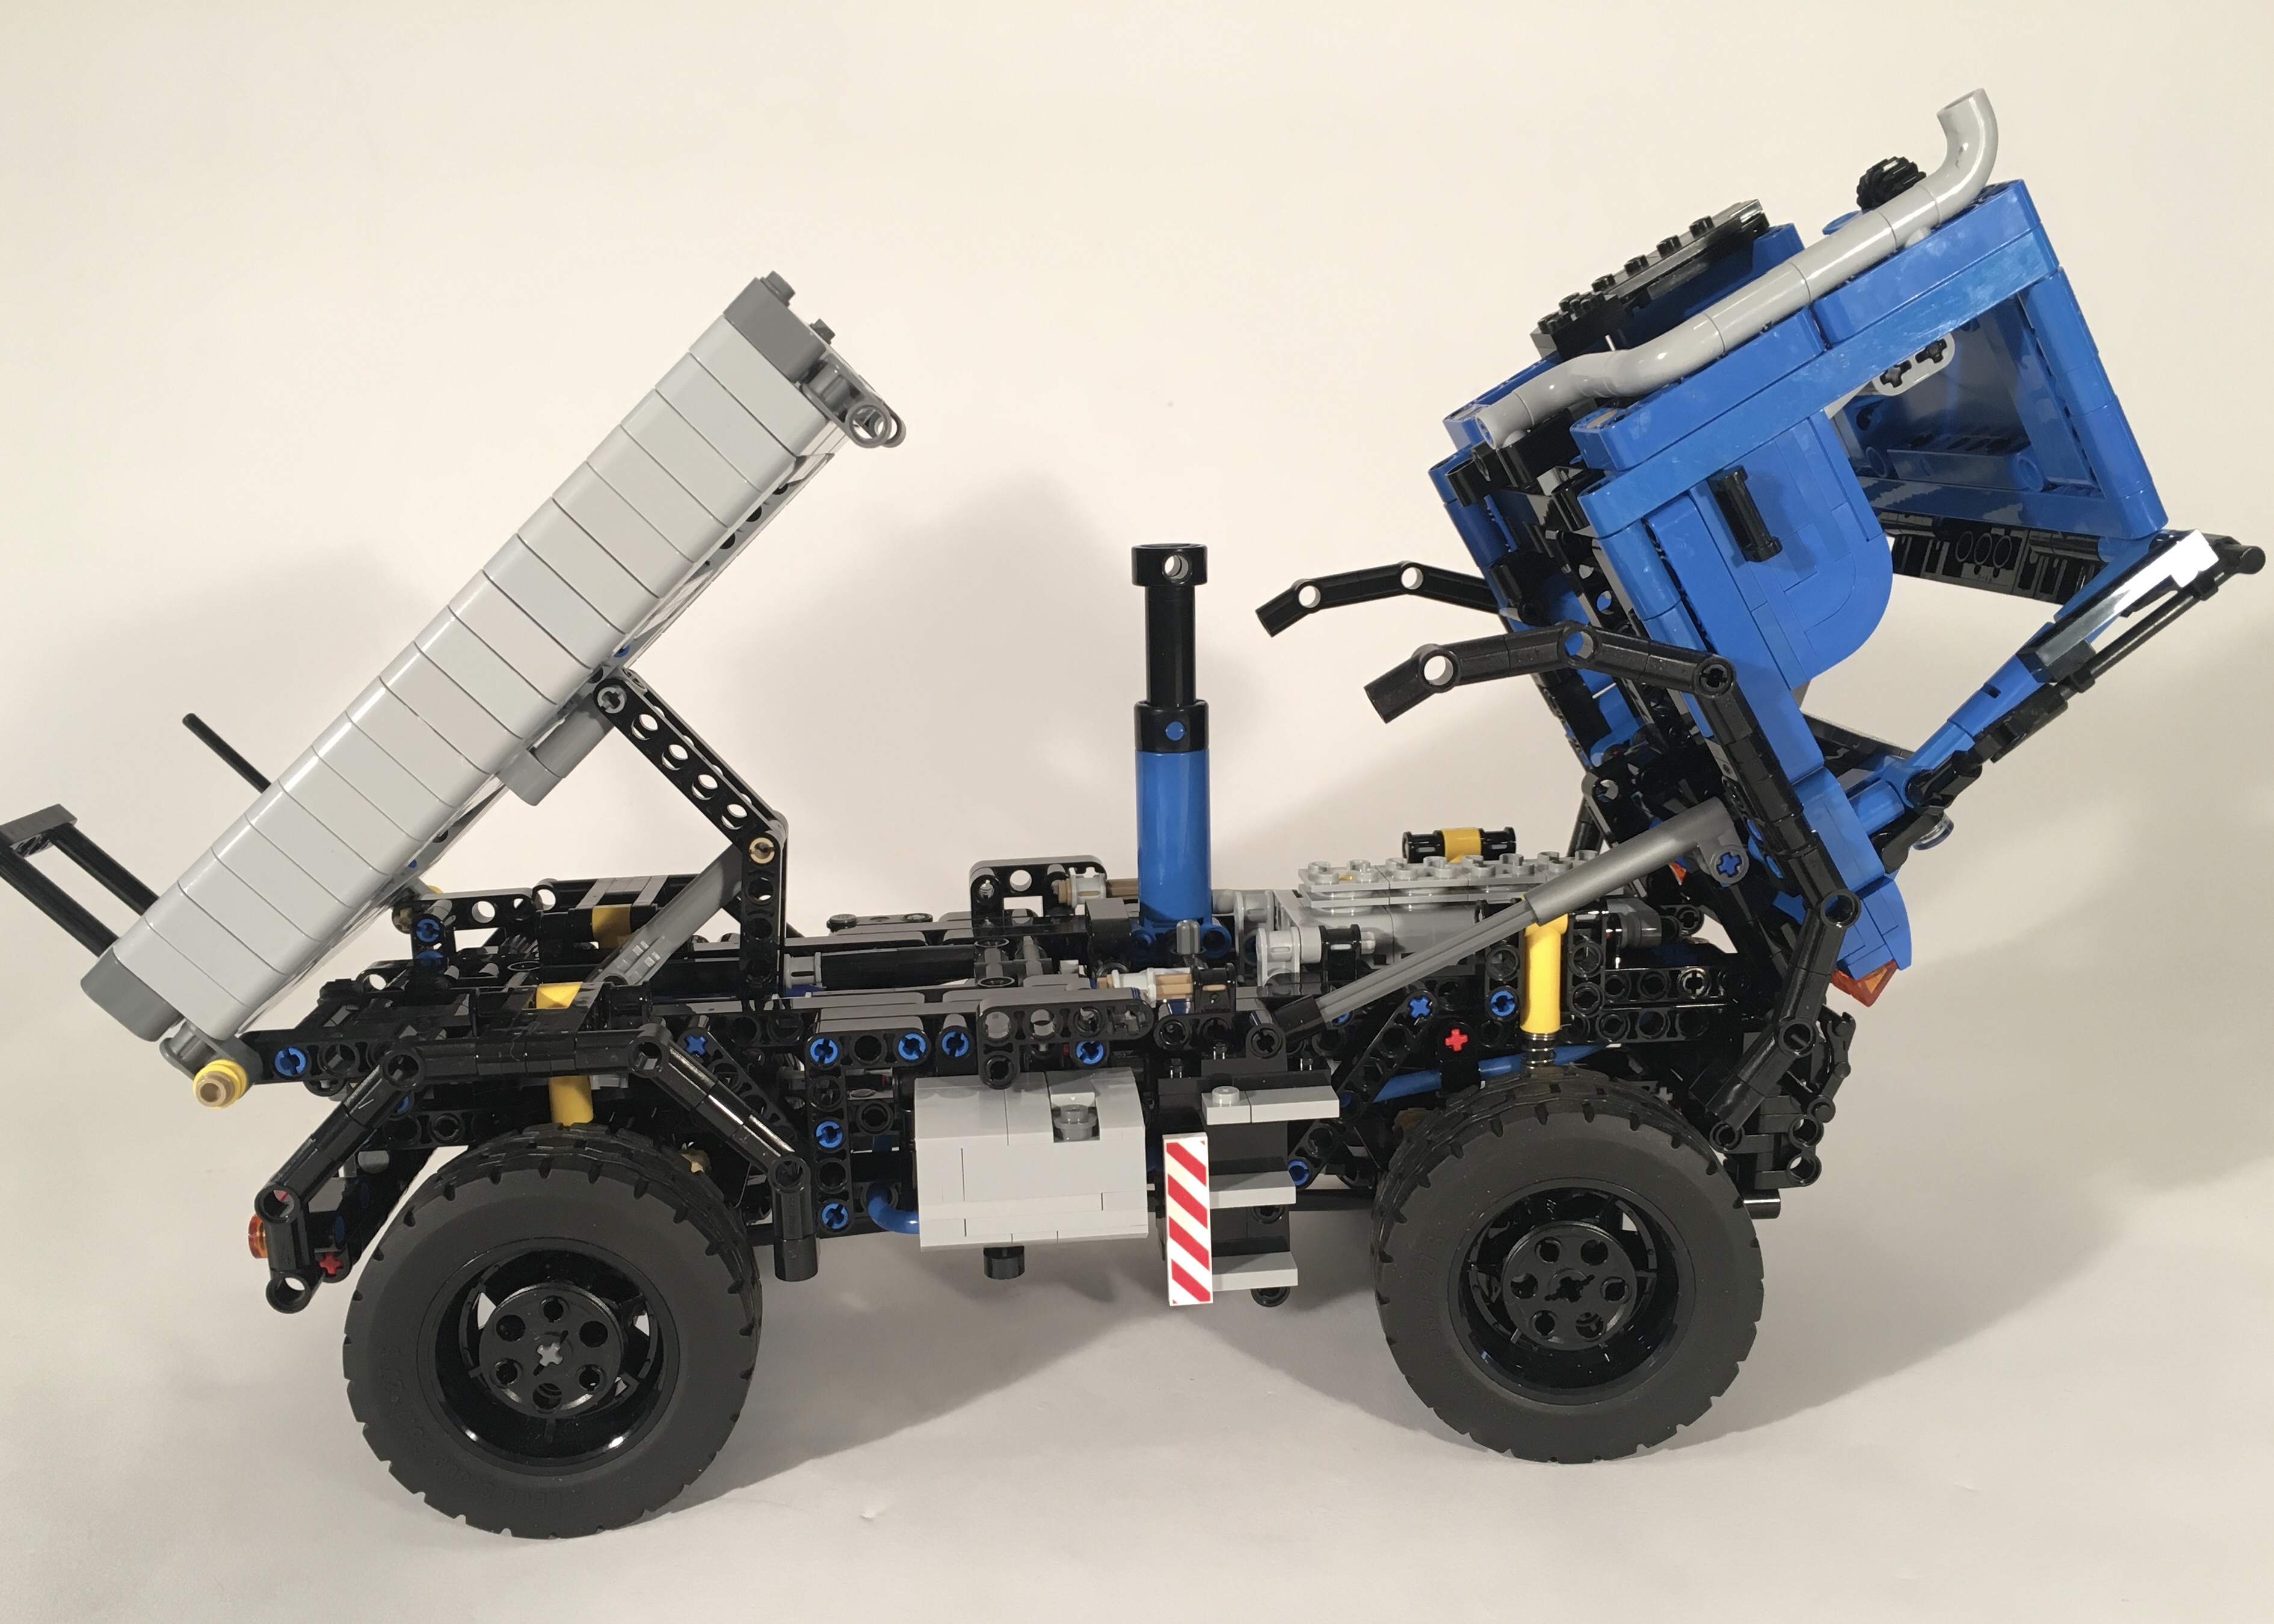
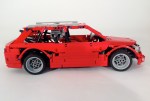
I started with a simple, small, row tractor that I called the Atmos. This tractor was mid scale and in addition to steering and a fake engine like most of my builds, it featured a front implement mount, rear three point hitch, rear PTO, and rear Pneumatic PTO. Little did I know how the tractor would grow into a lot of other tractores, trailers, impliments, and farming support vehicles. At some point, I found myself interested in making a larger tractor, and I have always loved the Claas Xerion. The Claas been done in Lego Technic before, so I went the John Deere styling route for my build.

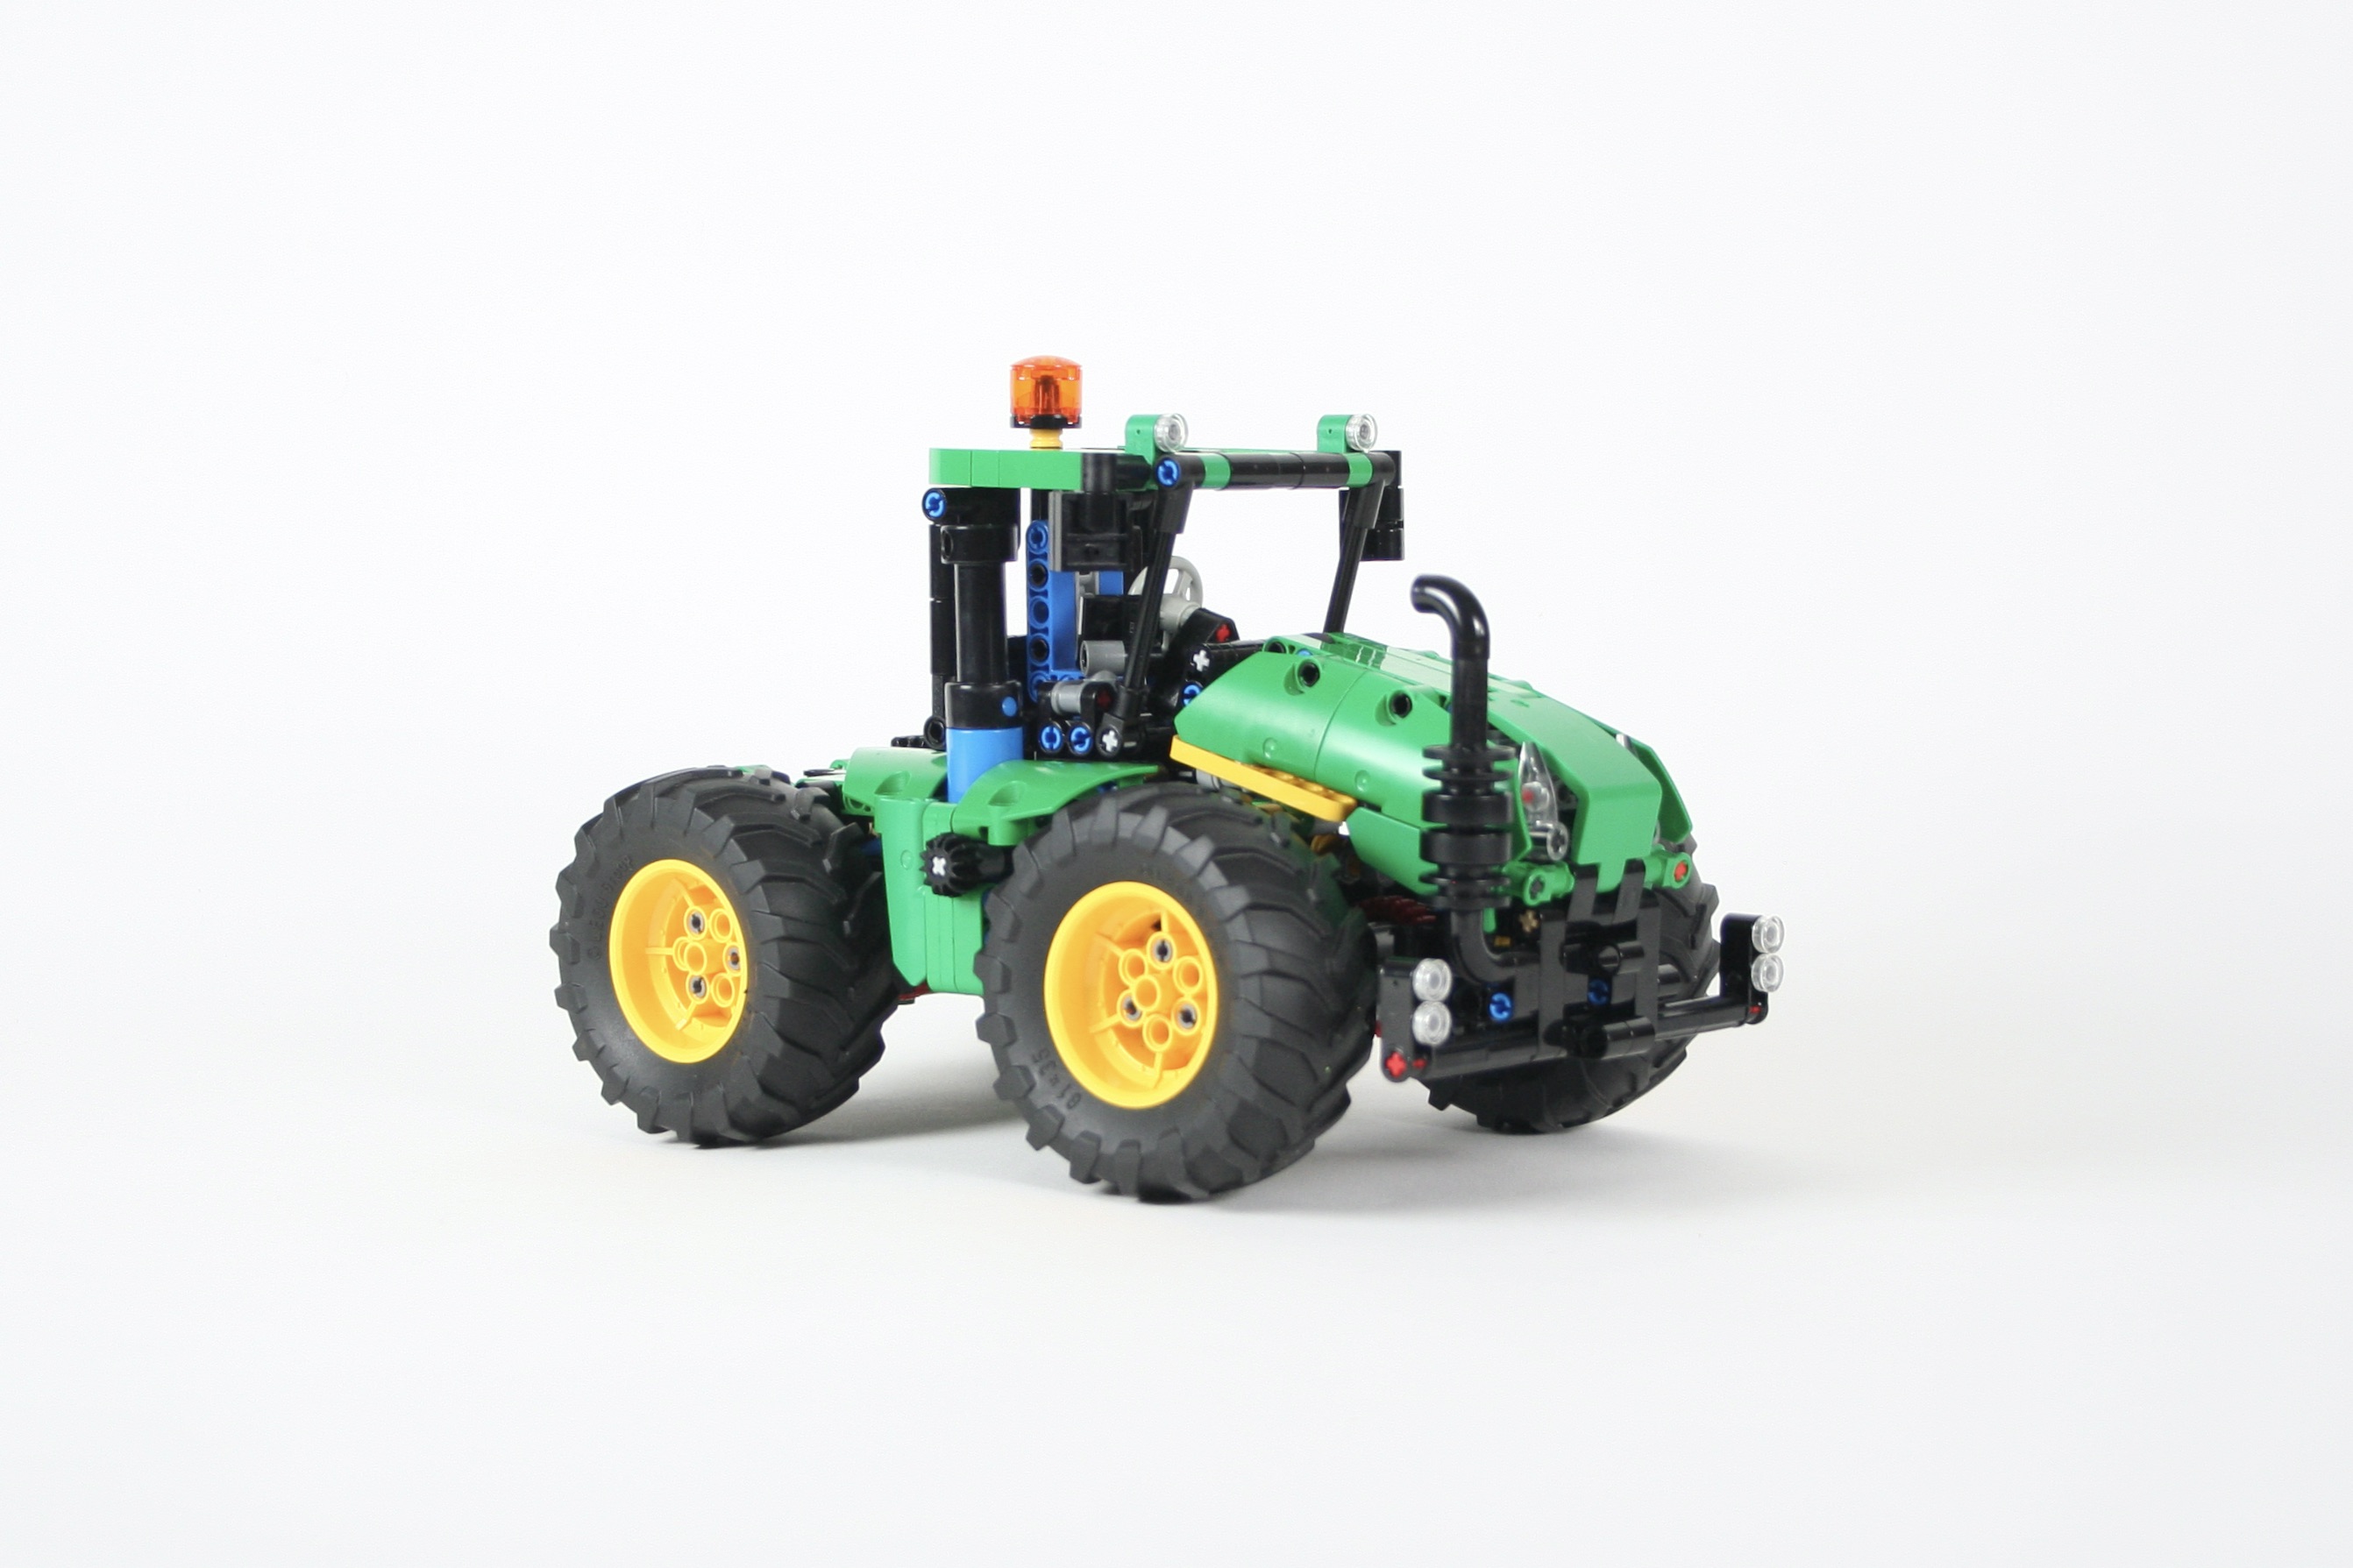
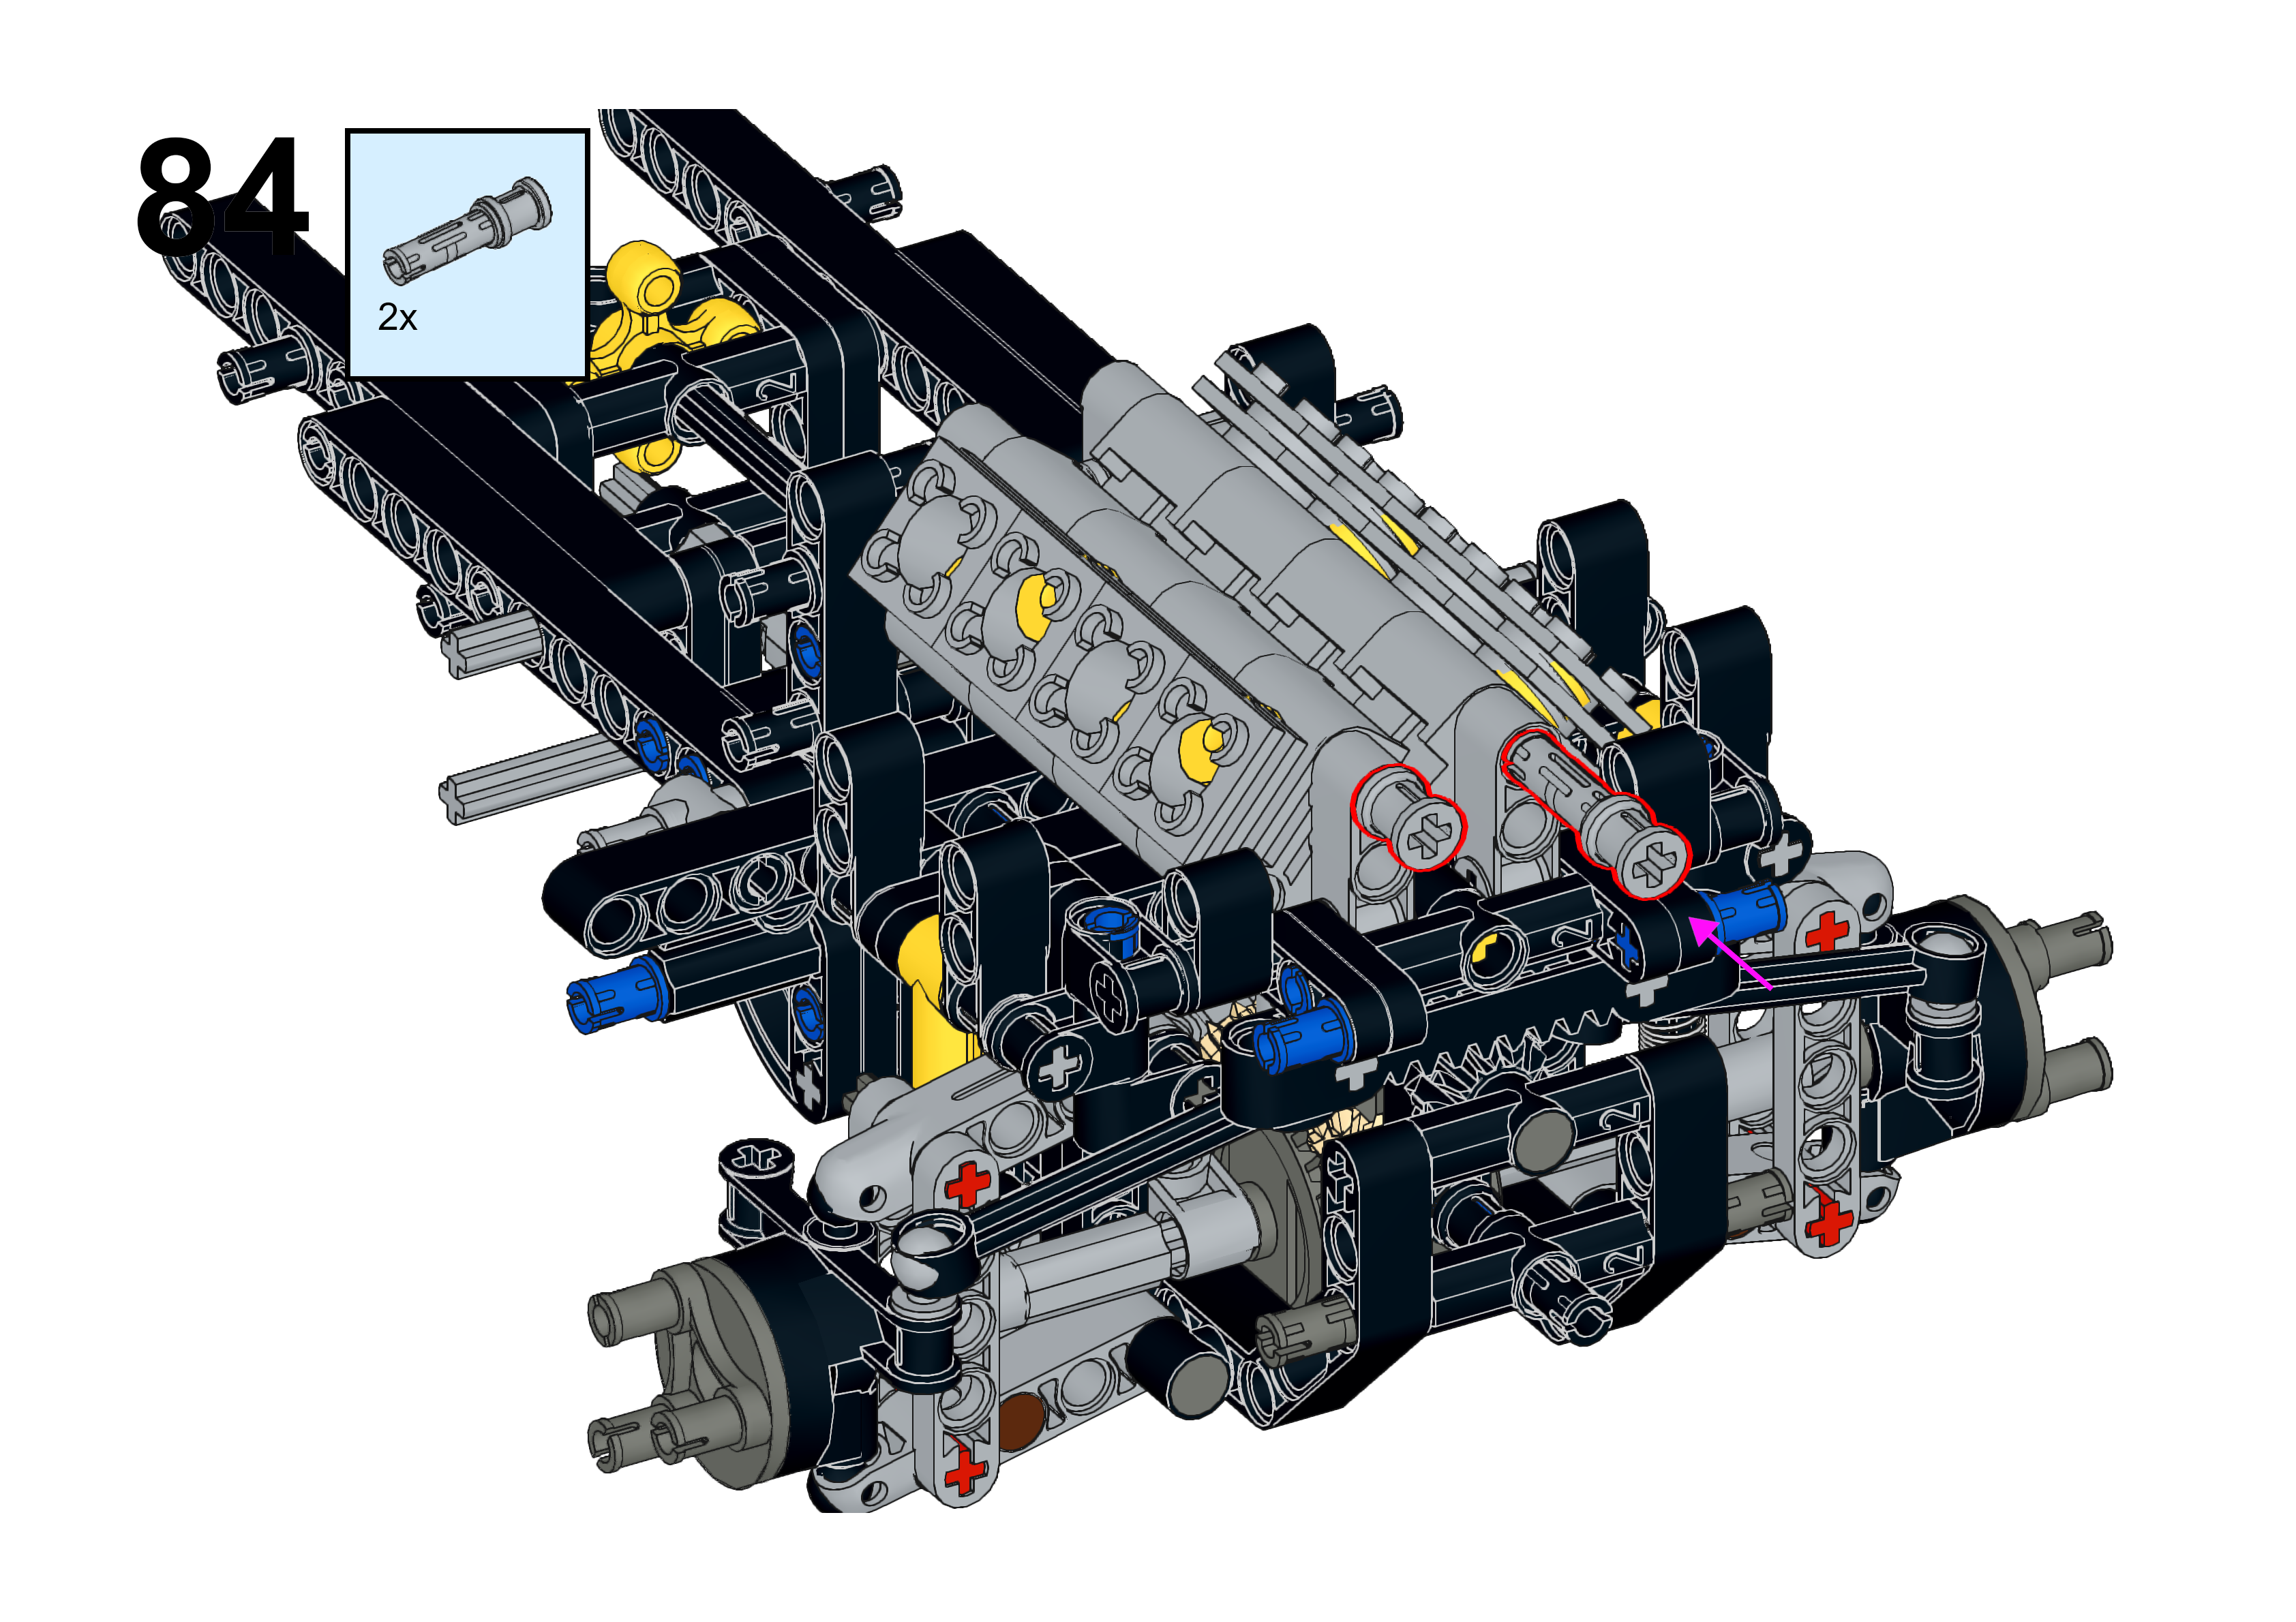
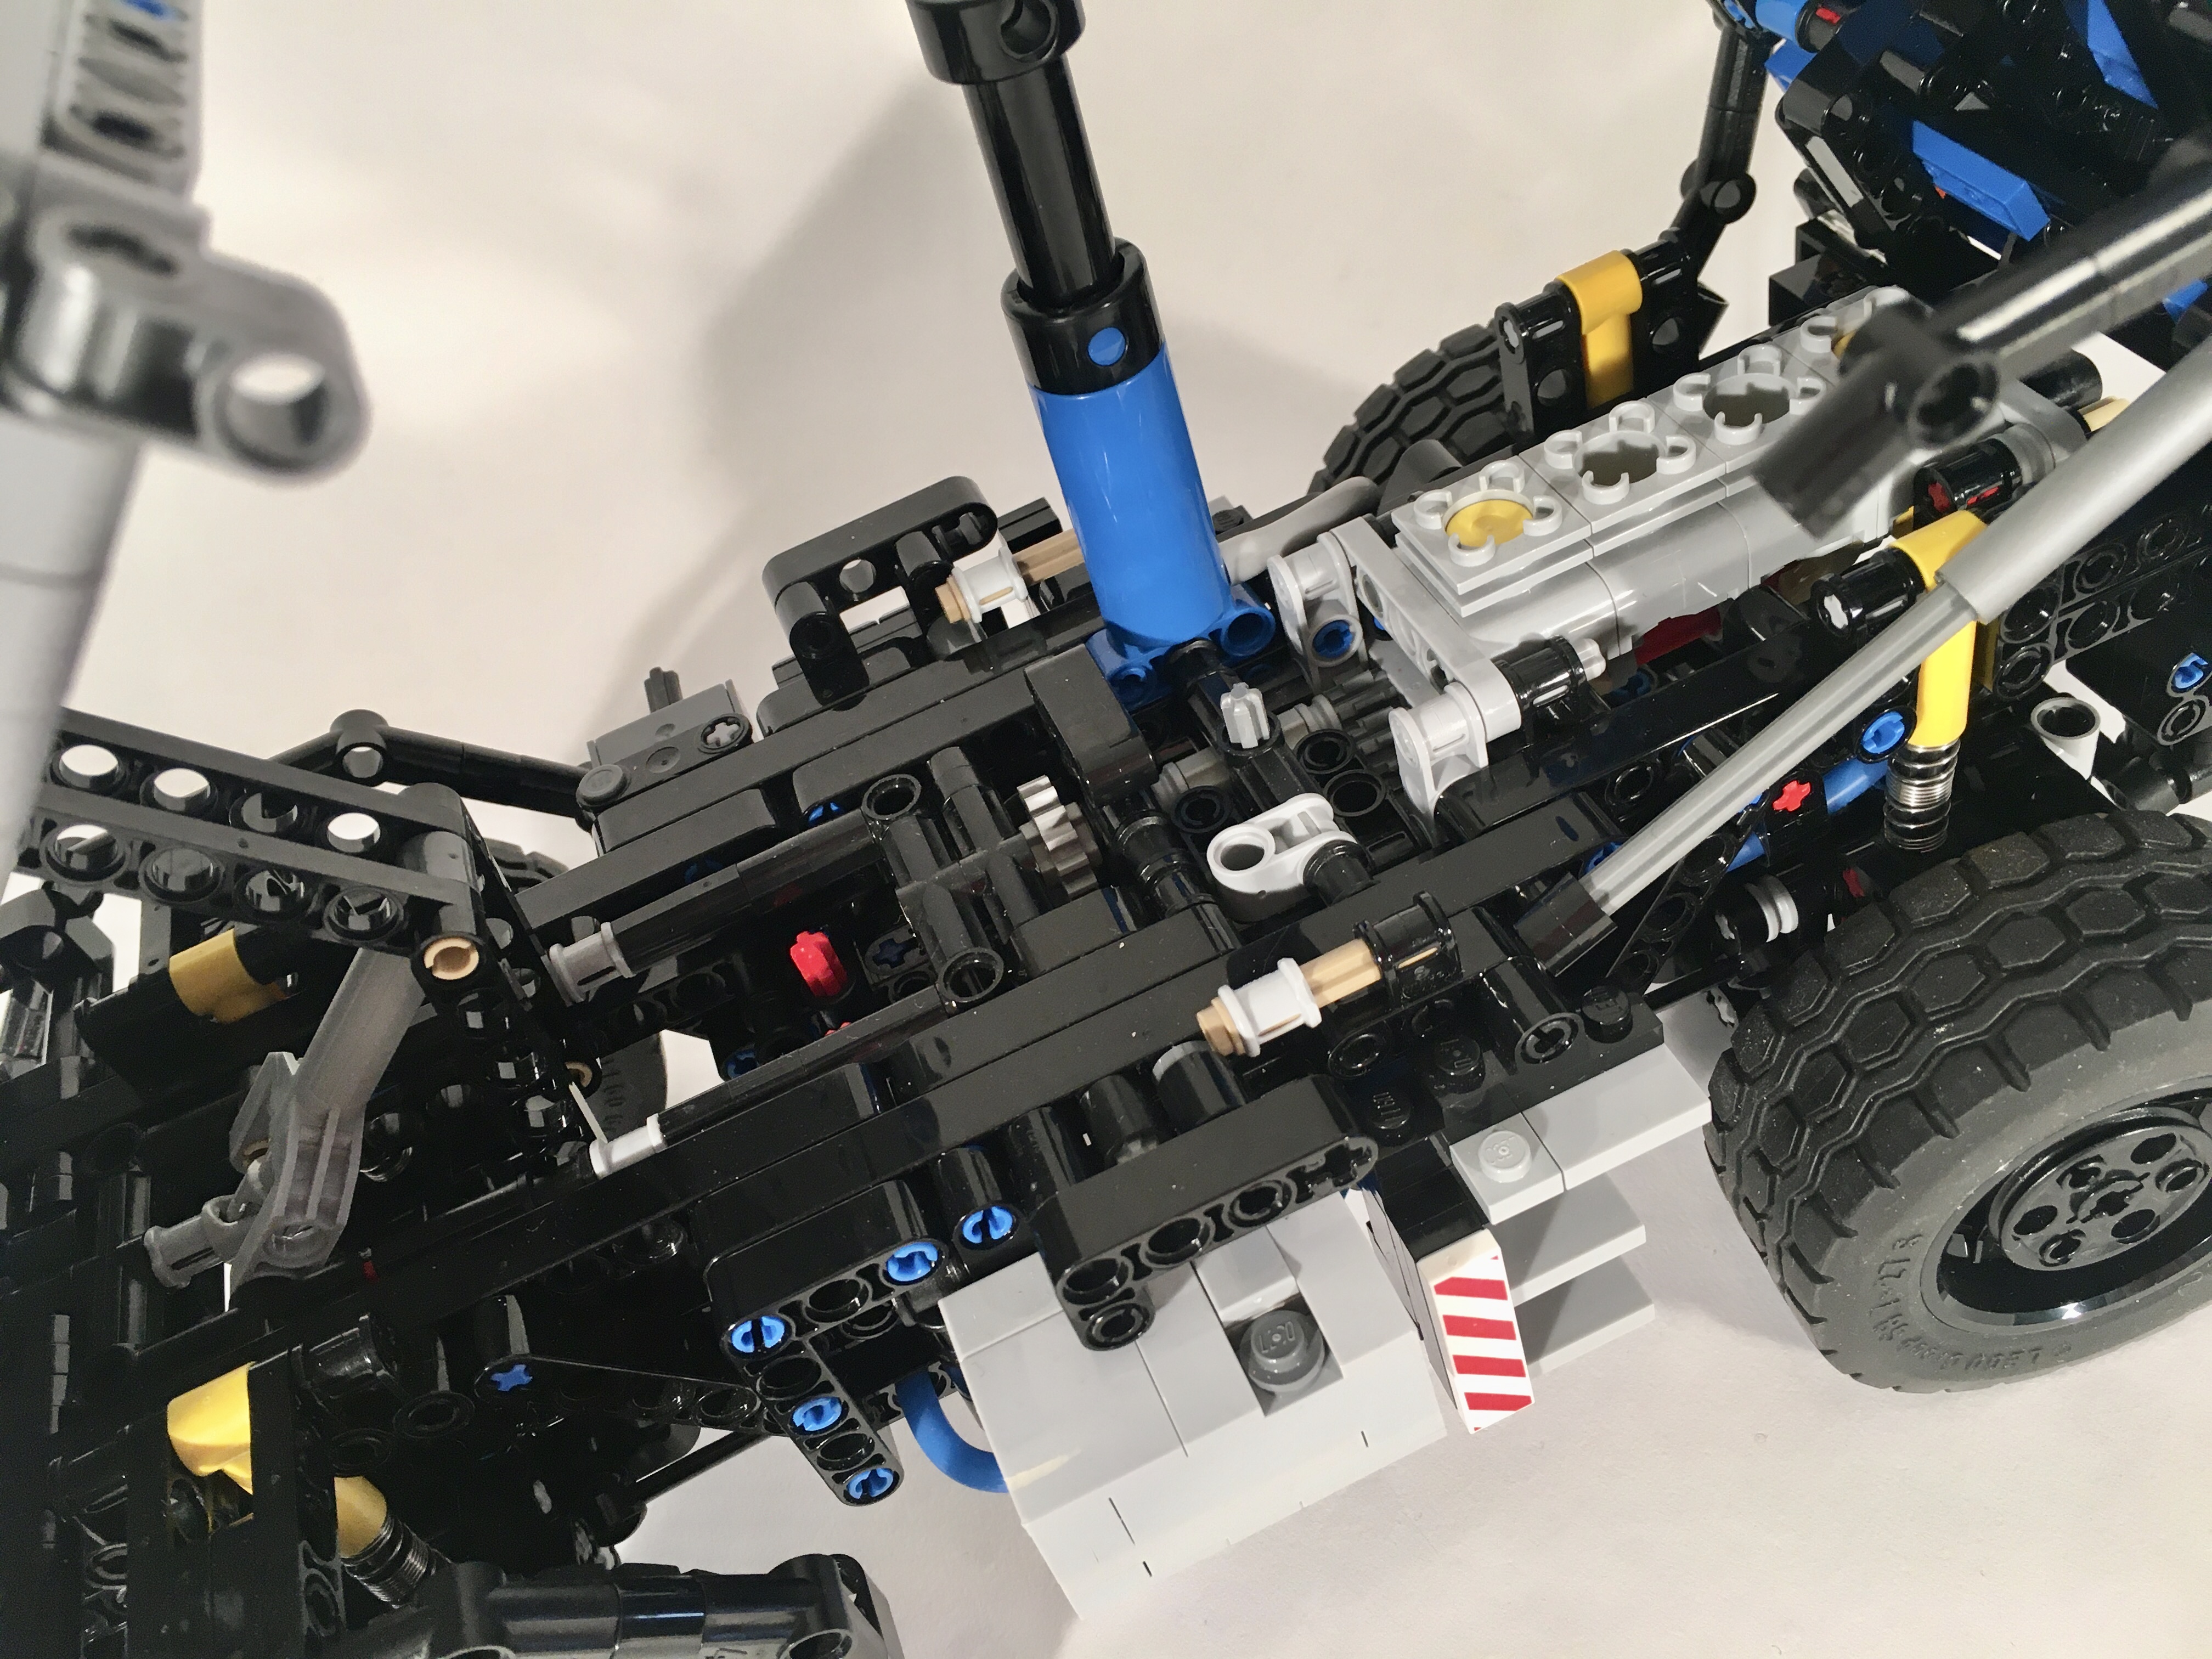
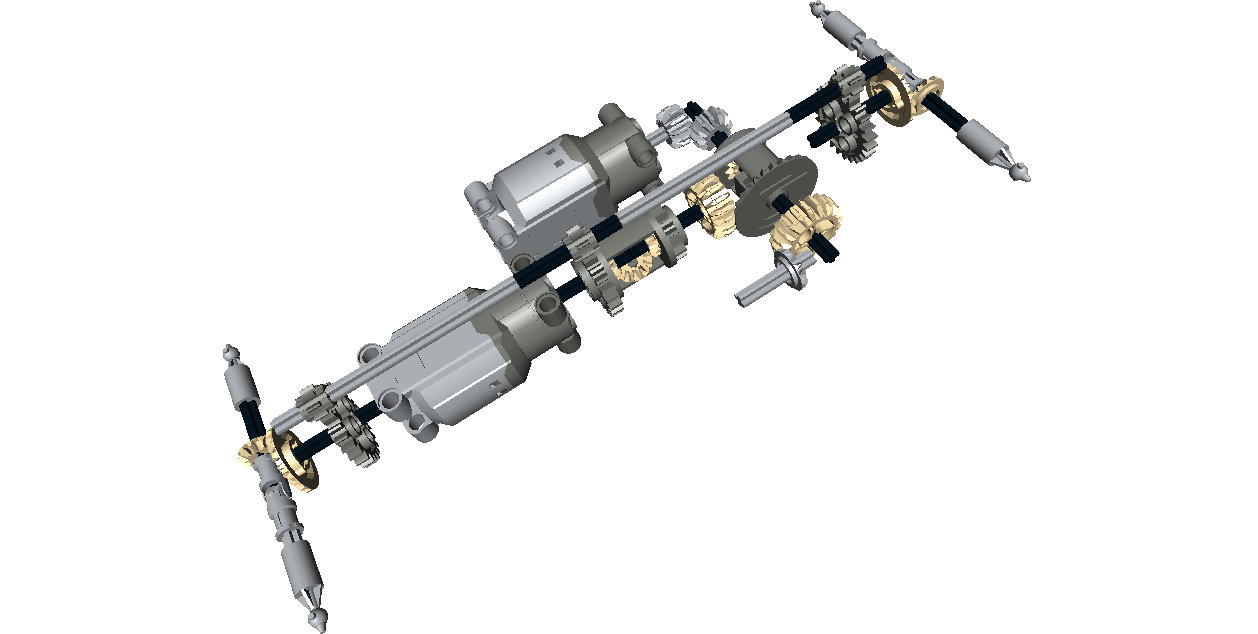
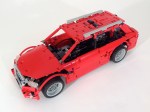
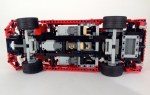
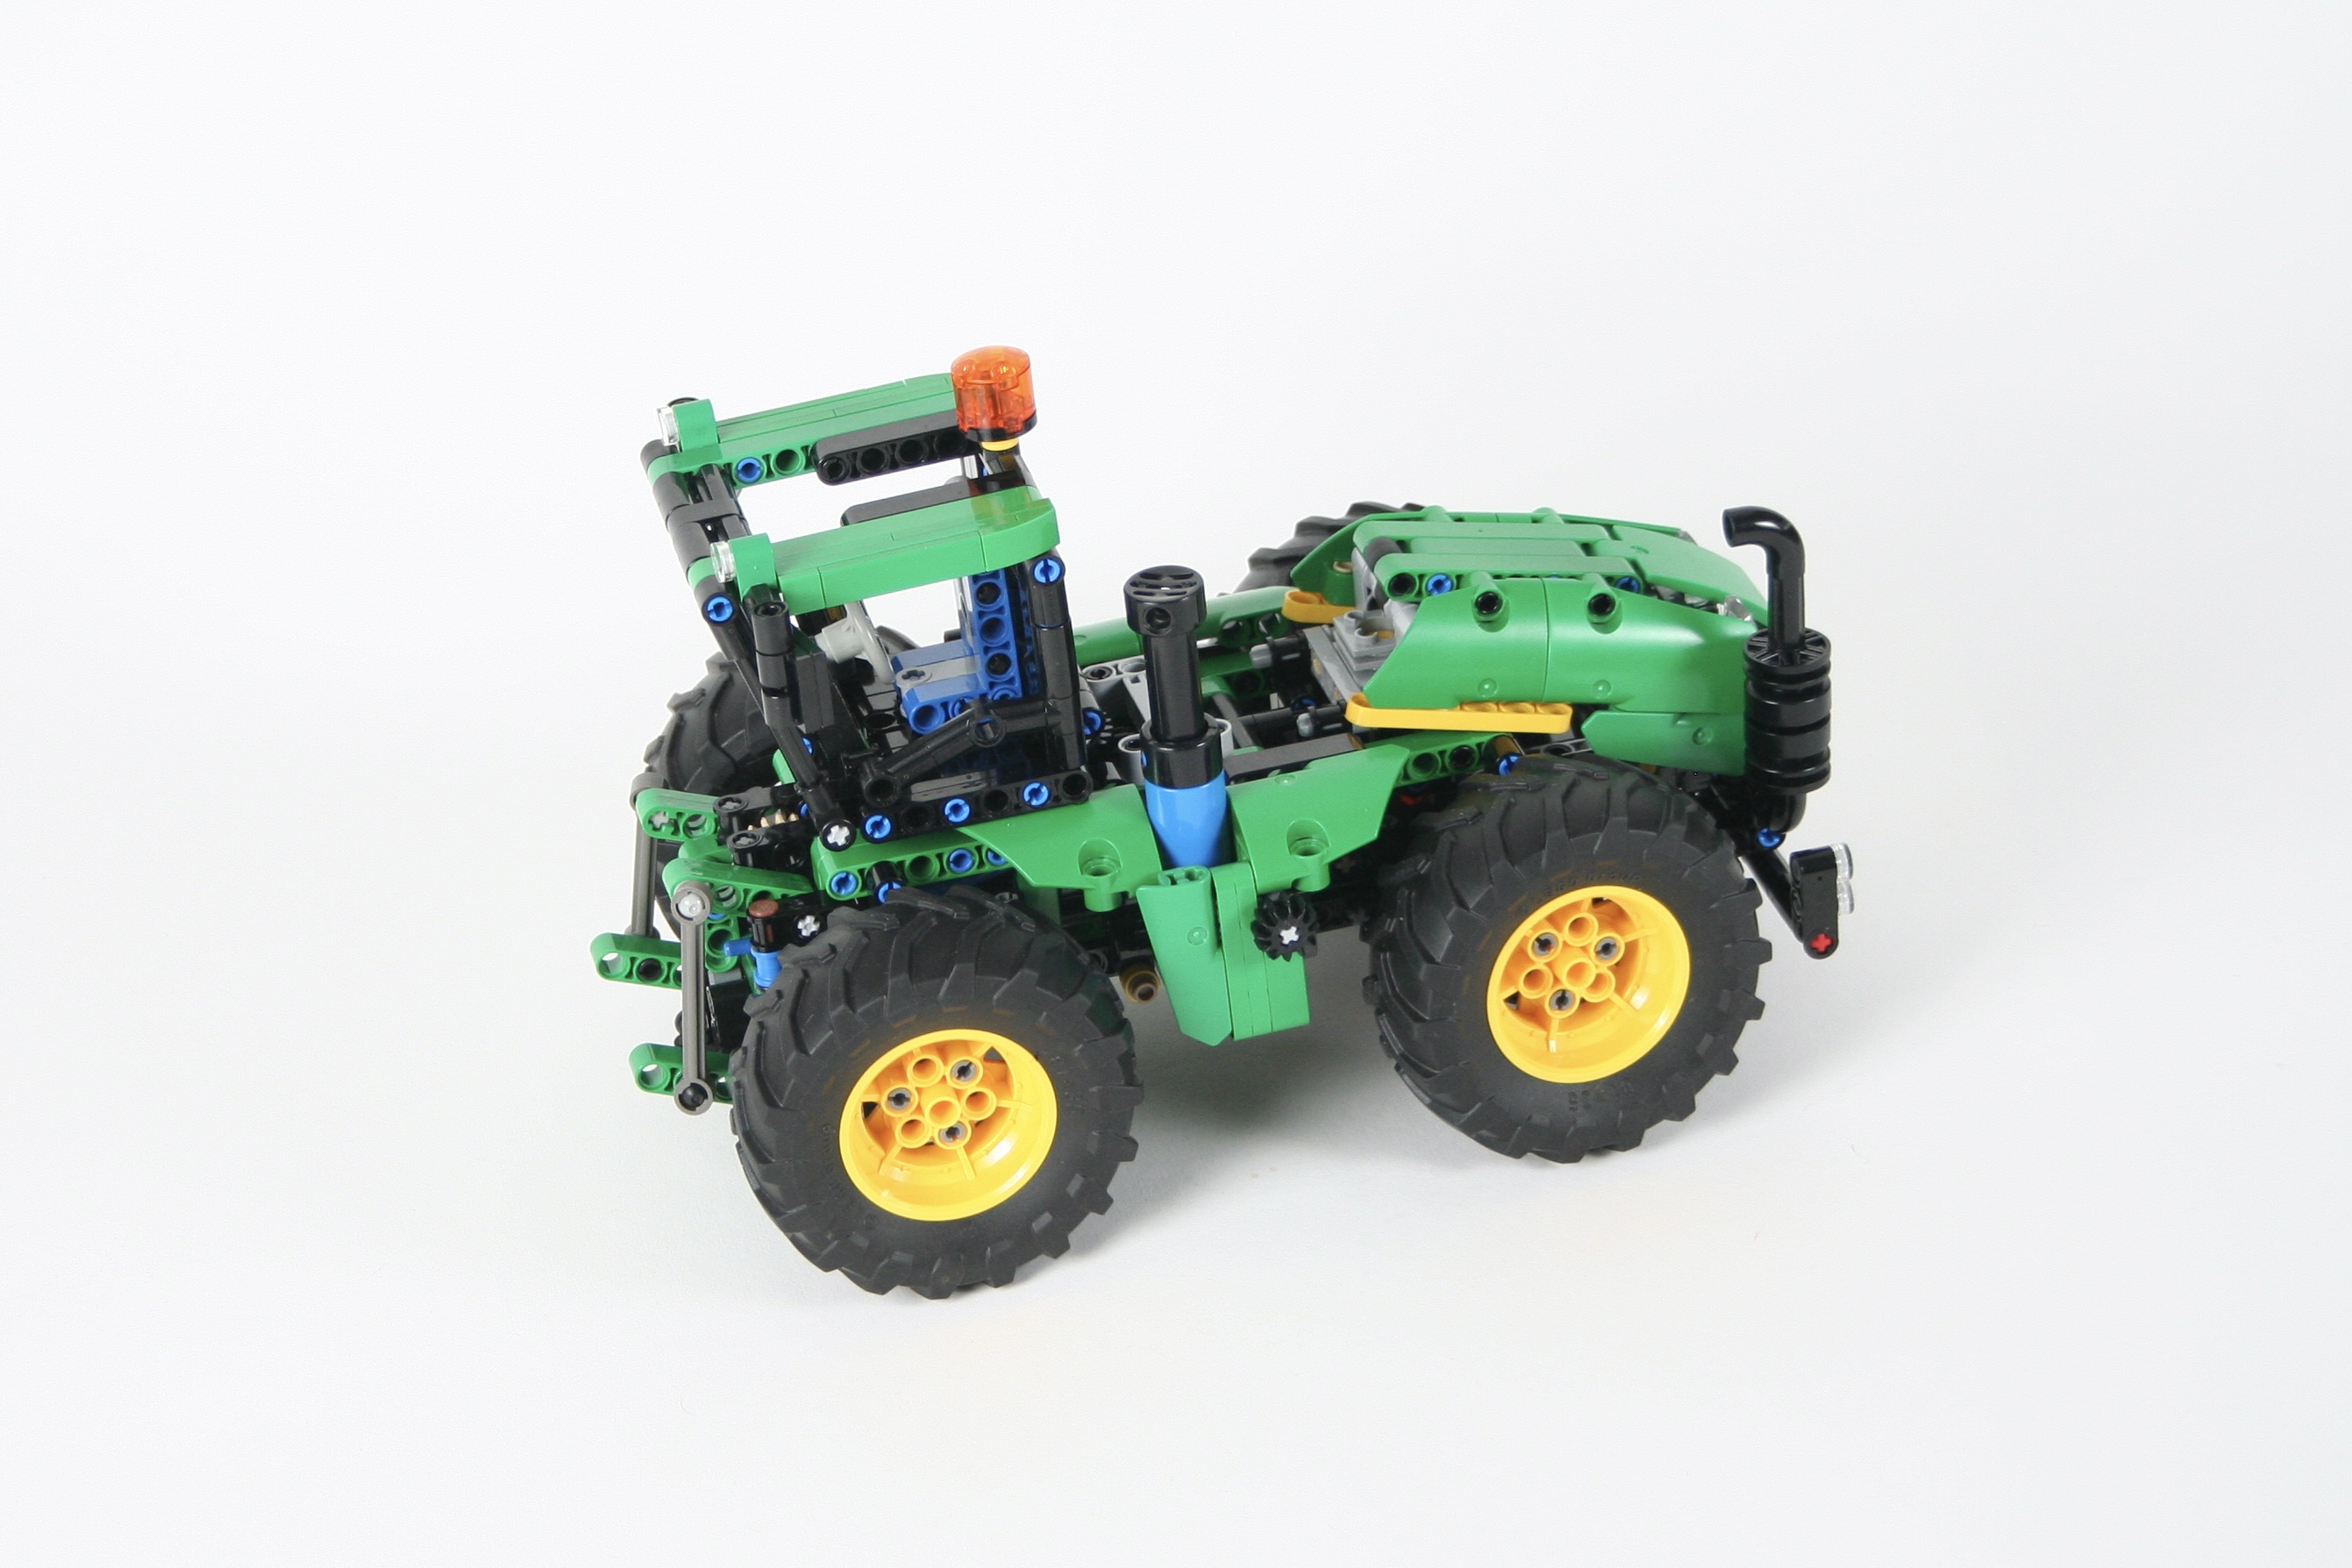
The tractor had to integrate into the other builds, so the front and rear mount and PTO placement dictated a couple of the hard points. I built the tractor with four wheel drive, and four wheel steering. A four cylinder fake engine is placed under the frond hood above the front axle. The rear most cylinder does not move as the crankshaft would have run into the steering unit, and any change I tried to fix it made for an ugly hood. A worm gear actuated rear three point hitch allows for implements to be mounted to the tractor.

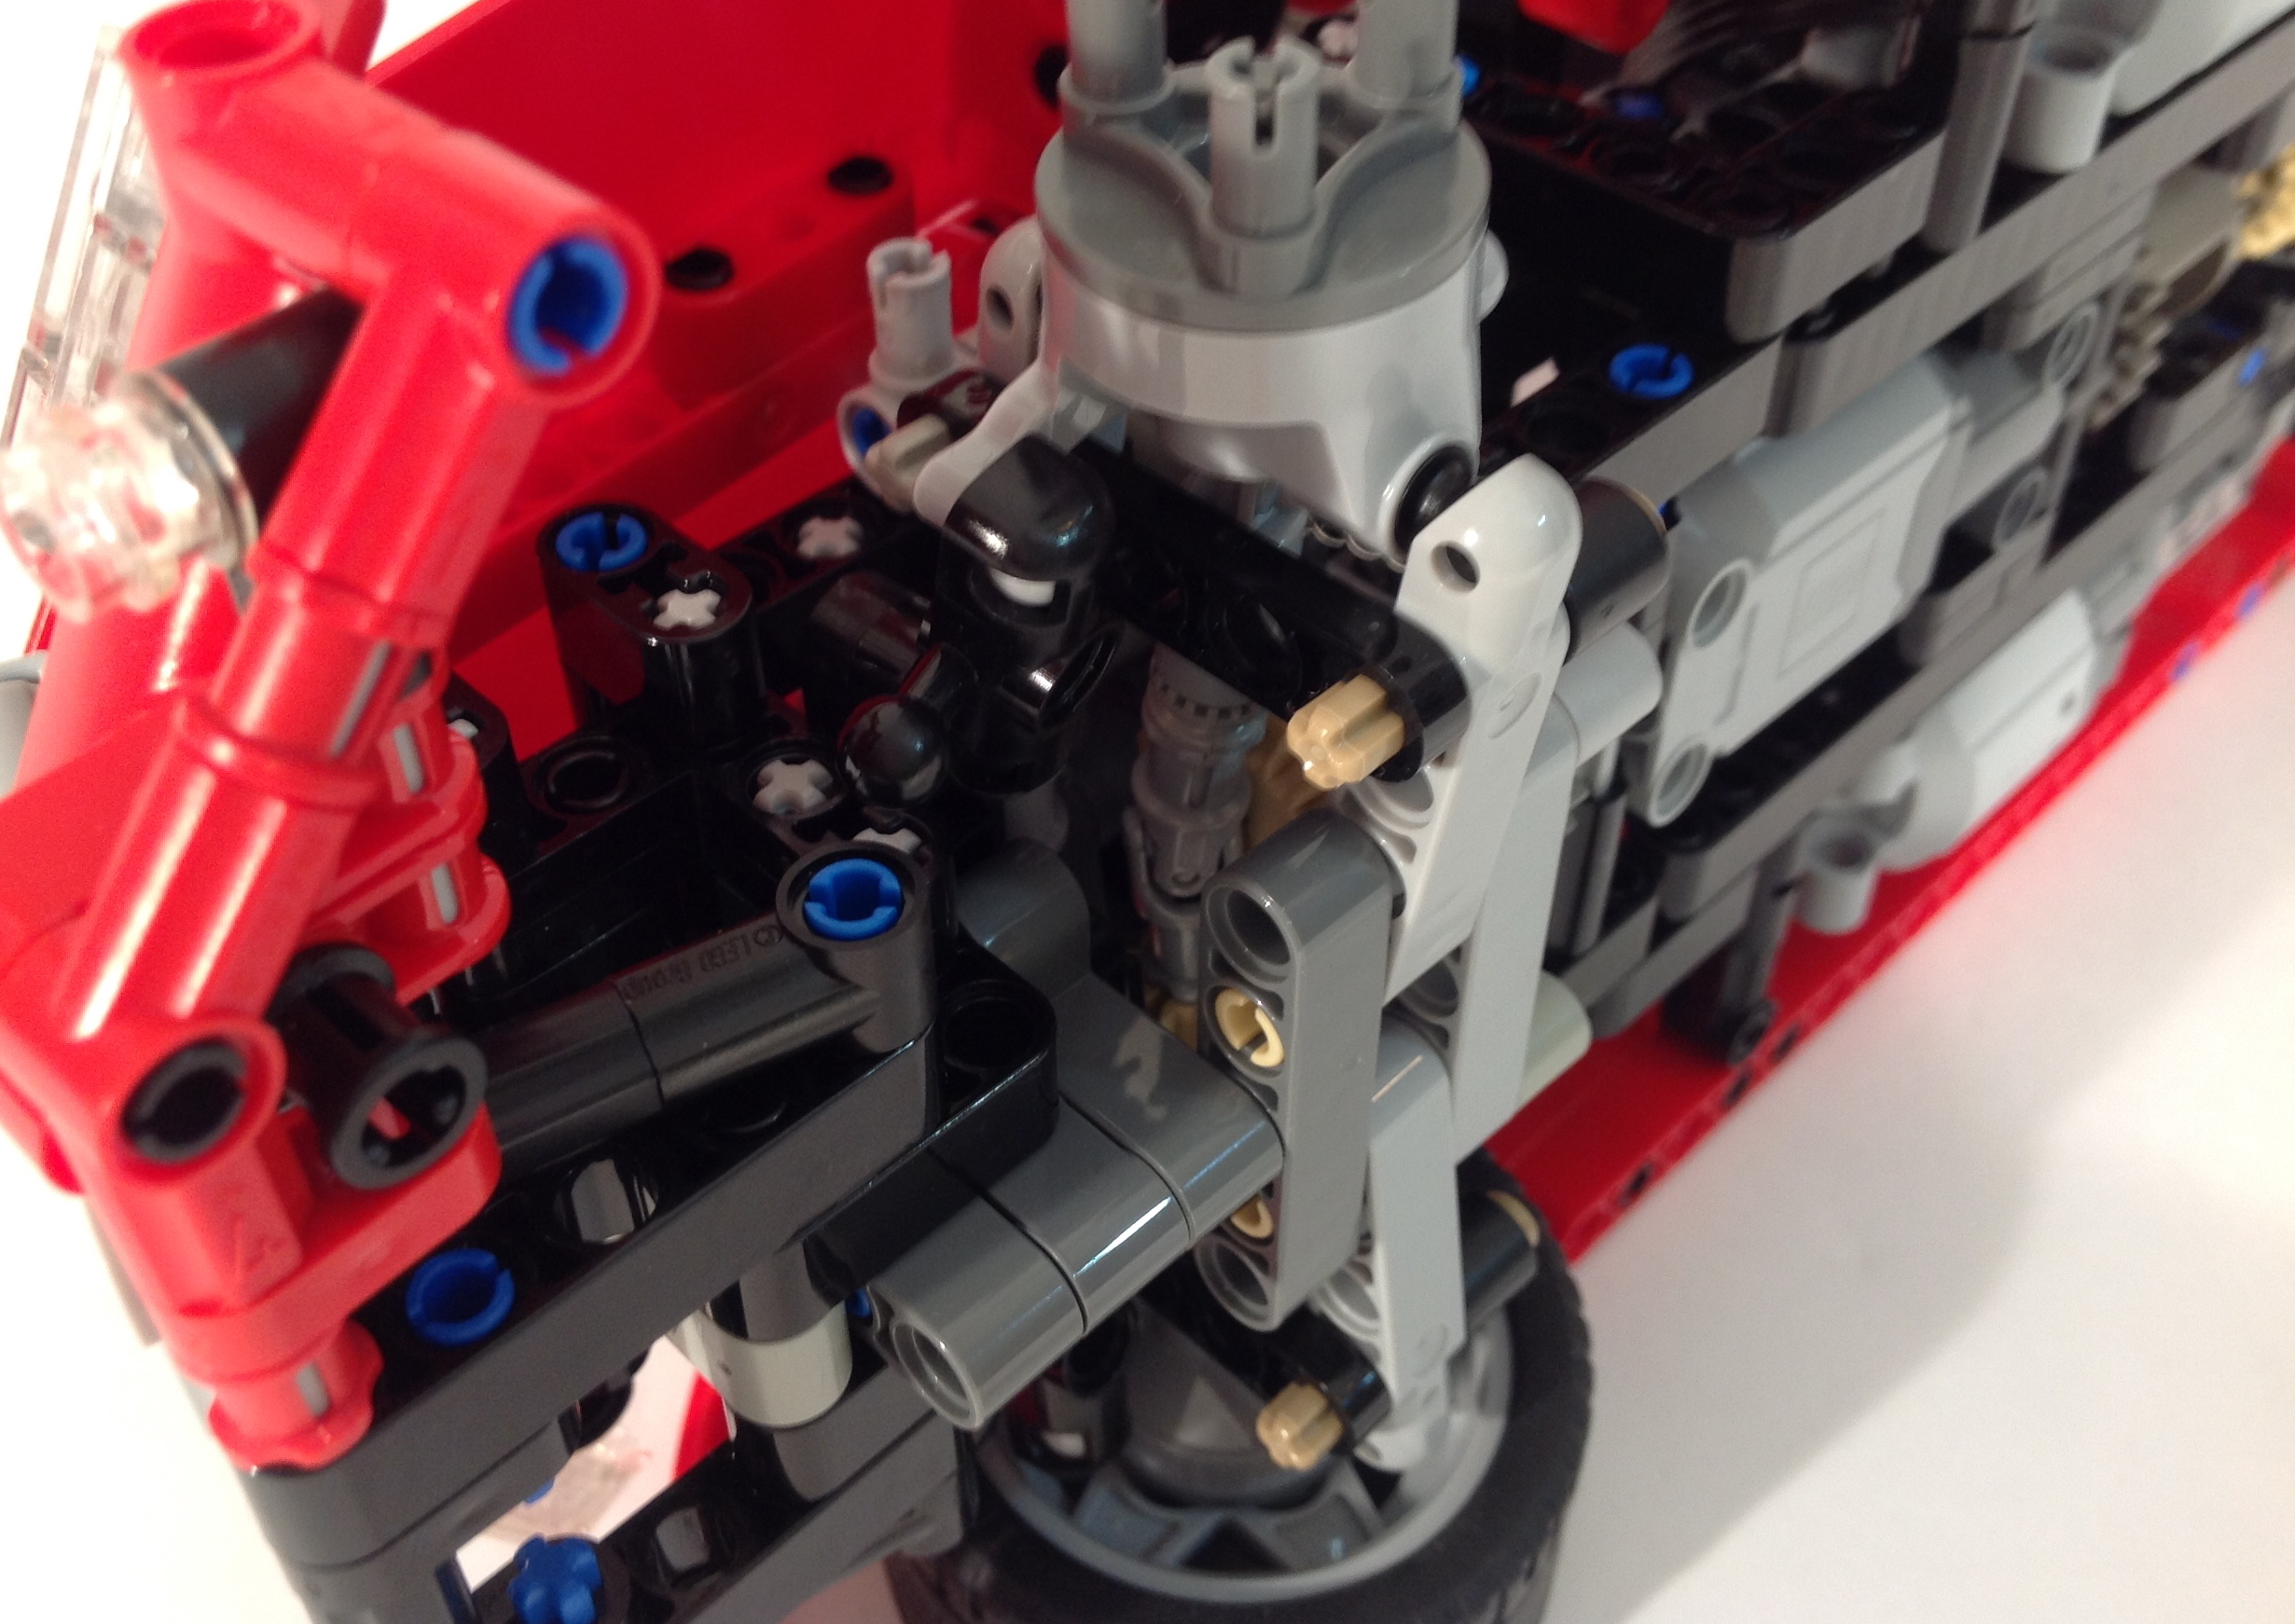
The steering is controlled by a HOG light at the top of the cab, which caused some headaches for placement as I wanted the cab to be able to rotate. There is a small gear on the right of the tractor that controls the rotation through and internally mounted worm gear. Getting the cab to rotate in the right spot, without hitting anything, and while still having the pneumatic pump, required endless test rotations.

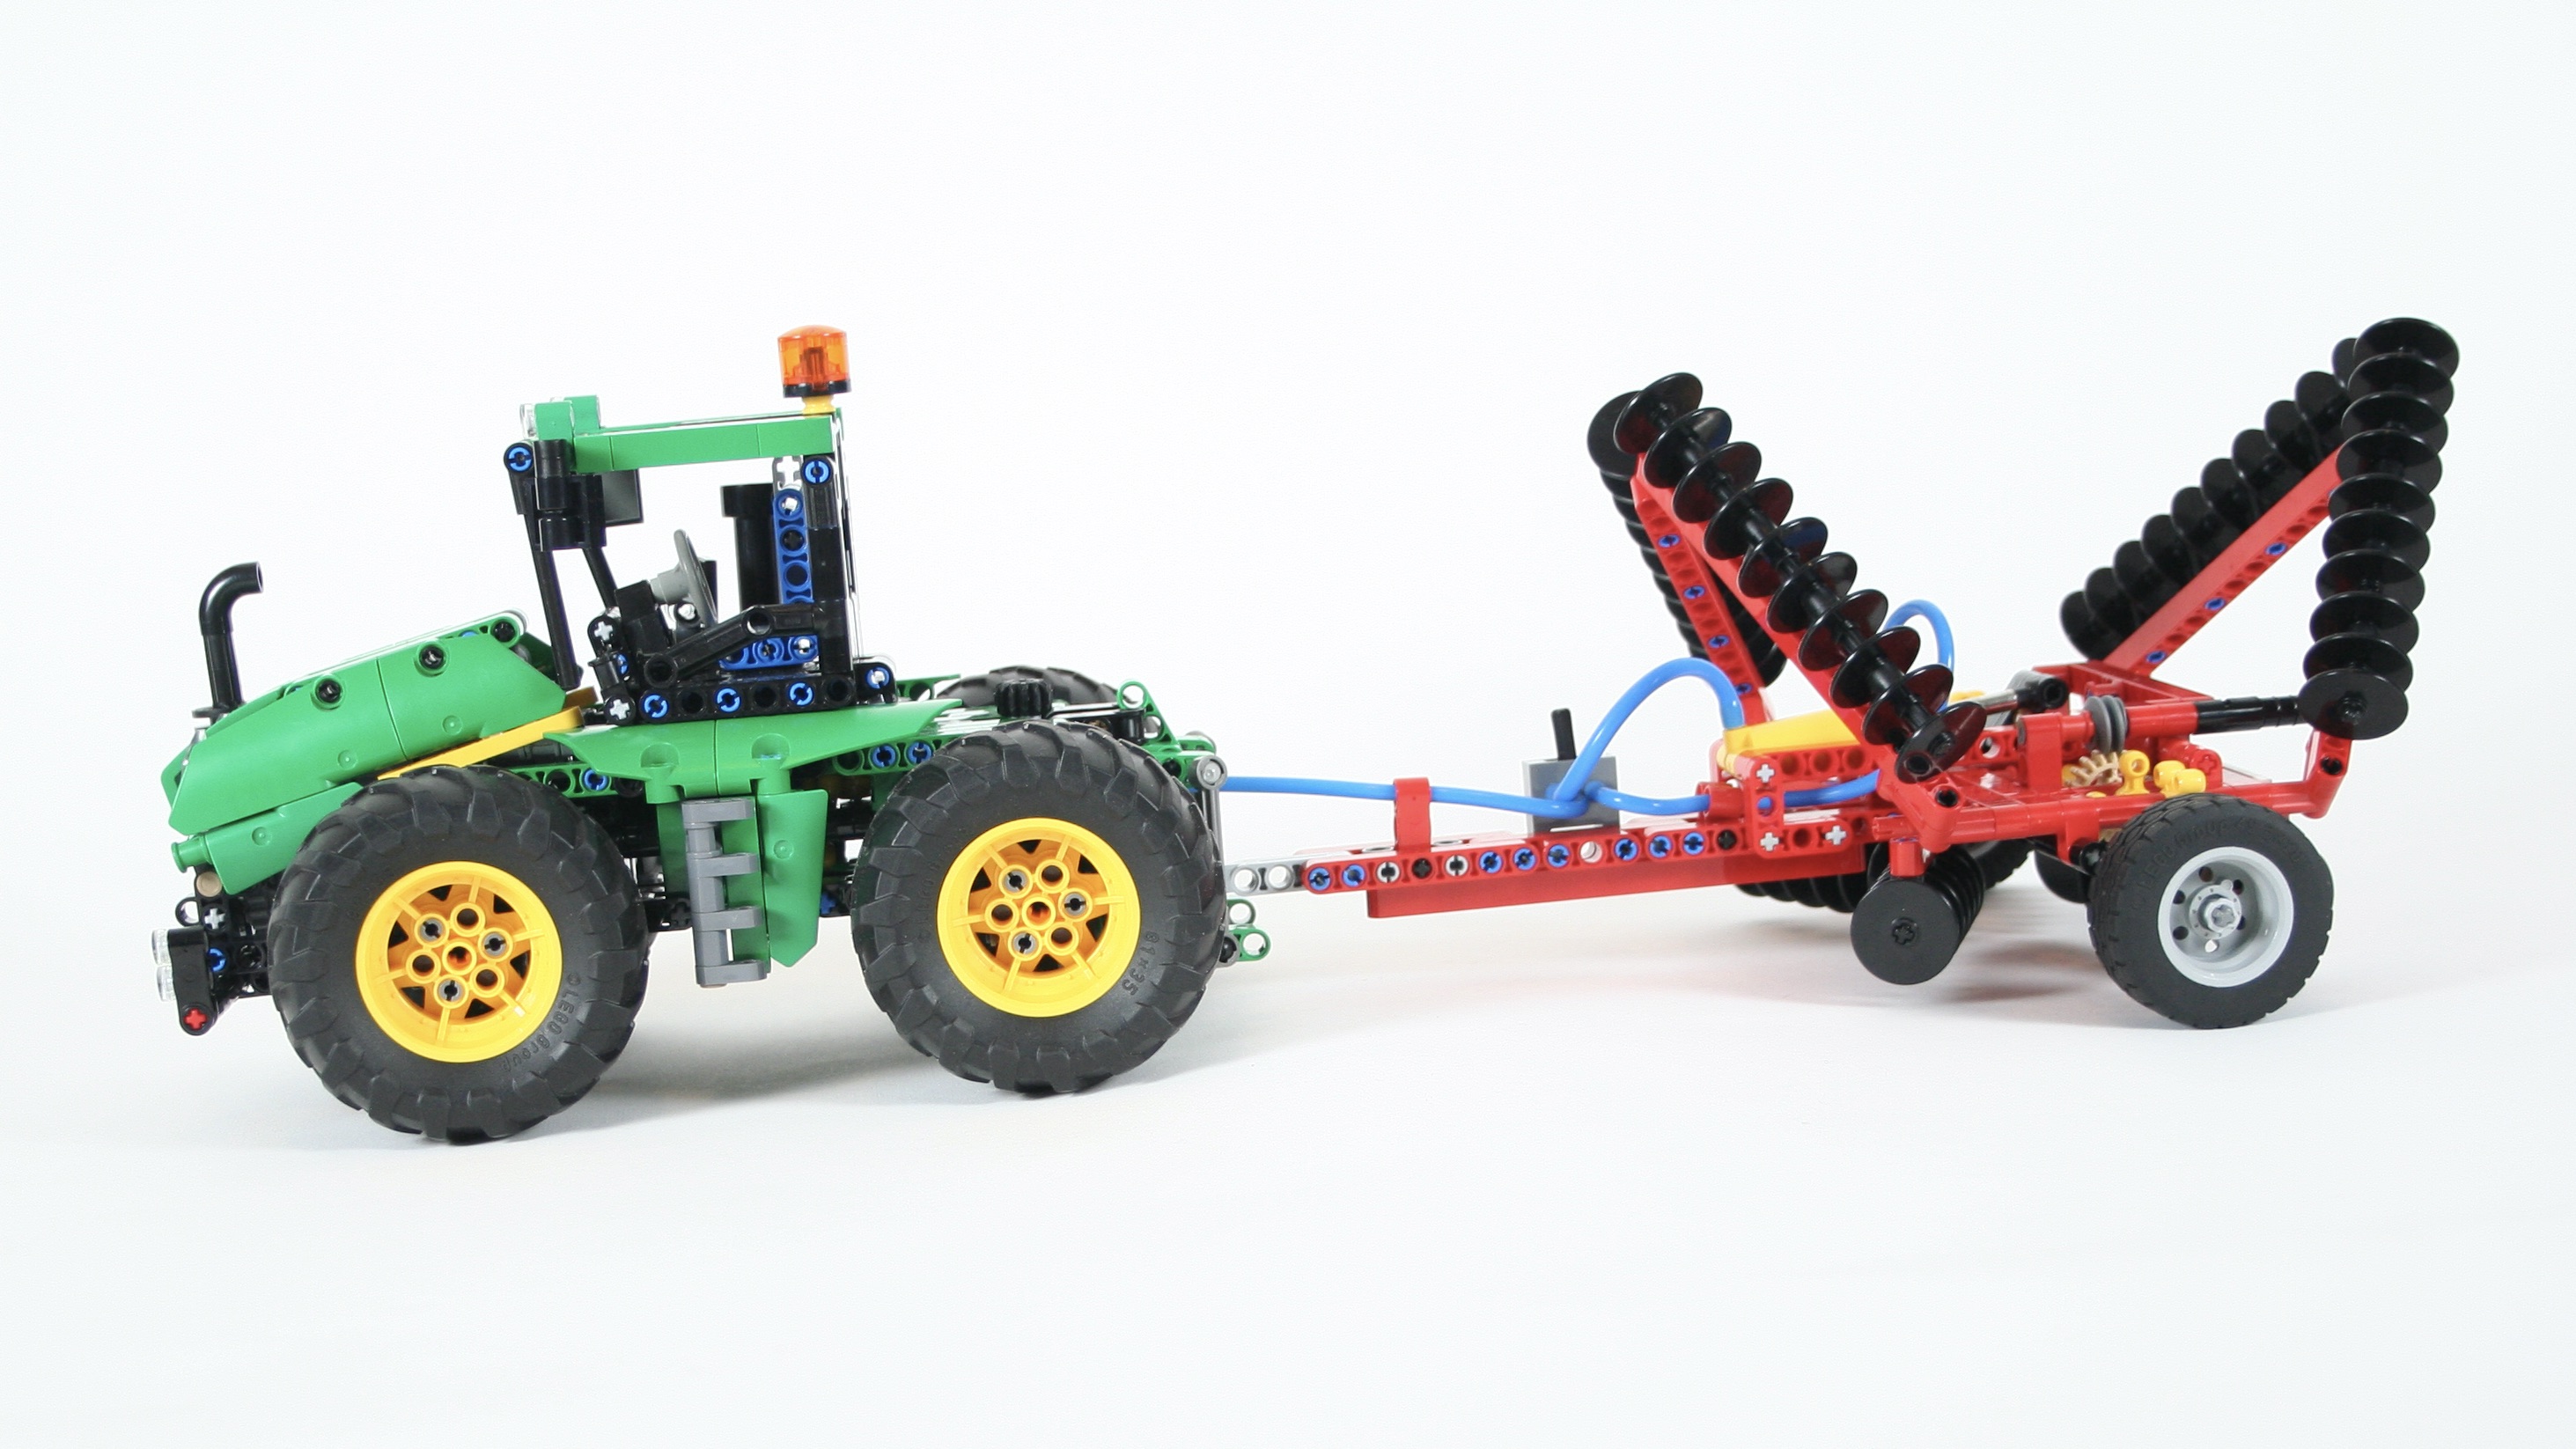
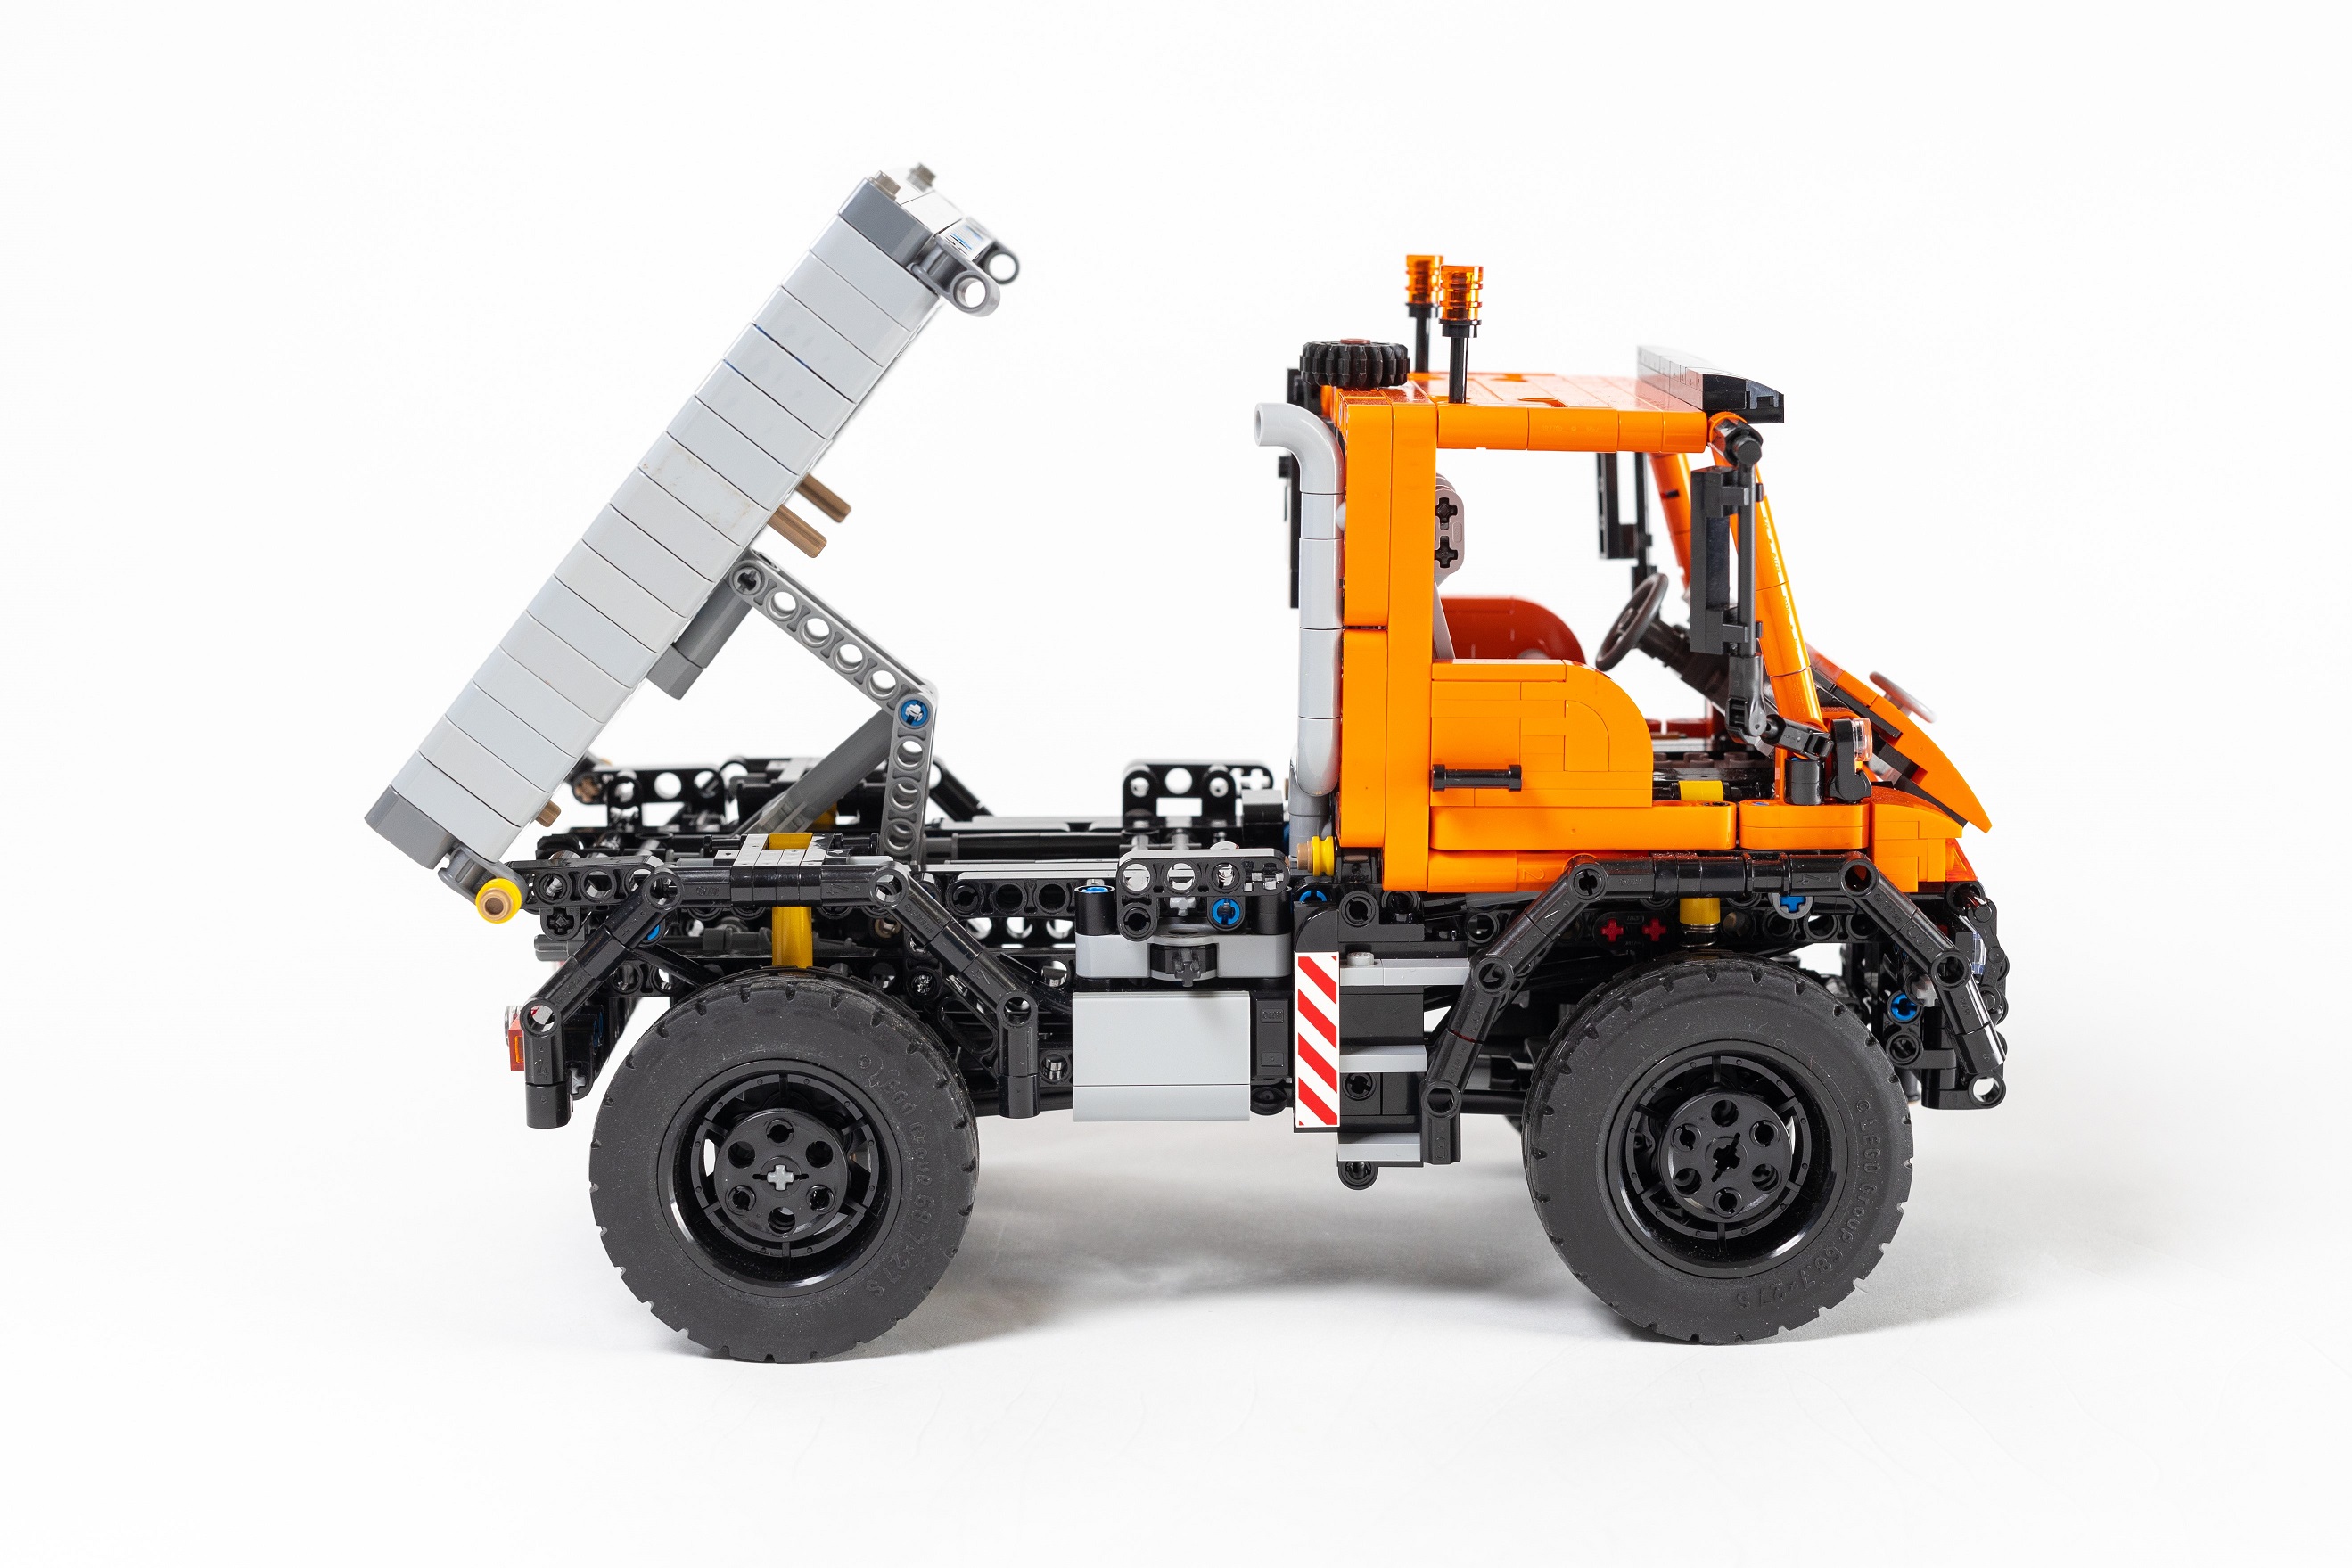
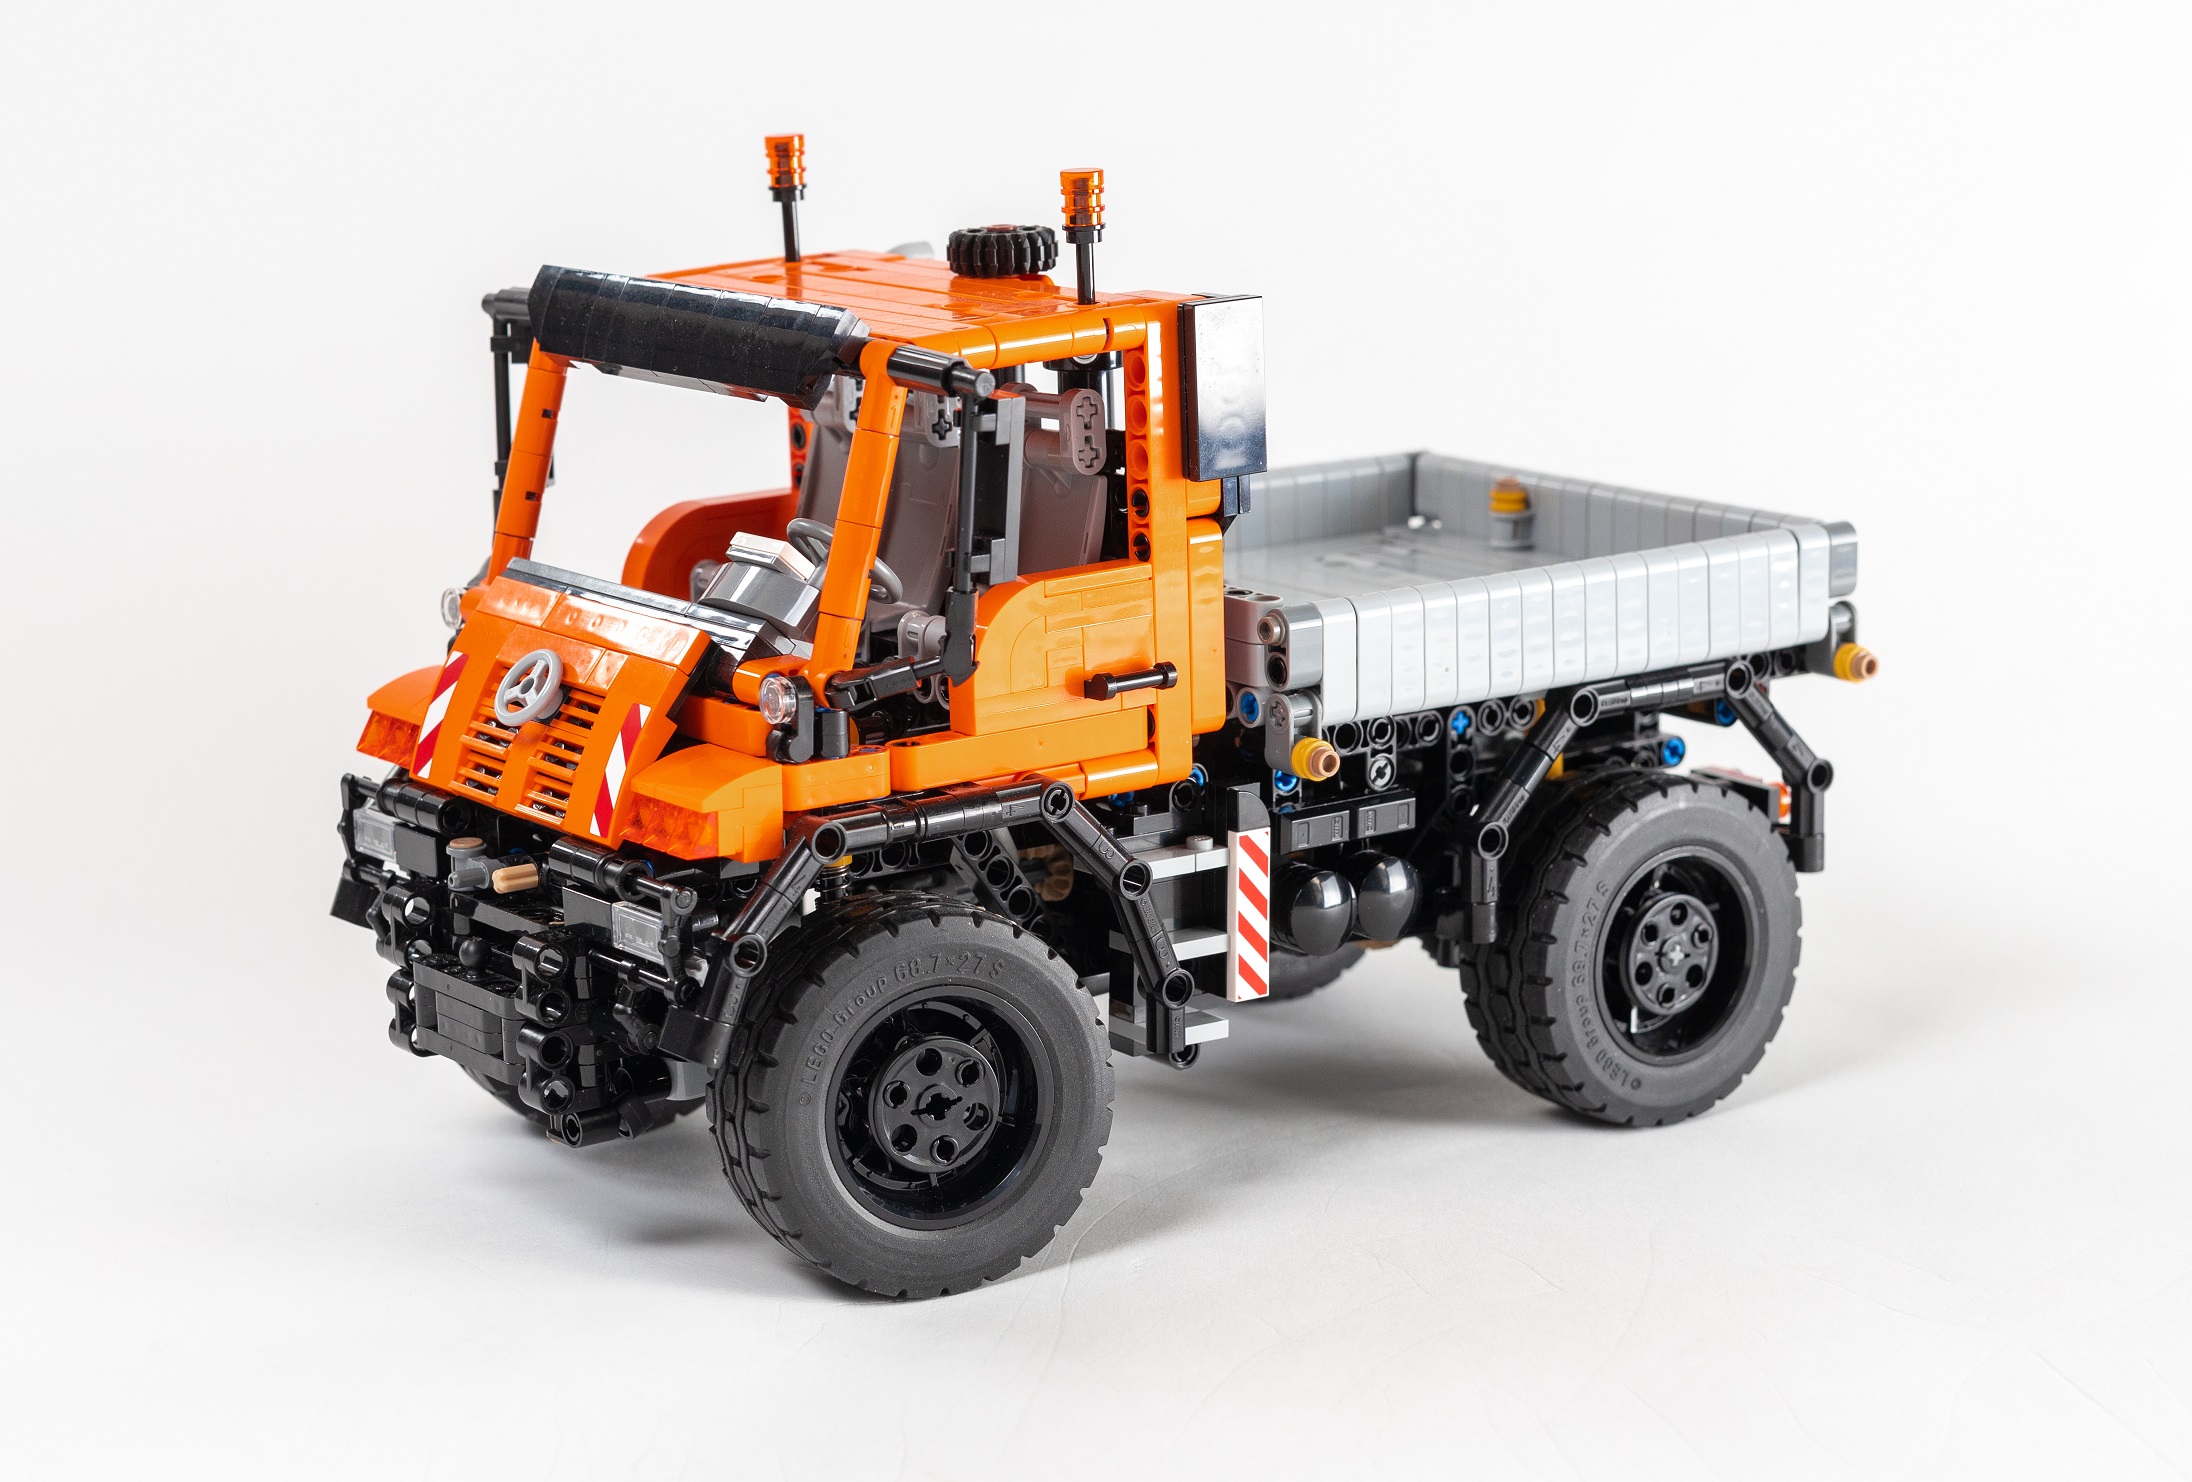
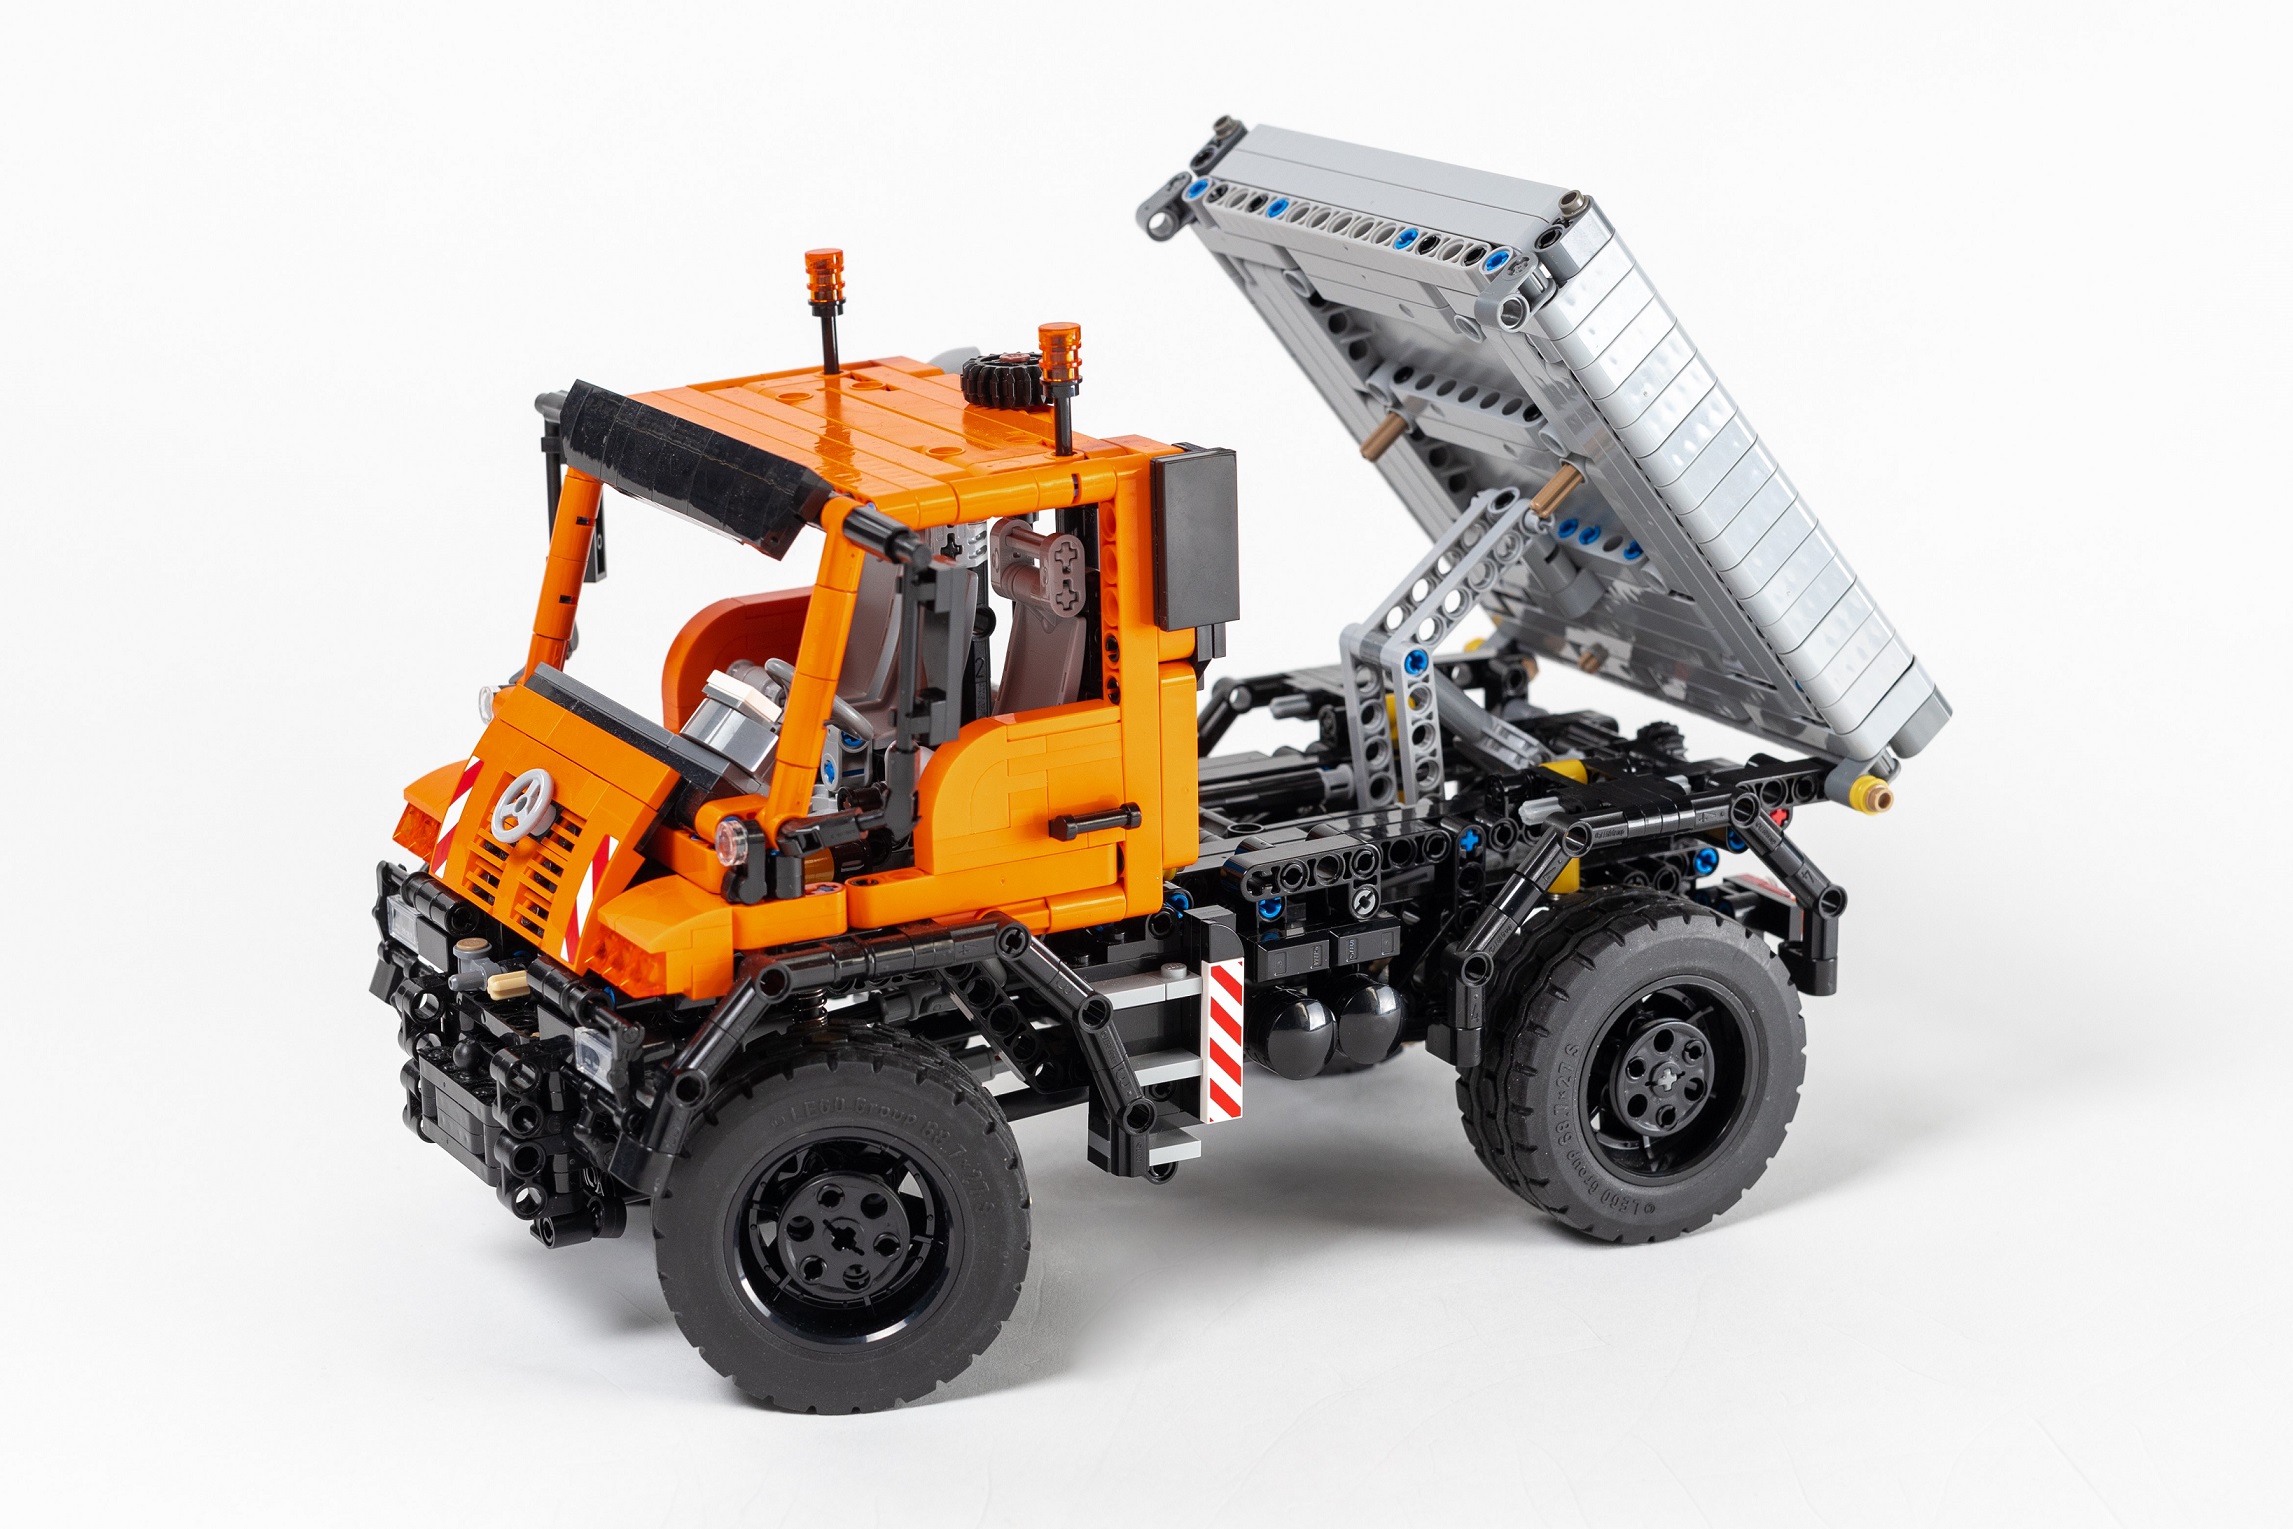
Since this is a Thirdwigg Farm tractor, there are many options to pair with this tractor, all with free instructions. My favorite is the Hookloadr trailer, but the Tandem Disc looks great too. Free instructions are available for all the options, so feel free to make your own farm.

It is always fun to make another tractor and this one was no exception. I wish the drivetrain was a little more smooth, but the rest of the tractor worked flawlessly. And it looks fantastic. Coupled with a trailer, makes it look strong and purposeful. And the rotating cab is so much fun to play with. We’ll see what gets added to the Thirdwigg Farm next!

Happy building!

Advertisement

Unimog U400/U430


I frequently build another Unimog after it has been a couple of months since the last one, so here is another TWO!

You may find building instructions for both the U400 and the U430.

I generally find myself building a Unimog about every year, and this year, I built three. Kindof. Early in 2021, I built a Short Wheelbase U500 in blue, and I loved it. So, I wanted to see if I could take the build a little further. I’m partial to the U500, but the U400 seems to be a little more popular, and the current U430 was another challenge I wanted to try.

Instructions available for both.

The chassis for both is a modification of the U500. The wheelbase is 2 studs shorter, so I removed the winch and the PTO on/off switch, and modified the bed tipping mechanism. The rest is the same, including the front and rear PTO, the four wheel drive, and the I4 engine. Both the U400 and the U430 have a manual pneumatic pump with a front/rear switch for attachments.

The tipping bed is the same for both, and can tip in three directions. The three sides drop as well. And the cab for both is generally the same, with a slight change to the front to address the styling differences for both. You can see the similarities between both in the videos below.

I’m pleased with these MOCs, and how they worked. The U400 is the most beautiful MOC I have made in a long time. It currently adorns my desk at work, and will continue to do so for some time. While I wish both would have portal axles, the stability of the drivetrain, and the flawless reliability is worth tradeoff. The U430 looks great as well, especially with the tires, the orange is my favorite. Hopefully I am able to make some attachments for the front and rear. Stay tuned.

Until then, happy building!

LEGO 42126 V-8 4×4


Sometimes a LEGO set needs just a little more content. 42126 is one of them.

Instructions may be found on Rebrickable.com.

LEGO 42126 was introduced in the Summer of 2021, and I was immediately drawn to the pickup as it included some features I like, such as steering, suspension, a decent (at least in the USA) price, and it’s Orange! But there were serious features lacking such as four wheel drive, a V-8 (I know, I know, a Raptor, and many of Ford’s F-150s use a turbo V-6), and the rear suspension geometry was weird. I agree with others, that some parts of the design like the rear taillights and the front headlights are a little off. But, like 8081, I saw some potential here, and I ordered the set.

In fact, before I even received my copy of 42126, I was designing and a building a new chassis. The V-8 was easy enough to add, as the space under the hood is extensive. Adding in a front drive axle was a little more complicated. To keep the width, steering geometry, and suspension travel the same as 42126, adding a front drive axle would take a little work. I used a floating differential design, which allows the differential to move freely as the suspension travels through its movement. The steering link was flipped upside down, and relocated in front of the drive axle. The suspension swingarm and shock absorber mounds did not change.

42126 V-8 4×4 Chassis

Immediately behind the engine firewall a differential that connects to the V-8, and the rear axle. The rear axle is changed to replicate a better movement of the rear Raptor. LEGO noted how the half module offset of 42126 was a feature they had to work on to get the placement of the axle correct. However, this feature was only needed as the pivot point of the rear axle was so to the rear of the pickup. By moving the pivot point of the rear axle farther forward, the travel pivots less, and creates a better axle movement of more up and down. This also helps place the axle better when one side is up, and the other down.

While I made no changes to the exterior, I made minor changes to the interor. The colors of the seats have been changed so they match one another a little better. Finally, with a little bit of cross frame bracing, the pickup was done. When 42126 finally arrived, I removed the bed, the doors, the hood, and the roof from 42126, and my F-150 was done.

I like making modifications of sets more than I like making B or C models of them. As such, this project was an enjoyable one for me. I worked fast, and I liked the improvements I was able to make to the original. I like the look of 42126, so keeping this consistent was fine for me, and the additions of the V-8 and the four wheel drive was a fun challenge to pursue. Now to see if I can do a Sport Truck version of 42126. Stay tuned….

Happy building!

Unimog U500 (405.201)


Every couple of years I build another Unimog; they tend to be a favorite subject.

Instructions may be found here.

Unimog U500 (405.201)

Right after the LEGO Batmobile 76139 was released, I saw the front tires, and immediately planned this Unimog. The tires were perfect for a U500. I stared working on a draft before I had acquired the tires. I wanted the build to be in the theme of my Unimog 437 in that it was about 1:18 in scale, and had modular cabins and bed options. But I wanted to take this idea to the next level so that front and rear attachments could be added, as well as trailers. Many of my builds as of late are more system focused, in that a main build supports lots of other attachments, trailers, and versions of the same build. With this one, standard attachment points on the front, rear, bed, cab, and hitches allow for a variety of versions and attachments to be added quickly. I’ll make more of these soon.

Rear Hitch, Attachment point, PTO, and PPTO

I quickly set up a front and rear suspension using what was learned on the 437. The MOC has front and rear live axle suspension, four wheel drive, and front steering. A I4 engine is placed under the cab, over the front axle. Unlike the 437, I added a front and rear PTO. The rear PTO has an on/off switch. A center PTO is present as well for attachments that go in place of the rear bed. Finally, I added a Pneumatic pump behind the cabin to run pneumatics on the front or rear of the truck. A value determines if the preasure goes to the front or rear.

U500 Chassis

I added a three way tipper bed on the rear of the chassis, and created a way for the cab to be tilted. Both can be released by pulling a couple of axles out to allow for the tipping. The cab has seating for three, and both doors open. Finally, I added a front winch that is released and wound up using the fake air tanks on the left of the truck.

In the coming months I will make some attachments and trailers for this truck and for a U400/430 version that use the chassis of the U500 with some adjustments.

2016 Unimog U430

The truck turned out how I wanted it too, and had the features work the way as intended. The suspension is a little hard, but that supports various attachments well. This tipper bed and winch are a little addictive to play with. I did not spend much time making attachments for this truck, but I hope to do so soon. Until the next build or Unimog, Happy Building.

Audi allroad


There are not many projects I start that I do not finish. I can count a couple. But, sometimes there are projects that take a long time to complete. I either loose motivation, lack parts (read budget), or find something else to do. If I were wise, I would toss the project, and move on to something better. But there is value to trudging through the slog and completing something difficult. The Spitfire is a great example of this. The Audi Allroad has been on The Queue for about 16 months, and it’s finally done.

The full gallery may be seen on Brickshelf or on Flickr.

Audi allroad

After completing the OCTAN F1, I thought I could use the suspension for an all-wheel drive car. I was sure I could make the front suspension with steering work at this scale.

allroad Suspension

I wanted it to have another fun feature, so using a bunch of differentials, I developed a simple three speed transmission. Three power functions motors are connected via two differentials which connect to the drive axles. Each differential acts as a subtractor between each motor. When one motor is running, the power moves through two differentials, and the car moves slowly. When two motors are running, the power moves through one differential, and it’s a little faster, and when all three motors are running the car is running the fastest as no differentials are splitting the power. I got it to work, and within a day, I had a working chassis.

allroad Driveline

Once this was done, the MOC sat on my desk for a long time. This past fall, Thirdwiggville welcomed another citizen to the village, and this gave me lots of time late at night to get back to working on this project. I spent a couple of weeks working on the body work with the perspective of “finish this.” So the body work could use a little more polishing; doors, mirrors, better lines, maybe an interior. But I was happy to finally get this done.

The MOC worked well. The suspension functions quite well at this scale, and the transmission was simple and effective. It could be a little quicker, but I was not going to make a substantial gearing change after the MOC was built.

Two final thoughts. I need to stop building supercars because they take a lot of time and effort for me, and I find little motivation for the body work; I do not think the body work looks good, and I lack motivation to work on it. Second, I needed to test the driveline earlier in the build process. I spend too much time fiddling with gear ratios after everything was build. But this project is done, and I am happy it is.

Happy building.