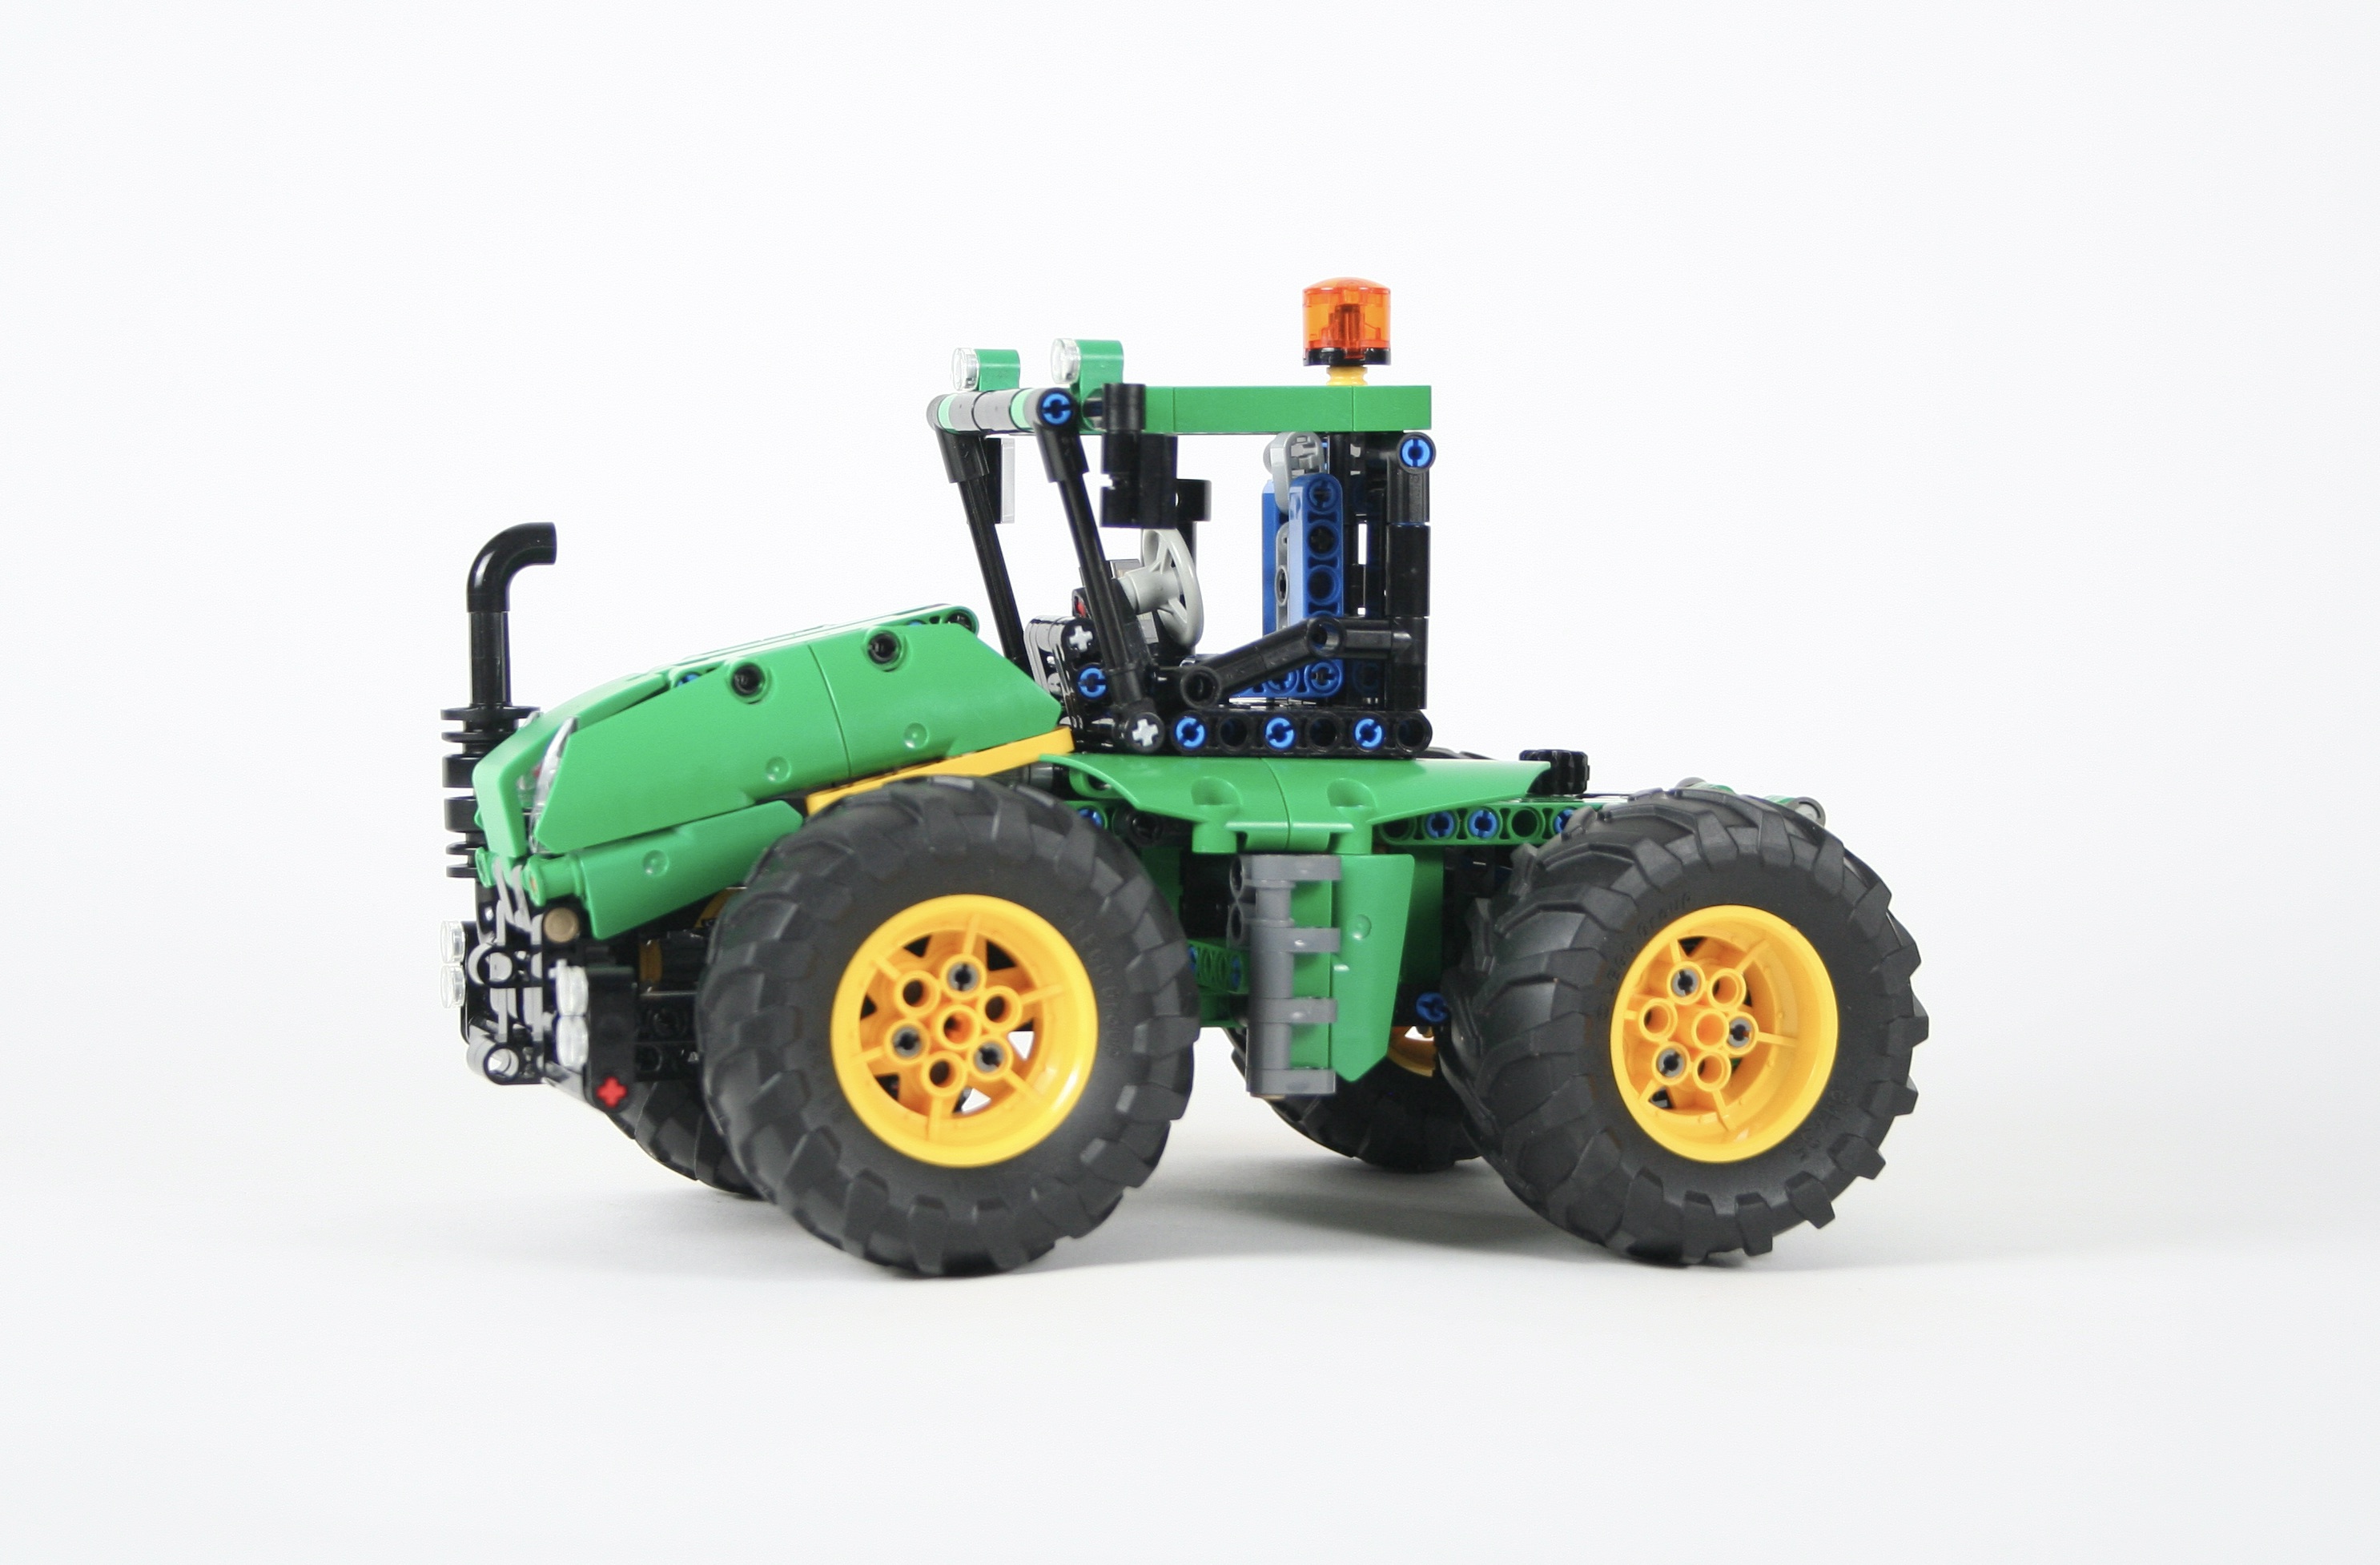
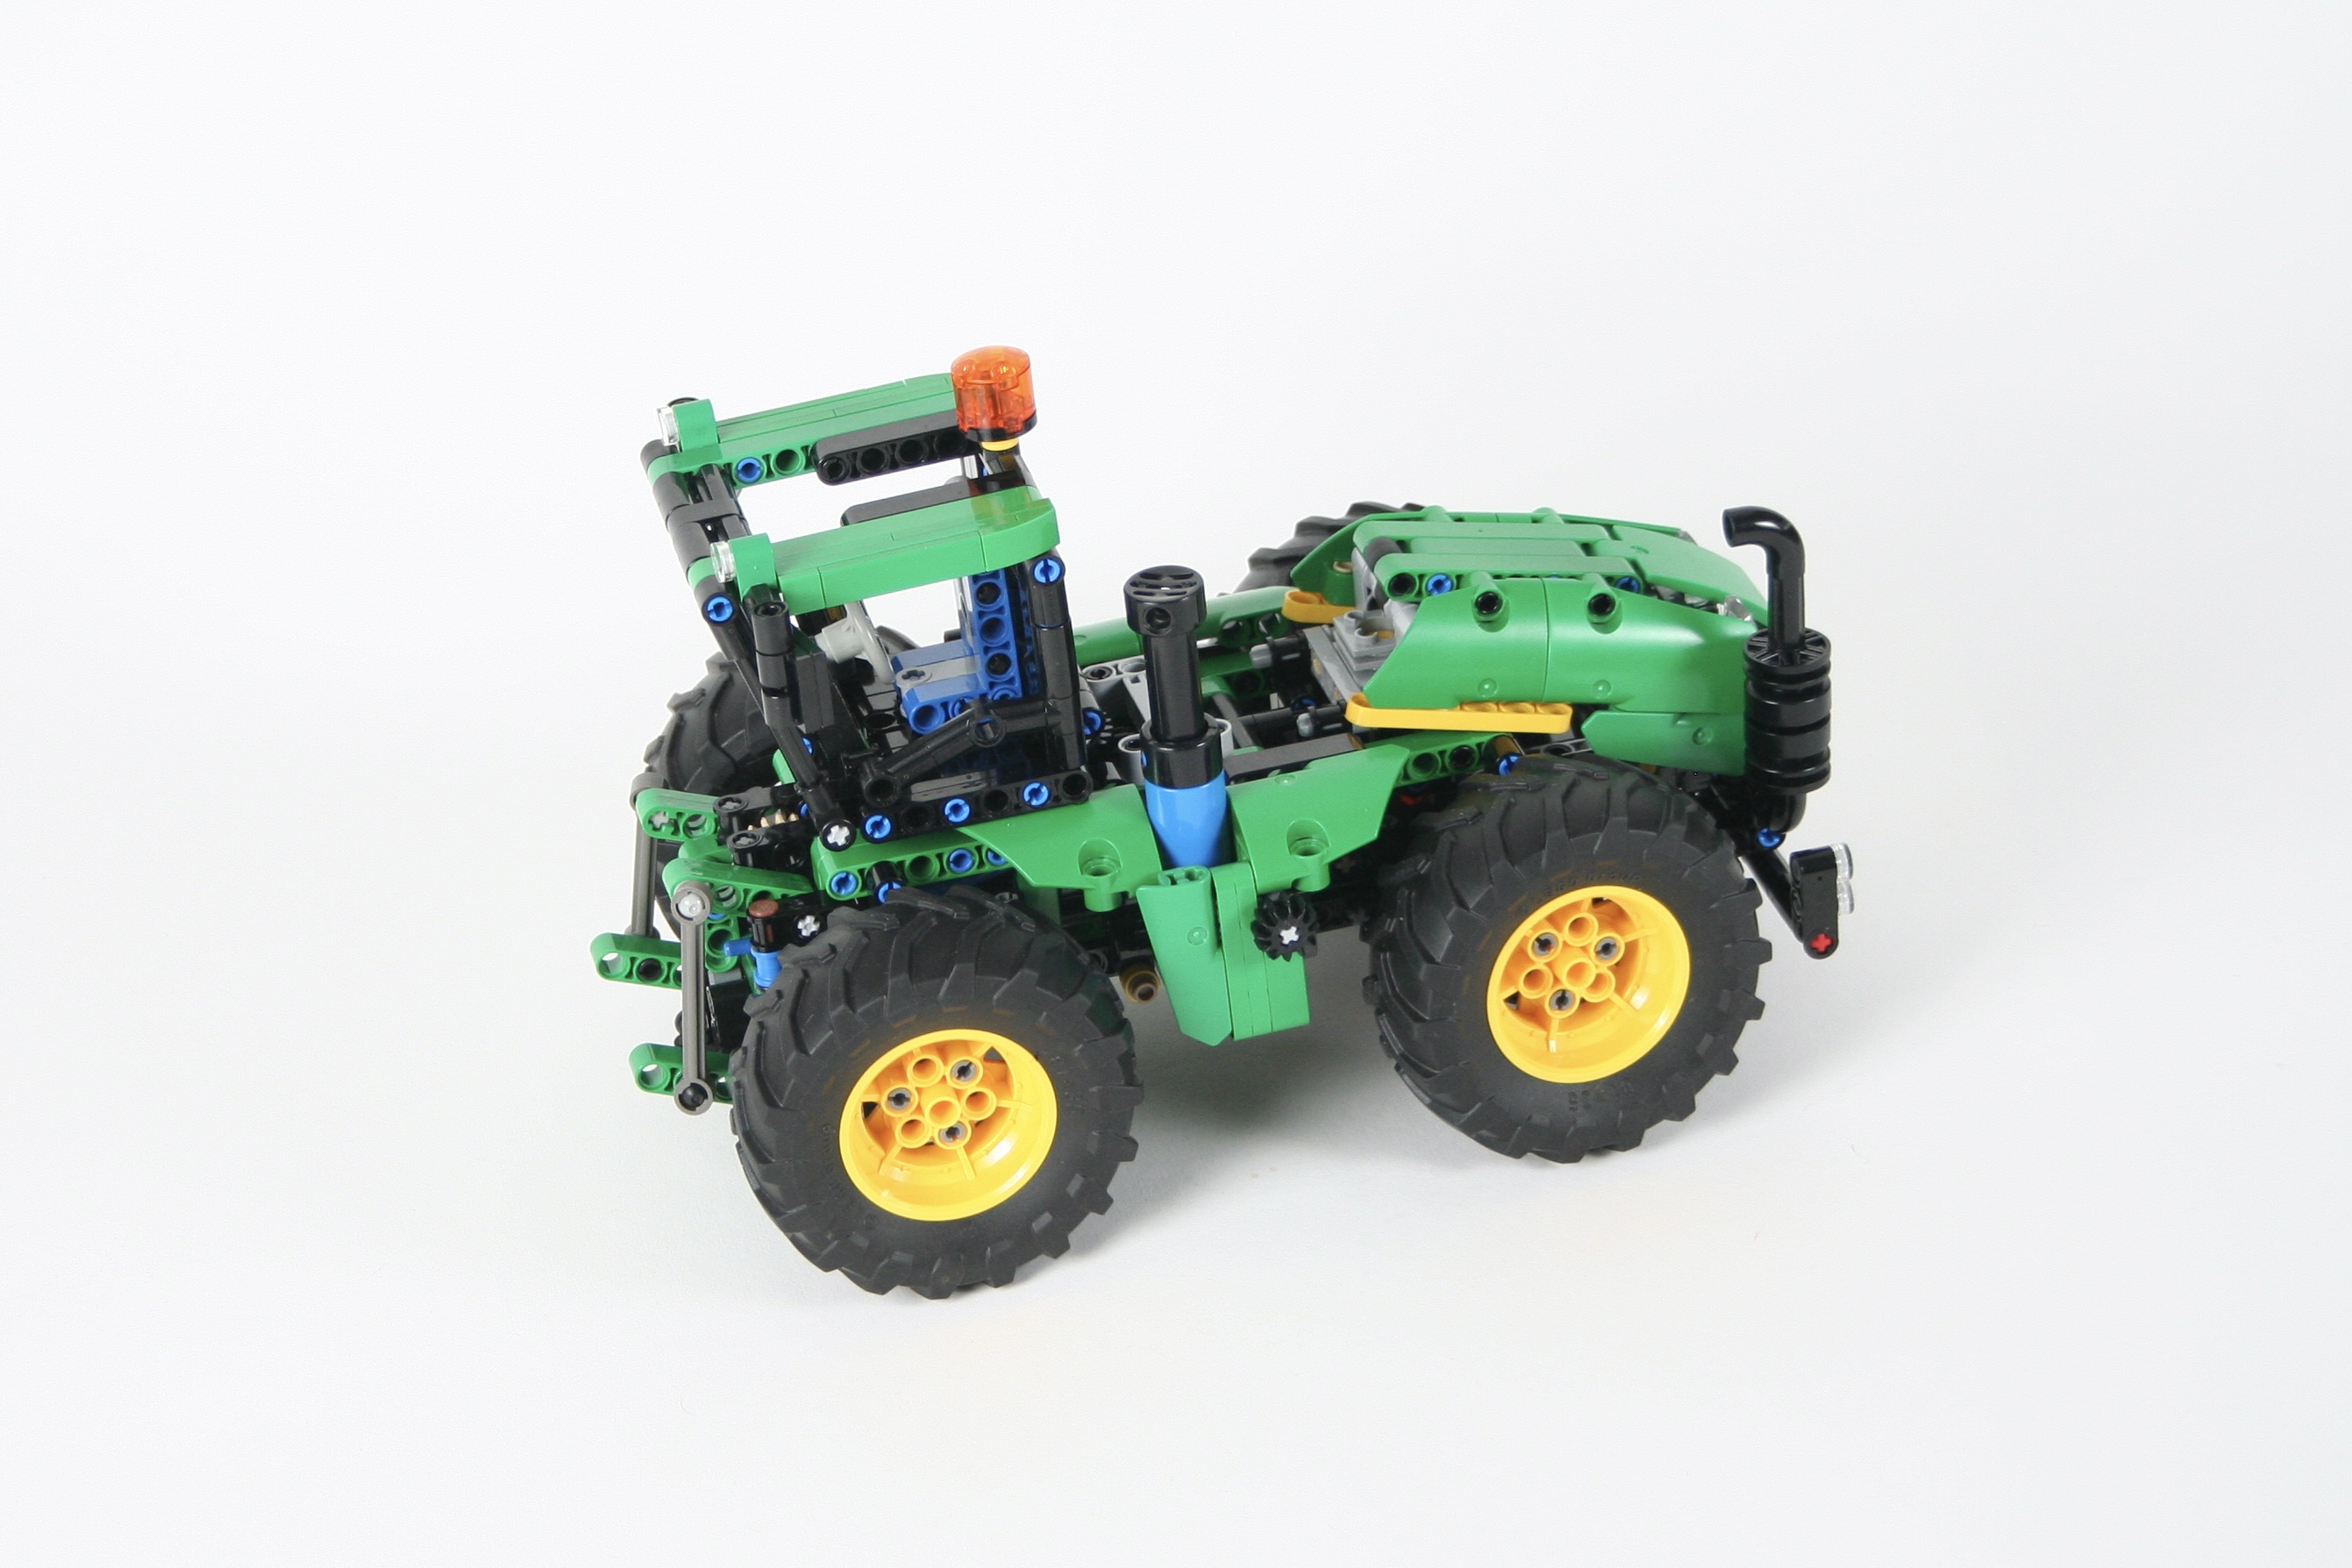
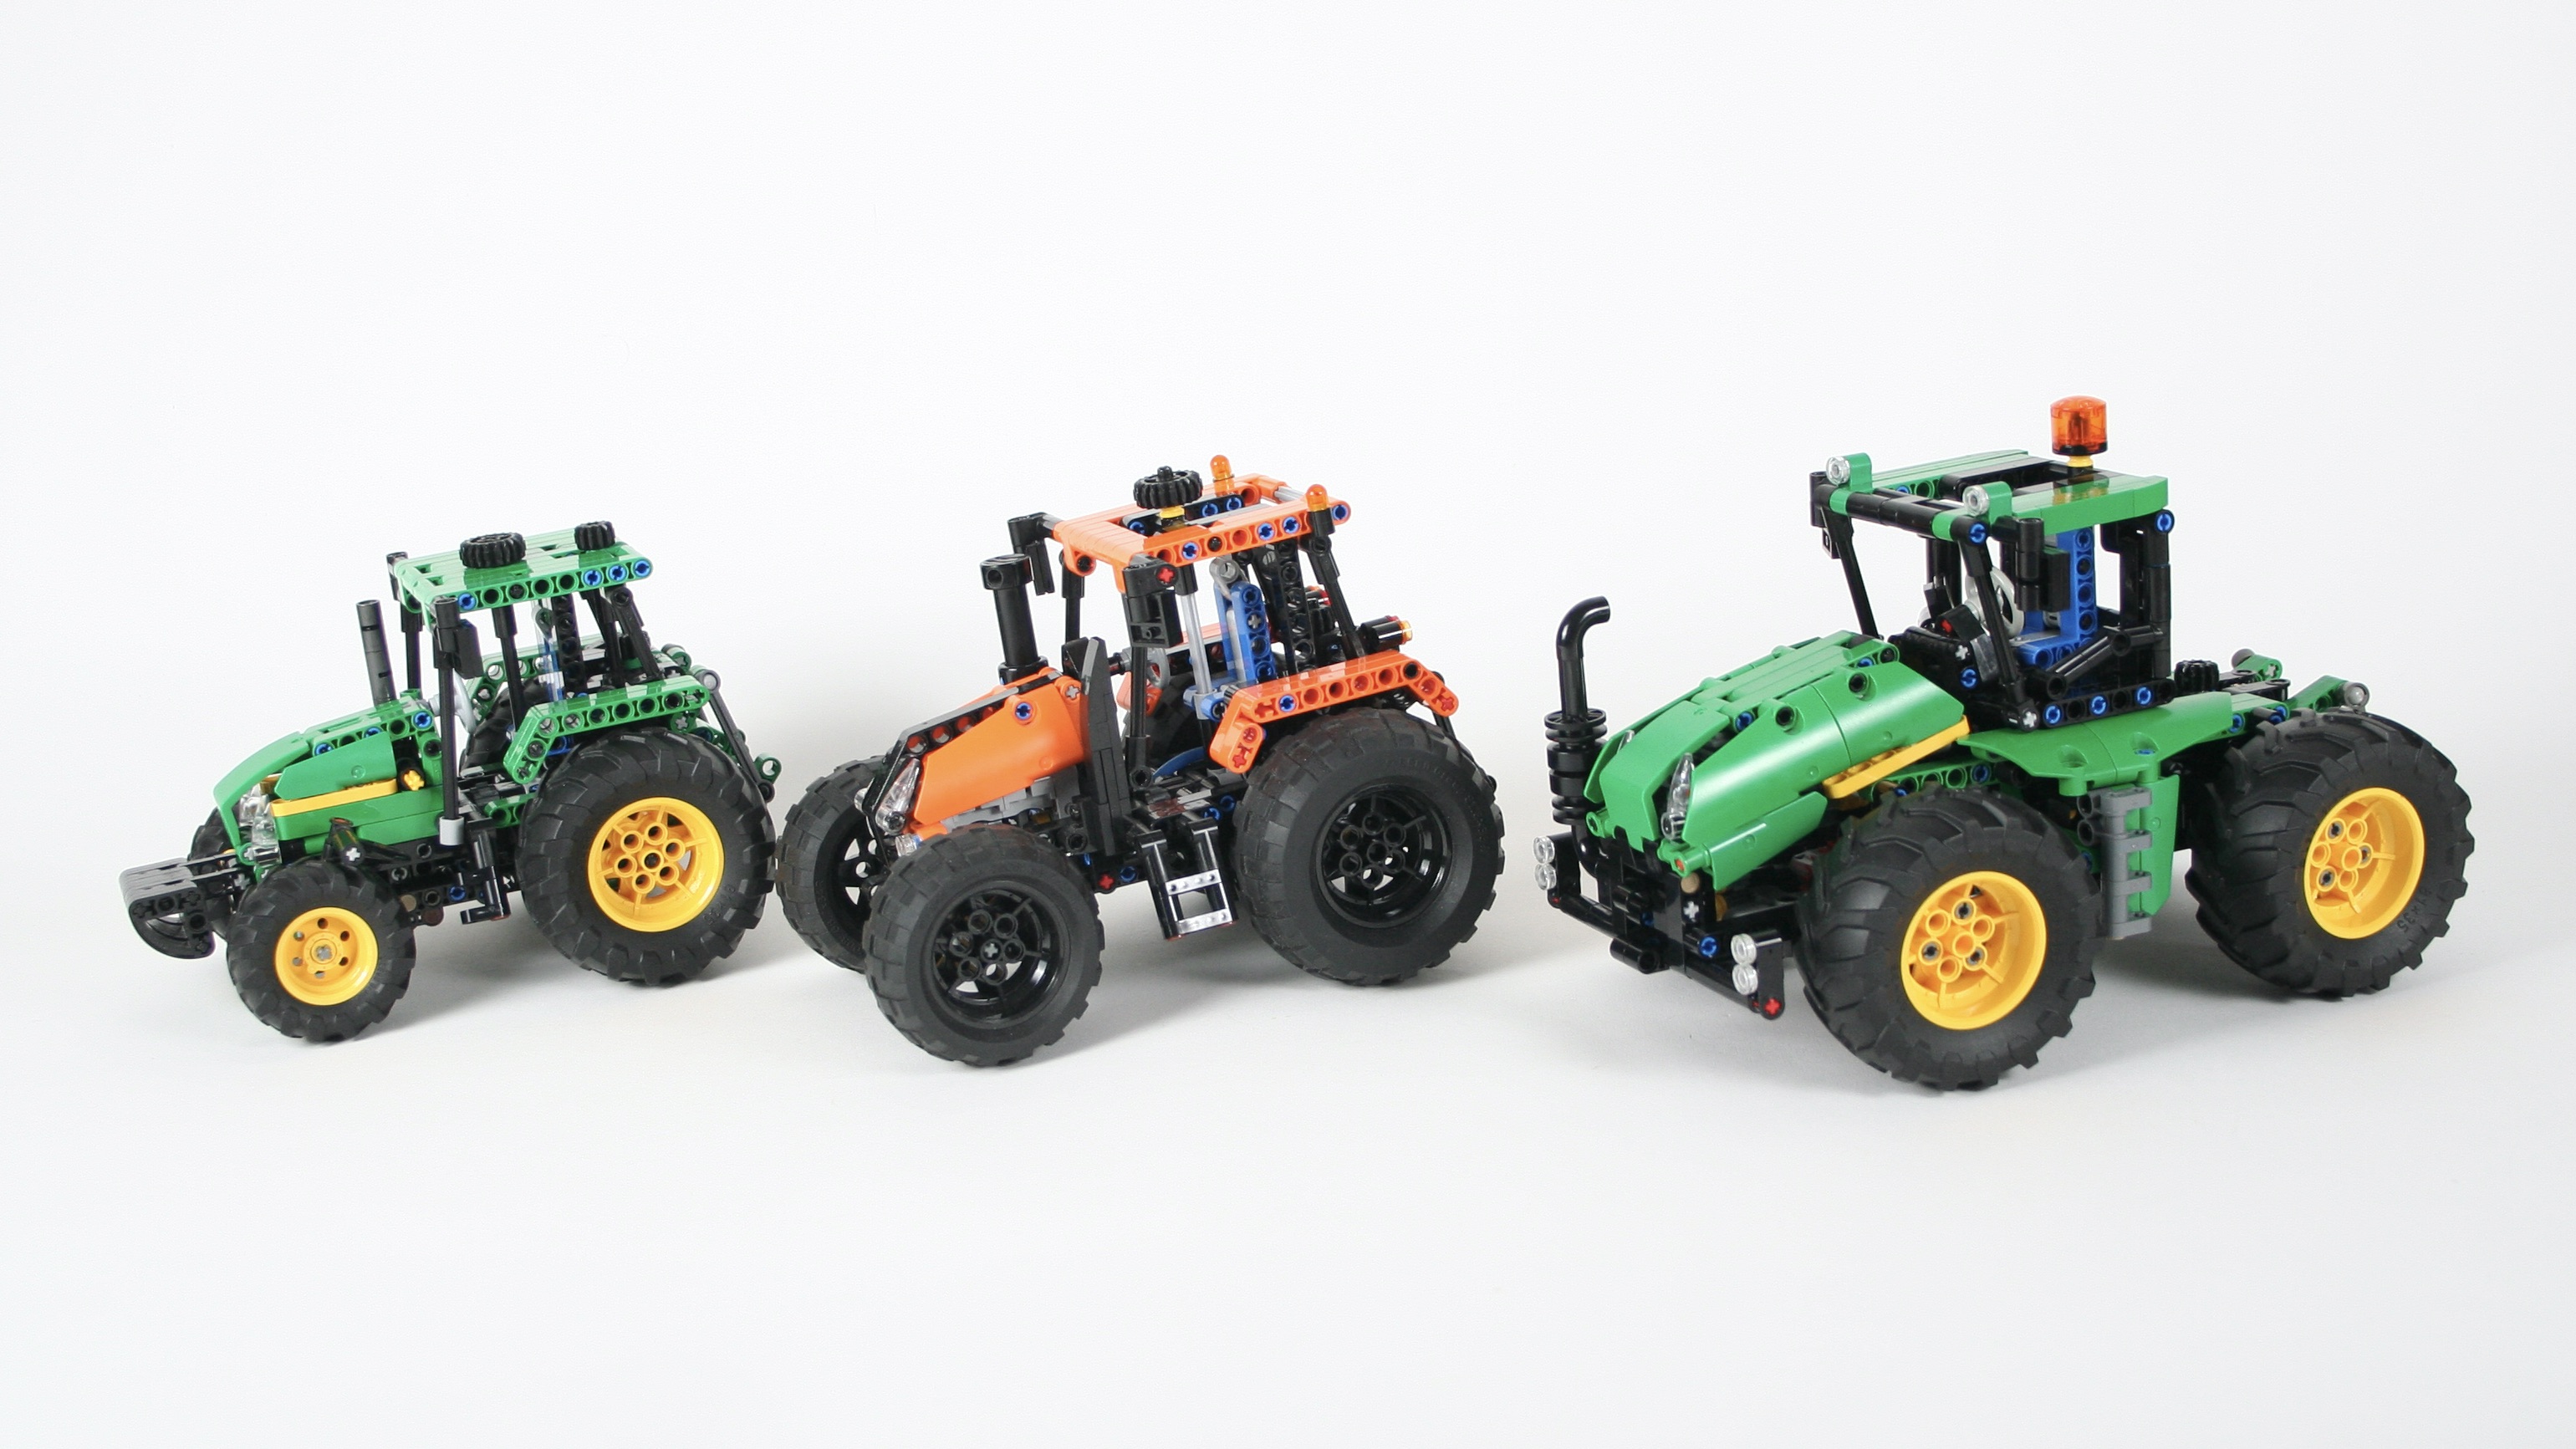
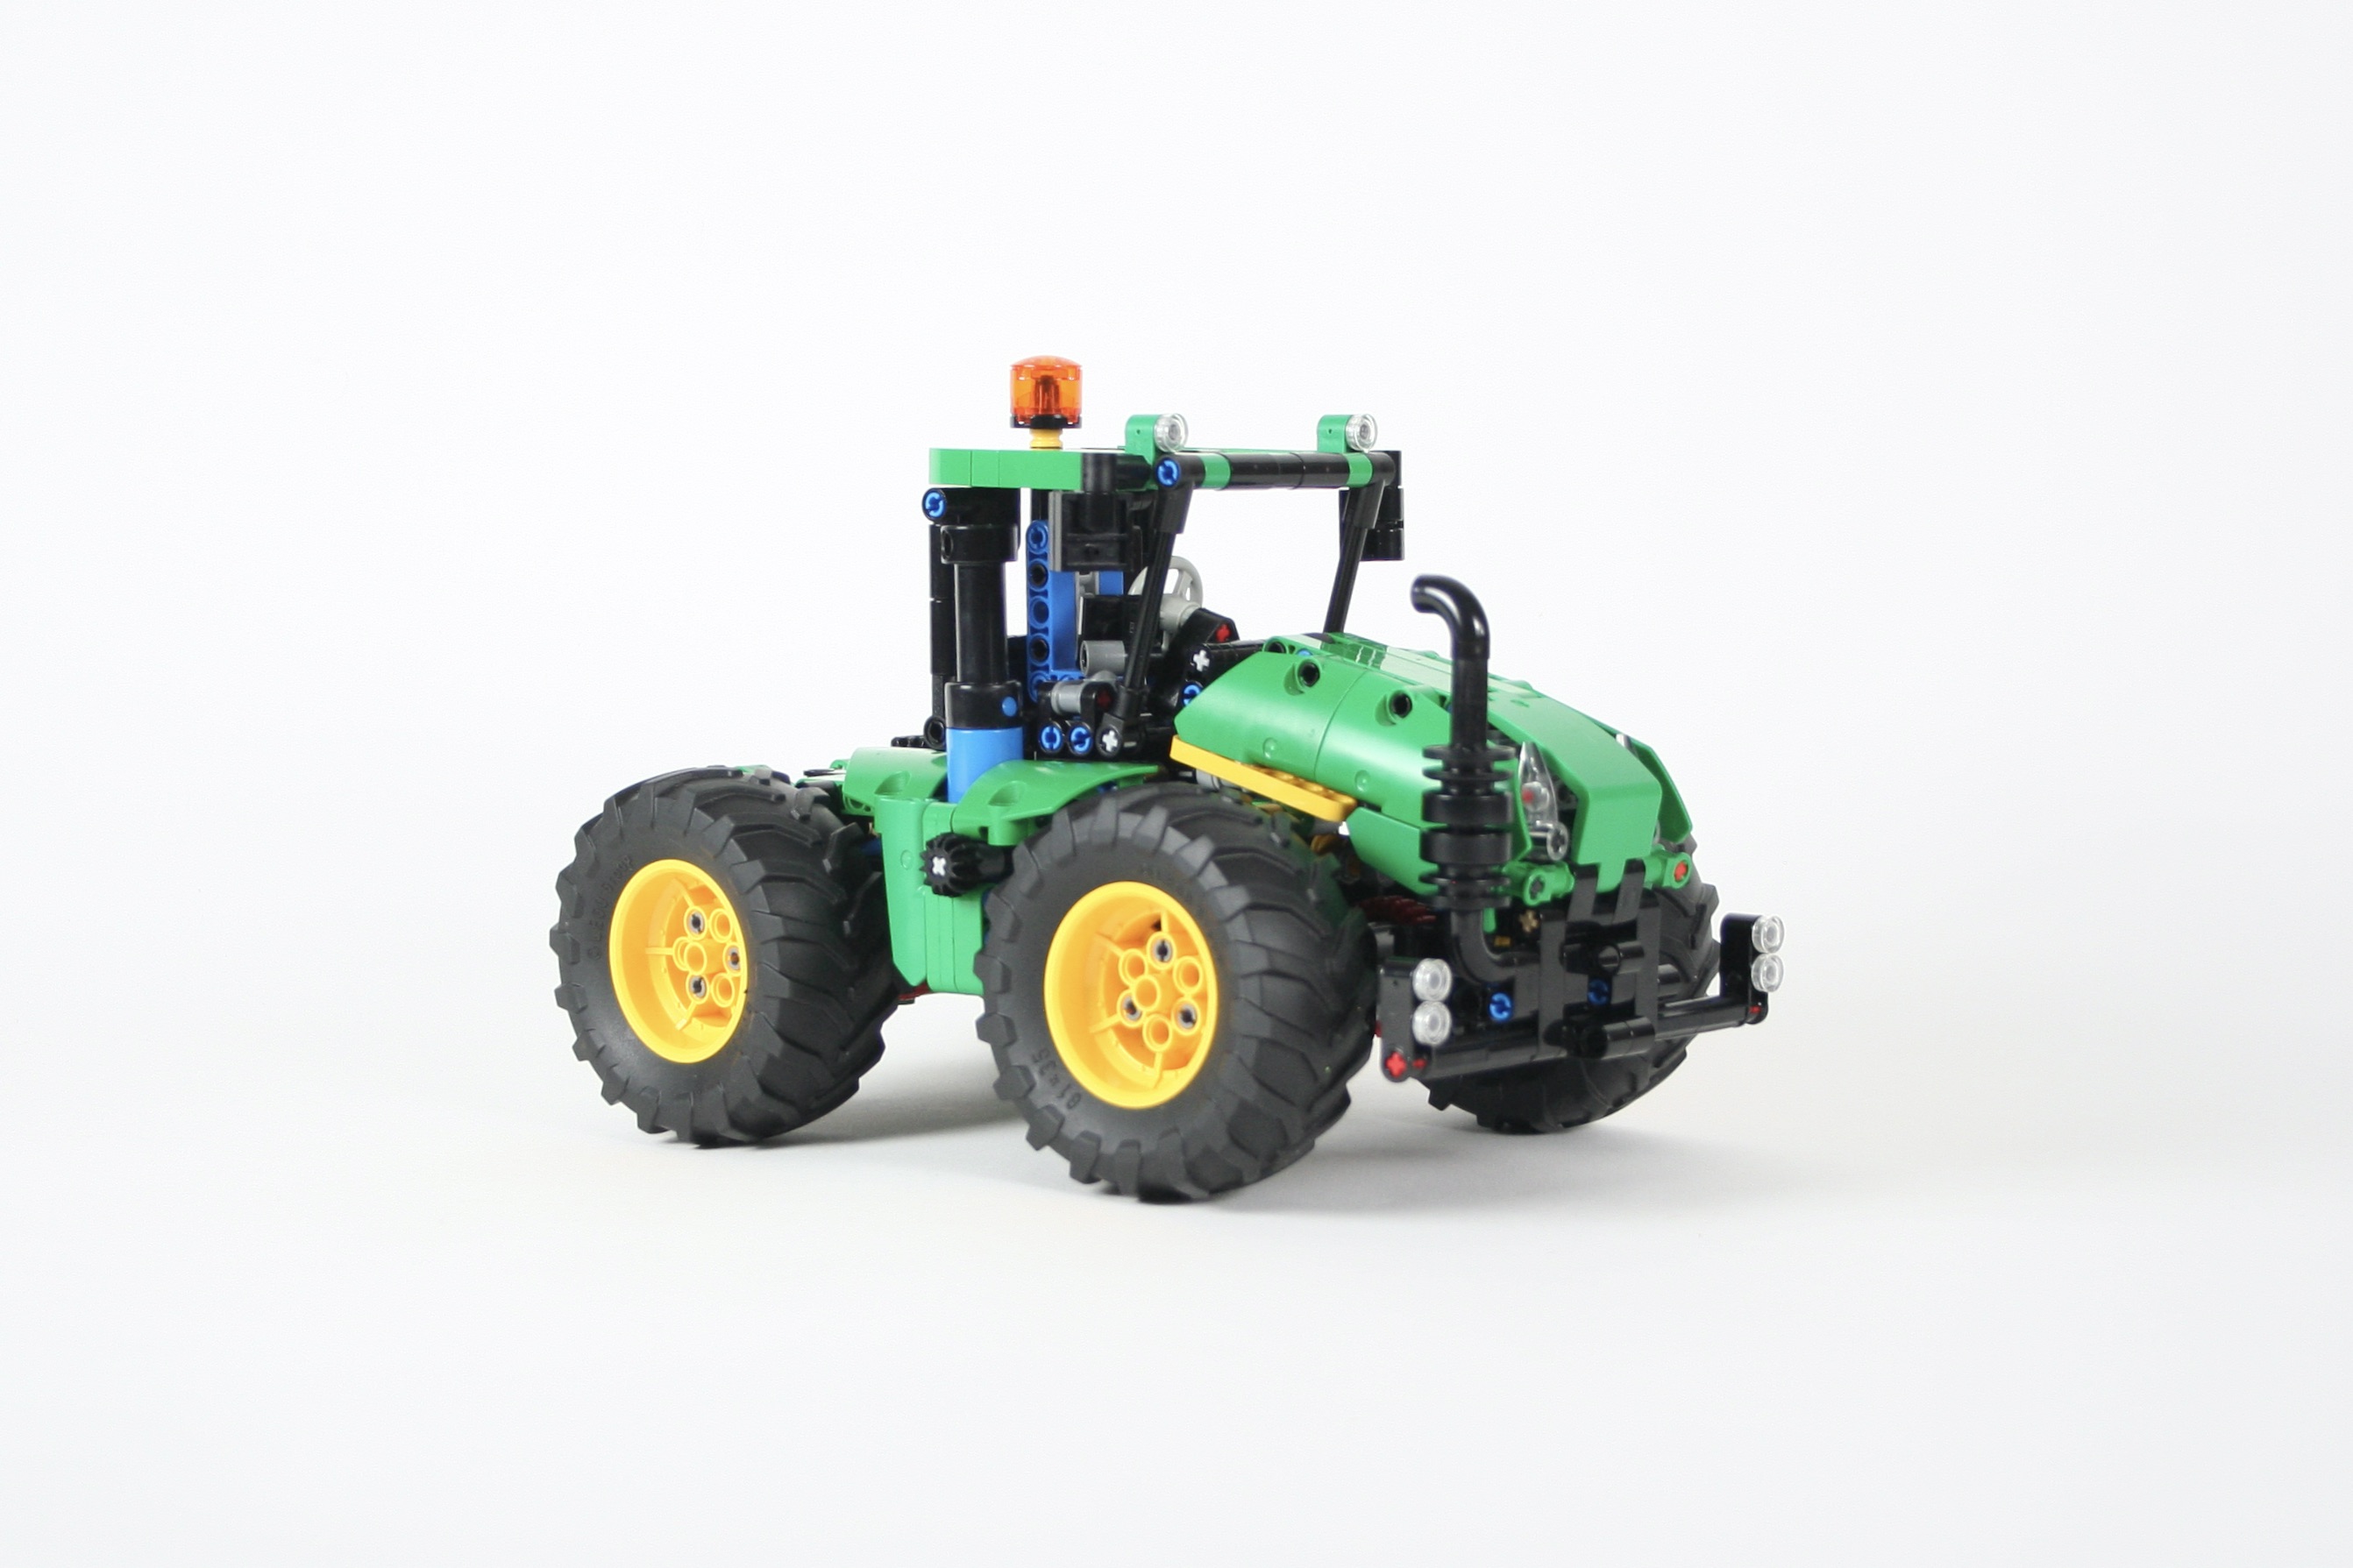
I started with a simple, small, row tractor that I called the Atmos. This tractor was mid scale and in addition to steering and a fake engine like most of my builds, it featured a front implement mount, rear three point hitch, rear PTO, and rear Pneumatic PTO. Little did I know how the tractor would grow into a lot of other tractores, trailers, impliments, and farming support vehicles. At some point, I found myself interested in making a larger tractor, and I have always loved the Claas Xerion. The Claas been done in Lego Technic before, so I went the John Deere styling route for my build.
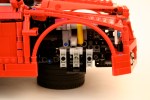
The tractor had to integrate into the other builds, so the front and rear mount and PTO placement dictated a couple of the hard points. I built the tractor with four wheel drive, and four wheel steering. A four cylinder fake engine is placed under the frond hood above the front axle. The rear most cylinder does not move as the crankshaft would have run into the steering unit, and any change I tried to fix it made for an ugly hood. A worm gear actuated rear three point hitch allows for implements to be mounted to the tractor.
The steering is controlled by a HOG light at the top of the cab, which caused some headaches for placement as I wanted the cab to be able to rotate. There is a small gear on the right of the tractor that controls the rotation through and internally mounted worm gear. Getting the cab to rotate in the right spot, without hitting anything, and while still having the pneumatic pump, required endless test rotations.
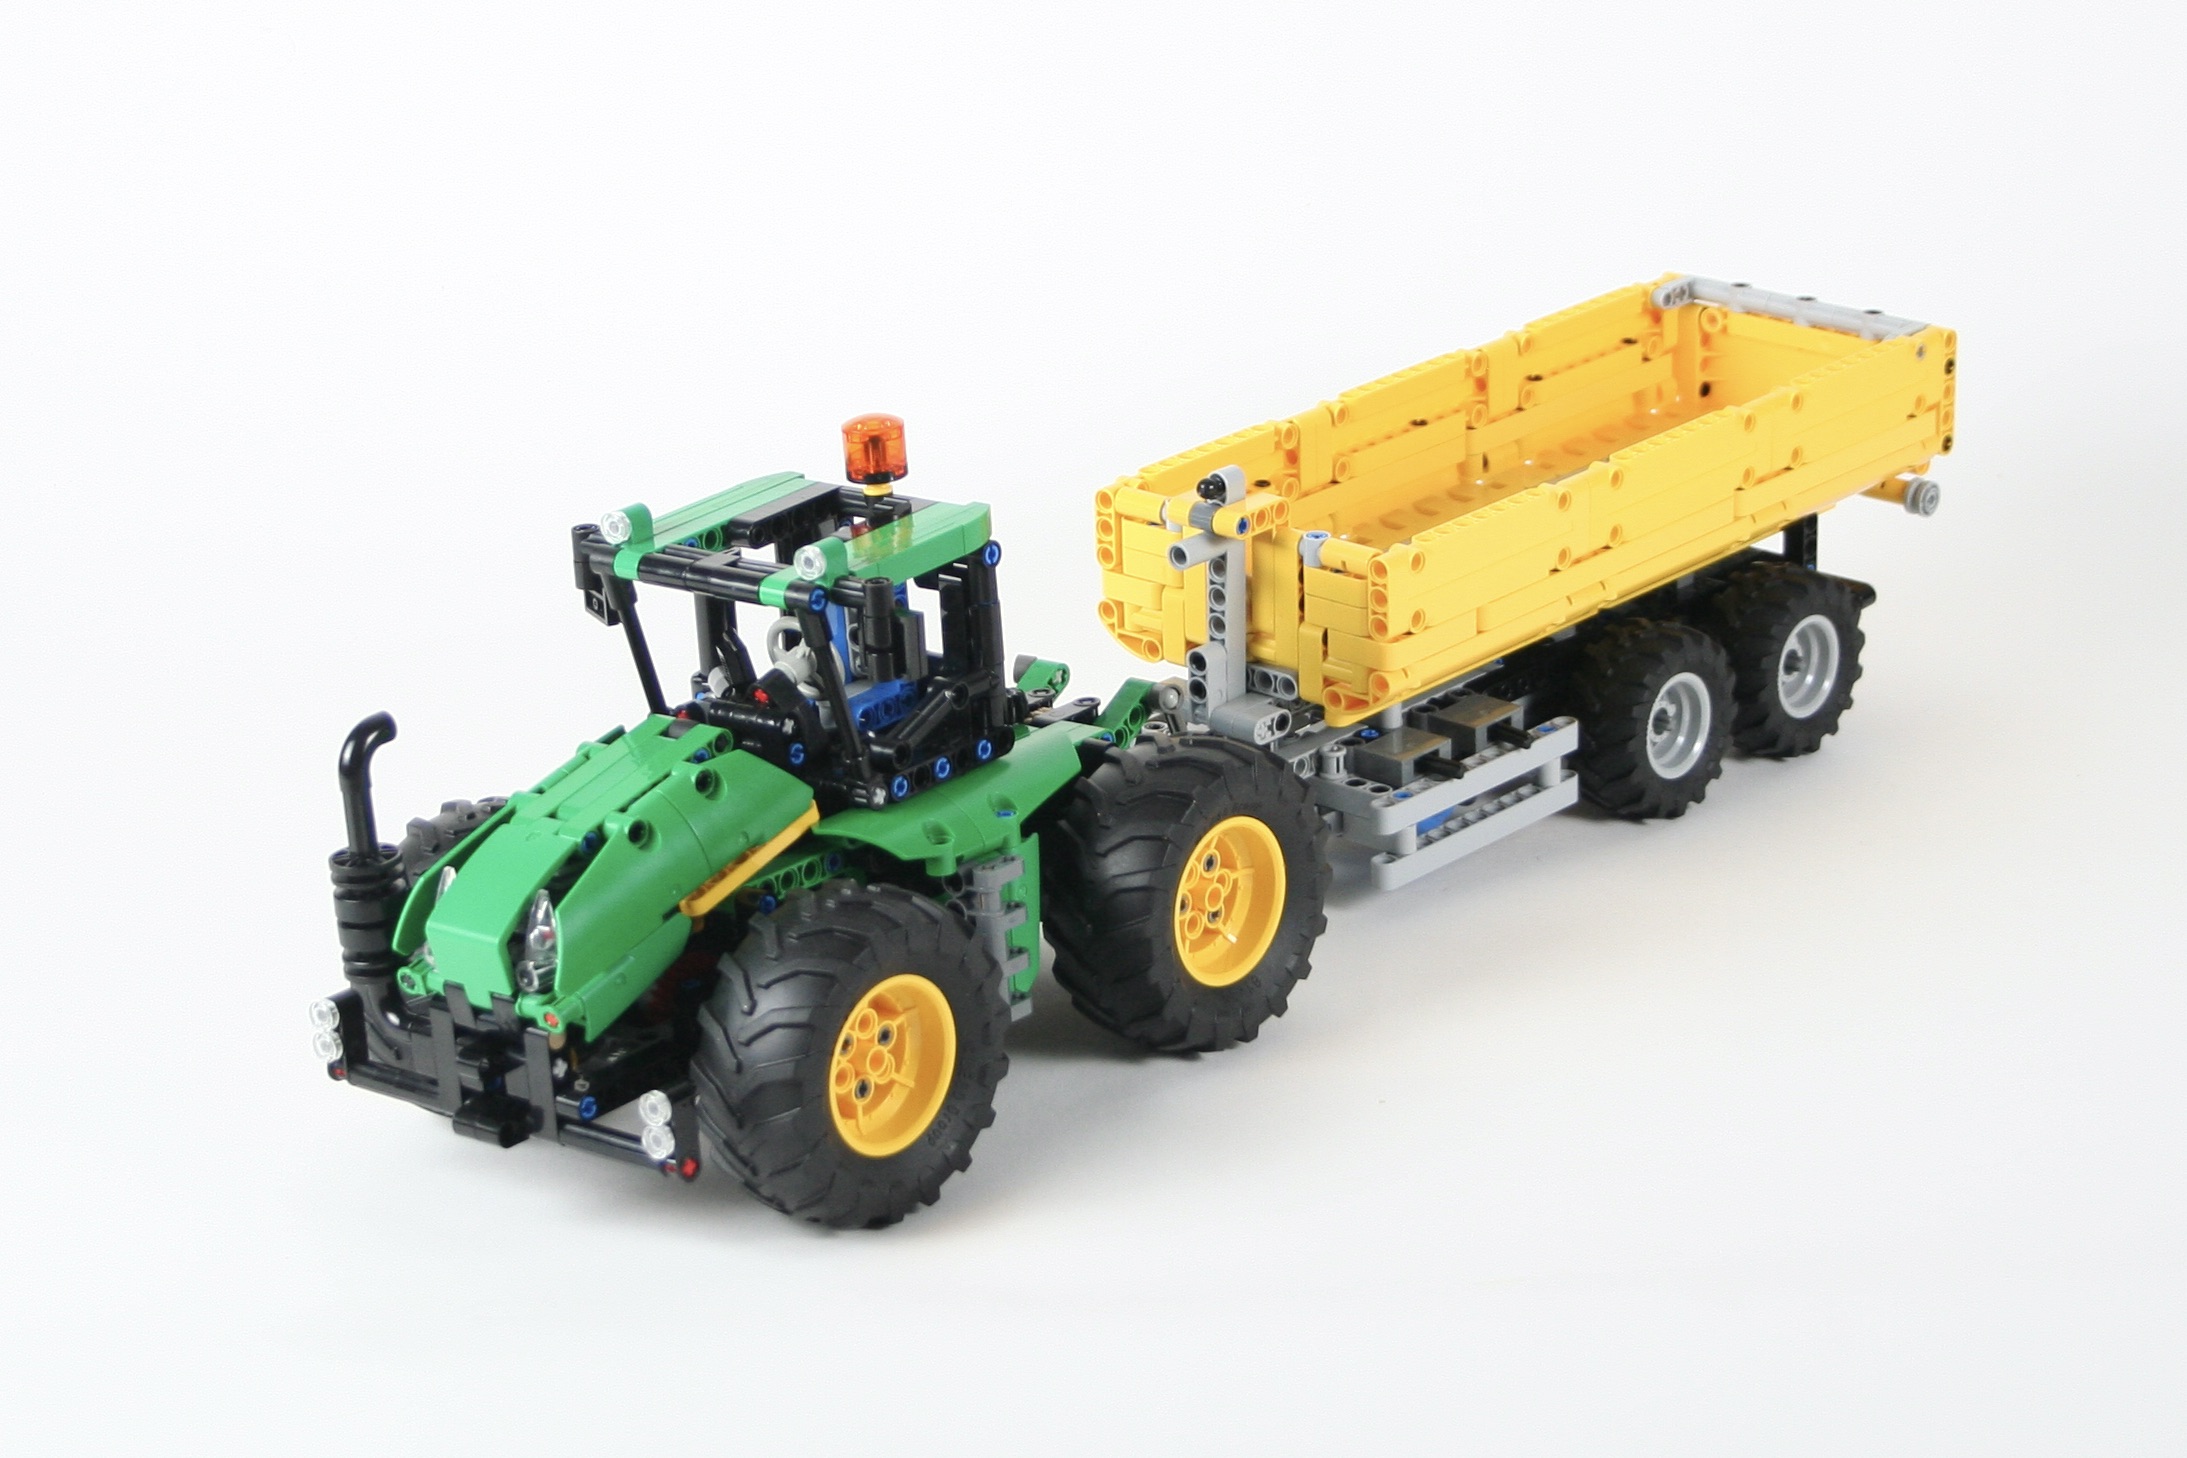
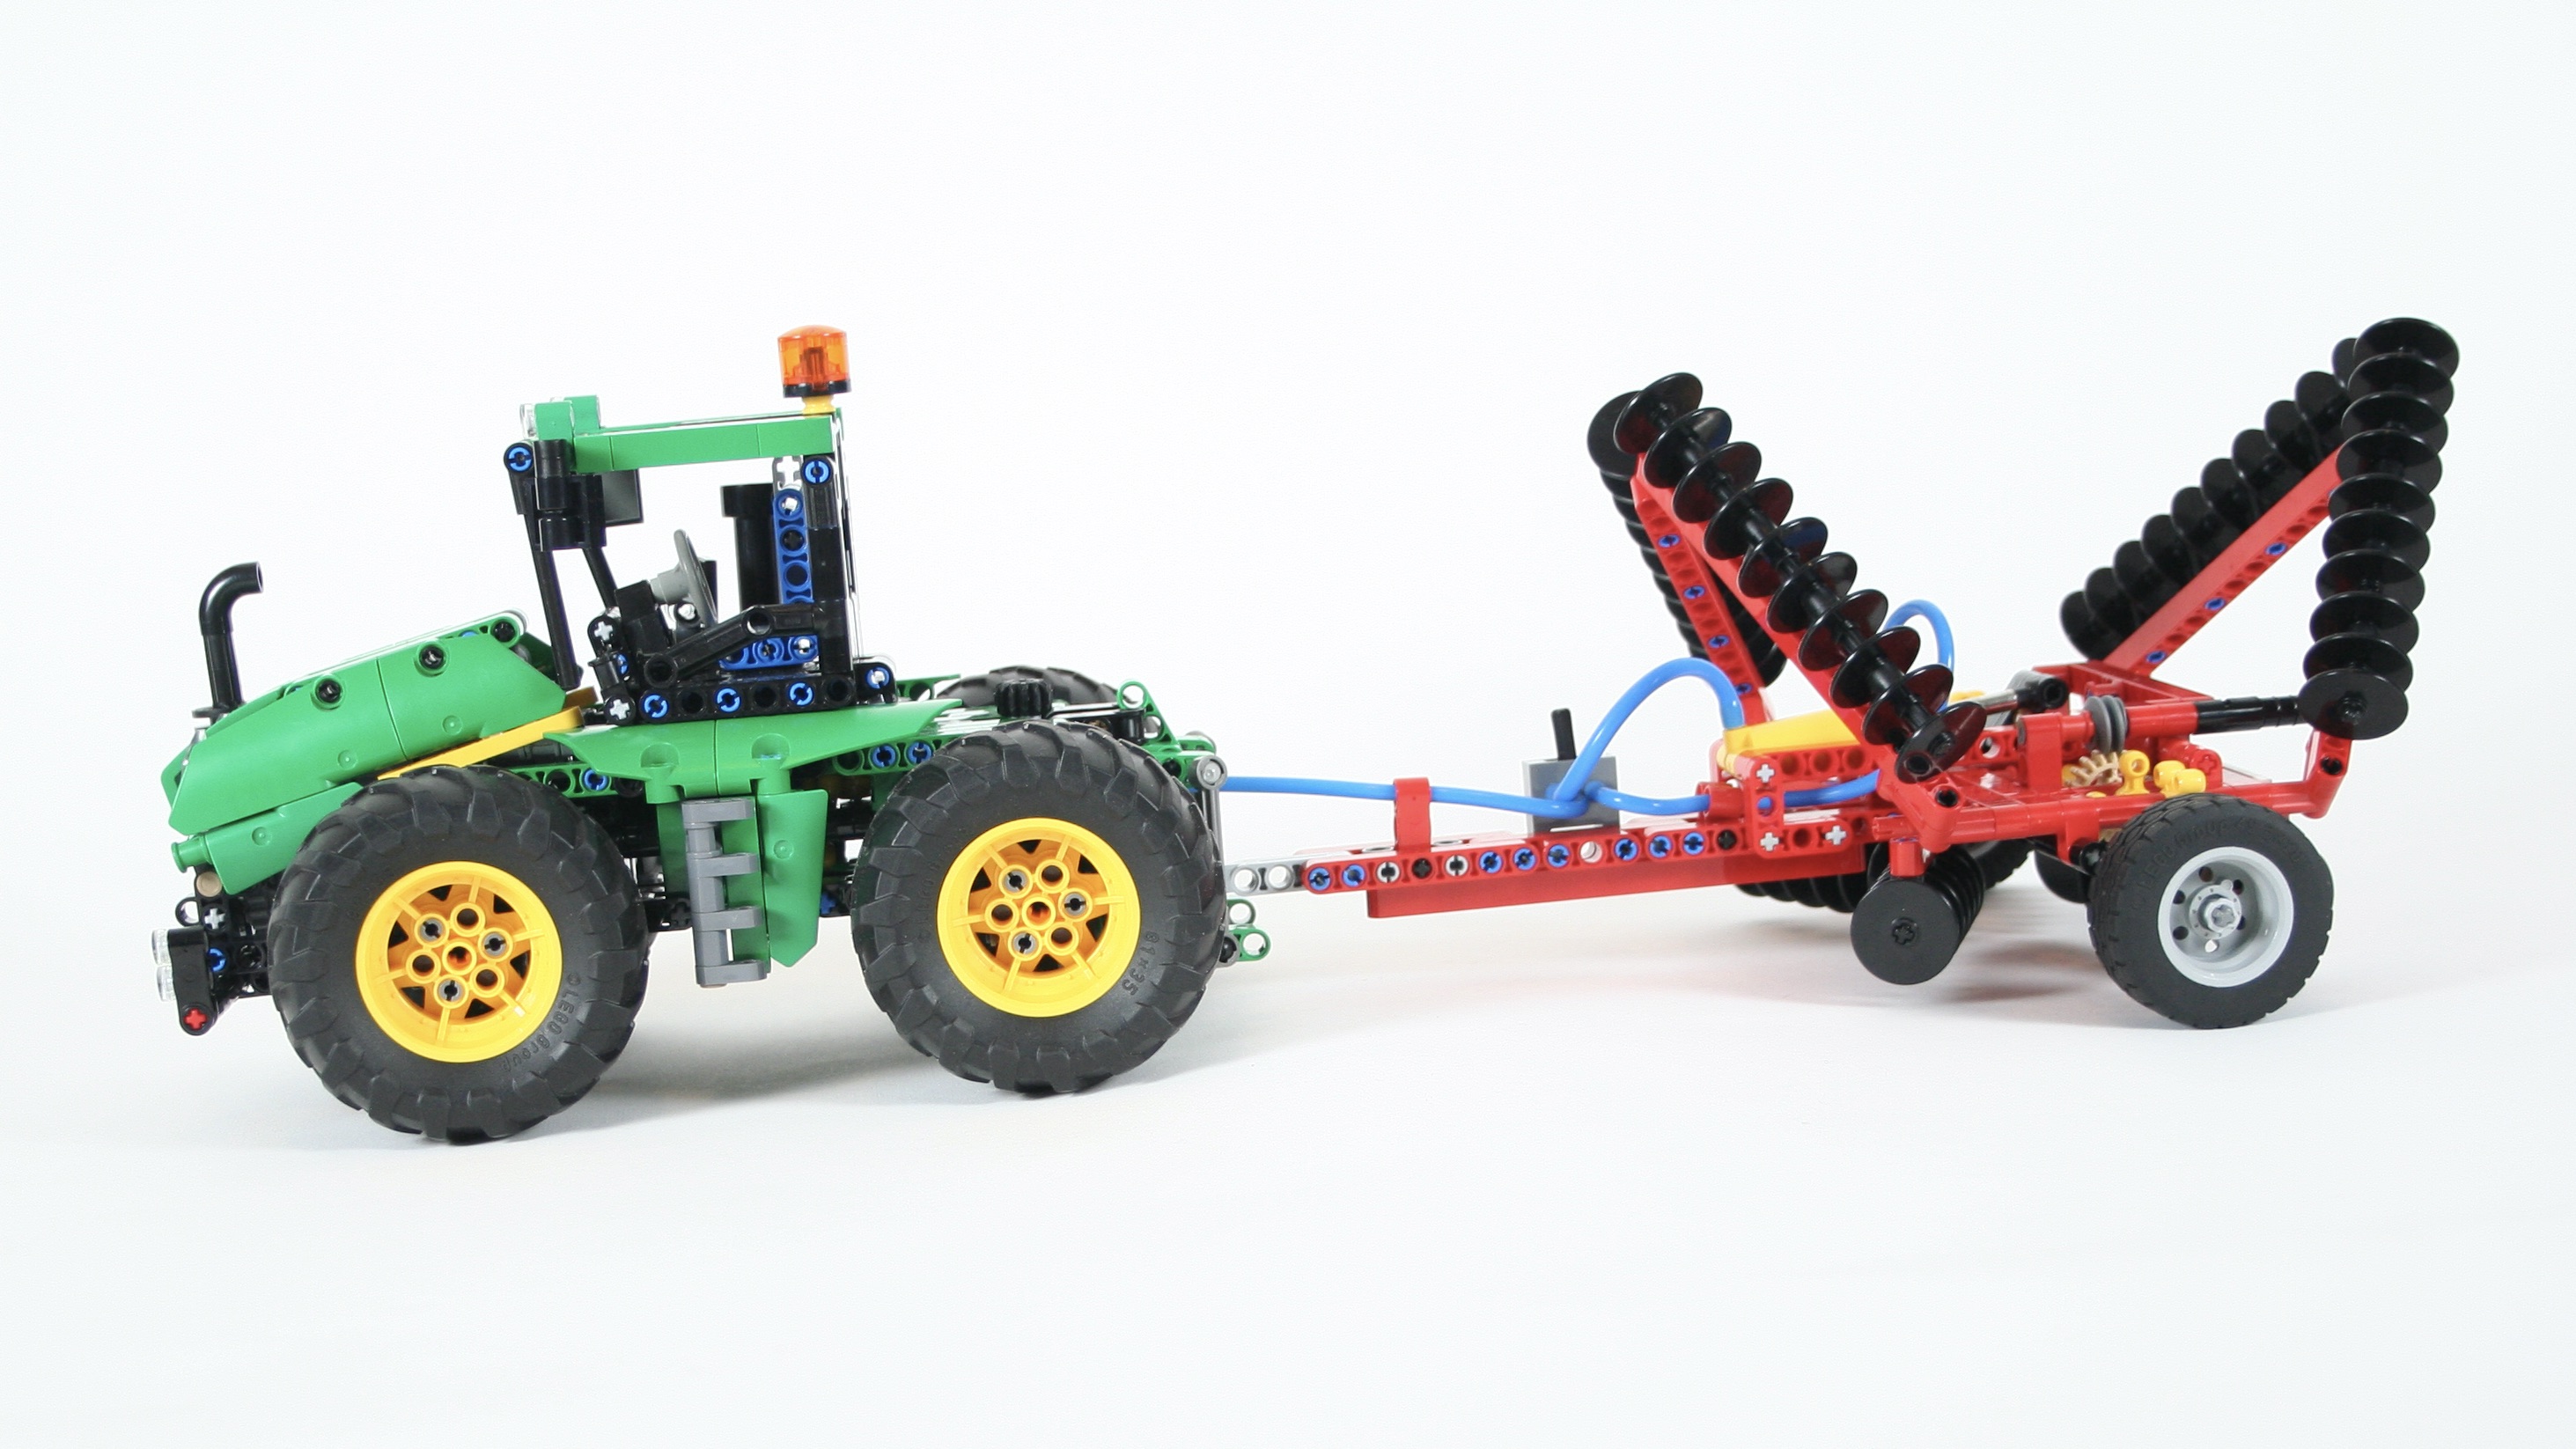
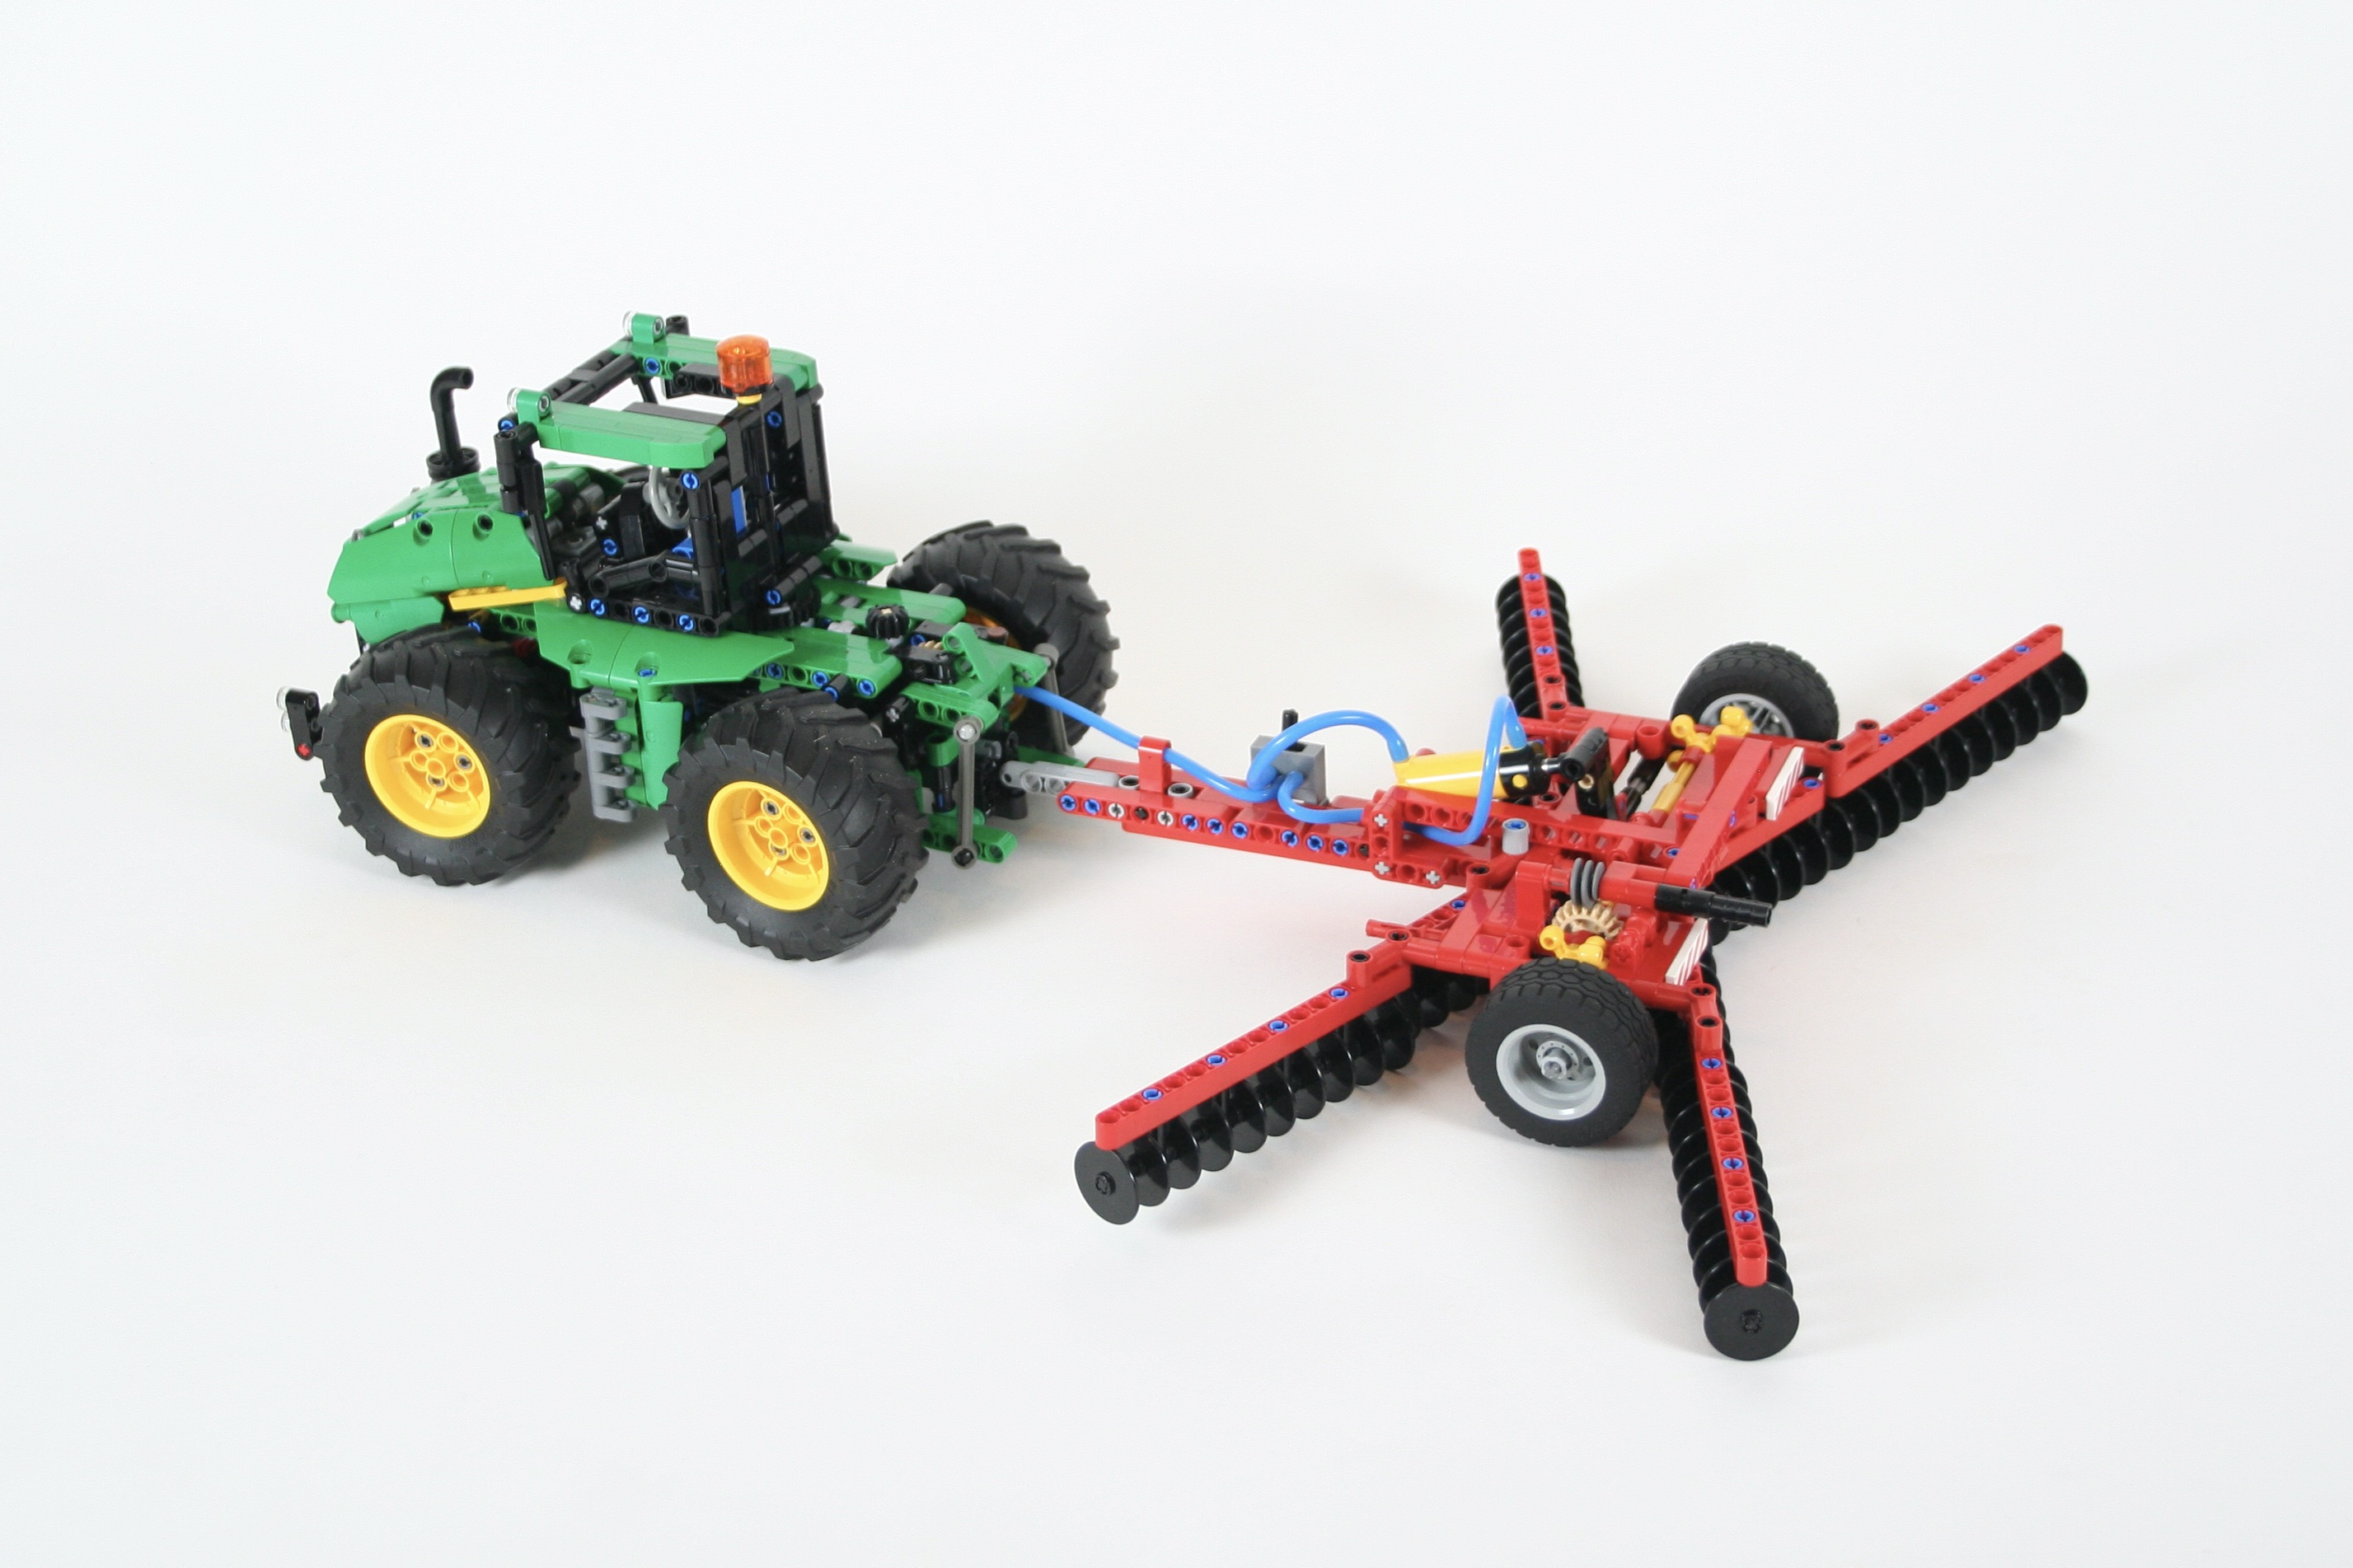
Since this is a Thirdwigg Farm tractor, there are many options to pair with this tractor, all with free instructions. My favorite is the Hookloadr trailer, but the Tandem Disc looks great too. Free instructions are available for all the options, so feel free to make your own farm.
It is always fun to make another tractor and this one was no exception. I wish the drivetrain was a little more smooth, but the rest of the tractor worked flawlessly. And it looks fantastic. Coupled with a trailer, makes it look strong and purposeful. And the rotating cab is so much fun to play with. We’ll see what gets added to the Thirdwigg Farm next!
I frequently build another Unimog after it has been a couple of months since the last one, so here is another TWO!
You may find building instructions for both the U400 and the U430.
I generally find myself building a Unimog about every year, and this year, I built three. Kindof. Early in 2021, I built a Short Wheelbase U500 in blue, and I loved it. So, I wanted to see if I could take the build a little further. I’m partial to the U500, but the U400 seems to be a little more popular, and the current U430 was another challenge I wanted to try.
Instructions available for both.
The chassis for both is a modification of the U500. The wheelbase is 2 studs shorter, so I removed the winch and the PTO on/off switch, and modified the bed tipping mechanism. The rest is the same, including the front and rear PTO, the four wheel drive, and the I4 engine. Both the U400 and the U430 have a manual pneumatic pump with a front/rear switch for attachments.
The tipping bed is the same for both, and can tip in three directions. The three sides drop as well. And the cab for both is generally the same, with a slight change to the front to address the styling differences for both. You can see the similarities between both in the videos below.
I’m pleased with these MOCs, and how they worked. The U400 is the most beautiful MOC I have made in a long time. It currently adorns my desk at work, and will continue to do so for some time. While I wish both would have portal axles, the stability of the drivetrain, and the flawless reliability is worth tradeoff. The U430 looks great as well, especially with the tires, the orange is my favorite. Hopefully I am able to make some attachments for the front and rear. Stay tuned.
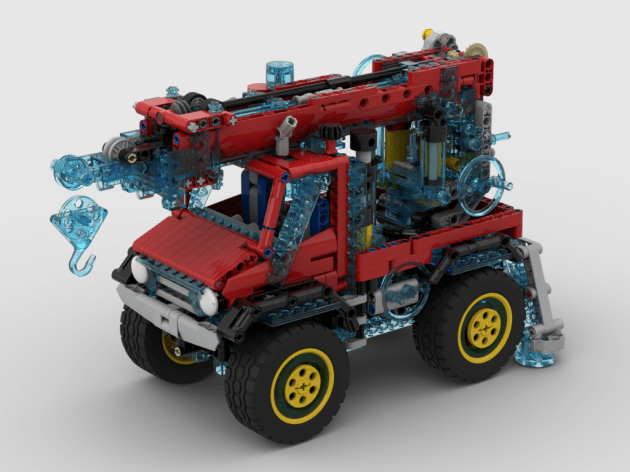
I often participate in online LEGO contests, and most of them are on Eurobricks.com. In the summer of 2021, Eurobricks announced TC20, Technic Studless Recreation. I participate in many, but not all, of the contests that Eurobricks offers. The requirement was to pick an old studded set, and recreated it in studless Technic. I couldn’t sit this contest out, as it checked all the right boxes for me. Entries would be smaller to stay in scale, the builds would be feature packed, and it they would have a deep nostalgic connection. I was in.
Choosing a set to recreate took some time. I started with a list of 32 sets, and started to whittle it down from there. Quickly I removed some of the sets for various reasons: interest, size, not right now, too sacred (8880). I ended with a top three of 6357, 8855, and 8854. 6357 would be interesting to me, but after doing 8640 a couple months back it could wait. 8855 had some opportunity. It is a classic set, and instantly identifiable. I built a little mock-up, and let it sit for a couple of days. I didn’t come back to it.
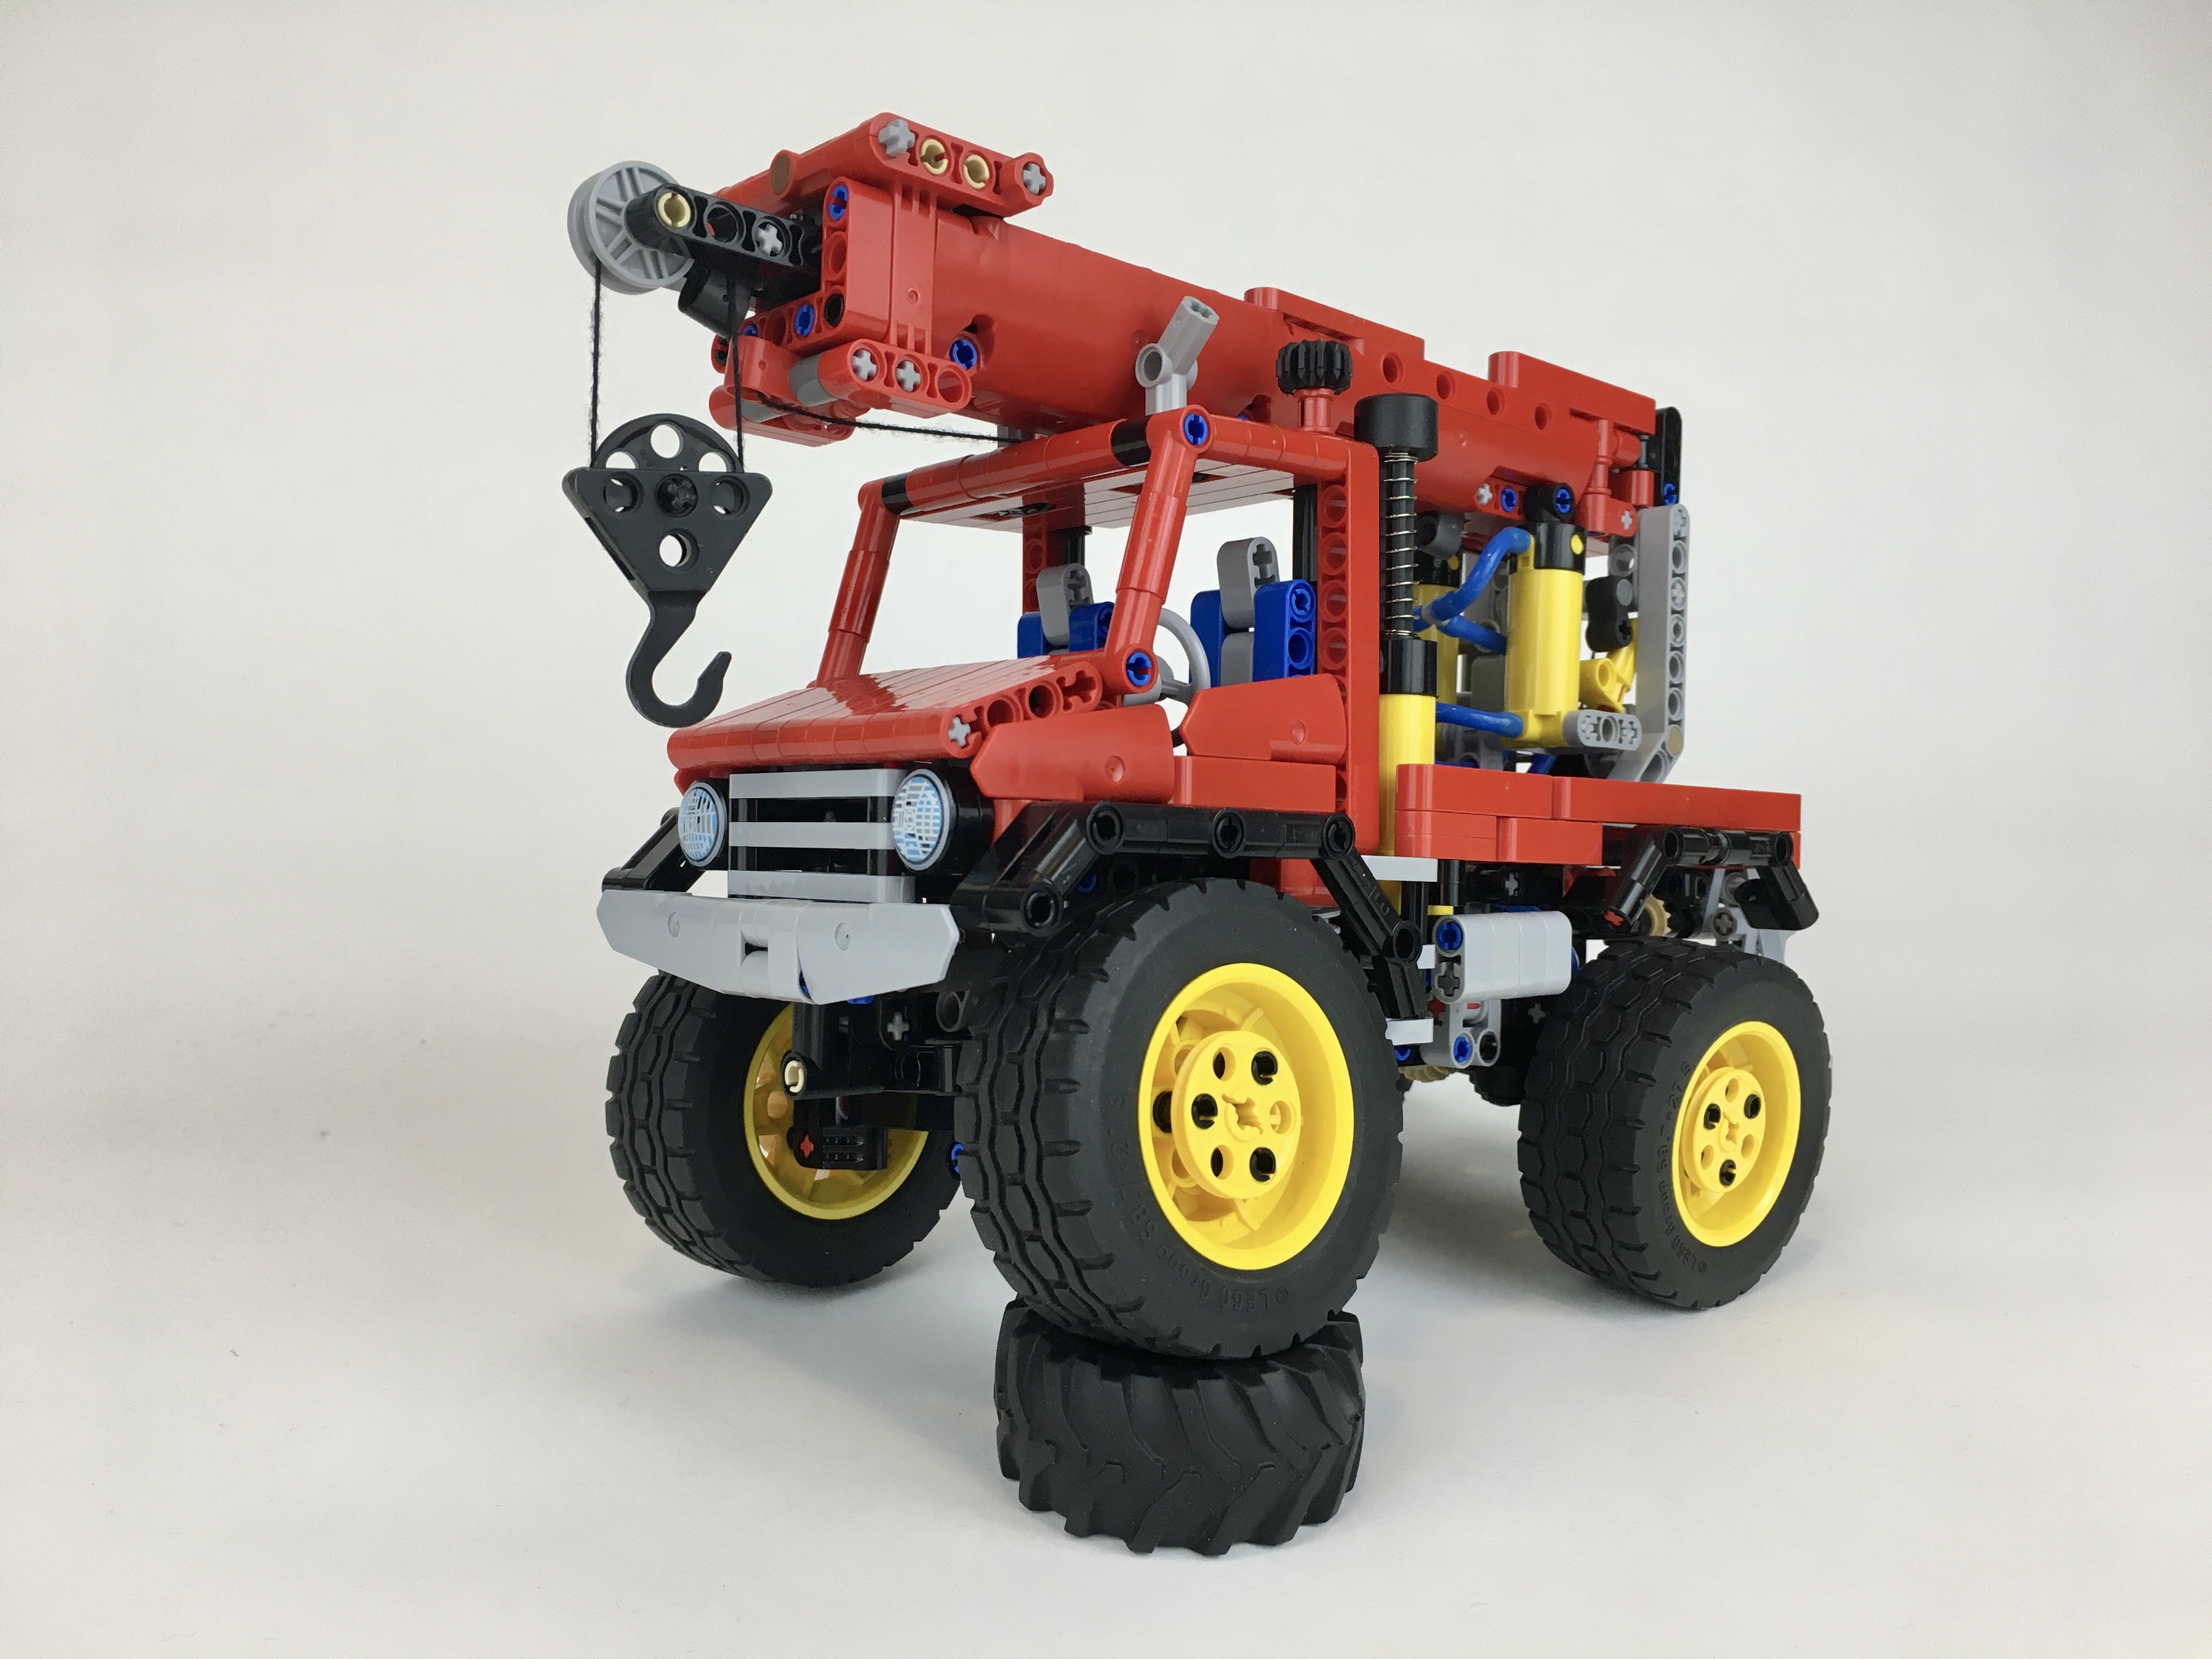
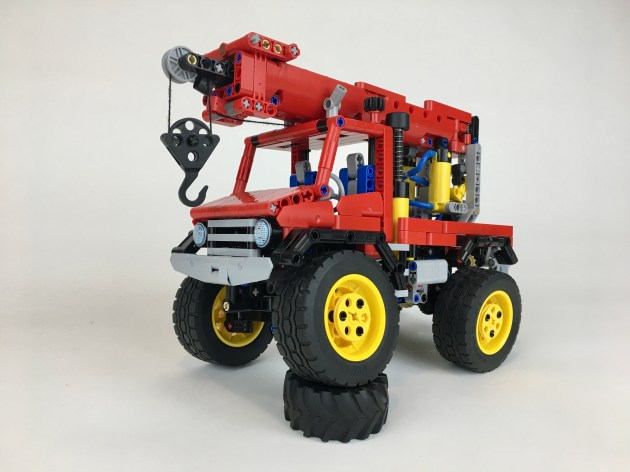
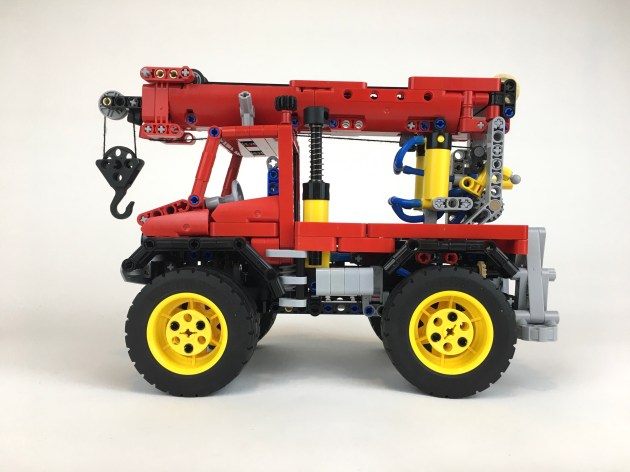
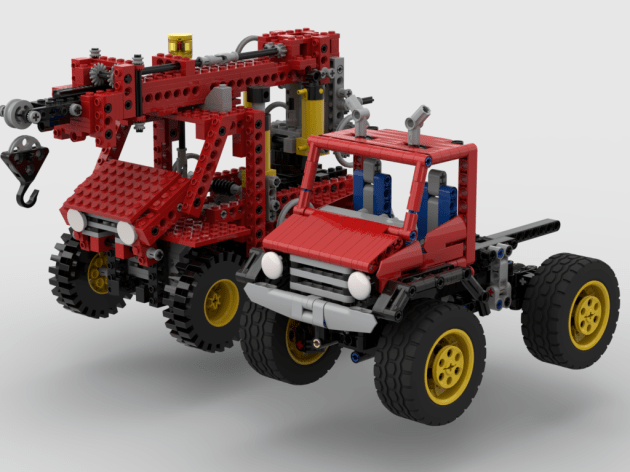
I am not sure why I did not settle on 8854 right away. I love building Unimogs, and when I do updates I like to add some features. 8854 was missing suspension and an engine, so everything was right for me to recreate this iconic set. I had made my decision and I started posting my progress. First, I had to decide the scale. I made the decision to use the newish Batmobile tires in the build, which make the tires a little larger than the original 8854. I added a stud to the wheelbase to compensate, but otherwise the scale would remain the same.
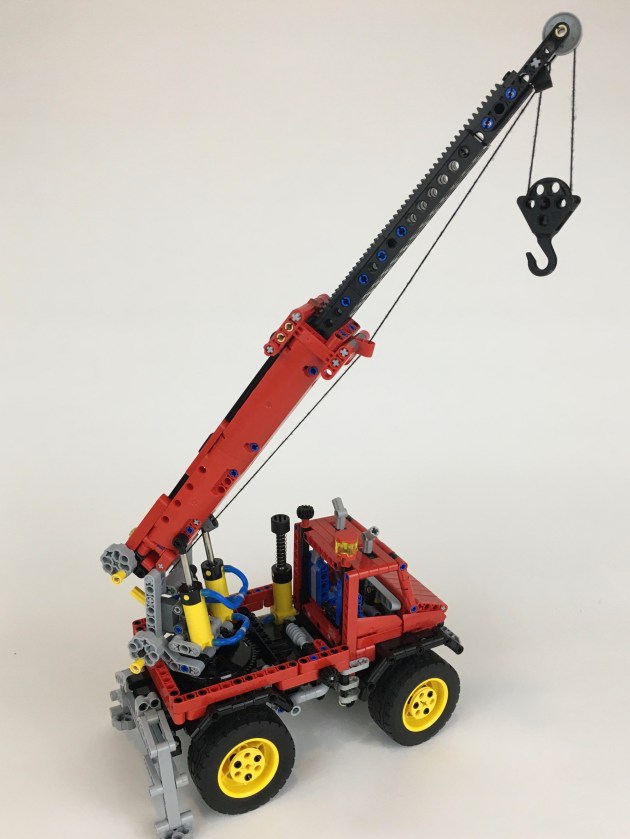
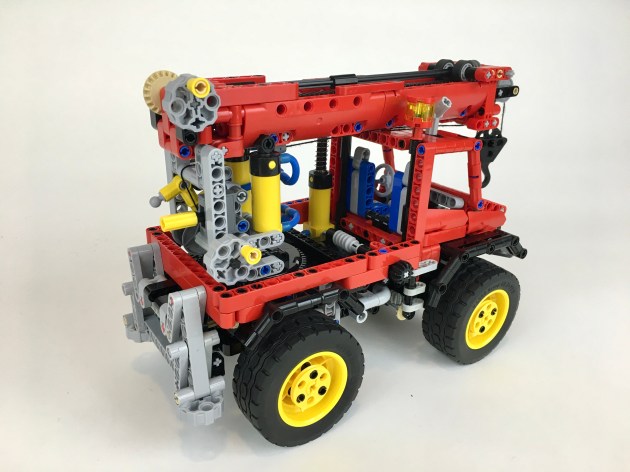
Next, I had to figure out how to add all the features I would want, while keeping all the original features. HOG for the steering would remain on the top right side of the cab, naturally as a beacon. I then added a control gear for the outriggers on the top left side of the cab. The rotation of the crane would be on the right of the truck driven by a worm gear, and all other crane controls would be on the crane itself.
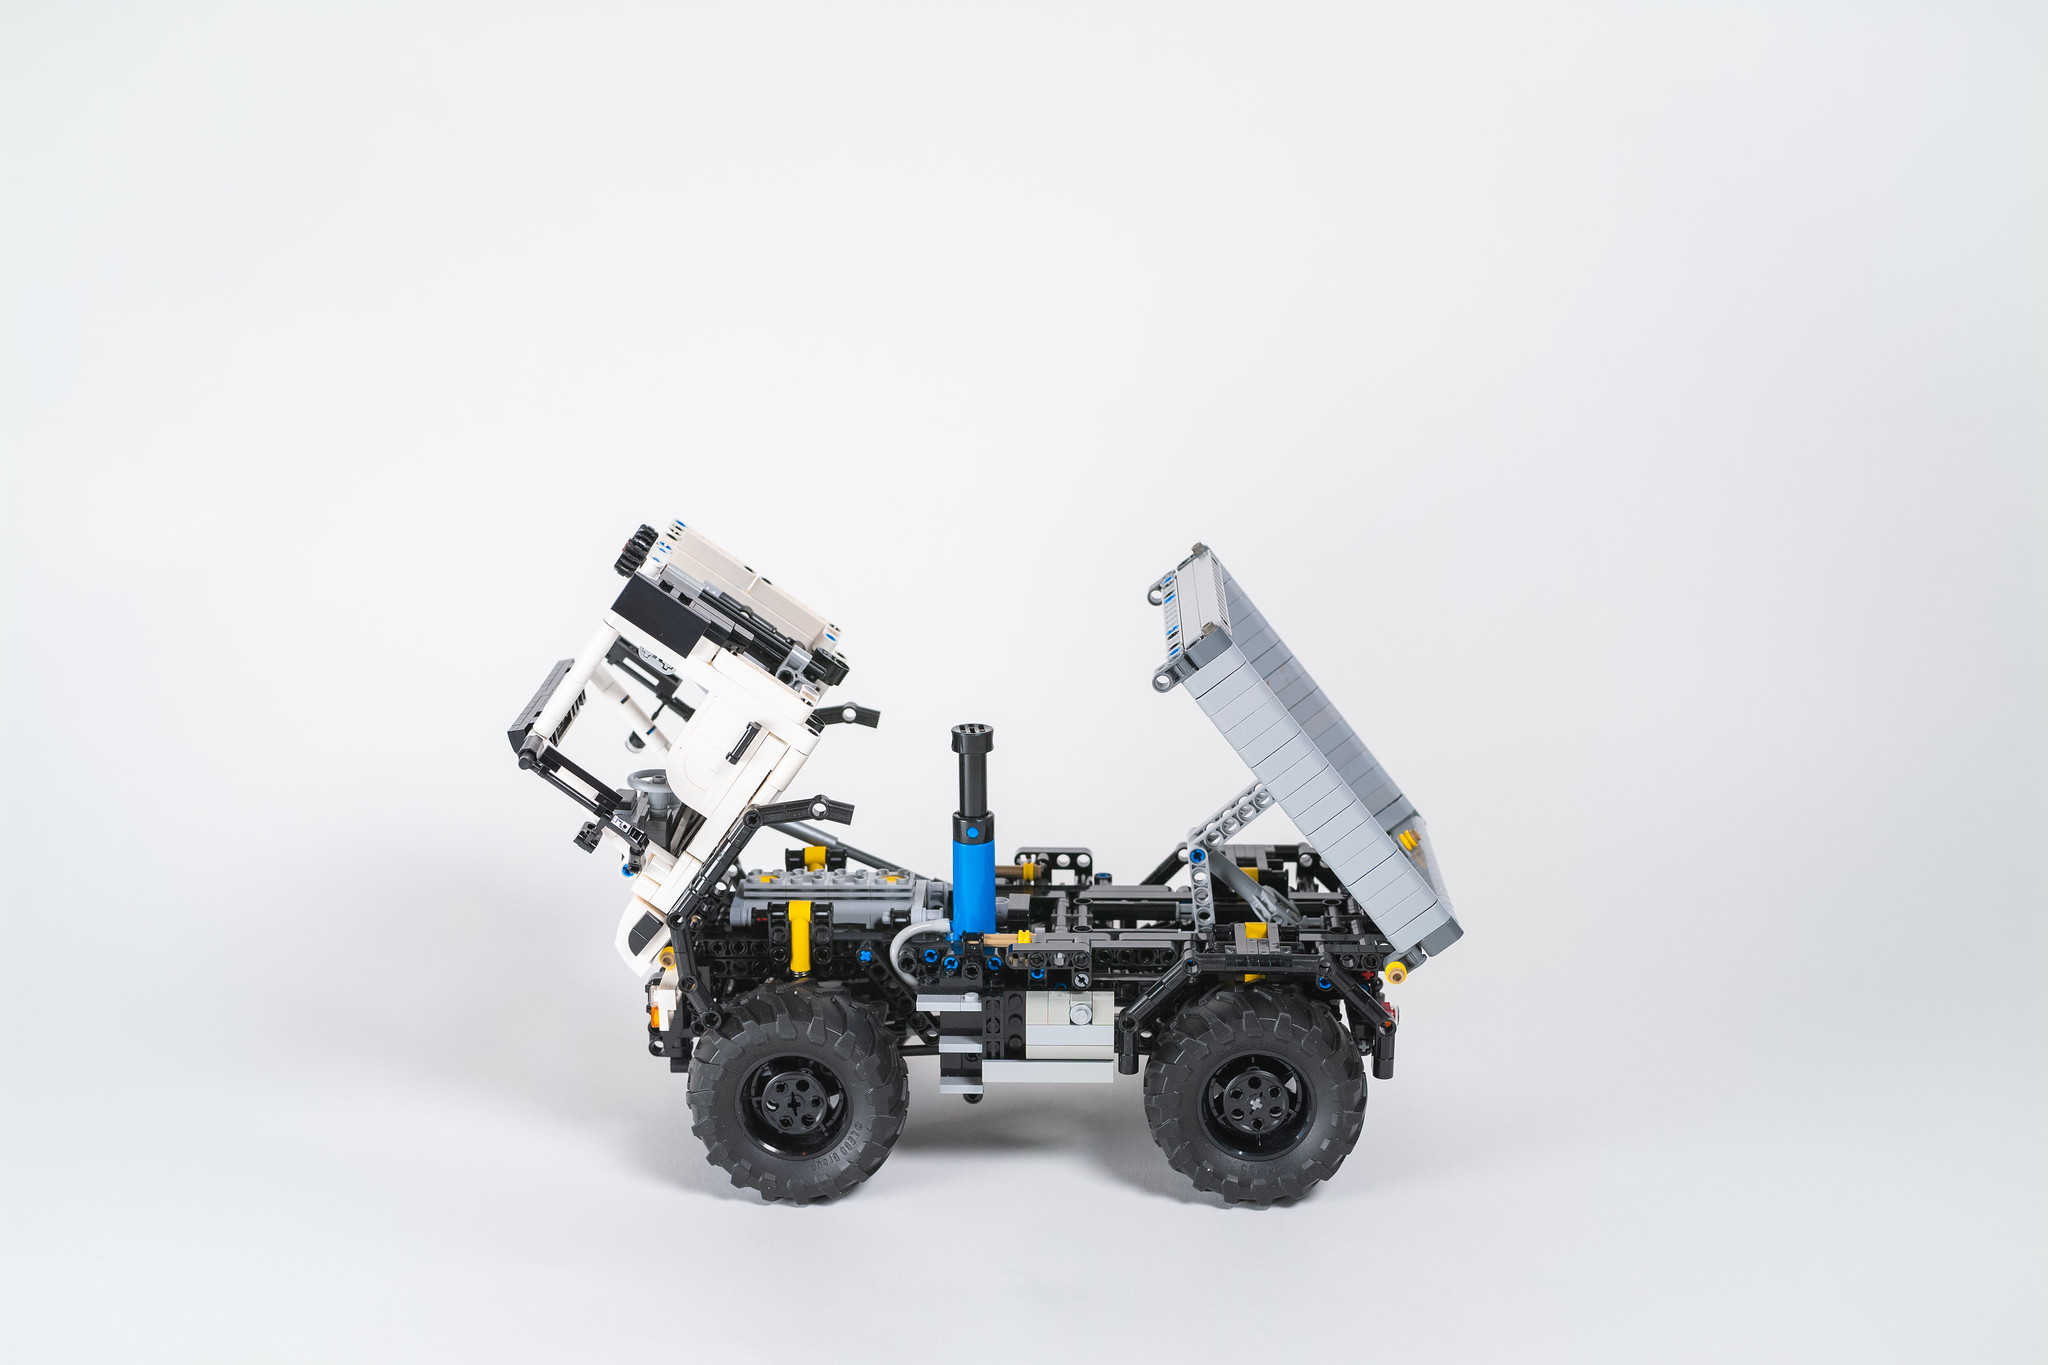
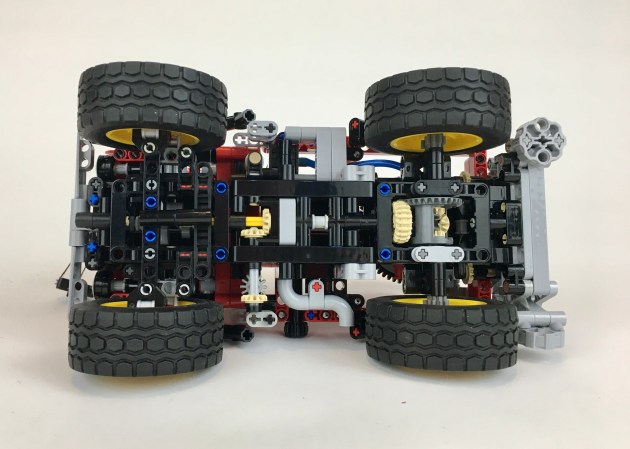
Fitting in the suspension and engine was a little tricky. Adding the engine was simple enough. There is a differential on the rear axle with portal axle. The driveshaft goes forward to drive a I4 mini engine. Suspension is a dual pendular axle setup: both axles pivot side to side. The front and rear axles are linked together so that when one axle pivots right, the other axle pivots left. It is a simple design that functions well.
LEGO 8854 Engine
Designing the crane was the easiest part. Panels form the base of the arm, and a simple extending boom as created using studded technic beams and some rack gears. A worm gear extends the boom.
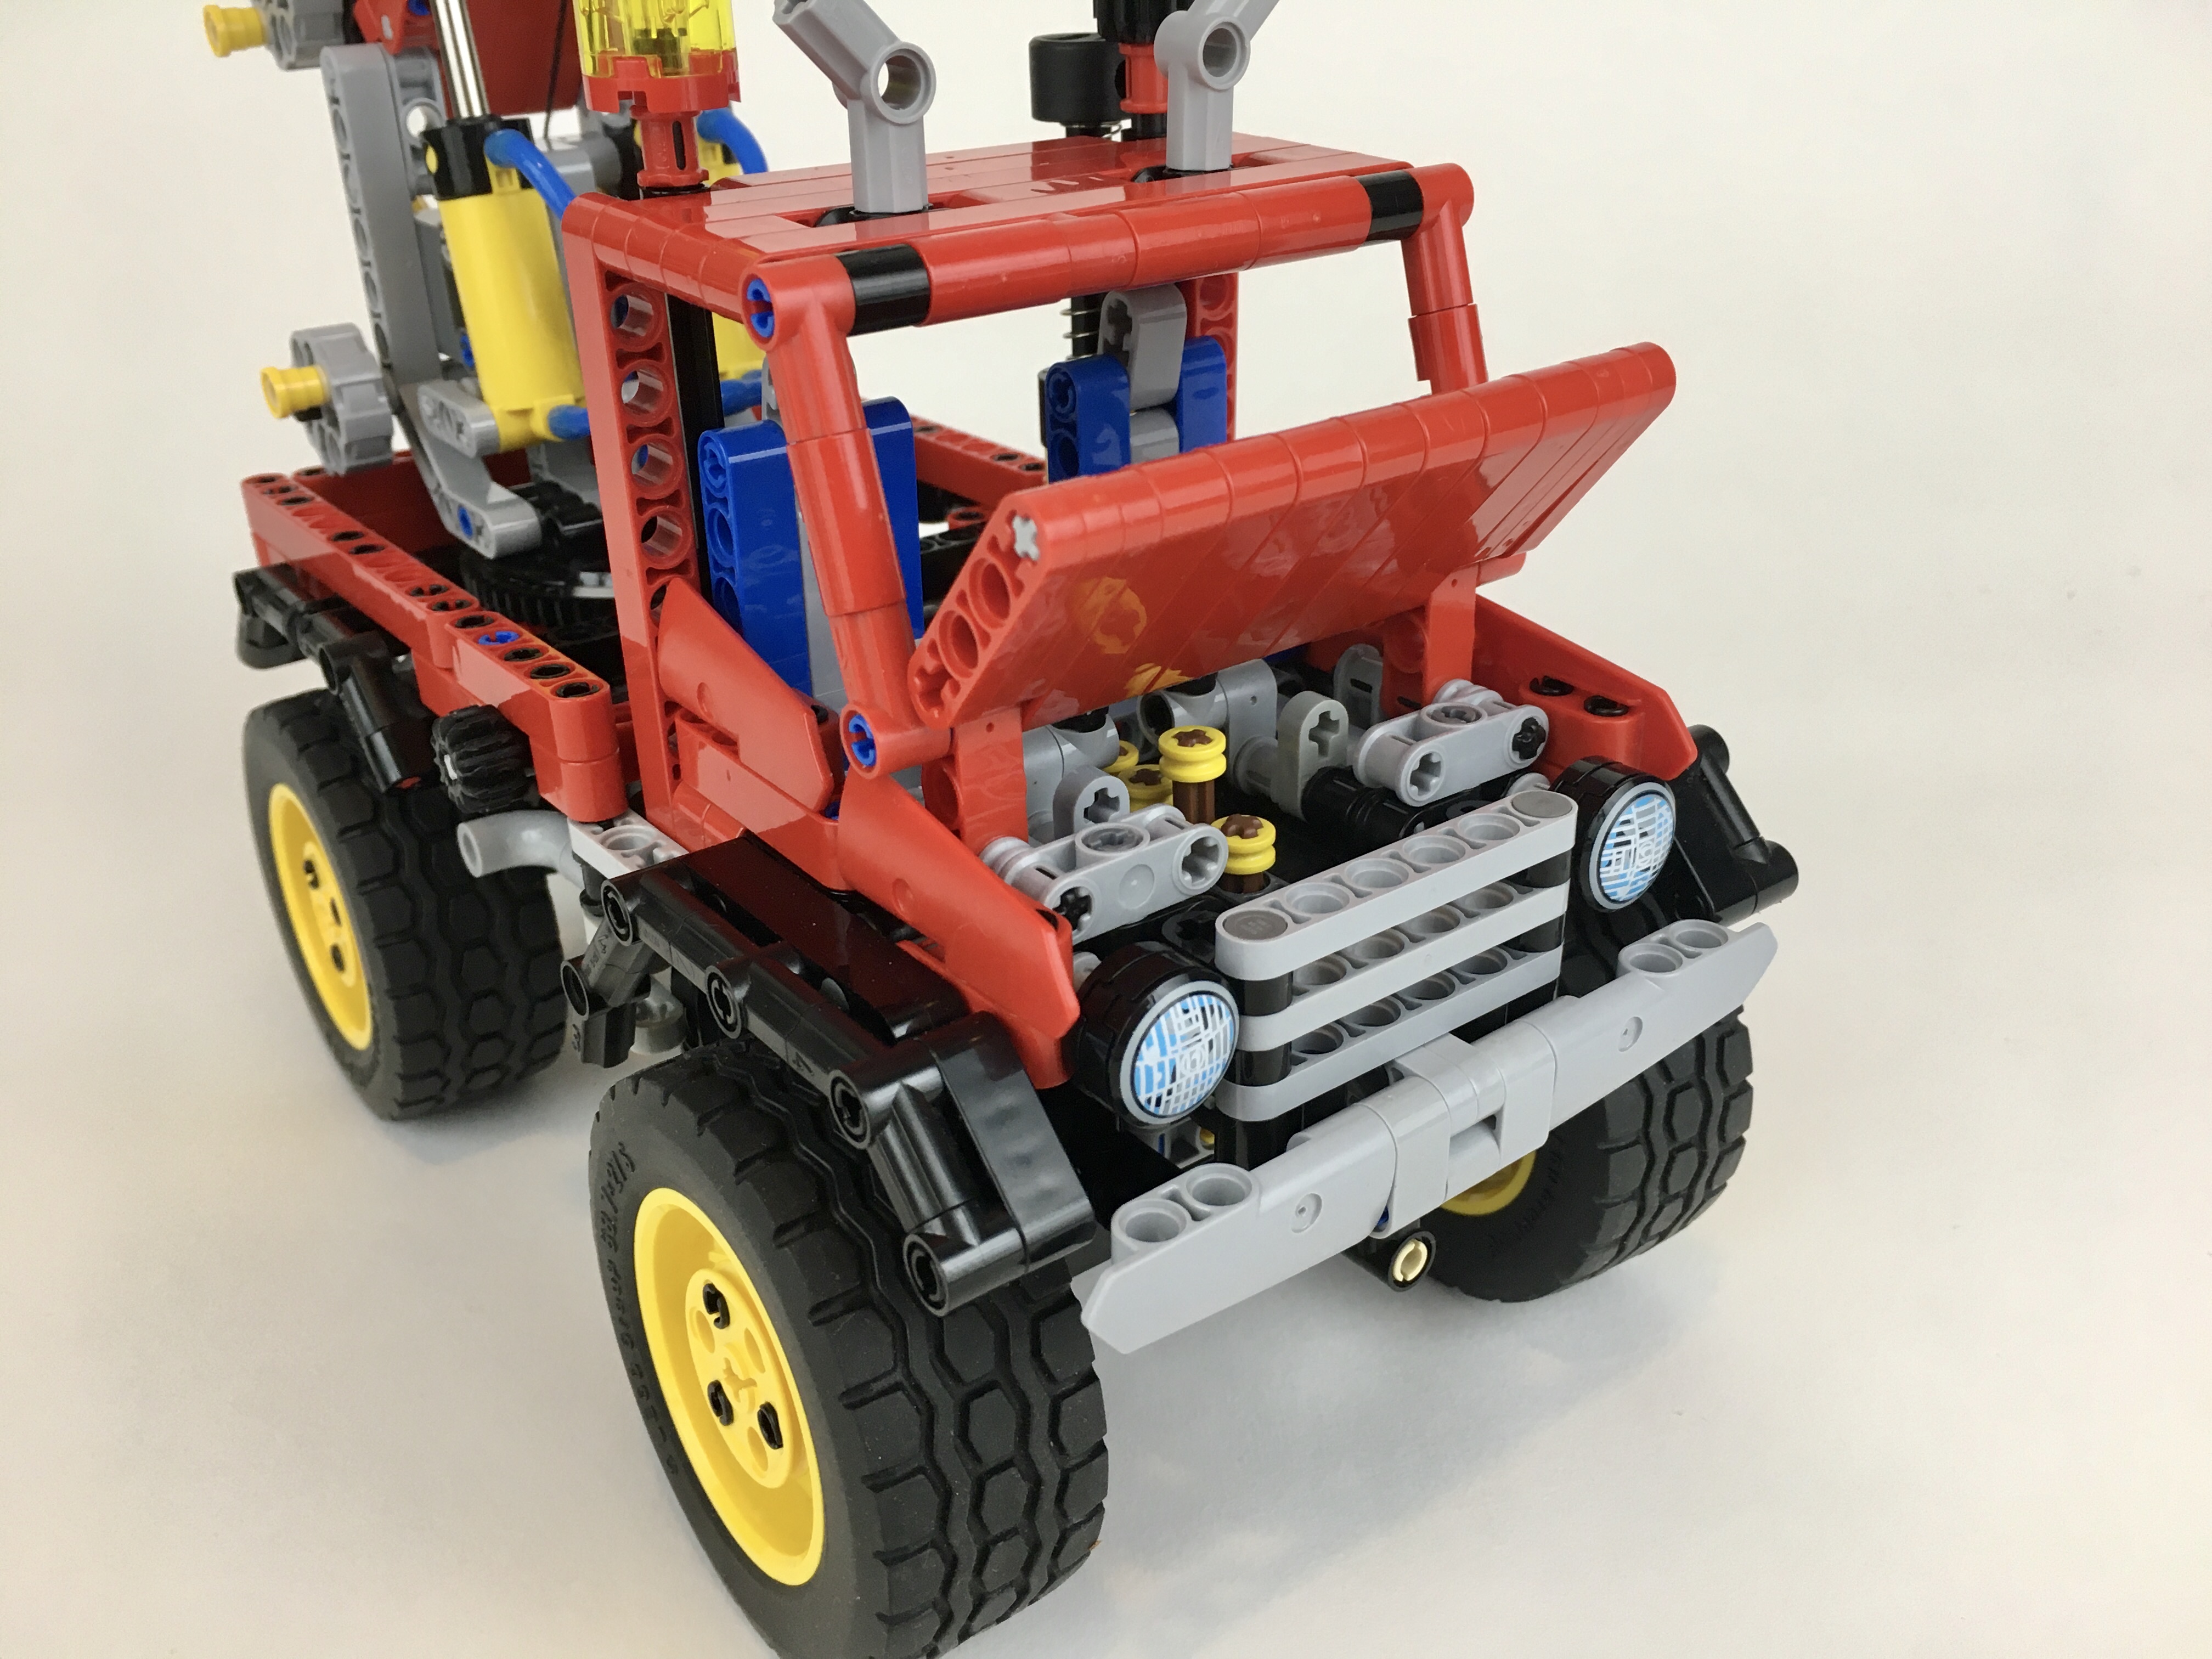
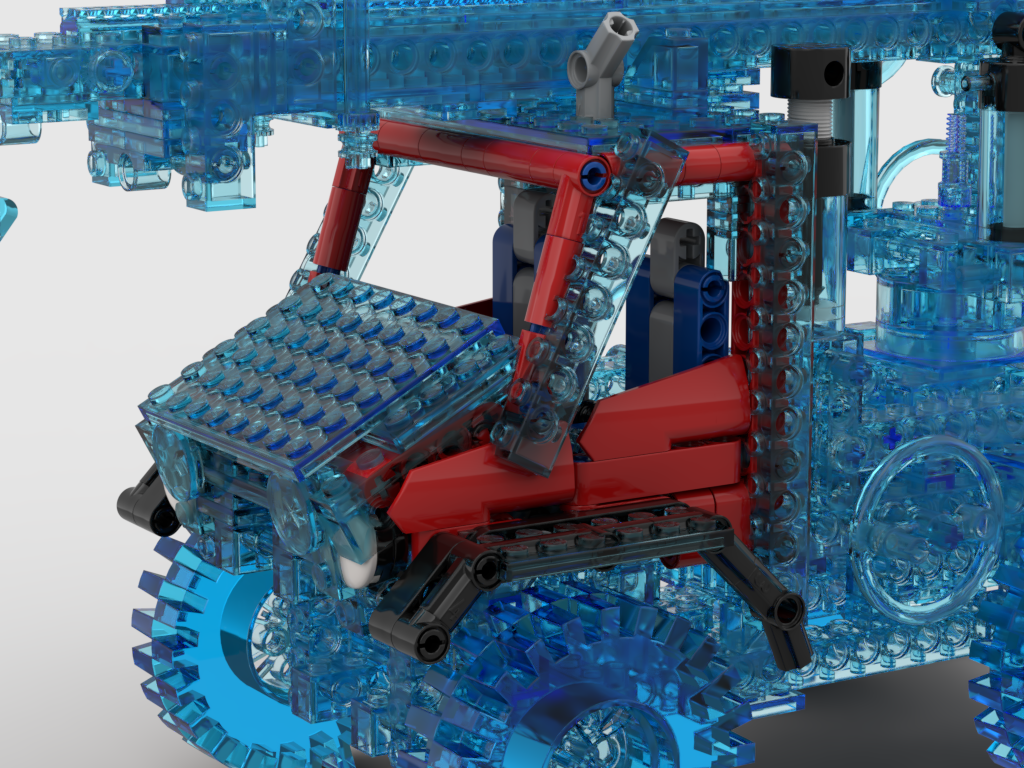
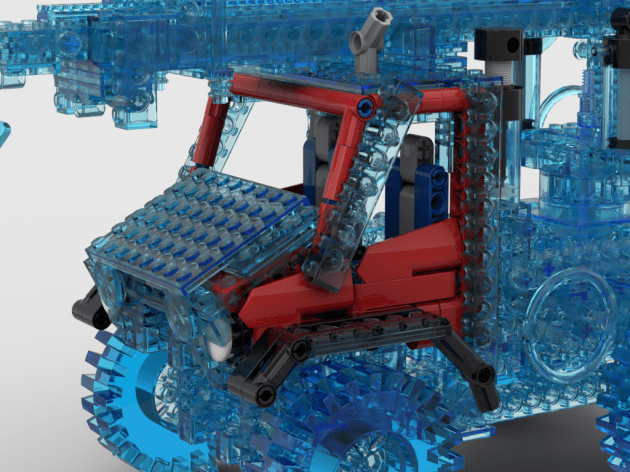
The cab is where I had some trouble. 8854 has a funny shaped cab to my eyes. First, it is very narrow. Second, the hood slopes very steeply. Third, the windshield is not very steep, more car shaped than truck shaped. I rebuilt 8854 in Bricklink Studio to help me compare the two designs over each other. I found this to be a helpful step, and allowed for some good feedback from other Eurobrick members. I ended up making the hood a little more flat and slightly shorter. The roof was made a little longer, which made the windshield a little more steep. Then added the fenders that wrap around the wheels a little better, and headlights and a grill that referenced the original grill. I was pleased with the final design. Oh, and I added seats, opening doors, and a dashboard.
Being able to compare the two versions side by side helped me feel comfortable with how the build was going. Most of the time I use Studio when the build is complete, as do not like to tinker in Studio. However, being able to see changes in real time, was immensely helpful. I could ask was the new version staying true to the original? If not, what was the specific part that was making it feel/look off? Being able to overlay both versions on top of each other was helpful, and a step I will do again in the future.
Cab Comparison Overlay
It turns out the design was good enough for a first place! I was thrilled that through both a voting and jury stage, this update was picked over 46 other designs. In addition to that affirmation, I was pleased with how the MOC turned out as well. The functions all worked well, and the control of each was simple and effective. I only wish the suspension was little more stable, but this was only noticeable when the crane was fully extended. I’ll use the suspension again in other MOC soon. If you love 8854 as much as I do, I hope you will give this update a build as well.
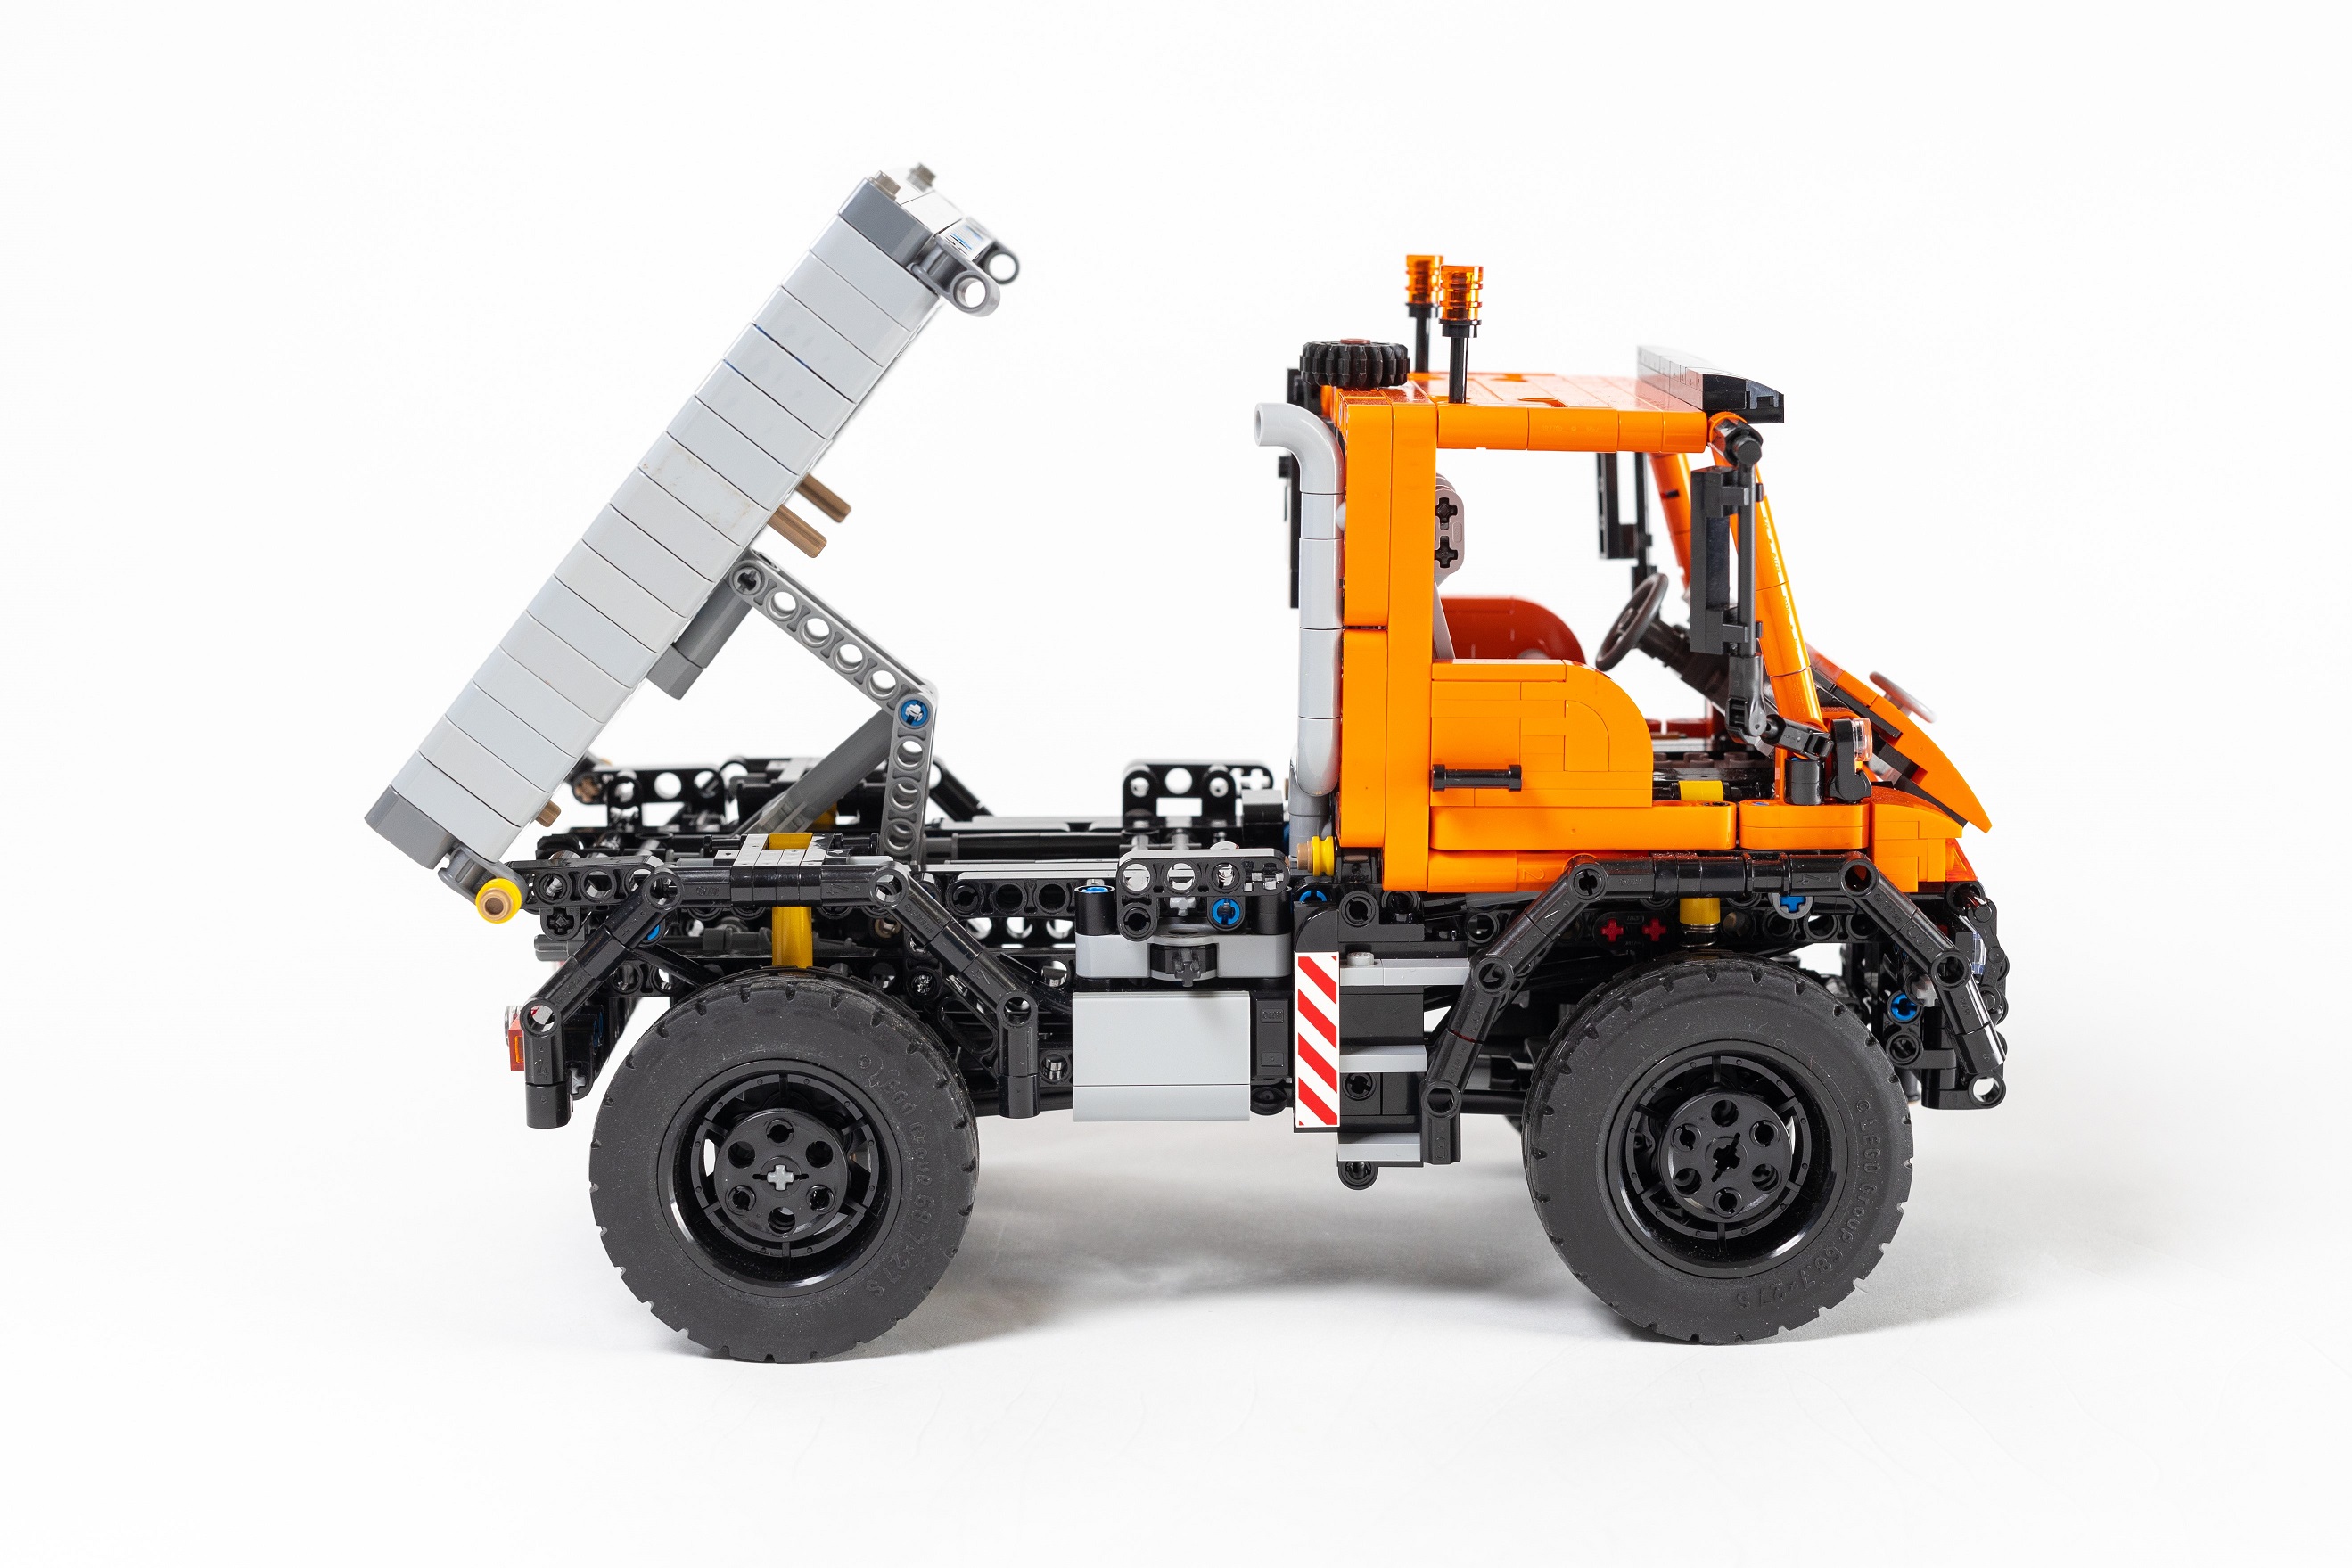
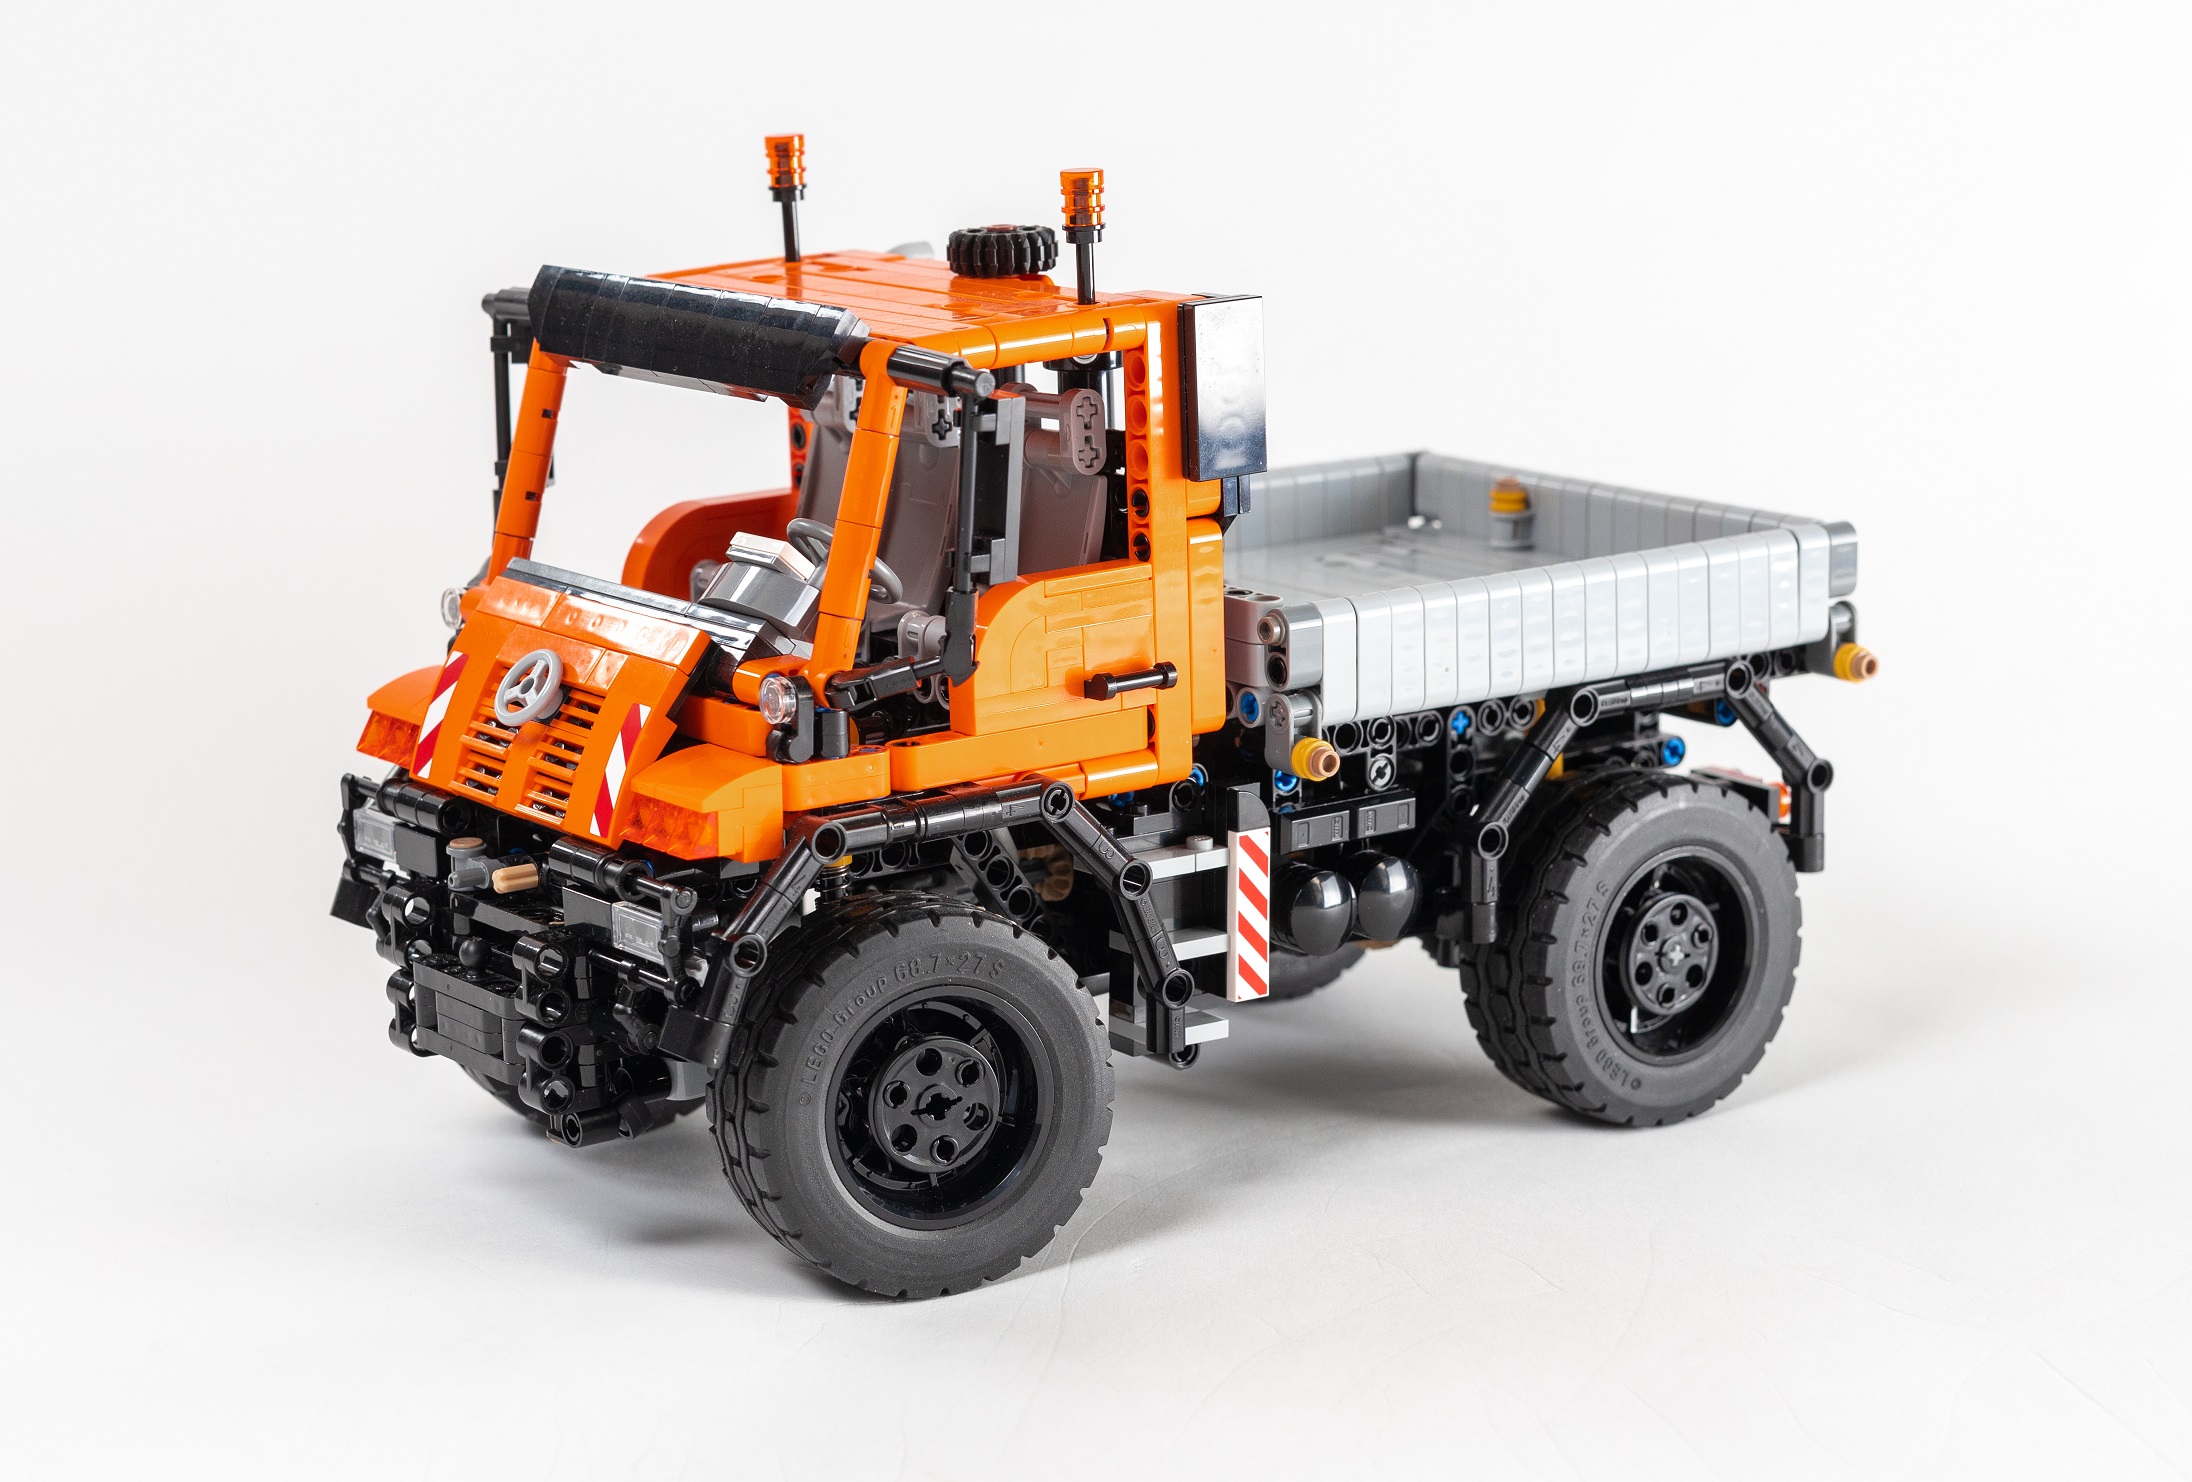
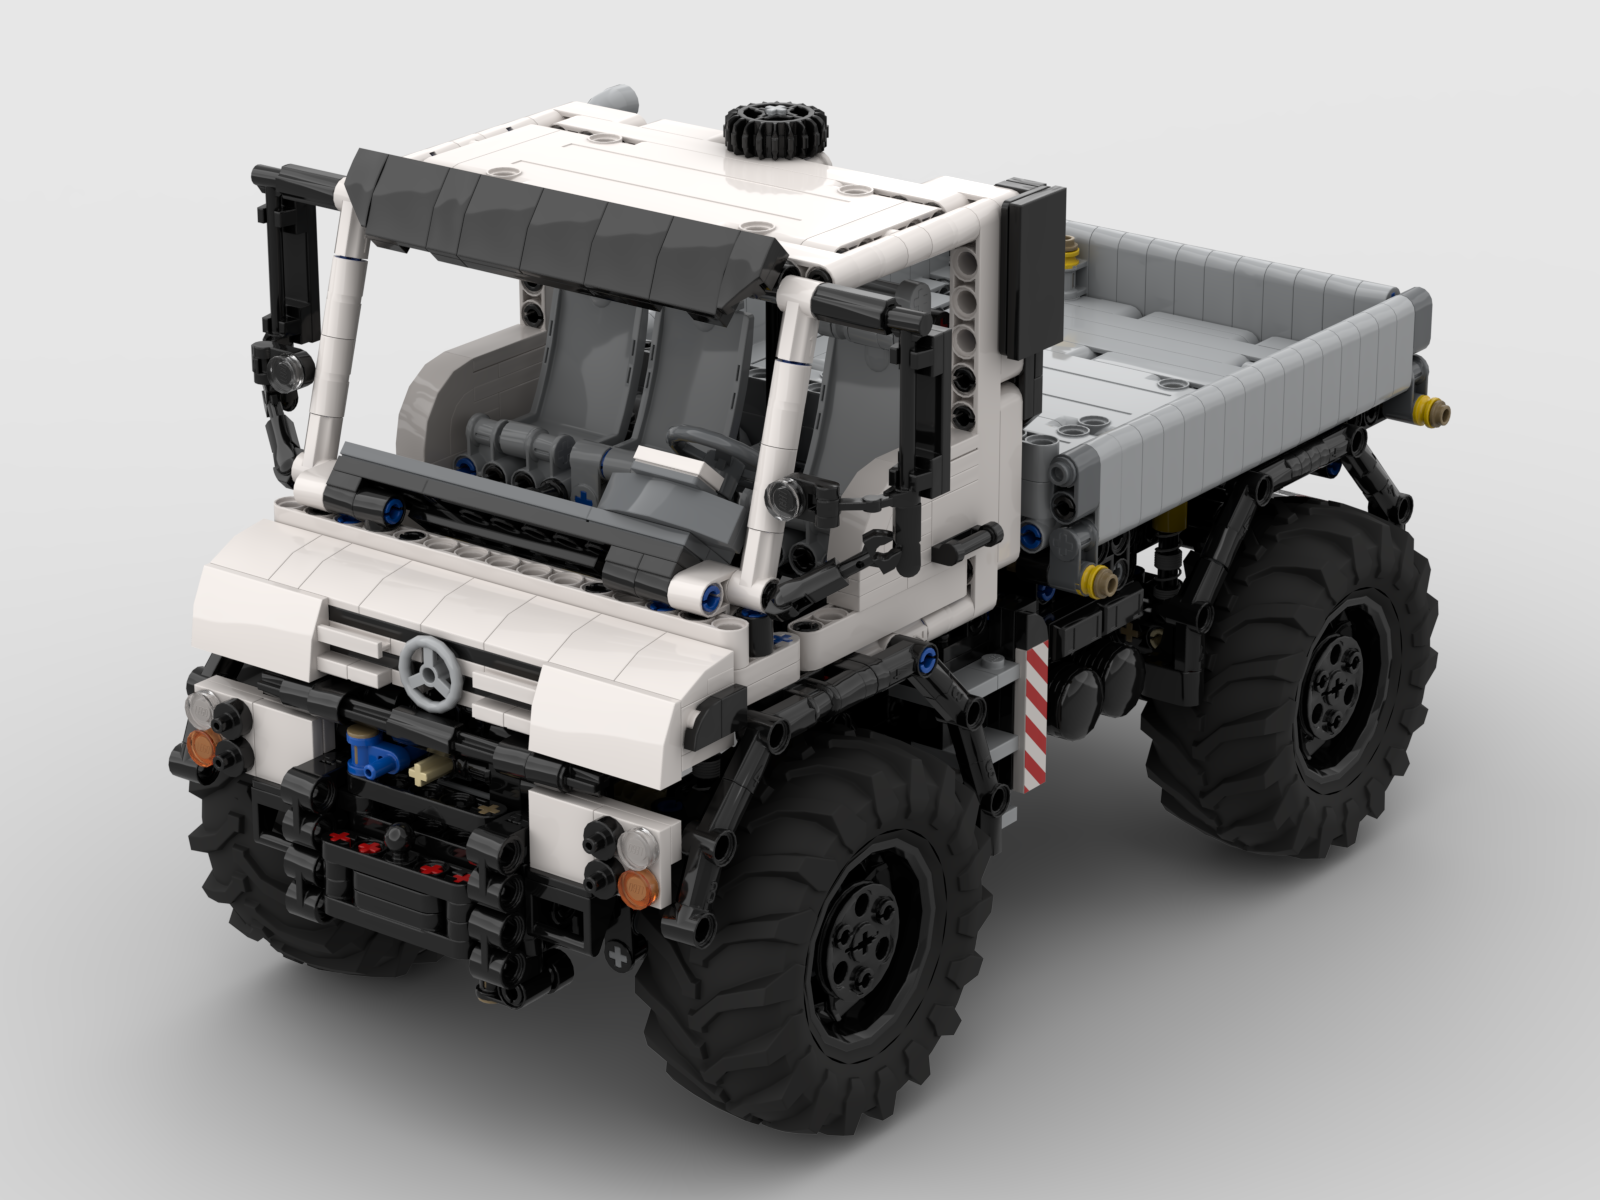
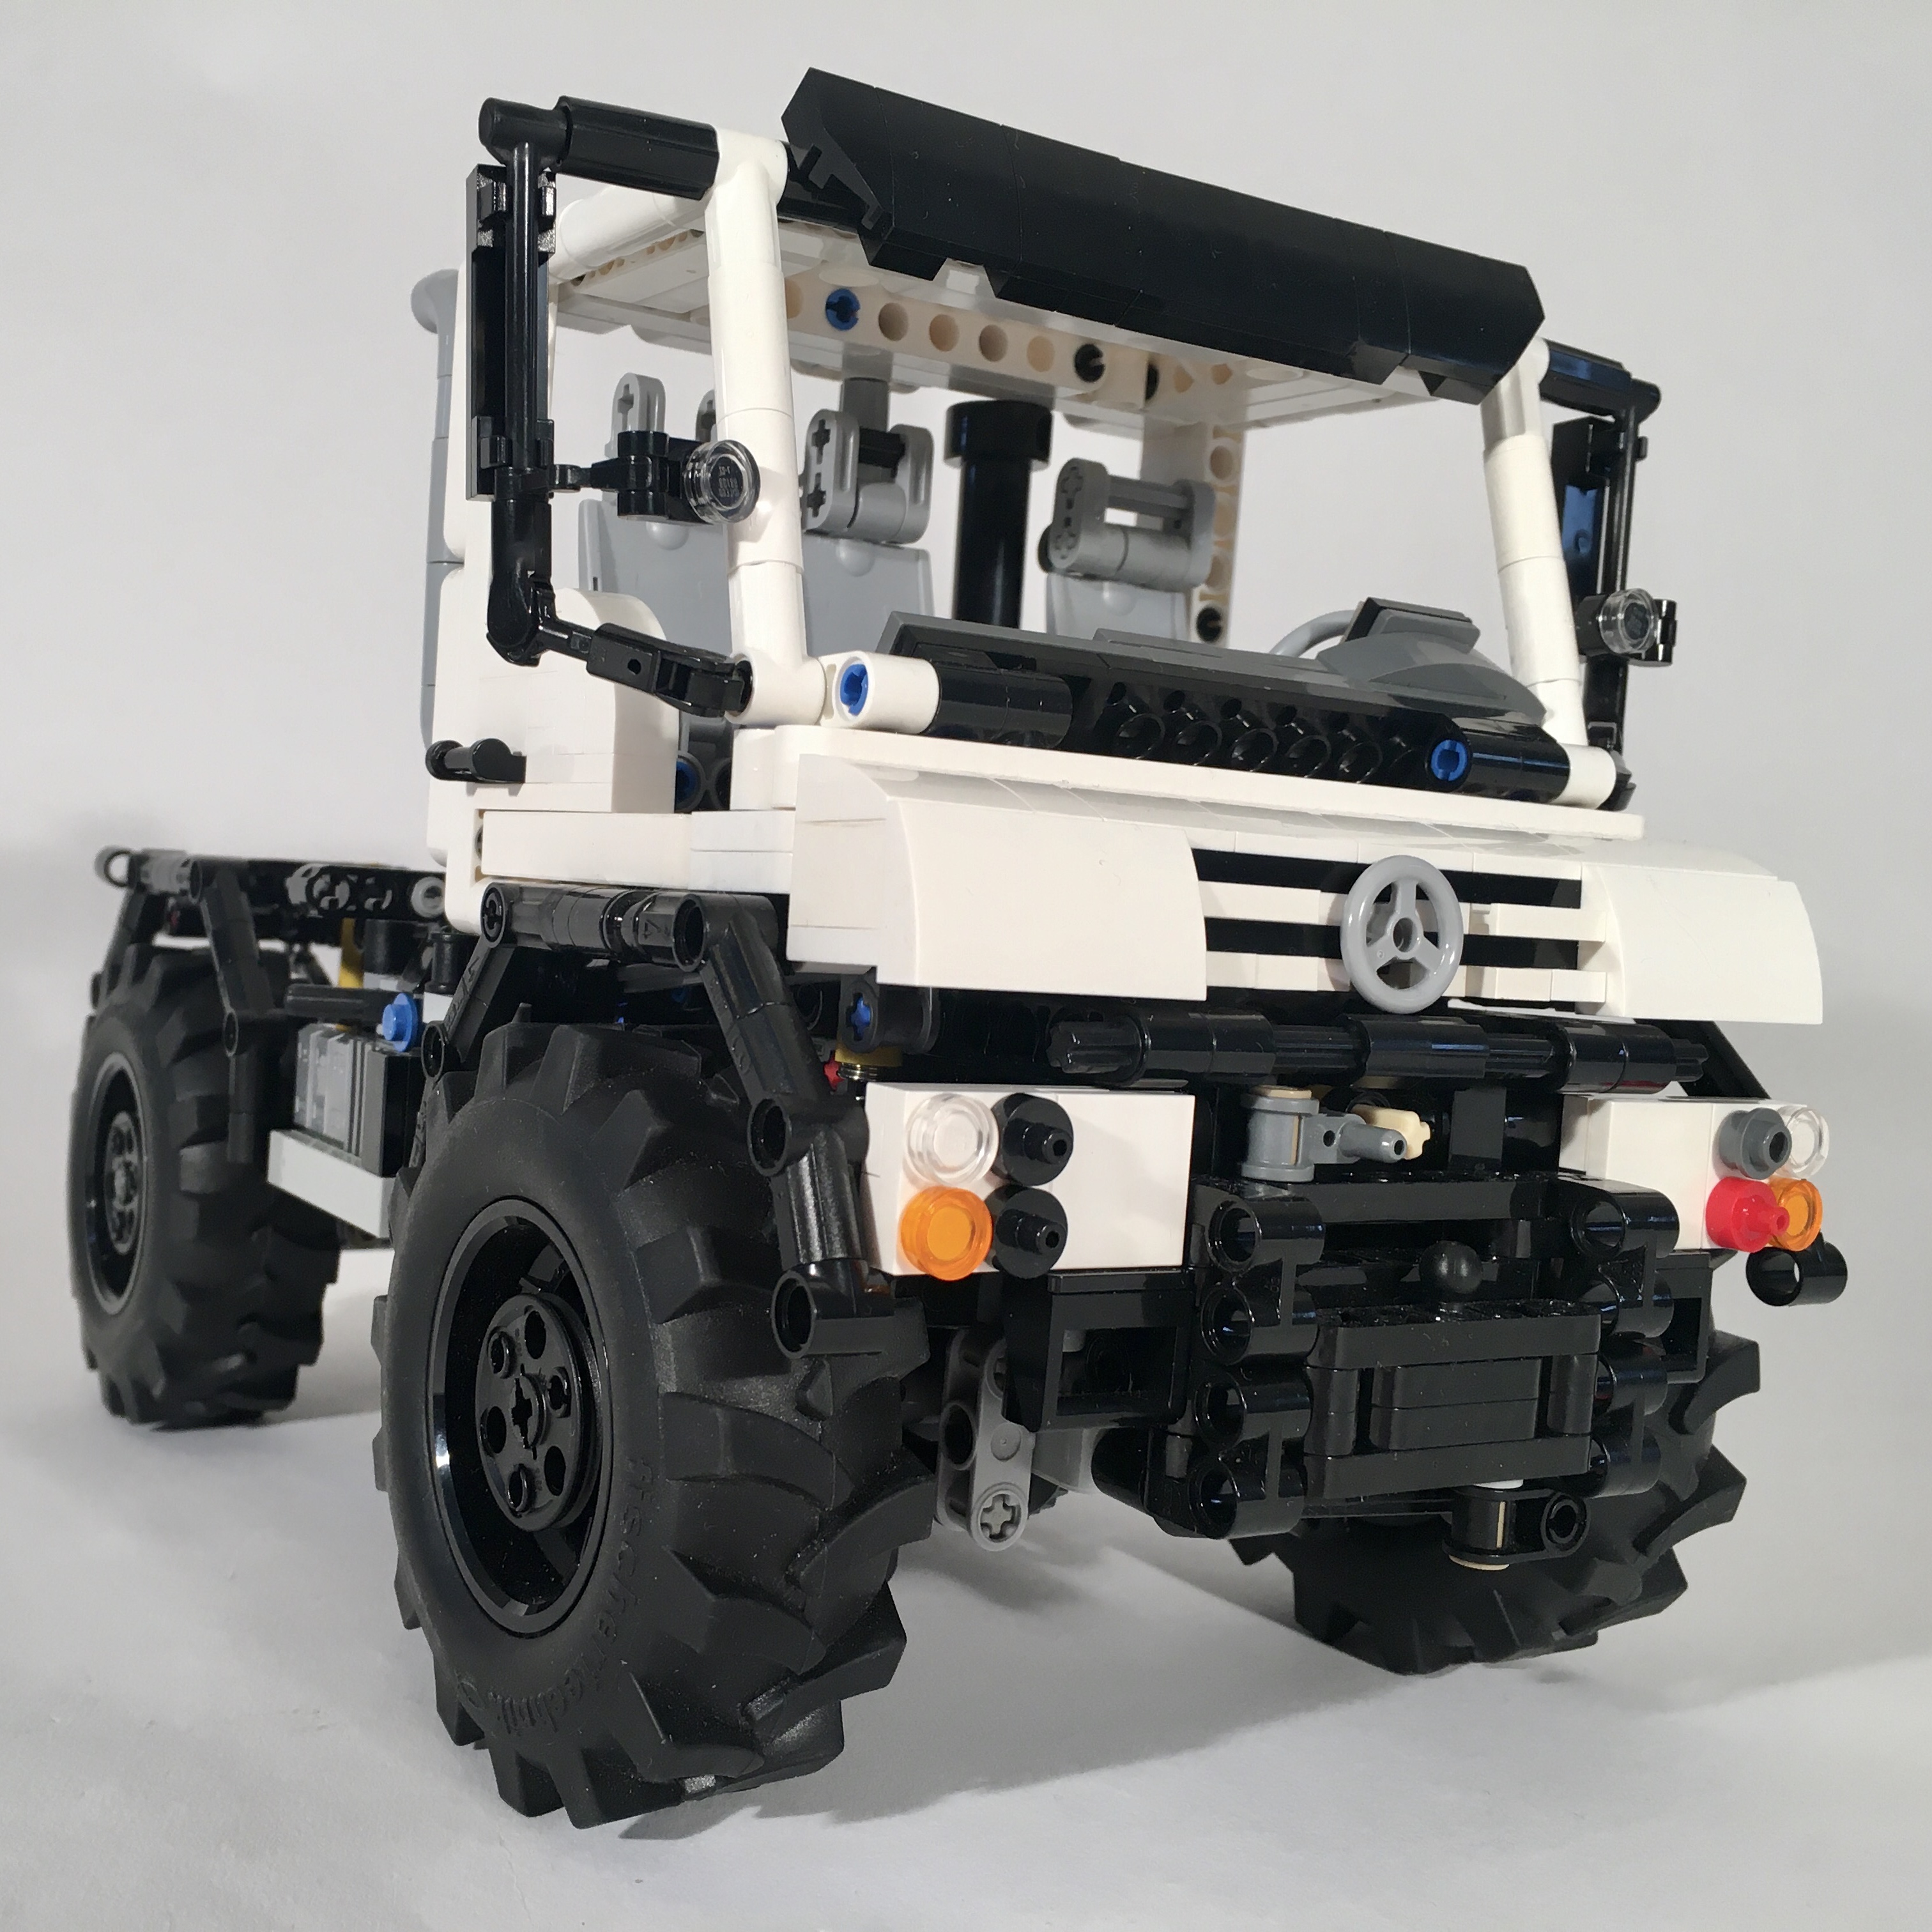
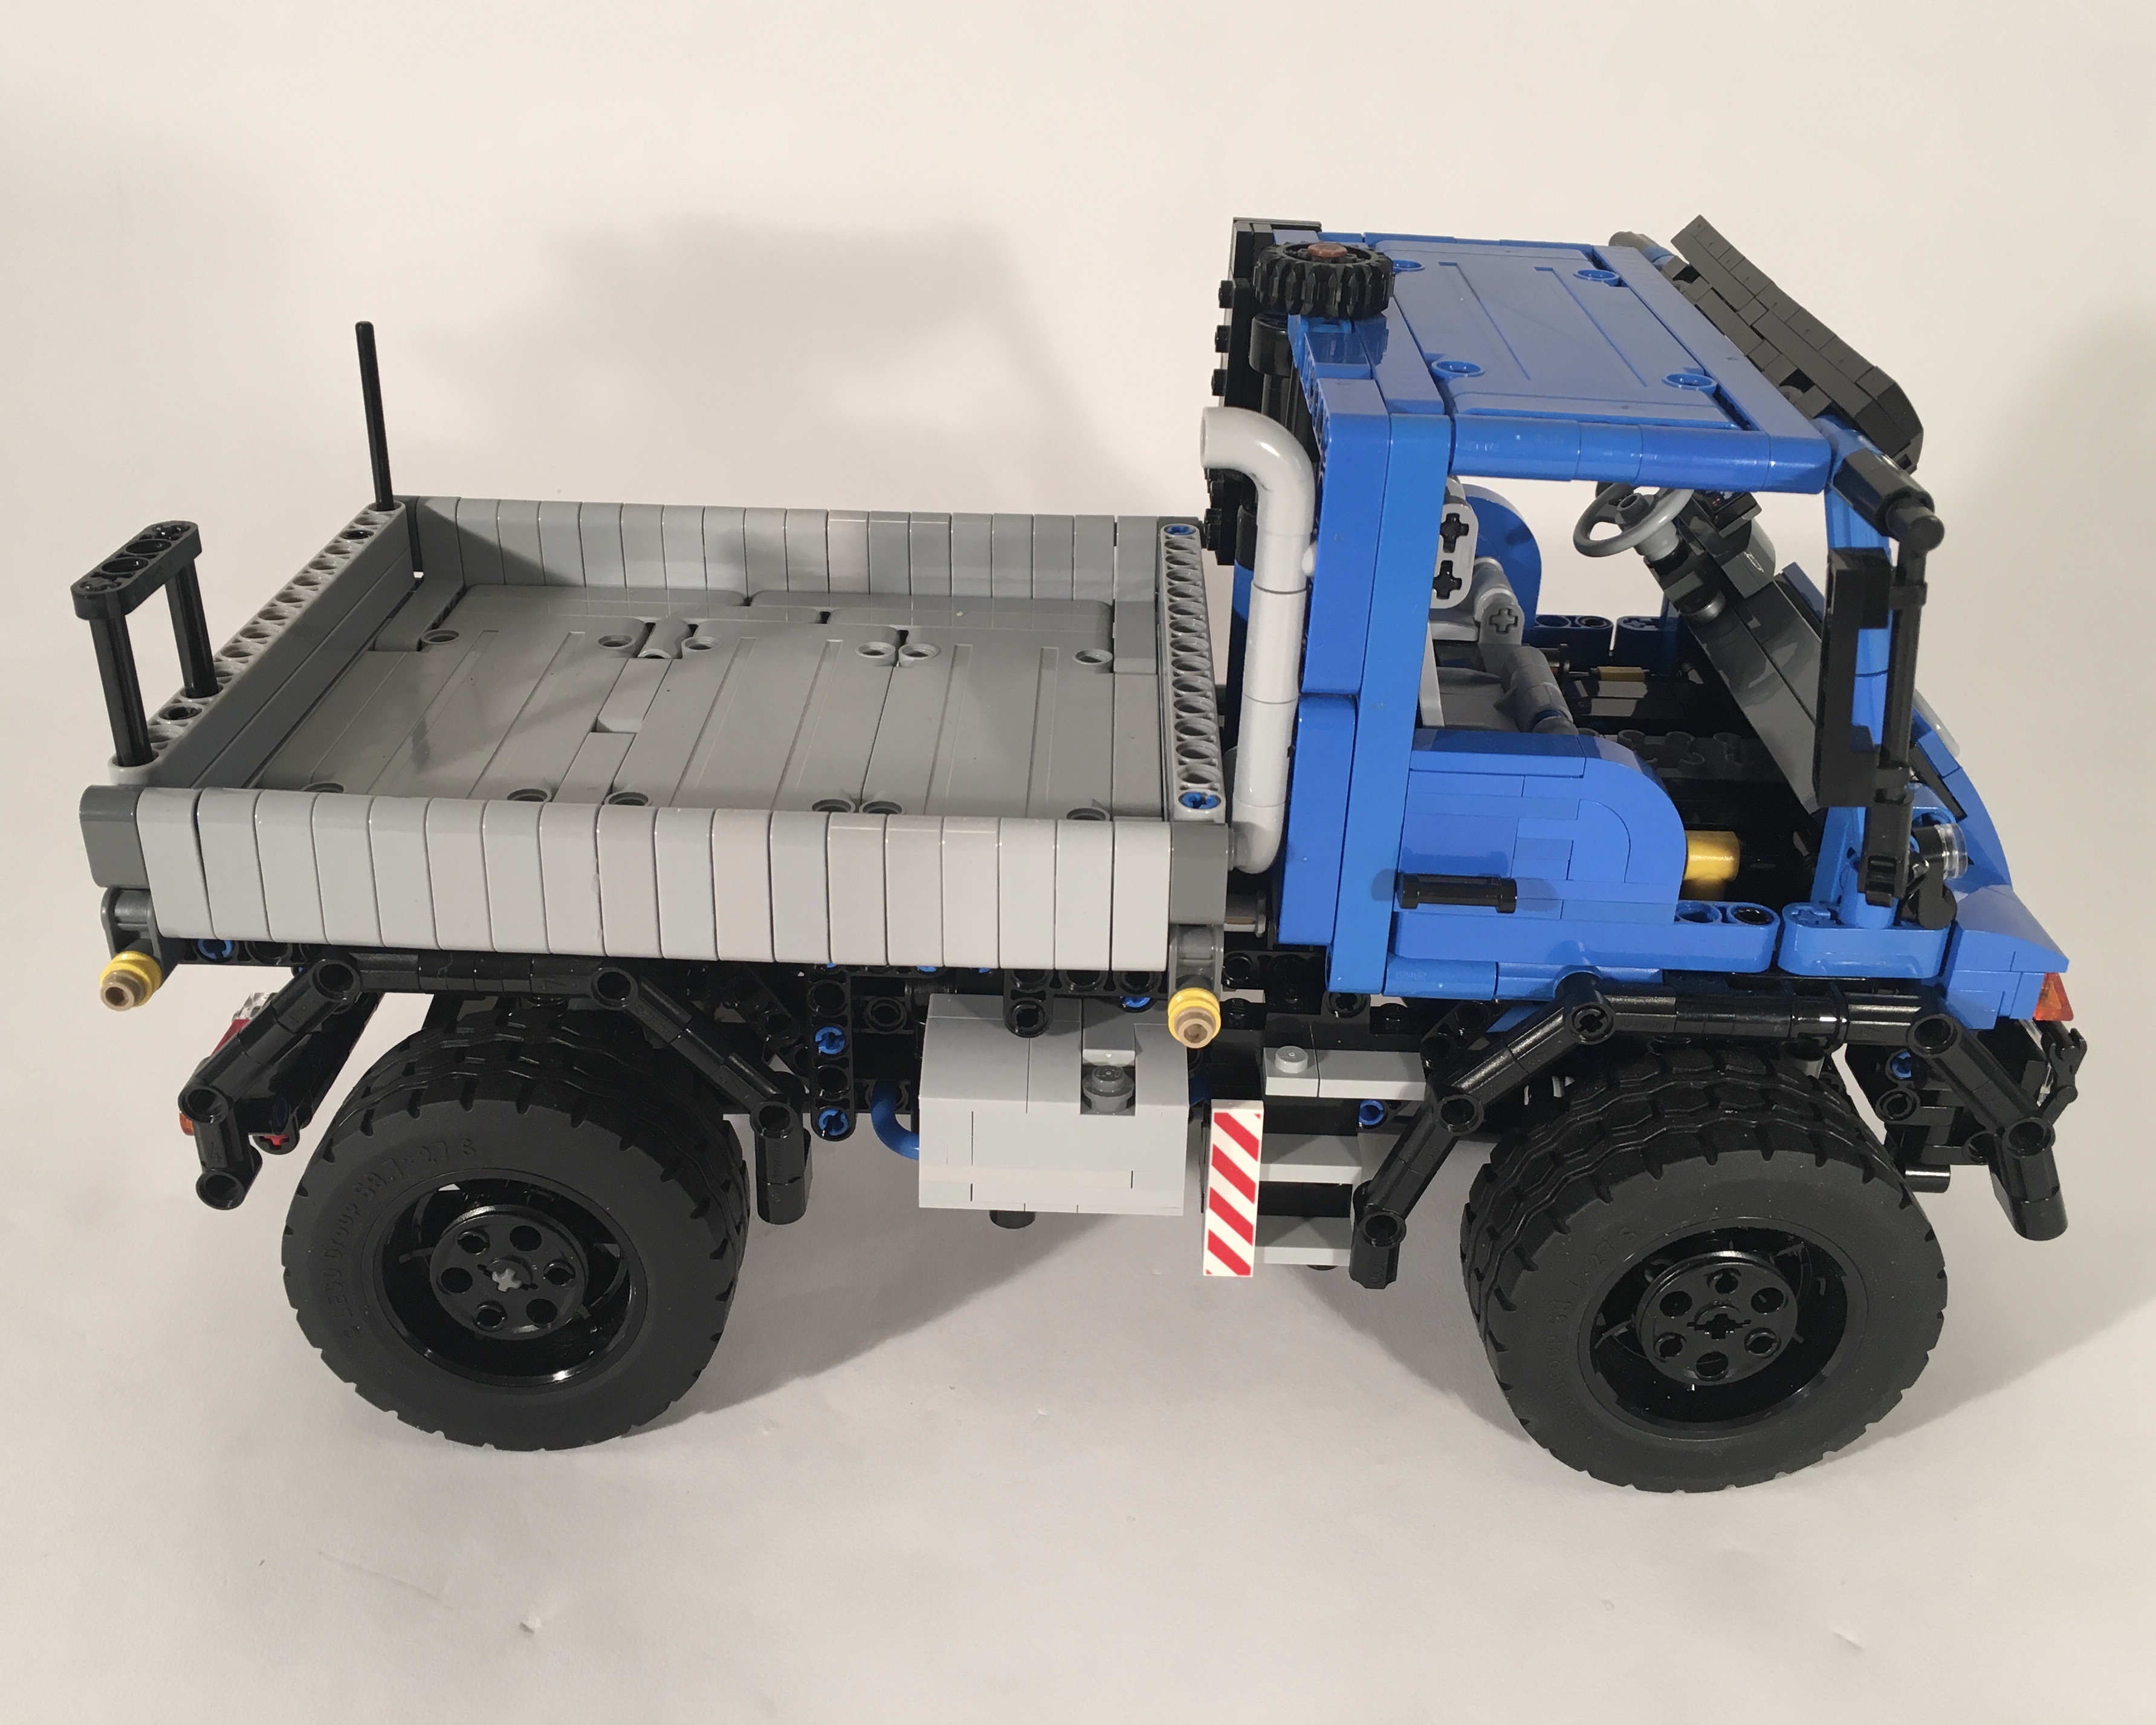
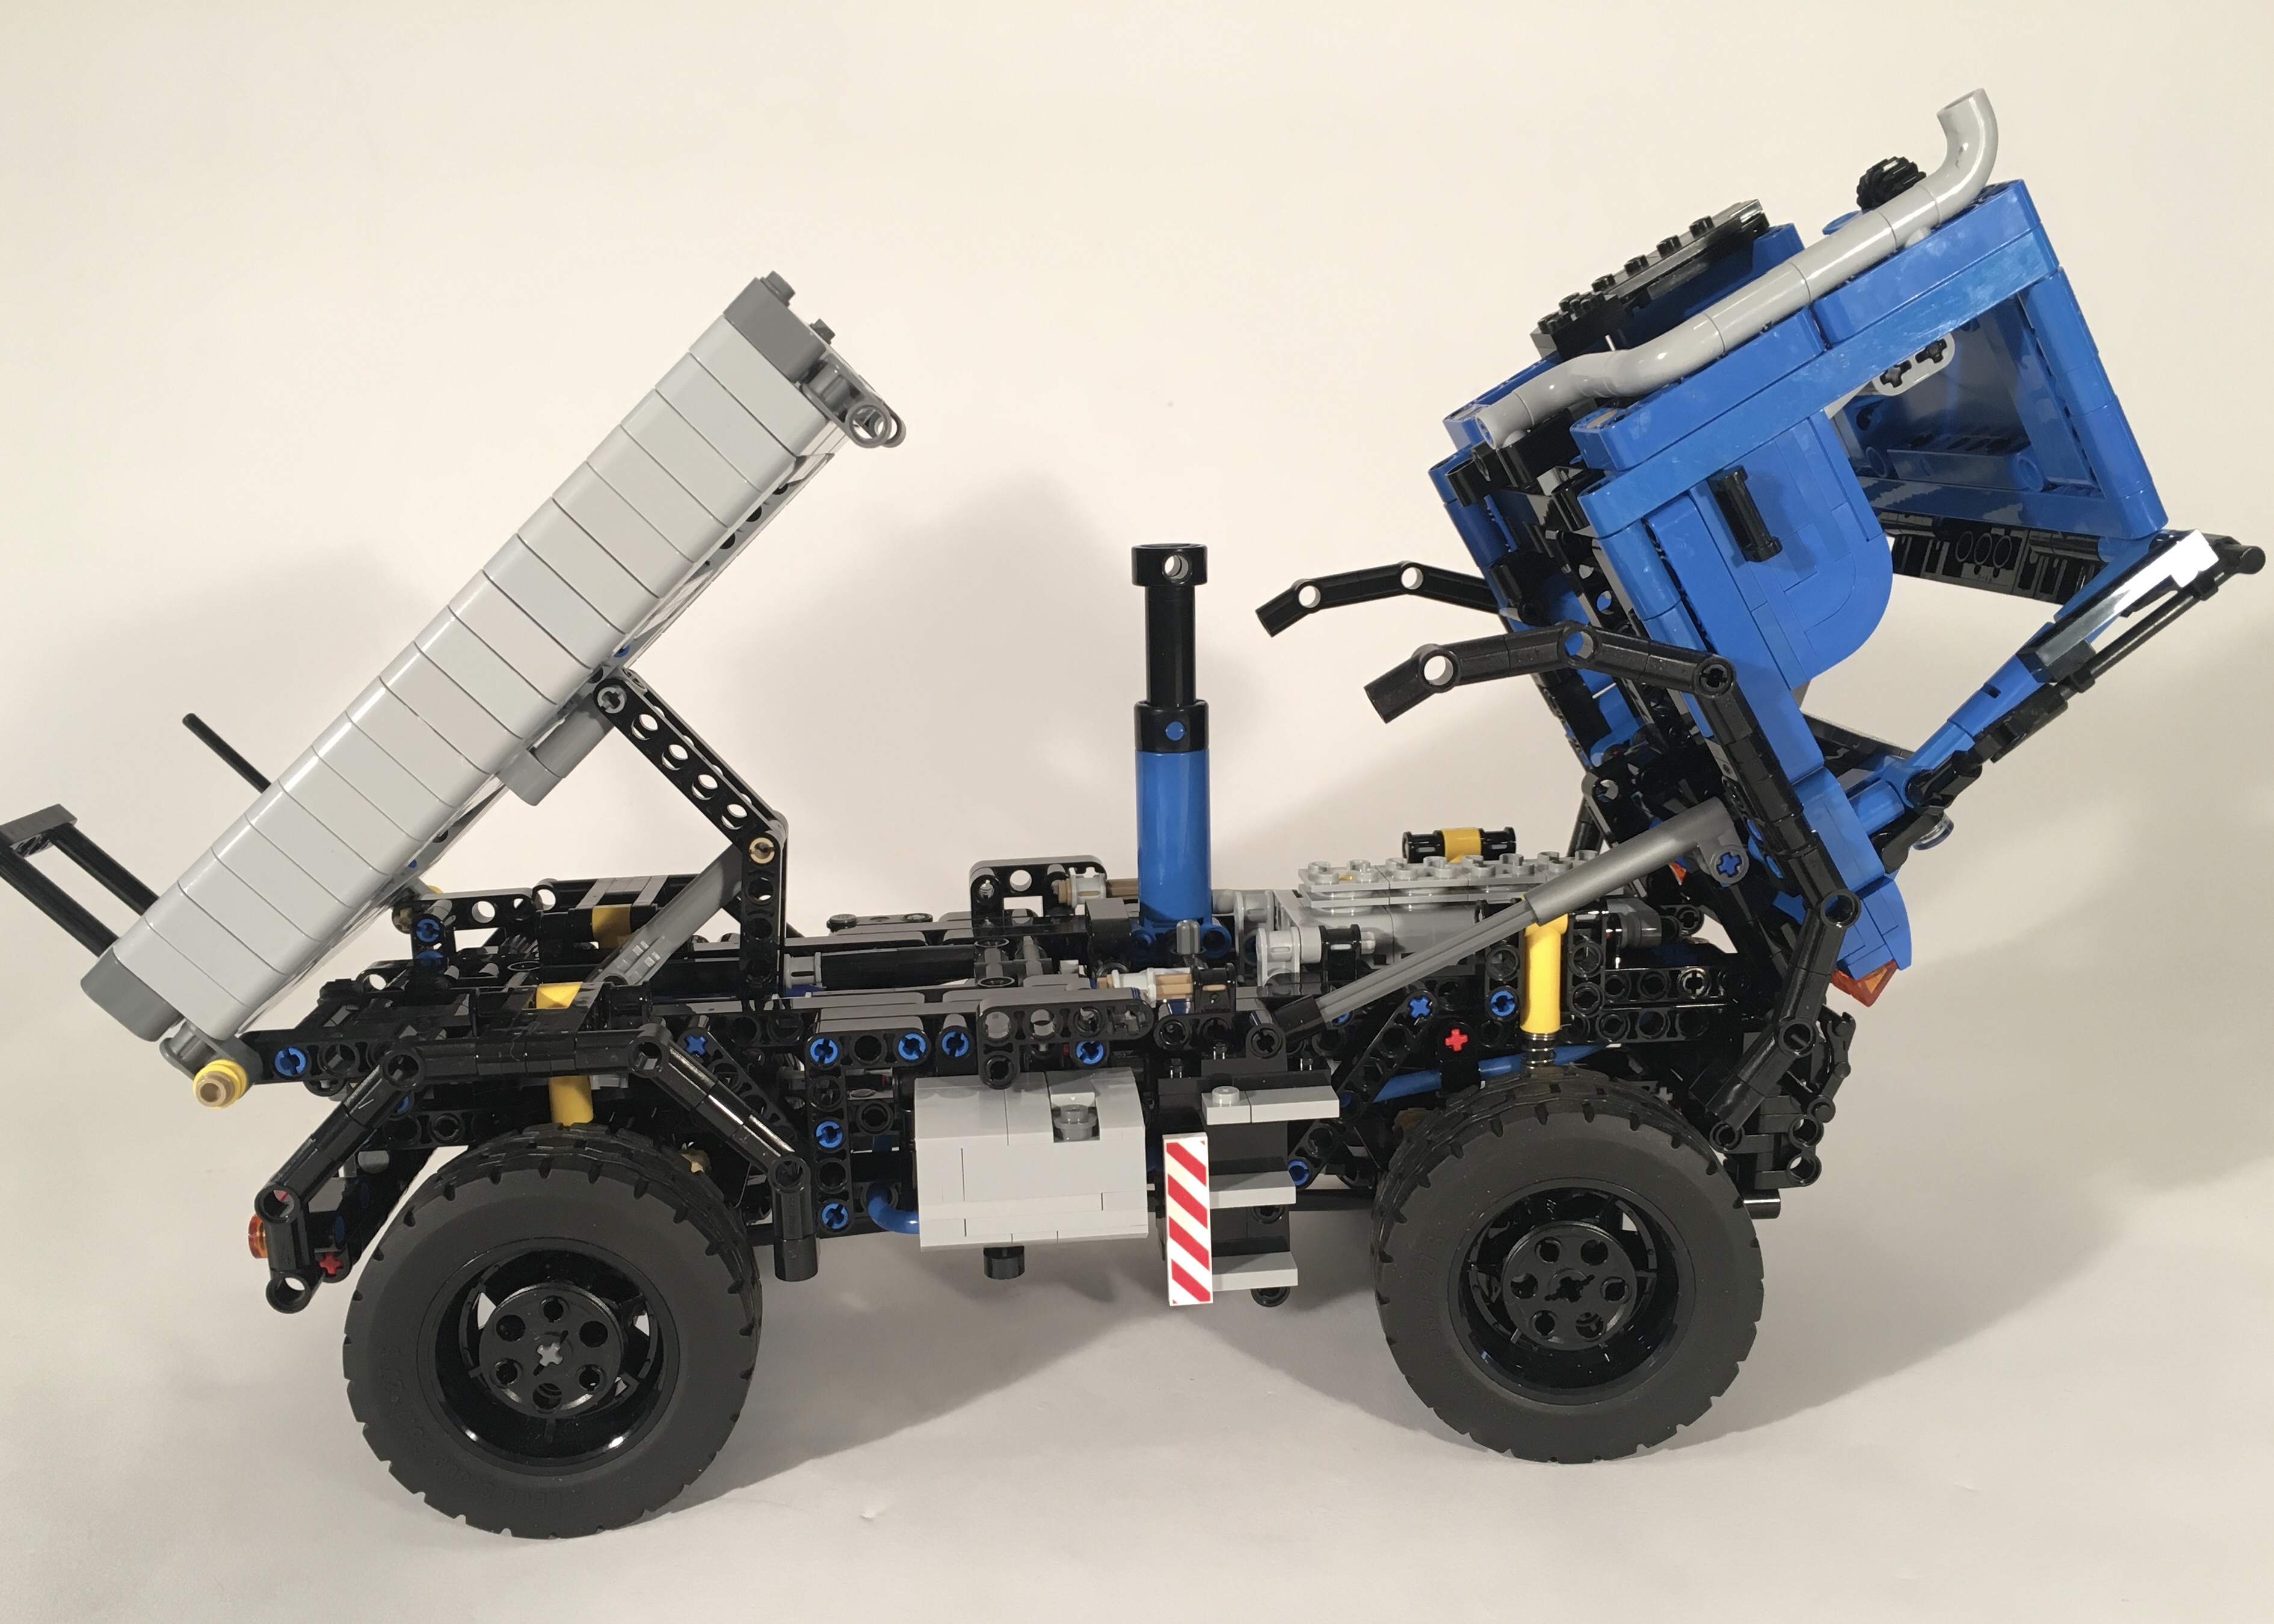
Right after the LEGO Batmobile 76139 was released, I saw the front tires, and immediately planned this Unimog. The tires were perfect for a U500. I stared working on a draft before I had acquired the tires. I wanted the build to be in the theme of my Unimog 437 in that it was about 1:18 in scale, and had modular cabins and bed options. But I wanted to take this idea to the next level so that front and rear attachments could be added, as well as trailers. Many of my builds as of late are more system focused, in that a main build supports lots of other attachments, trailers, and versions of the same build. With this one, standard attachment points on the front, rear, bed, cab, and hitches allow for a variety of versions and attachments to be added quickly. I’ll make more of these soon.
Rear Hitch, Attachment point, PTO, and PPTO
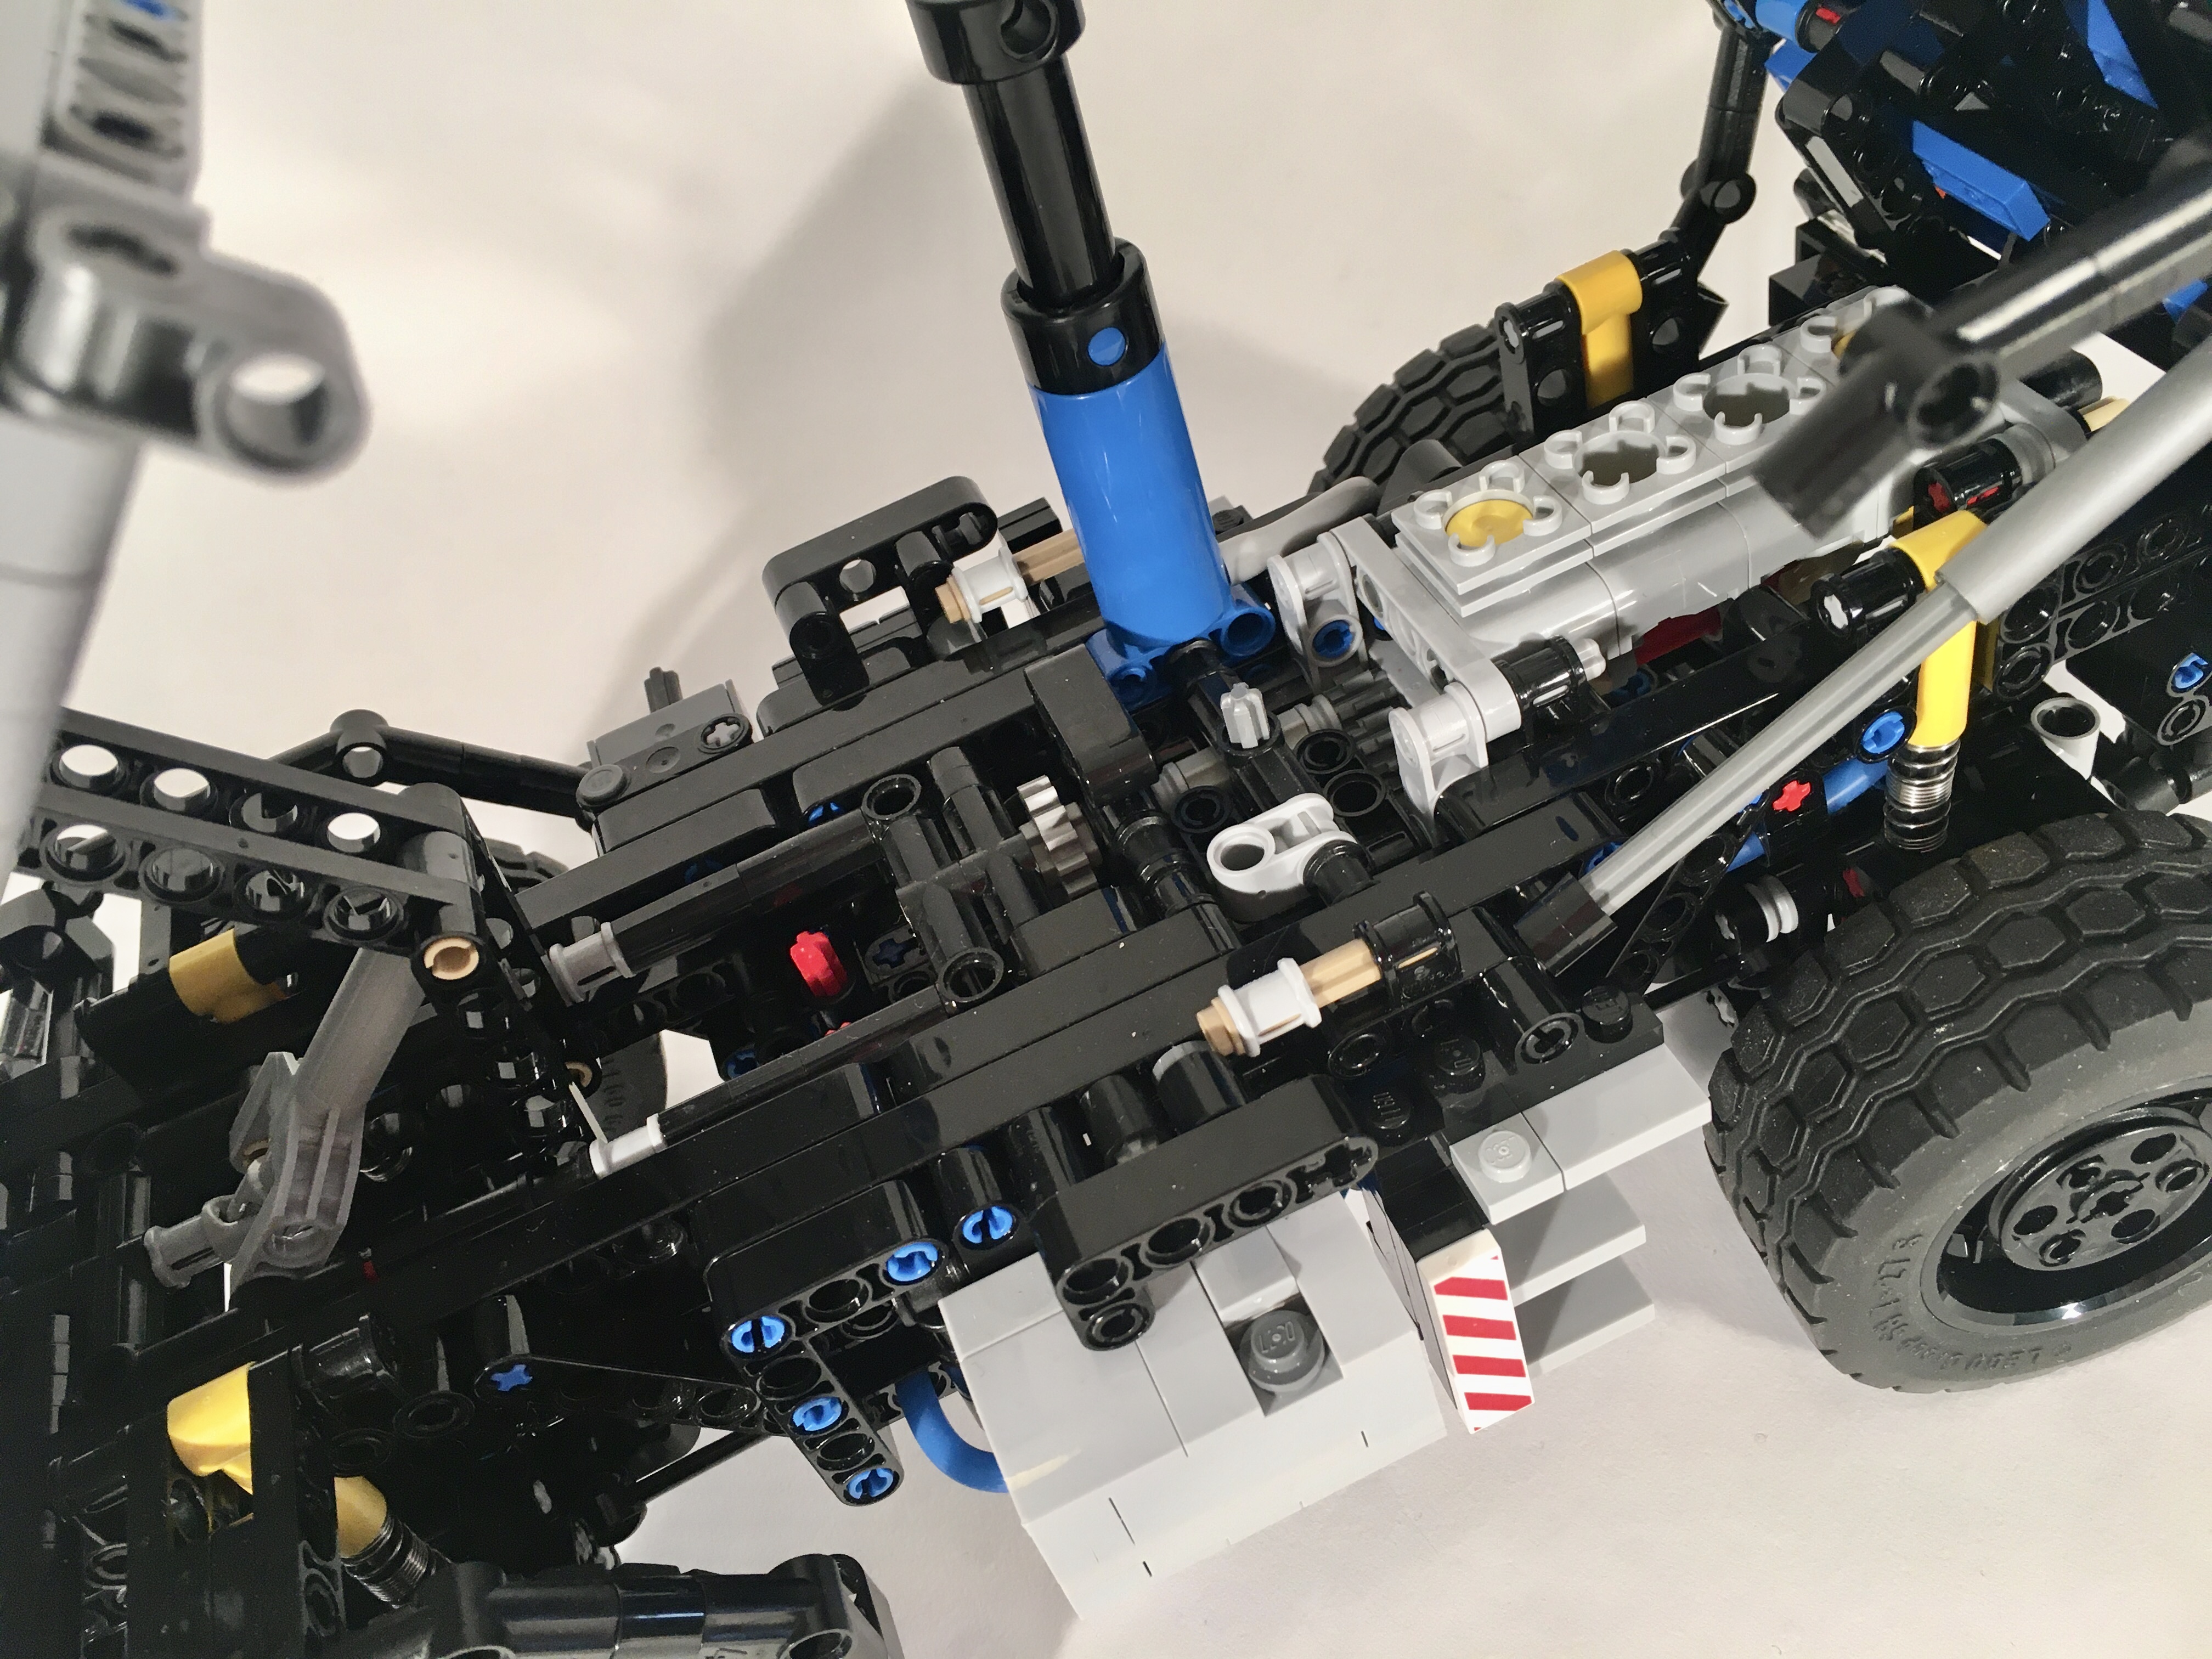
I quickly set up a front and rear suspension using what was learned on the 437. The MOC has front and rear live axle suspension, four wheel drive, and front steering. A I4 engine is placed under the cab, over the front axle. Unlike the 437, I added a front and rear PTO. The rear PTO has an on/off switch. A center PTO is present as well for attachments that go in place of the rear bed. Finally, I added a Pneumatic pump behind the cabin to run pneumatics on the front or rear of the truck. A value determines if the preasure goes to the front or rear.
U500 Chassis
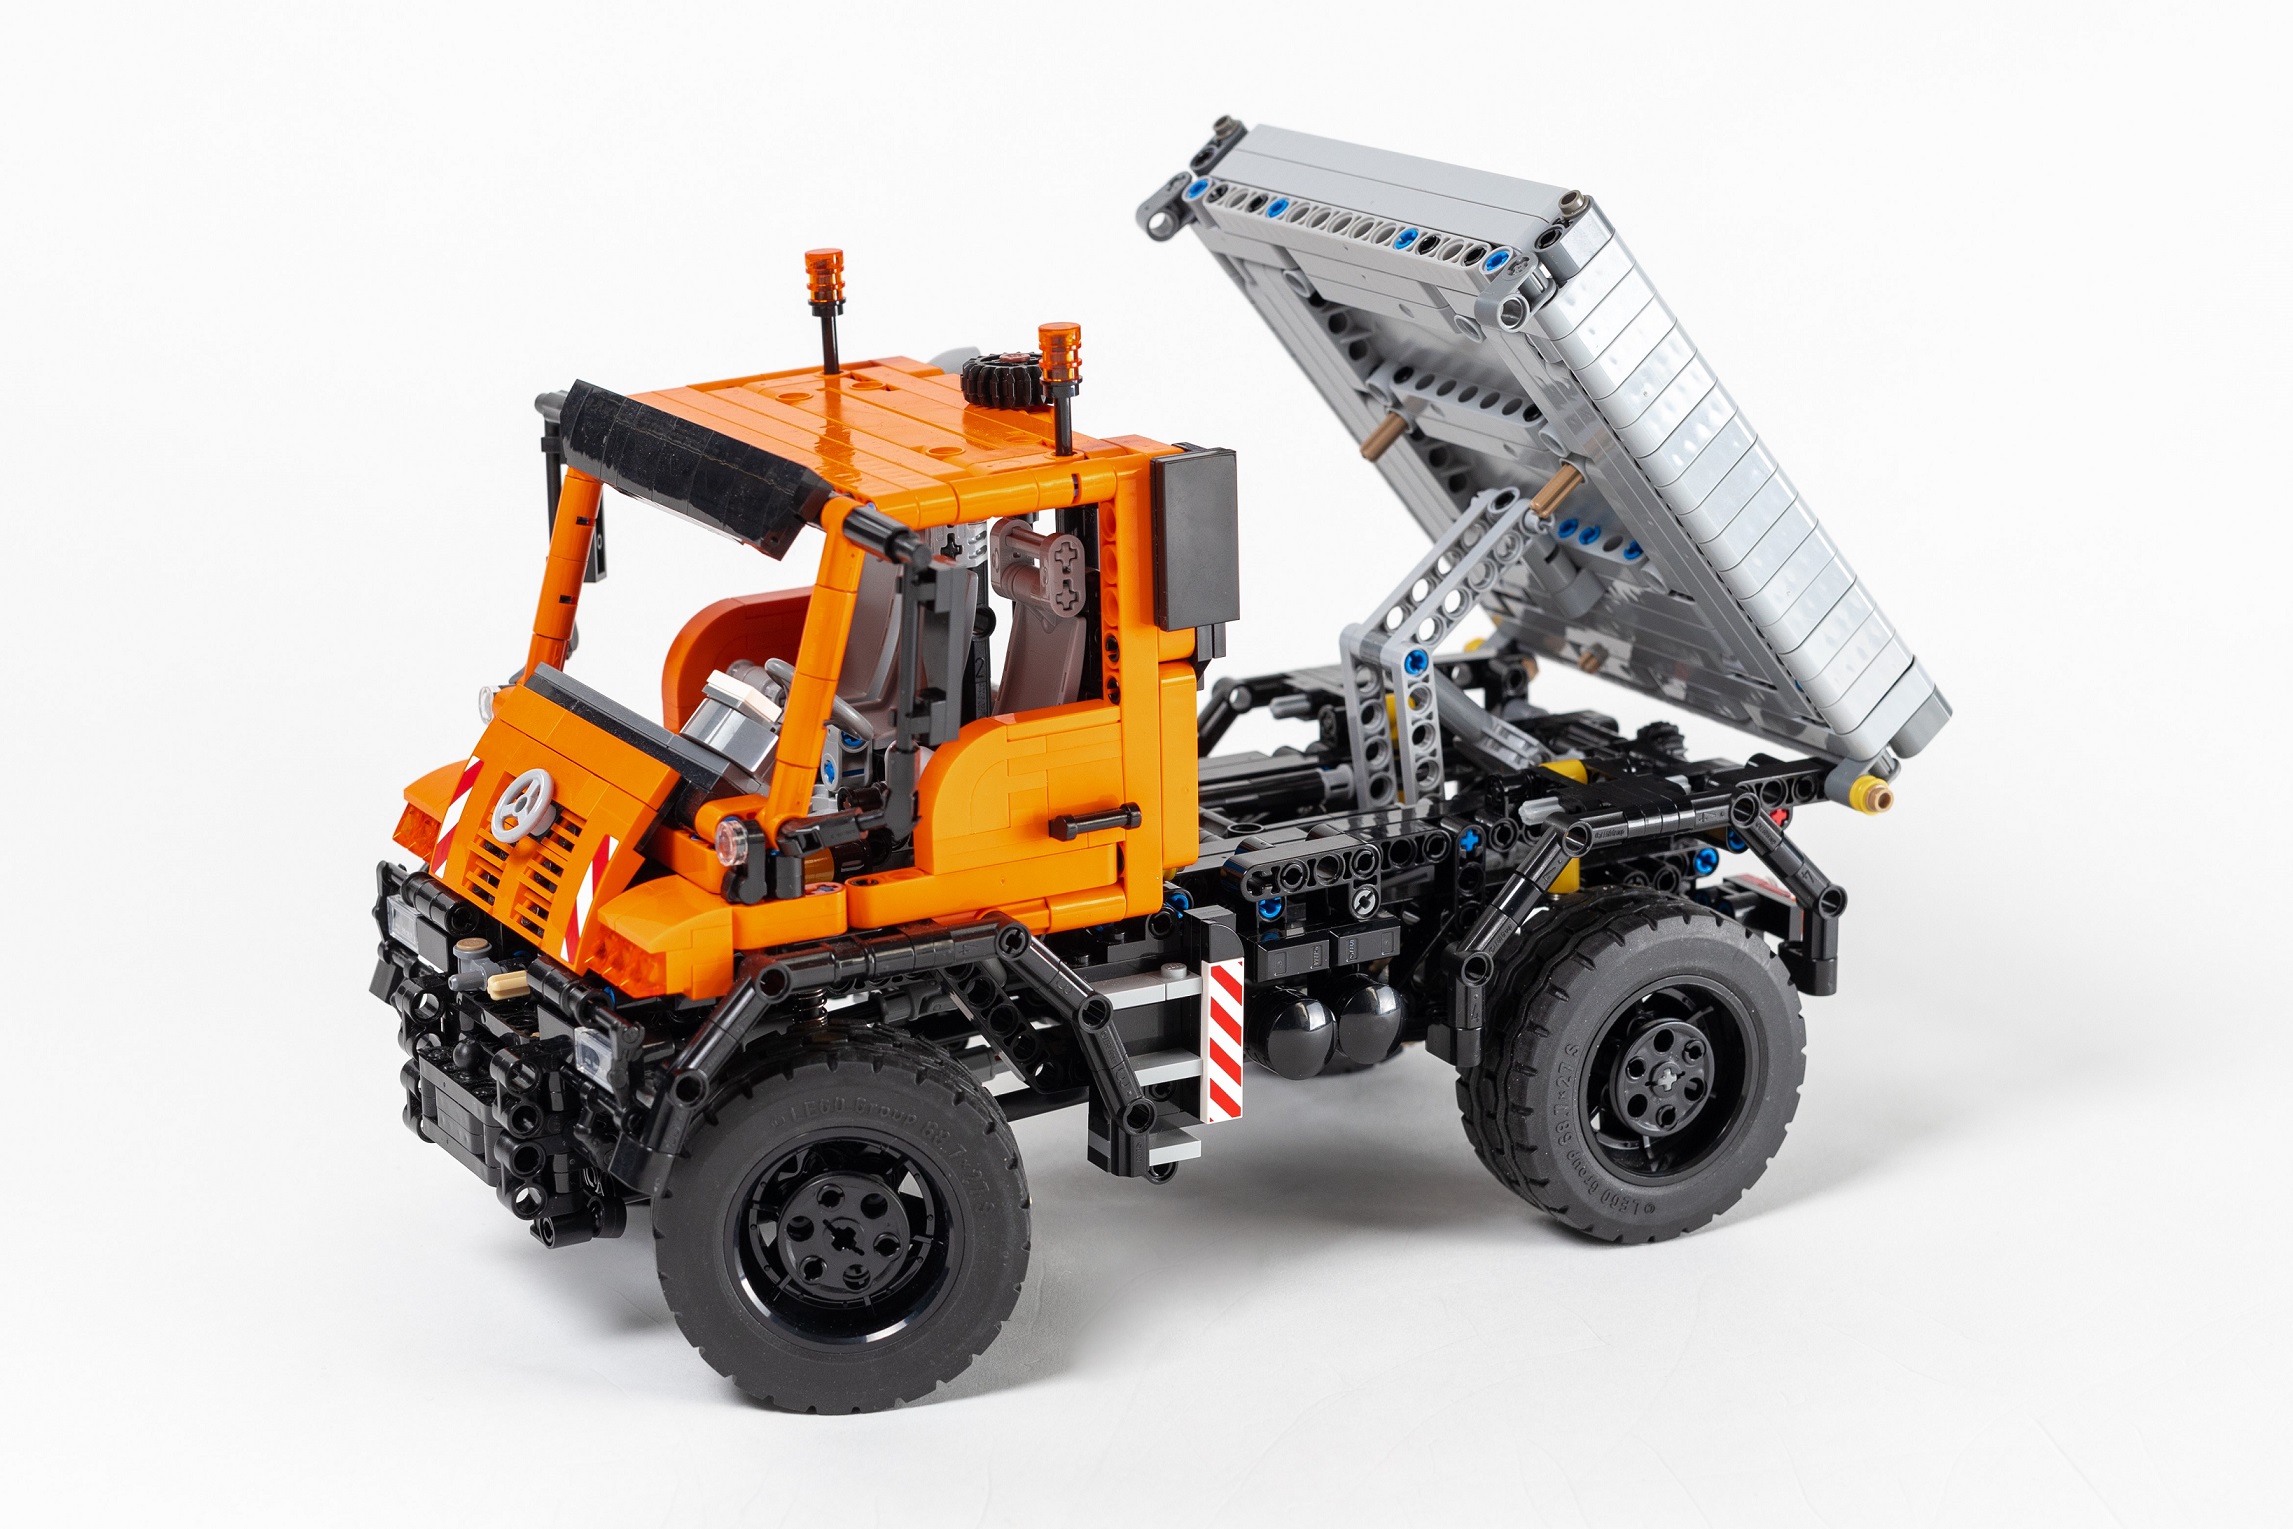
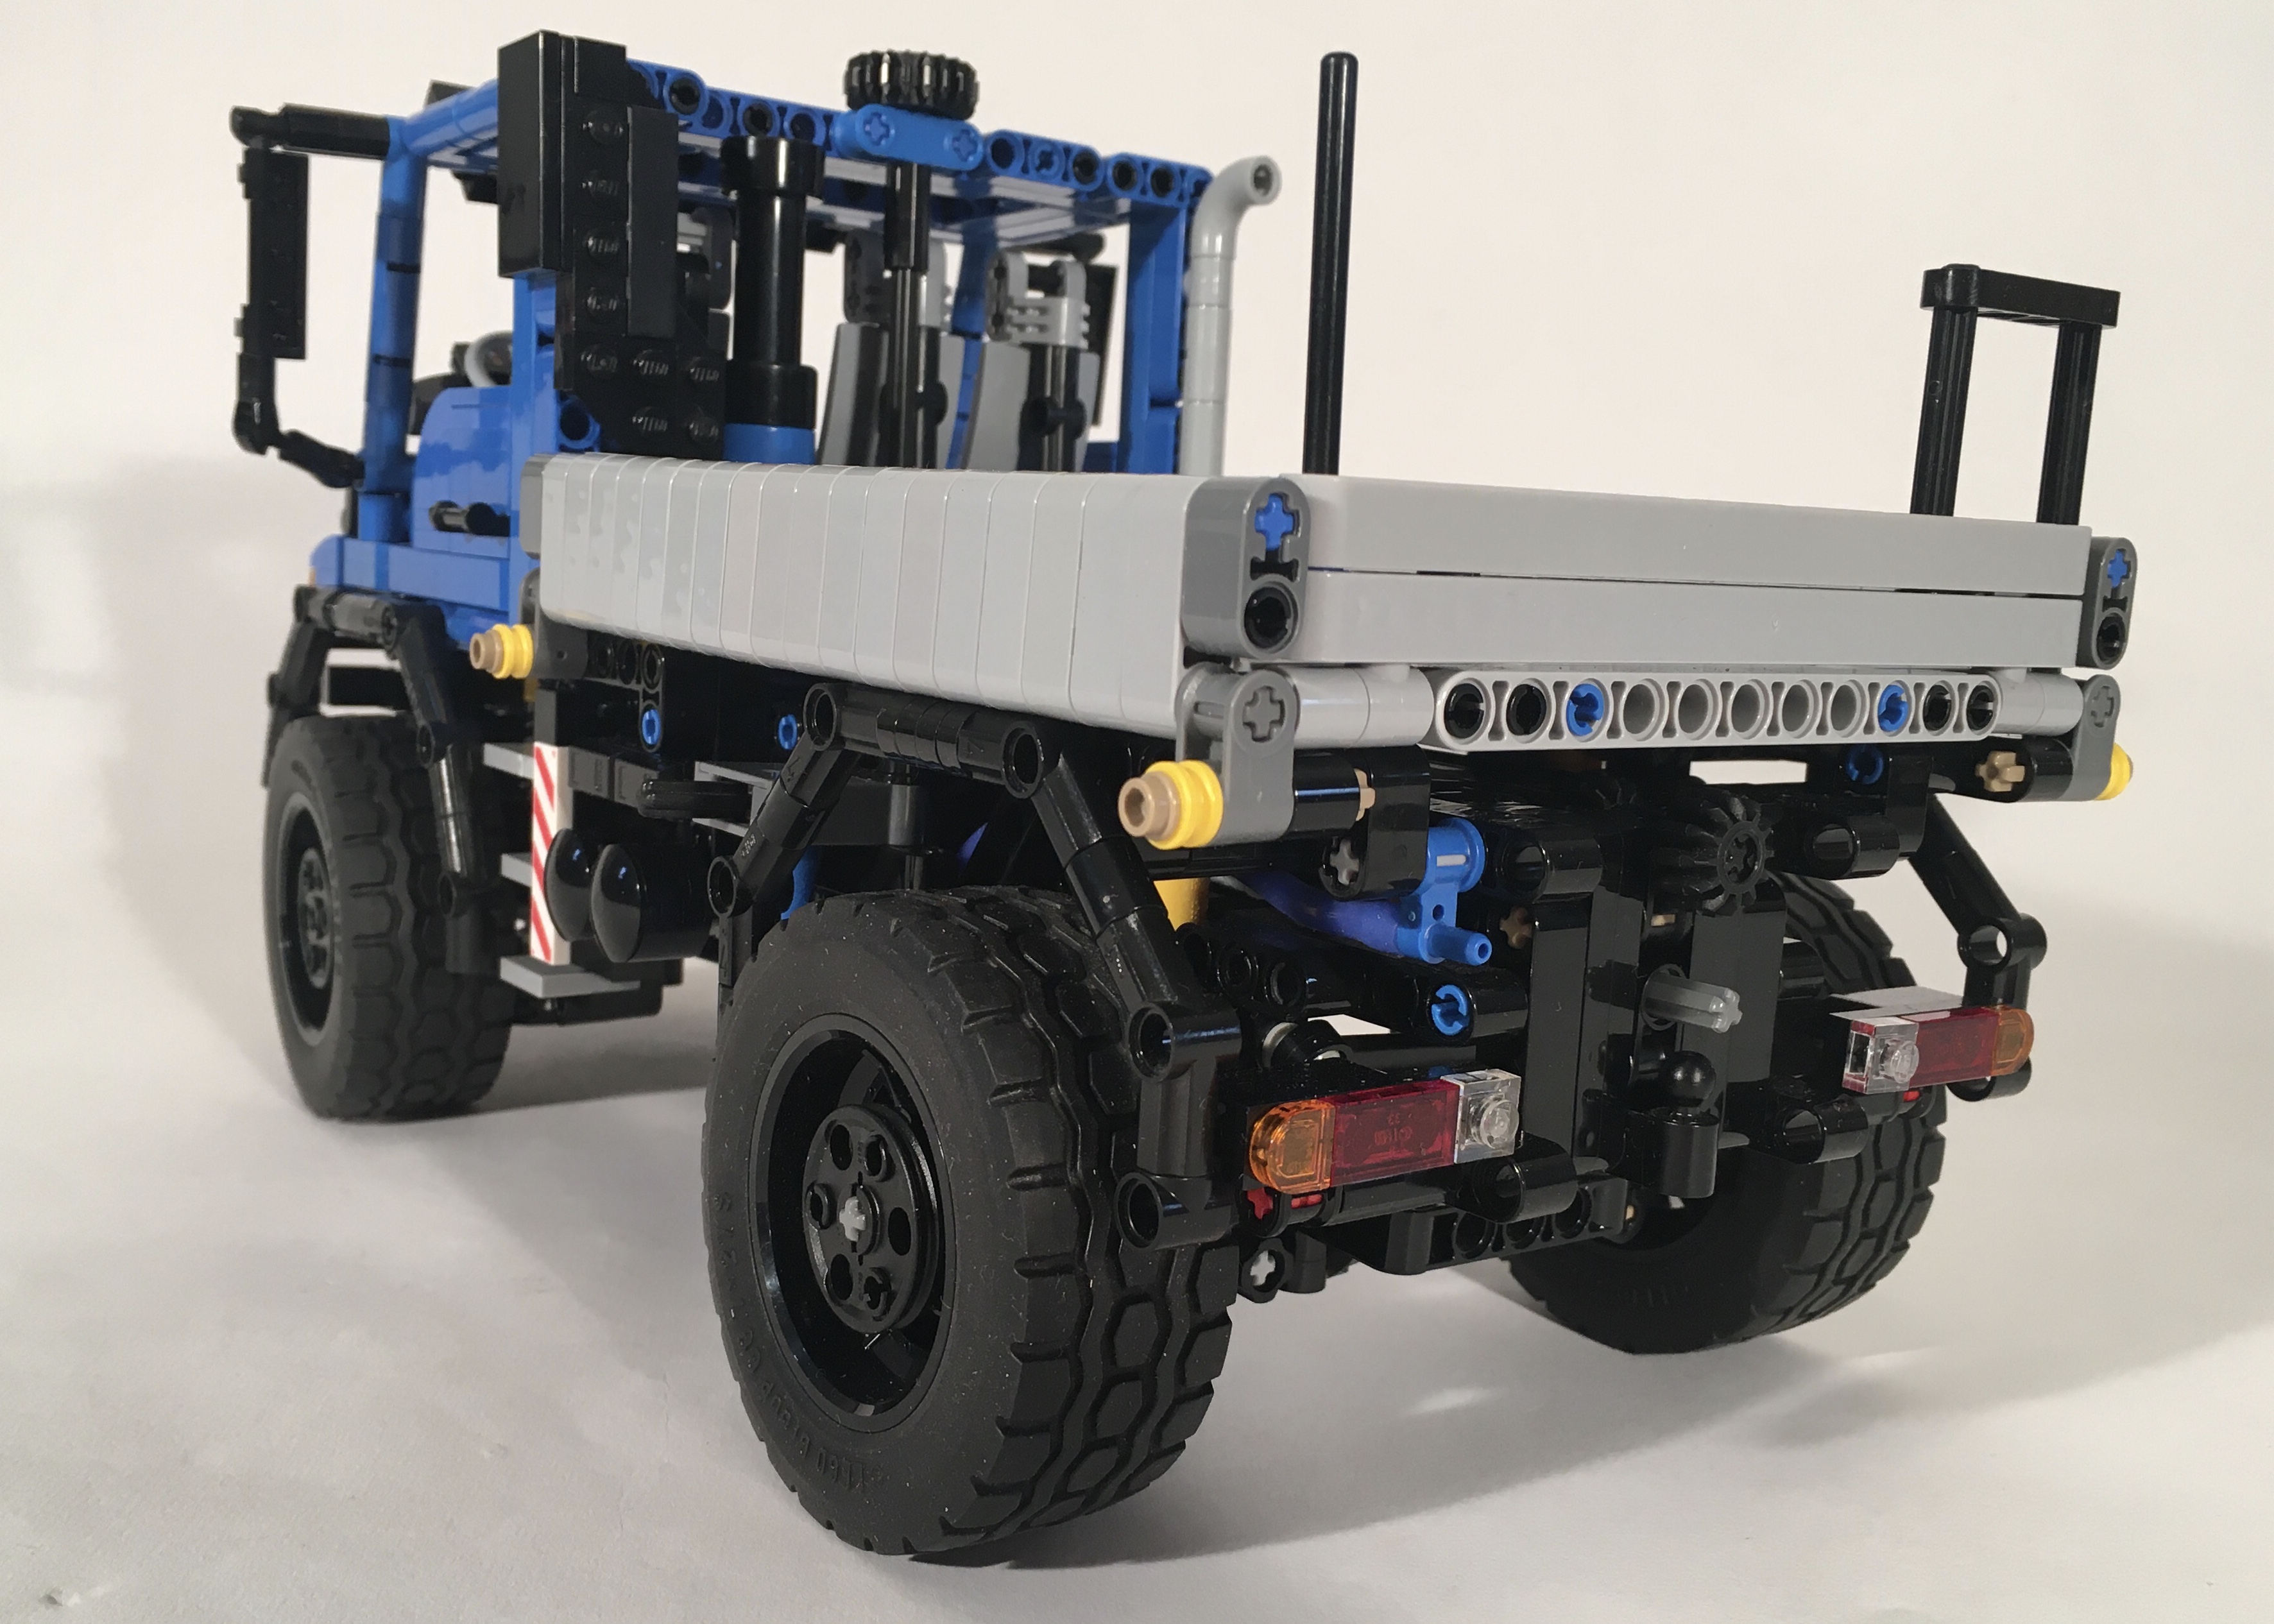
I added a three way tipper bed on the rear of the chassis, and created a way for the cab to be tilted. Both can be released by pulling a couple of axles out to allow for the tipping. The cab has seating for three, and both doors open. Finally, I added a front winch that is released and wound up using the fake air tanks on the left of the truck.
In the coming months I will make some attachments and trailers for this truck and for a U400/430 version that use the chassis of the U500 with some adjustments.
2016 Unimog U430
The truck turned out how I wanted it too, and had the features work the way as intended. The suspension is a little hard, but that supports various attachments well. This tipper bed and winch are a little addictive to play with. I did not spend much time making attachments for this truck, but I hope to do so soon. Until the next build or Unimog, Happy Building.
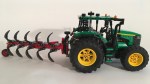
I am into a little bit of a tractor phase lately, so here is a model of the John Deere 6130R row tractor.
The full gallery including instructions may be found here.
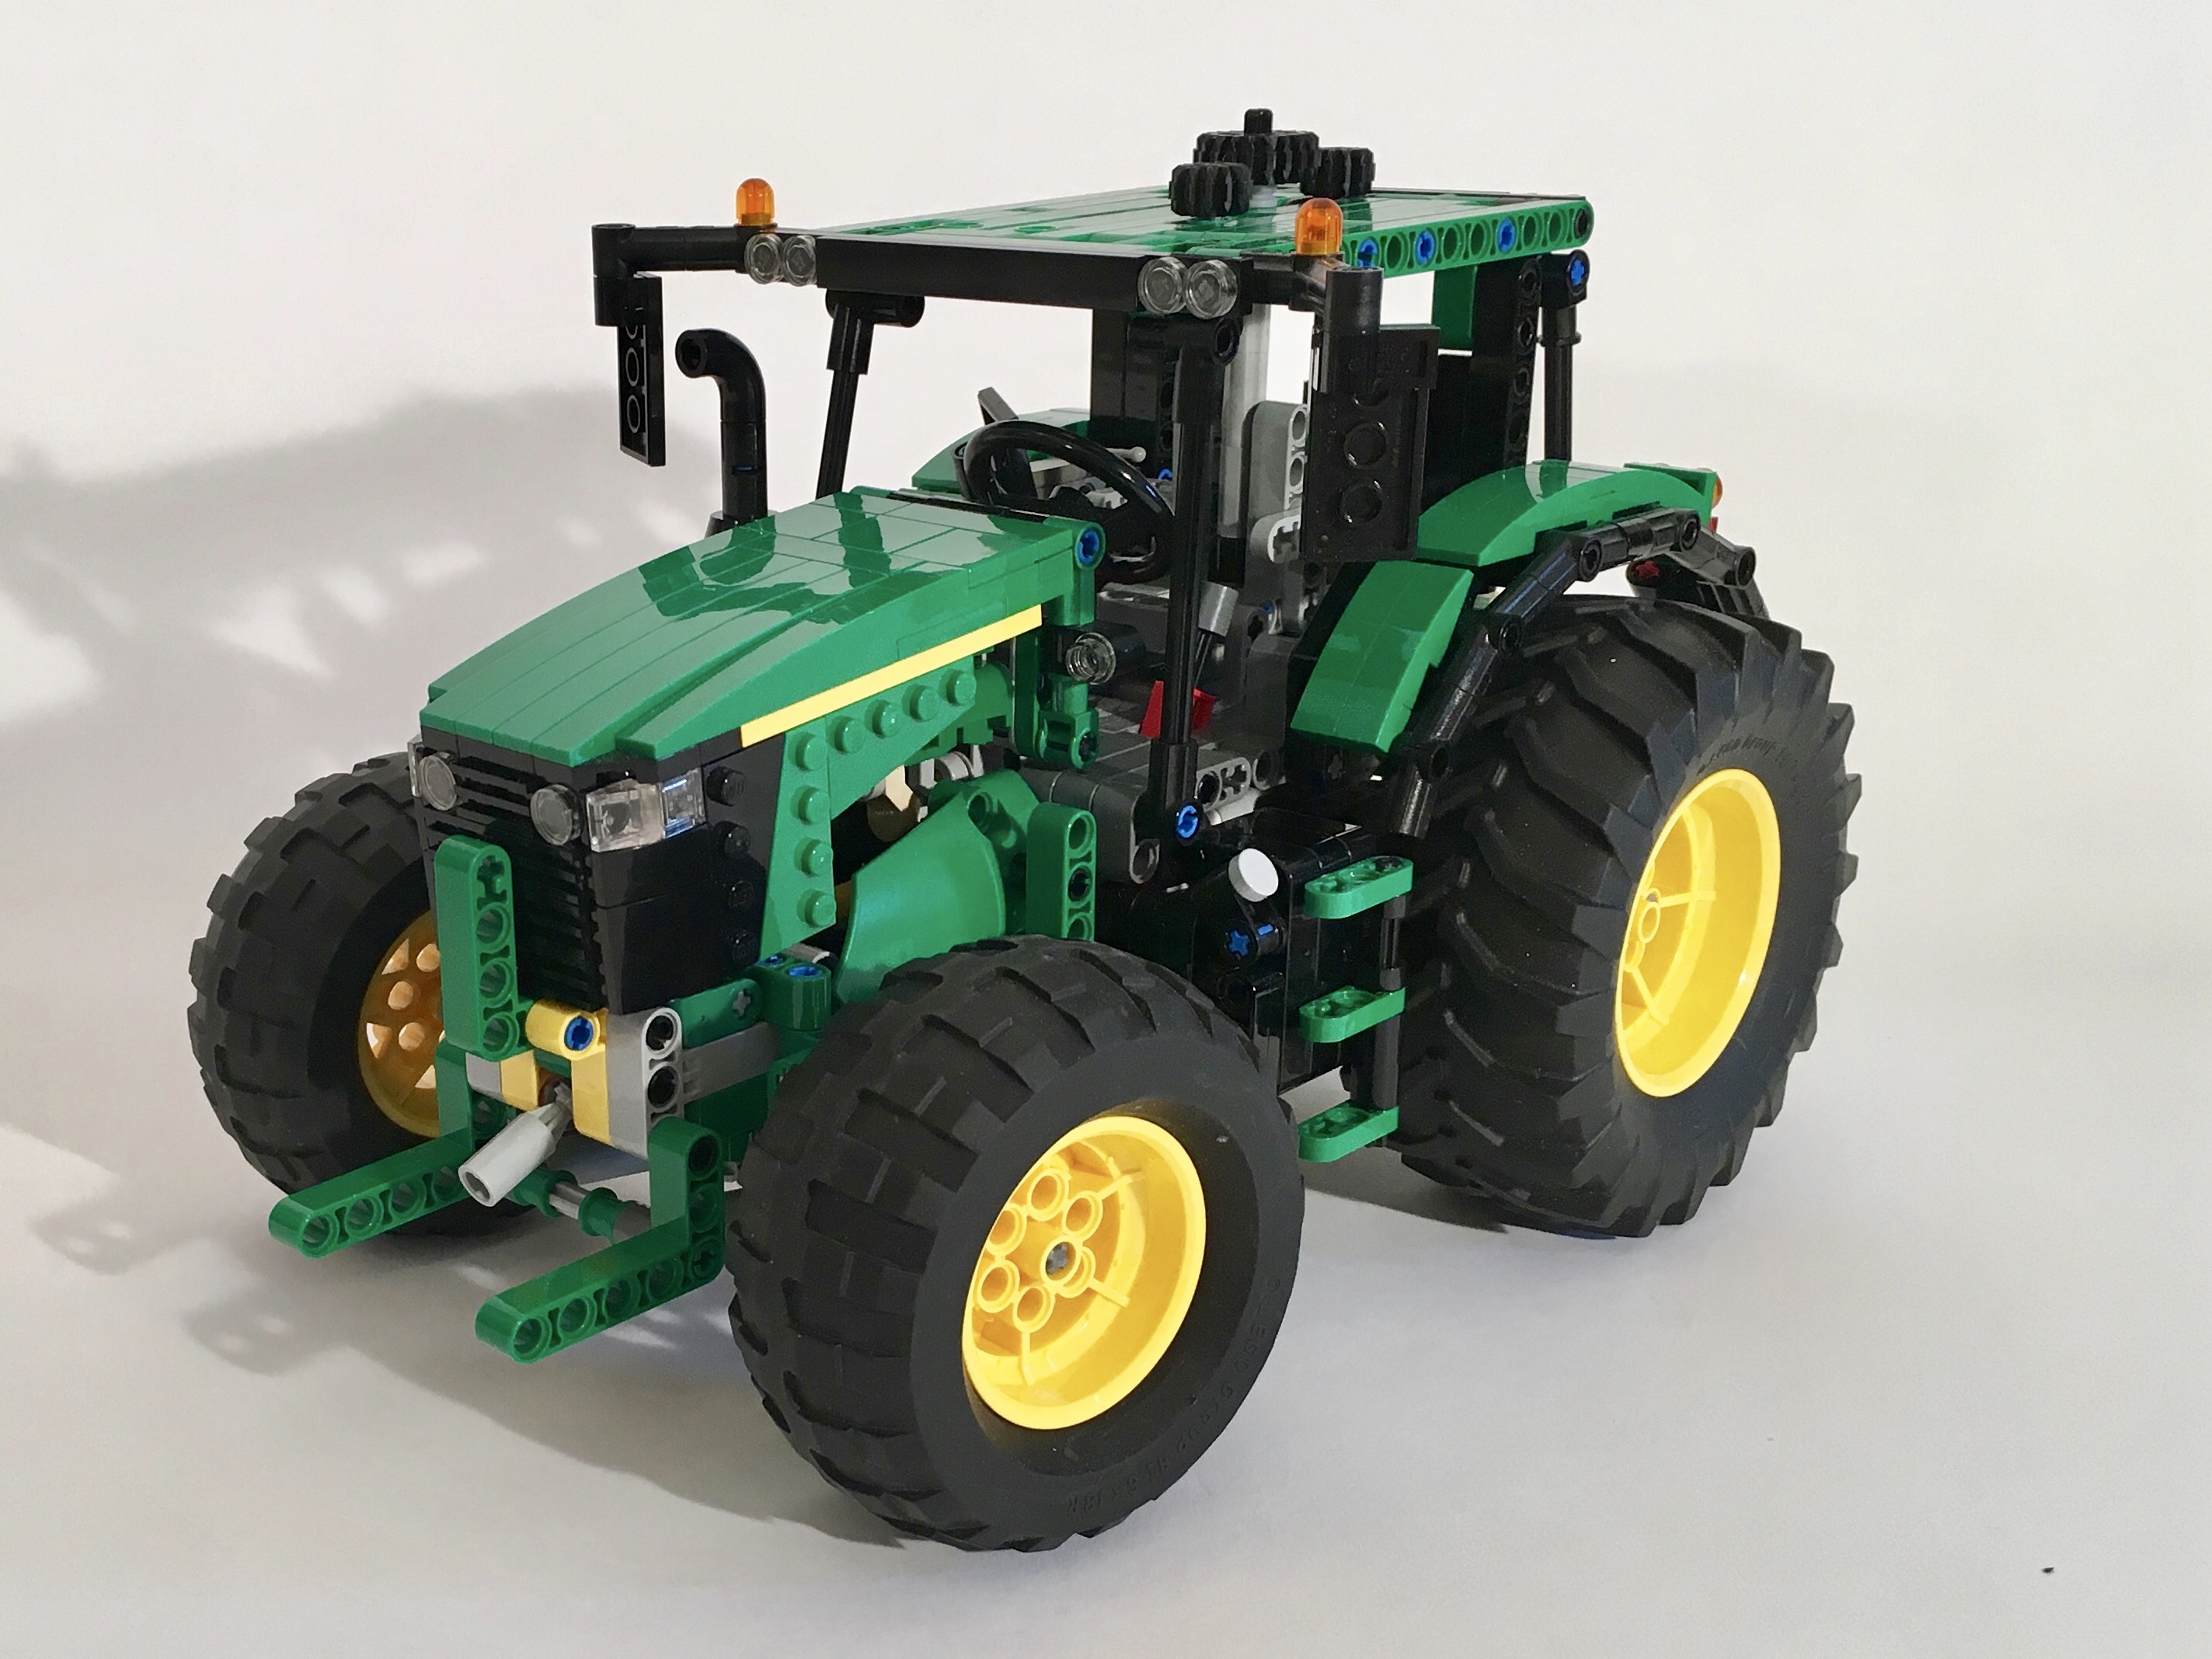
After the completion of my 9393 MOD, and the Claas Atos, I wanted to expand on what could be done in the tractor theme, and I wanted to use the newish large technic tires that first came from 42054. I set out to set the scale and list some of the features I wanted. I decided on a John Deere tractor, because green looks sharp in LEGO, and the hubs I would need were available in yellow.
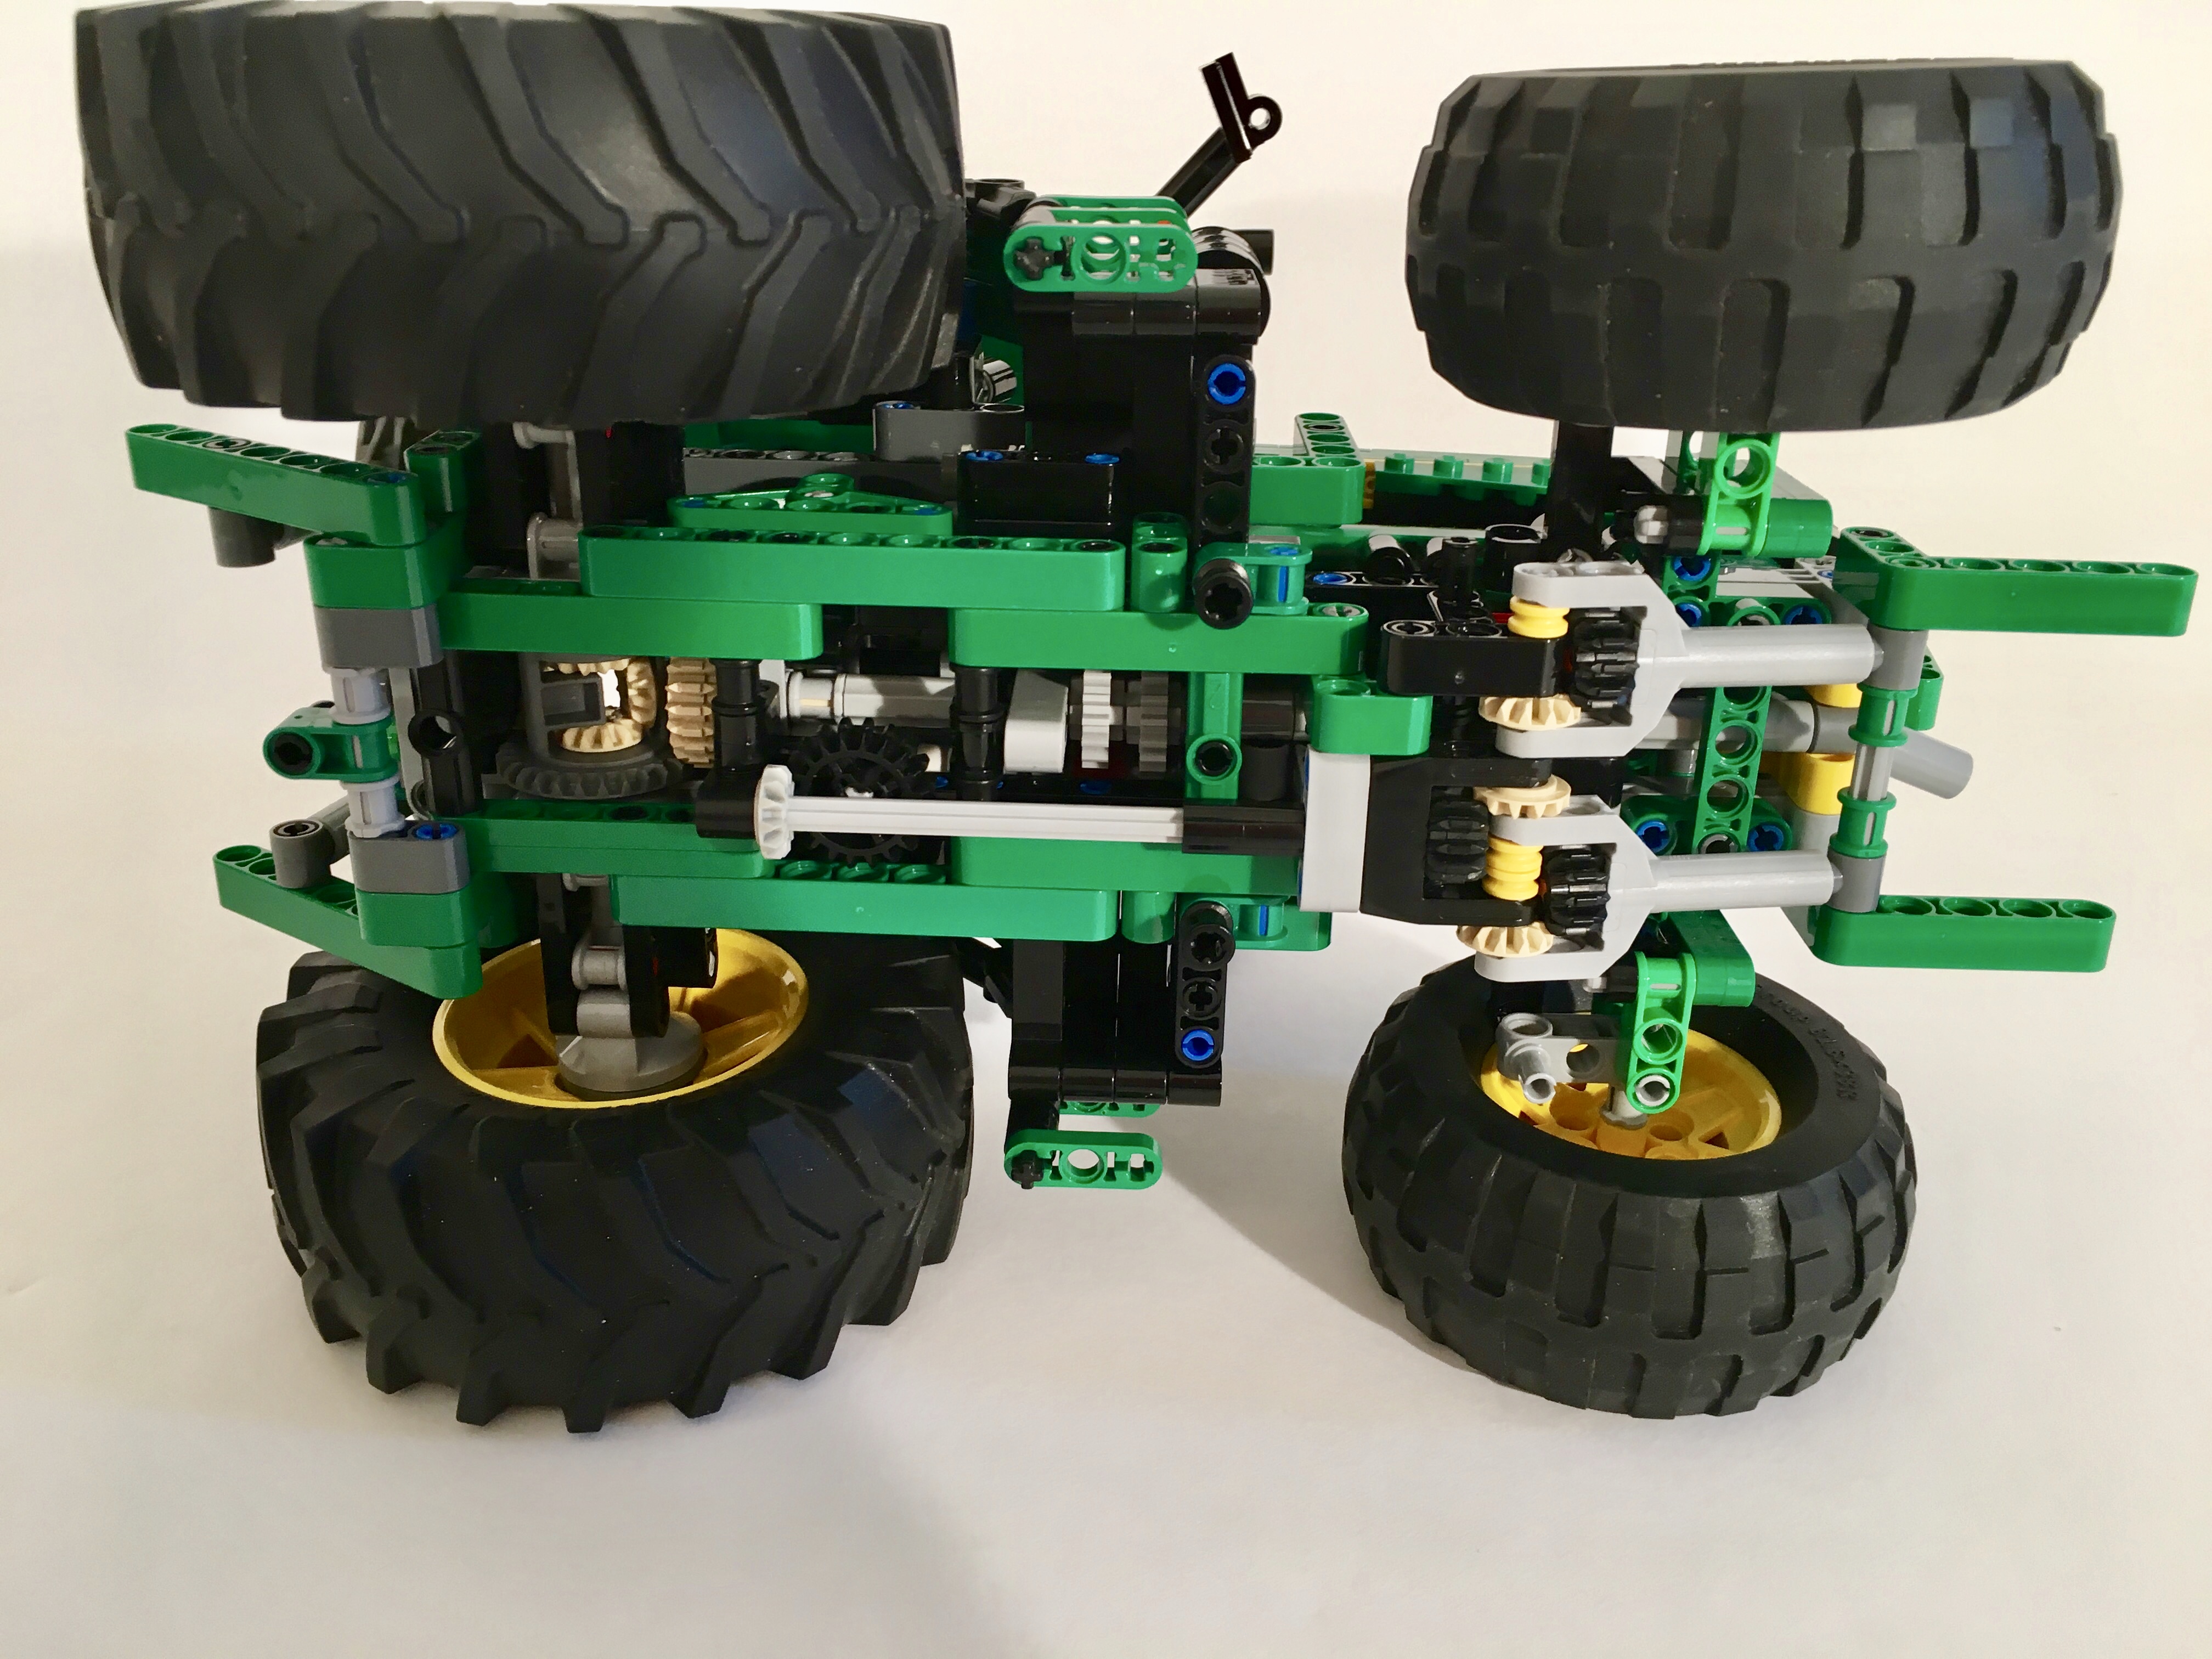
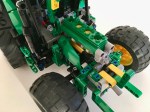
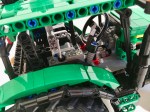
I first started with the driveline which is simply a differential between the rear tires, and a couple of gears to the I4 engine (green of course). The steering was the second feature added, and runs from the HOG on the roof, goes through one bevel setup to the rack under the from engine.
The tractor also has a front and rear PTO, with dual on/off switches, and front and rear drawbars. These features were a little tricky to add. The PTO on the rear is connected to the driveline on the right by a changeover catch, and routes rearward over the rear axle. The PTO on the from is connected to the driveline on the left, and routes under the steering axle to the front. Both drawbars can be raised and lowered by a HOG on the roof ahead and behind the steering HOG. Both use two mLAs to raise and lower the drawbar, and both can hold enough weight to tip over the tractor.
Working on the body work took some time. After trying a couple of technic options for the front hood, and rear fenders, I settled on an option that uses mostly system bricks. I was pleased how it turned out as it does not subtract from the look of the tractor too much. The hood can open to see the engine.
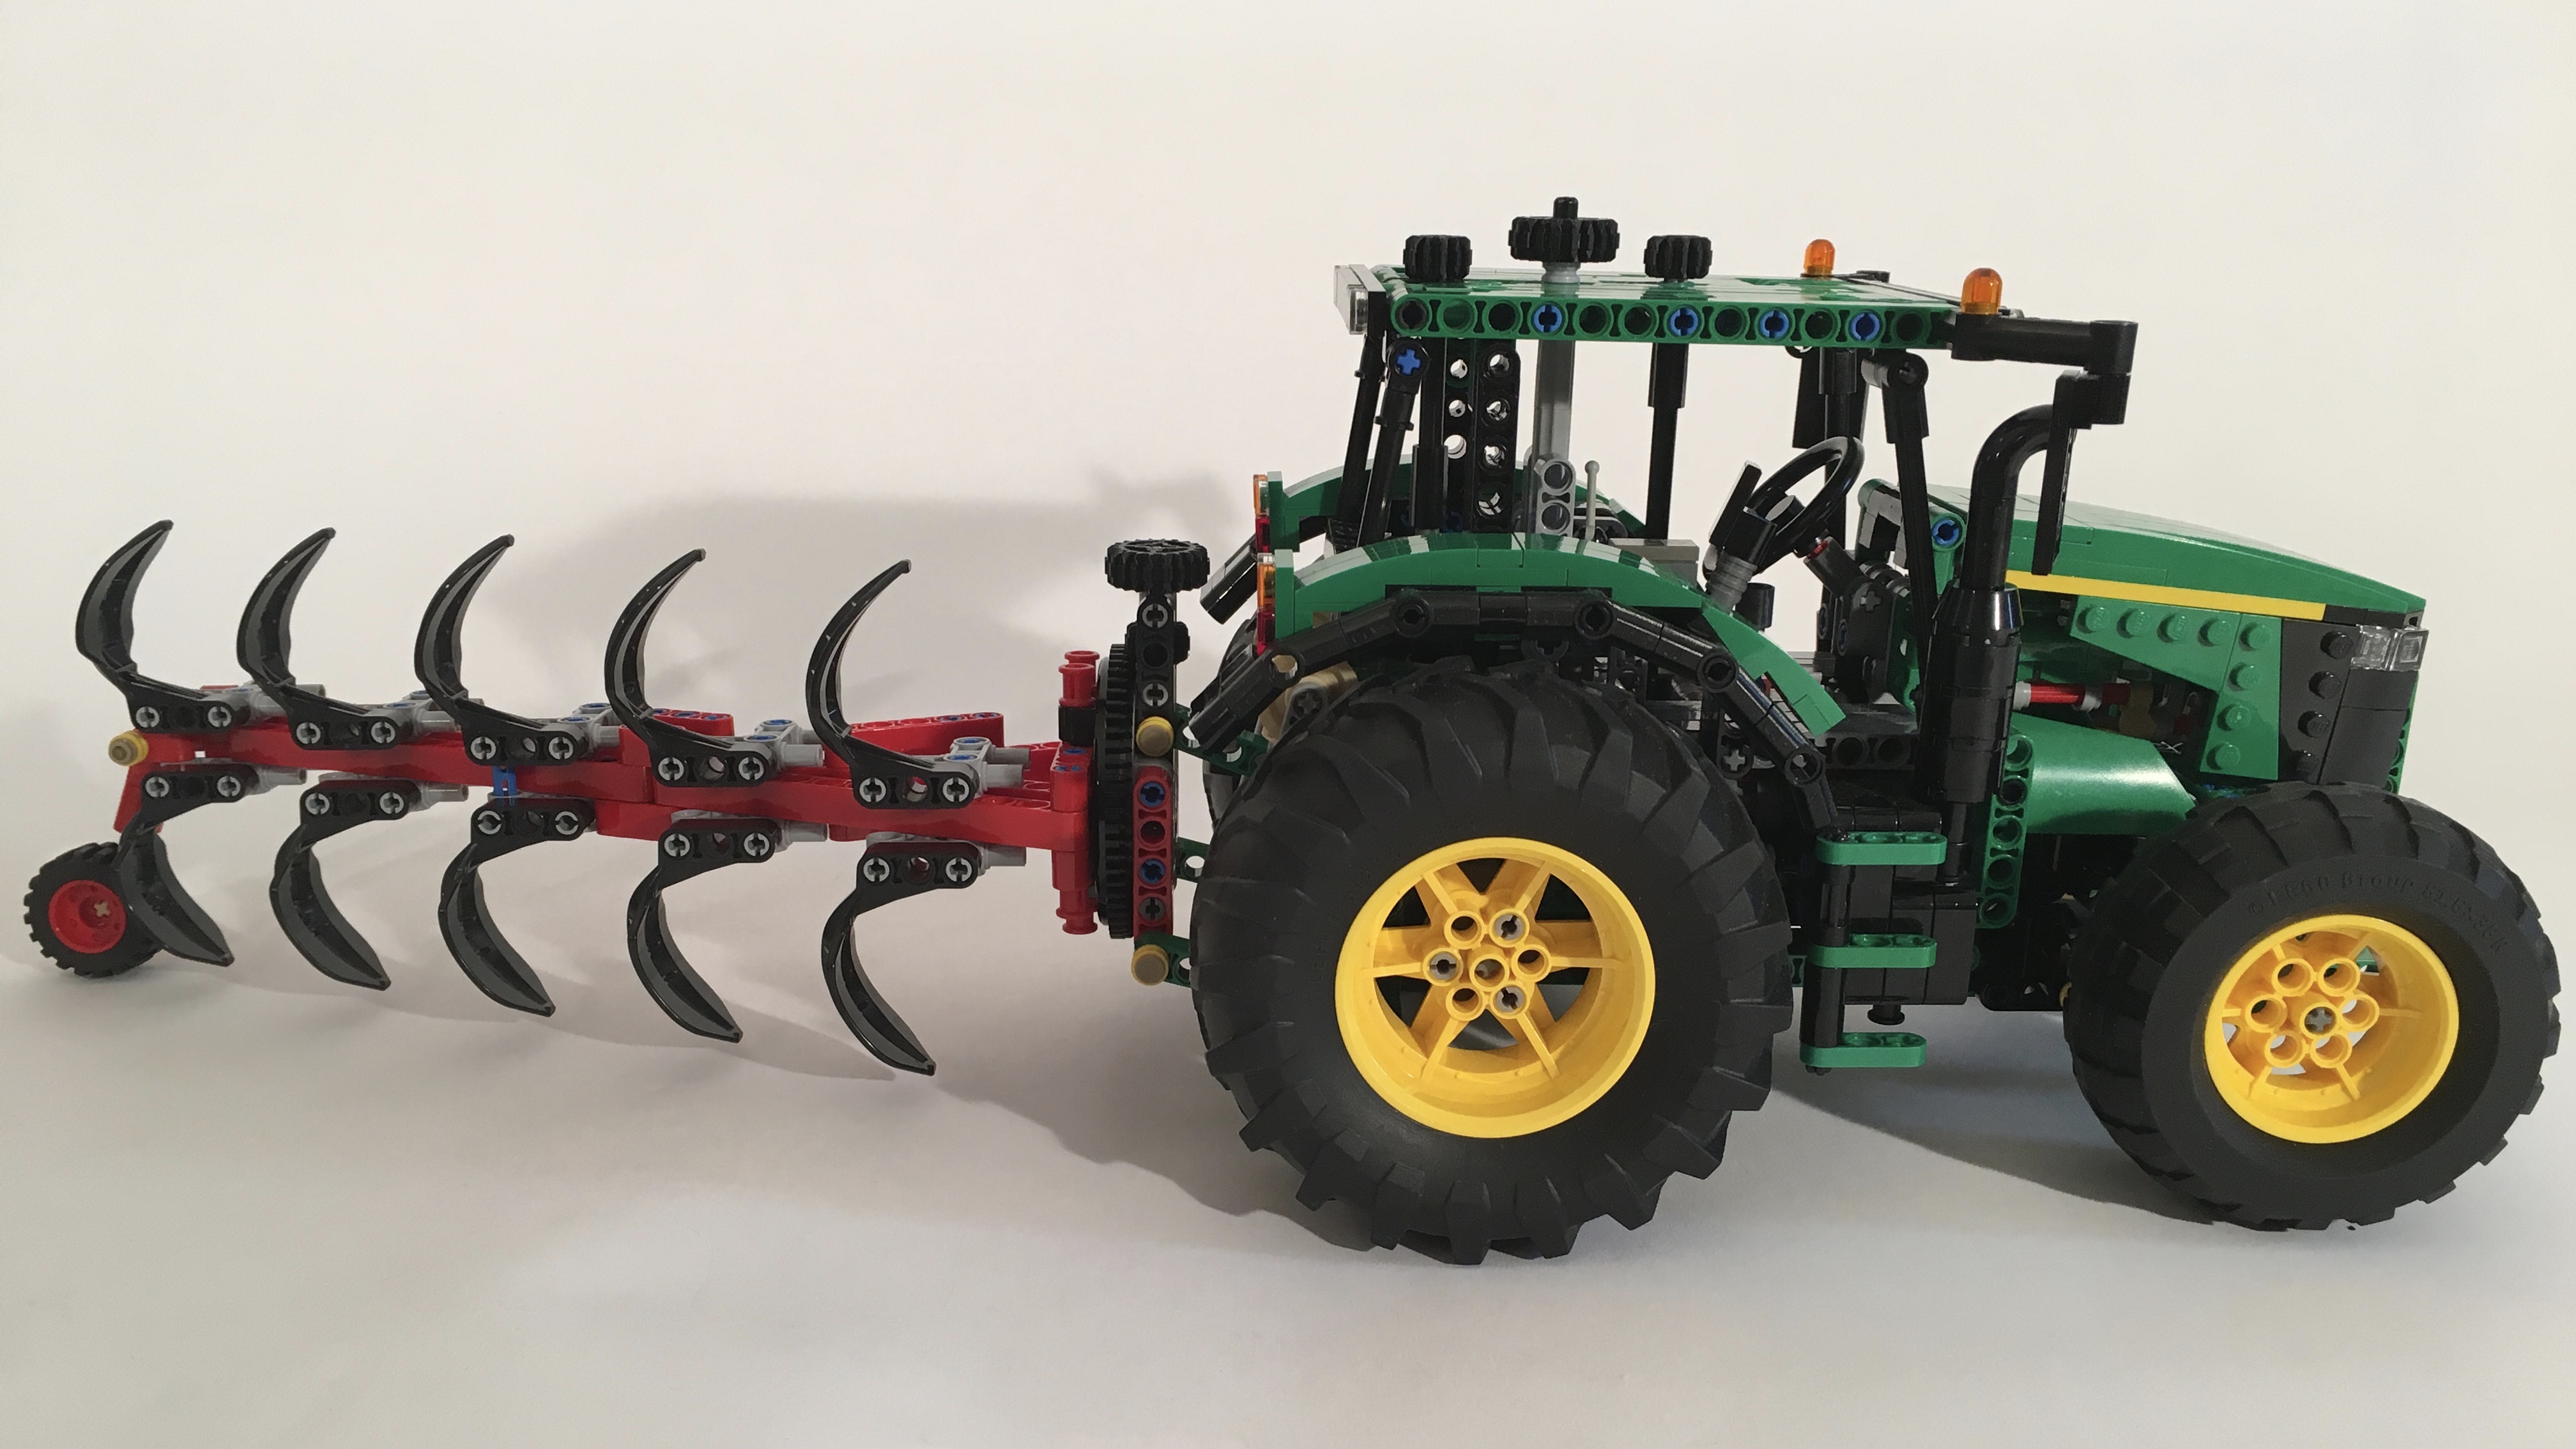
The tractor worked well, and all the features functioned as they should. I will continue to design implements, and test them out as long as the tractor stays built.
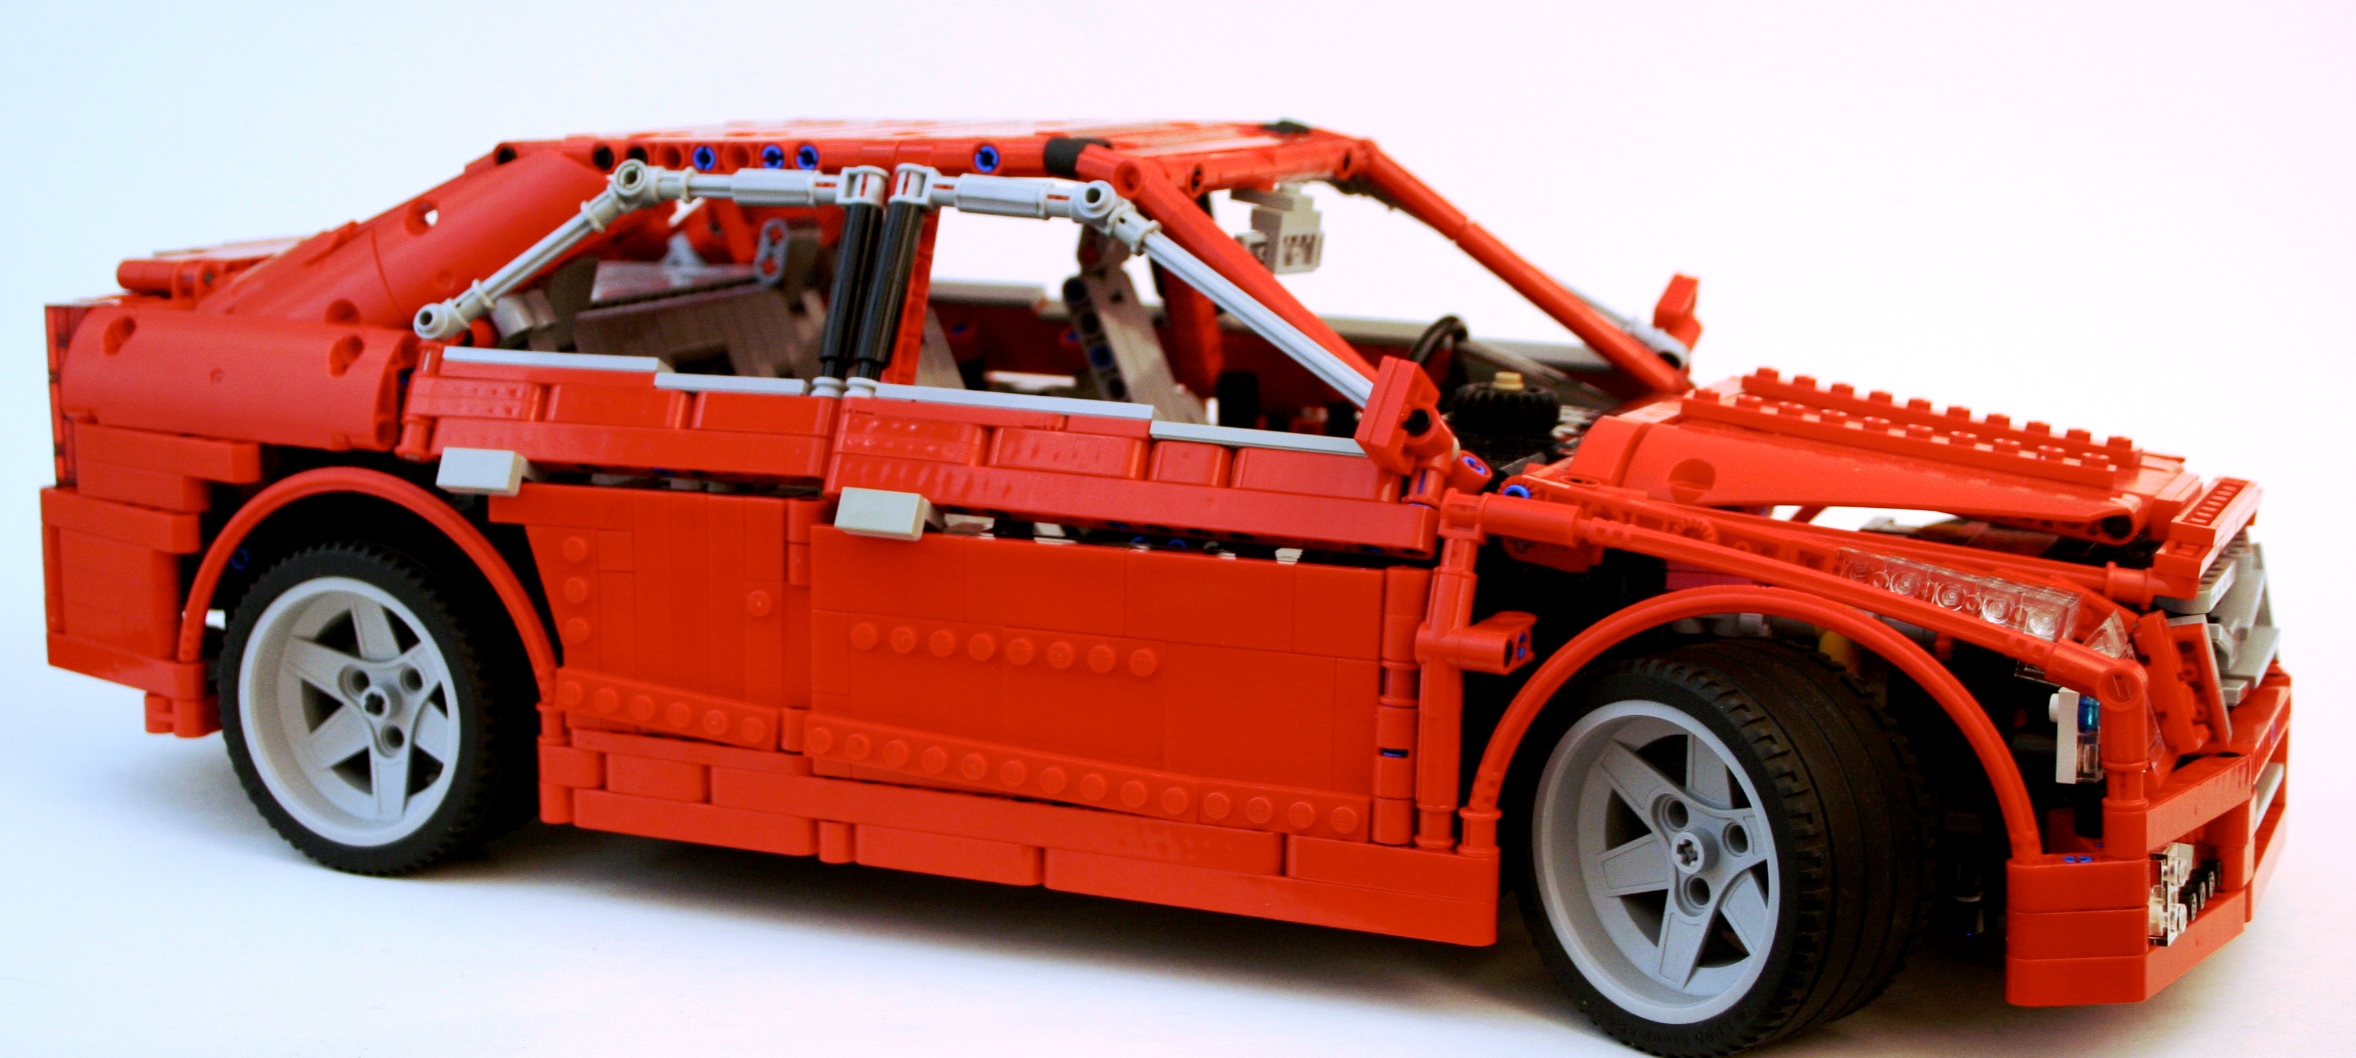
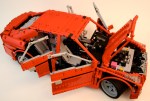
A while ago I decided I was going to do a proper new school supercar. Something with all the features that are to be expected in the LEGO Technic Community. You know what they are; suspension, a gearbox, opening doors, a working engine, steering, and something fast looking. Probably red. It was time to test my chops and throw my hat into the ring.
The full gallery can be viewed here, and instructions may be purchased for $9 USD. Partlist
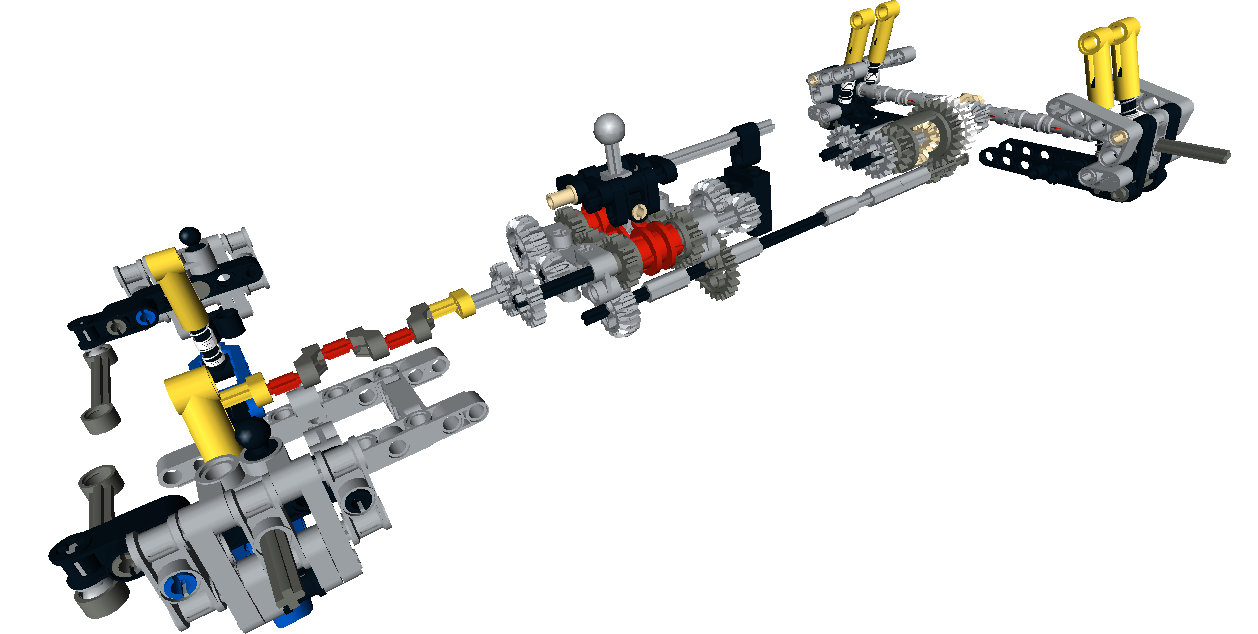
It has been a long time since I have built a supercar. While I enjoy many of the cars others make, I long for exceptional creativity in suspension design, gearboxes, and body style. It was time for me to build another one and contribute to these areas. About two years ago I set out to create a six speed gearbox that would have a more realistic gear change movement. I tried linkages, springs, and so many gears. In a bit of a breakthrough, I offset the two outside changeovers vertically by 1/2 stud. This allowed for the changeover lever to connect all three changeovers as it rotated from a single center pivot point. Once this design was completed, it needed a home.
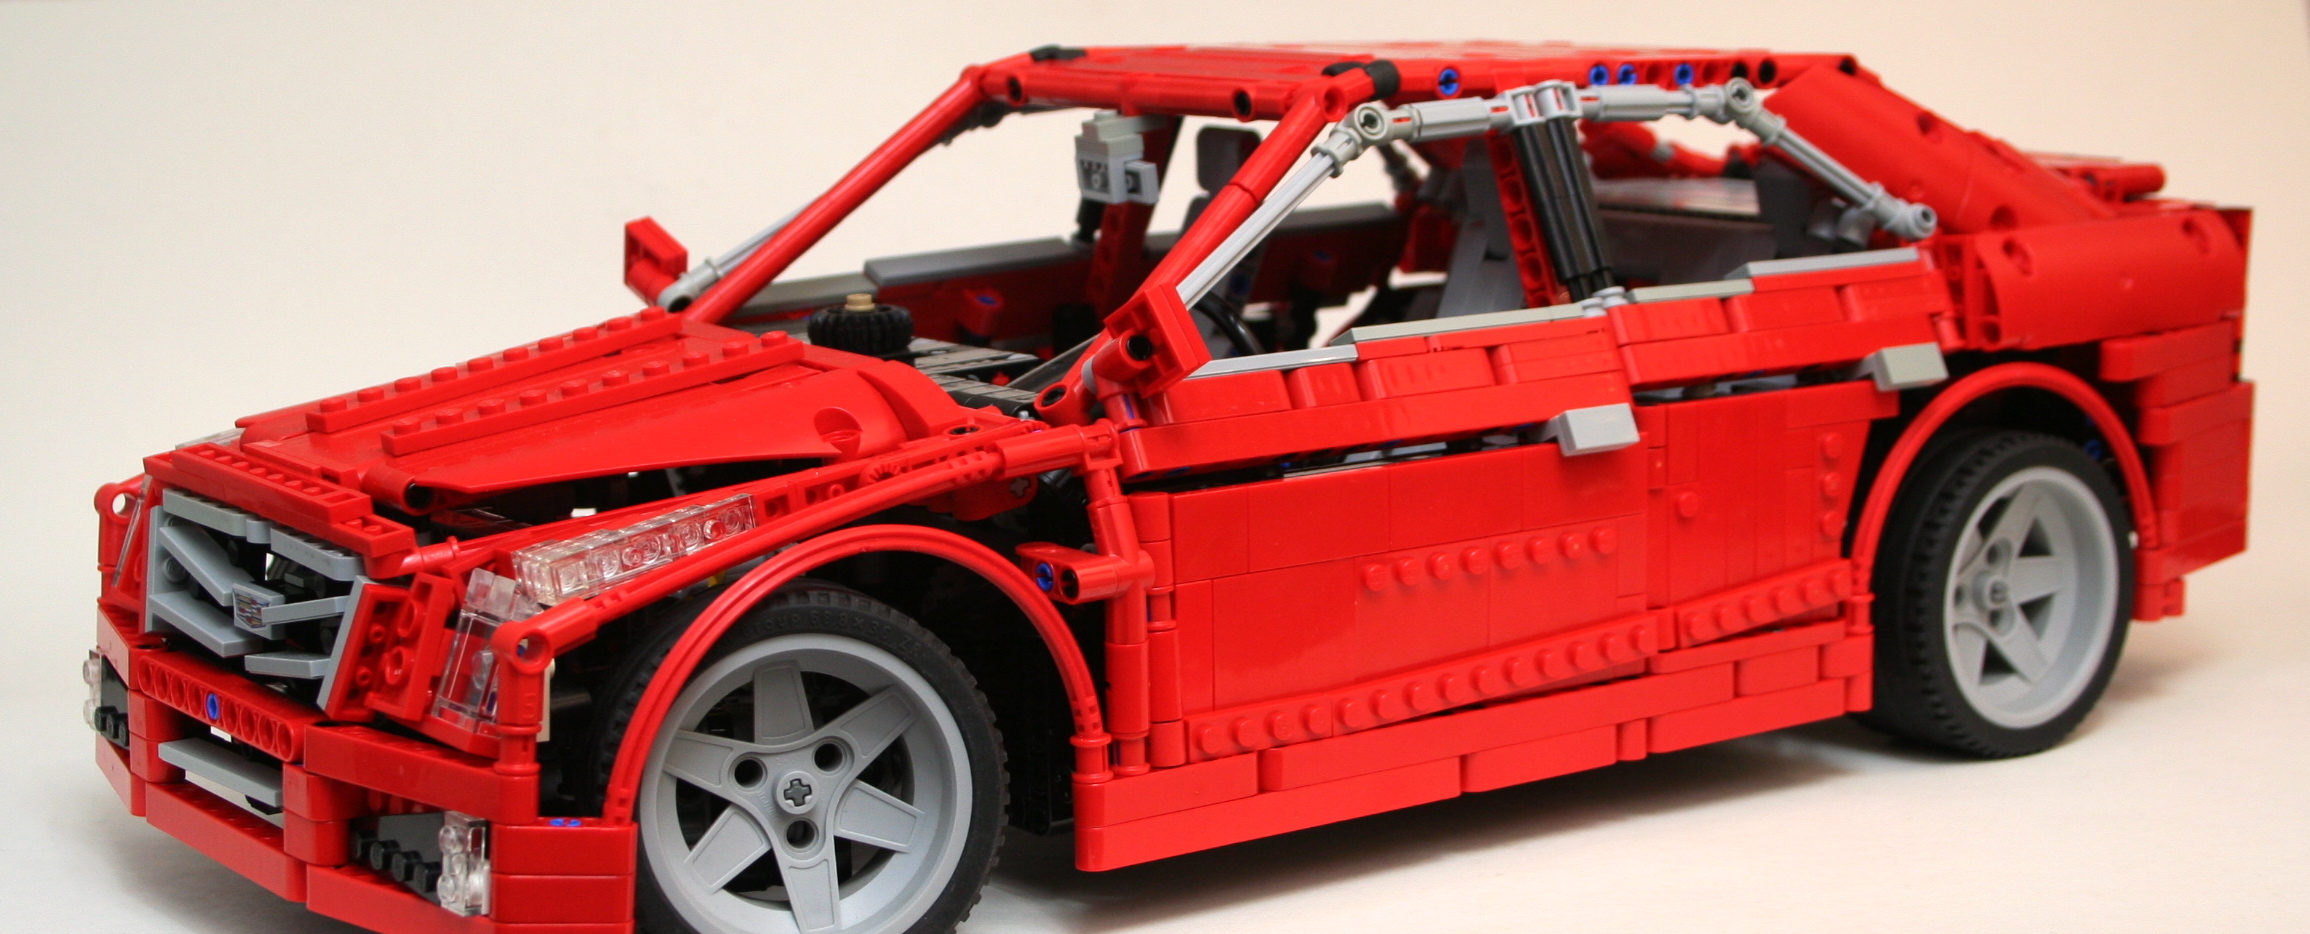
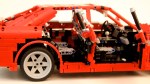
I have a preference for sedans rather than coupes. Plus too many two-door supercars have been created. Forgive the slight nationalism, but I thought it would be fun to do an American sports sedan, so a Cadillac was the best choice since the demise of my beloved Lincoln LS. The ATS was new, and at the scale would be a little more manageable than the CTS. I worked a little on the scale of the car. Some parts would be a challenge to convey the look, but I was ready to start building.
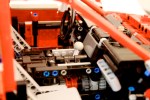
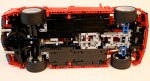
I started with the front suspension. The new suspension arms allowed for a short/long arm setup. The two different arm designs allowed for a increasing negative camber as the suspension moved through its travel. Additionally, the pivot points on the steering hub allowed for a kingpin inclination to provide an improved caster angle. Finally, I added Ackerman geometry to the steering link. After some work mounting the suspension, and the rack and pinon steering, I had the front suspension done.
The rear suspension was more simple, but still had some unique features. While the real ATS uses a 5 link setup in the rear, I was not too impressed with the results I came up with as too much flex was found at the wheel. I started with a transversely mounted limited slip differential that I have used before. This connected directly to the two half-shafts for the rear wheels. I applied a short/long arm setup for the rear suspension so the tires would keep their contact patch as the body would roll through a corner. Like the front, this created increasing negative camber as the suspension moved through its travel. Normal in real cars, not often replicated in LEGO.
Tying all of these parts together was a little bit of a challenge. I wanted the steering wheel to be connected to the steering as well as a HOG knob on the dashboard. In addition, the doors, trunk, and hood should all open. Naturally, the car had to have a spare tire, and various engine options which could be easily removed. The chassis had to be stiff enough for the suspension to function well. Packing this all together took some time. About 9 months, but who is counting?
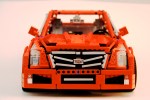
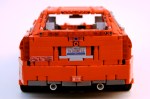
But what took the most time was the body work. This is the part for which I have little motivation, and the important part that would identify the car as an ATS. I had a lot of work to do. And my palmares have not trained me well for this task. After major parts were placed, and the dimension were set (37 stud Wheelbase, 60 stud Length, 25 stud Width), I worked on one section at a time. As the front bumper was part of the chassis, this part was developed early. As did the rear bumper. The headlights are unique for the ATS, so this was done early as well. After the roof was placed I worked on the trunk, which came together rather easily. I worked on the hood of the car, and after two designs I was happy with the result. I then worked on the grill, and after tinkering with a couple of SNOT techniques, I was able to get most of the distinctive Cadillac grill in my design.
Then off to the doors. I made seven designs. Most sedans these days have various creases that identify their sedan as different than any other sedan. You will notice the ATS has two, one on the bottom that rises slowly to the rear, and one midway up to the windows that moves along the length of the car from the hood to the trunk. The top line was accomplished by having the angle for the windows start a little lower on the front door and higher by a 1/2 stud on the rear door. The bottom crease was added by attaching some angled plates to the bottom of both doors, which cant slightly inward. Finally, both doors have an upper pivot point that is 1/2 stud inboard to bring the upper part of the doors toward the center of the car. Once I got a design I liked, I had to bring it all together to make sure everything fit well. I adjusted the roof, modified the hood, tightened up the dashboard connection to the doors, and made some changes to the rear quarter panels. There were still some areas where improvement could be made, but I was running out of ideas. I was pleased with the result. Pleased enough to say I was done.
All in all, I was pleased with the result of the car. As this is my first studless supercar, I was happy with how it turned out. The functions were up to my standards, and nothing was compromised as the car came together. While I was overwhelmed with the bodywork, I was pleased with how it turned out. Because it took me a long time to get it to work, it may be a long time before I do another one. I was happy I did a sedan, and hopefully a new moniker can begin in the LEGO community. #supersedan.