8081 110


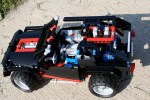
I have made it clear on a number of occations that I love LEGO set 8081. To celebrate this little unloved set, I created another MOD of this set.

Full gallery may be found here.

fullsizeoutput_1986

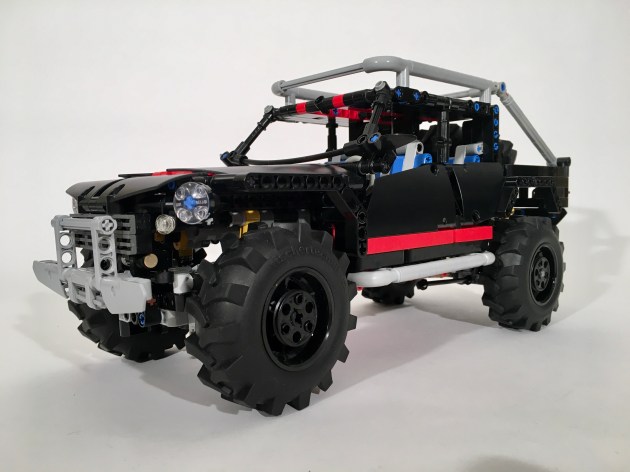
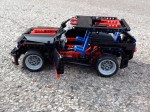
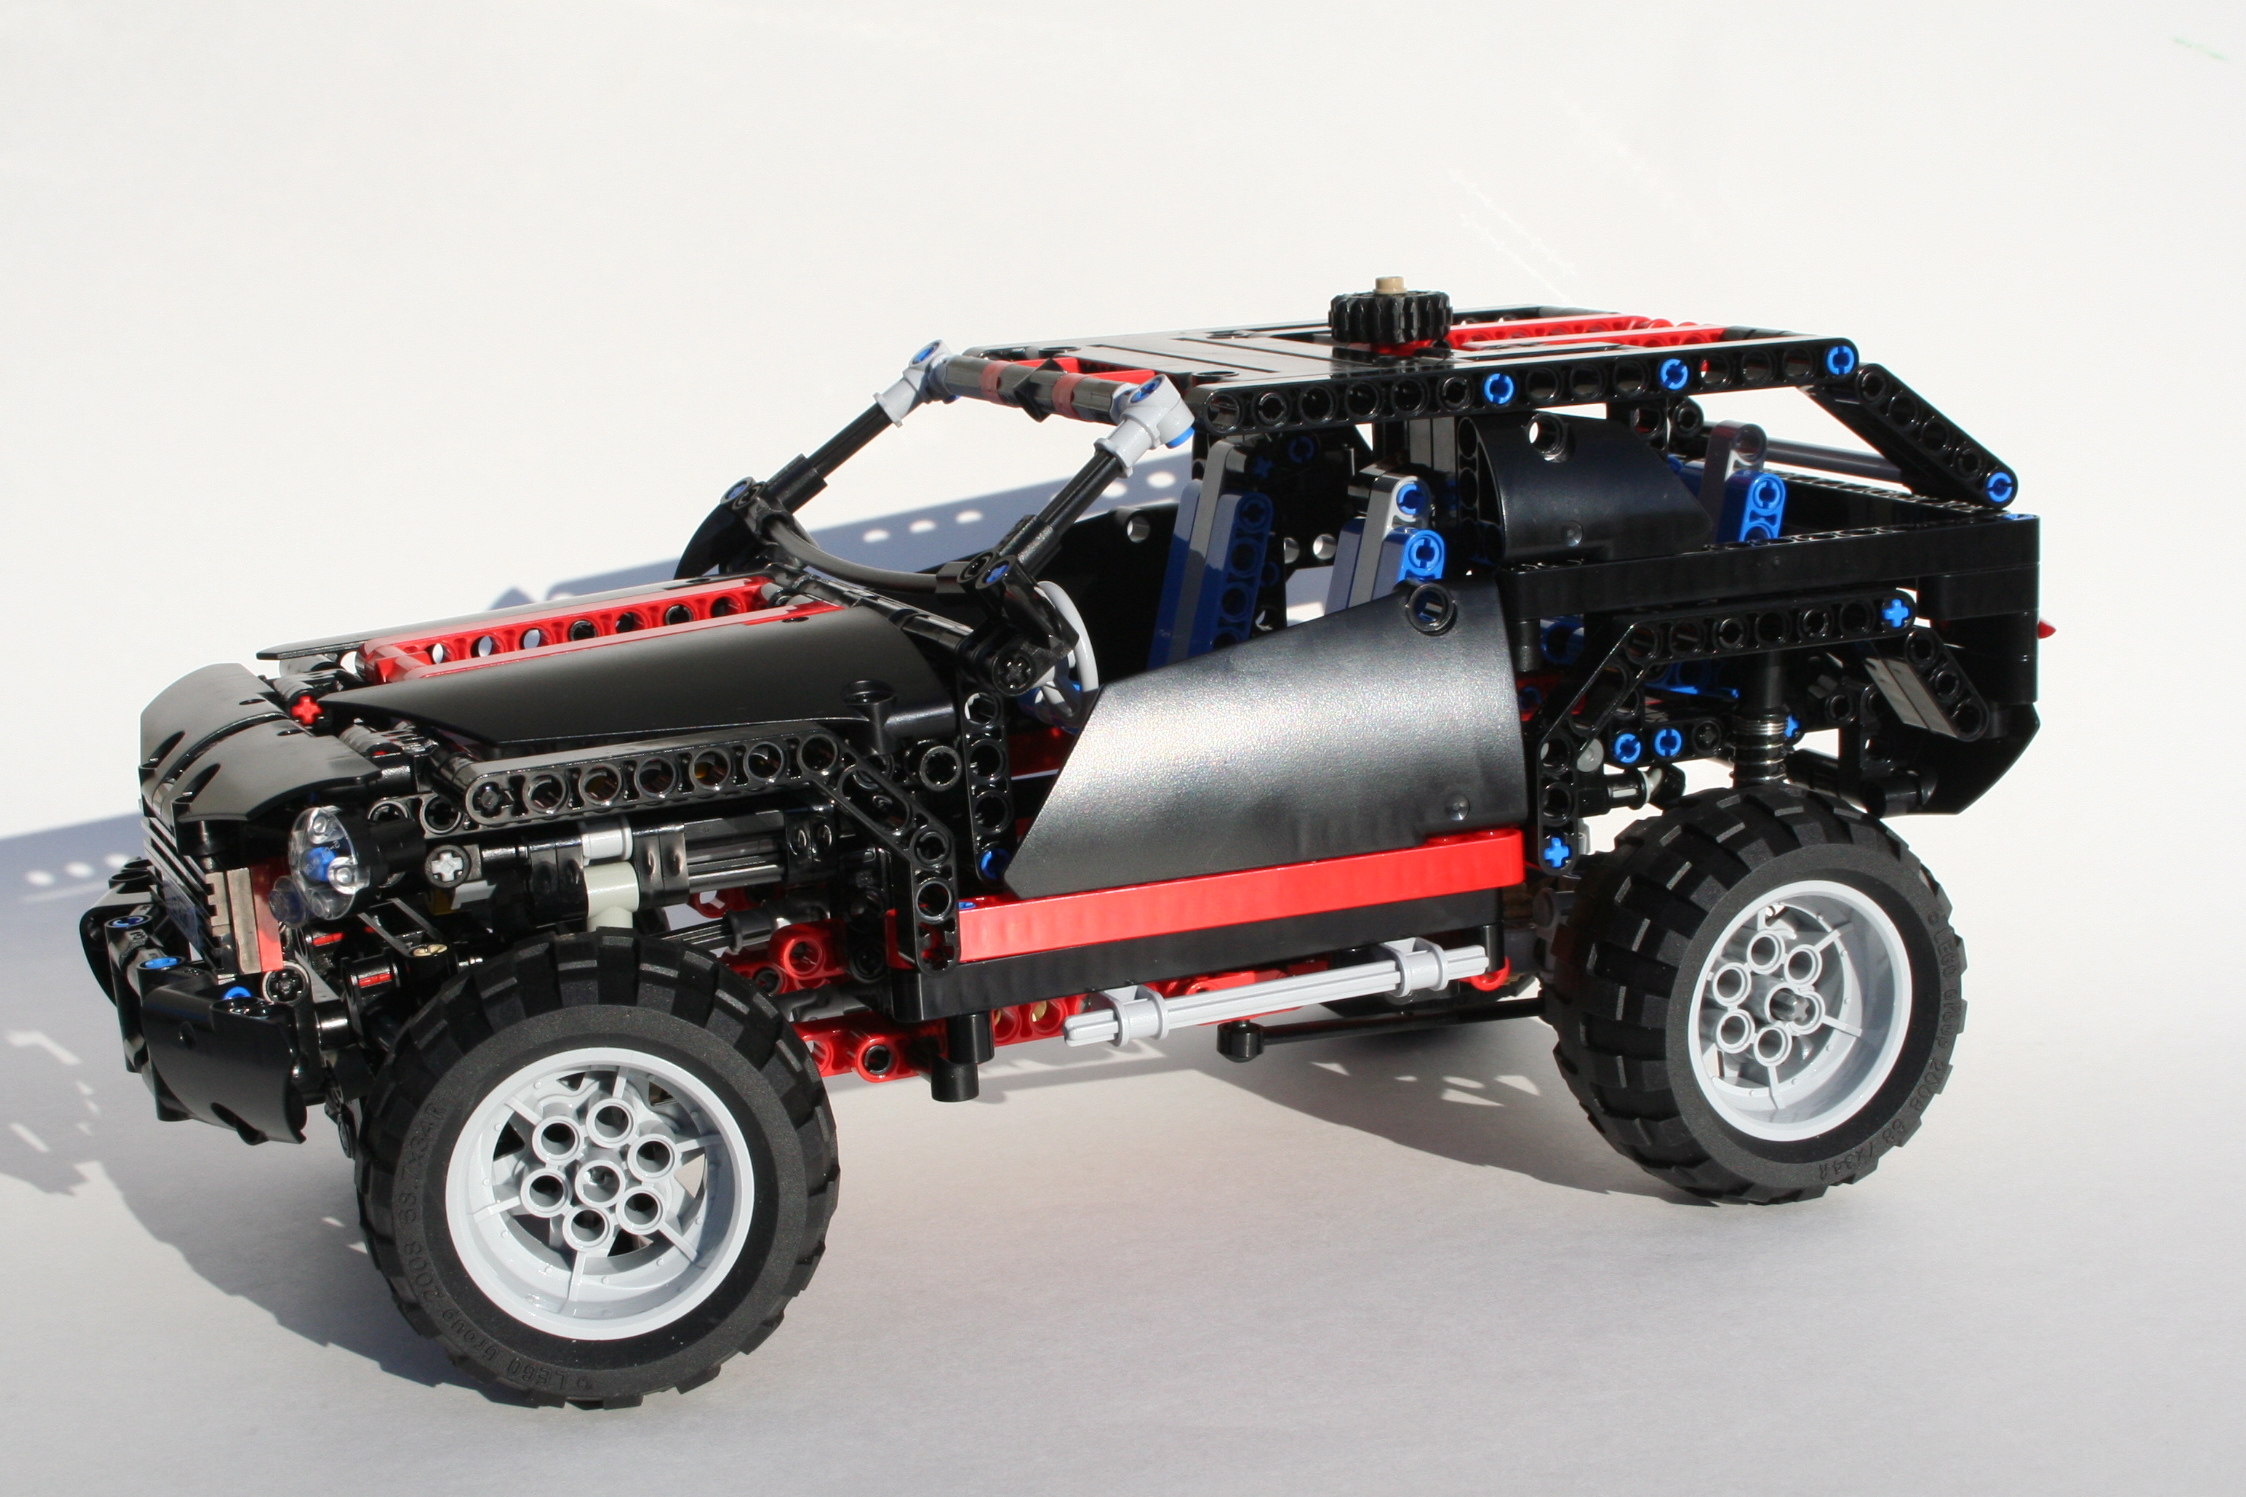
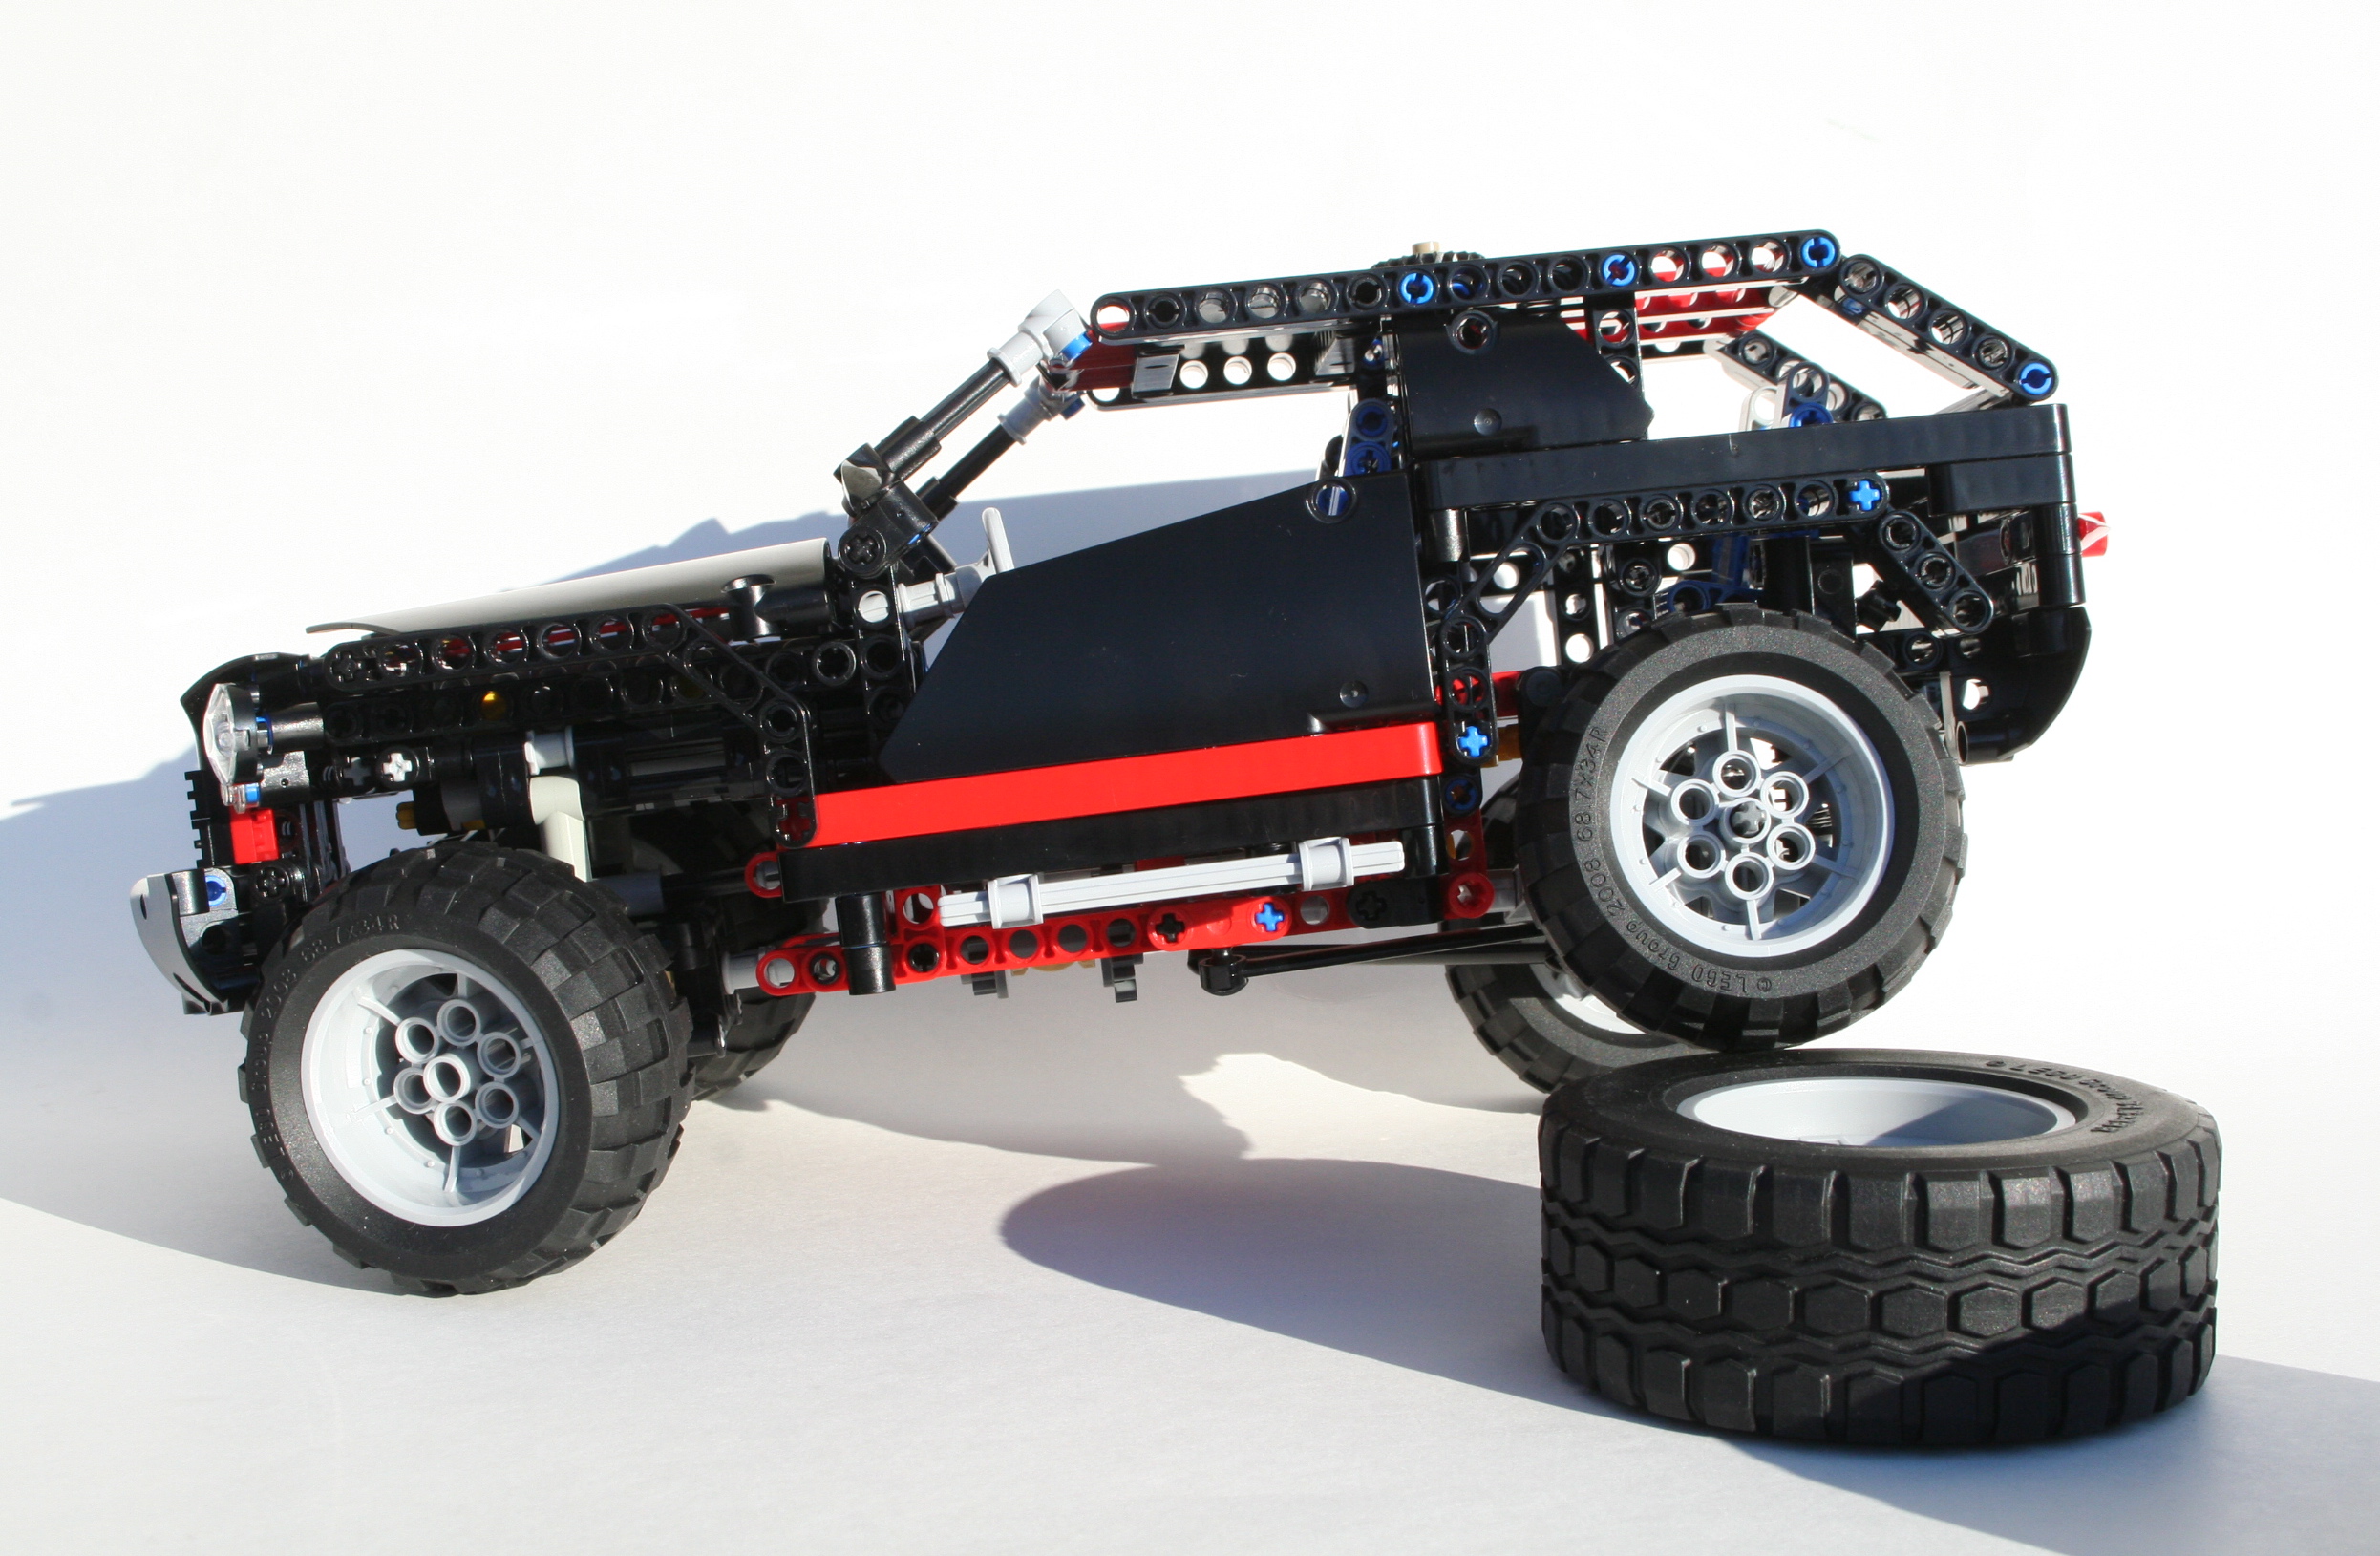
A couple of years ago I did my first MOD of 8081, the 8081 4×4. It was the same bodywork of 8081, but I added 4 wheel drive, a front mounted V-8, and rear seats. It was a substantive change to the set. Likewise this MOD is so different from the first set, I am not sure if this is a MOD, or a MOC. I keep the design features of 8081, but not much from the original set still remains.

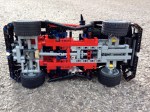
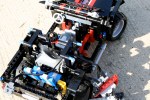
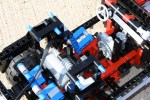
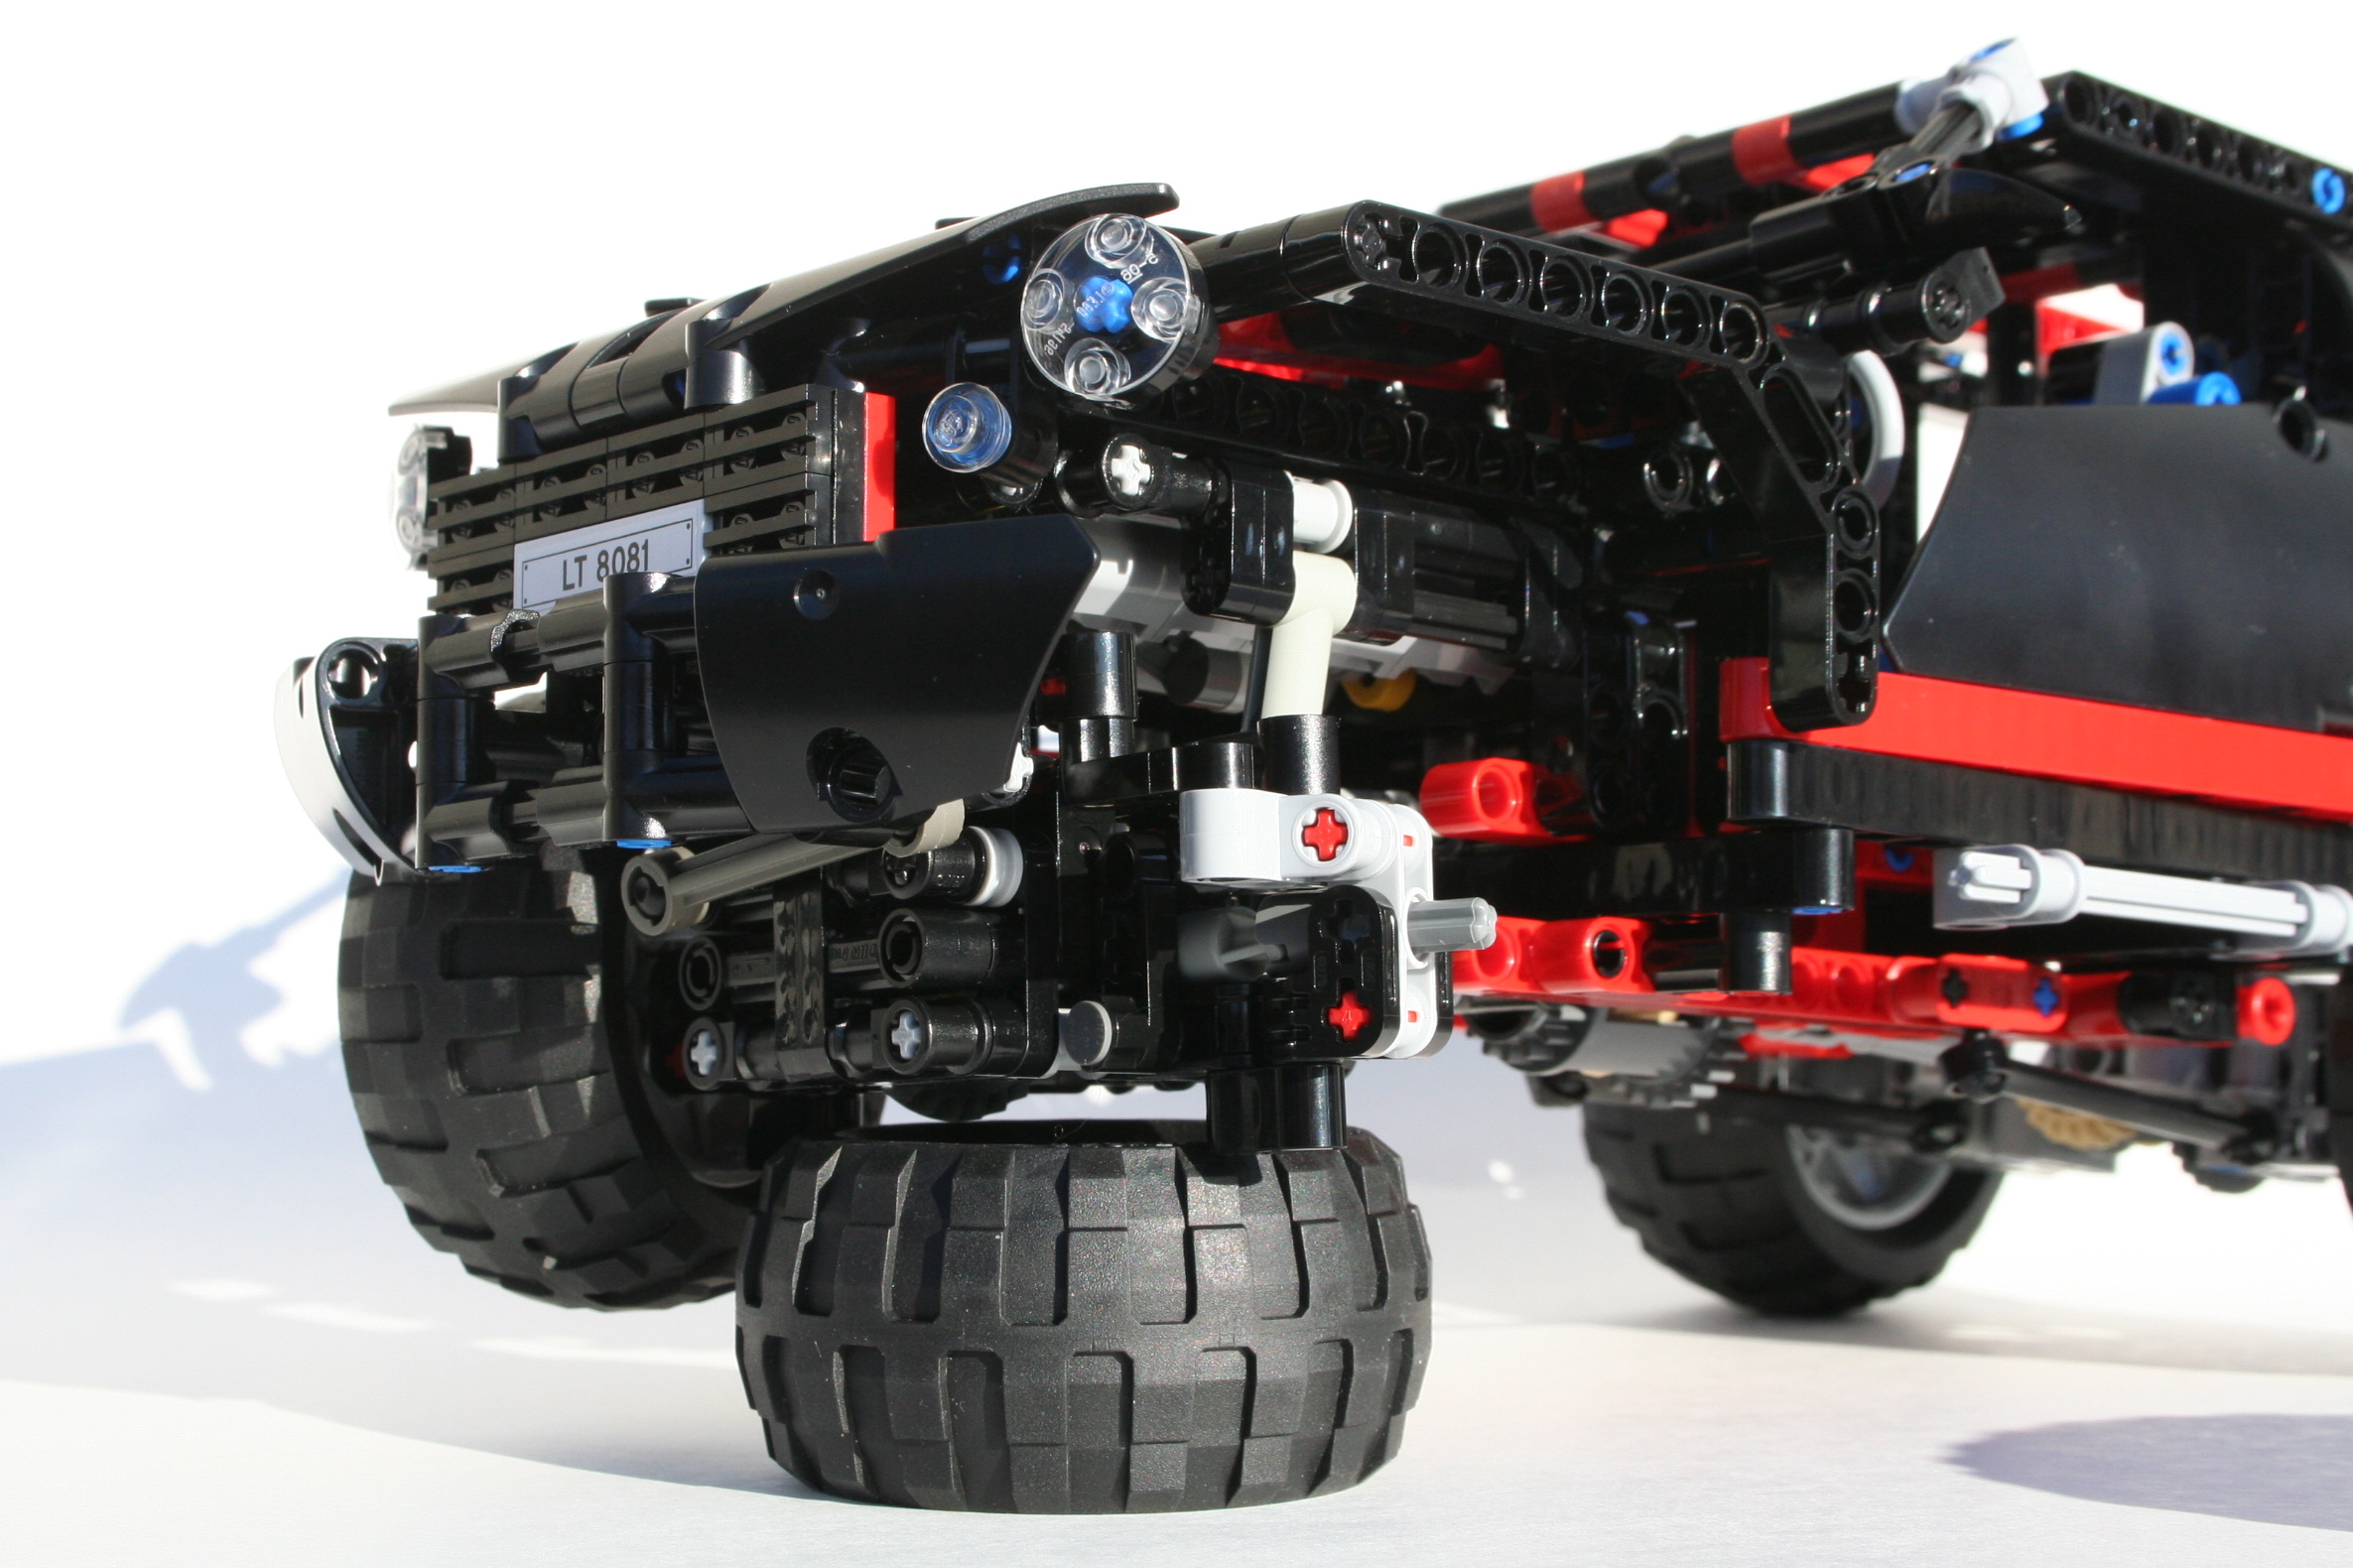
I took from front end of the 8081 4×4 which mounted the V-8, and the front bumper. Then I lengthened the chassis to accommodate a 4 stud longer wheelbase. The rear axle is the same, but the front axle needed to be modified to handle the increased weight of the truck. The center differential powers the V-8.

fullsizeoutput_196e

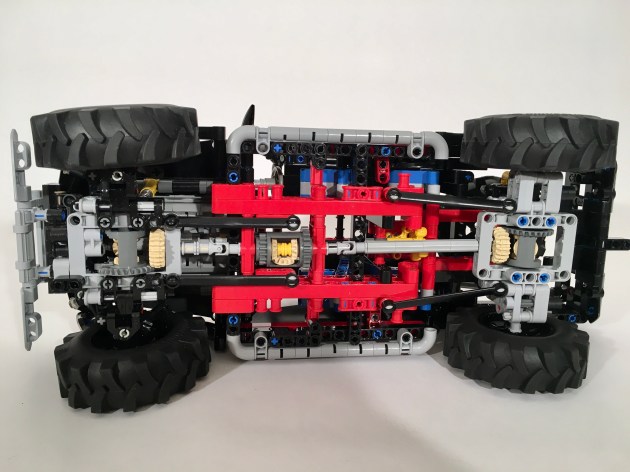
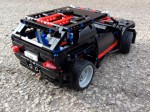
Both axles are live axles that are suspended with a hard spring at each corner. Each axle has two stabilizing links on the bottom, and a Panhard rod for each. Steering is on the front axle. Combined with the Fischertechnik tires, the truck has significant suspension articulation.

fullsizeoutput_1974

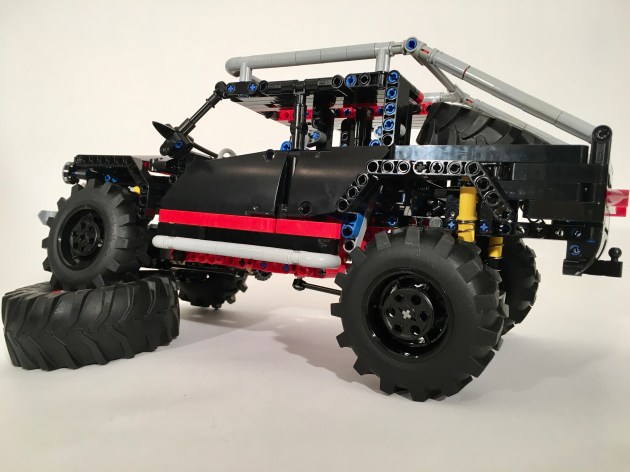
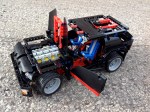
I added the bodywork last, but this did not take long as much of the design work followed themes determined by set 8081, though the pickup body style was planned from the beginning. The truck looked too big and black when I was done, so I added the roof rack/roll cage, the running boards, and a bull bar (though its little clunky).

The truck works well, and looks pretty tough. The suspension works much better than the first 8081 4×4. The new wheel hubs help the front a lot. Also the front suspension is better supported laterally than the first iteration. The Fischertechnik tires work great on this model, and while not LEGO parts, they are quickly becoming a favorite addition to my builds.

Throughout the whole project I kept asking myself, when is a build a MOD, and when is it a MOC. This project felt a lot like the later, but still connects to 8081.

Happy Building.

Advertisement

8081 RT


I have said it before; I really like set 8081. It has so many possibilities for improvement. After talking a look at RM8‘s design, I thought I should do a street version of the 8081 to follow up on the 4×4 8081 I built a while back.

The full gallery can be found here, and free instructions can be found here.

8081 RT Front

I took the existing bodywork and frame of the 8081, and chopped out the rear suspension unit to revise the rear suspension design. I wanted an independent setup with a differential. As I have used a couple of times before, I used a floating differential design. The differential is attached to the driveline much like a live-axle set up, but is connected to two independently mounted wheel hubs. I have used this before, and I like the way it works. It allows for a driven axle with independent suspension in a very narrow setup. This way each wheel can move independently, but it does not require two universal joints on each side of the differential. Since the differential is not fixed to the chassis, it has to be braced to the driveshaft. While this set-up is not often used in real cars, it works well for LEGO designs. I used the new wheel hubs, and attached them via a short upper arm, and a long lower arm so the camber would change through the suspension travel.

Moving to the front, I kept the V-8 as in my 4×4 8081, and built the rest of the front around the motor. I used a suspension design similar to 8081, where there are two equal length arms holding the steering pivot. A single shock absorber is used for each side. All told, the car is about two studs lower, due to the new suspension, and the new tires.

It is not much of a redesign, but sometimes I need a project that is not a significant, and allows me to just build something simple.

Happy Building.

Power Functions 4×4 8081


For most LEGO enthusists, when they purchased the set 8081, they quickly modified the set with a Power Functions drivetrain.  It makes sense.  LEGO models are a little more exciting when they are motorized.  But I guess I went a little backwards.  I wanted to do the fun stuff first, and make the most complicated and compact drivetrain I could make.  I posted the instructions here, and they can also be viewed on Rebrickable.com.

But the comments kept coming from people who wanted to see my model motorized.  So I thought it might be a fun addition.  I added a two PF M motors, a 8878 Battary Box, and an IR receiver.  I tried to keep the modifications simple, so I could easily add the motors to the MOD, and take the system out if I wanted to.  The drive motor was placed on a simple mount that connected to the frame.  The power was fed thought a 8z gear to a 24z gear which then connected directly to the V8 driveshaft.  The driveline was unchanged from the V8 down.  The steering motor was mounted laterally in front of the rear seats.  A 20z double bevel gear drove a 16z gear, then a worm gear moved the final 8z gear which was mounted on the existing HOG steering axle.  I removed the passanger seat which is where I placed the battary box, and created a simple mount for the IR receiver.  The added weight required a new shock absorber, so I added that as well.

The model worked alright.  The drivetrain did well to handle the new power, and I could easily control the Crusier.  The steering motor was a little too powerful for the upside down facing steering rack.  It skipped a little under load, which was a problem over rougher terrain.  The drive motor was a little taxed, so a PF XL would have done a little better.  I guess I could add that, but I am ready to move on to my next model.  Stay tuned.

The full gallery may be found here.

4×4 8081


Truthfully, I was excited about set 8081 when it was first announced.  I liked the size.  I liked the coloring. I liked the stance.  But mostly I liked the potential.  Most of the Technic community dismissed the 8081 because of its watered down functions, but I was interested in making some changes to see if I could make the Cruiser Extreme.

The full gallery can be found here, and instructions here.

Image

I first added a V-8.  There was plenty of room, and after seeing a great modification from Efferman, I had some ideas.  It was a simple addition.

Image

Next was the drivetrain.  This was a little more complicated.  I wanted to make it four wheel drive, and I wanted to make sure there were three differentials.  I rebuilt the rear axle, so It would have a more active setup.  I put in longer shocks, and added a Panhard rod, and two stabilizing links.  It worked well.  The front axle was more challenging.  The new CV joints made the project a little easier.  Once I had the differential place, I had to fit everything around it.  The steering rack was placed upside down, and was connected directly to the existing steering link in the original 8081.  Then I added a Panhard rod on the front of the axle, and rebuild the front bumper, and everything was set.

ImageImageImage

Instructions can be found at Rebrickable.com or here.

Full gallery is here.

I also created a motorized version after a number of requests.  You may see the gallery for that MOD here.