LEGO 42126 V-8 4×4


Sometimes a LEGO set needs just a little more content. 42126 is one of them.

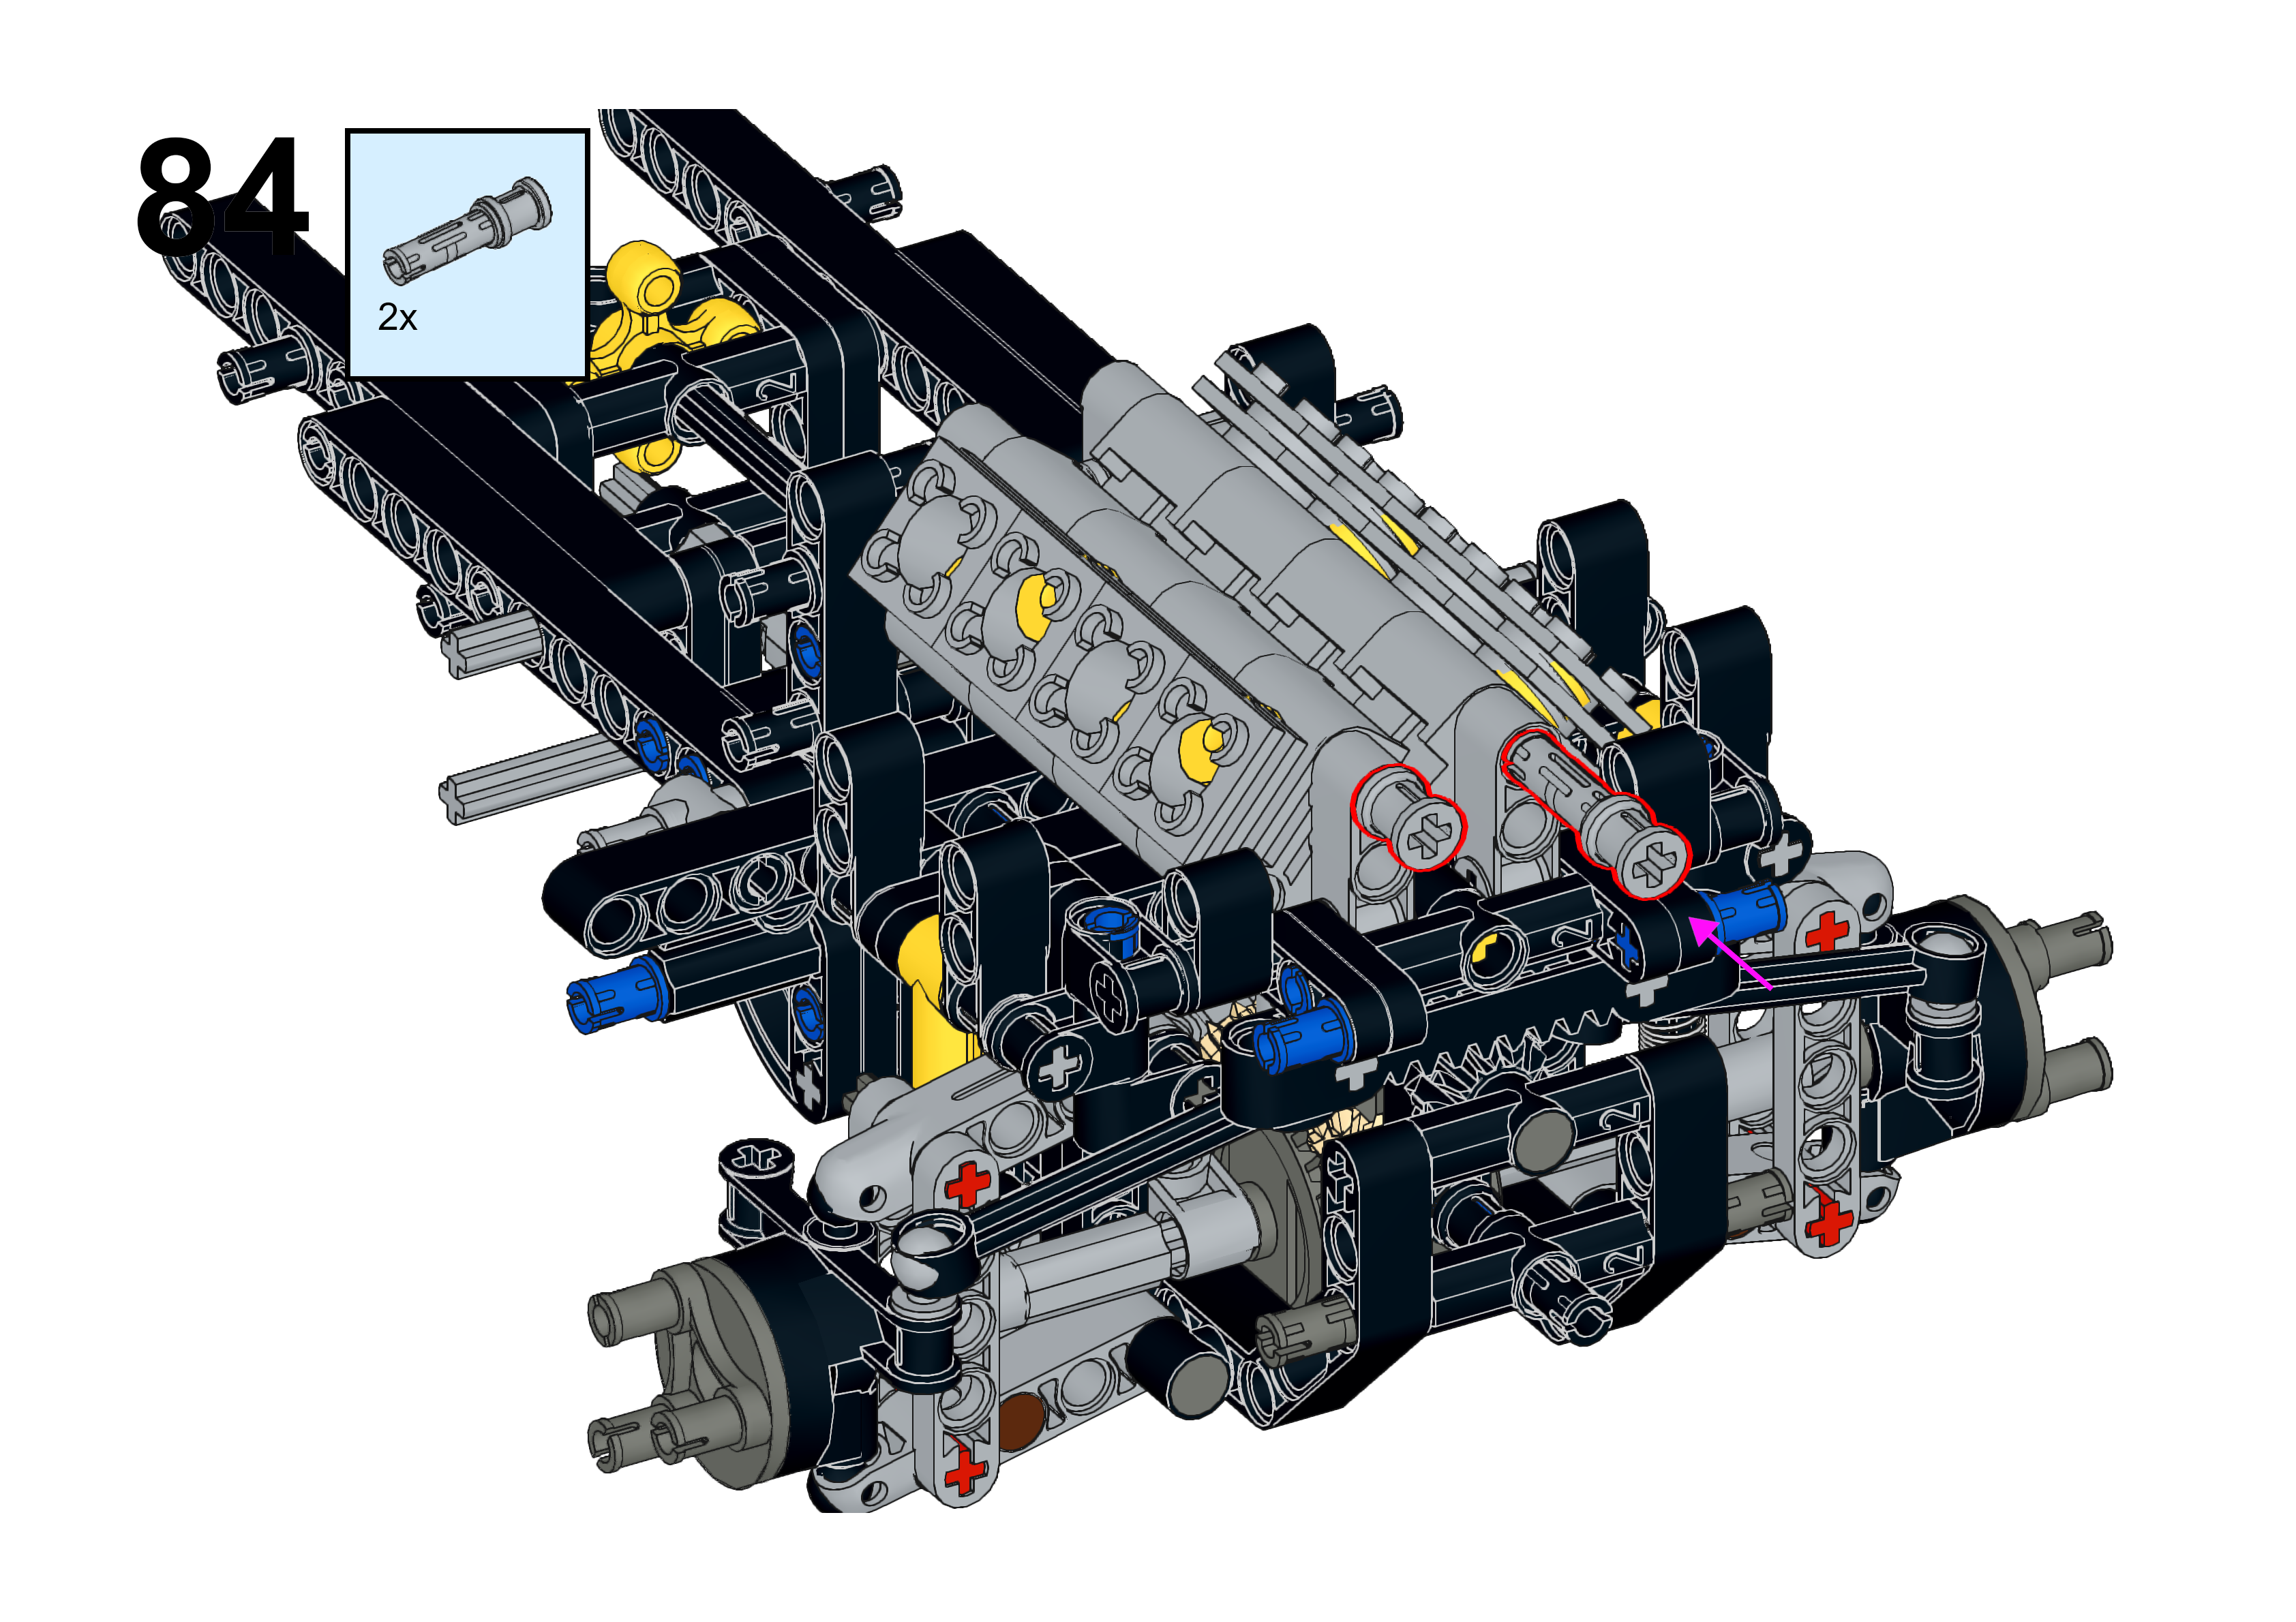
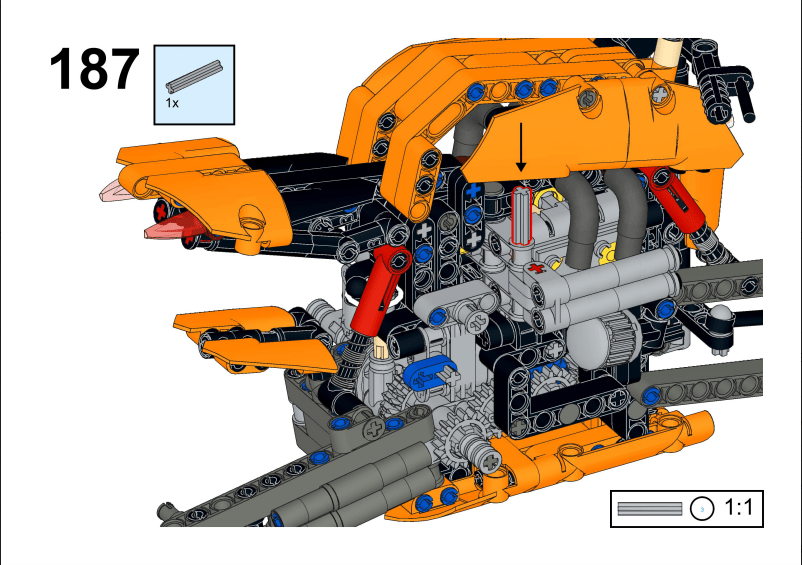
Instructions may be found on Rebrickable.com.

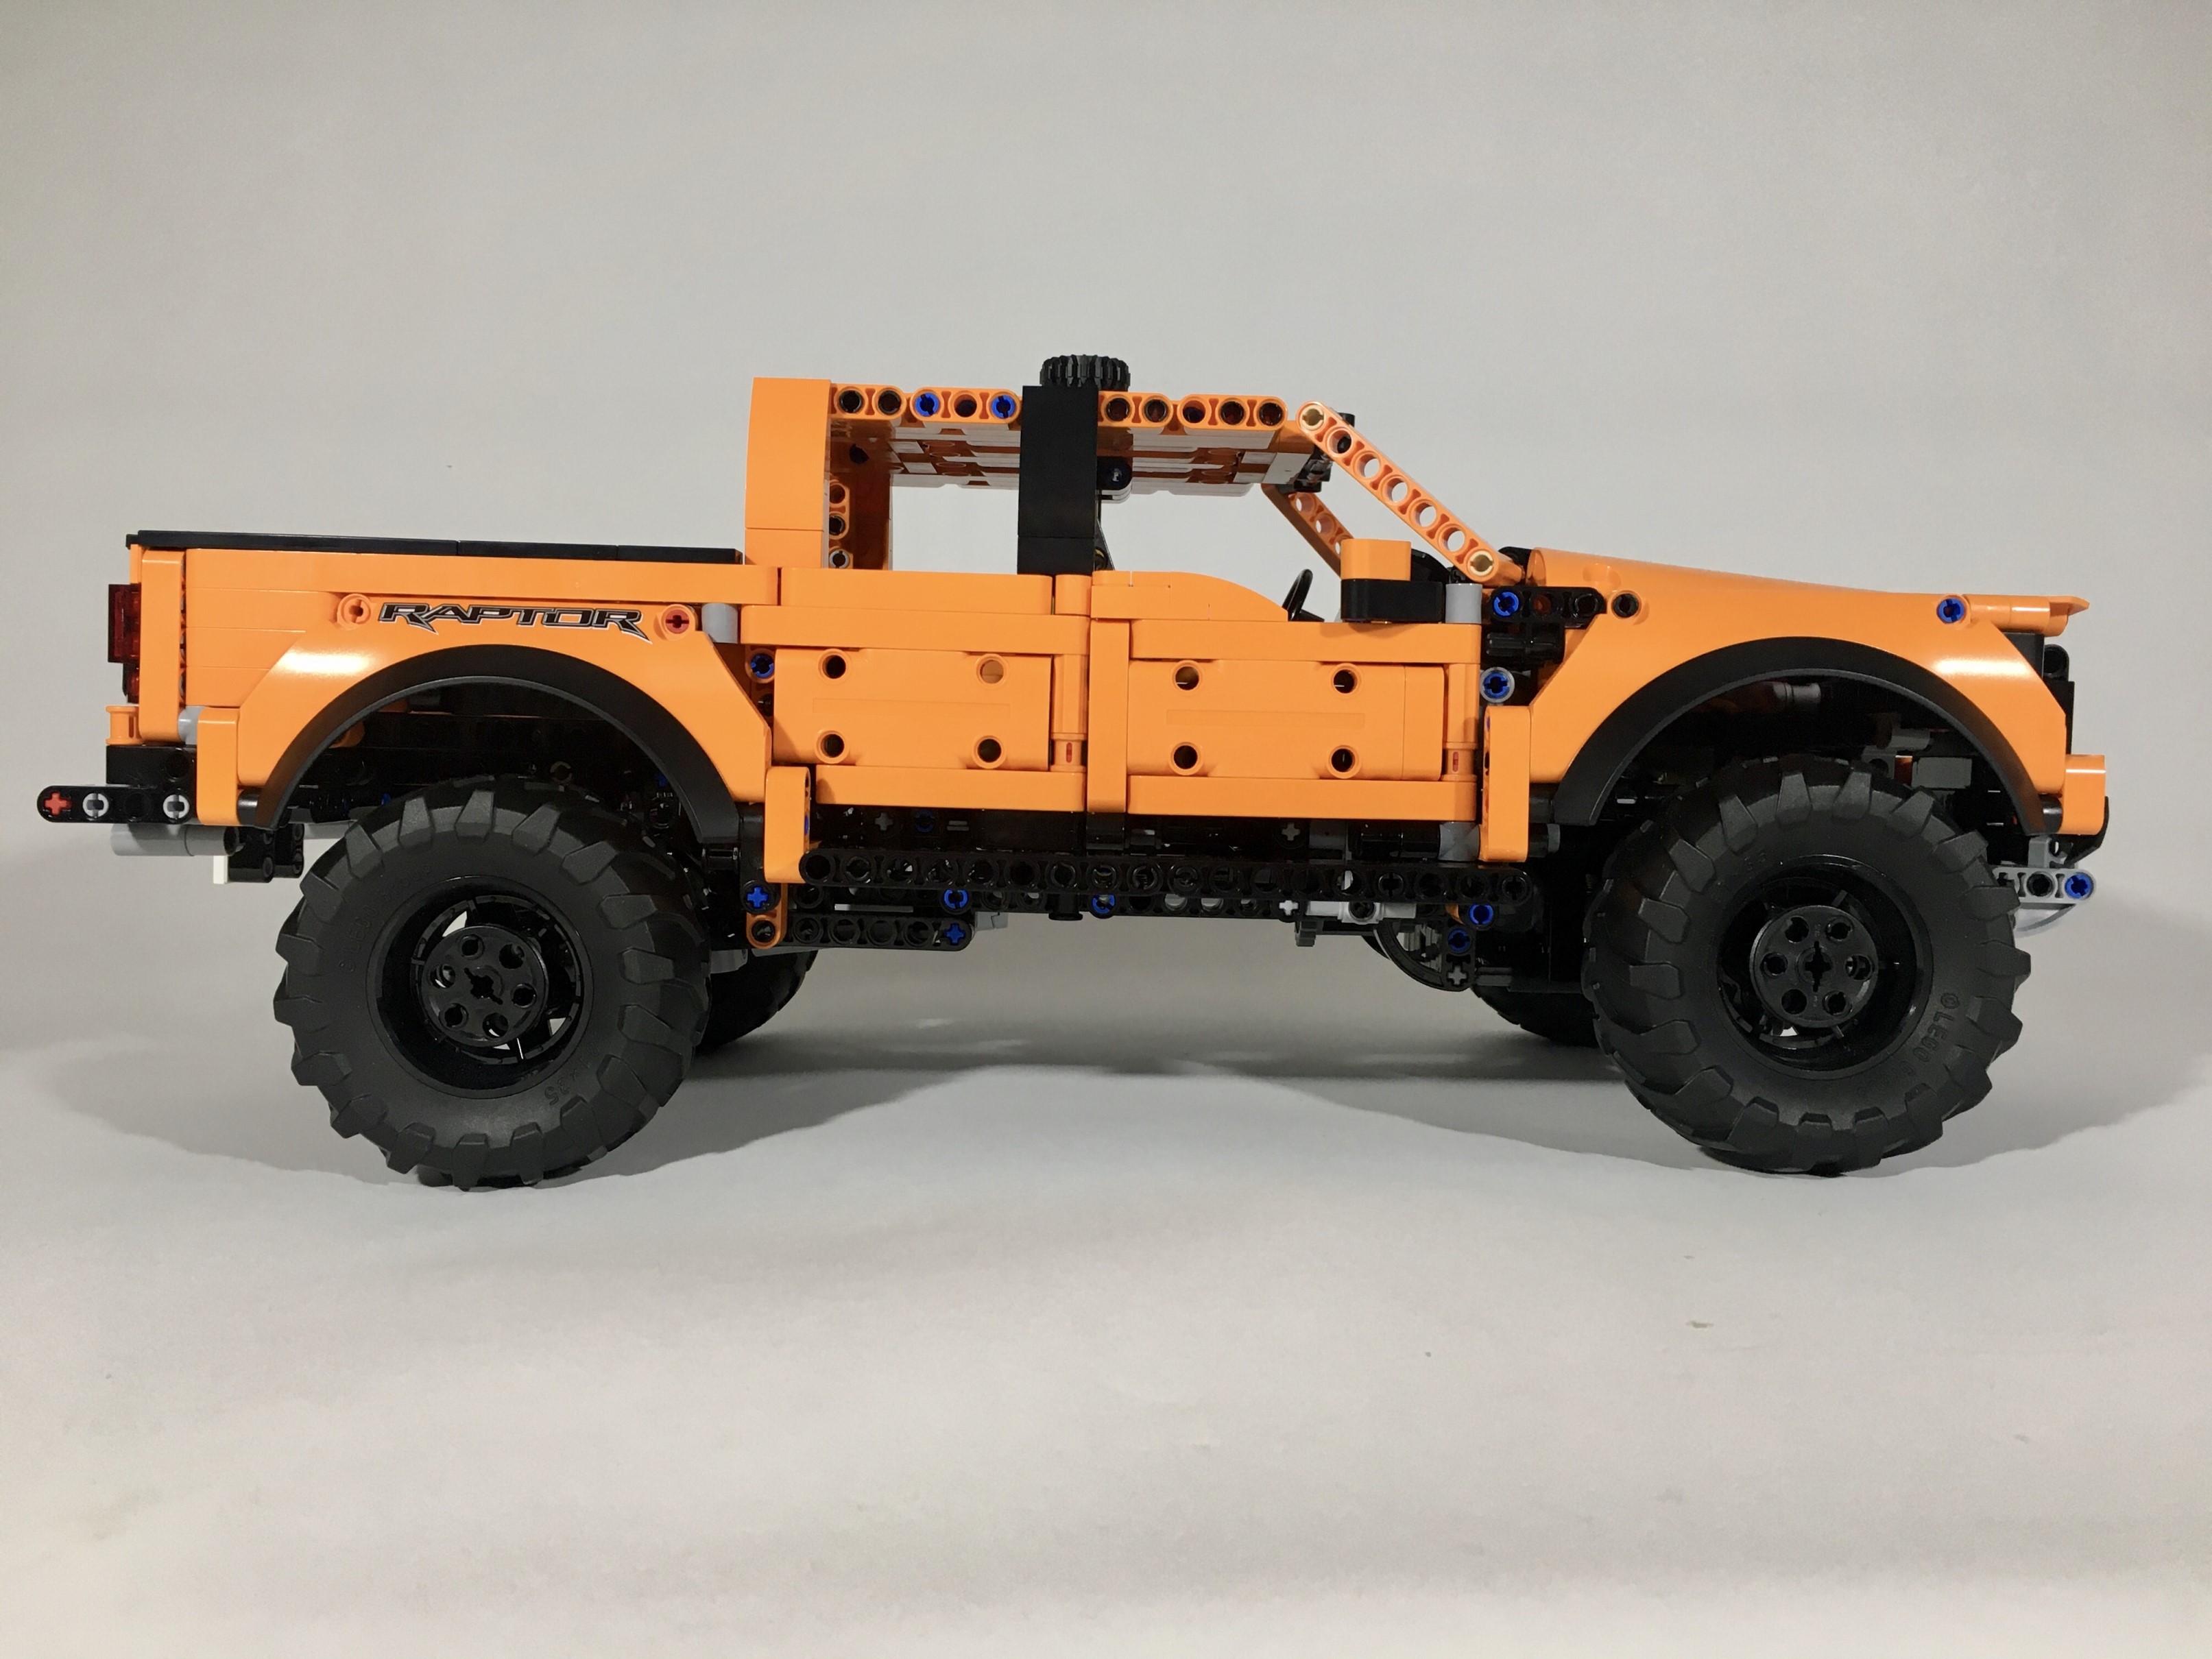
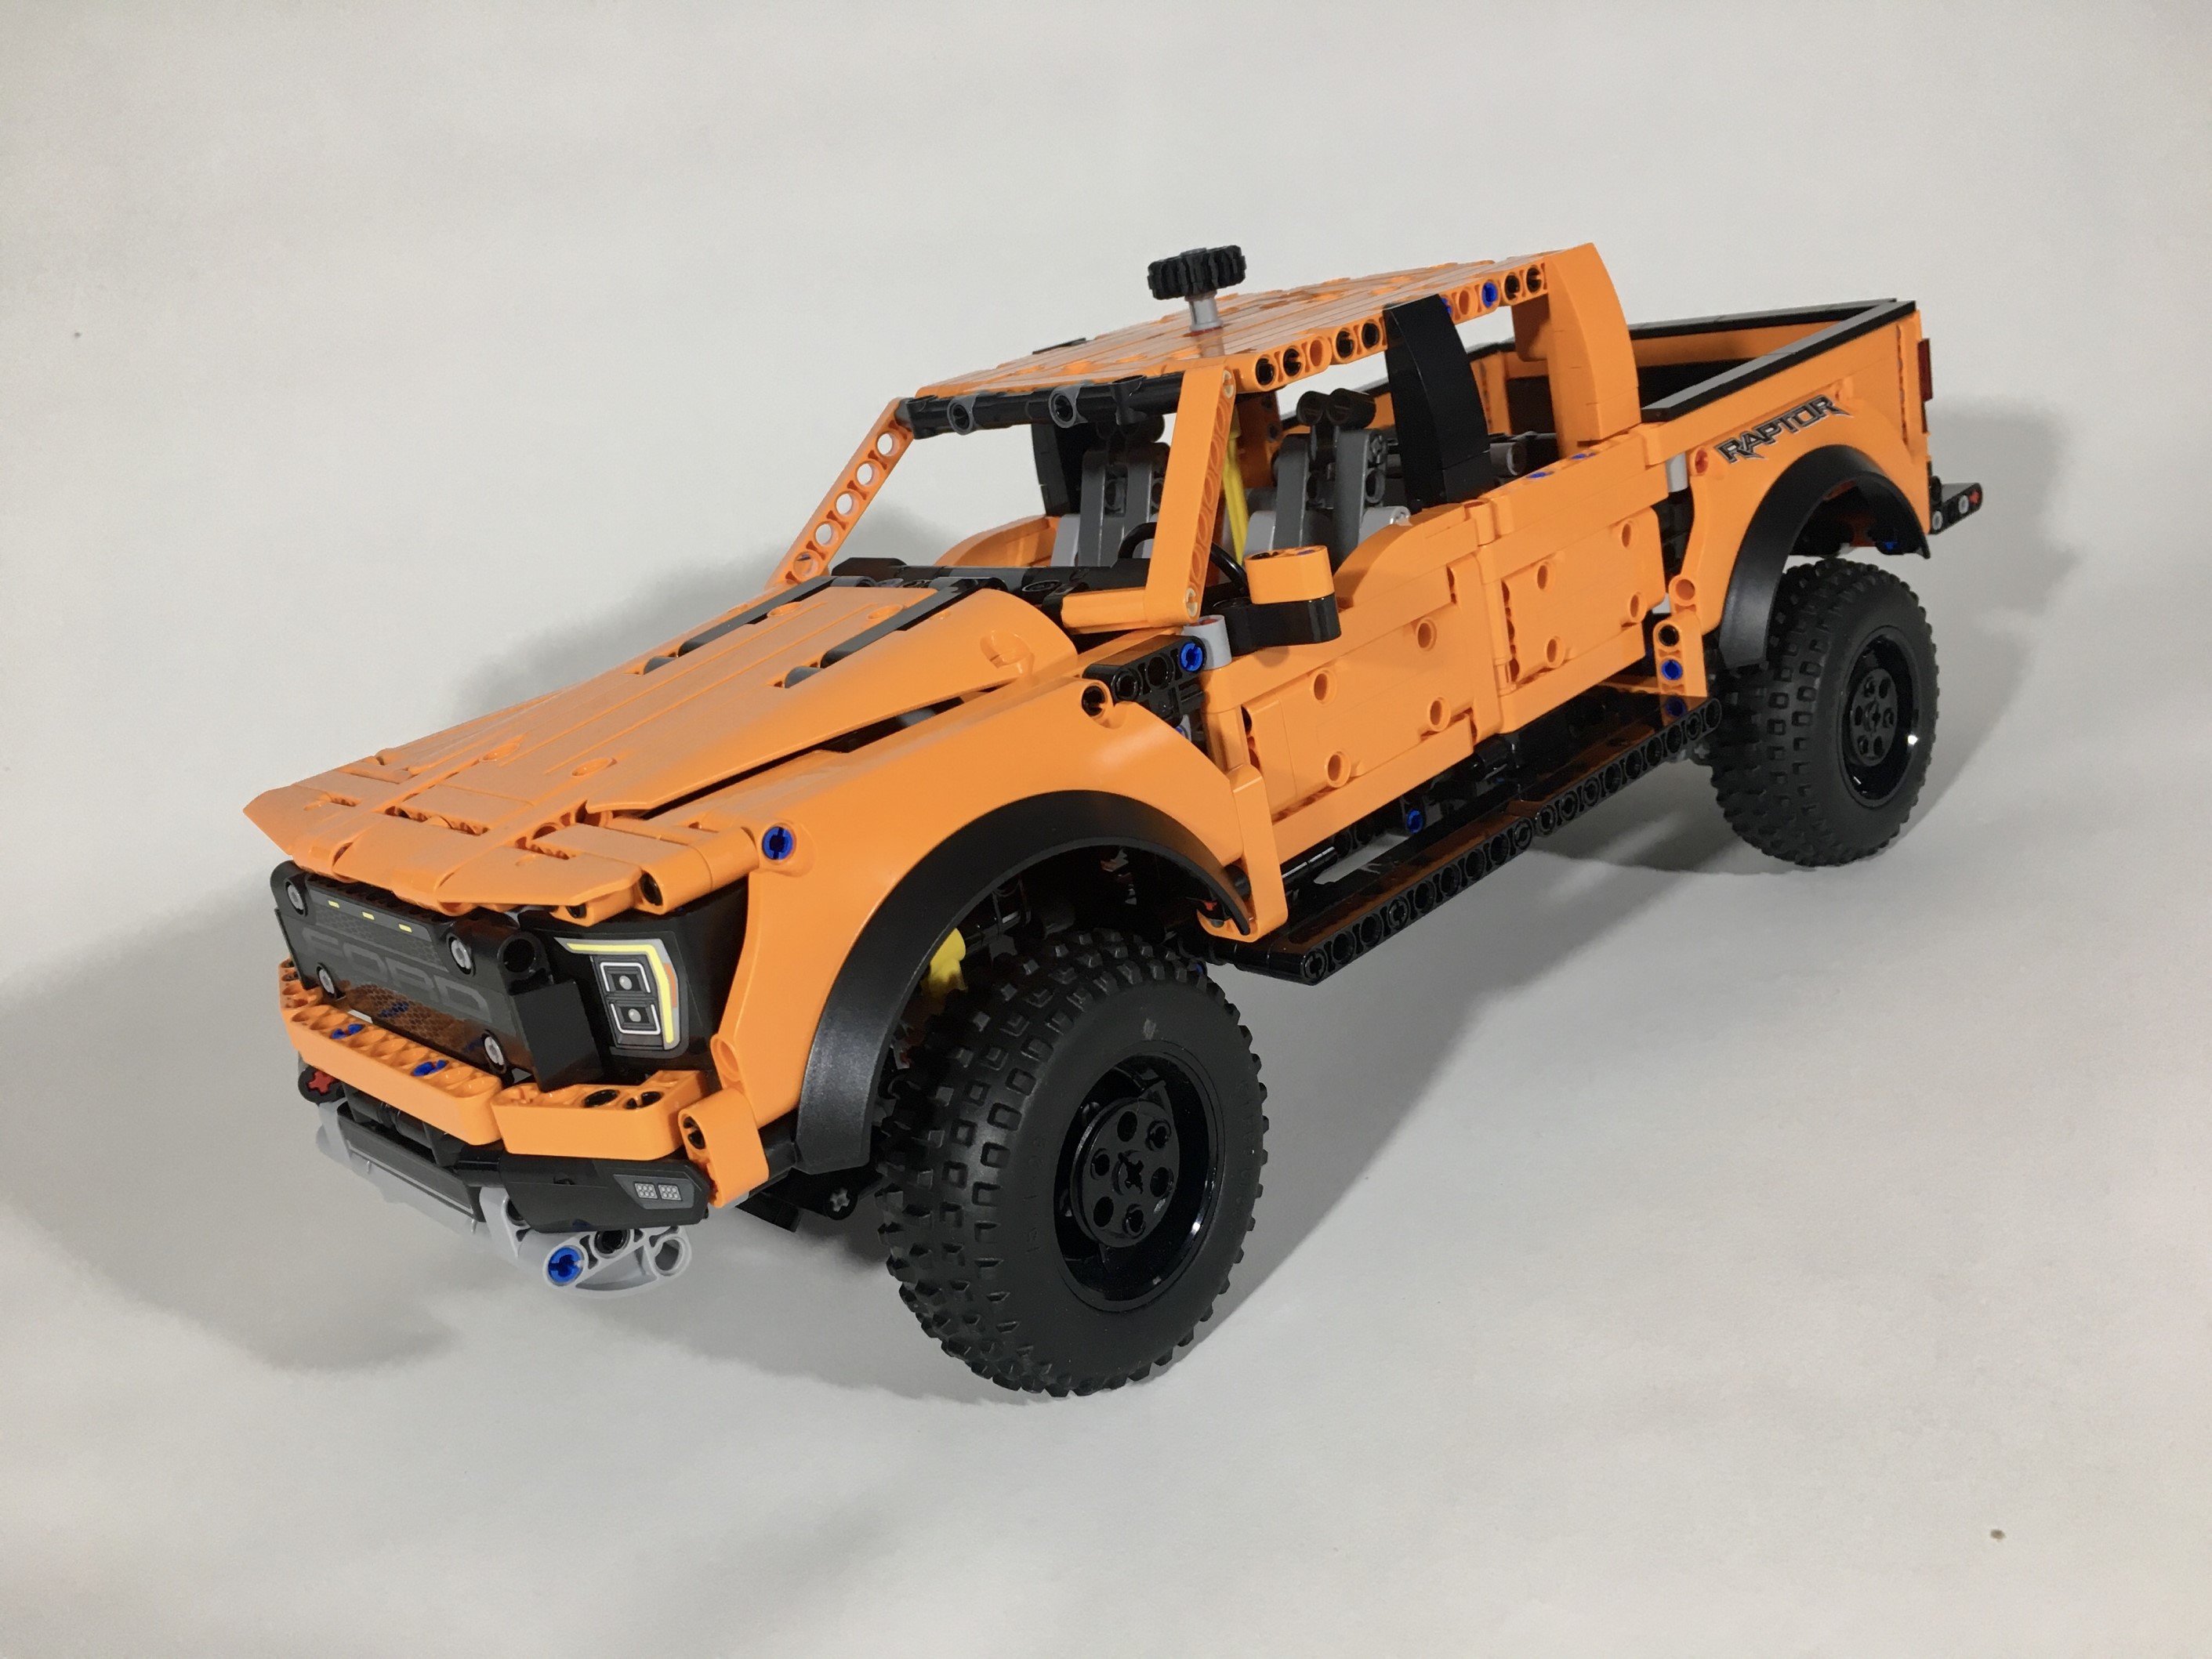
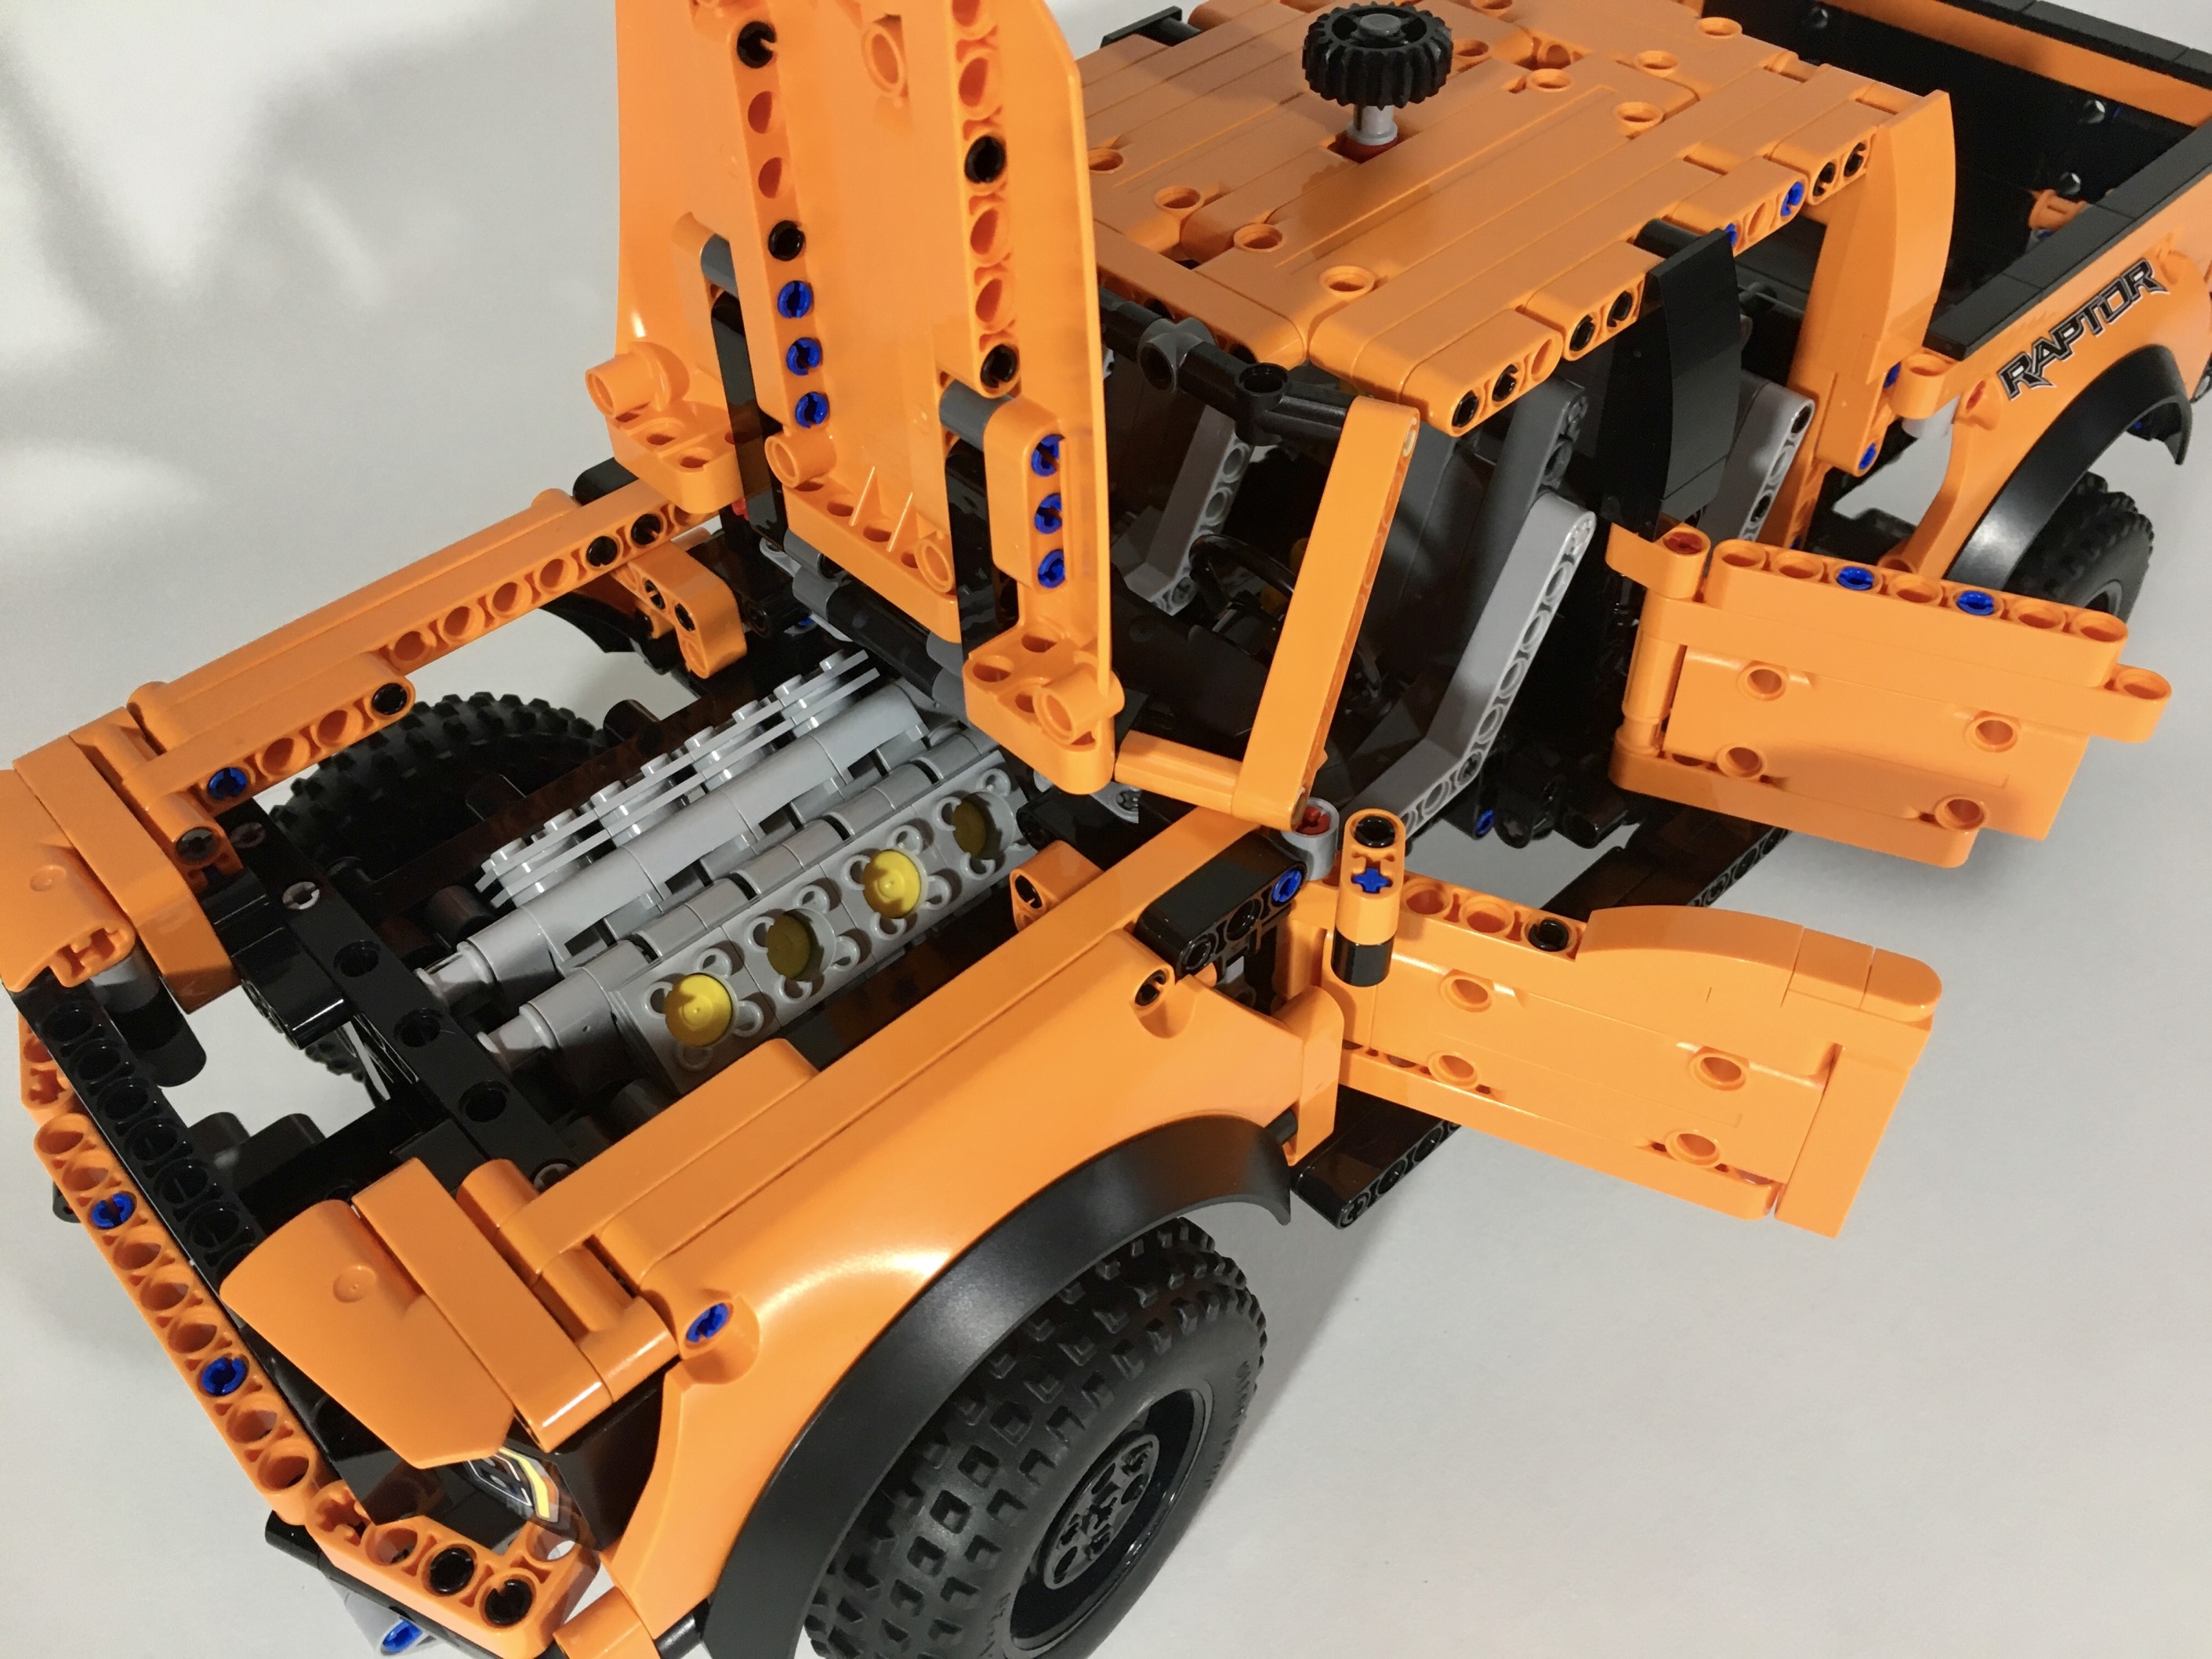
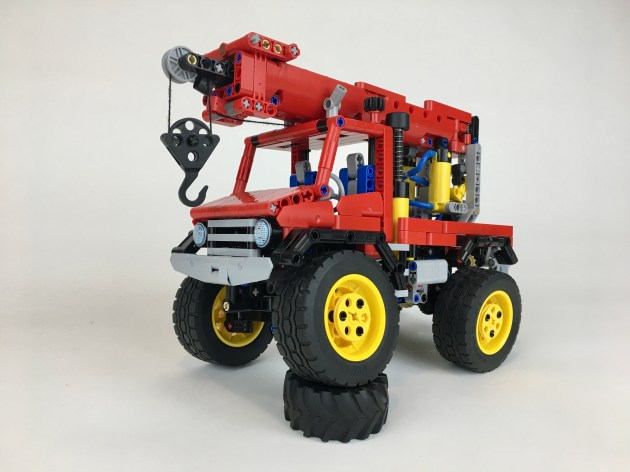
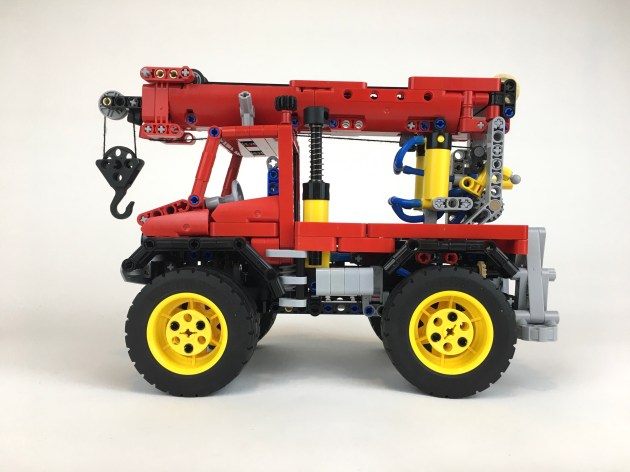
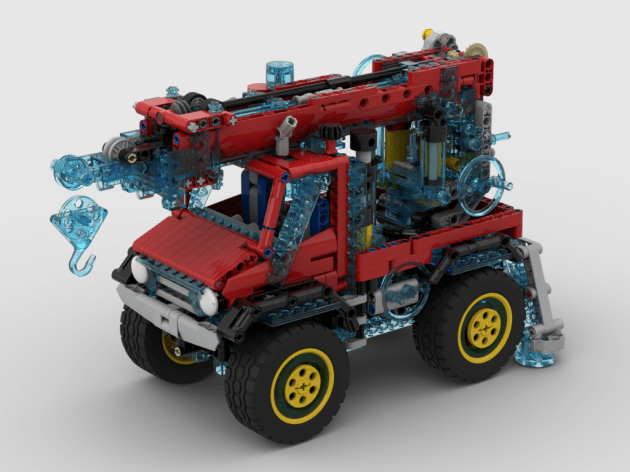
LEGO 42126 was introduced in the Summer of 2021, and I was immediately drawn to the pickup as it included some features I like, such as steering, suspension, a decent (at least in the USA) price, and it’s Orange! But there were serious features lacking such as four wheel drive, a V-8 (I know, I know, a Raptor, and many of Ford’s F-150s use a turbo V-6), and the rear suspension geometry was weird. I agree with others, that some parts of the design like the rear taillights and the front headlights are a little off. But, like 8081, I saw some potential here, and I ordered the set.

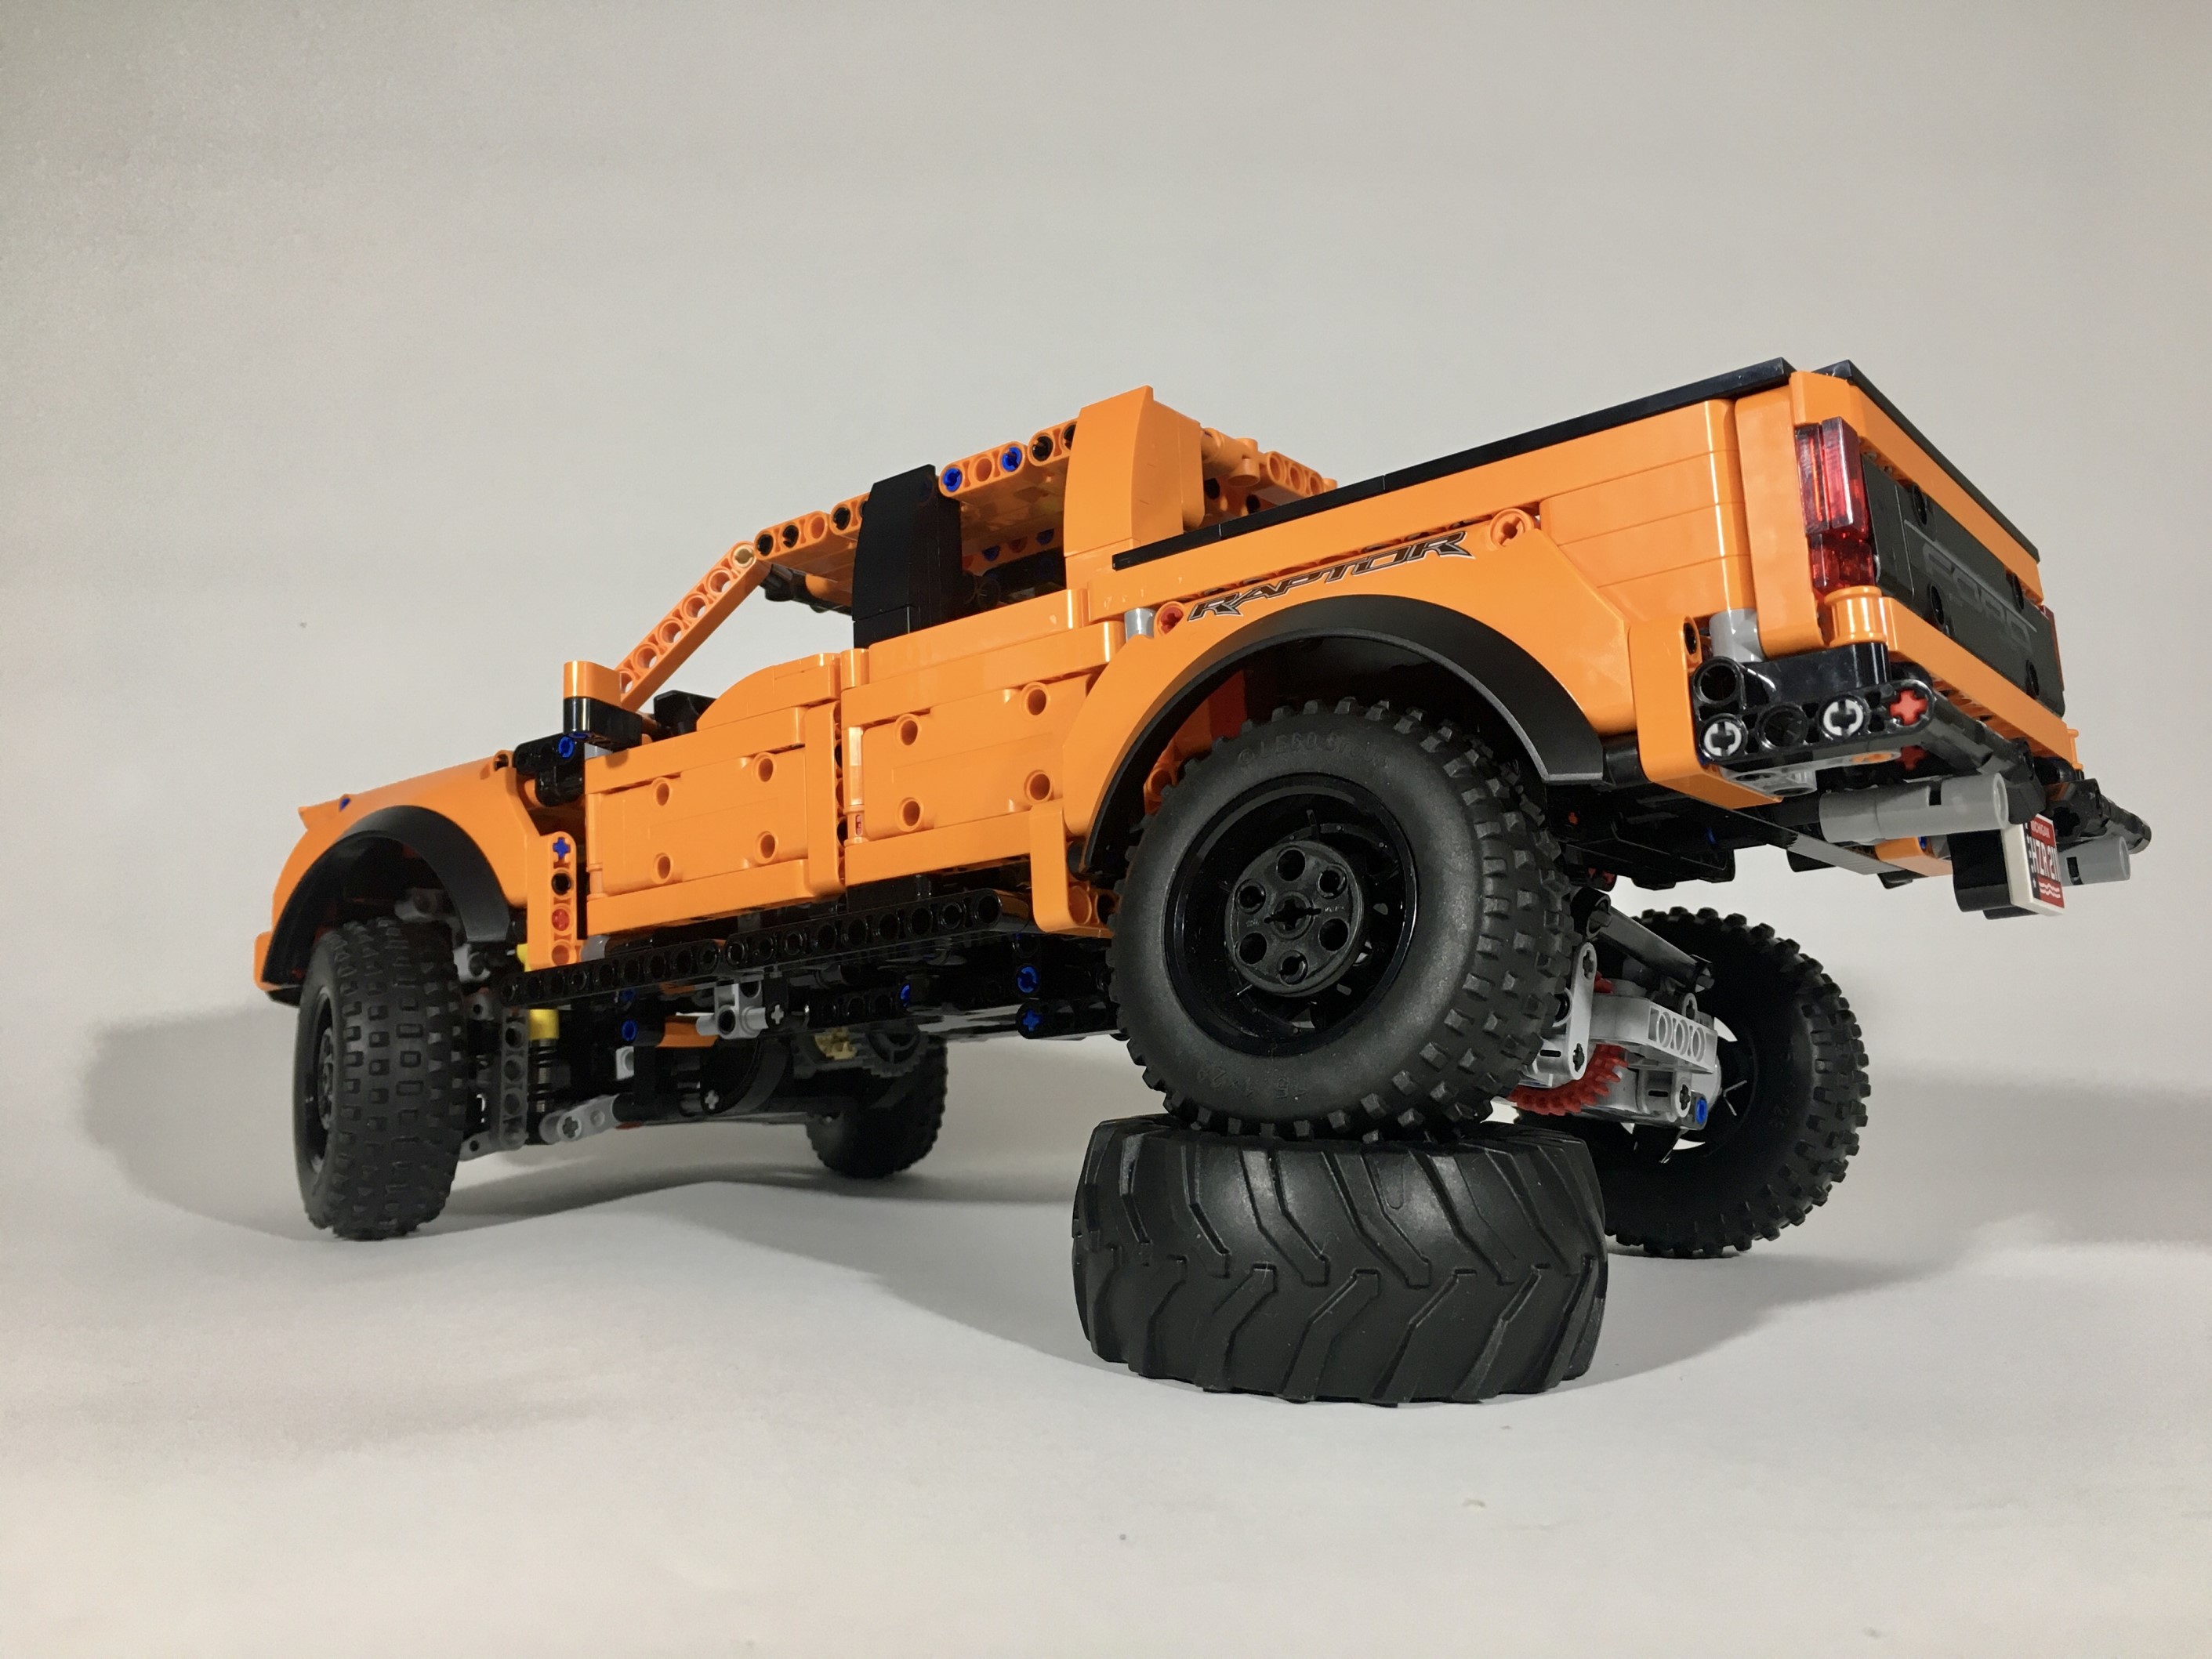
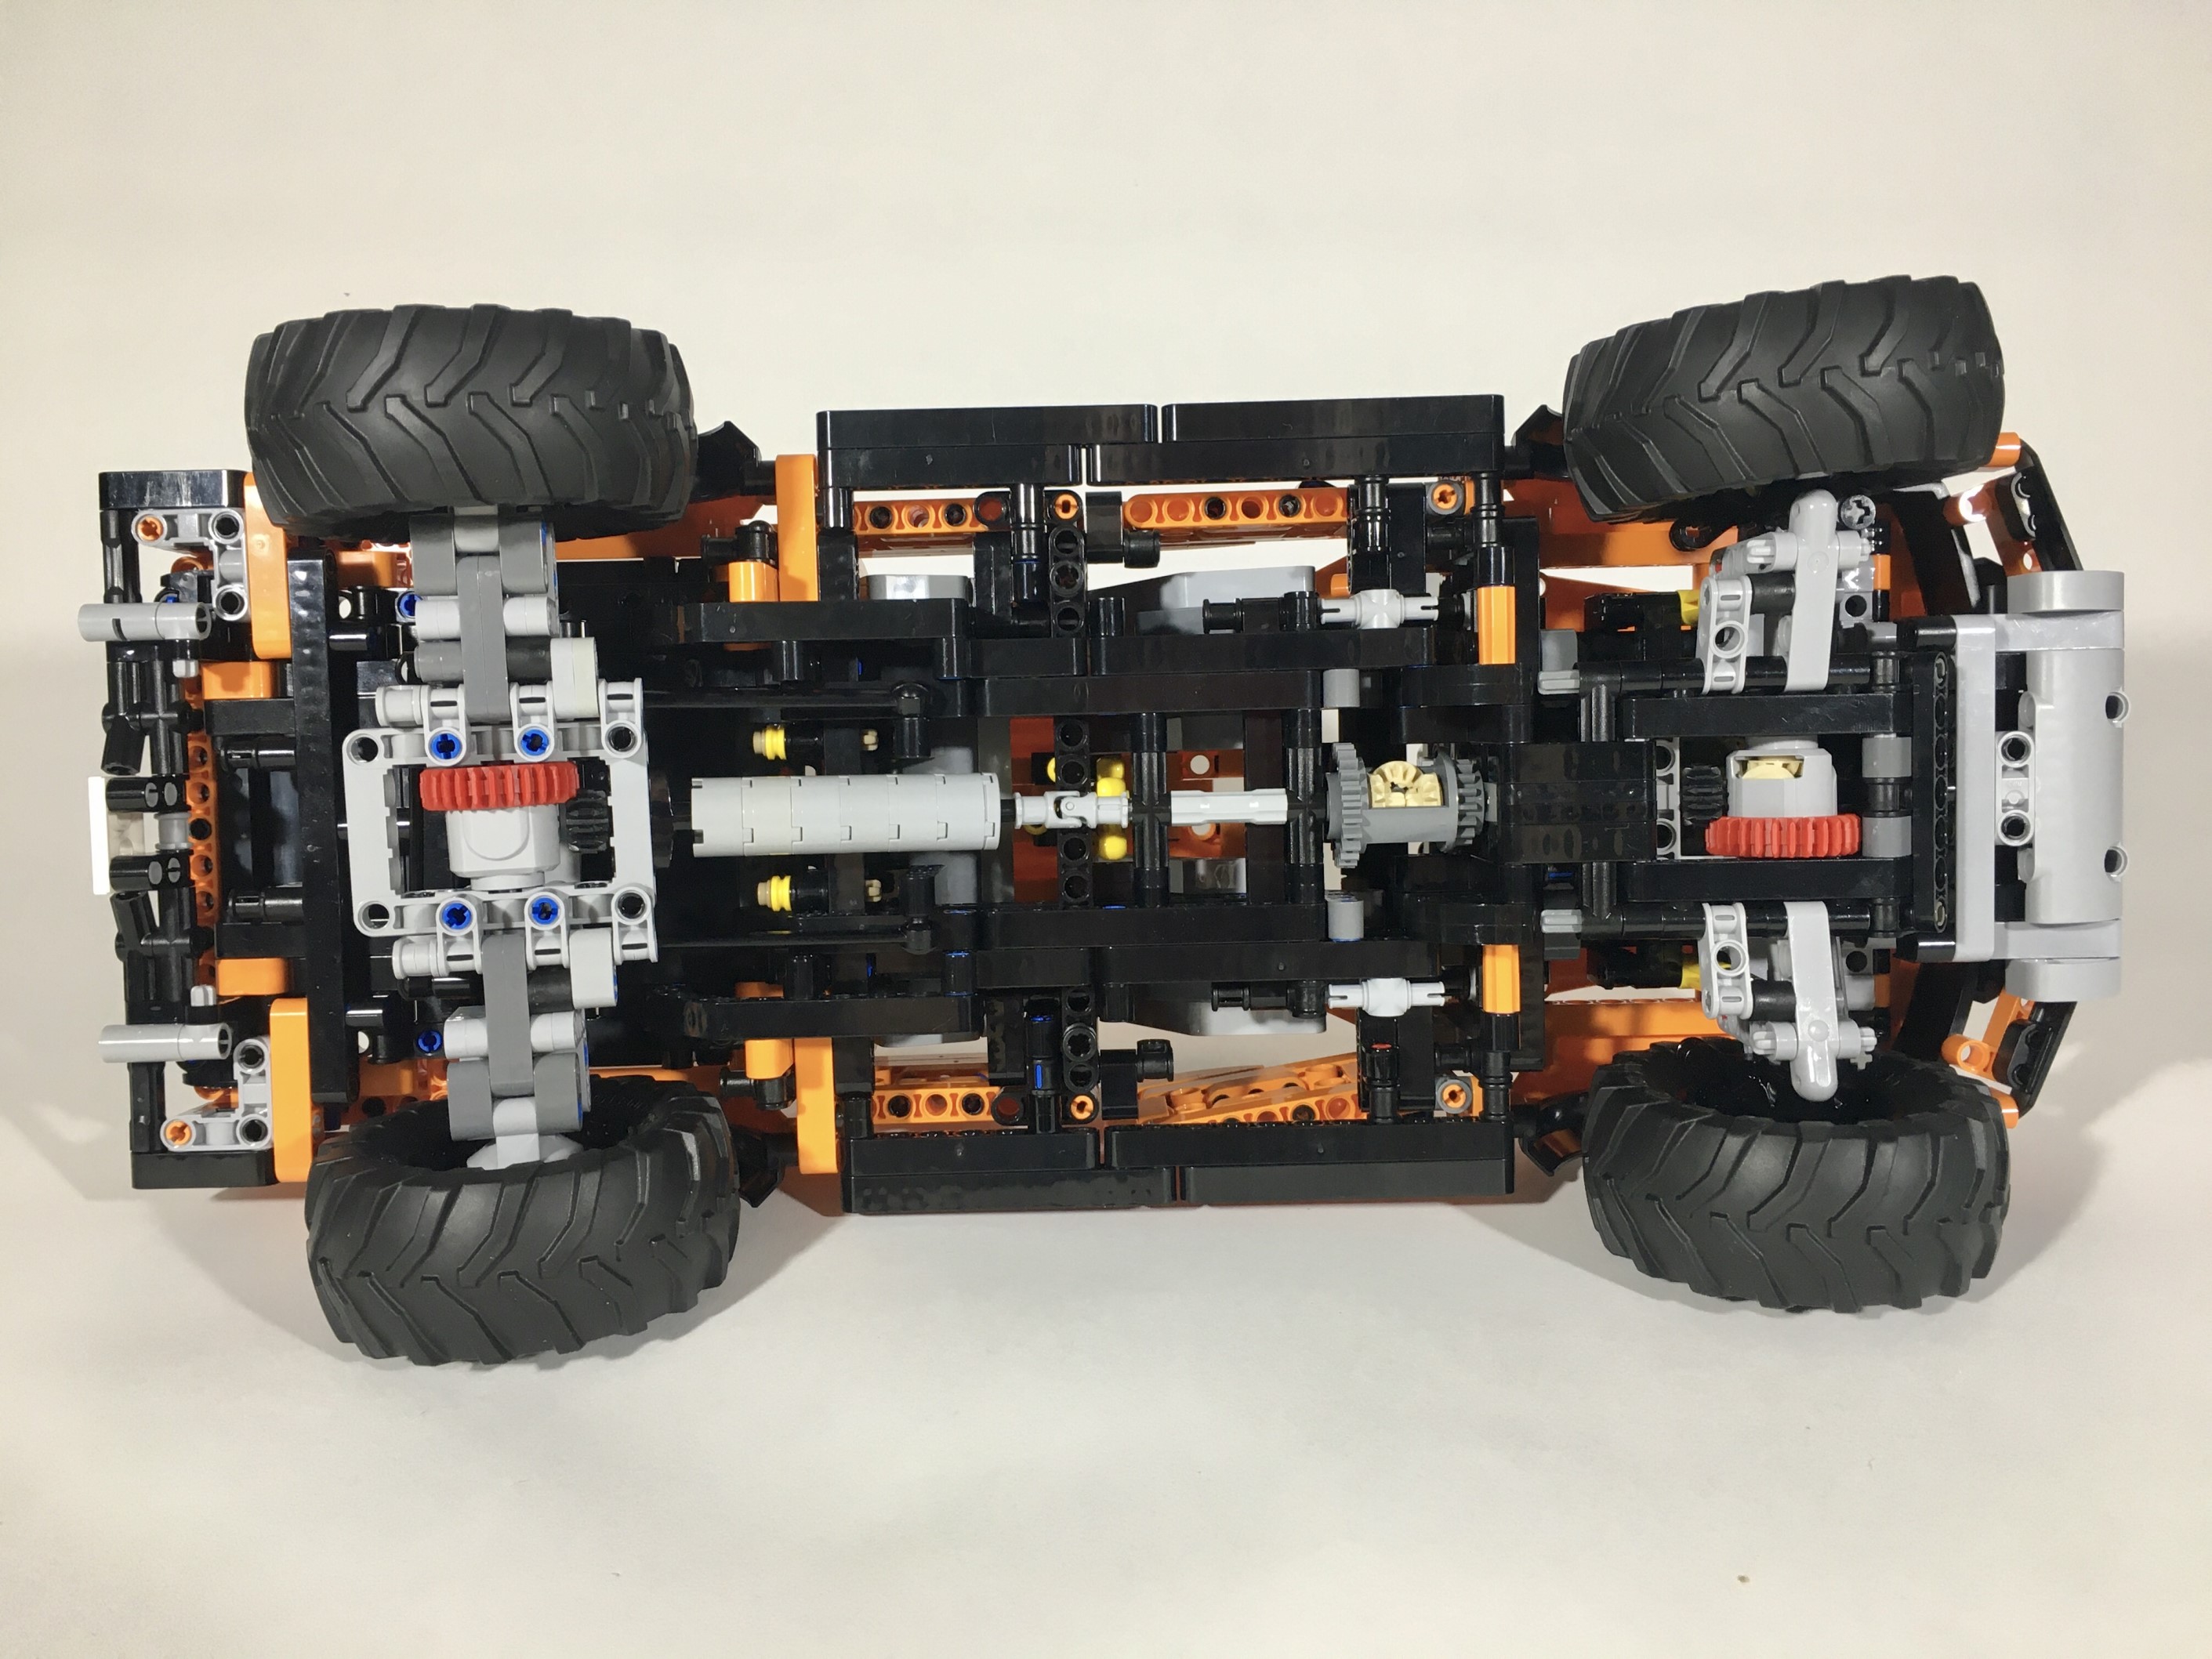
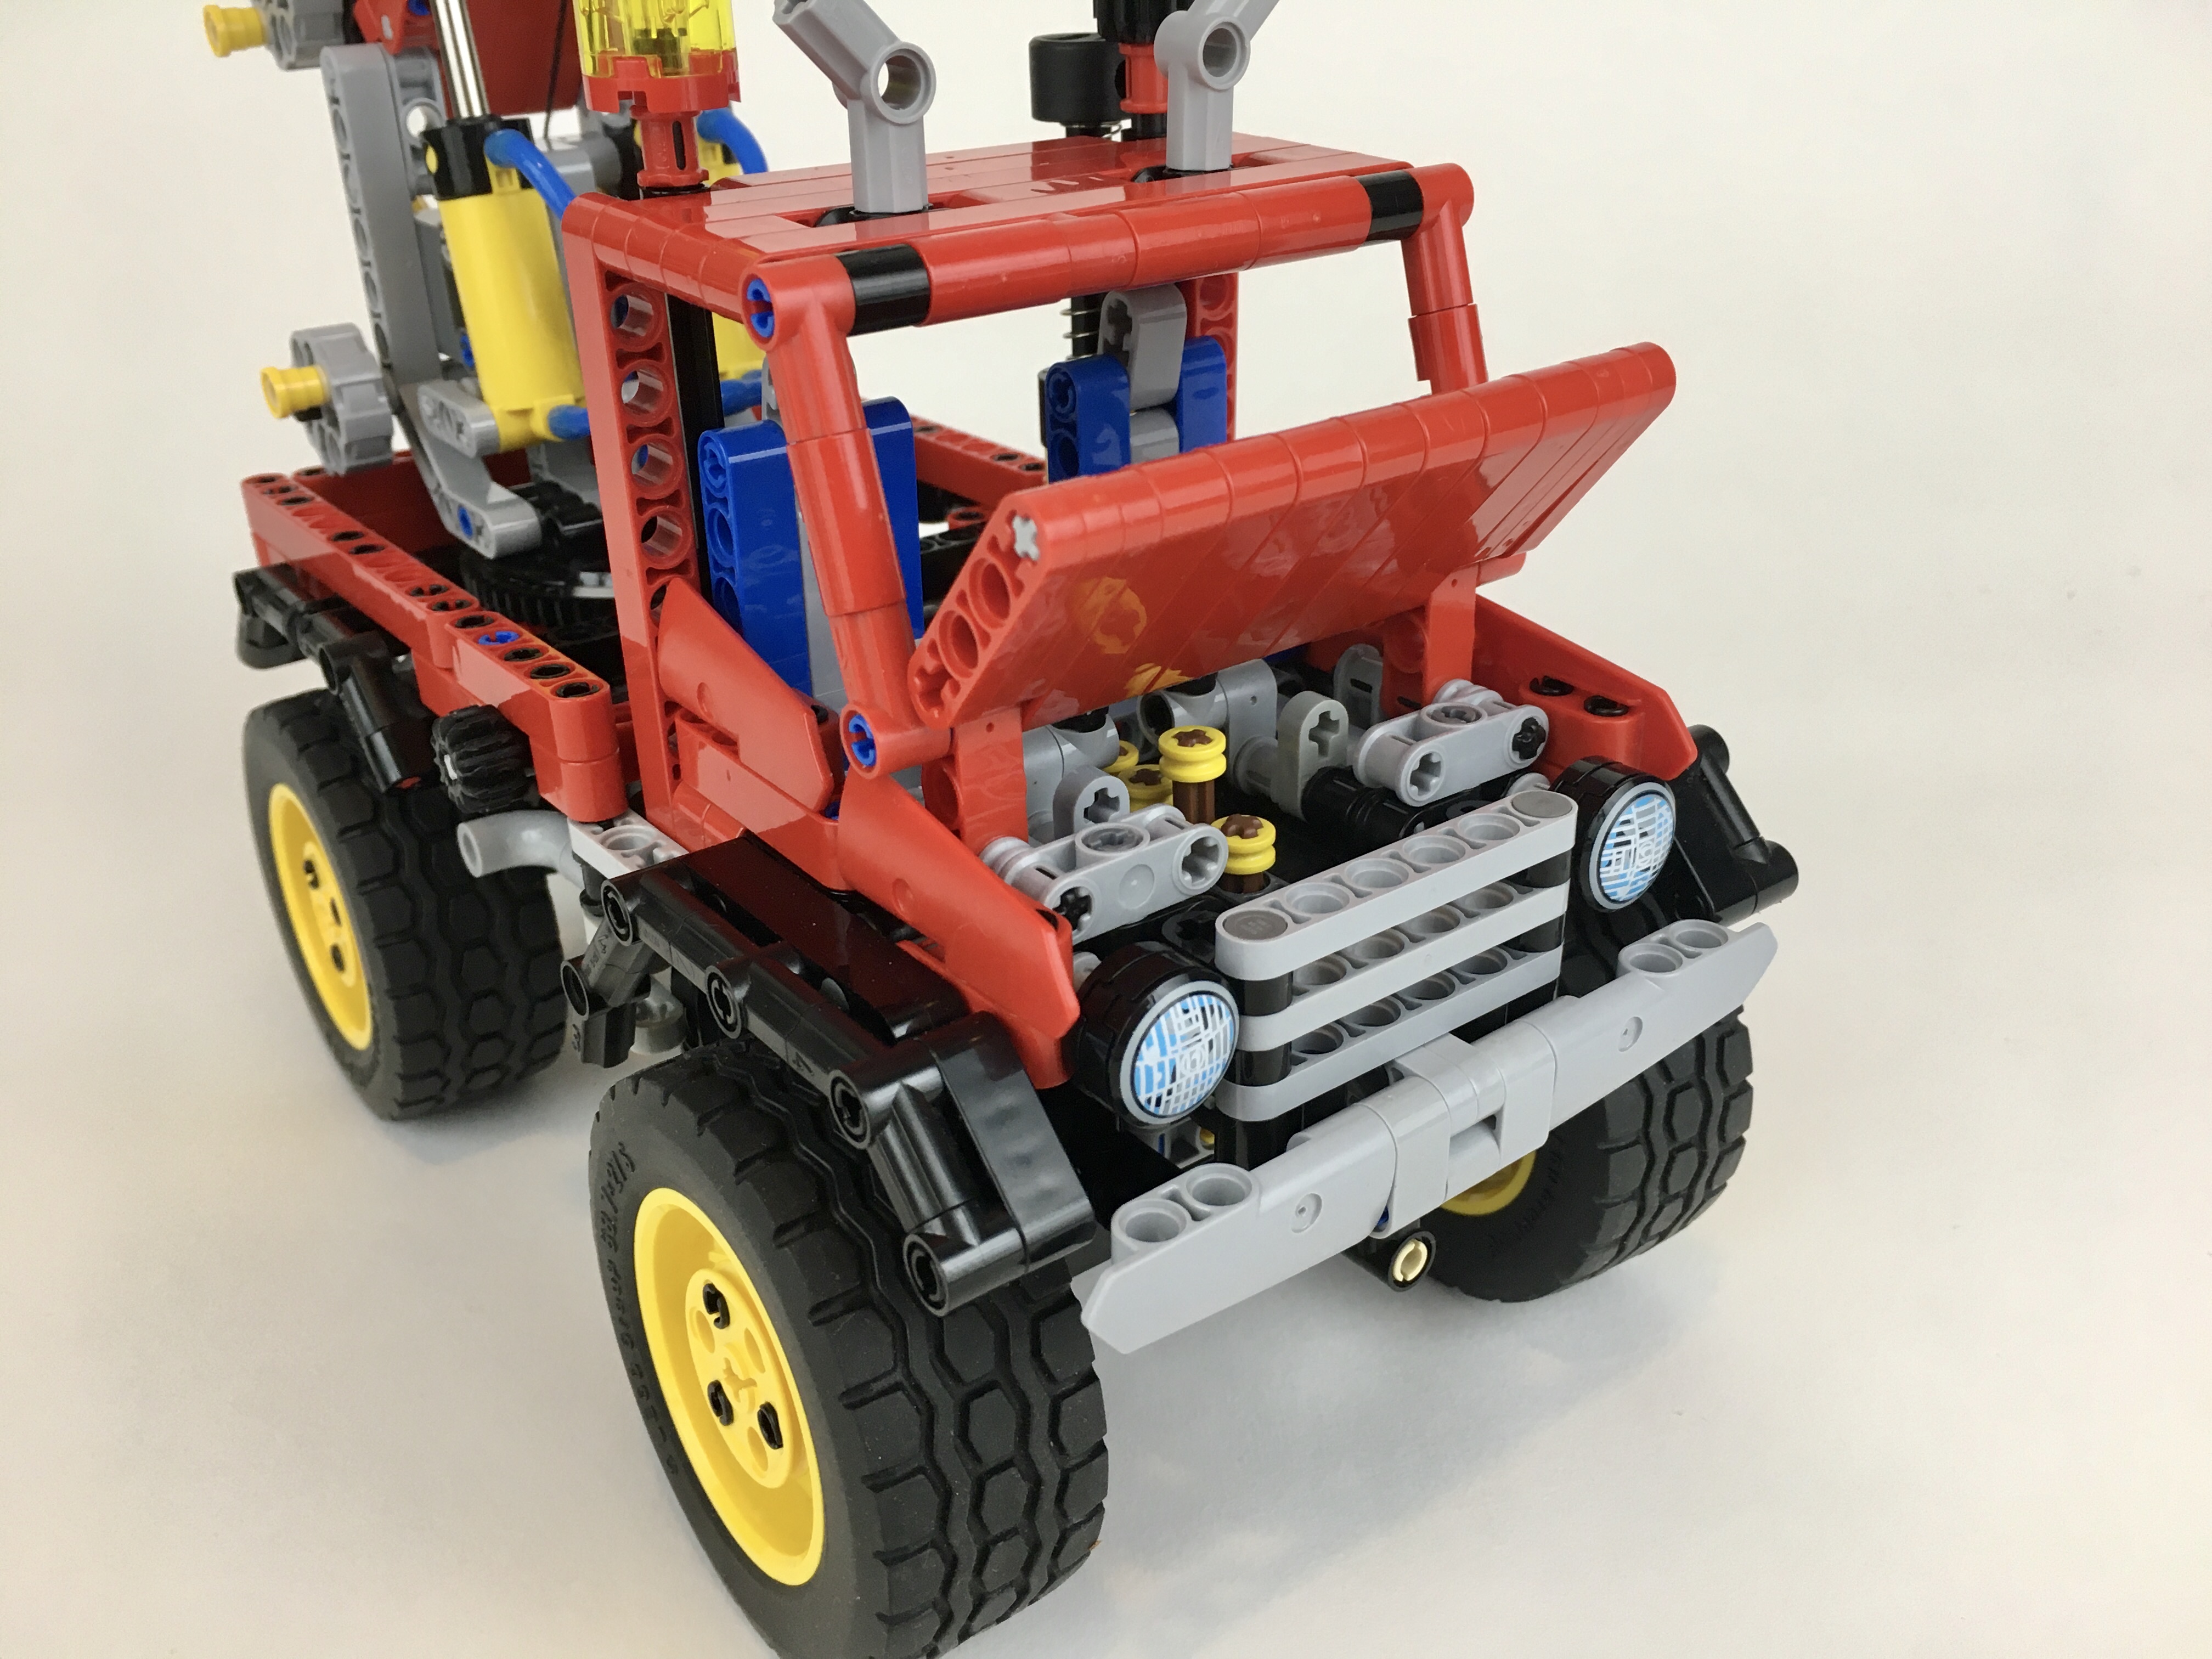
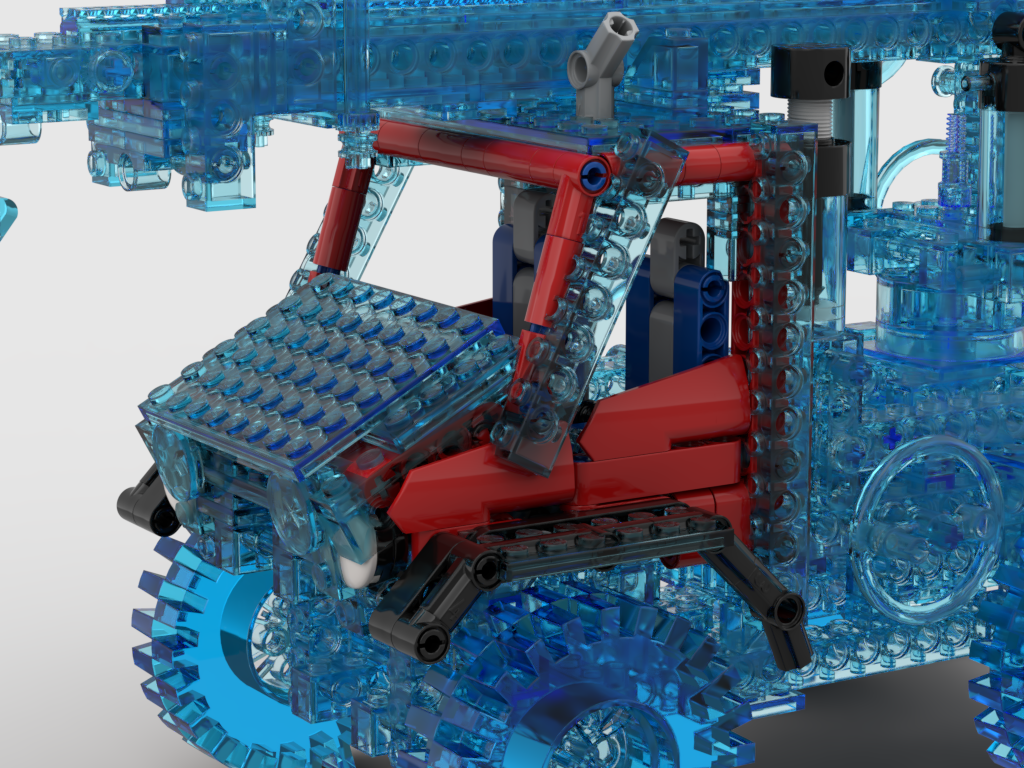
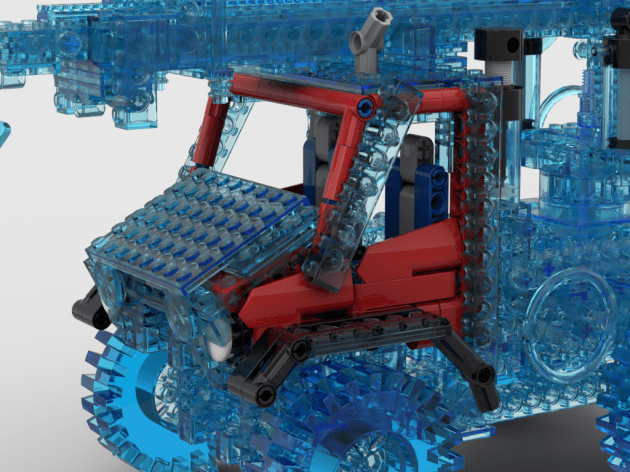
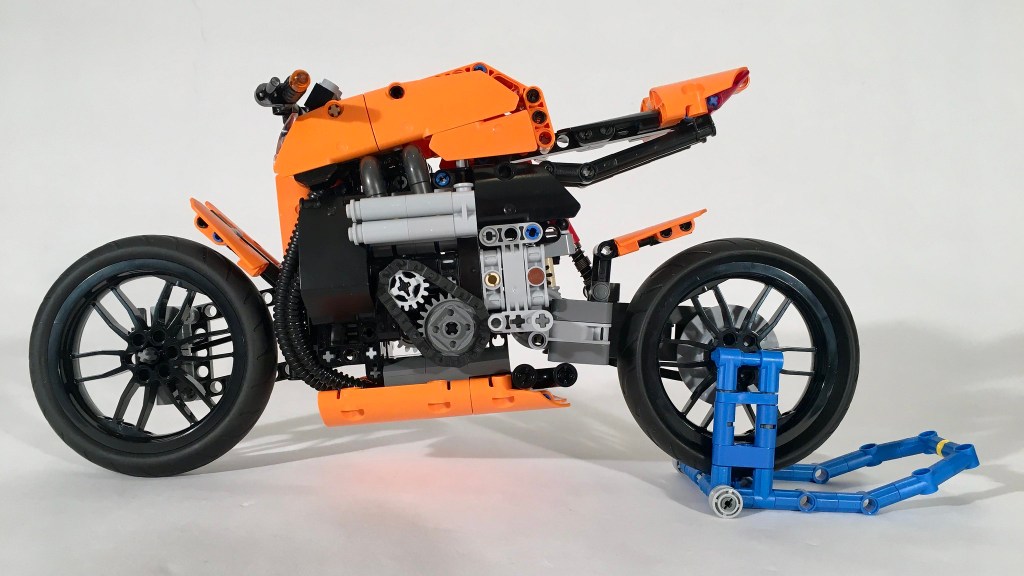
In fact, before I even received my copy of 42126, I was designing and a building a new chassis. The V-8 was easy enough to add, as the space under the hood is extensive. Adding in a front drive axle was a little more complicated. To keep the width, steering geometry, and suspension travel the same as 42126, adding a front drive axle would take a little work. I used a floating differential design, which allows the differential to move freely as the suspension travels through its movement. The steering link was flipped upside down, and relocated in front of the drive axle. The suspension swingarm and shock absorber mounds did not change.

42126 V-8 4×4 Chassis

Immediately behind the engine firewall a differential that connects to the V-8, and the rear axle. The rear axle is changed to replicate a better movement of the rear Raptor. LEGO noted how the half module offset of 42126 was a feature they had to work on to get the placement of the axle correct. However, this feature was only needed as the pivot point of the rear axle was so to the rear of the pickup. By moving the pivot point of the rear axle farther forward, the travel pivots less, and creates a better axle movement of more up and down. This also helps place the axle better when one side is up, and the other down.

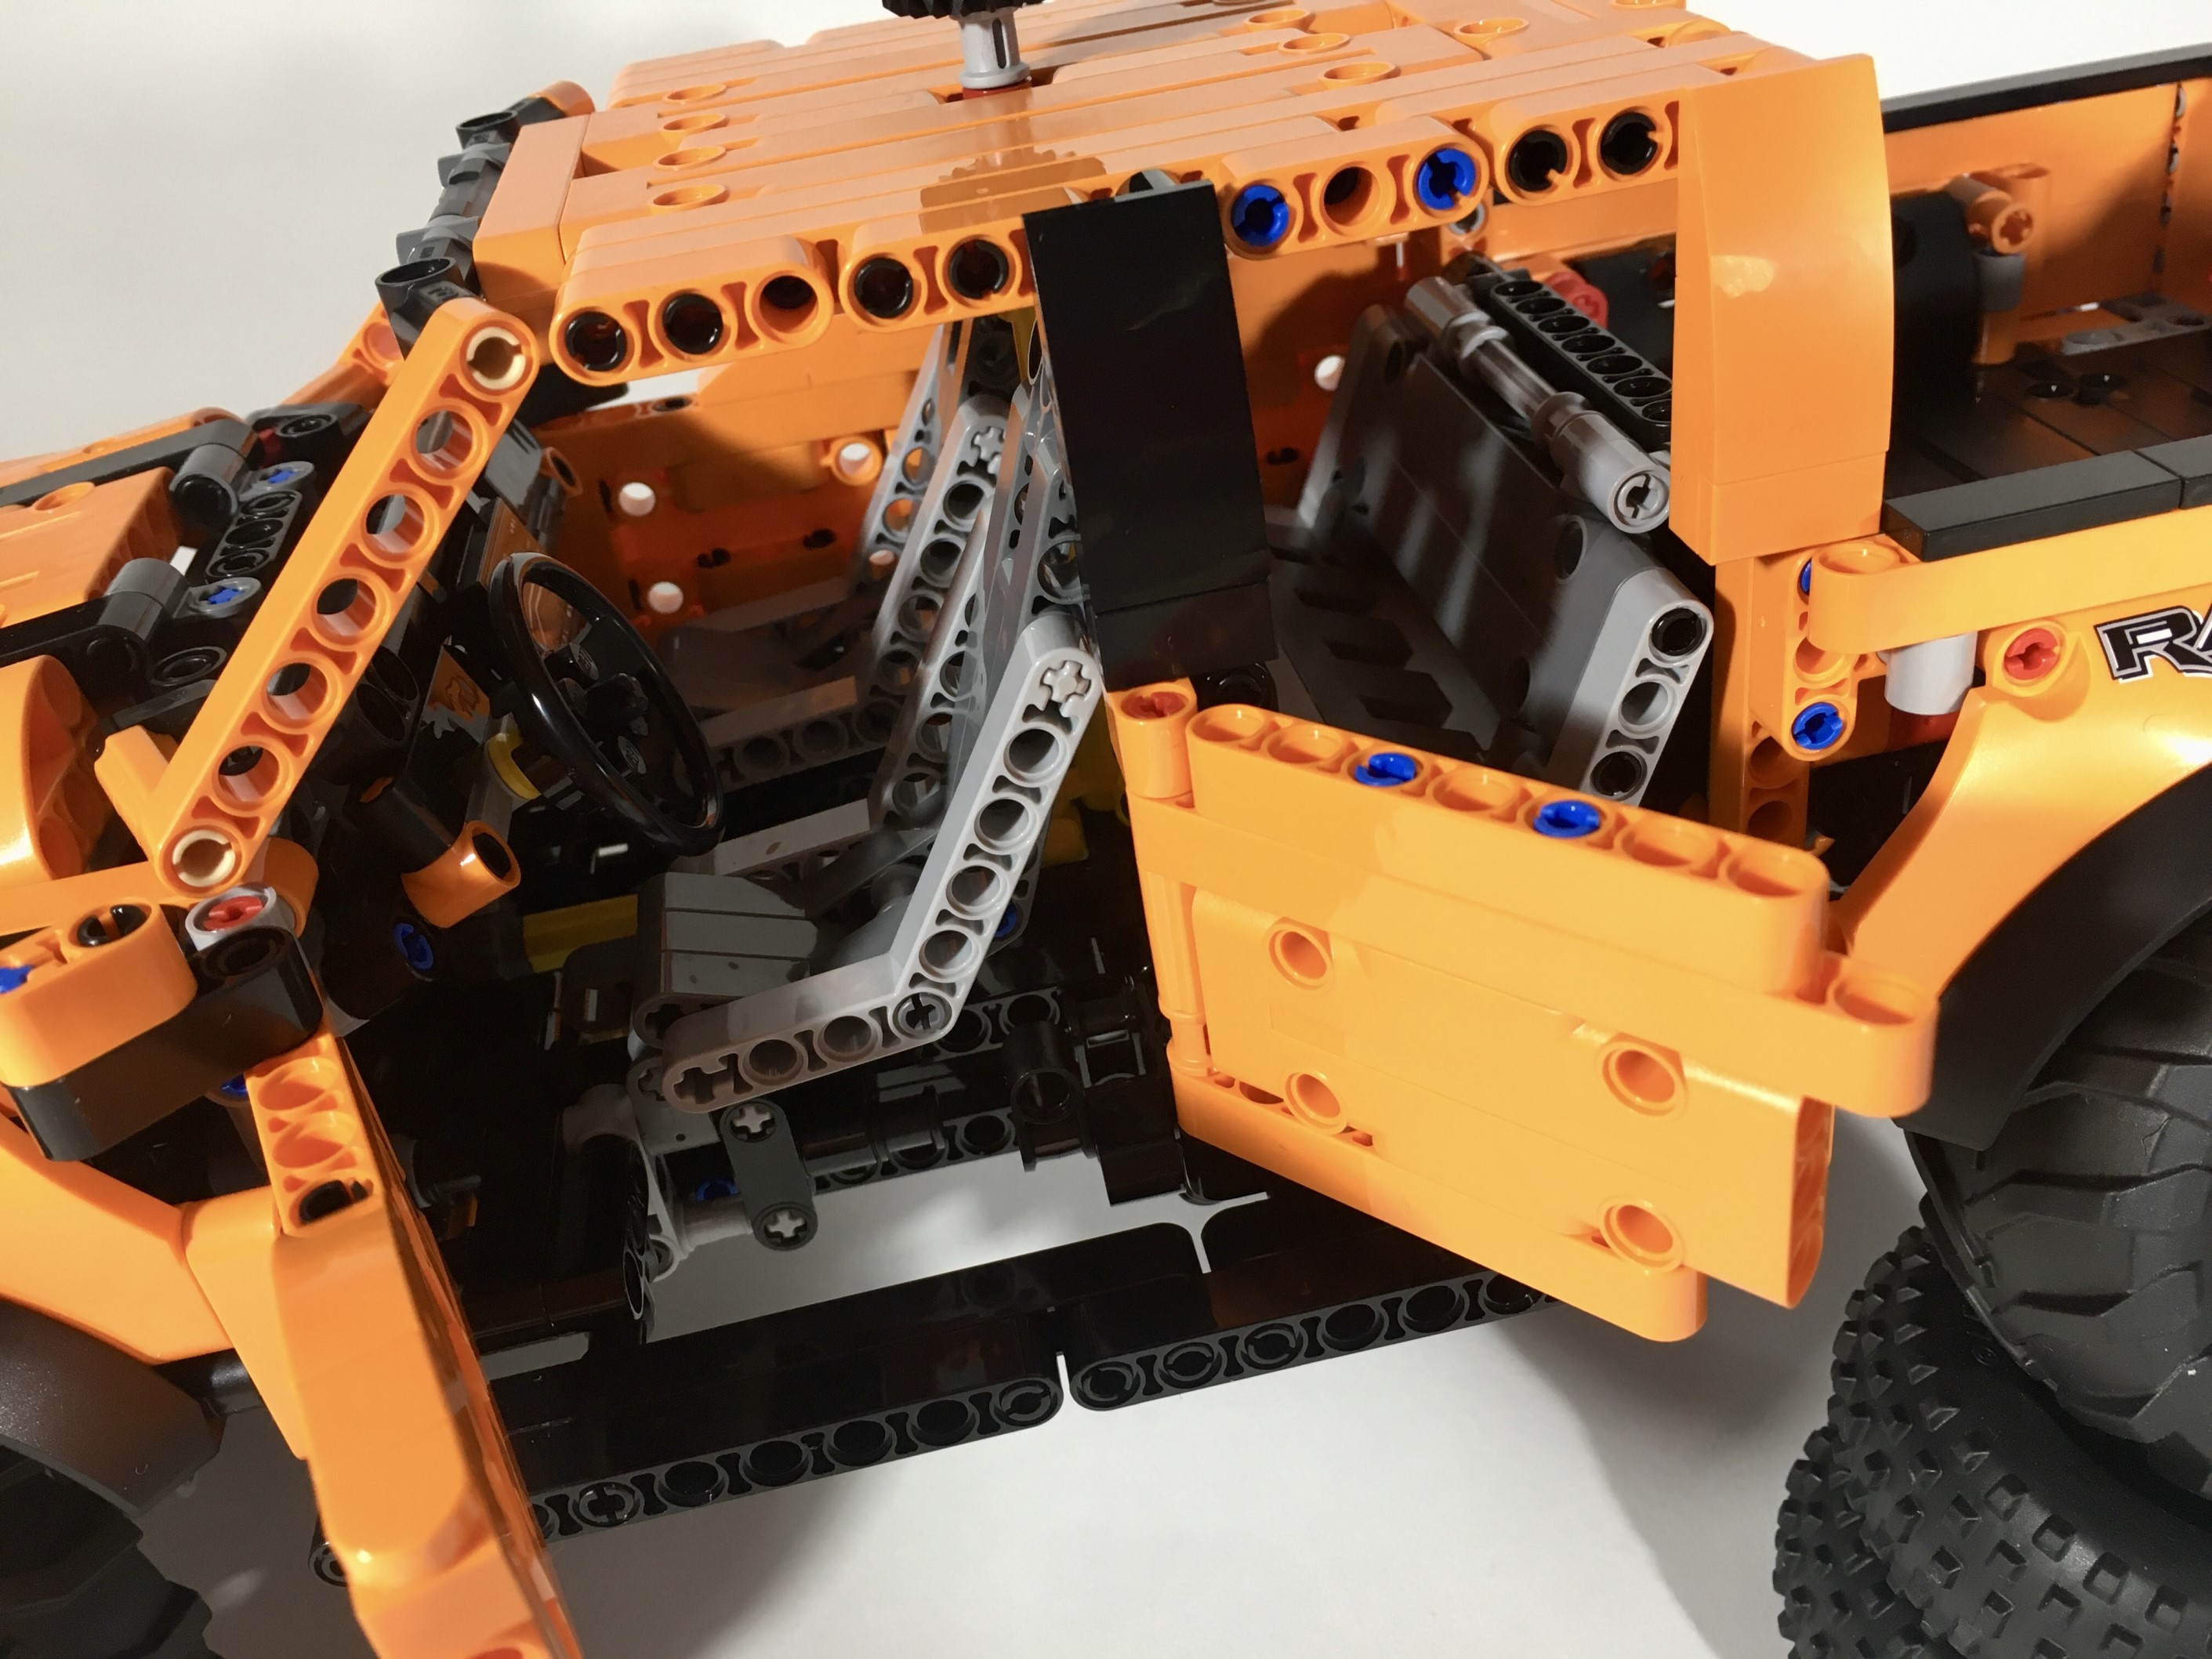
While I made no changes to the exterior, I made minor changes to the interor. The colors of the seats have been changed so they match one another a little better. Finally, with a little bit of cross frame bracing, the pickup was done. When 42126 finally arrived, I removed the bed, the doors, the hood, and the roof from 42126, and my F-150 was done.

I like making modifications of sets more than I like making B or C models of them. As such, this project was an enjoyable one for me. I worked fast, and I liked the improvements I was able to make to the original. I like the look of 42126, so keeping this consistent was fine for me, and the additions of the V-8 and the four wheel drive was a fun challenge to pursue. Now to see if I can do a Sport Truck version of 42126. Stay tuned….

Happy building!

8854 Update


Winner, Winner, Chicken dinner is what we say in my house!

Free instructions are available at Rebrickable.com.

LEGO 8854 Update

I often participate in online LEGO contests, and most of them are on Eurobricks.com. In the summer of 2021, Eurobricks announced TC20, Technic Studless Recreation. I participate in many, but not all, of the contests that Eurobricks offers. The requirement was to pick an old studded set, and recreated it in studless Technic. I couldn’t sit this contest out, as it checked all the right boxes for me. Entries would be smaller to stay in scale, the builds would be feature packed, and it they would have a deep nostalgic connection. I was in.

Choosing a set to recreate took some time. I started with a list of 32 sets, and started to whittle it down from there. Quickly I removed some of the sets for various reasons: interest, size, not right now, too sacred (8880). I ended with a top three of 6357, 8855, and 8854. 6357 would be interesting to me, but after doing 8640 a couple months back it could wait. 8855 had some opportunity. It is a classic set, and instantly identifiable. I built a little mock-up, and let it sit for a couple of days. I didn’t come back to it.

I am not sure why I did not settle on 8854 right away. I love building Unimogs, and when I do updates I like to add some features. 8854 was missing suspension and an engine, so everything was right for me to recreate this iconic set. I had made my decision and I started posting my progress. First, I had to decide the scale. I made the decision to use the newish Batmobile tires in the build, which make the tires a little larger than the original 8854. I added a stud to the wheelbase to compensate, but otherwise the scale would remain the same.

Next, I had to figure out how to add all the features I would want, while keeping all the original features. HOG for the steering would remain on the top right side of the cab, naturally as a beacon. I then added a control gear for the outriggers on the top left side of the cab. The rotation of the crane would be on the right of the truck driven by a worm gear, and all other crane controls would be on the crane itself.

Fitting in the suspension and engine was a little tricky. Adding the engine was simple enough. There is a differential on the rear axle with portal axle. The driveshaft goes forward to drive a I4 mini engine. Suspension is a dual pendular axle setup: both axles pivot side to side. The front and rear axles are linked together so that when one axle pivots right, the other axle pivots left. It is a simple design that functions well.

LEGO 8854 Engine

Designing the crane was the easiest part. Panels form the base of the arm, and a simple extending boom as created using studded technic beams and some rack gears. A worm gear extends the boom.

The cab is where I had some trouble. 8854 has a funny shaped cab to my eyes. First, it is very narrow. Second, the hood slopes very steeply. Third, the windshield is not very steep, more car shaped than truck shaped. I rebuilt 8854 in Bricklink Studio to help me compare the two designs over each other. I found this to be a helpful step, and allowed for some good feedback from other Eurobrick members. I ended up making the hood a little more flat and slightly shorter. The roof was made a little longer, which made the windshield a little more steep. Then added the fenders that wrap around the wheels a little better, and headlights and a grill that referenced the original grill. I was pleased with the final design. Oh, and I added seats, opening doors, and a dashboard.

Being able to compare the two versions side by side helped me feel comfortable with how the build was going. Most of the time I use Studio when the build is complete, as do not like to tinker in Studio. However, being able to see changes in real time, was immensely helpful. I could ask was the new version staying true to the original? If not, what was the specific part that was making it feel/look off? Being able to overlay both versions on top of each other was helpful, and a step I will do again in the future.

Cab Comparison Overlay

It turns out the design was good enough for a first place! I was thrilled that through both a voting and jury stage, this update was picked over 46 other designs. In addition to that affirmation, I was pleased with how the MOC turned out as well. The functions all worked well, and the control of each was simple and effective. I only wish the suspension was little more stable, but this was only noticeable when the crane was fully extended. I’ll use the suspension again in other MOC soon. If you love 8854 as much as I do, I hope you will give this update a build as well.

Happy Building.

Compact Telehandler


Sometimes I plan out a build, and other times, a build just kind of happens. This was the latter.

You may find free instructions for this MOC at Rebrickable.com.

After building the Atmos Tractor, and then a gazillon implements, attachments, and trailers, I started branching out to other machines that could be used at the Thirdwigg Farm. The Compact Loader was a result of this. I was playing with the new LEGO 42122 tires, and quickly came up with a little four wheel steering idea. I added a fork boom, and decided to see where the project would go.

I am quite fond of LEGO 8283, and the rest of the design was influenced by this little set. I tried a couple of boom extension designs, but each looked a little too “overweight” for the little tractor. So I came back to the extension design that was used on 8283. A mini linear actuator is used to lift the boom. Both functions are controlled by two separate gears on the back of the telehandler.

The cab came together pretty quickly, though I had to make sure the new tires had a clear range of motion. I added some lights, and front fenders which brought a little visual weight to the front. I had a tricky time finding rear fenders that I liked, but I eventually found a solution I liked. In my move towards increasing the readability of my instructions, I have published a PDF with step-by-step instructions that list required parts for each step. I hope they are clear for you, and they bring value to your own build.

The Compact Telehandler worked just as I hoped. The steering is great; it’s fun to drive this little tractor around on a small desk. The boom lift works well, and has a great range of motion. The extension works smoothly, though since it is driven by a worm gear, if the extension is in the wrong position while trying to lift the boom, the boom will bind. The fork tilt mechanism is smooth, and is easily accessible in all boom positions. We will see what next build come from just playing with a couple of parts.

Happy building.

Kickboxer Diesel


I have done a lot of difficult LEGO projects over the years, but this project was the hardest in a while.

You may find free instructions for this MOC at Rebrickable.com.

I often participate in Eurobricks Technic contests, and this last winter, I chose to participate in TC19 Technic Motorbike Contest as I enjoy Motorcycles, and I have built only one. This was an oportunity for me to develop some skills in a MOC that I have not done in the past. I had no idea, how much it would stretch me. From the start I committed to the following features: steering , suspension, an engine, and a transmission.

I quickly picked a motorcycle to replicate, the fantastic Kickboxer, and got to work. First I set the scale and did a rough draft of the suspension. I built a little flat 4 engine.

Then I started on the transmission. The transmission is a four speed sequential transmission that is shifted on the left of the motorcycle. I took a while to get the design to work, and then took a lot of time to get it to fit into the motorcycle. Finally, I was able to get the final solution to work. It’s dense and complicated. I encourage you to take a look at the instructions to explore it a little more.

The suspension worked until I finished much of the bike. Then it sagged, and required a complete rebuild. I was able to retain much of what I wanted even after the redesign.

The motorcycle was a build I was very happy to finish. I was frustrated multiple times in this build, so I had a high sense of accomplishment when it was done. The transmission works flawlessly. The suspension is sufficient, and the steering is a little gummy. But all in all, it’s a build I am proud of. I hope you enjoy it too.

Happy building.