On December 18th, 2004 I bought 8386 here in Cologne, Germany. It was the first LEGO set I bought in 7 years, and thus was the end of my Dark Ages. It was my return to LEGO. Today marks ten years since I bought this set. This is a celebration of that event 10 years ago.
A lot has happened in the last ten years. When I think about that time I pause to reflect on where I have come. I have lived in 10 different places, including three states, had a number of different jobs, and increased my family unit by a factor of three. But people don’t come to this website to read about me, they come for LEGO. Over the last ten years we have gained much. The Technic line has improved both in terms of functional abilities, but also in the frequency and quantity of models offered. We have gained Power Functions. We have Linear Actuators, CV joints, more suspension parts, and so many more wheel options. We have favorite elements that did not exist ten years ago. Colors now include green, blue, white, and orange. LEGO made a Unimog. Bricklink started not much more than 10 years ago. Let that sink in for a moment. All of these developments have made so much of my building possible. It only makes sense to celebrate with a MOD of the set that reminds me of my return.
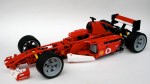
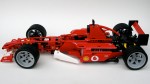
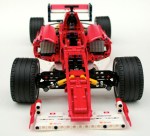
8386 was a rather basic set. It was modeled after the F2004 car #1 or #2 of the 2004 Scuderia Ferrari team through a licensing agreement with Ferrari. The cars were rather successful during the 2004 season at the hands Michael Schumacher and Rubens Barrichello. 8386 included working steering, a working V-10, and a removable engine cover. And that’s about it. Oh, and a lot of stickers. As I did with the 8081 4×4 my goal was to keep what was there, and improve what I could. I would add some additional features, namely suspension and a gearbox. Since 2004, LEGO has added a number of elements that made these goals easier than they would have been ten years ago.
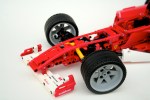
First, I built 8386 as is. After a good hour, I had the stock 8386 complete. I had my constraints, so now I needed to modify the set. I started with the front suspension, as I thought that would be rather difficult. Turns out it wasn’t. I removed a couple of axles, and added in two hard shock absorbers. The geometry made the suspension adequate. It could have been a little harder, and could have been a little more aesthetically pleasing, but it worked.
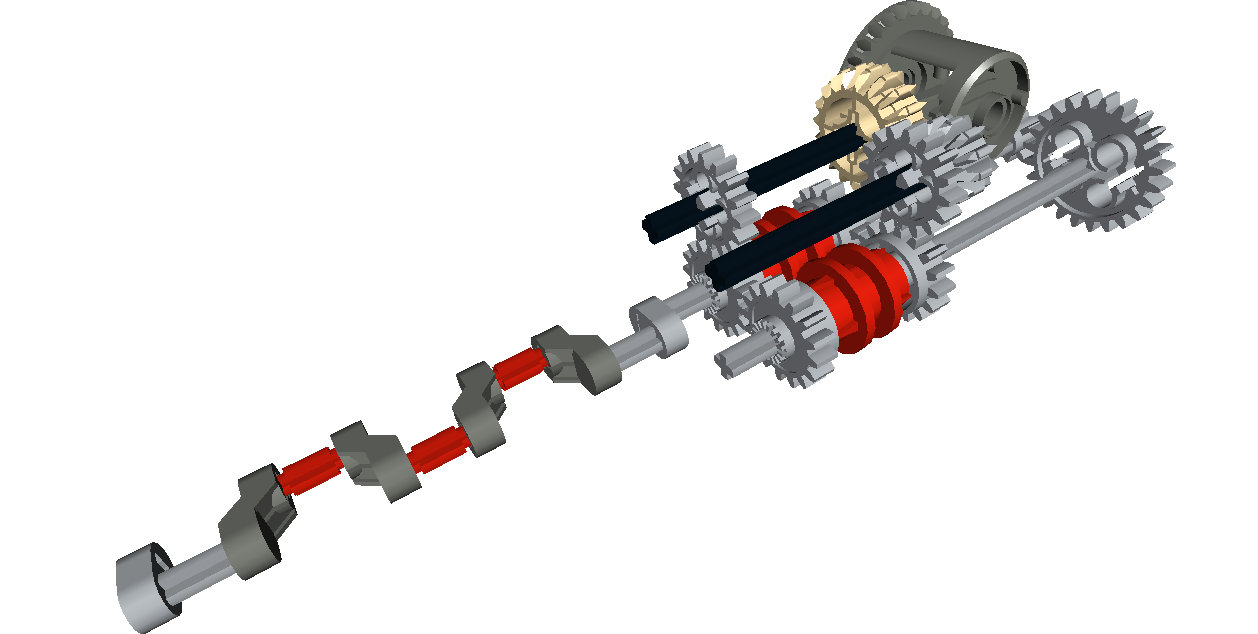
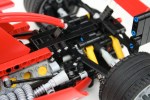
On to the rear. First to go was the trans-clear engine. Ugh. I knew I wanted to add rear suspension, but I was not sure I wanted to add a gearbox due to the limited space. I played around with some designs, and decided I should give it a go. I came up with a design that would need only 7 studs of space. The design would be off center of the car, which would present some changeover problems, but saved 3 studs of length. One axle would connect directly to the new style differential, and the other axle would connect directly to the crankshaft of the V-10. At first, I set the gearbox behind the differential, but I found that option to be rather unsightly and added some complications to the gearshift linkages. With some modifications to the chassis, moving the V-10 forward a stud, and increasing wheelbase by moving the rear axle back 1/2 stud the gearbox would fit.
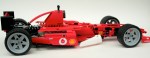
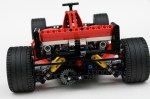
Once the gearbox was designed, I worked on the rear suspension. The gearbox got in way of the suspension design I wanted, but that was a cost I was willing to pay. I used the same upper arms as 8386, but created a liftarm design for the lower arm. Two shock absorbers connected from the chassis to the slightly modified wheel hub. While a pushrod design would have been nice, this setup worked well enough for me. I added a simple linkage to the gearbox that connected to levers in the cockpit. It looks a little clunky, but it allow all the controls to be at hand. I then made some modifications to the exhaust system so it would fit the added features. I made some modifications to the body work to give the car some visual lines that matched F2004, and added a little more white. The car was done.
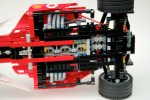
End of the V-10, beginning of the cramped transaxle.
All in all the design worked well, and required less time than some of my more fancy builds. It was a restful project, and one to which I enjoyed returning.
Maybe in another ten years, I’ll update this again with new features made possible with 10 years of LEGO changes and developments. I look forward to it.
Happy Building.
End of the V-10, beginning of the cramped transaxle.


Pingback: 2014 | Thirdwigg.com
Pingback: Windrower | Thirdwigg.com
Building shocks
Thanks