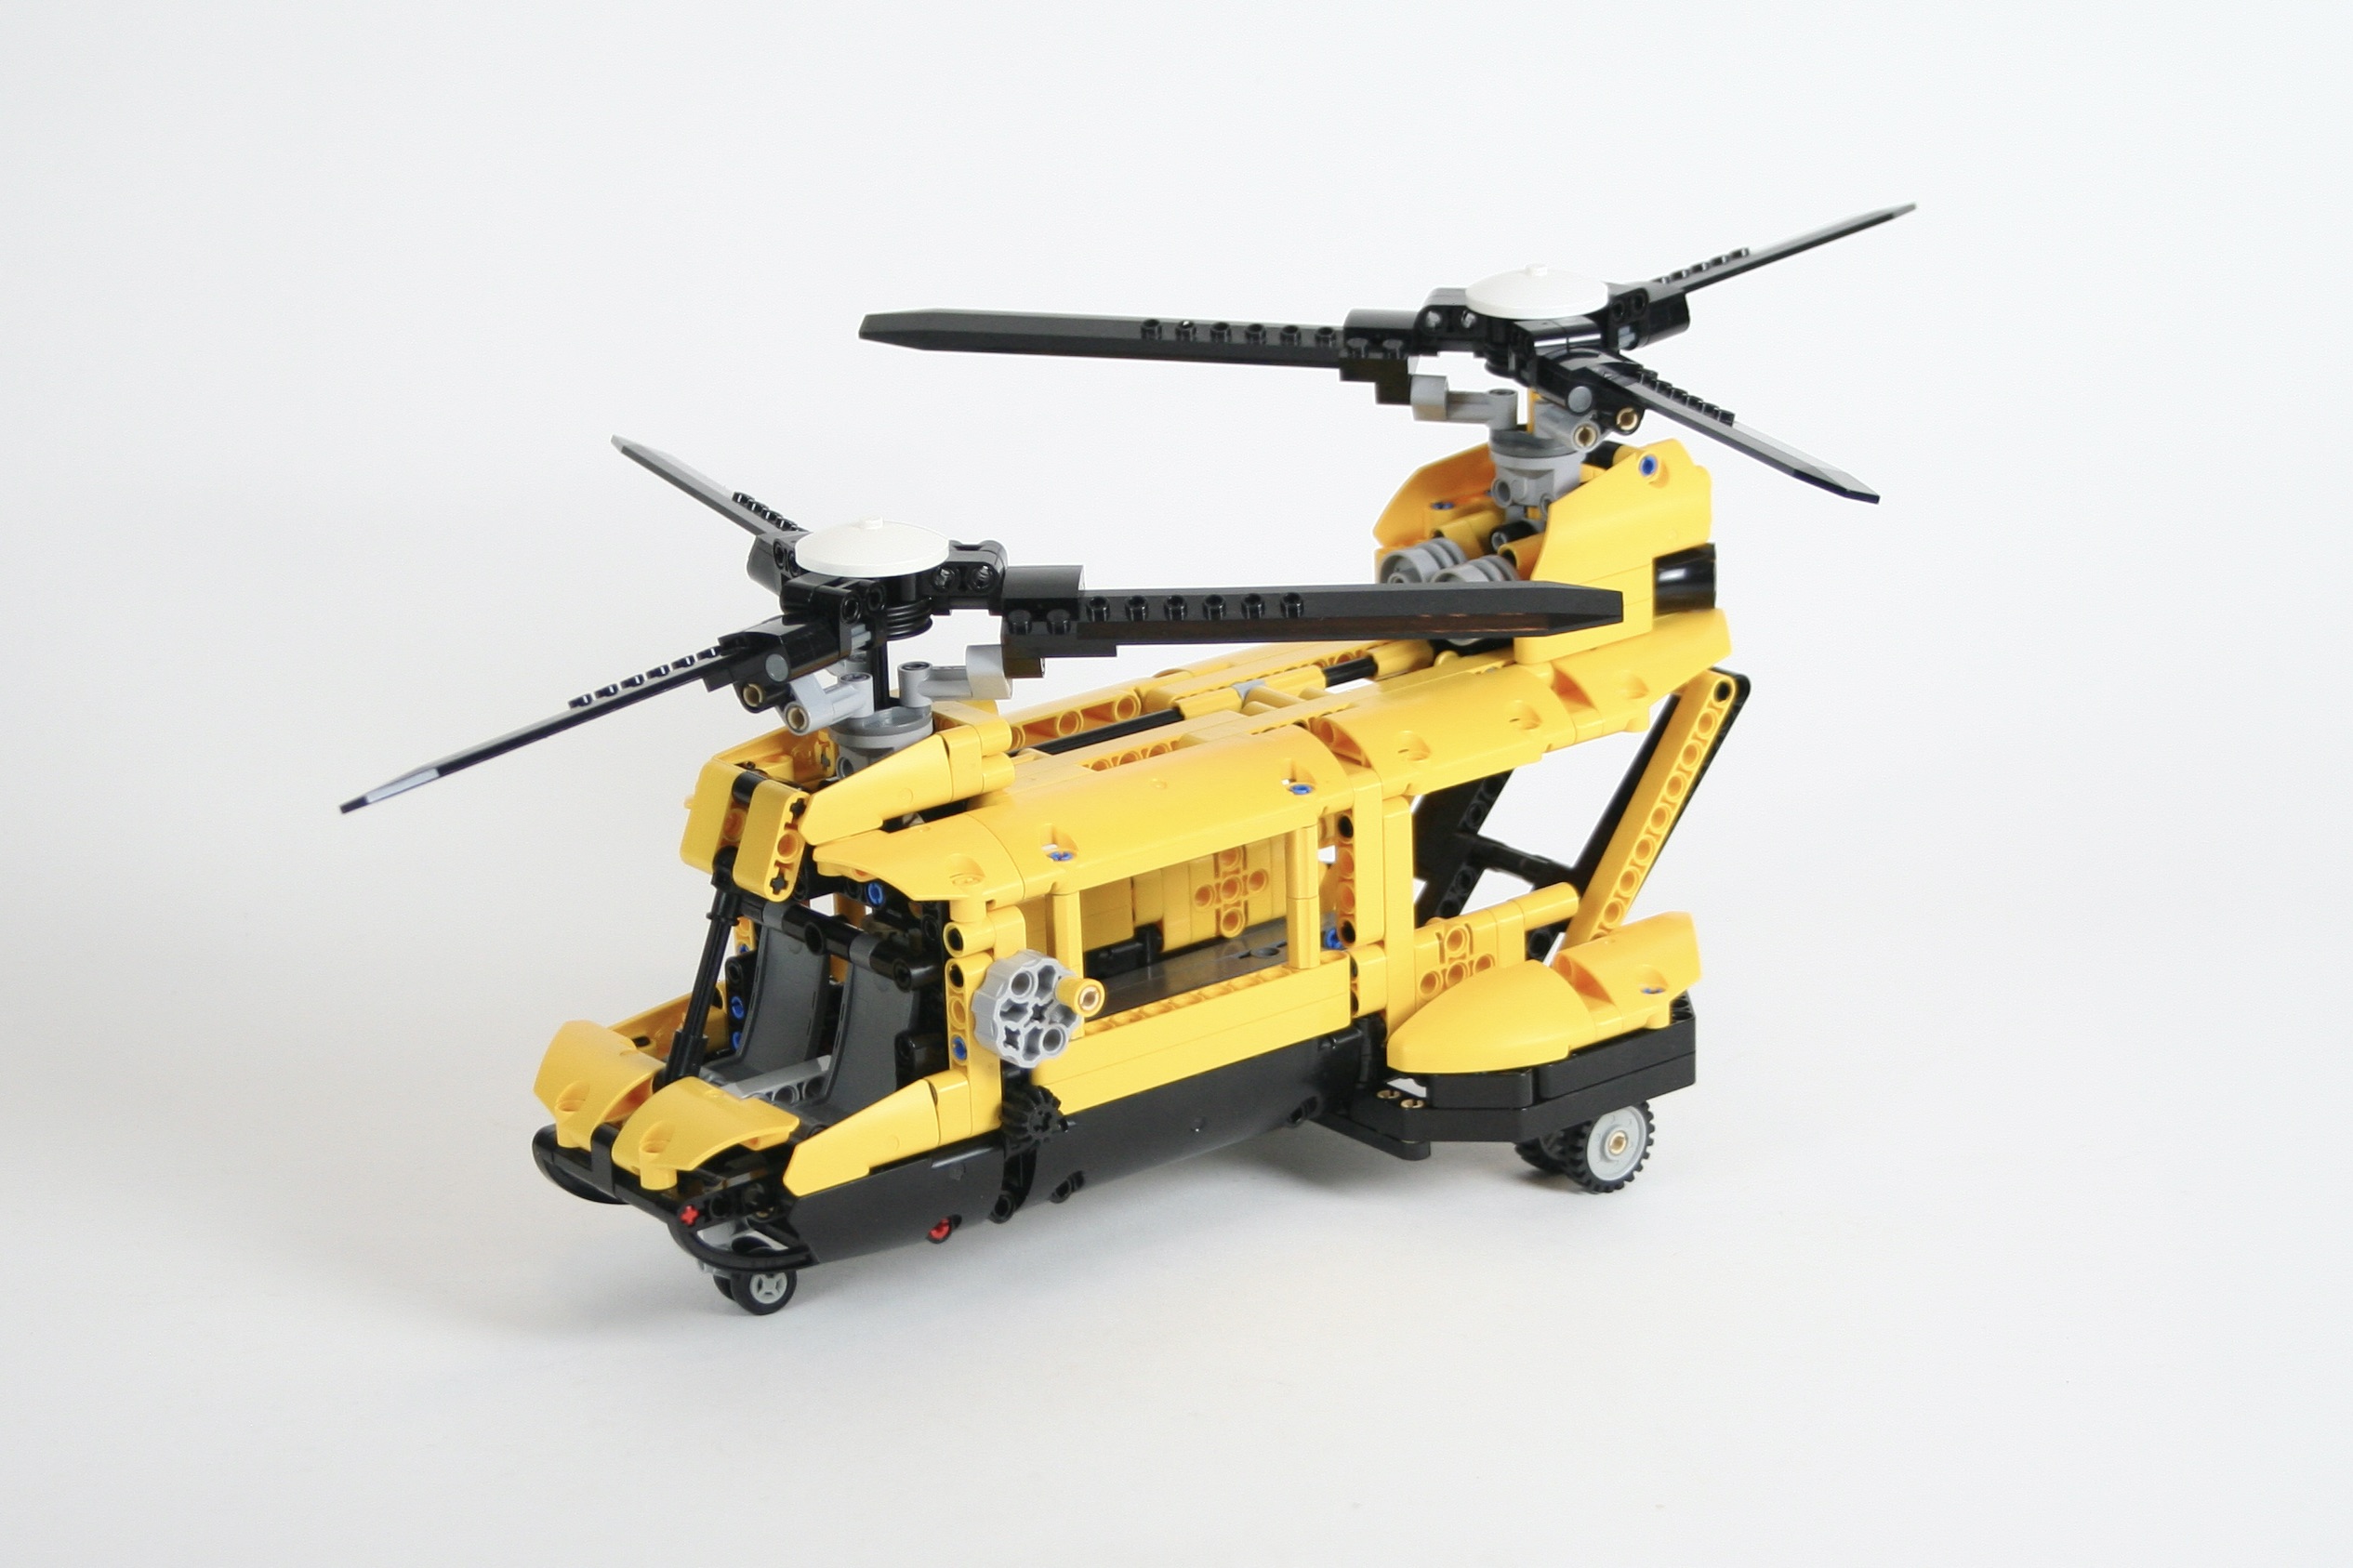
Like so many other people, I am have a nostalgic pull to LEGO sets that were released during my childhood. I, however, make the sometimes poor decision to try and update them using newer parts and building techniques. Set 8062 from 1994 was a unique little set in that it came with instructions for multiple builds and a carrying case. I never had the set, but the helicopter and grabber truck always caught my attention.
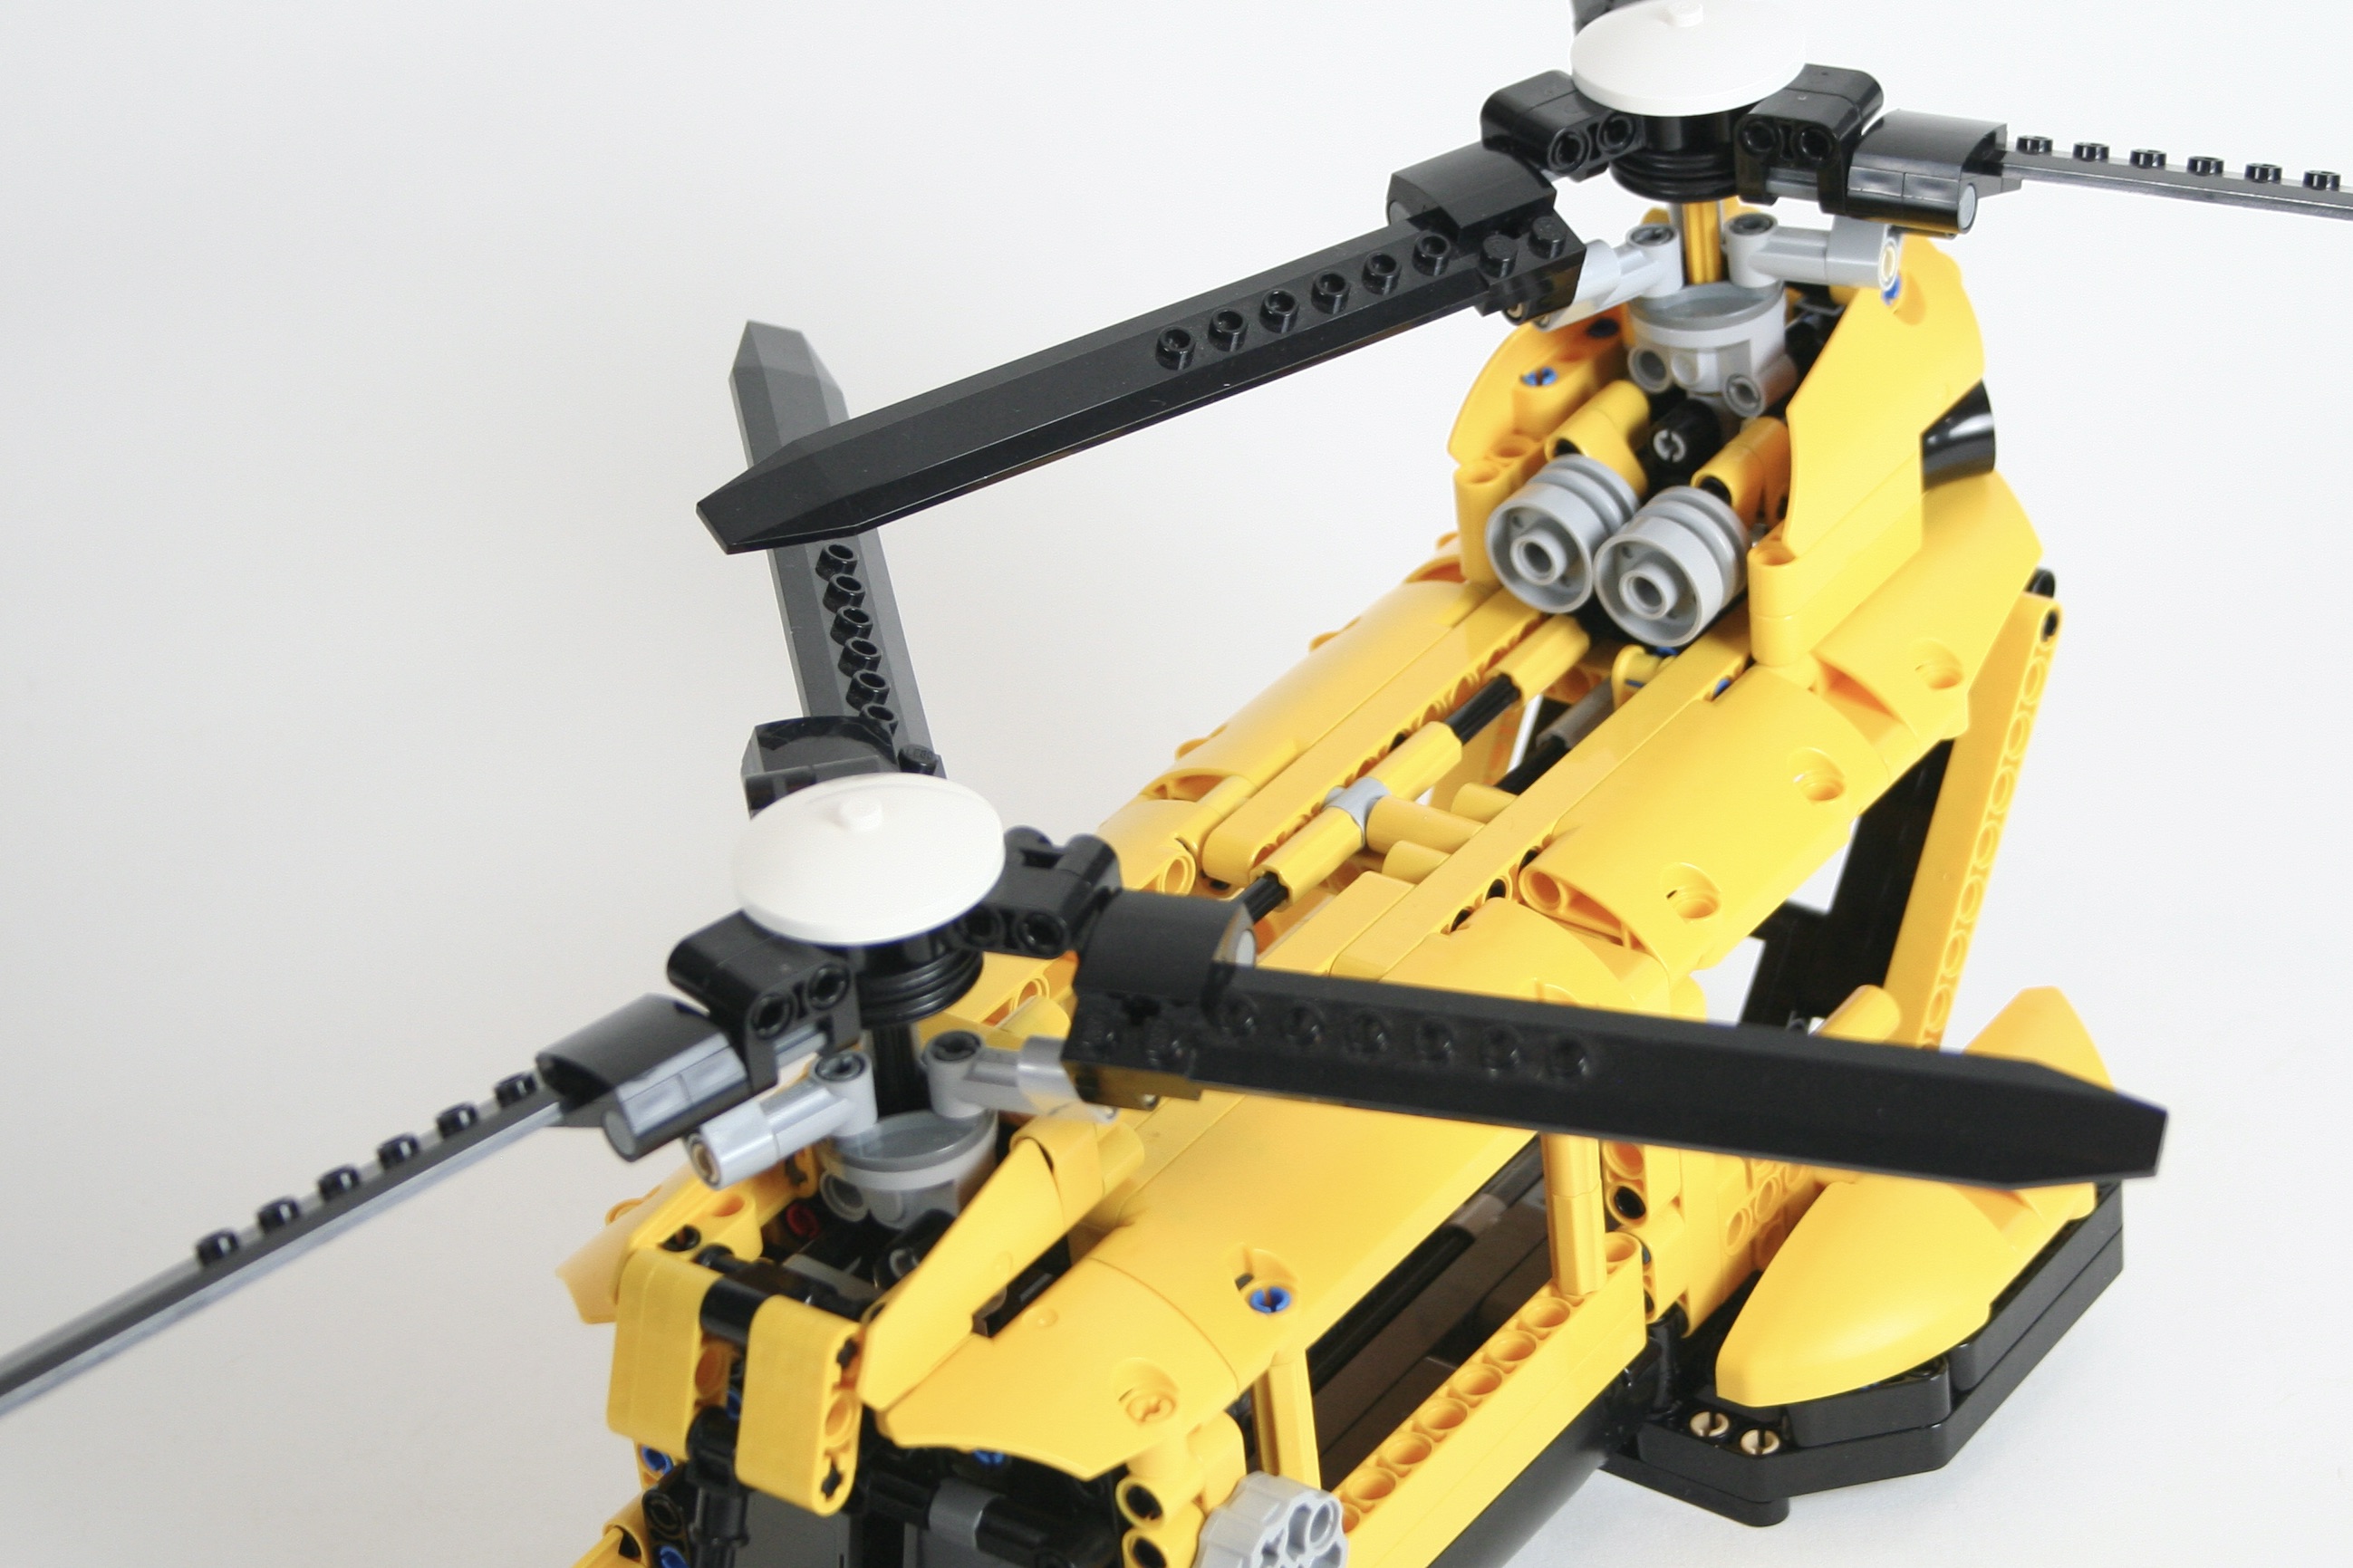
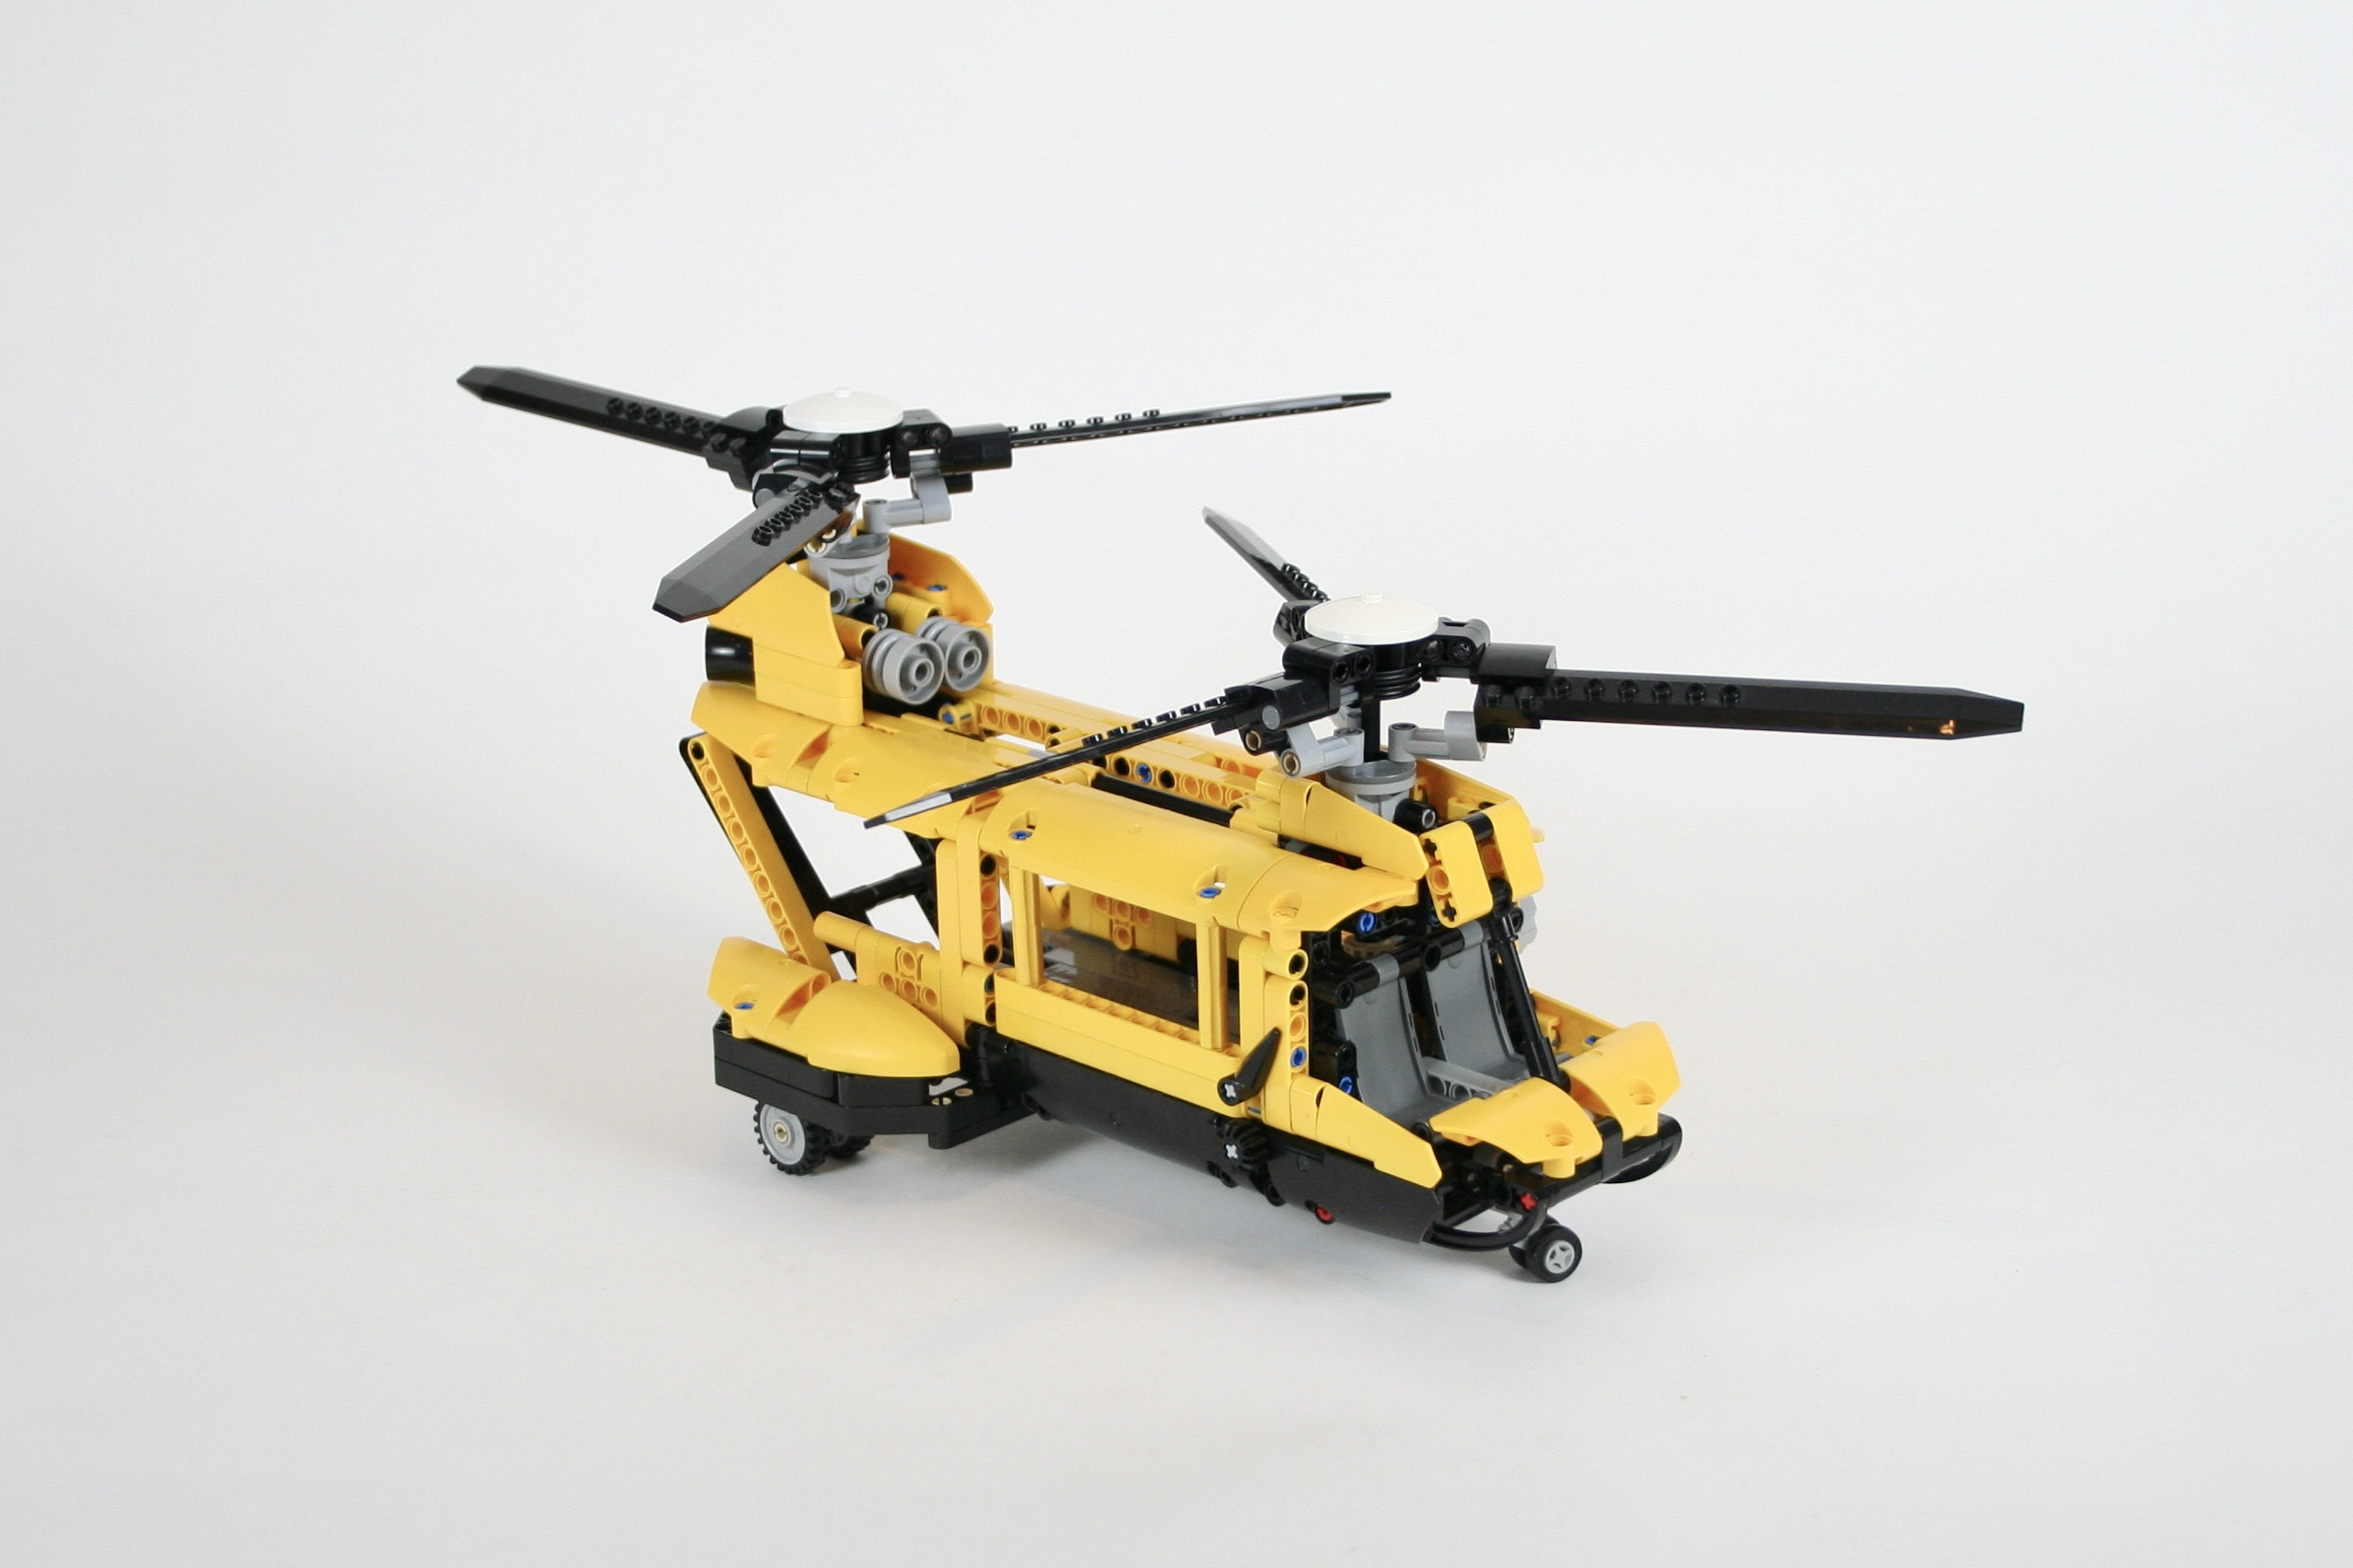
As I try to add features to an updated set, I used the main rotor design I have used before. This simple design allows for collective movement of three rotor blades. It’s a simple design, but was a little tricker for two rotors while trying to keep the cabin free of interruptions. A HOG is placed on the left of the helicopter to spin the blades.
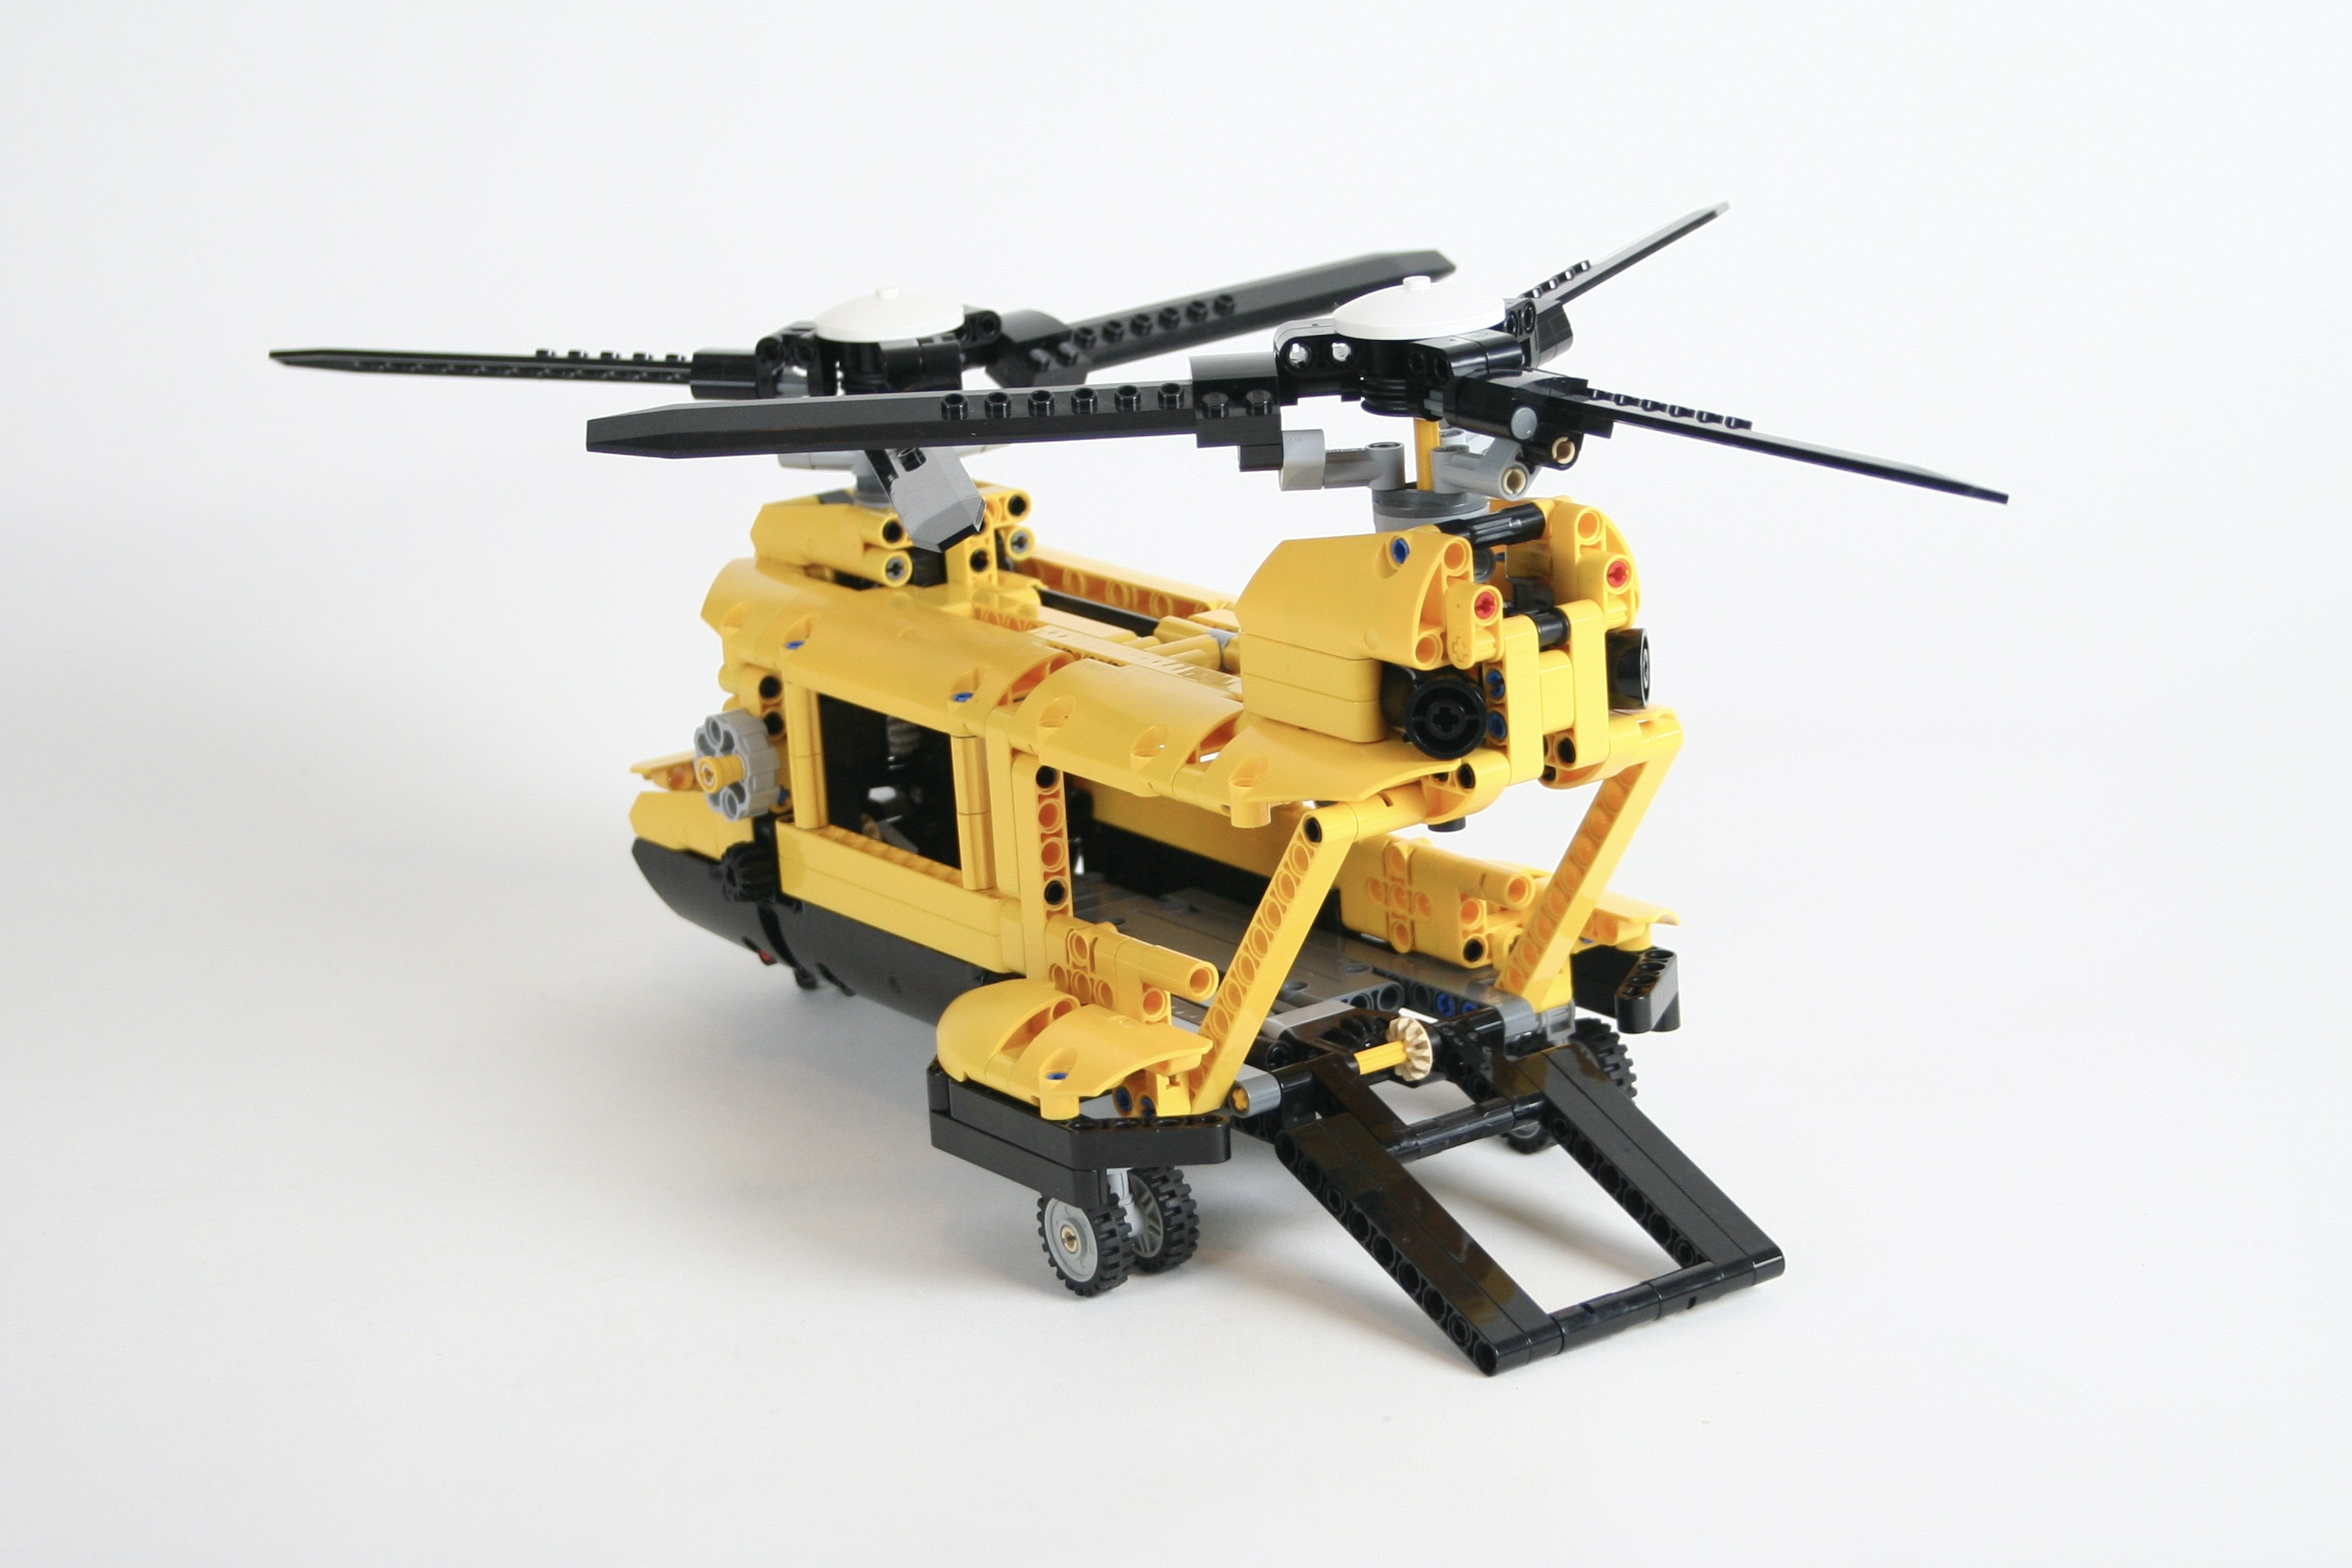
Like the original, a rear ramp is controlled by the HOG of the right of the helicopter. I also added a landing gear that retracts, which is controlled on the left. The front wheel is on a caster, and the rear wheels are fixed. I used many of the panel parts that have been released since 1994 for the body work, and kept the black and yellow livery.
This was simple and relatively quick build, but in the end, it seemed to be missing the look of the original. I think much of it comes down to the shape of the nose. To get the front rotor to fit with the rear rotor, I had to push it forward in such a way that the front windscreen needed to be a little more steep than 8062 was. But all the functions worked well which is always gratifying. I hope you enjoy.
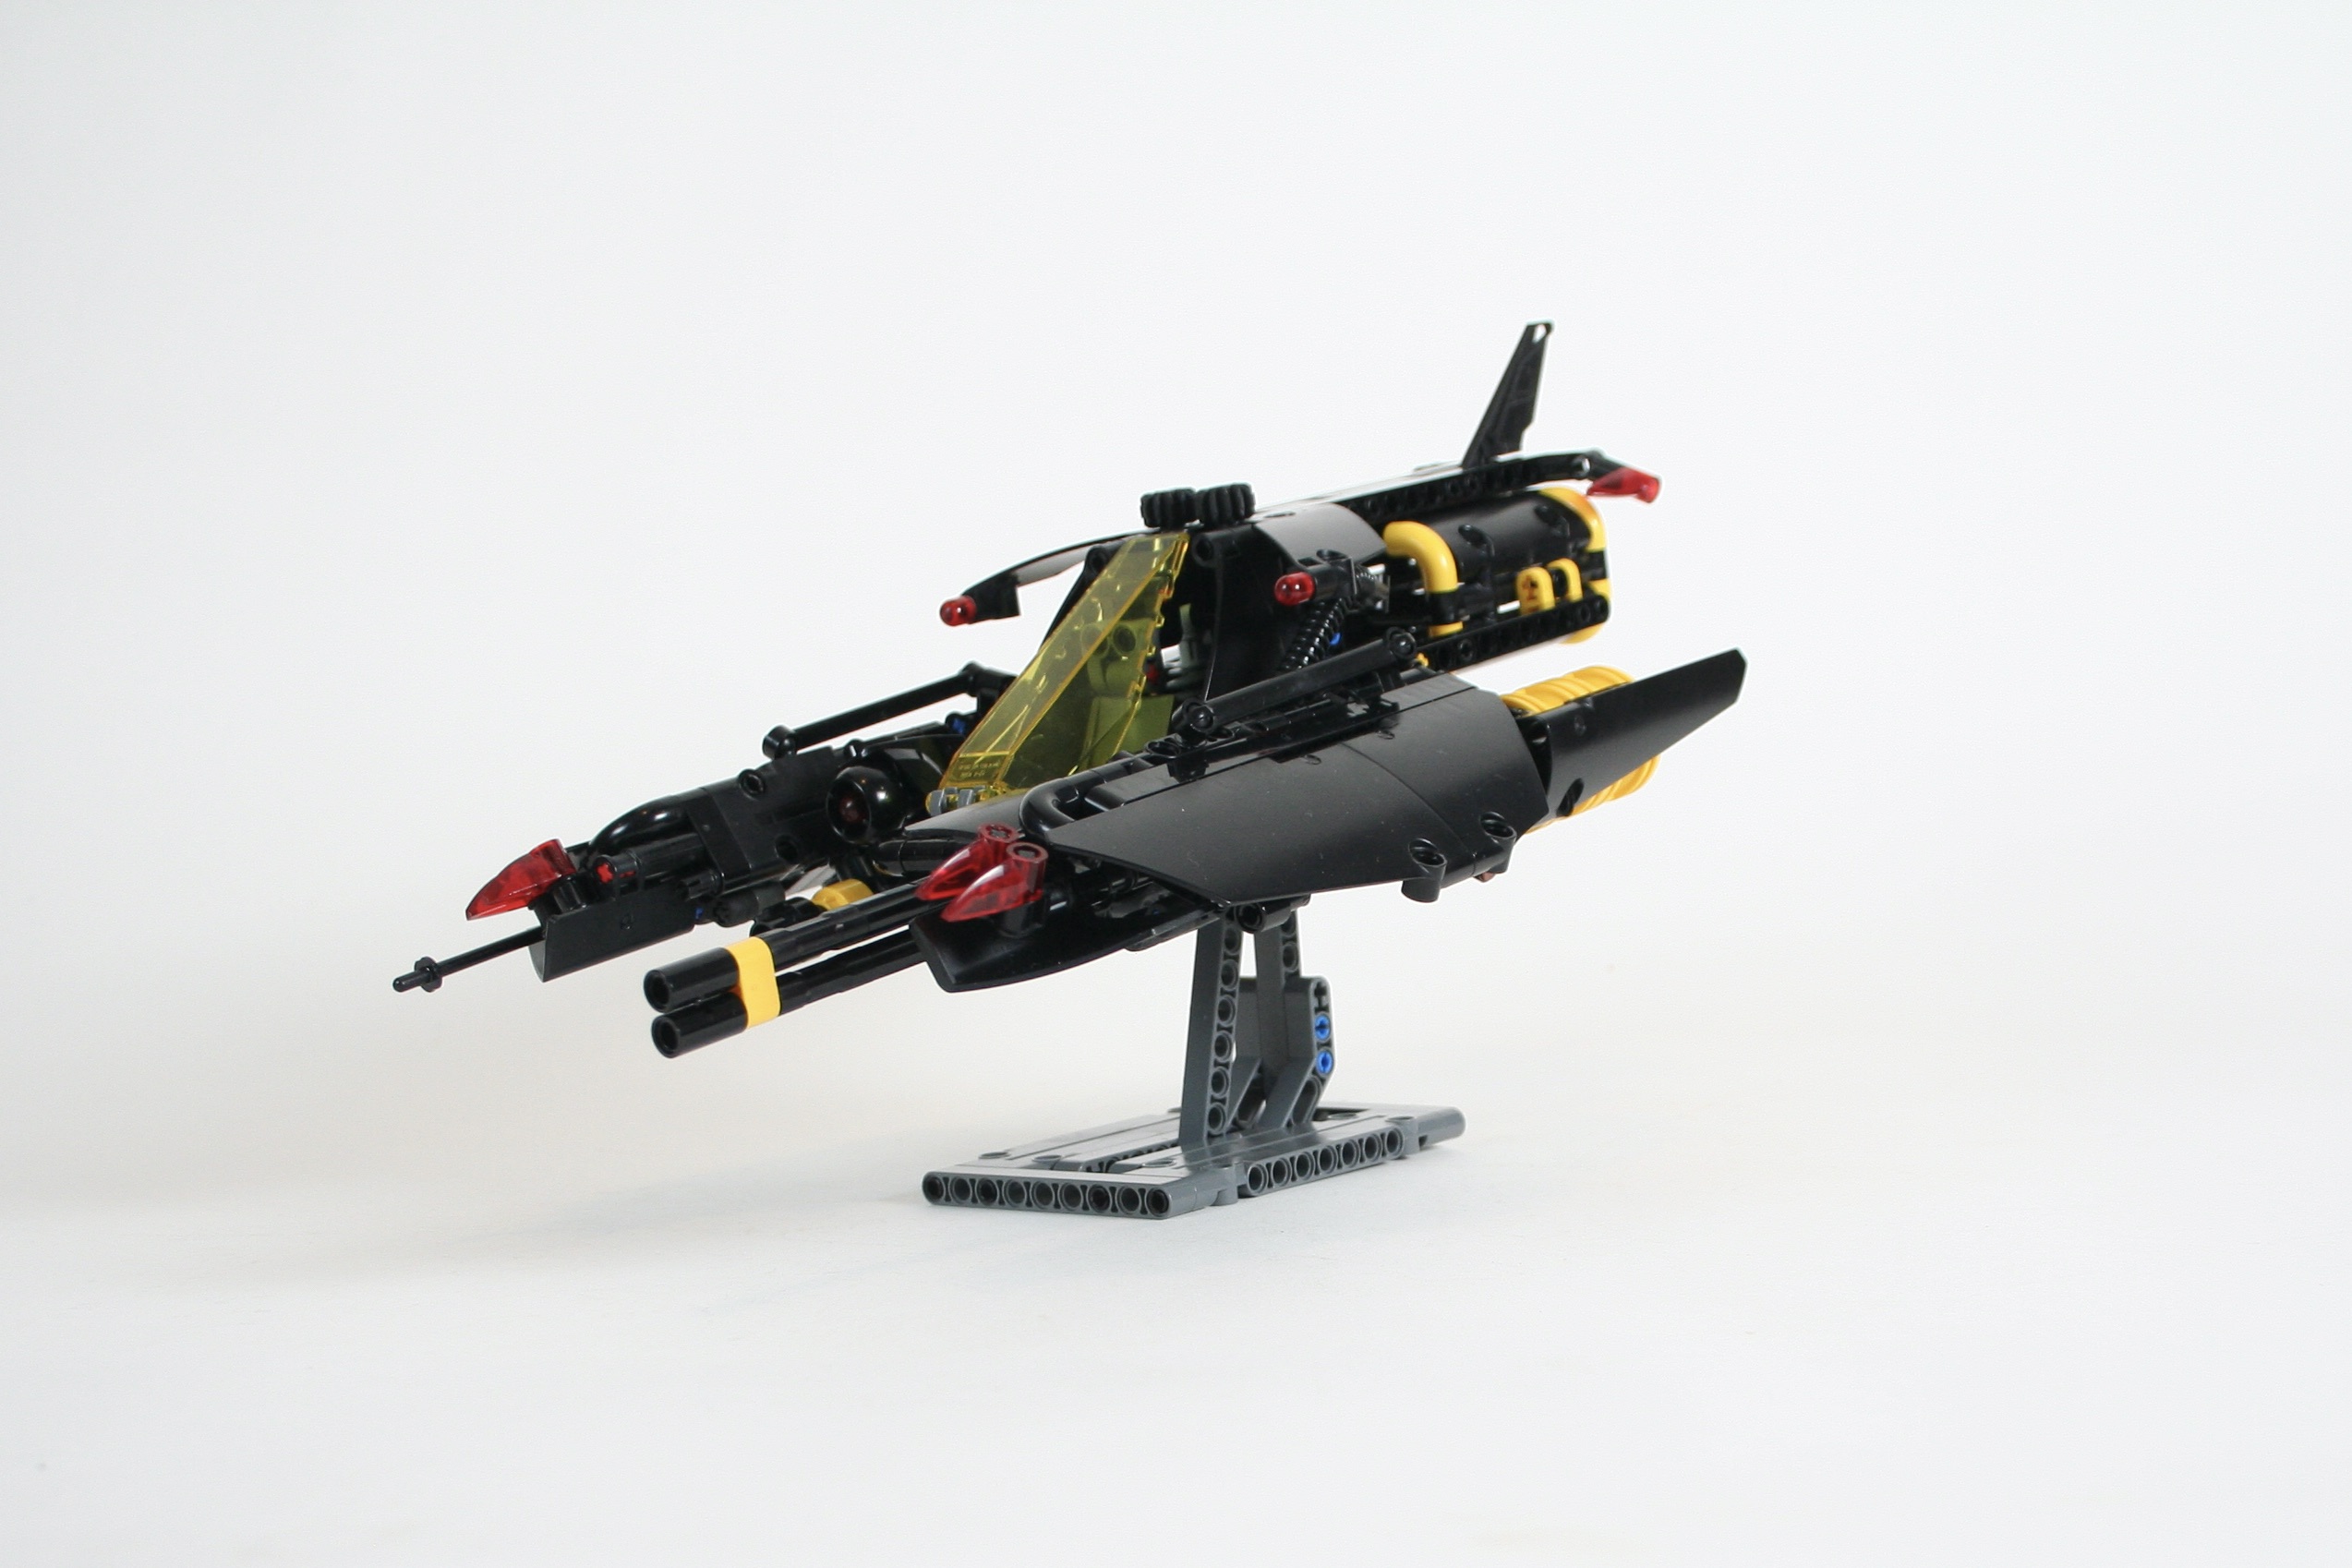
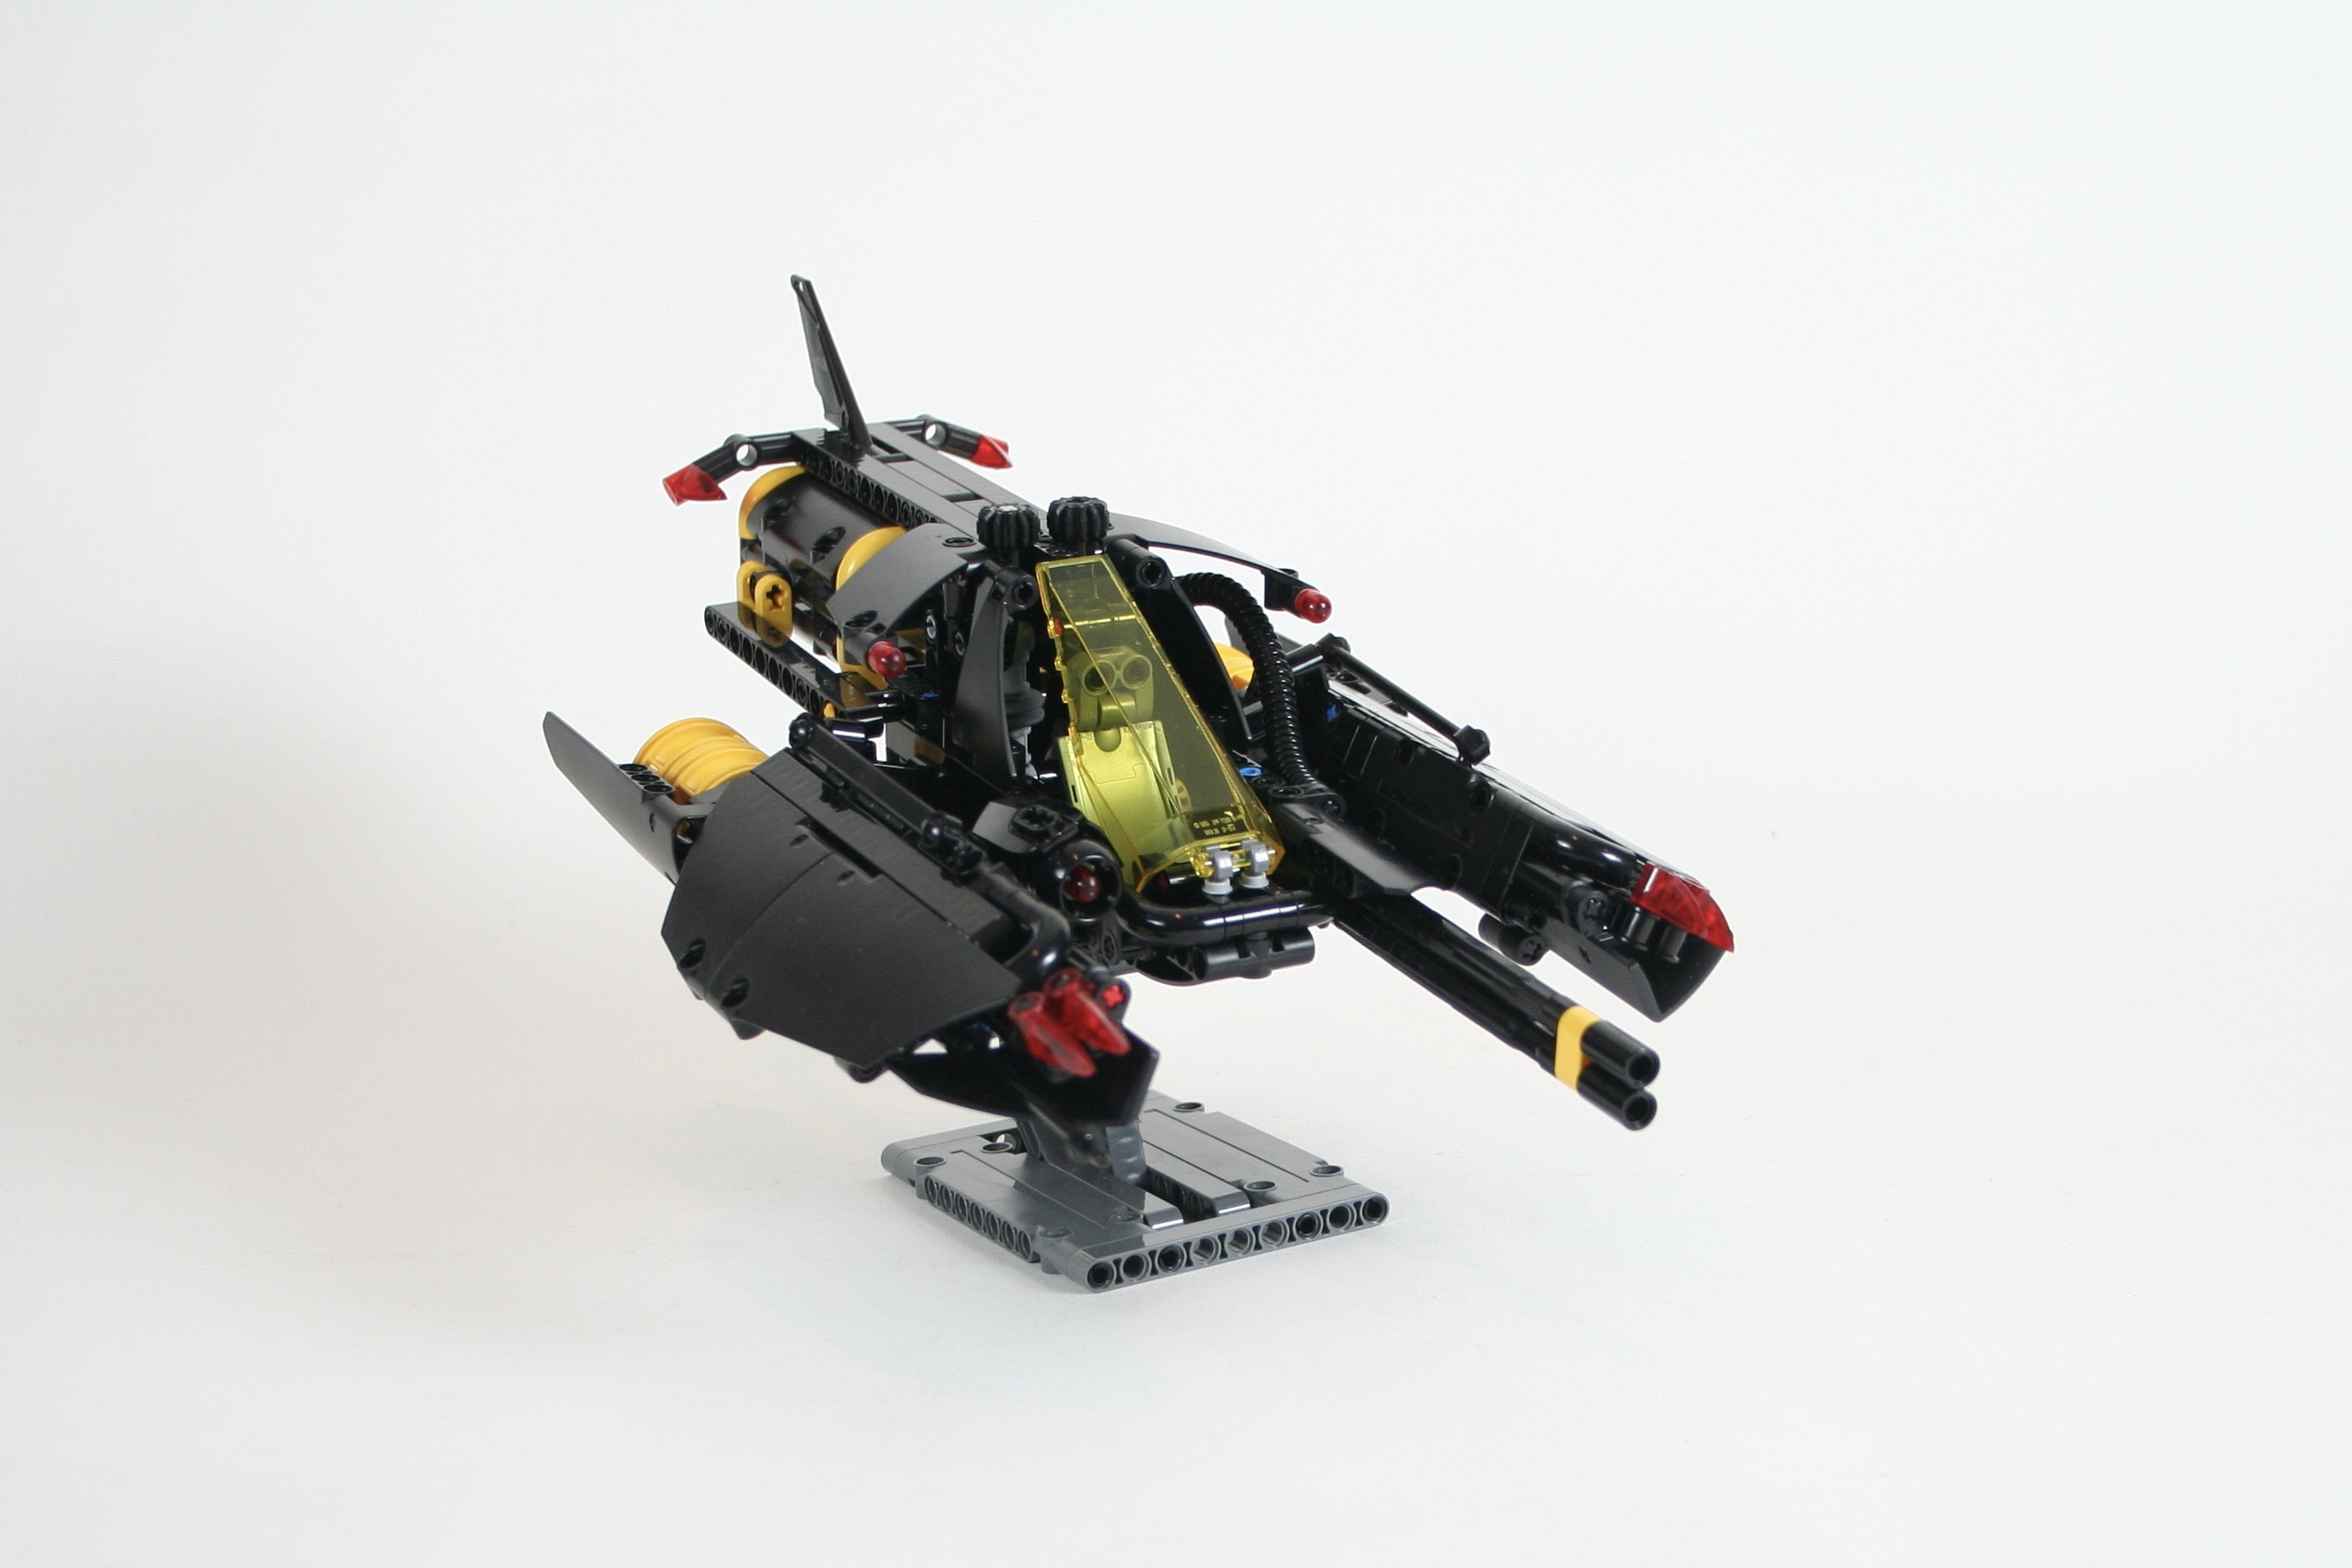
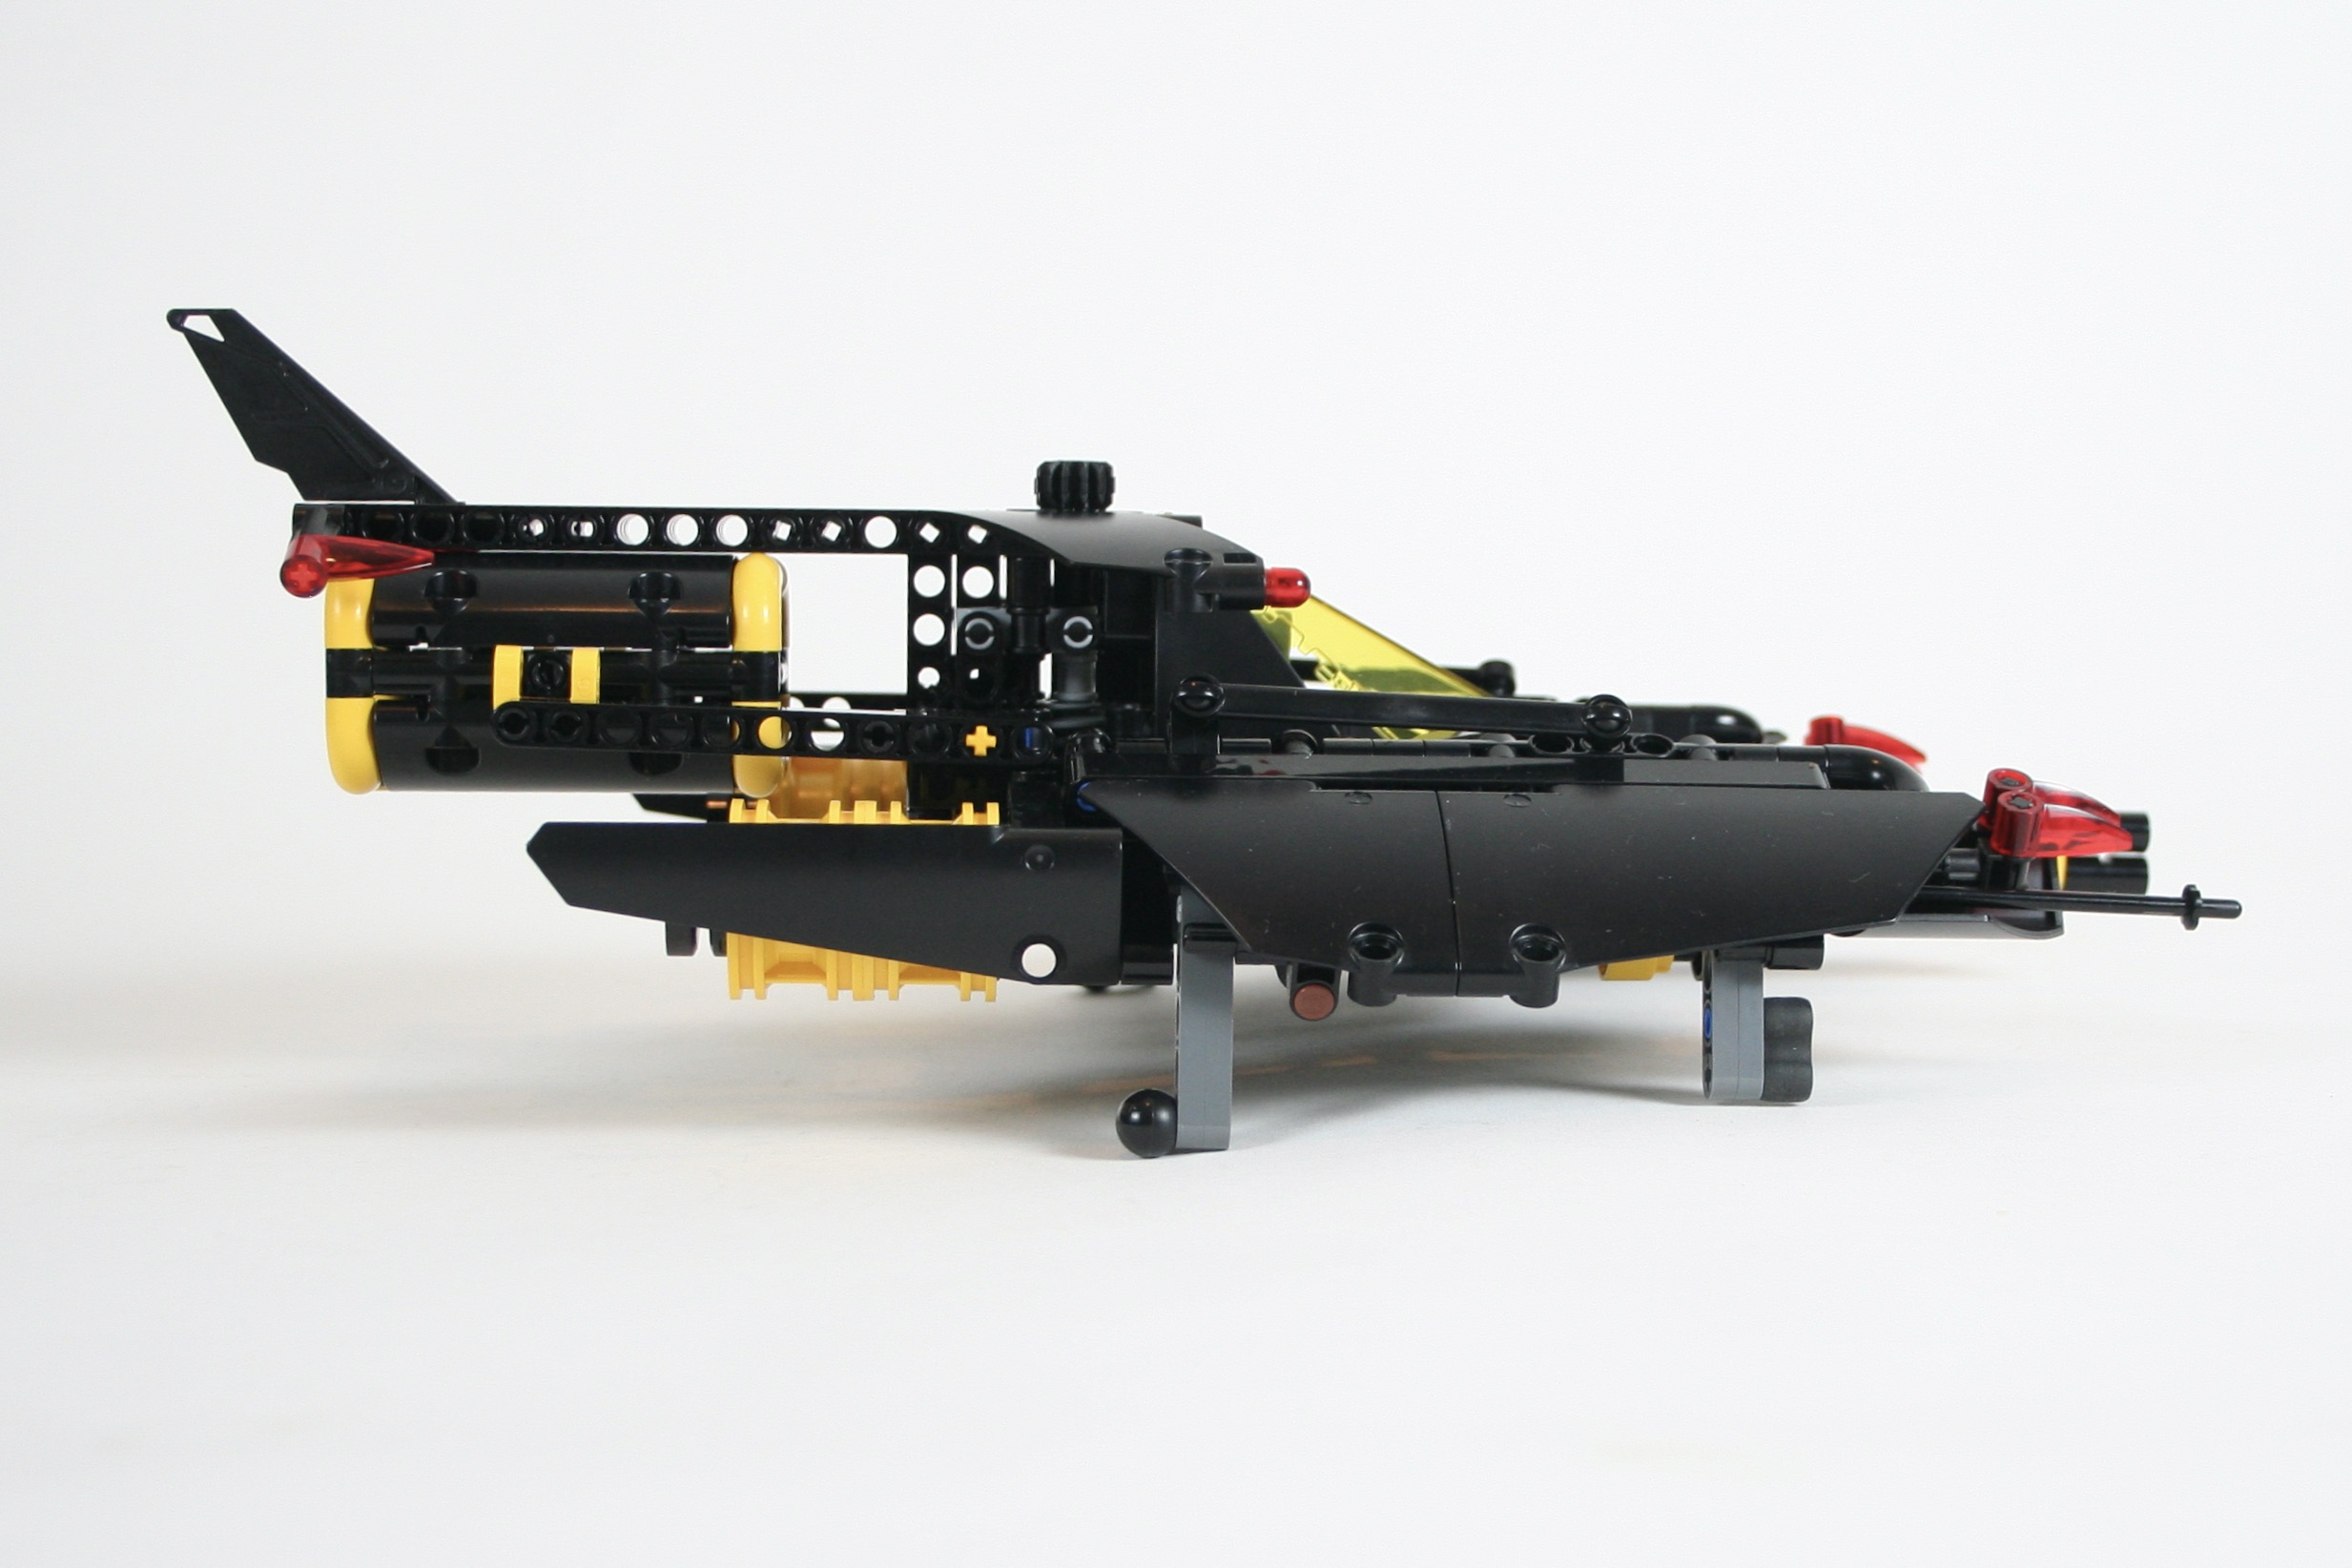
About once or twice a year, Eurobricks offers a Technic contest for builders all around the world to participate in a build challenge. This time, the theme was to build a space vehicle. Naturally I participated, because, 1) space is amazing, and 2) it gave me a chance to finally build something Blacktron. Like any builder who grew up in the 90s, classic LEGO space has a special place in my history, and for me specifically, Blacktron even more so.
I decided to make a little spaceship with a few features, and a fast look. Blacktron colors call for black, a little yellow, a trans-yellow canopy, and trans-red details. After the general shape was developed I placed a simple landing gear with two legs under each wing. This is controlled by a HOG above and behind the cabin. Second, I added a little pod that would be carried behind the cockpit, and could be lowered by another HOG behind the cabin. One pod is a cargo container, and the other is a little jail container.
The MOC looked perfect to my eyes with a fast look and just the right amount of greebling. The simple functions were enough for the size, and give it a nice bit of playability while maintaining appropriate swooshability. It turns out others agreed, as it won first place for the contest!
So it turns out that I have built a lot of MOCs over the years, and many of them have instructions posted on Rebrickable. Late last year, I recognized I was going to post my 100th MOC on Rebrickable, so I wanted to celebrate the occasion in some meaningful way. After a little thought, it became clear that building another Unimog was the only way to celebrate!
I have build a number of Unimogs over the years, but if one thing has happened during this time, it is the consolidation of the 1:21 scale truck that has become a standard in the LEGO MOC community. LEGO sets like 42098, 42078, and 42128 have helped to standardize the 1:21 scale truck, and many other MOCs have followed suit. Building a Unimog in this scale seemed like a good idea.
I planned right from the beginning that multiple implements would be available for the truck, so the design would need to be able to accommodate each attachment. To support this, a front, rear, and center PTO would be needed, and mounting points on the front, rear, and bed would need to be easily accessible. Once these standards were set, I measured the scale, and made a draft with all the set points fixed. As I built, the steering was finalized as well as the 2 cylinder fake engine. The truck used a rear wheel drive setup, and the rear axle has portal axles and a pendular suspension. Right above the rear axle, I placed a linear actuator to move the tipping bed. After some tinkering, I decided to use a large 36z gear on the left of the truck to move the bed up and down. It is placed just behind the steps, and looks like the left side radiator. Finally, there is a PTO on/off switch on the right of the truck that turns the rear and center PTO on and off.
As I was building the truck, I built the attachments as well, which allowed me to make sure the attachment connection points were ridged, accessible, and standardized. From the beginning I planned on the following attachments: plow, gritter, front winch, rear crane, and bed crane. The front attachments are connected using a 5l axle with stop, and the bed mounts are connected using four 3l axles with stop.
The front plow has worm gear lift and can tilt left and right. Free instructions for the plow may be found here. The rear gritter attaches at the rear and connects to the center PTO gear. When the PTO is turned on, the center auger and the rear spreader both turn. The top of the gritter can open to drop small 1×1 round plates to use as salt. Free instructions for the gritter may be found here.
The front winch and center crane and bed can be easily attached as well. The front winch has a locking mechanism that allows the winch to be locked as needed. The rear bed has a knuckleboom crane that folds up for transportation. Instructions may be found for both here.
Finally, a rear knuckleboom crane is also available. This crane uses the same crane as above, but uses a different attachment point. A small interior cam mechanism that is worm driven is used to connect the rear crane to the truck. Two outriggers are on both sides of the crane and are locked by worm gears as well. The crane folds completely and extends as needed. Again, free instructions for the crane can be found here.
Maybe I will find additional attachments, trailers, and implements for the truck but for now I am done. This project worked just a well as I had hoped and was perfect for my 100th MOC. The truck is just the right size, and has all the features I wanted it to have. The functions work well and integrate with each other well. Each attachment was great addition as well, and gave the truck lots of distinctive styles and looks. I hope you enjoyed the build as well.
It was time for another truck! Free instructions can be found at Rebrickable.
I have been building a lot of tractors and construction vehicles lately. I love building them as they offer a lot of movement and features. But it was time to build another truck. LEGO truck MOCs are beginning to coalesce around the “Mack Anthem standard” which is a 15 module wide truck in about 1:20 scale. Many MOCs are being designed in this scale as it is a good playable size, and fits the scale of some of the more recent LEGO trucks that have been released. I wanted to offer another truck in this scale, with some fun playable features.
I started with a chassis that uses a simple pendular suspension on the rear axle, which is damped by 2×1 rubber connectors. The rear axle drives a simple I3 fake engine under the cab through a two speed transmission. The transmission changeover is on the right side of the truck. Front steering is controlled though the HOG light on the top of the cab.
I have found a simple way to add a three way tipper bed in my trucks, and I have used it many times before. A mini linear actuator moves simple linkage under the bed that can pivot in three different directions. Each corner of the bed has a removable axle that allows control for which way the bed tiles. But in the past the control for this tipping function was in a tricky place to reach, so I wanted to route the control to the top of the cab. I managed to add this right next to steering light. I used a top pivot design on the bed sides and rear, locked by a 3/4 pin on the bottom.
Finally, I added a crane, and since I had a little space left over, two stabilizing outriggers. The outriggers are a simple two link design that are controlled with a worm gear mechanism. The crane is a little more complicated. It is mounted on a small turntable with a rotation control on the left side of the truck. The first lift mini linear actuator is controlled by the third HOG on the top of the cab. The second lift stage is controlled by another mini linear actuator. Finally, the third stage has an extending boom that allows the reach of the crane to extend a little more. The crane can lift some; not a lot, particularly when the boom is fully extended. By removing the three HOG knobs, the cab tips to show the engine. Also, both doors open.
I loved the way this trucks looks. The beefy tires, and the cabover design give the truck presence and look of toughness. The crane was a lot of fun to play with even if it could be a little stiffer. However, this may be the last time I use this three way tipper design. I am happy I moved the control to the top of the cab, but the linkage does not have the power it needs at the start of the tip. I will have to come up with something better for the next truck.
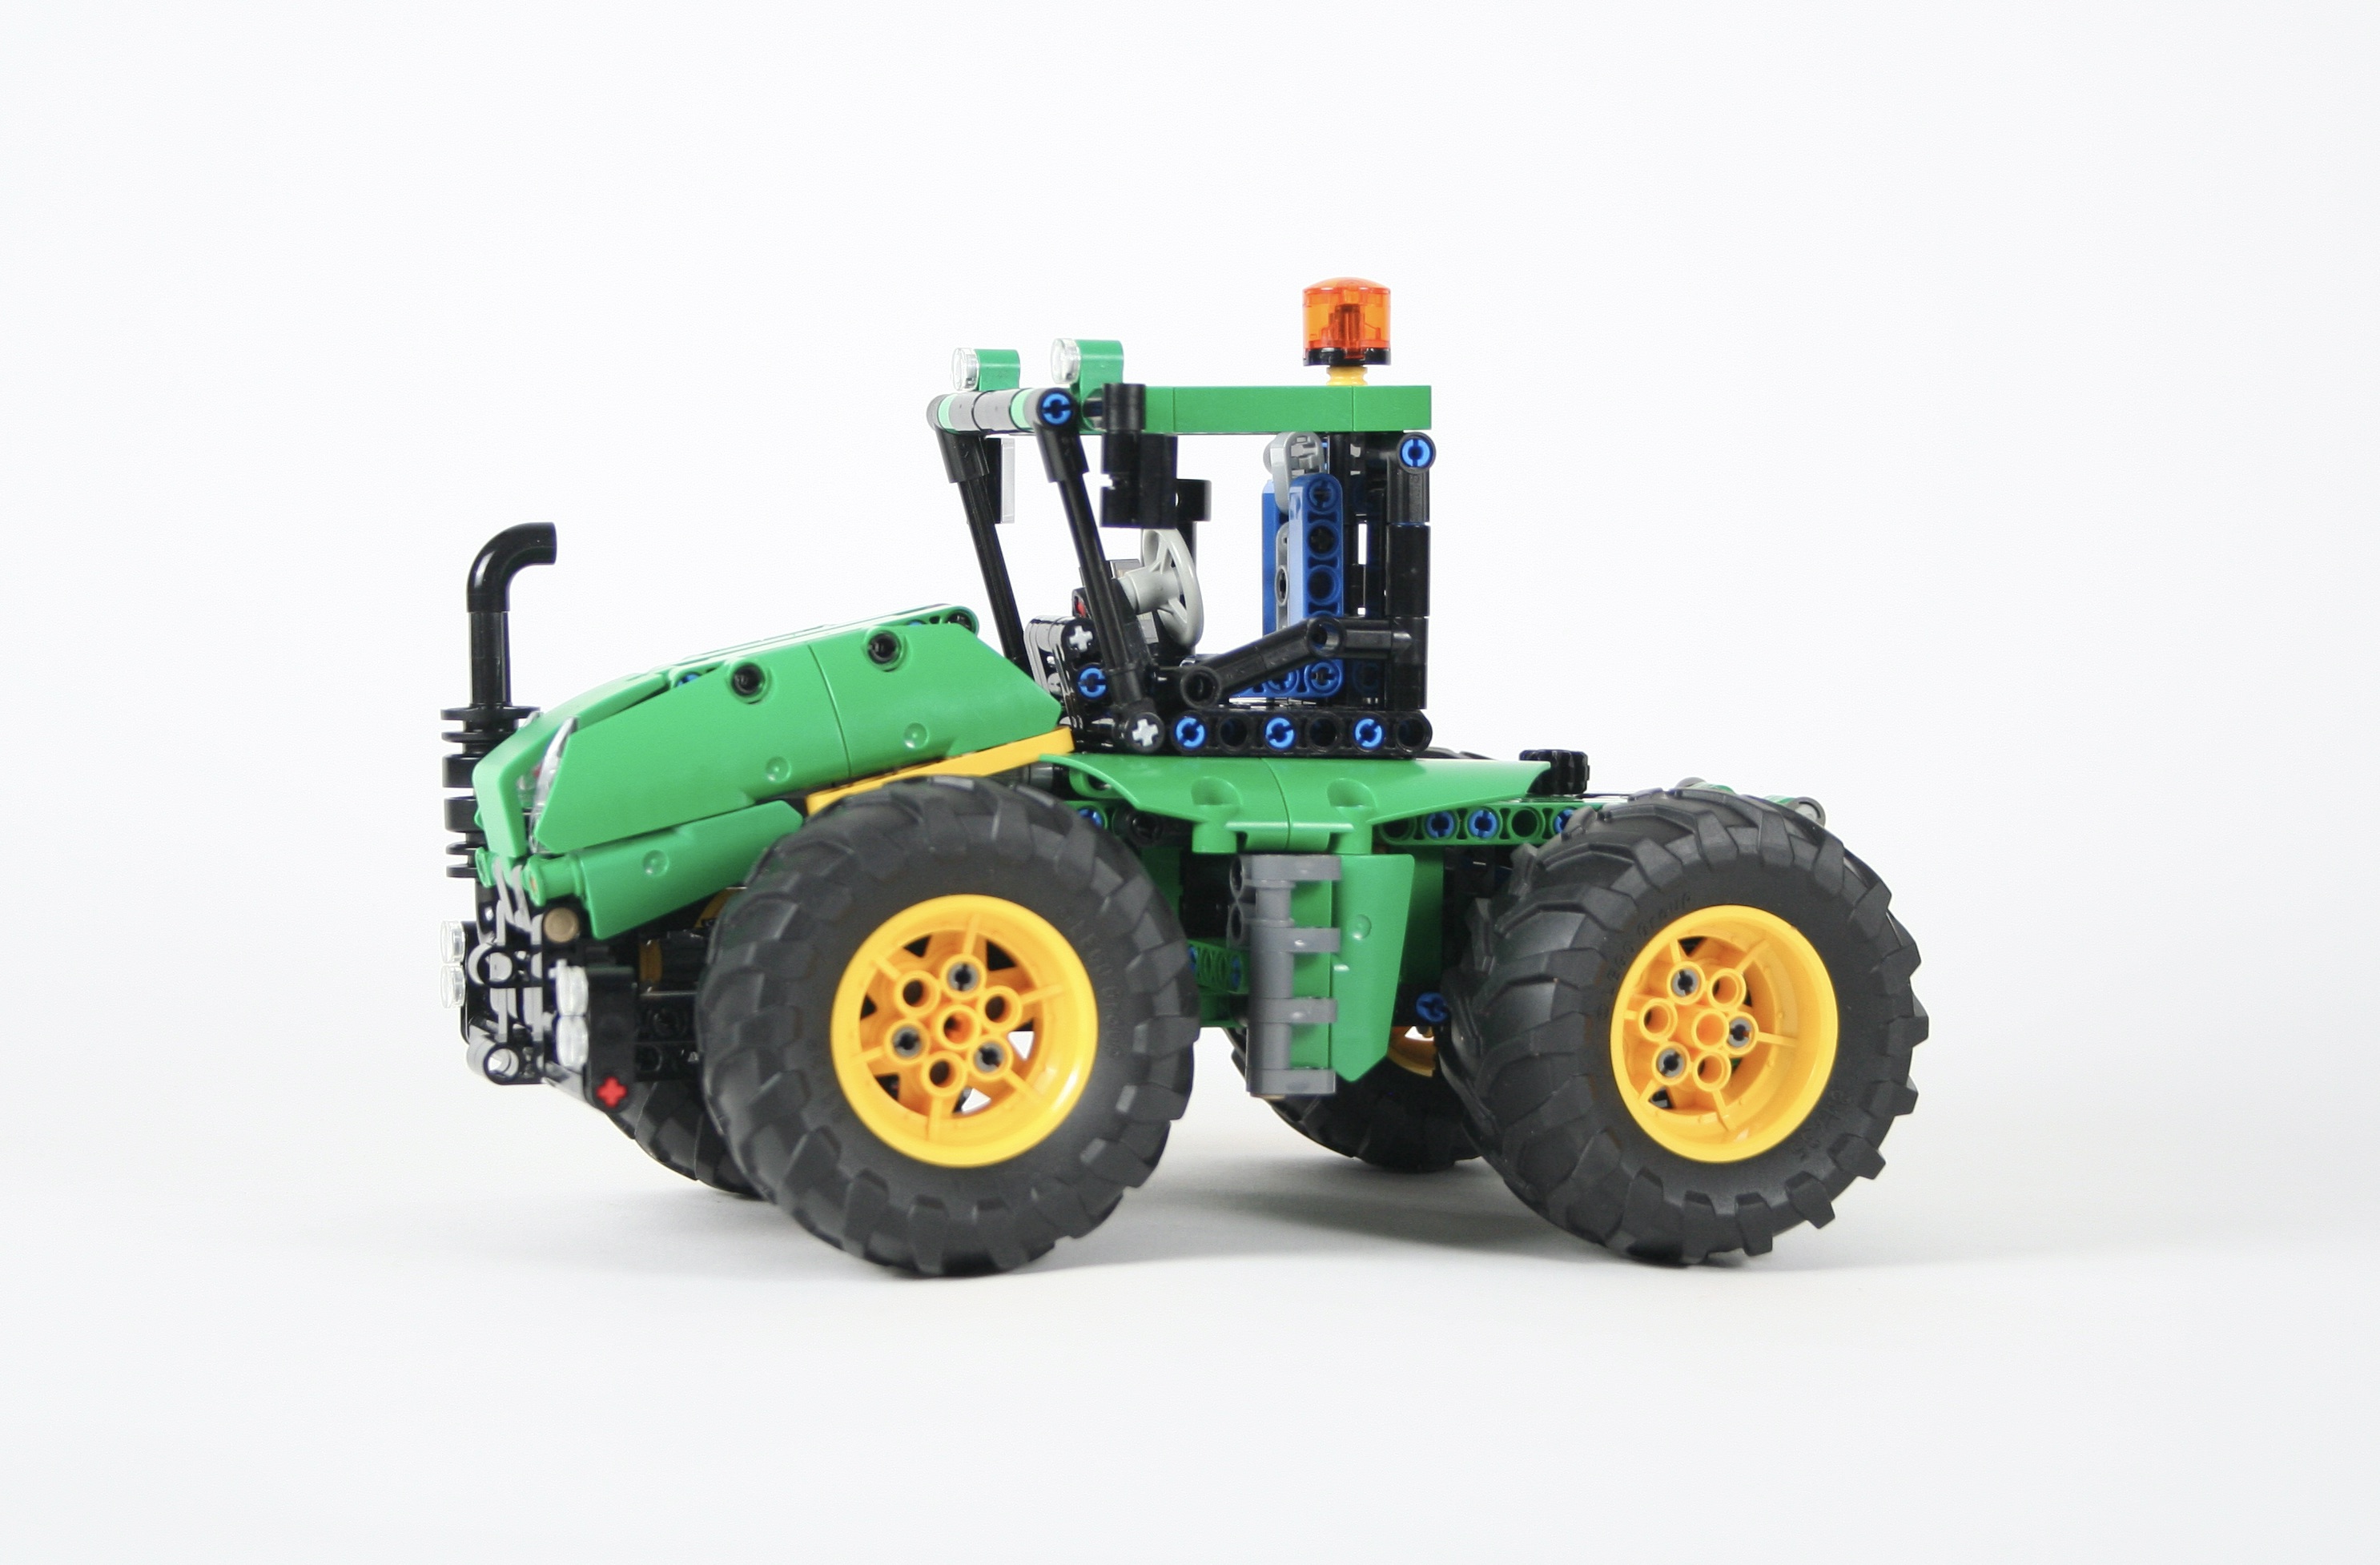
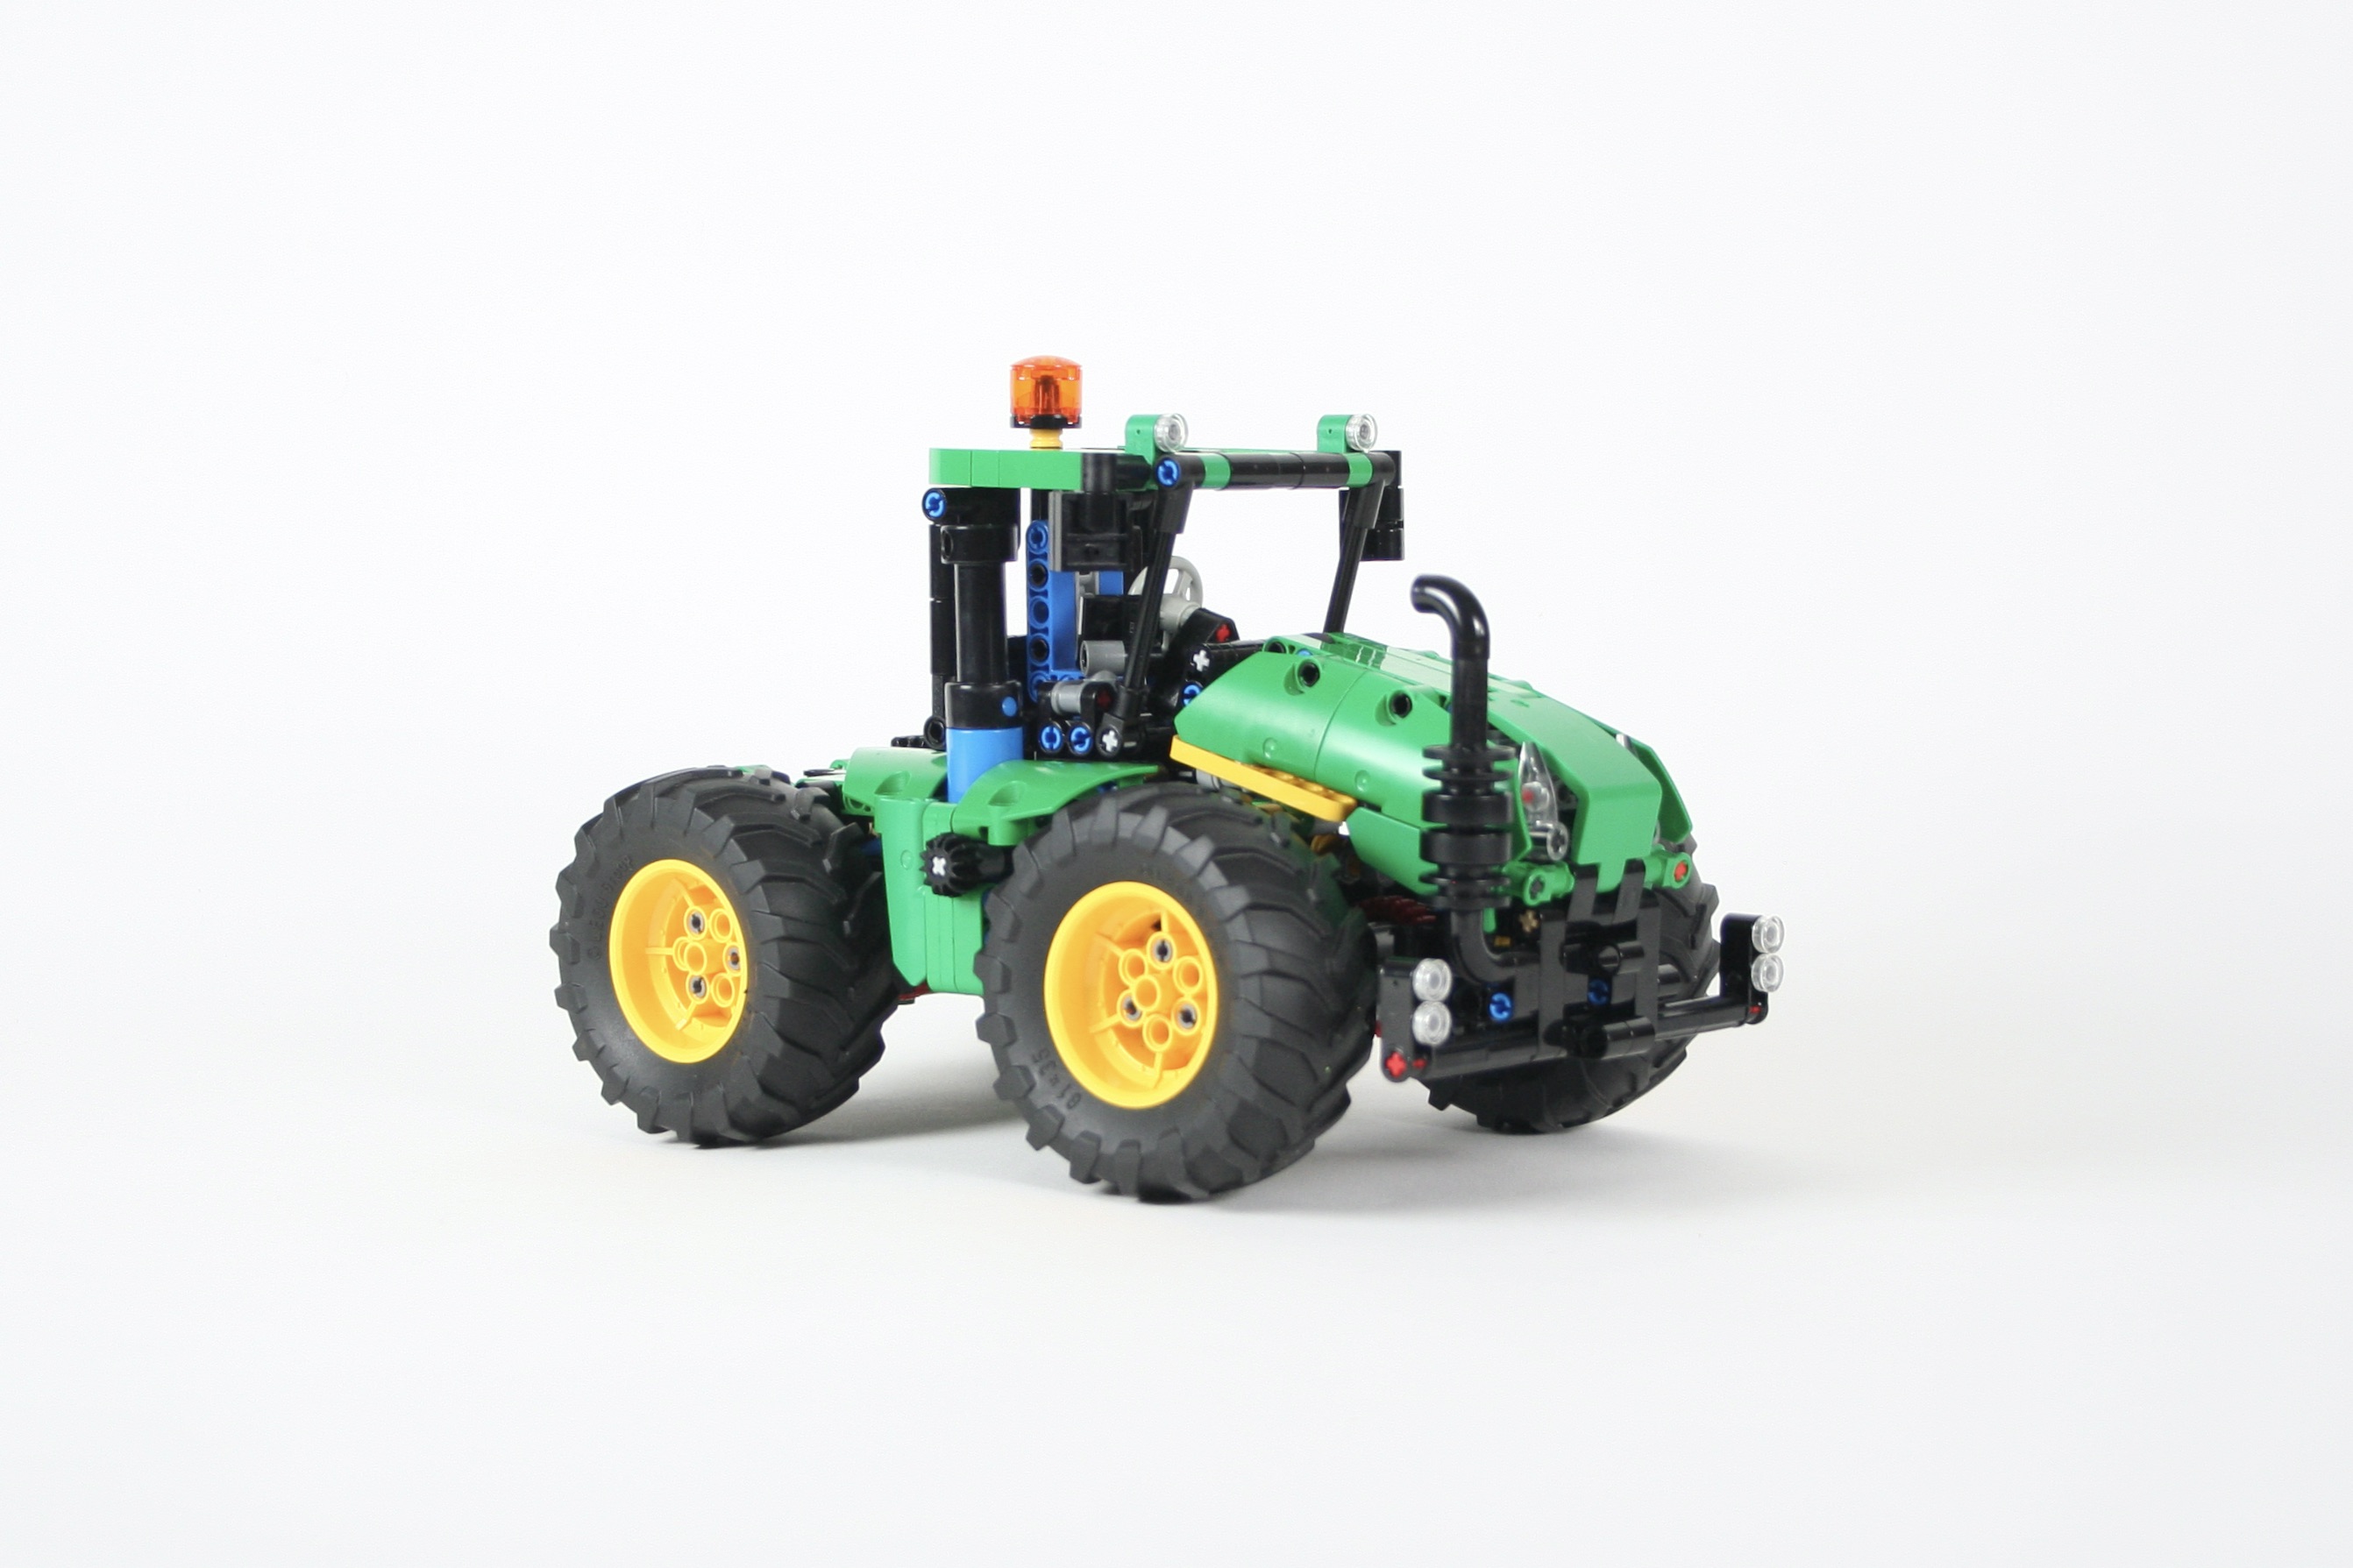
I started with a simple, small, row tractor that I called the Atmos. This tractor was mid scale and in addition to steering and a fake engine like most of my builds, it featured a front implement mount, rear three point hitch, rear PTO, and rear Pneumatic PTO. Little did I know how the tractor would grow into a lot of other tractores, trailers, impliments, and farming support vehicles. At some point, I found myself interested in making a larger tractor, and I have always loved the Claas Xerion. The Claas been done in Lego Technic before, so I went the John Deere styling route for my build.
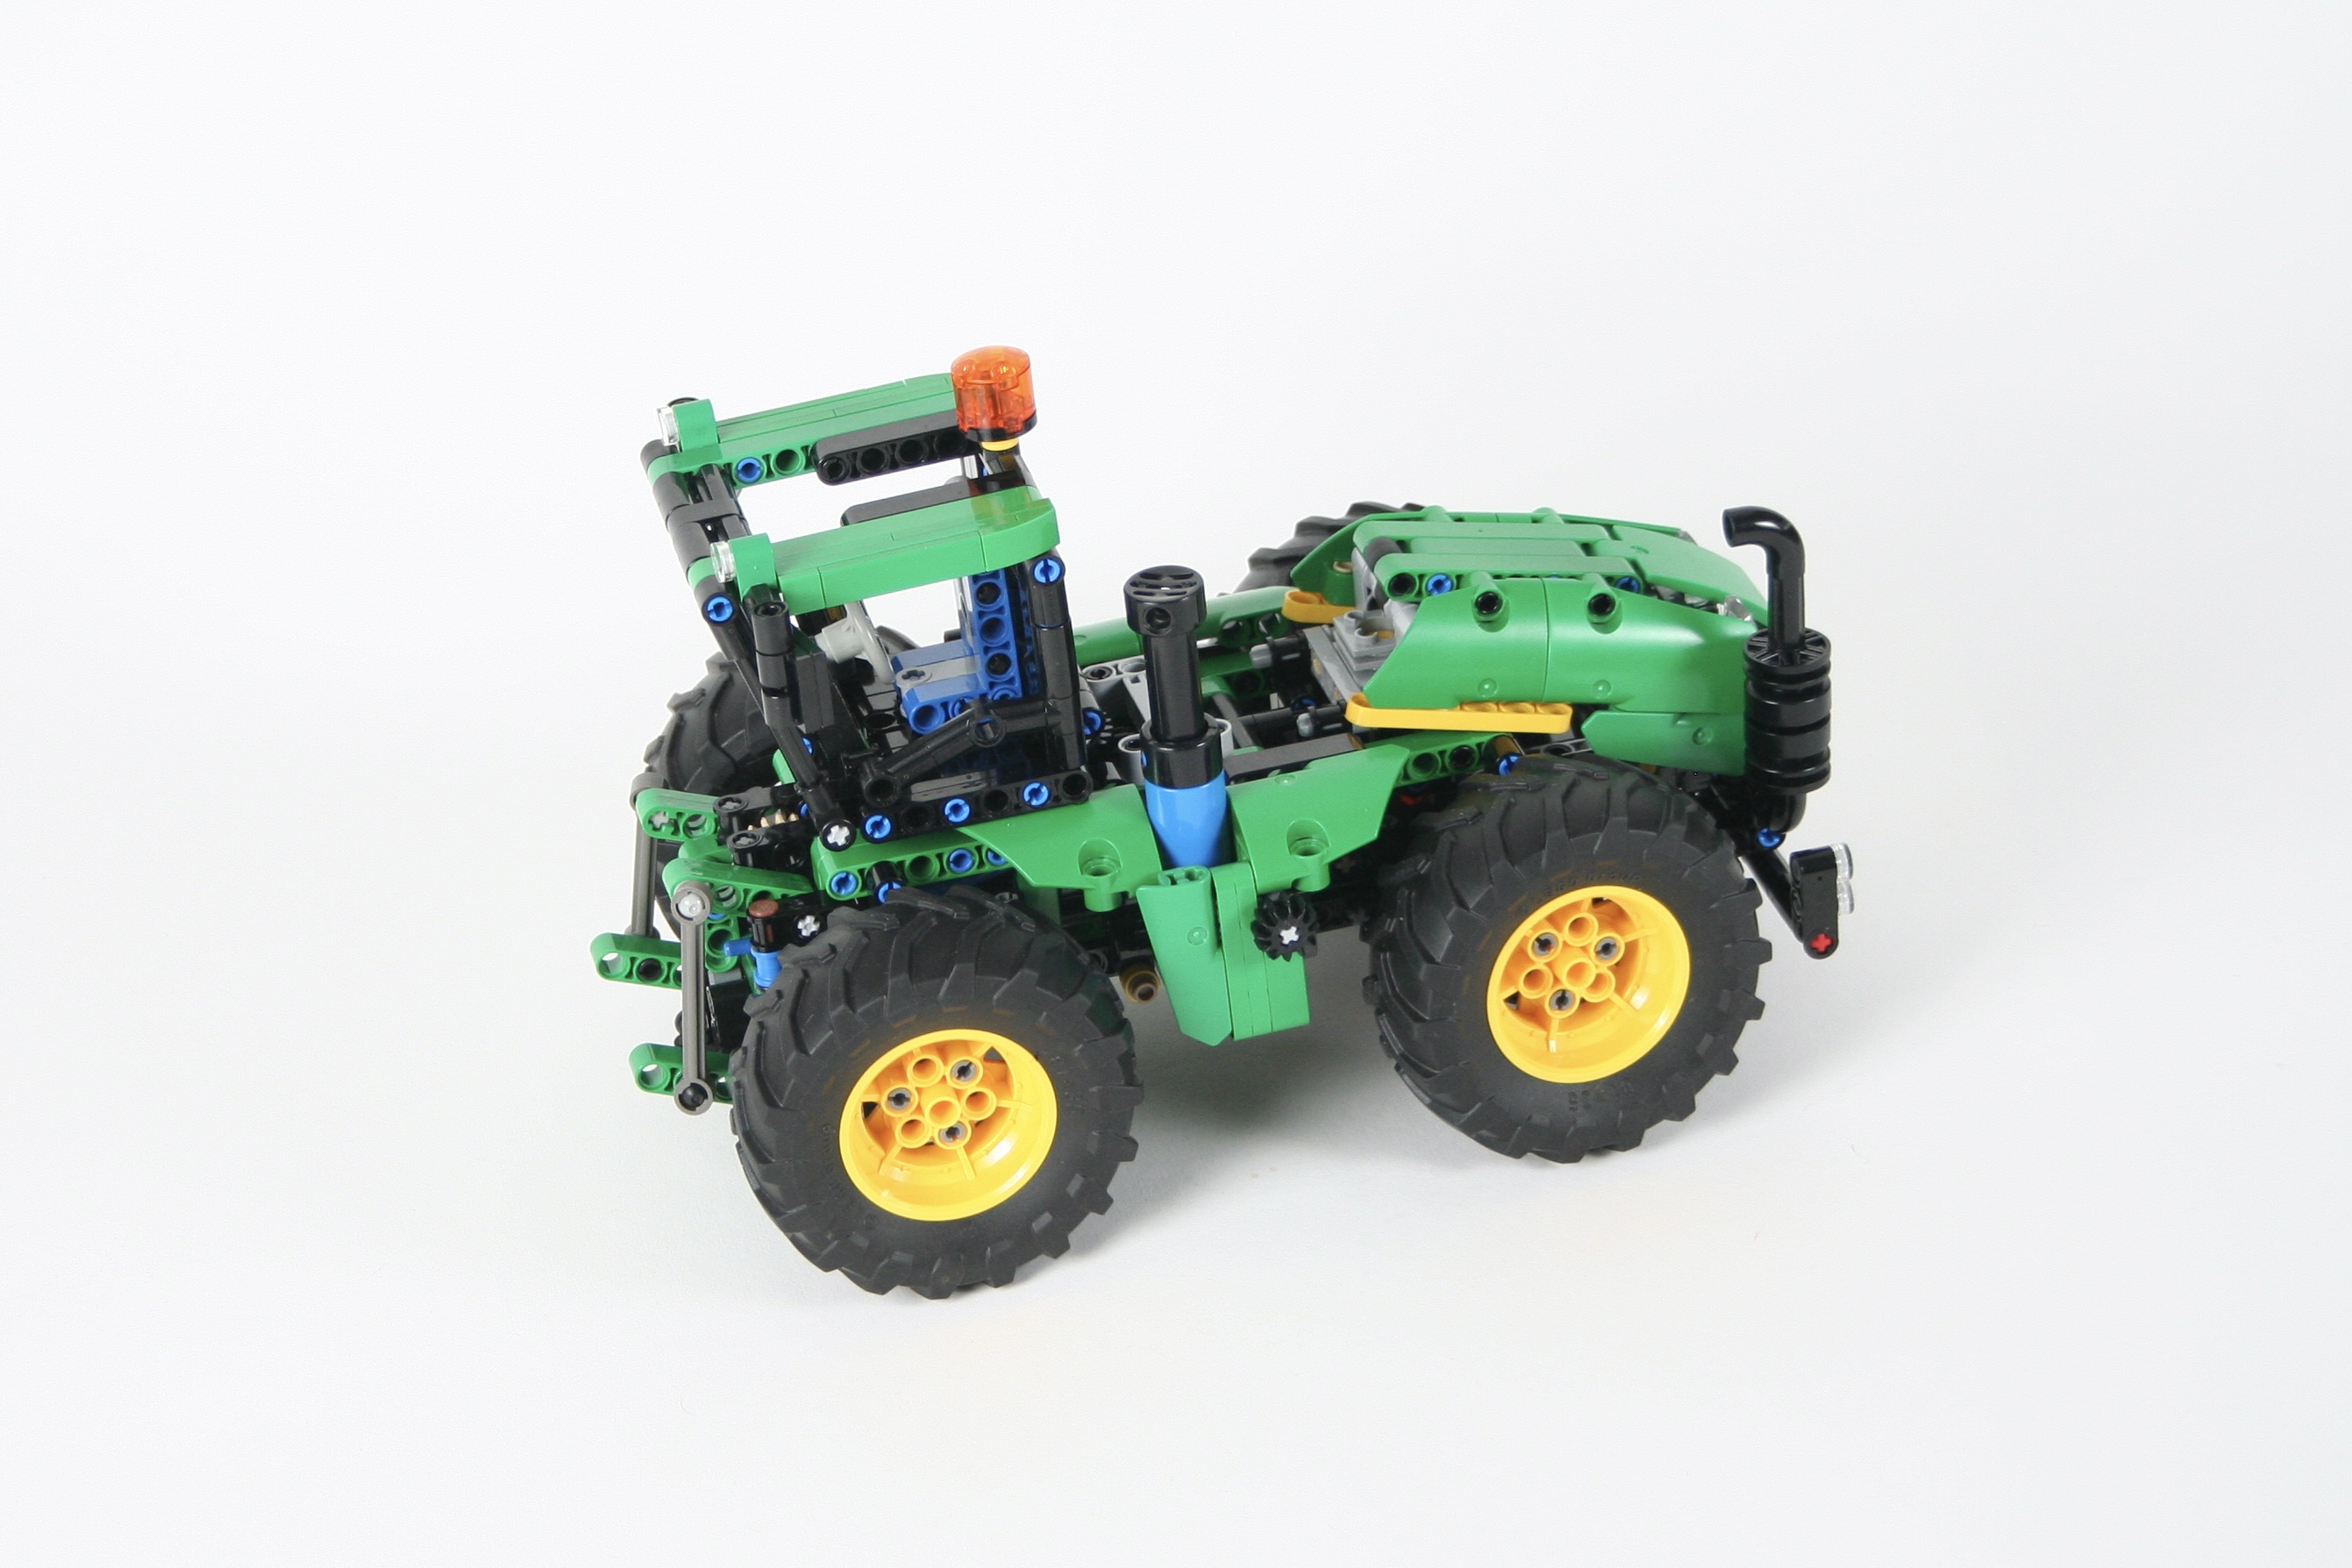
The tractor had to integrate into the other builds, so the front and rear mount and PTO placement dictated a couple of the hard points. I built the tractor with four wheel drive, and four wheel steering. A four cylinder fake engine is placed under the frond hood above the front axle. The rear most cylinder does not move as the crankshaft would have run into the steering unit, and any change I tried to fix it made for an ugly hood. A worm gear actuated rear three point hitch allows for implements to be mounted to the tractor.
The steering is controlled by a HOG light at the top of the cab, which caused some headaches for placement as I wanted the cab to be able to rotate. There is a small gear on the right of the tractor that controls the rotation through and internally mounted worm gear. Getting the cab to rotate in the right spot, without hitting anything, and while still having the pneumatic pump, required endless test rotations.
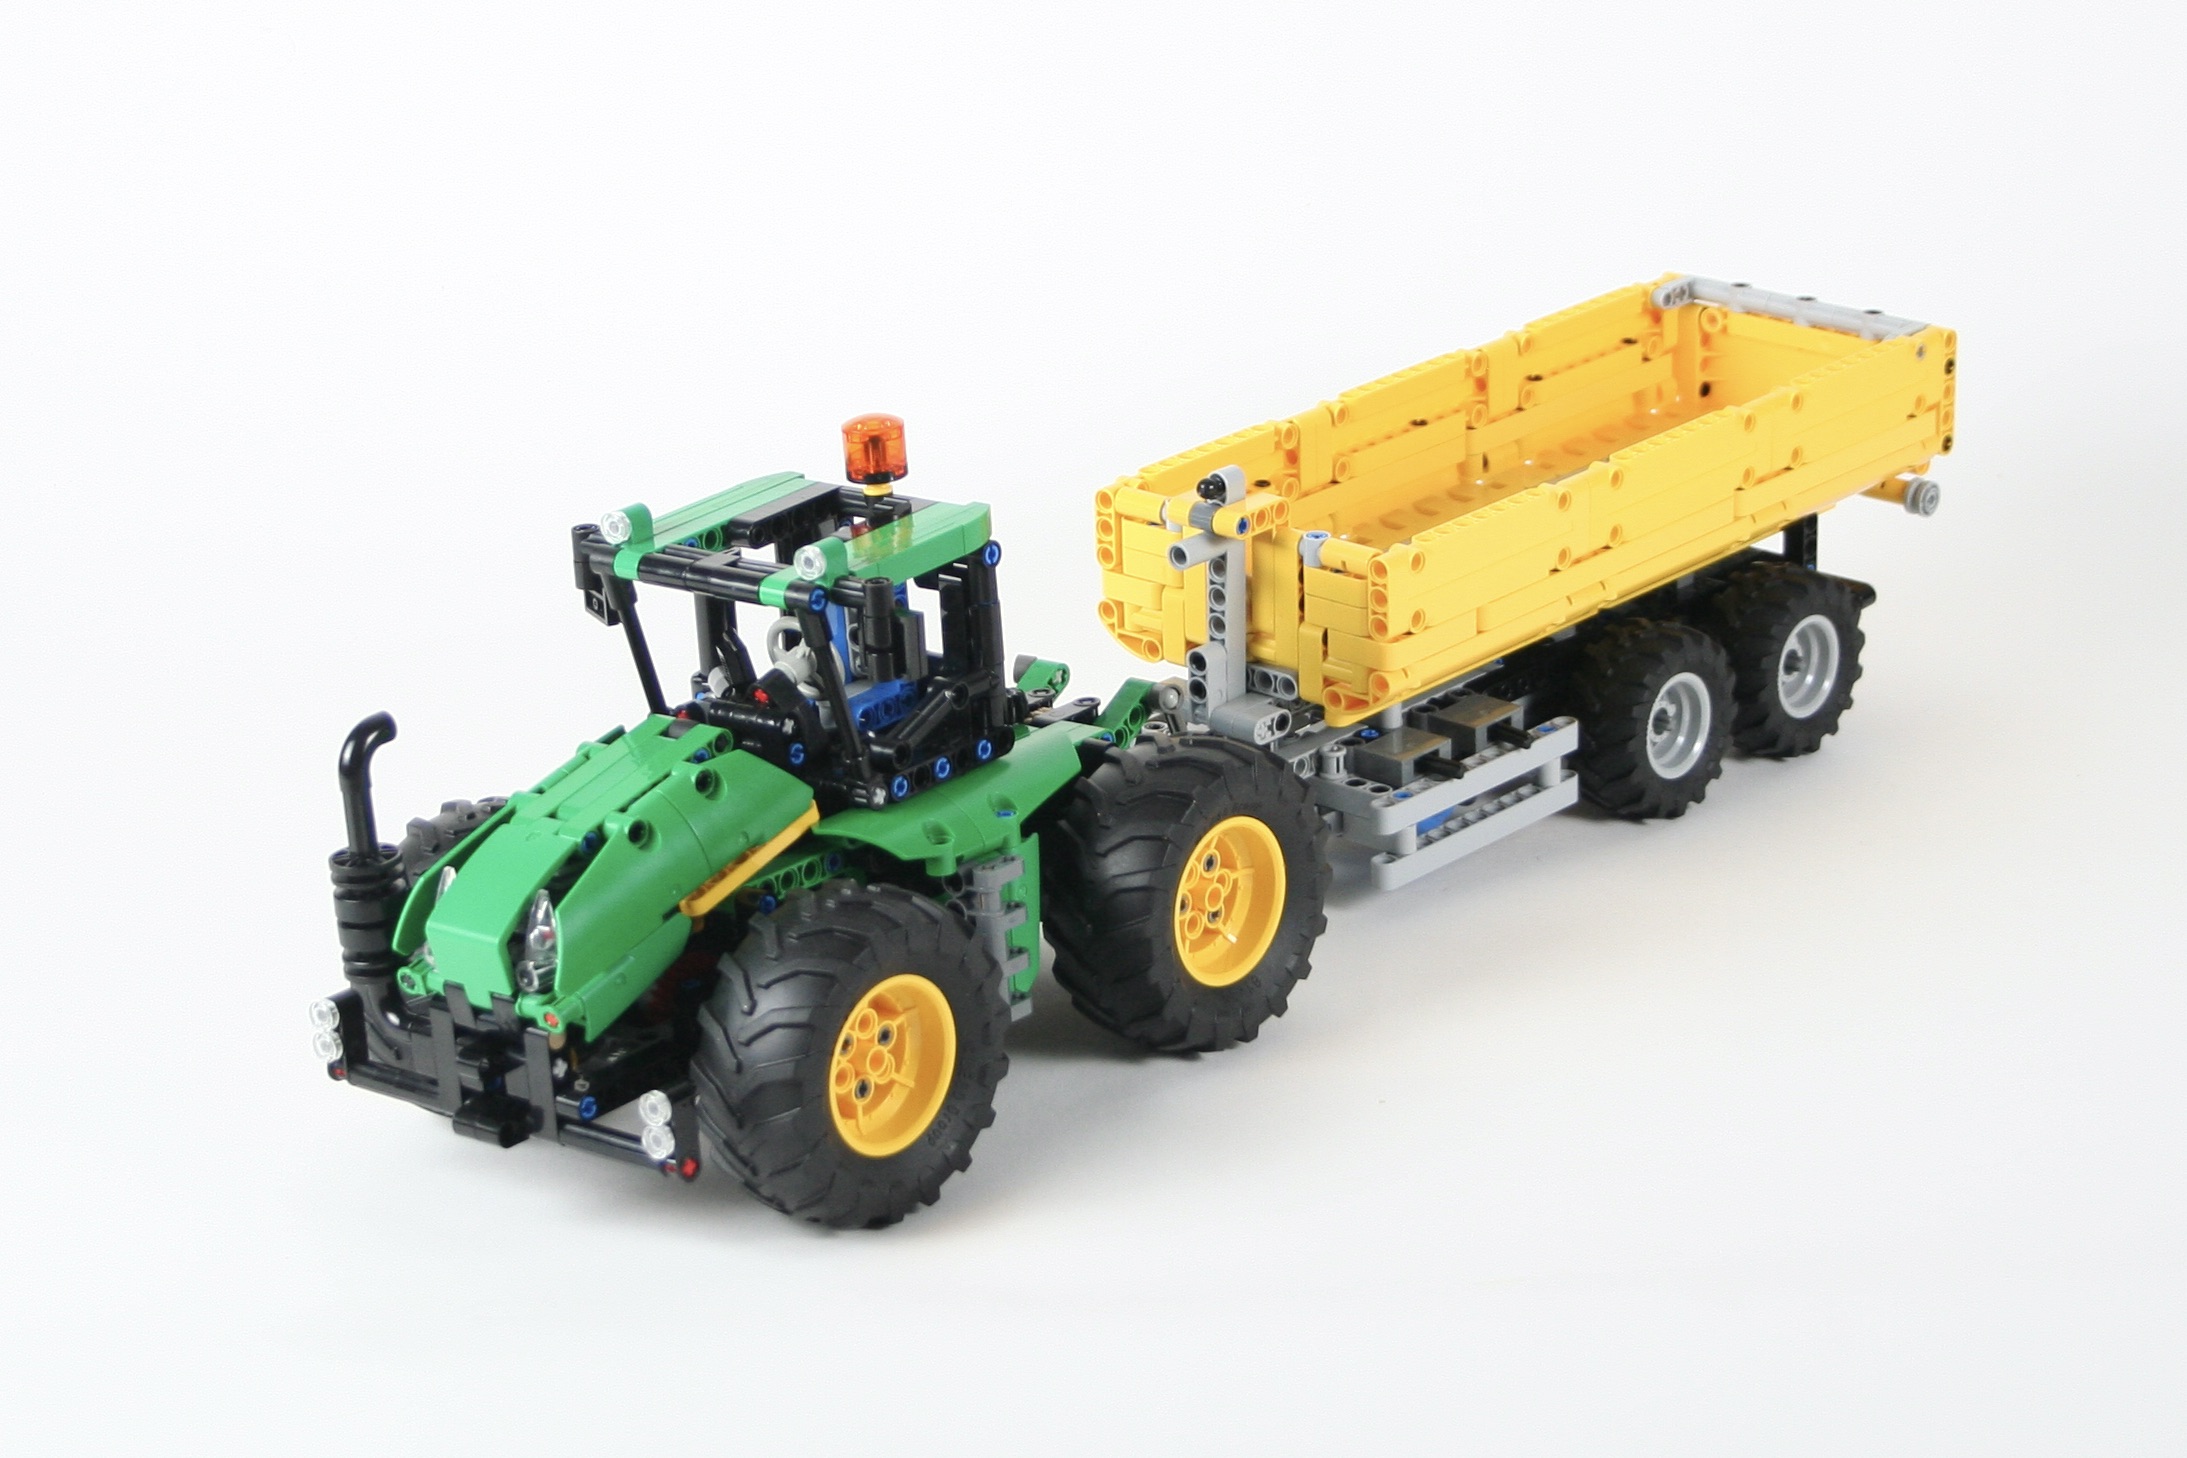
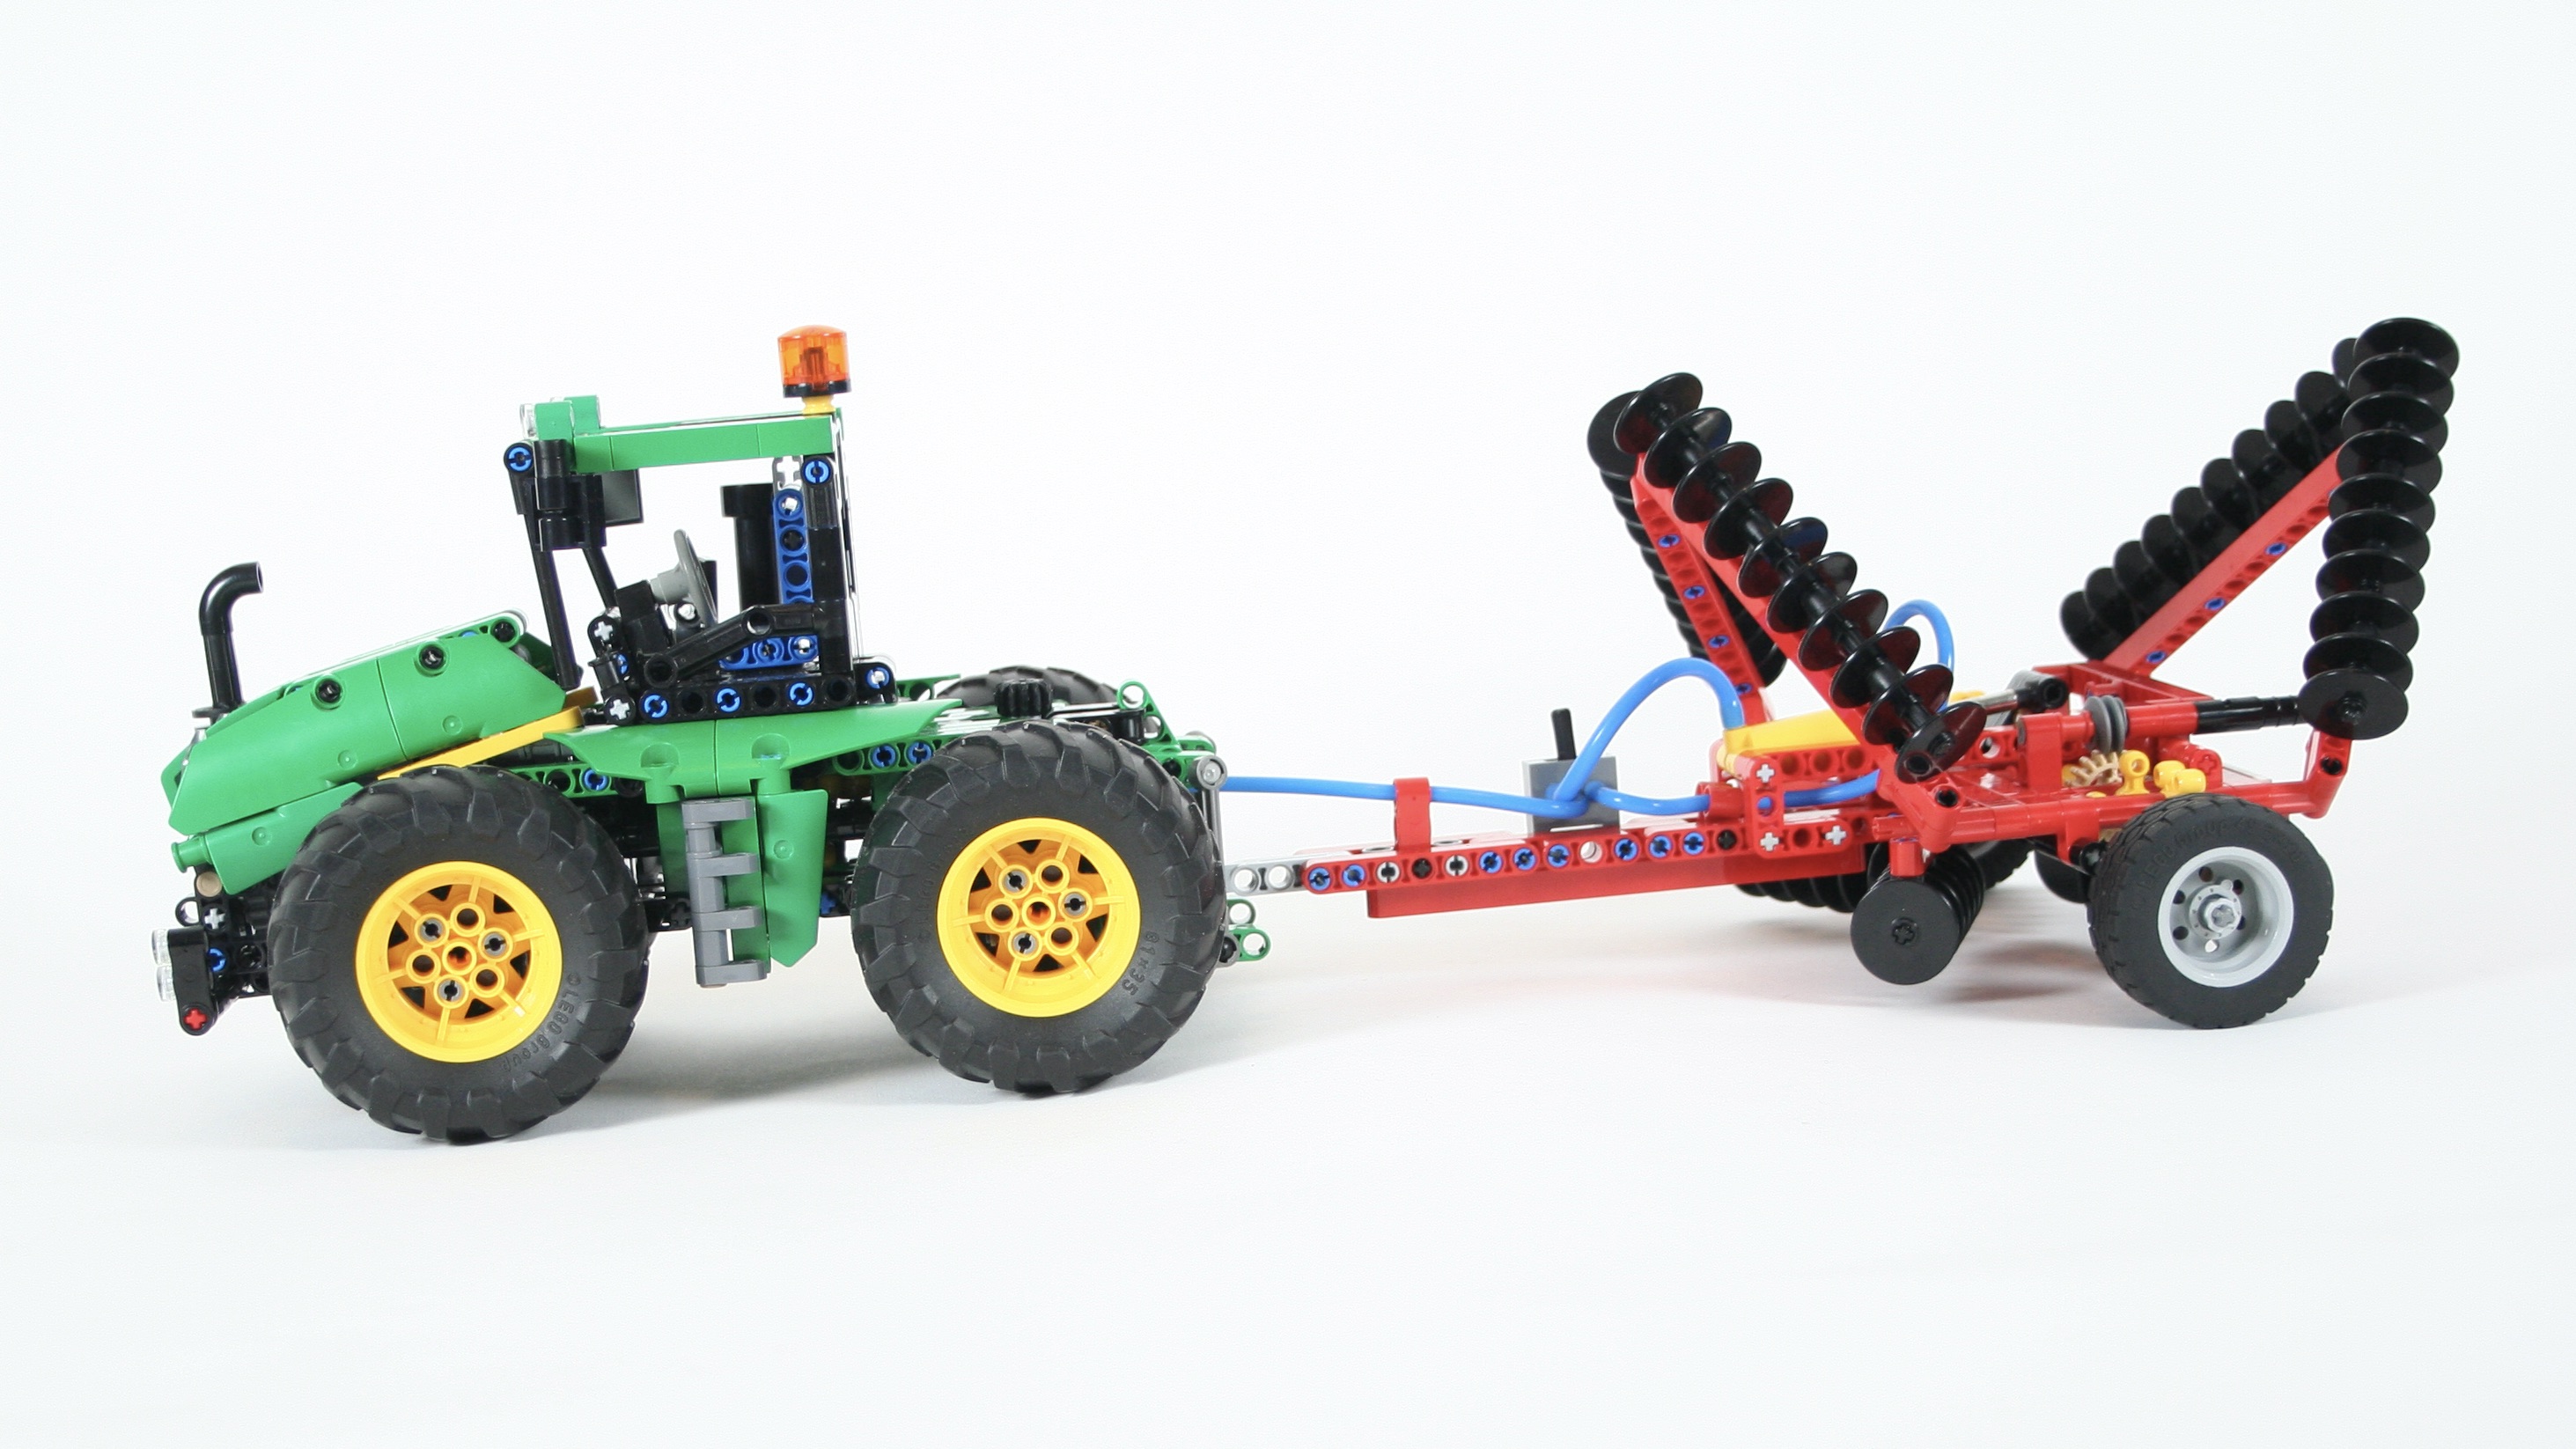
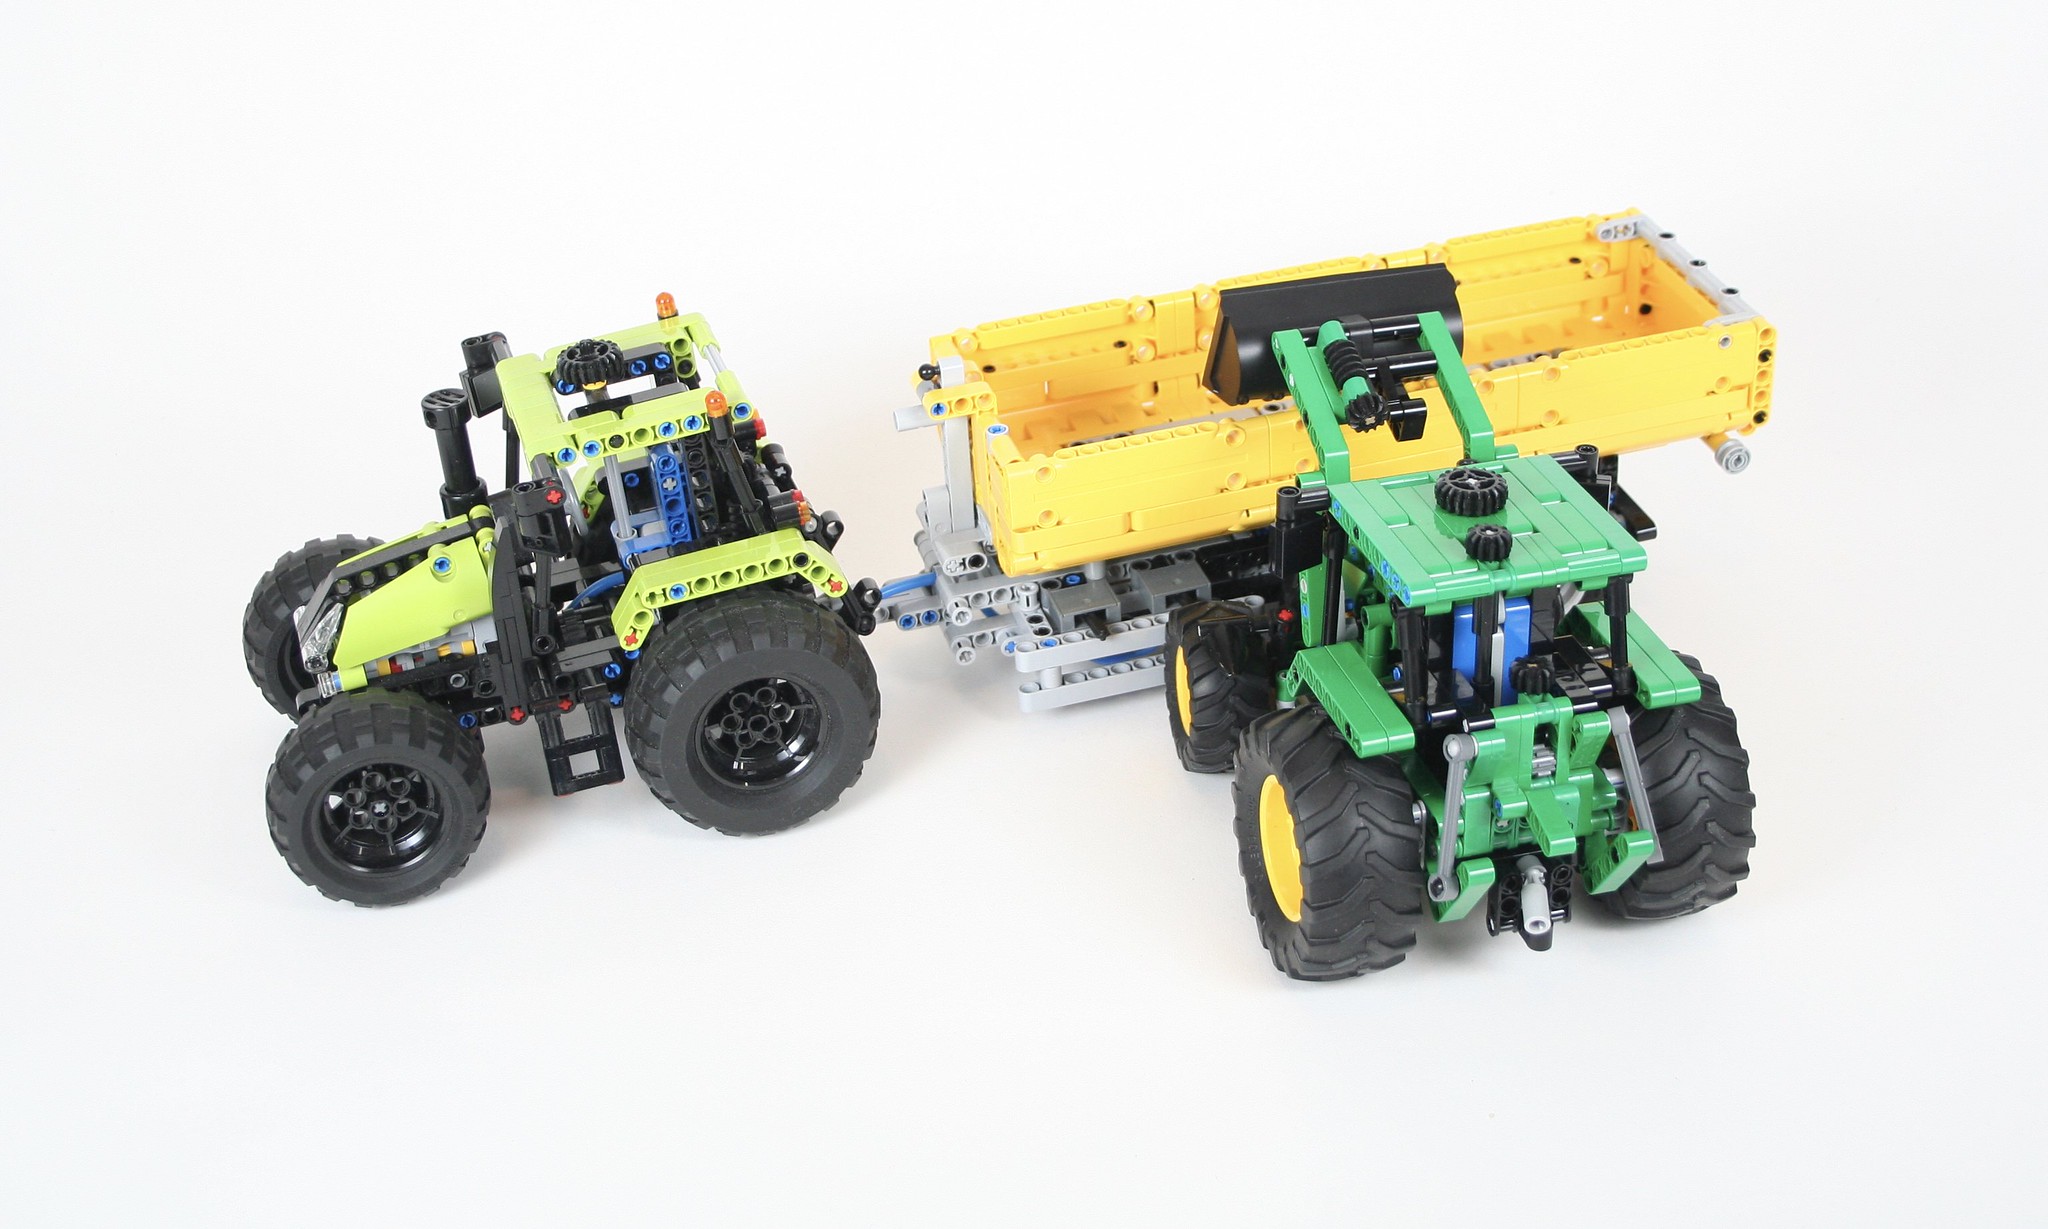
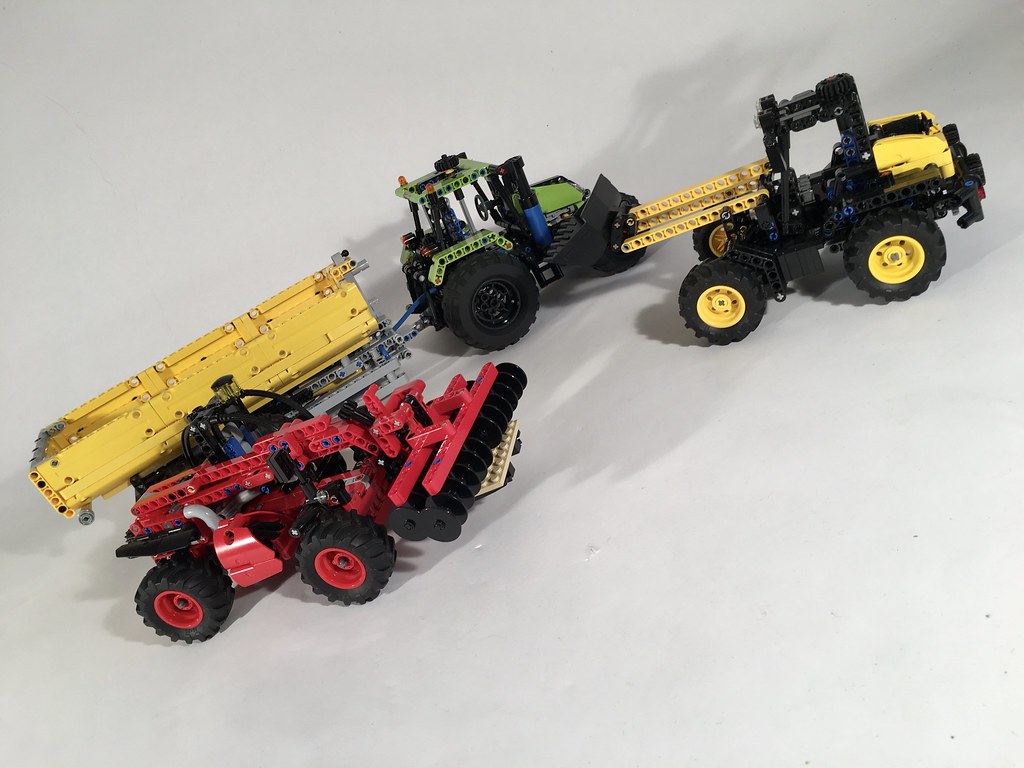
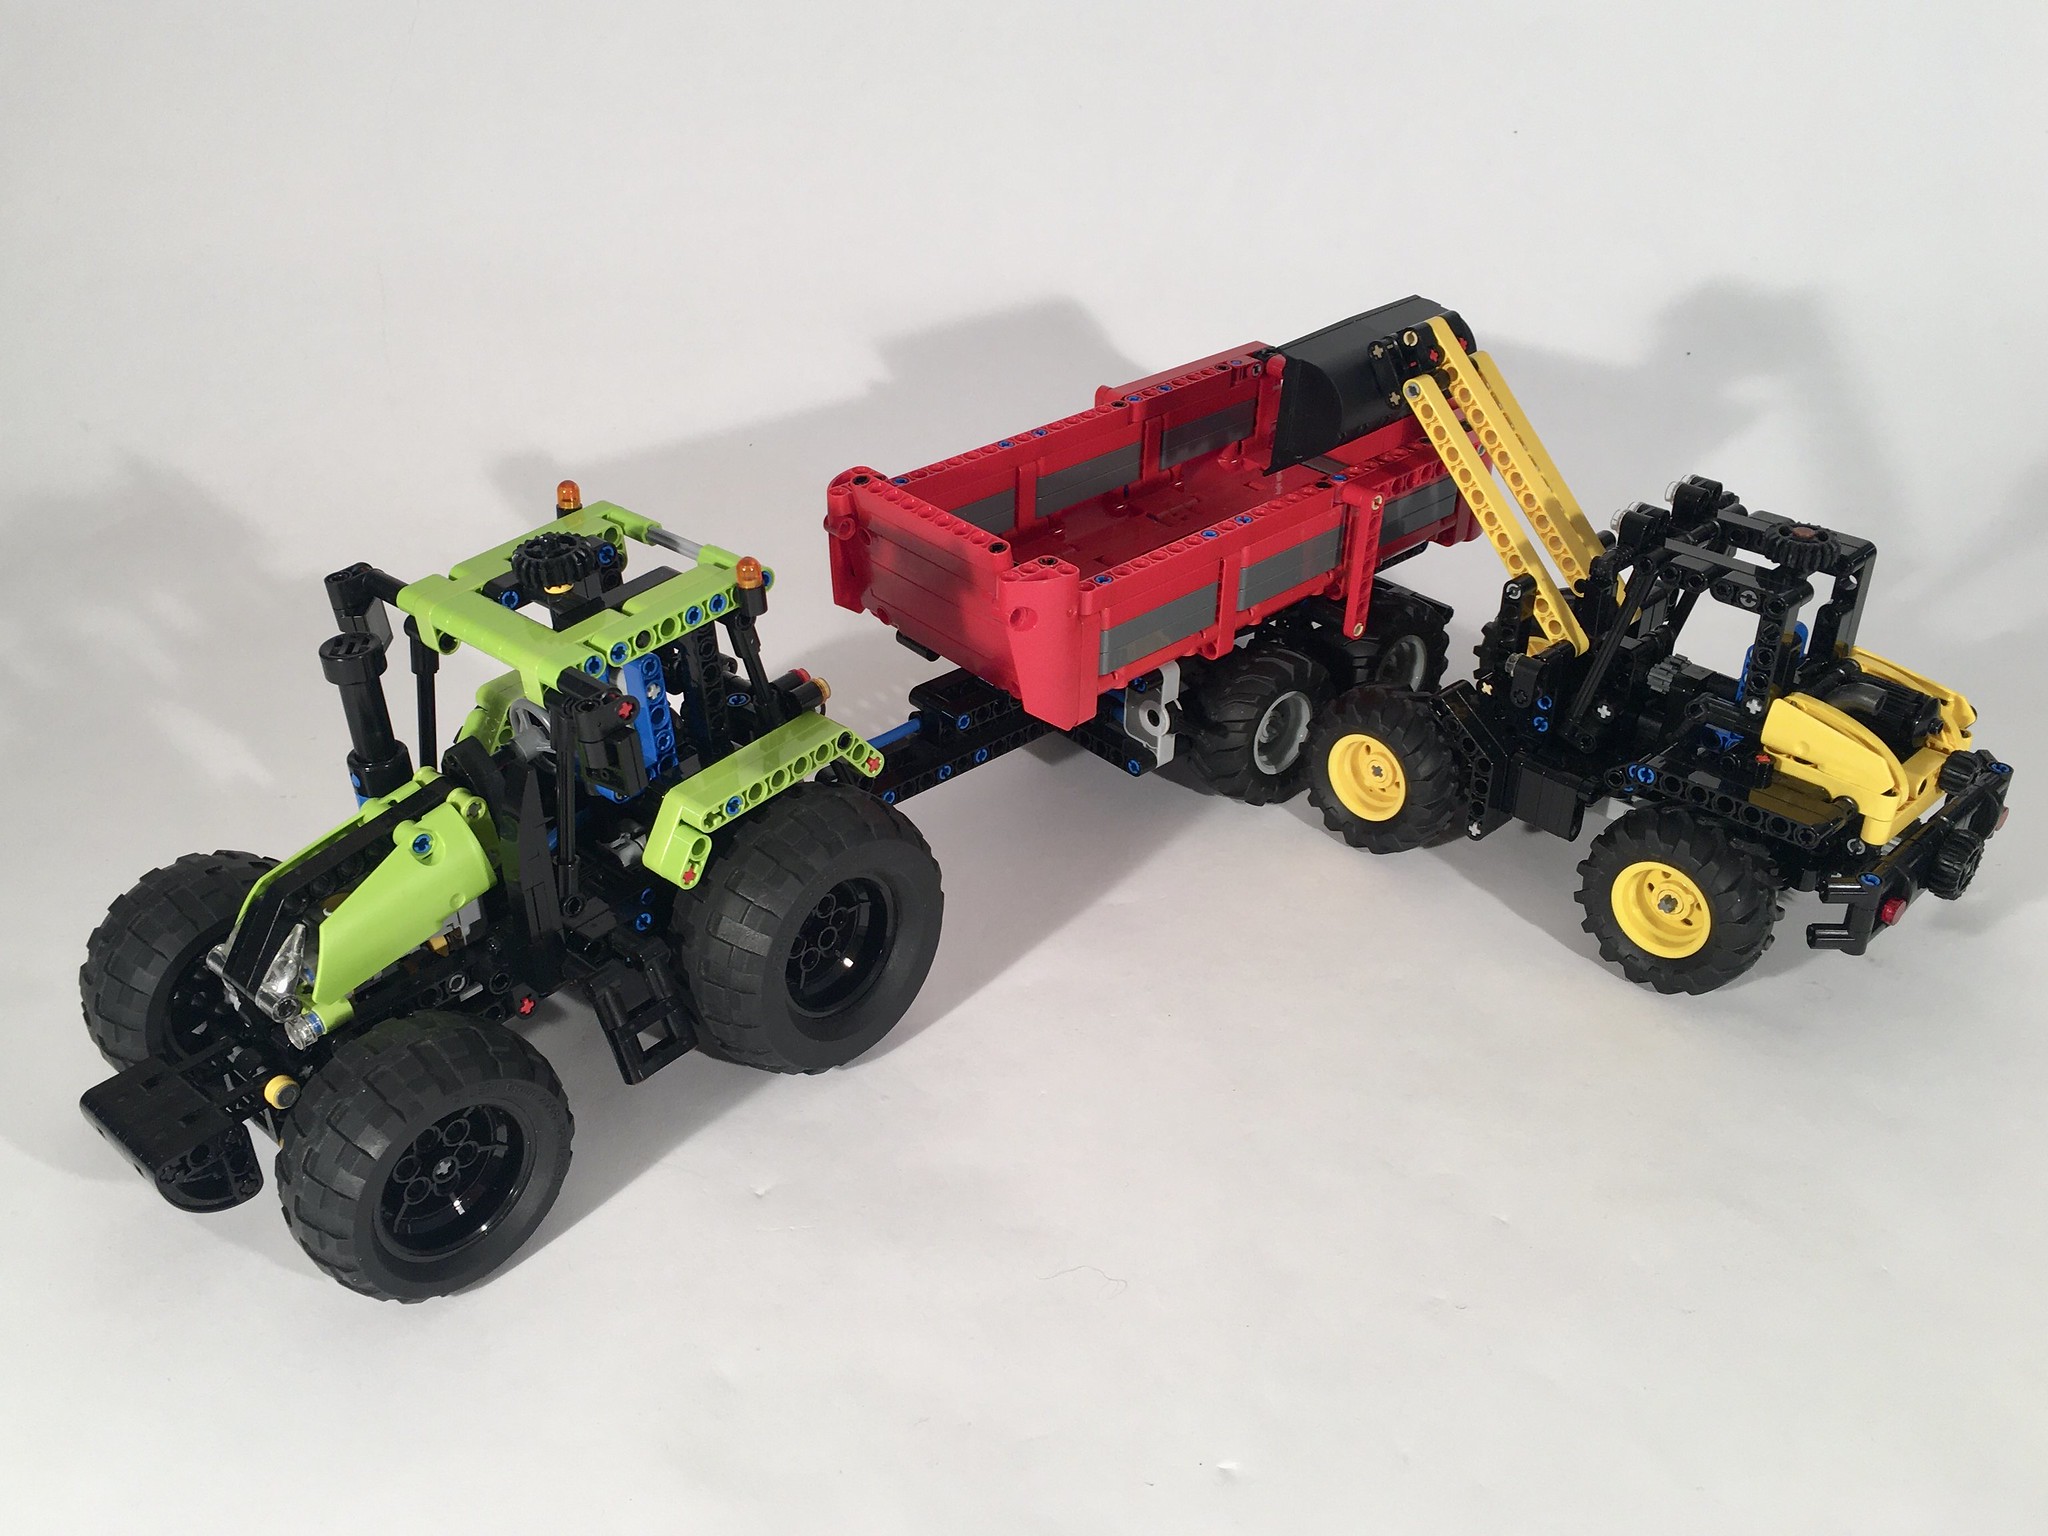
Since this is a Thirdwigg Farm tractor, there are many options to pair with this tractor, all with free instructions. My favorite is the Hookloadr trailer, but the Tandem Disc looks great too. Free instructions are available for all the options, so feel free to make your own farm.
It is always fun to make another tractor and this one was no exception. I wish the drivetrain was a little more smooth, but the rest of the tractor worked flawlessly. And it looks fantastic. Coupled with a trailer, makes it look strong and purposeful. And the rotating cab is so much fun to play with. We’ll see what gets added to the Thirdwigg Farm next!
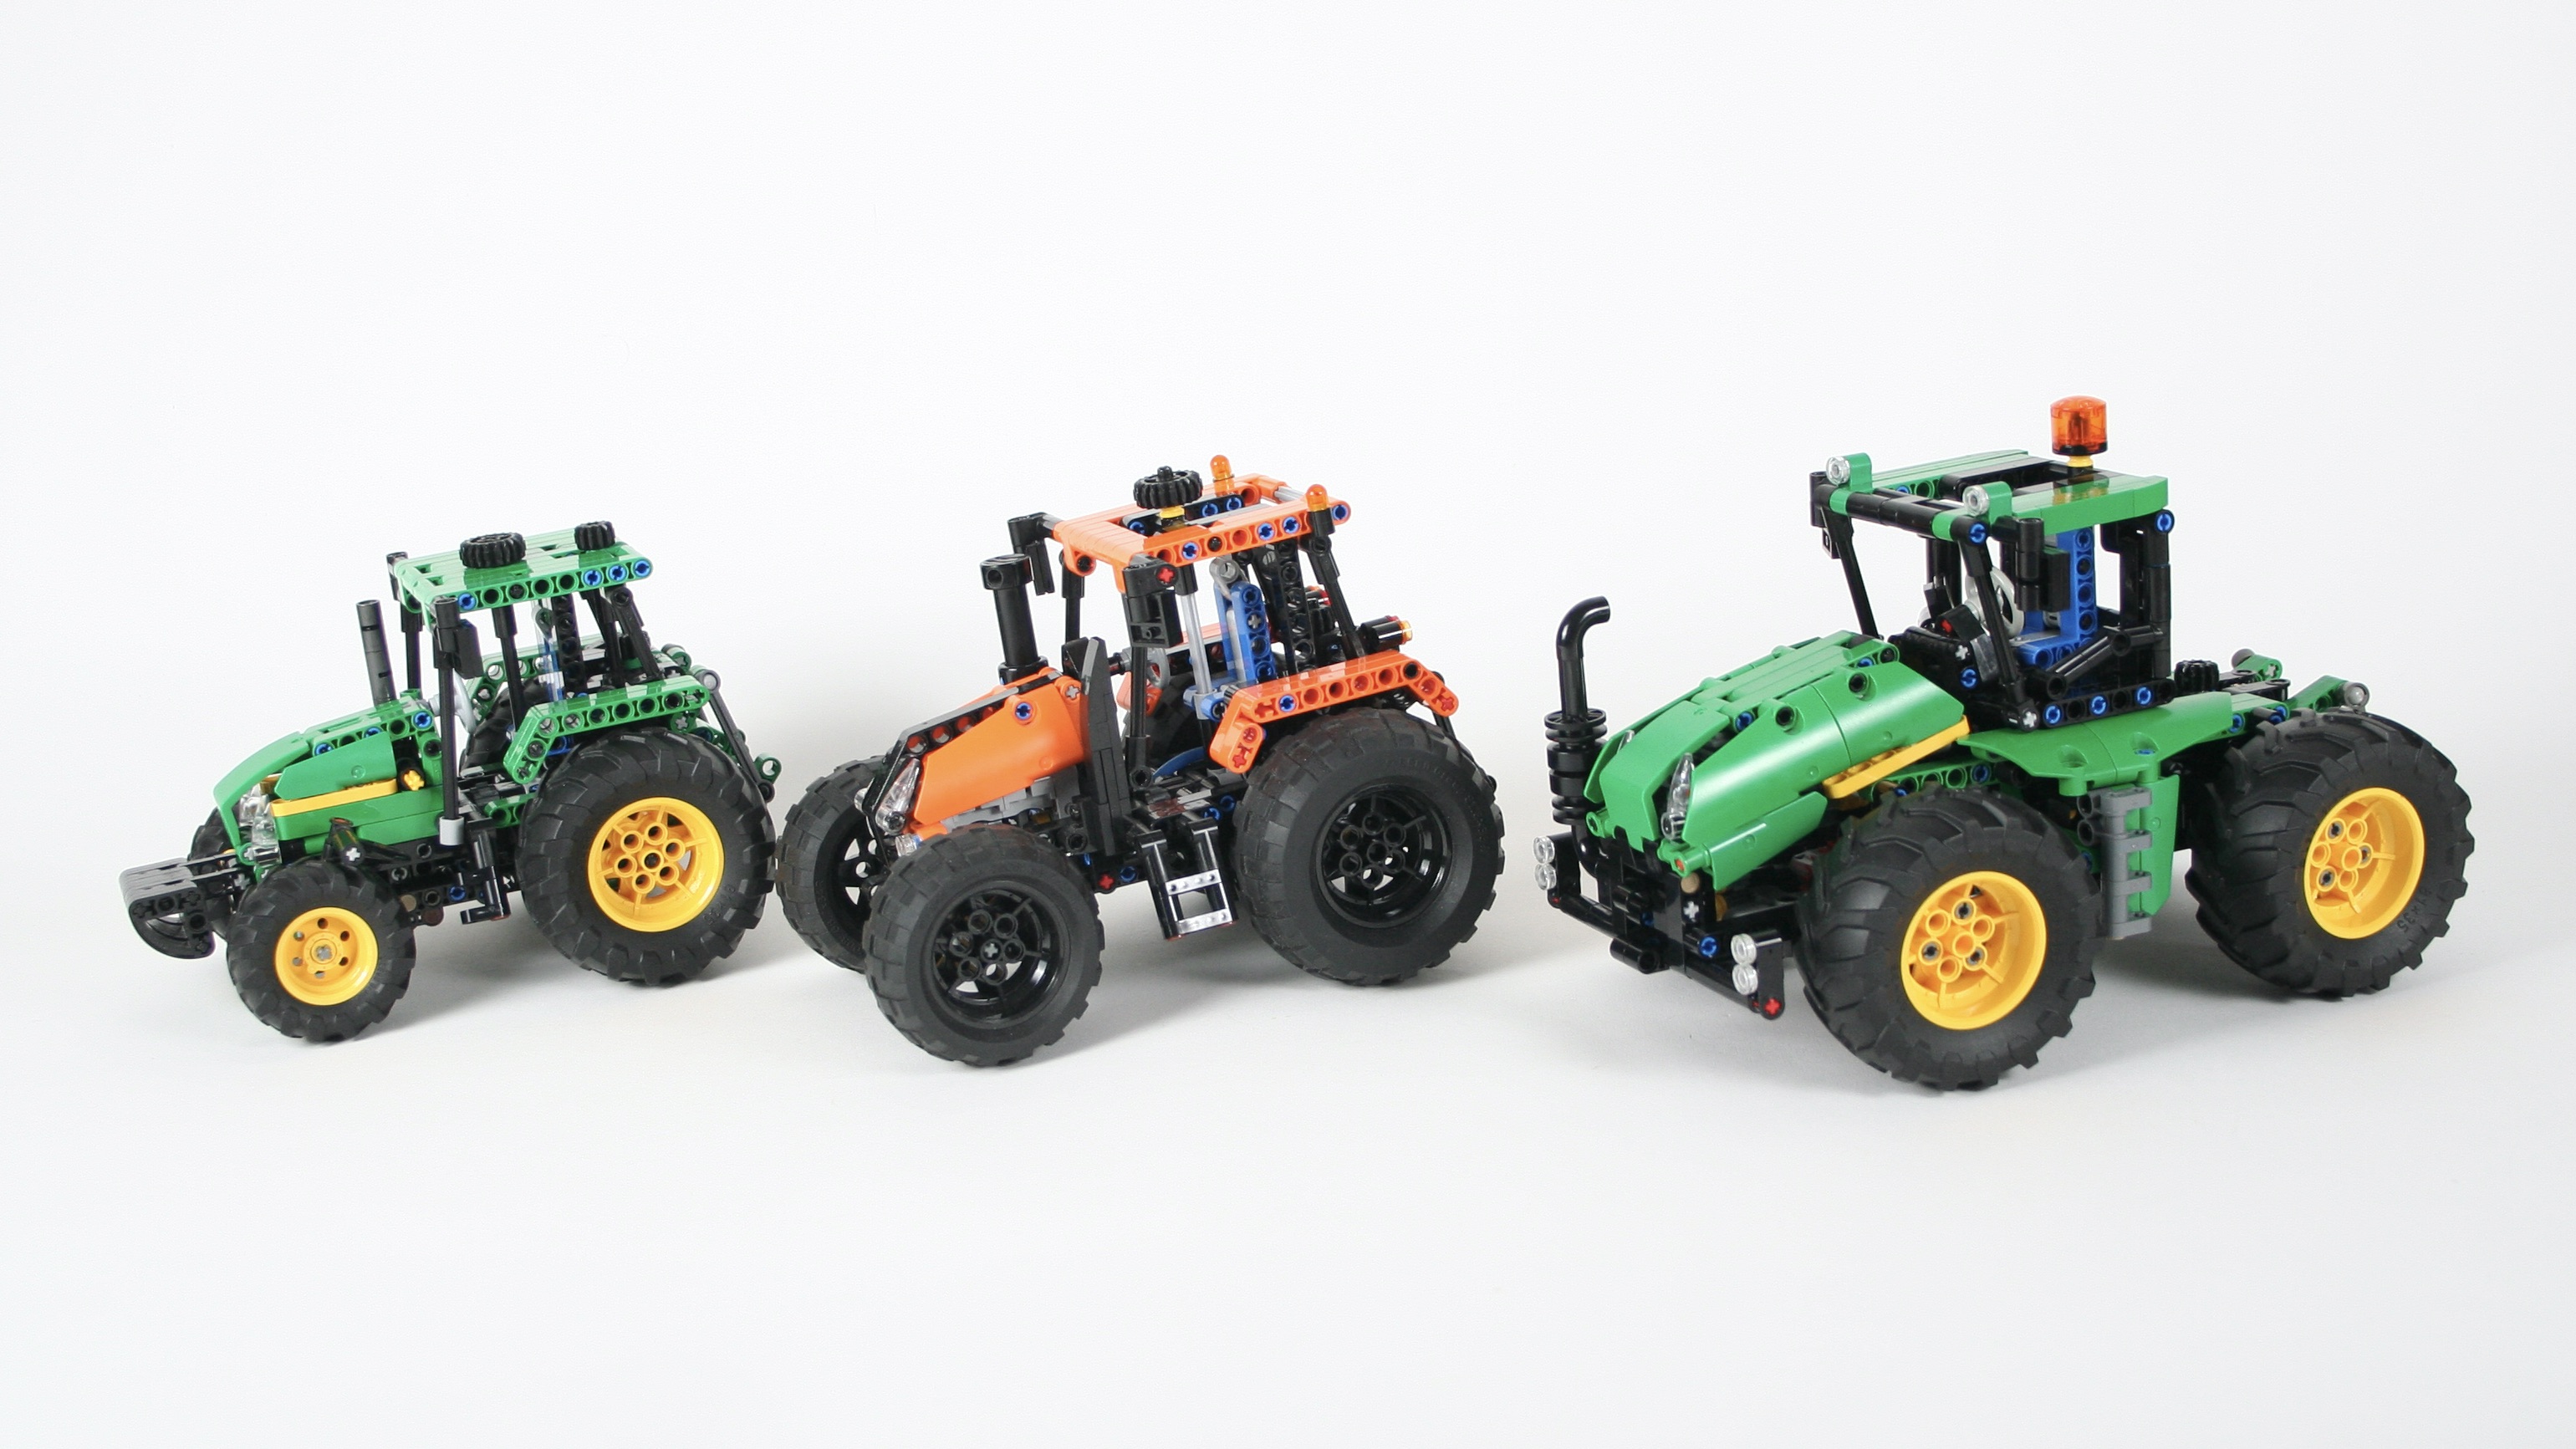
I built the Atmos Tractor a couple of years ago as a small little project. Soon I had created a number of attachments and trailers to work with the tractor, and soon I was more tractors and other machines were added. But the balance needed some additional tractors, so I decided to make a little partner.
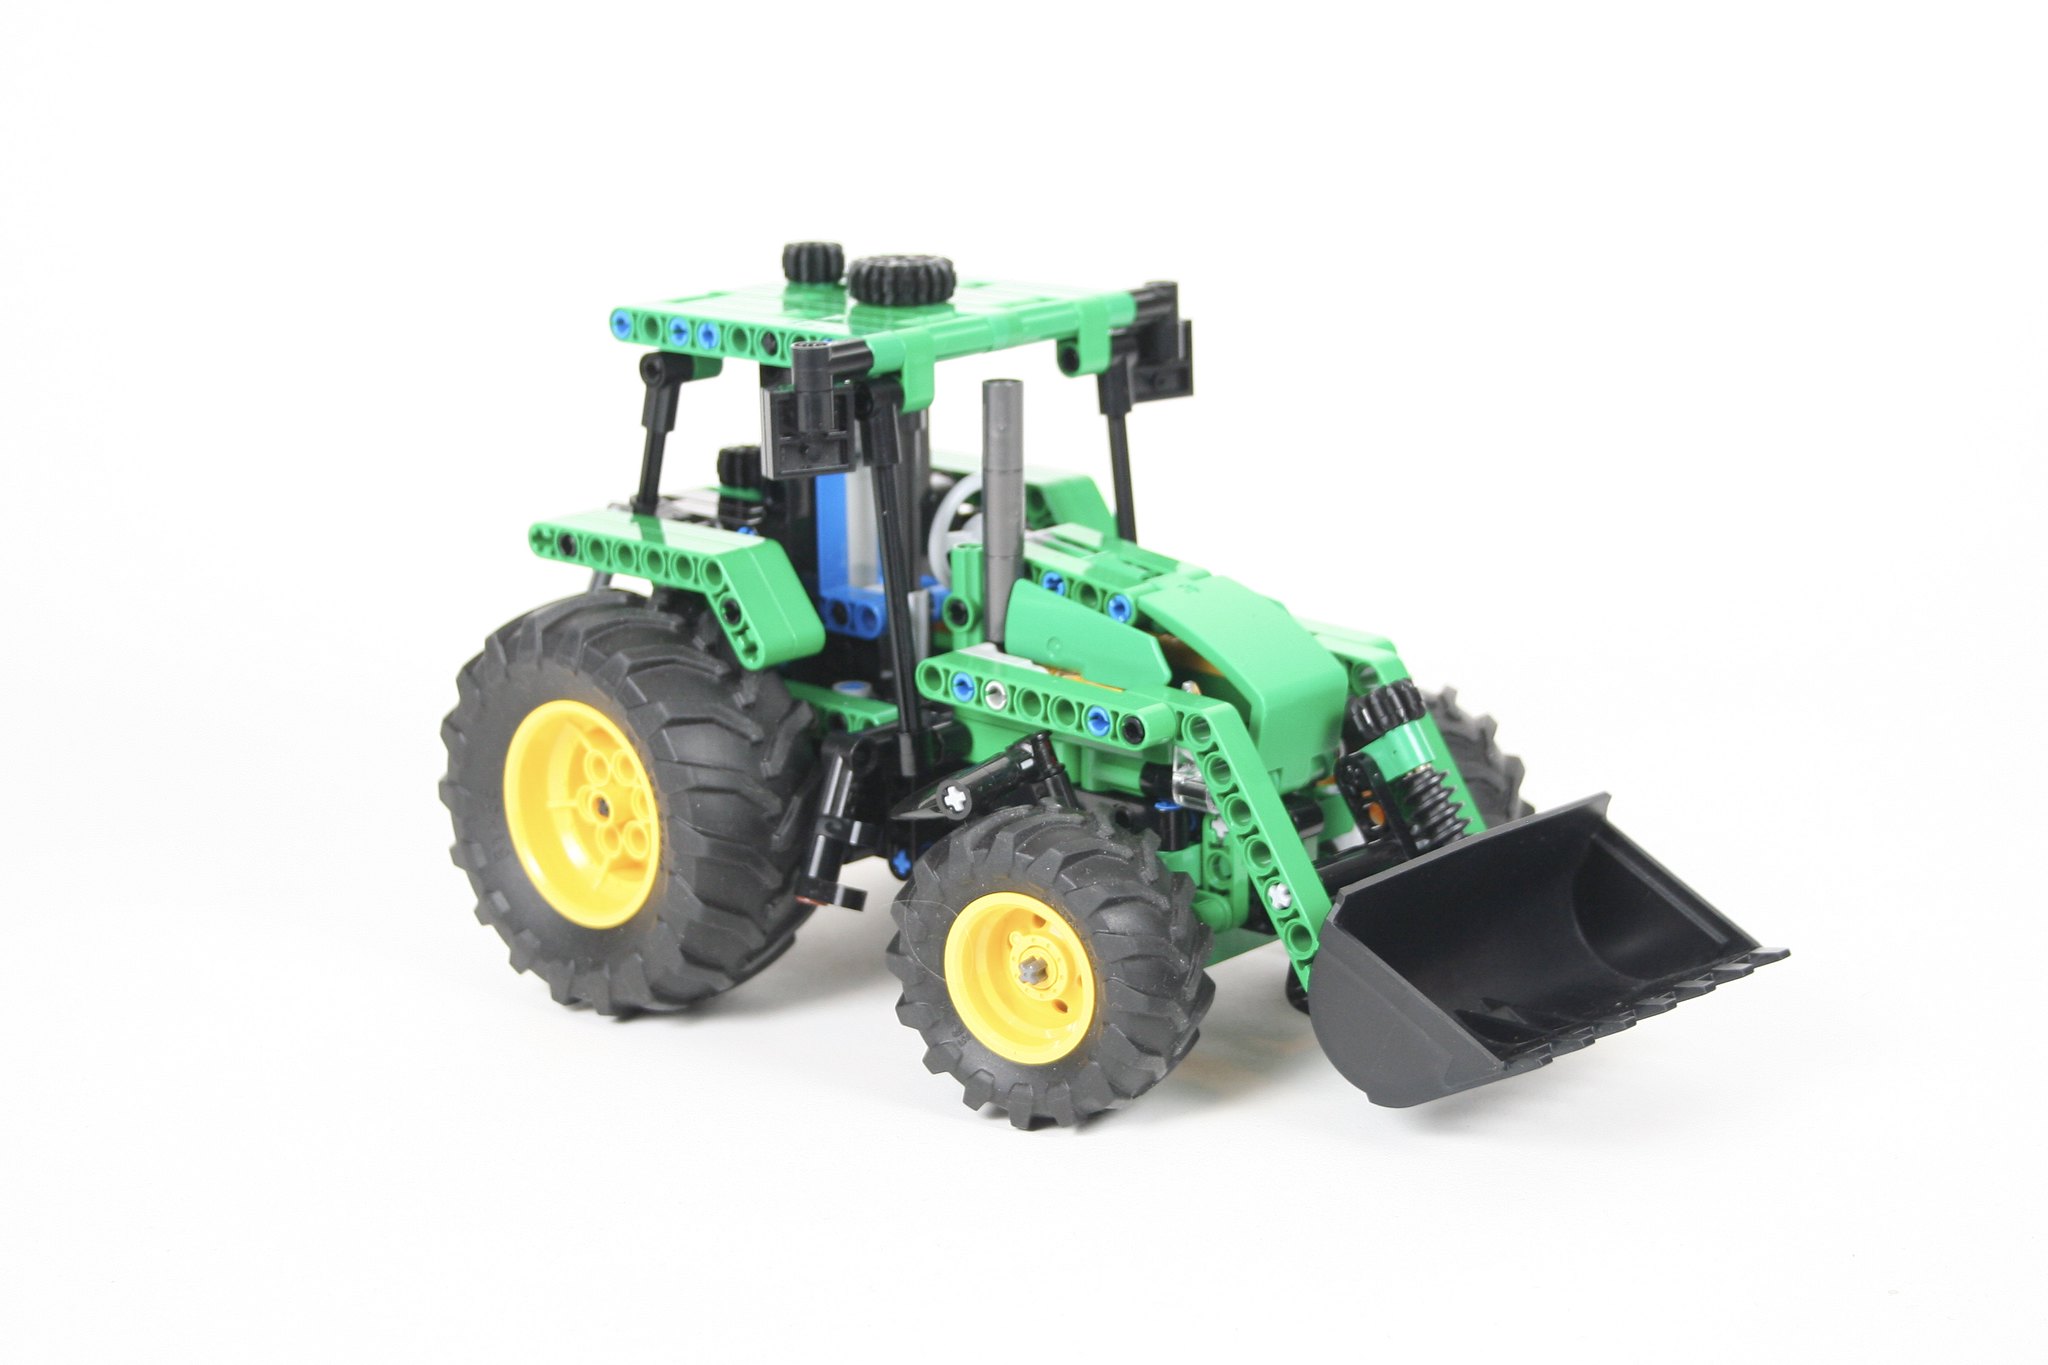
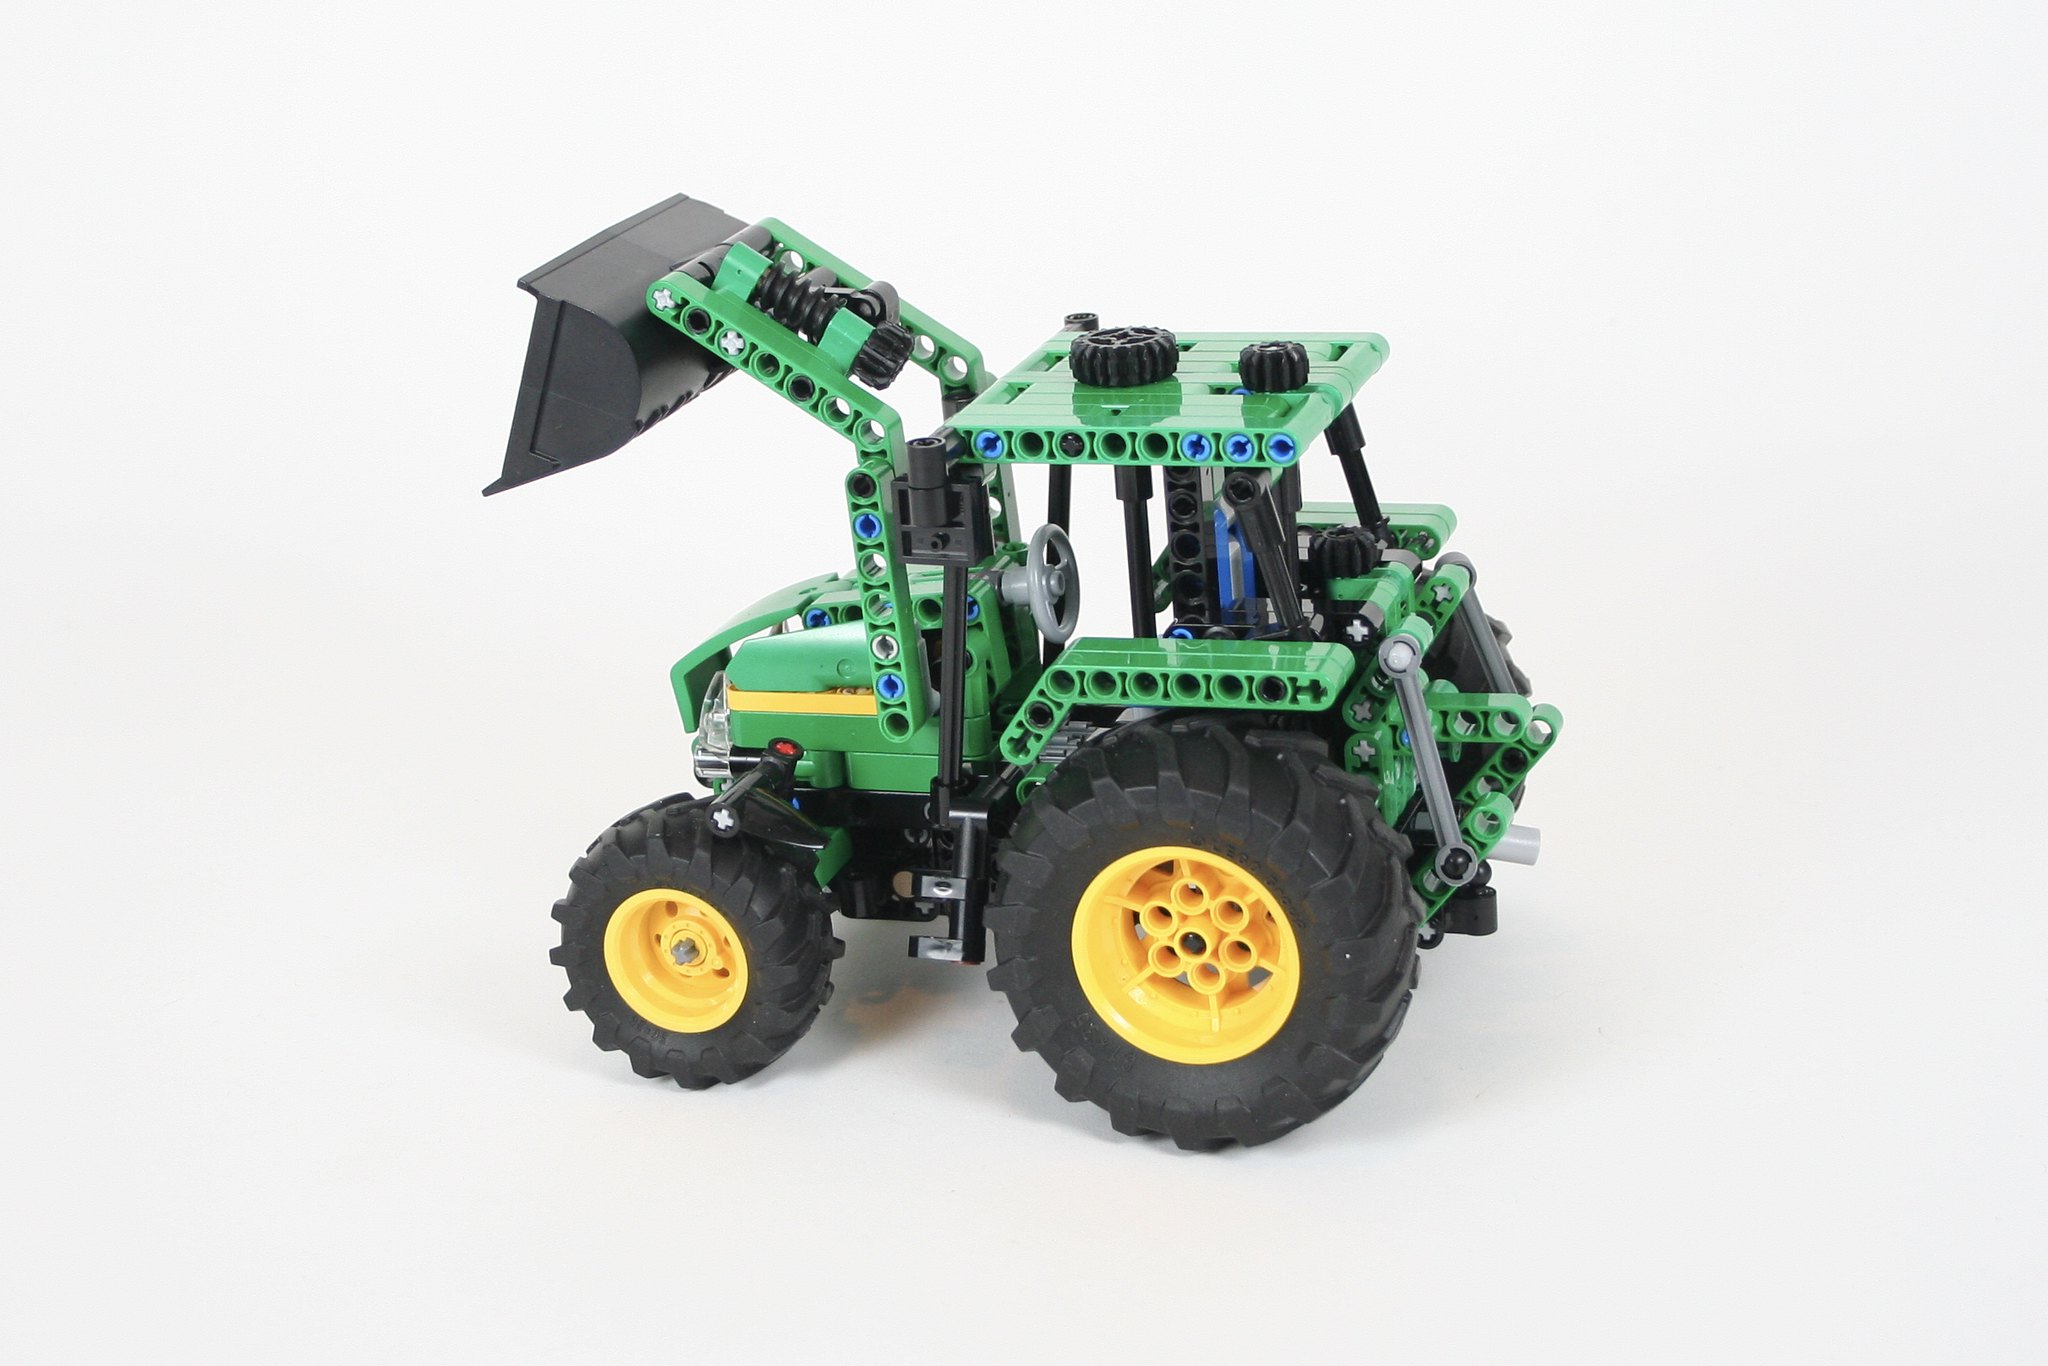
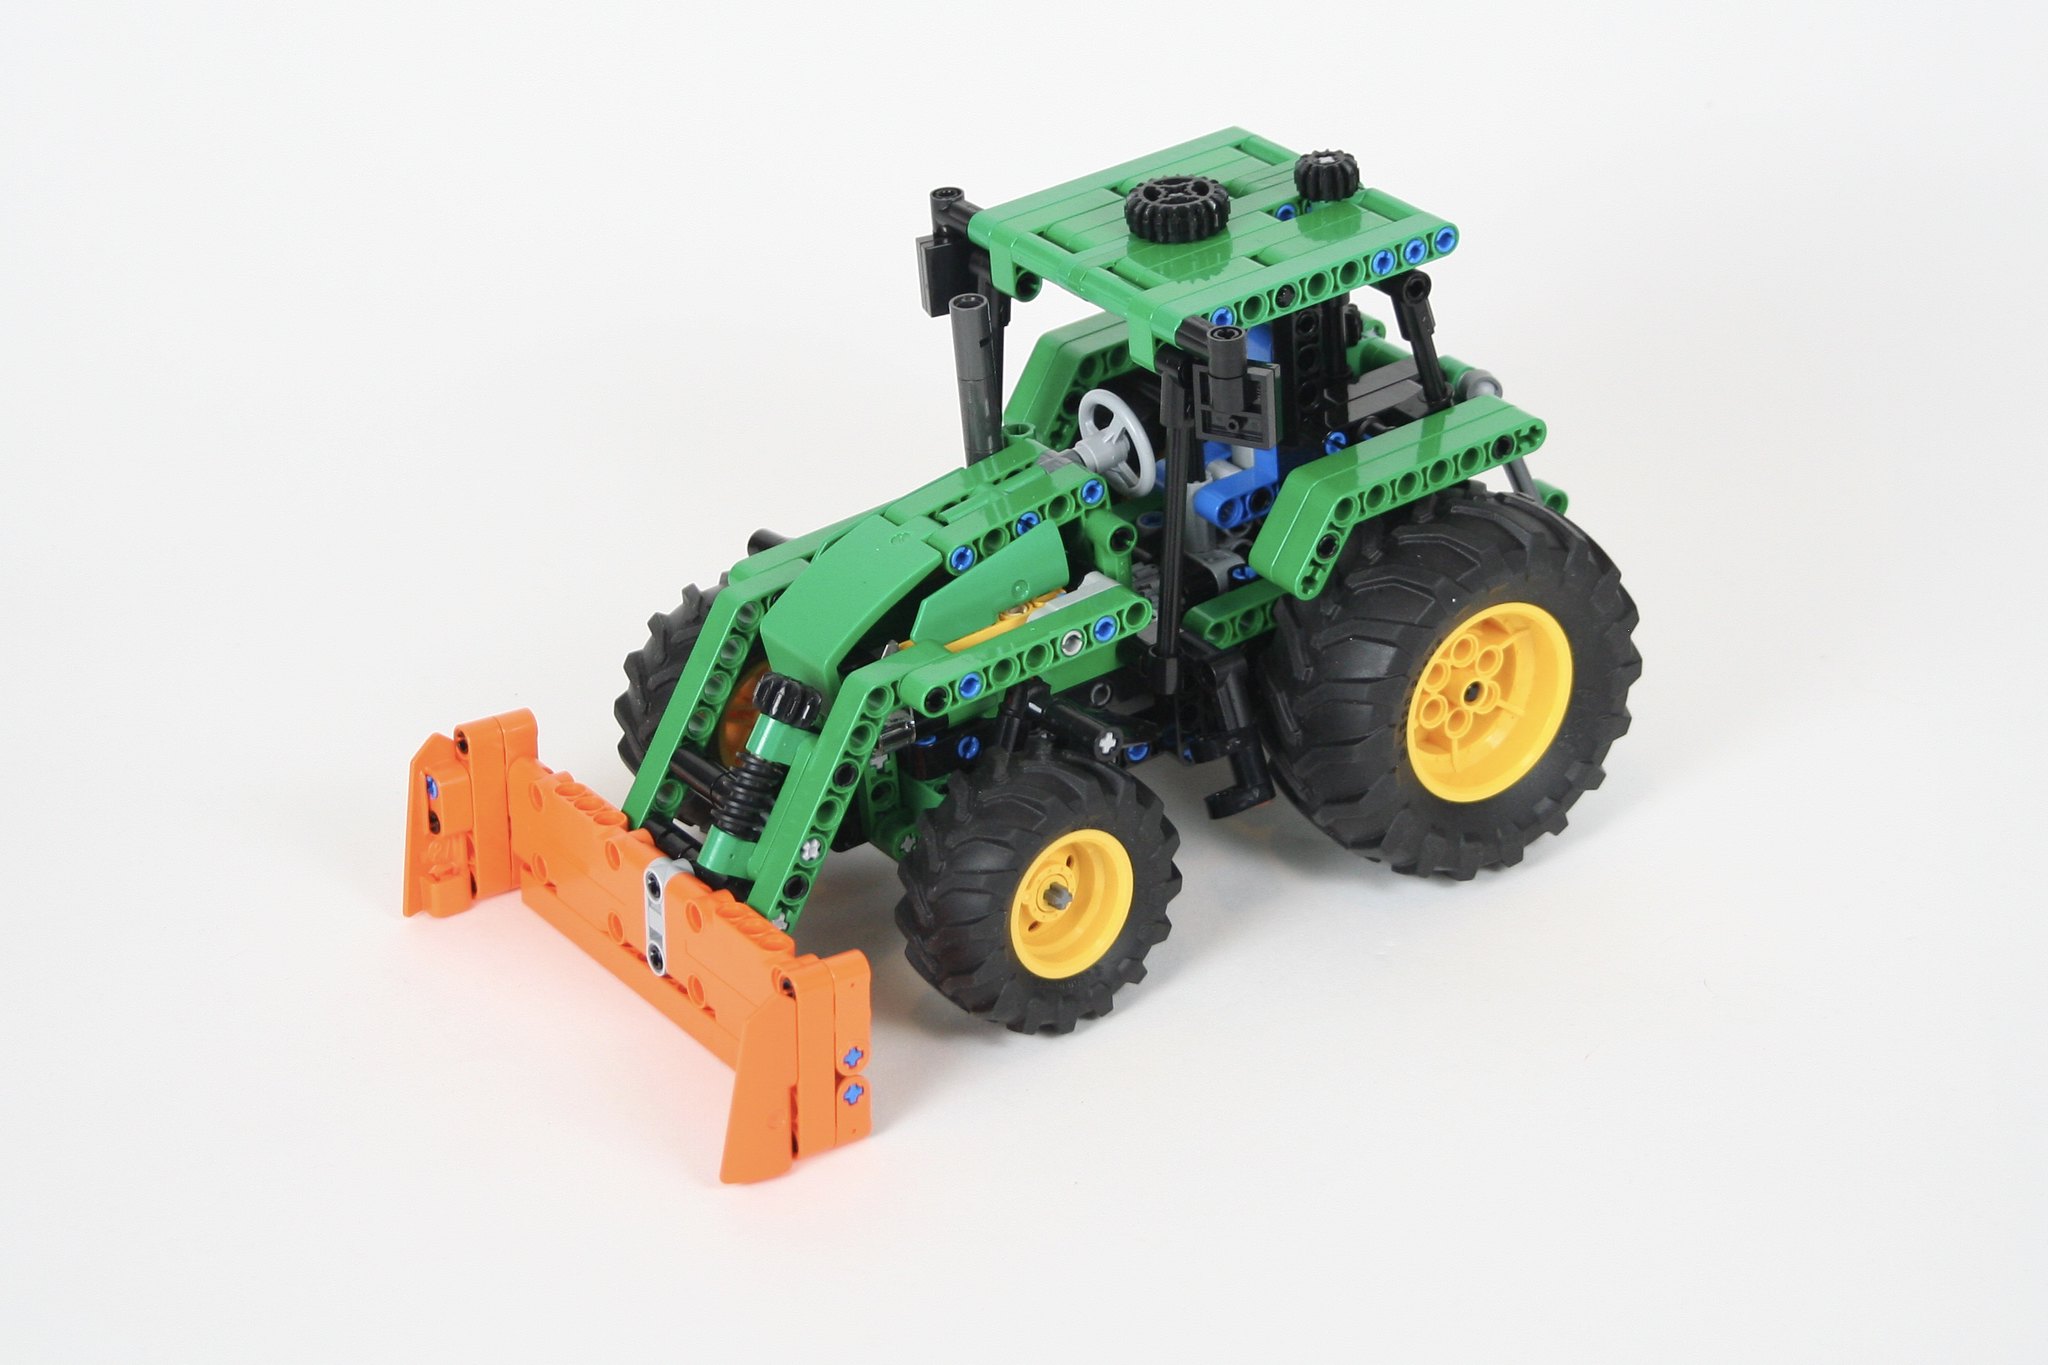
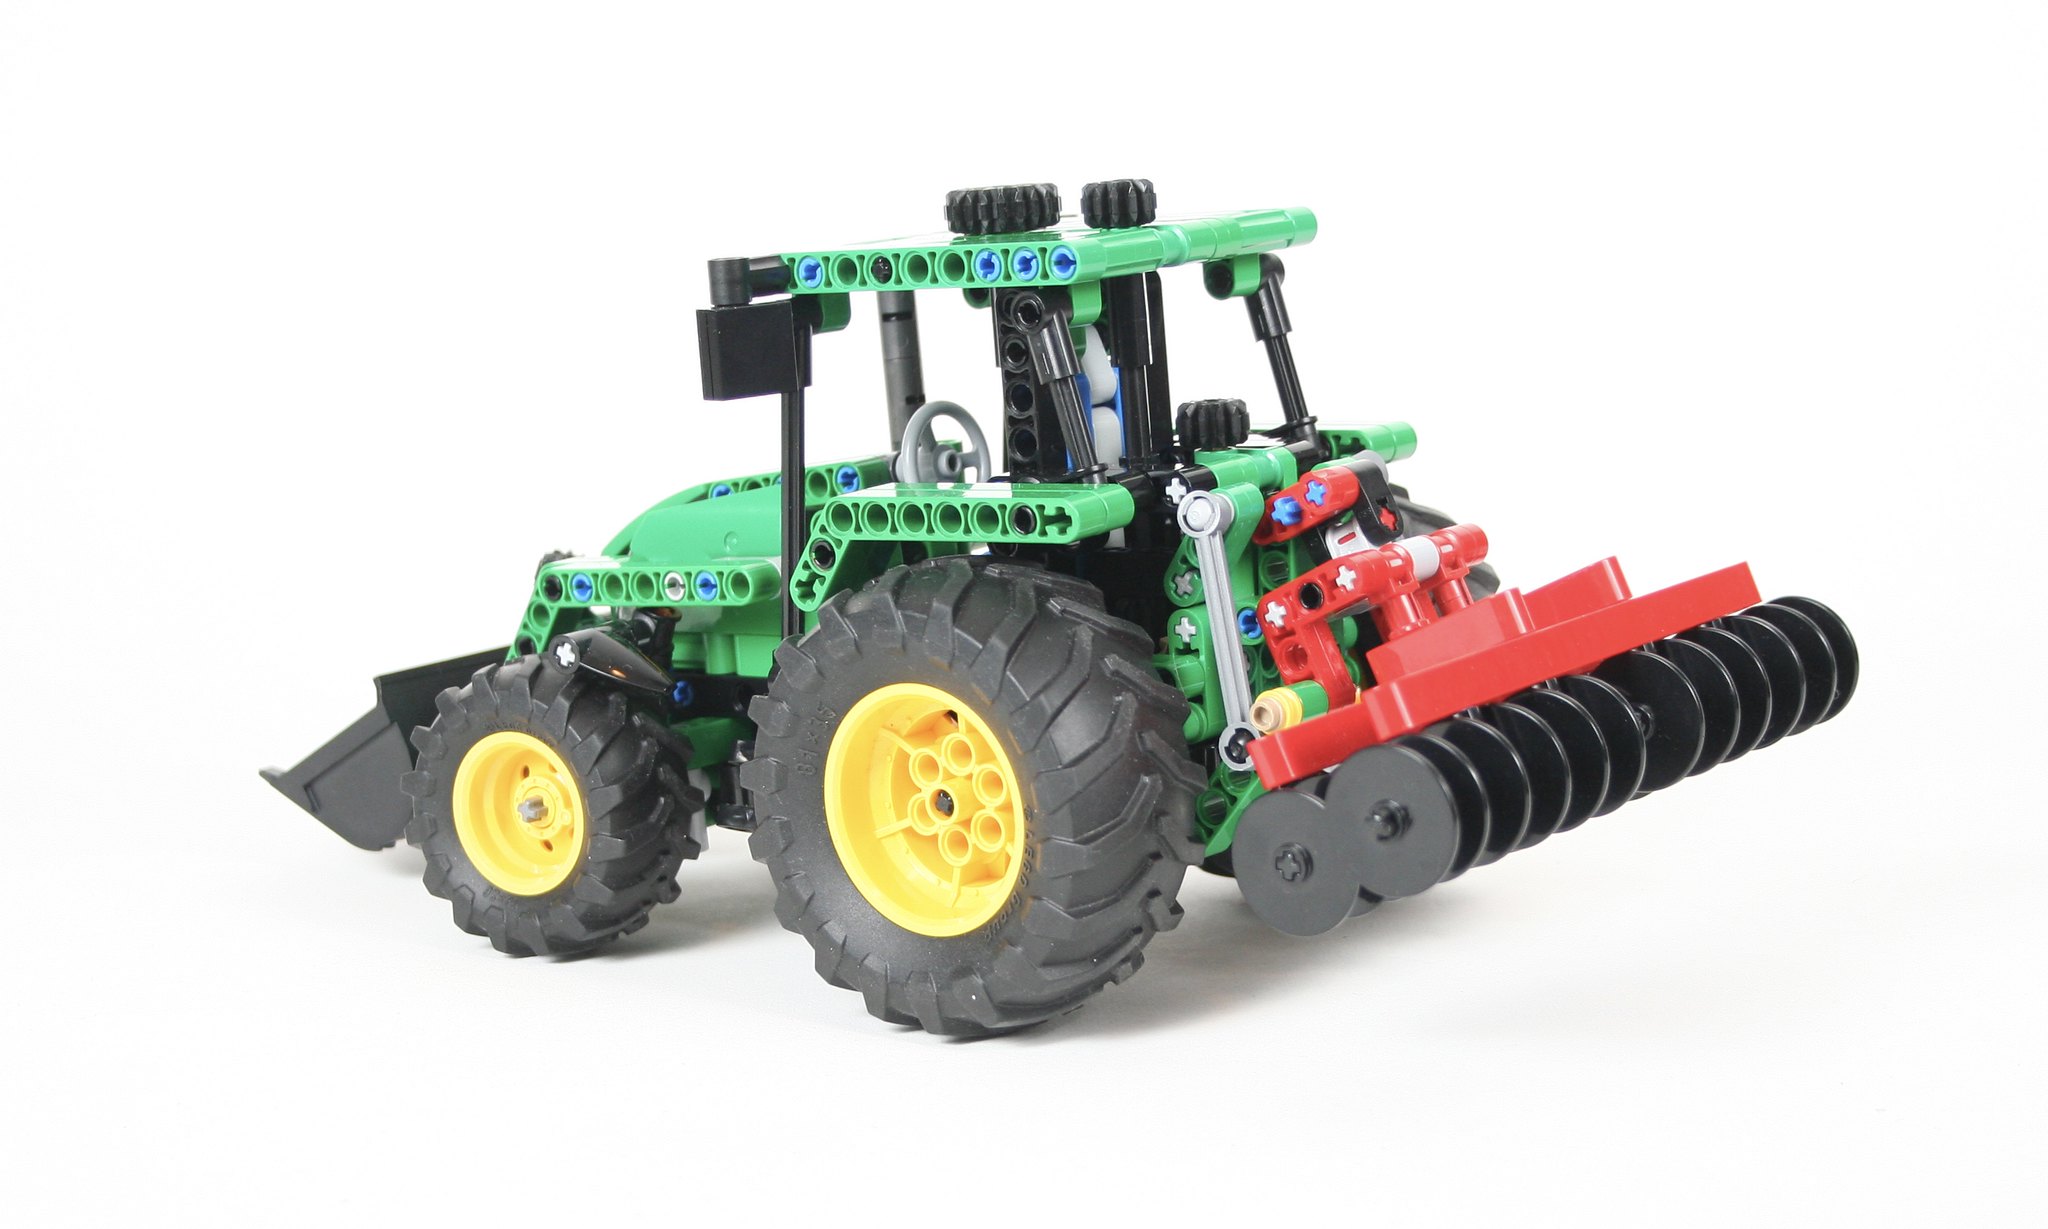
The John Deere Scout specifically so I could use the new Tractor tires that came from Lego 42122 and Lego 42129. But I wanted to it to be a smaller tractor with many of the features needed for full Thirdwigg Farm integration. Thus, the tractor had to have the common front and rear attachment points, a rear PTO, and steering because I put that it everything. Soon it was clear that the size of the tractor was going to make a fake engine poorly done, so I left it out. But I wanted some other feature to make this tractor unique.
The front bucket uses a worm gear function to lift the front arms. It is driven by a mechanism that drives rear, and then up to the top of the cab. There is a little gear for the HOG function that is just behind the steering HOG. A small worm gear mechanism is used to tilt the bucket. The arm can be easily removed if the desire is for the tractor to mount something on the front attachment point. The rear PTO is connected directly to the rear differential, and the common three point hitch is installed as well. Finally a trailer hitch is attached.
I also made a couple of attachments specifically for this tractor including a snow plow and scrapper, and a little trailer. Both may be found for free at Rebrickable.
With each additional tractor I add, I think it will be the last, but I keep having more ideas, and each one has been fun to design. I was pleased with how this tractor turned out, and how well it functioned. The tires look great at this scale. Most importantly, it matched well with each of the other tractors. The instructions are freely available at Rebrickable along with all the other Thirdwigg Farm builds, so feel free to make one of your own.
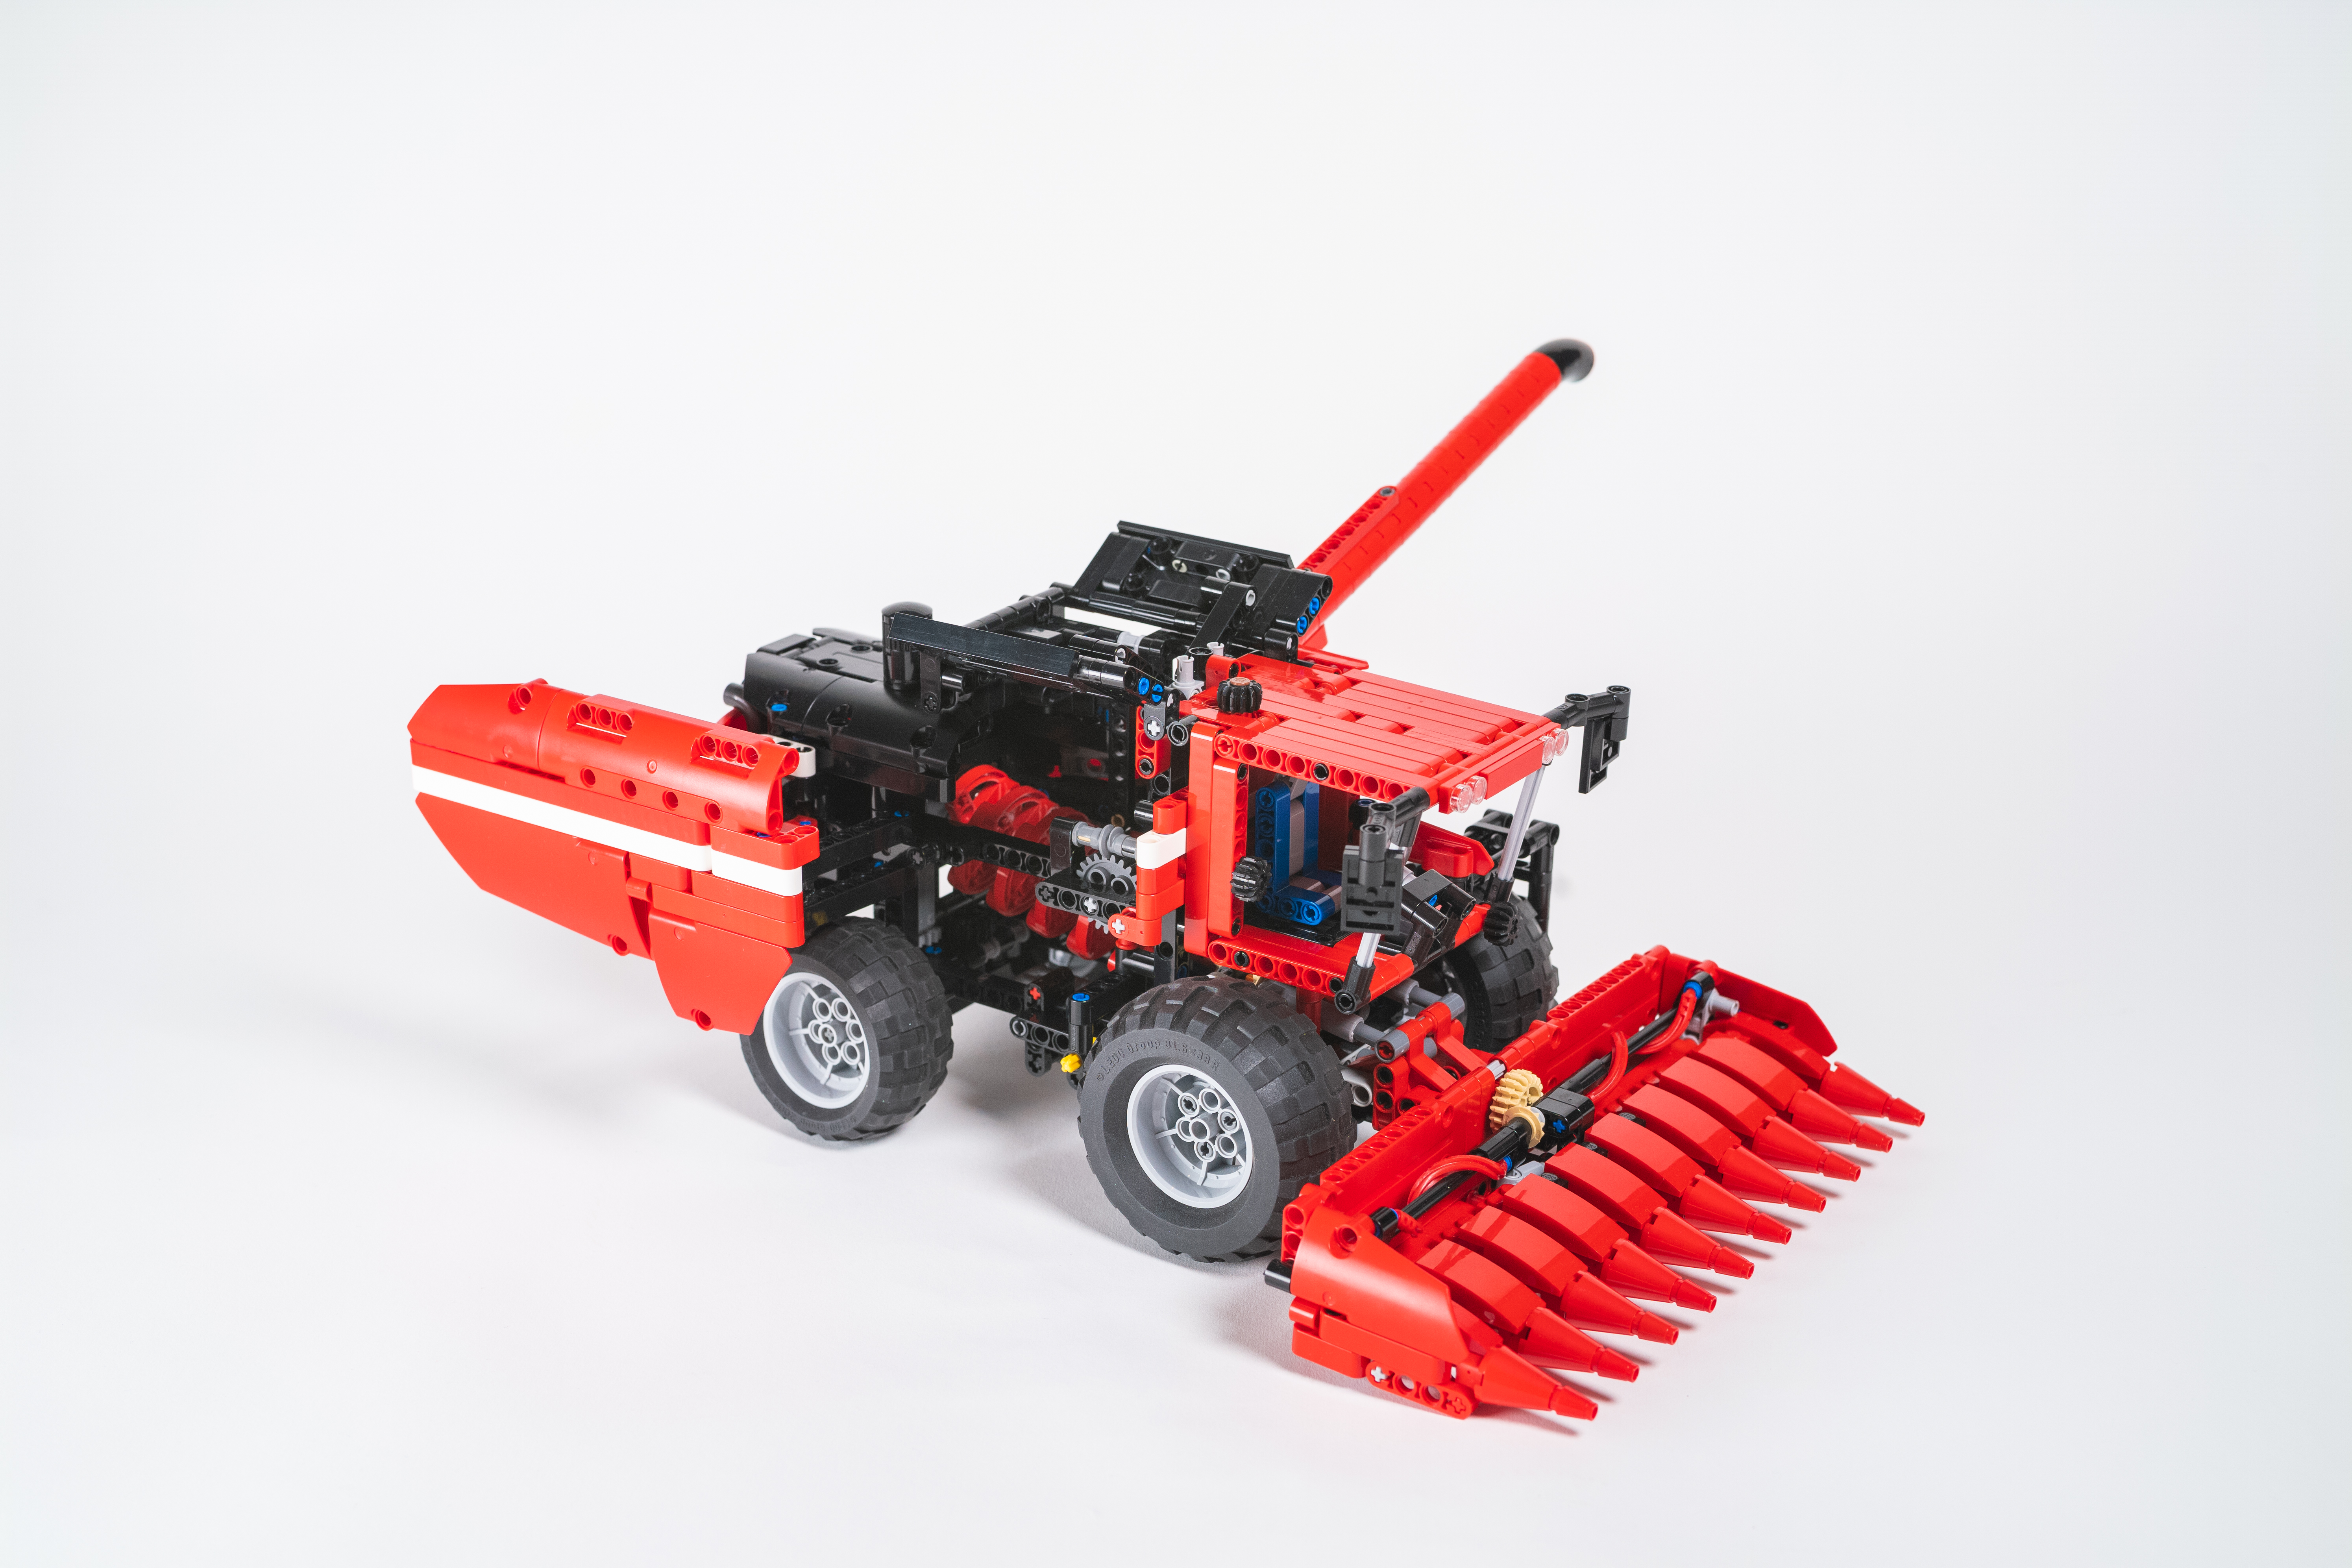
It was time to build a combine harvester for the Thirdwigg farm.
You may find instructions for this model at Rebrickable.com.
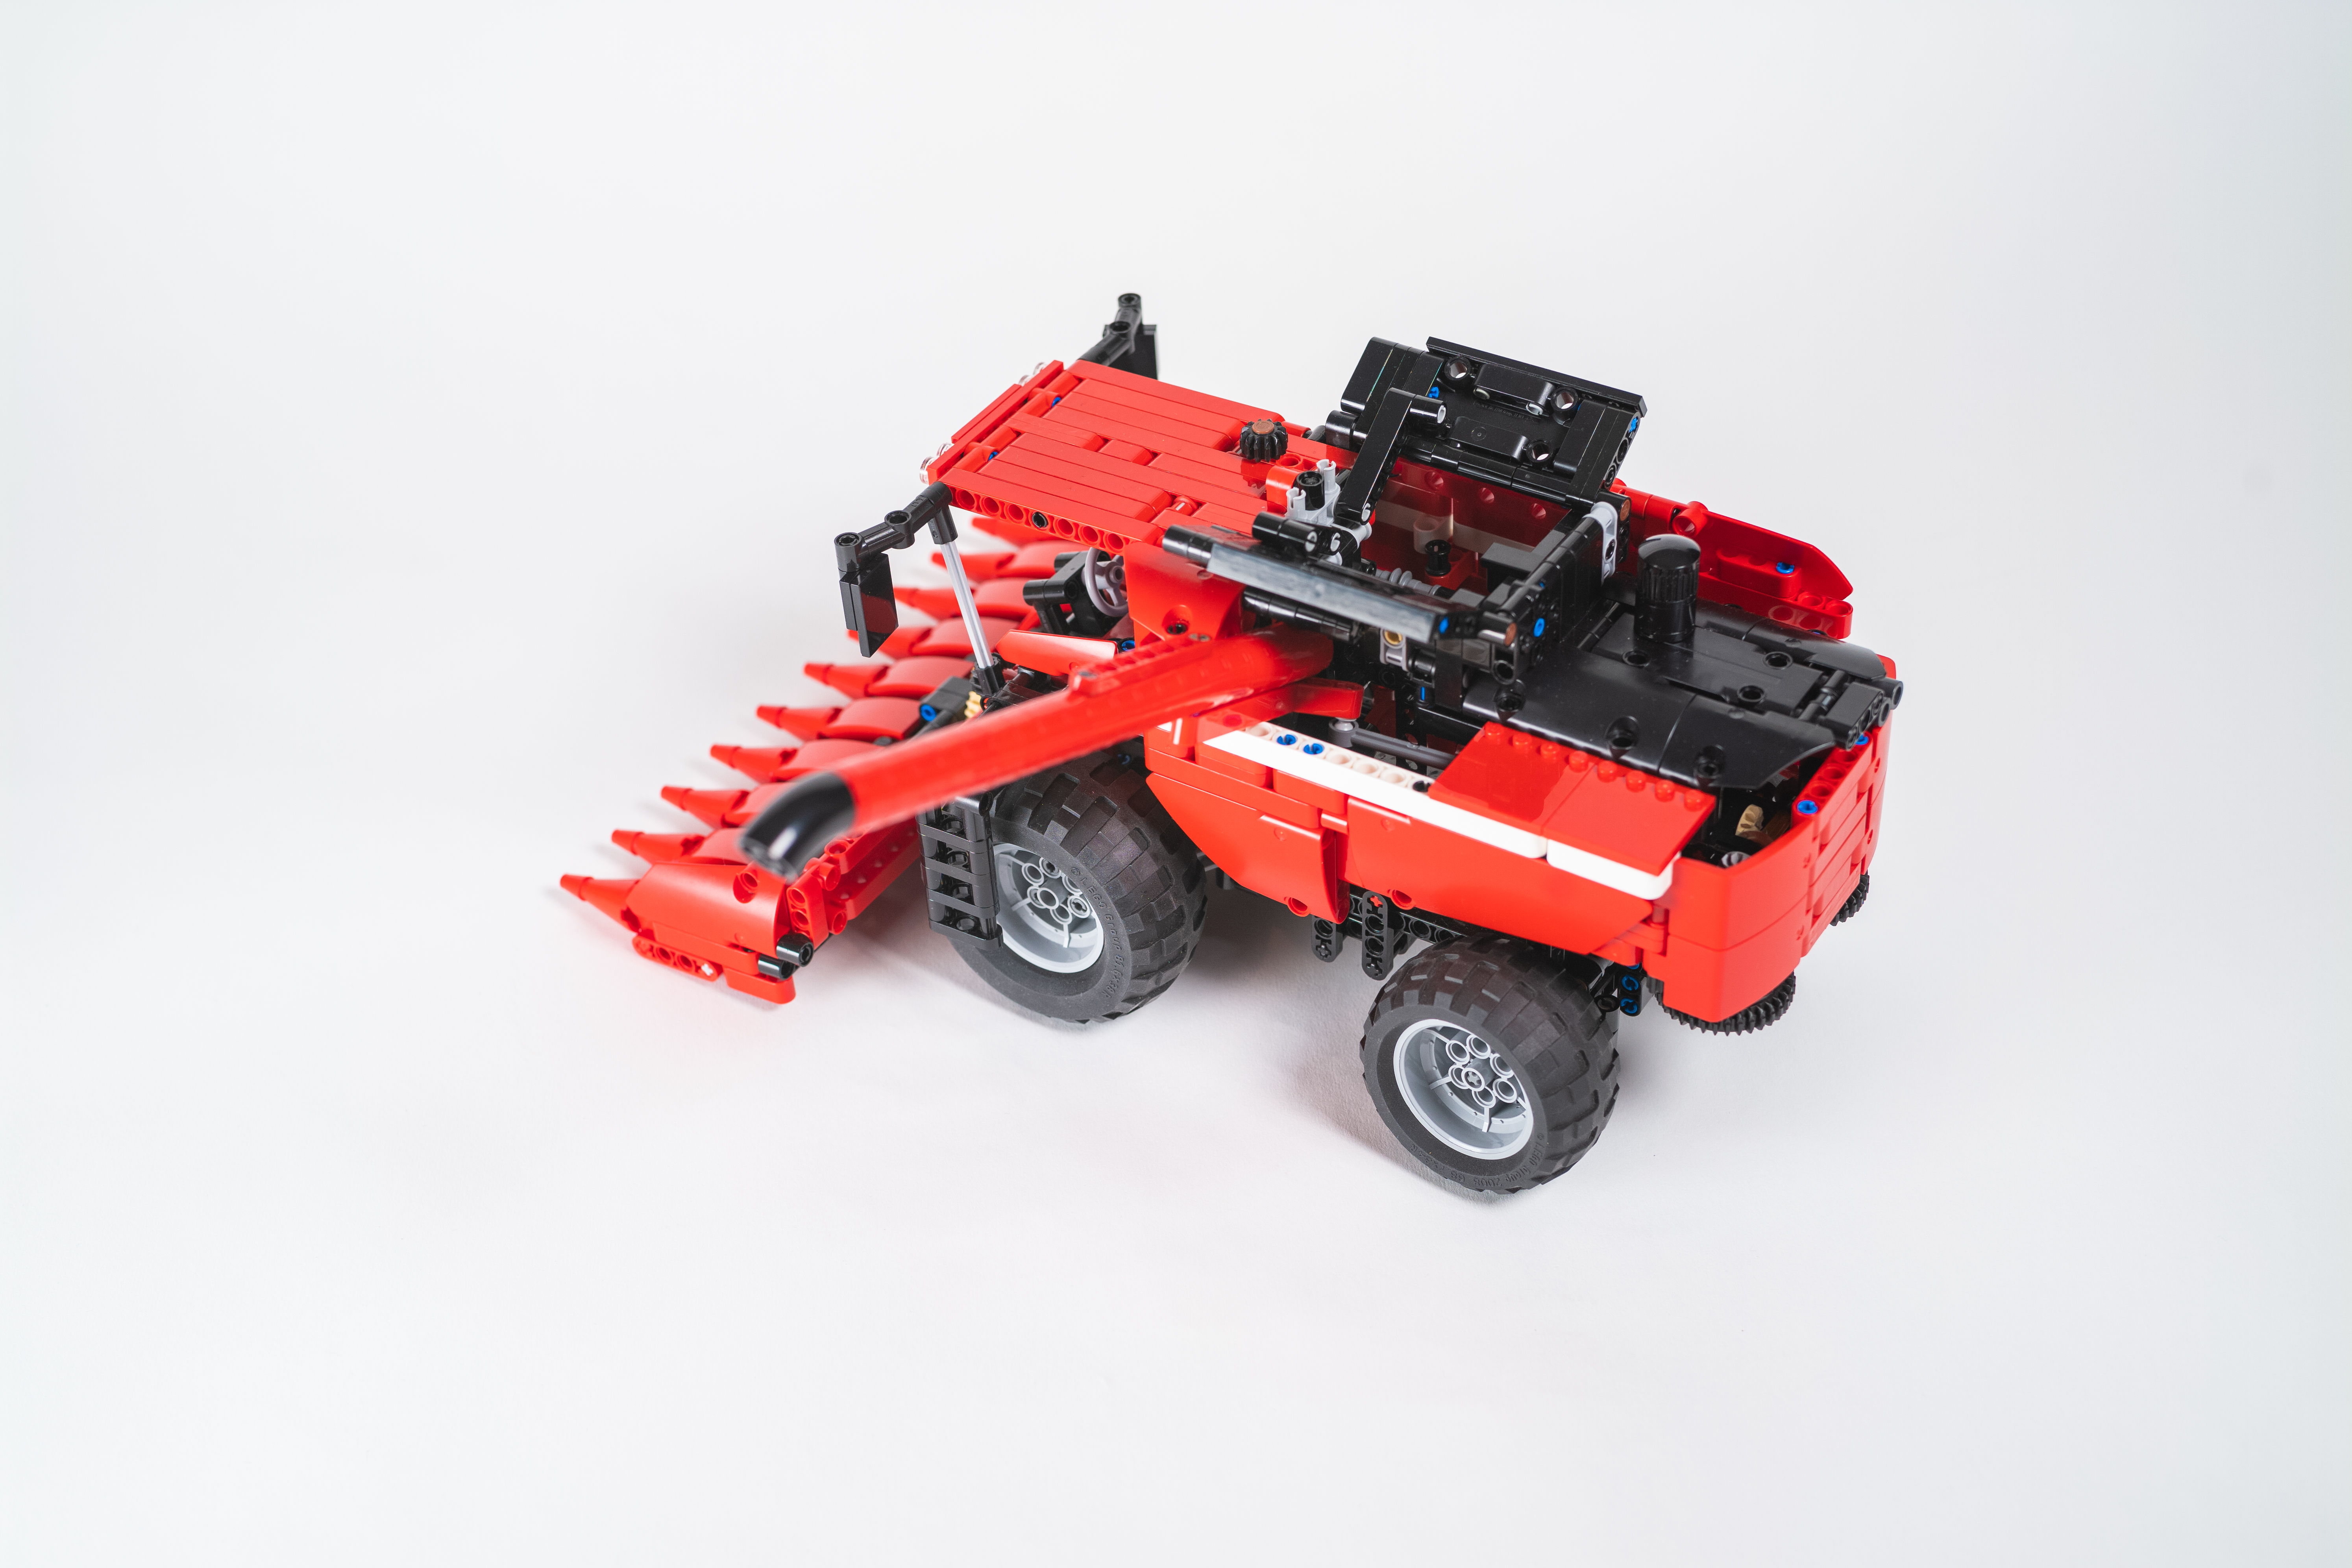
I was putting off building a combine for a while because they are pretty complicated. It took me a while before I felt like I understood enough about them to translate them to a LEGO MOC. After some time learning about them, I was ready to begin something. The scale was set based on the Atmos Tractor, so then it was a matter of deciding how many features I could add into the model. The models started with the thrashing mechnism, and then everthing fit in around it. I settled on a rotating thresher rather than a set of shuffling screens. In the center of the combine is a rotating auger that separates the grain from the staukes. As the auger spins it move the crop rearward separating the grain as it travels rearward. In the MOC, the auger is connected to the front wheels as the combine moves. Under the auger is a reciprocating screen that further separates the grain. Likewise this is also connected to the front wheels. At the rear of the auger are two spreaders that spread the chaft out the back of the combine.
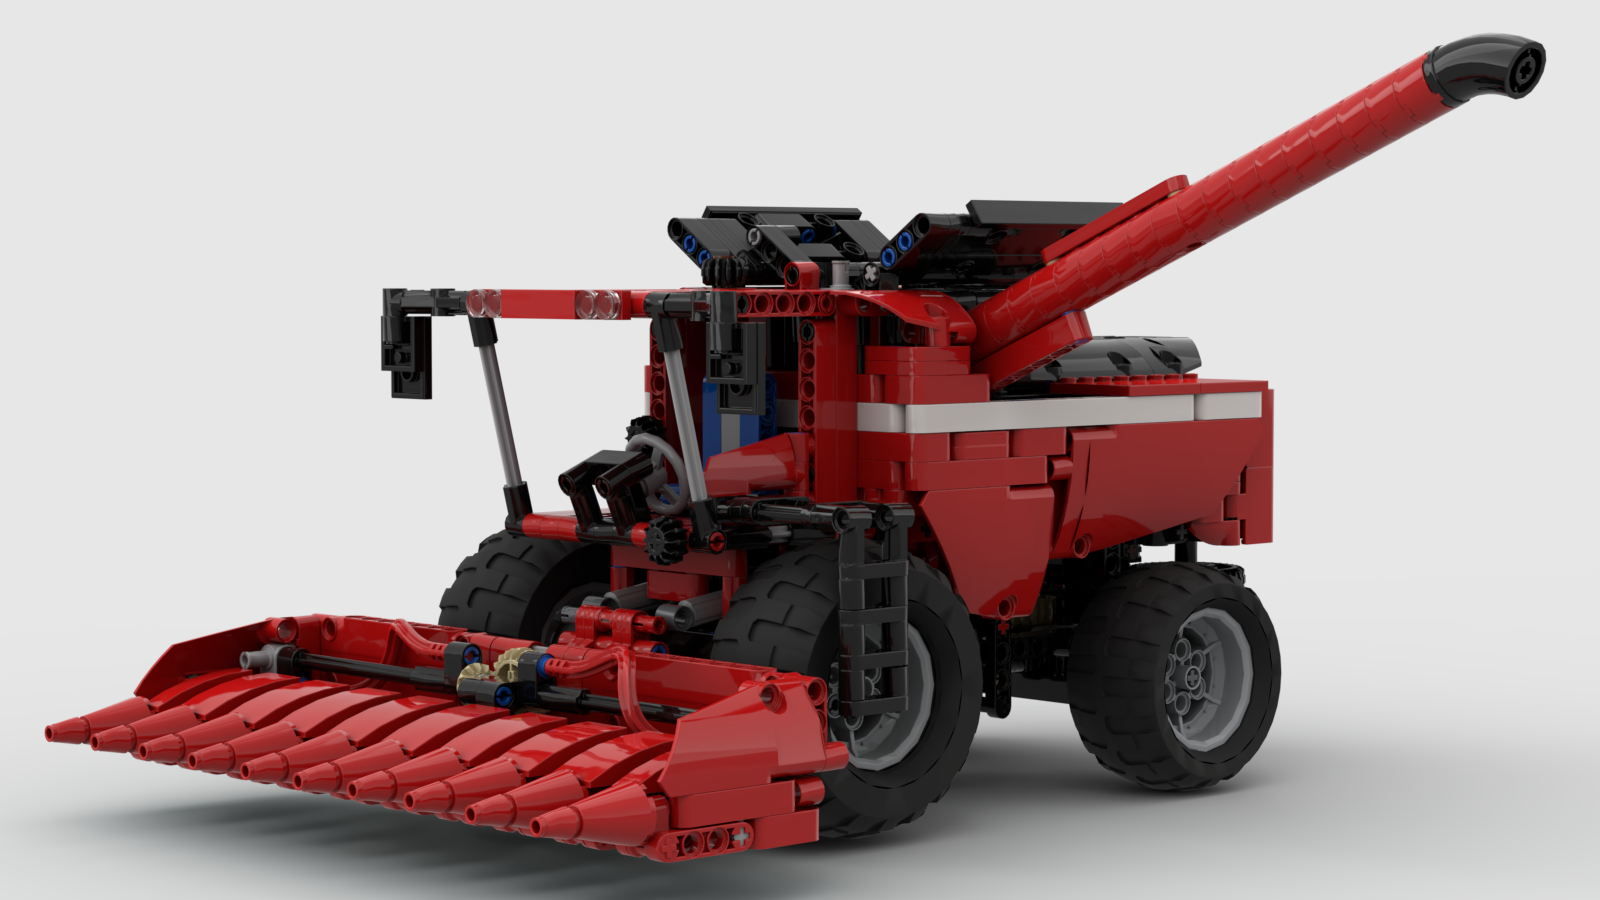
Also connected to the front wheels is a takeoff that operates one of two cutting heads. The cutting head uses two augers on each side to move the corn to the center so it may be driven into the combine. A cutting edge is right behind the cones, and its movement is driven by a link below the combine, so it may cut back and forth. The full corn head is removable, and can be easily replace with a grain head. Each head is mounted on a moveable mounting plate, which can be moved up and down for harvesting and transportation.
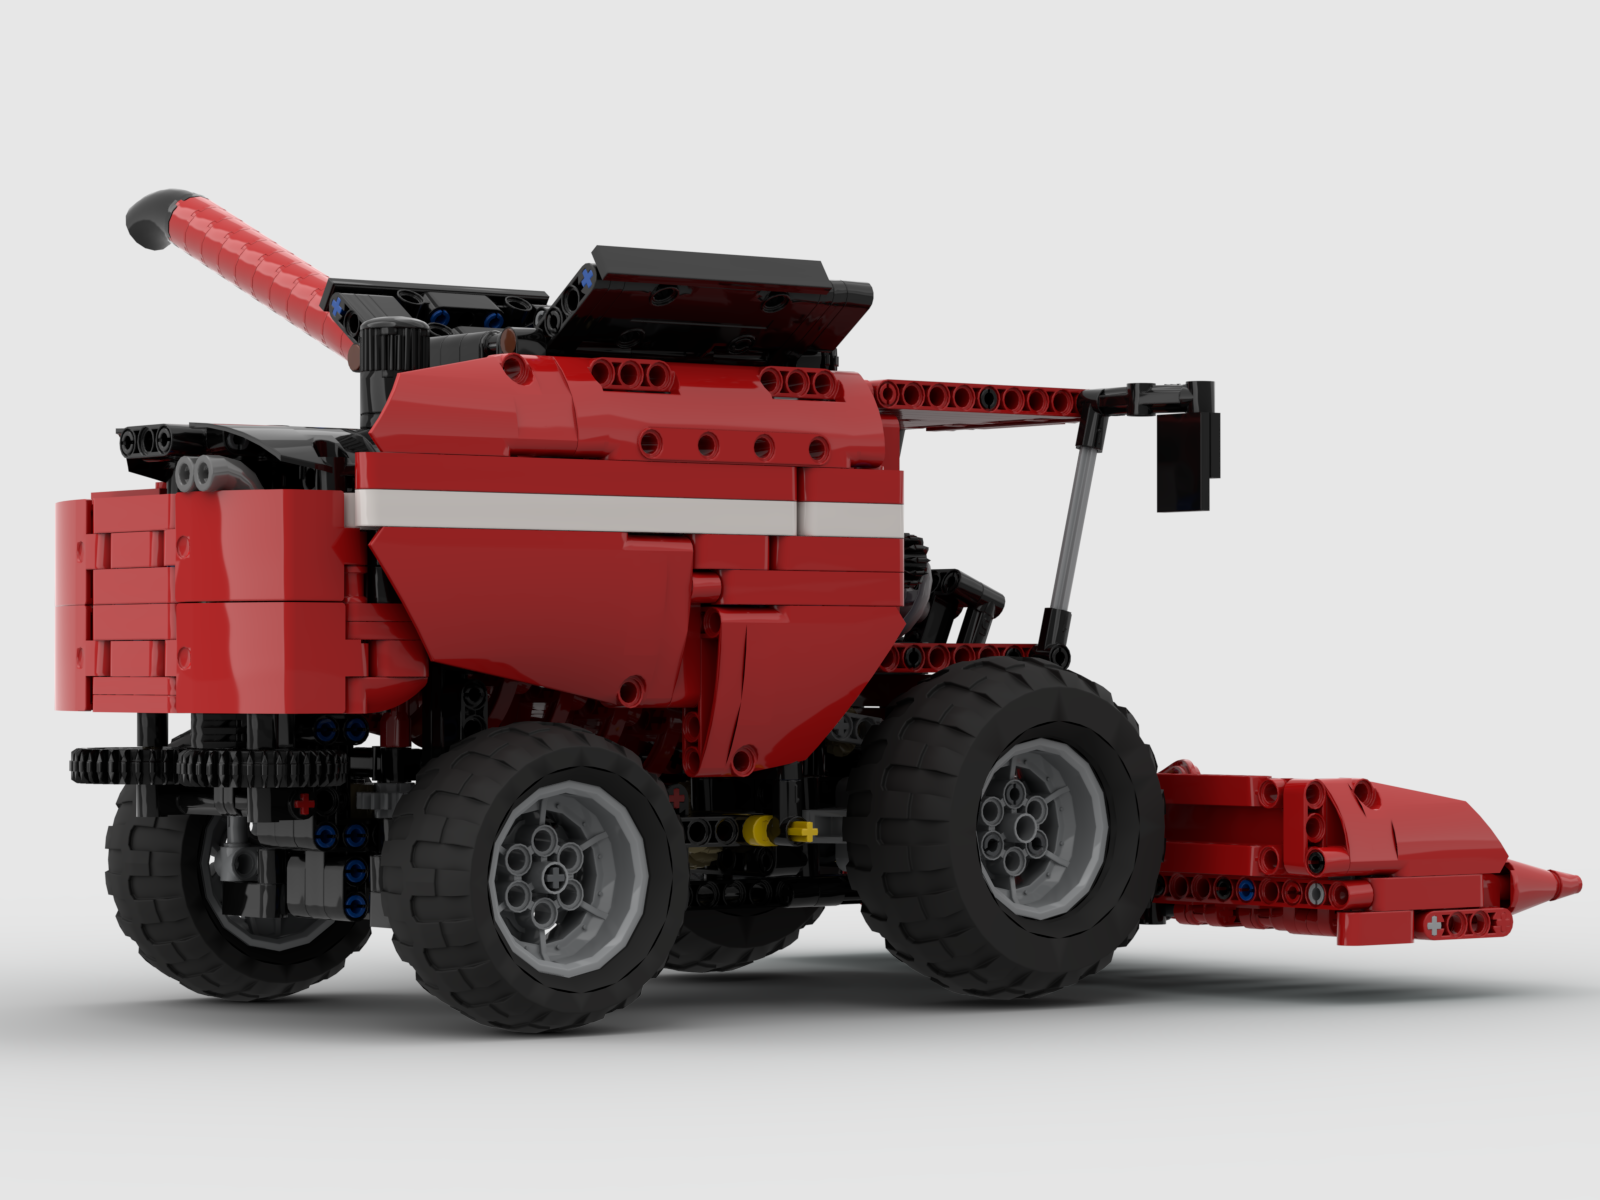
In addition to the harvesting functions, the combine also has an opening right side so you may see the internal functions of the tractor. Here you may also see the mechanism that opens the top hopper. Additionally, the grain extractor on the left of the combine can be extended. Steering for the rear axle is operated by the air intake on the rear of the body.
This MOC took more time than usual for me, and there were a couple of times that I thought about scrapping the build, but I am happy I stuck with it. In addition to having another vehicle to populate the Thirdwigg Farm, the functions of the Combine were fun to implement in this build. Each worked well, and were fun to play with. The interchangeable head was an addition that changed the look of the combine depending on my mood, and each functioned well.
I guess it’s time to plan another tractor. Until then, happy building!
I often participate in online LEGO contests, and most of them are on Eurobricks.com. In the summer of 2021, Eurobricks announced TC20, Technic Studless Recreation. I participate in many, but not all, of the contests that Eurobricks offers. The requirement was to pick an old studded set, and recreated it in studless Technic. I couldn’t sit this contest out, as it checked all the right boxes for me. Entries would be smaller to stay in scale, the builds would be feature packed, and it they would have a deep nostalgic connection. I was in.
Choosing a set to recreate took some time. I started with a list of 32 sets, and started to whittle it down from there. Quickly I removed some of the sets for various reasons: interest, size, not right now, too sacred (8880). I ended with a top three of 6357, 8855, and 8854. 6357 would be interesting to me, but after doing 8640 a couple months back it could wait. 8855 had some opportunity. It is a classic set, and instantly identifiable. I built a little mock-up, and let it sit for a couple of days. I didn’t come back to it.
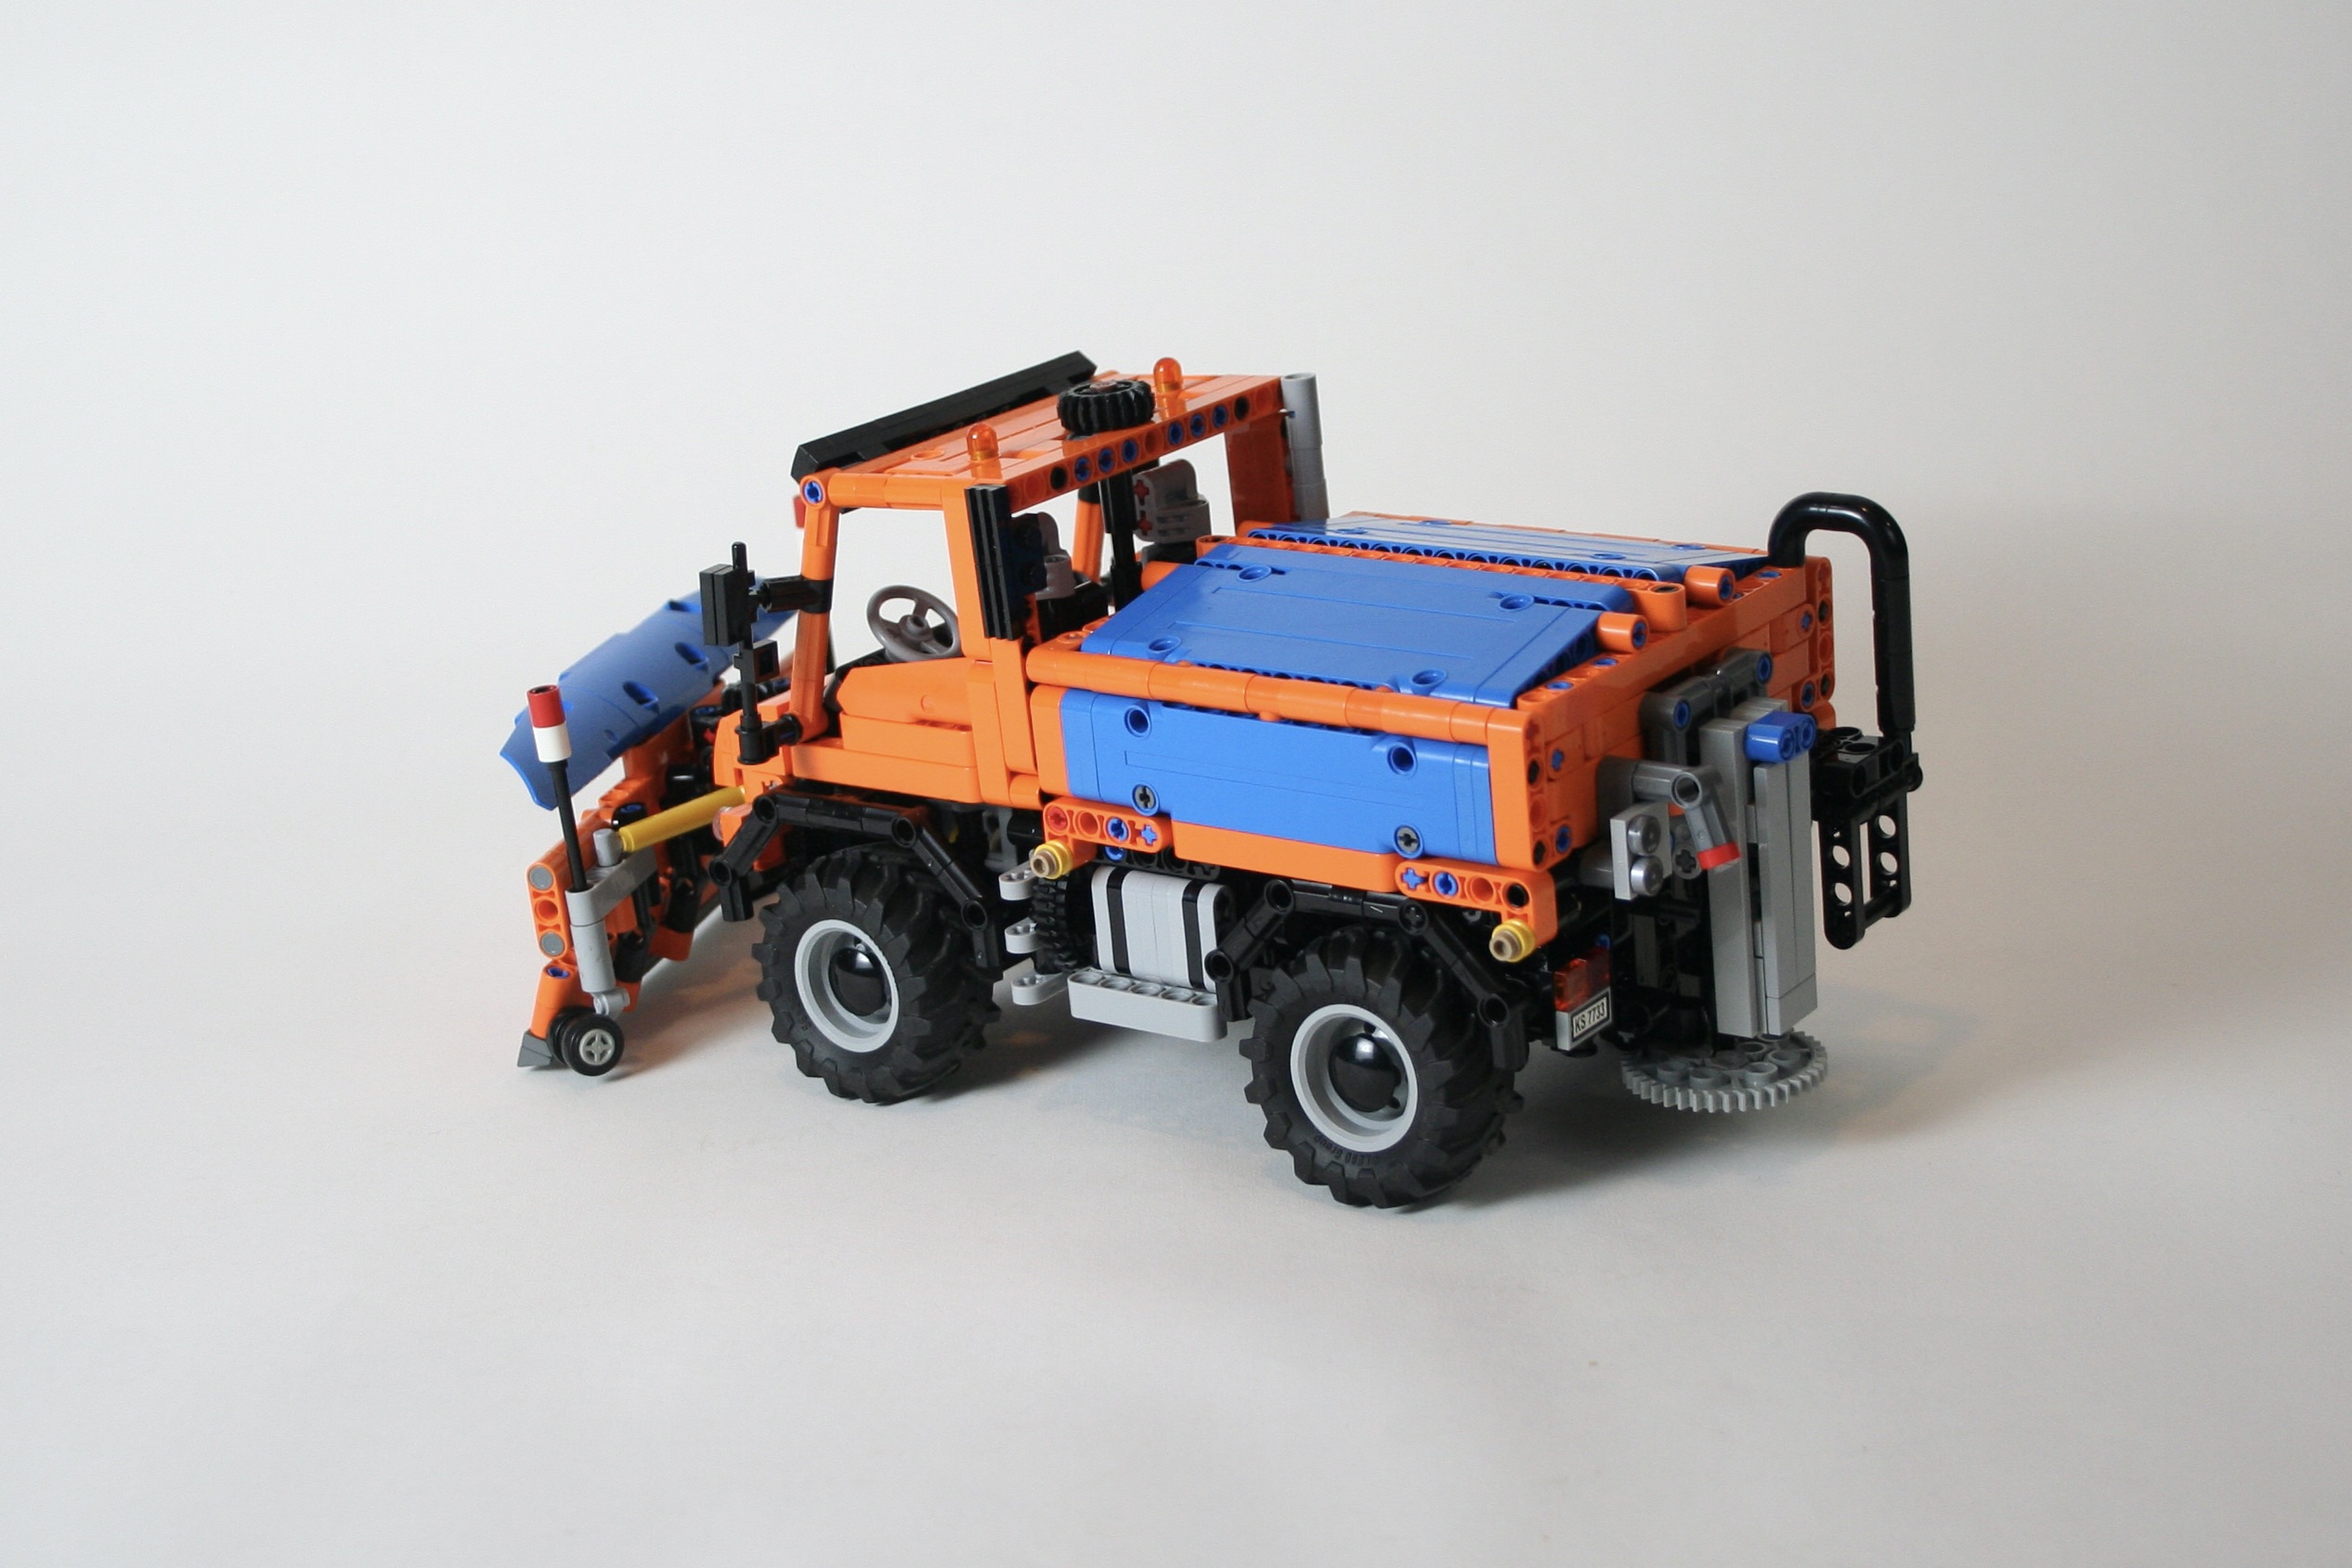
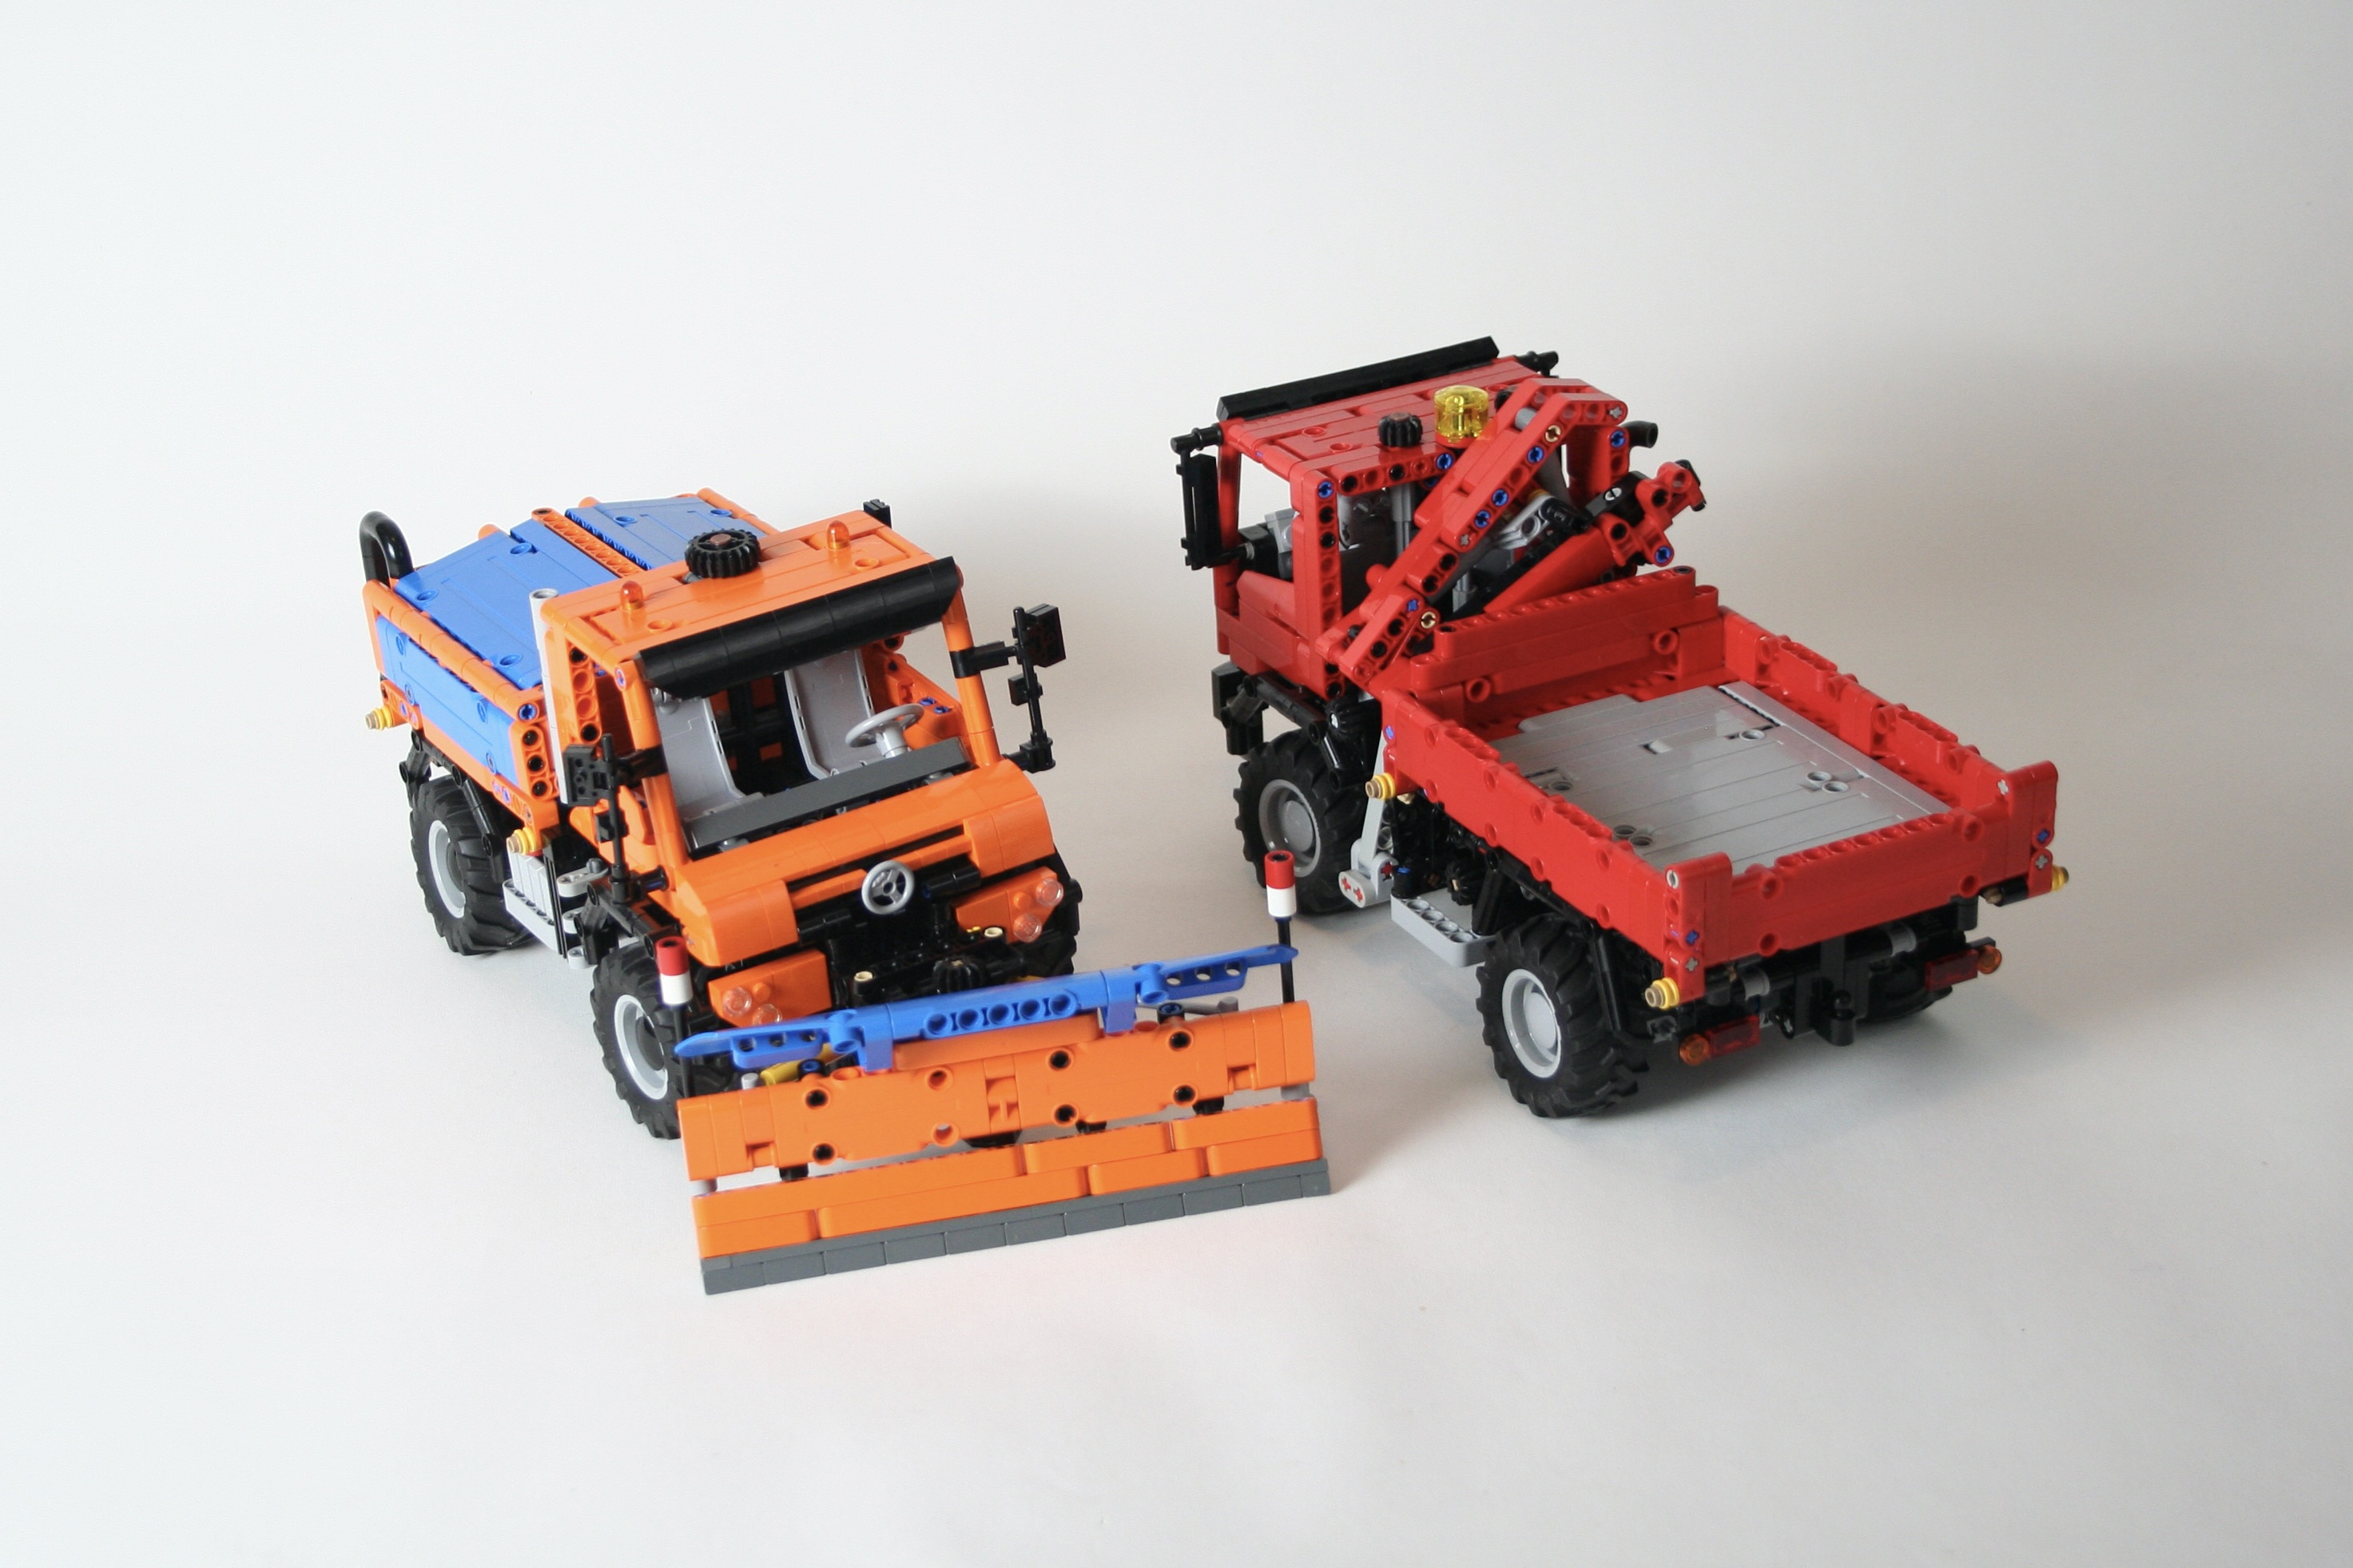
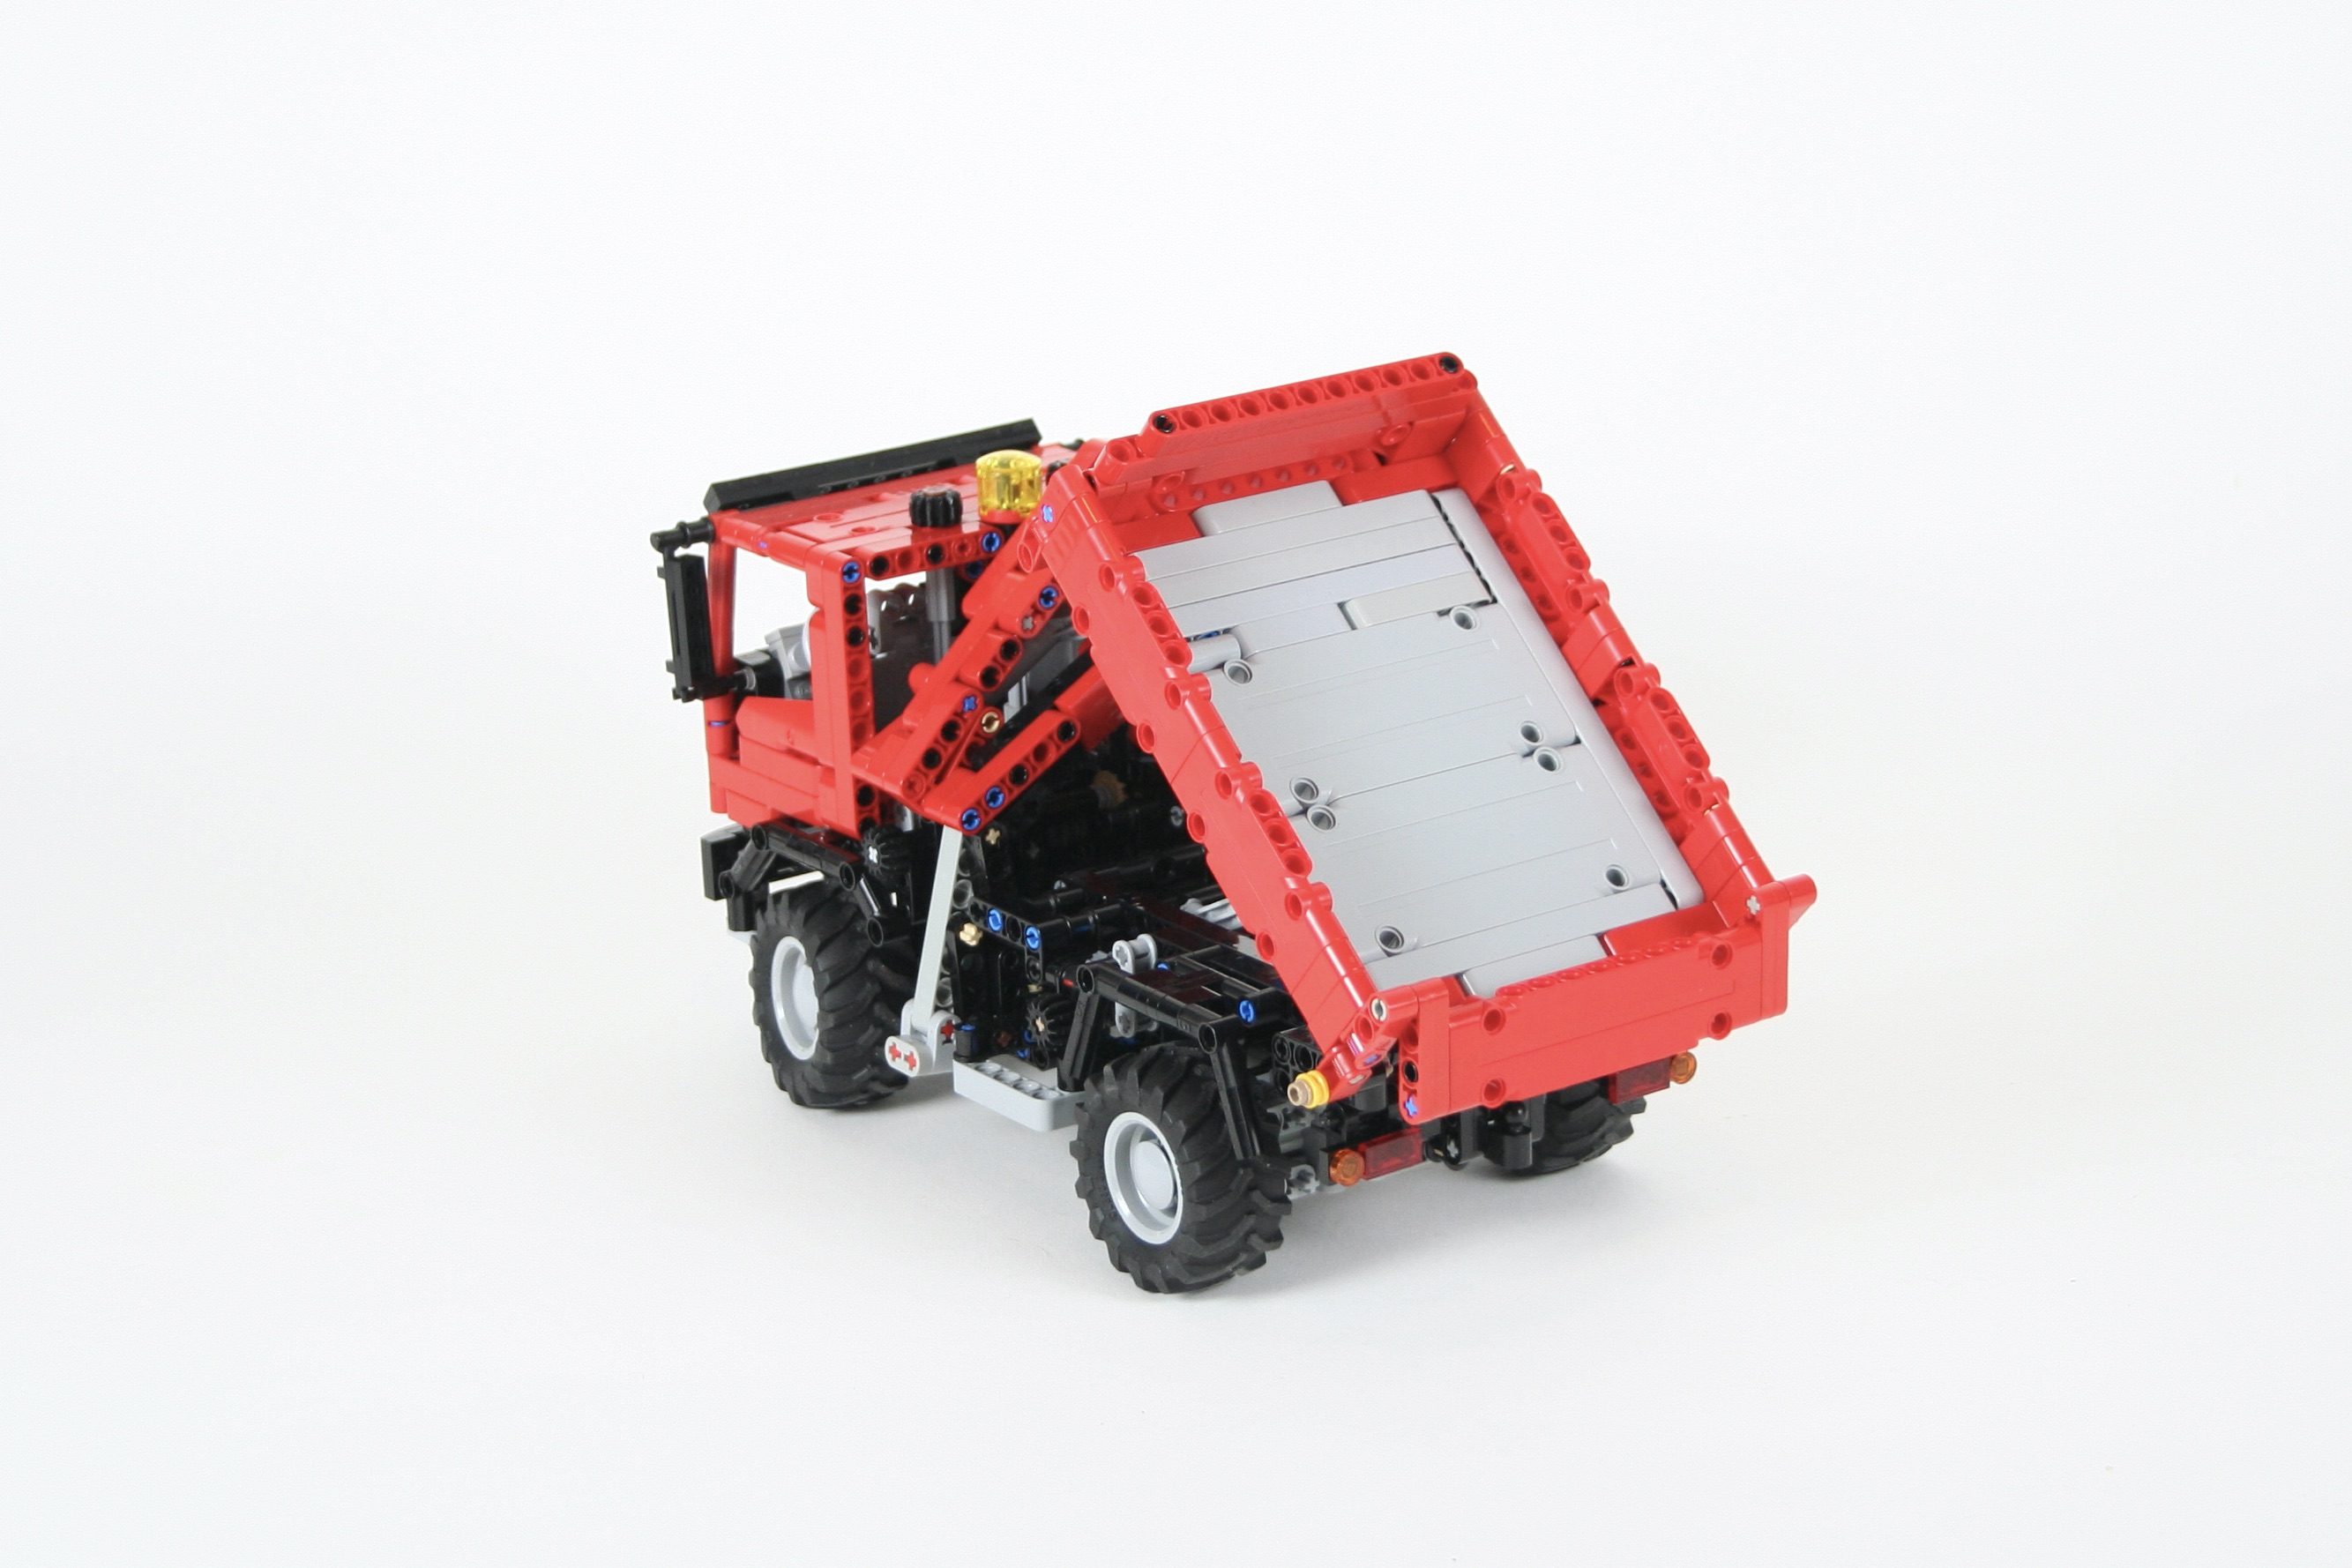
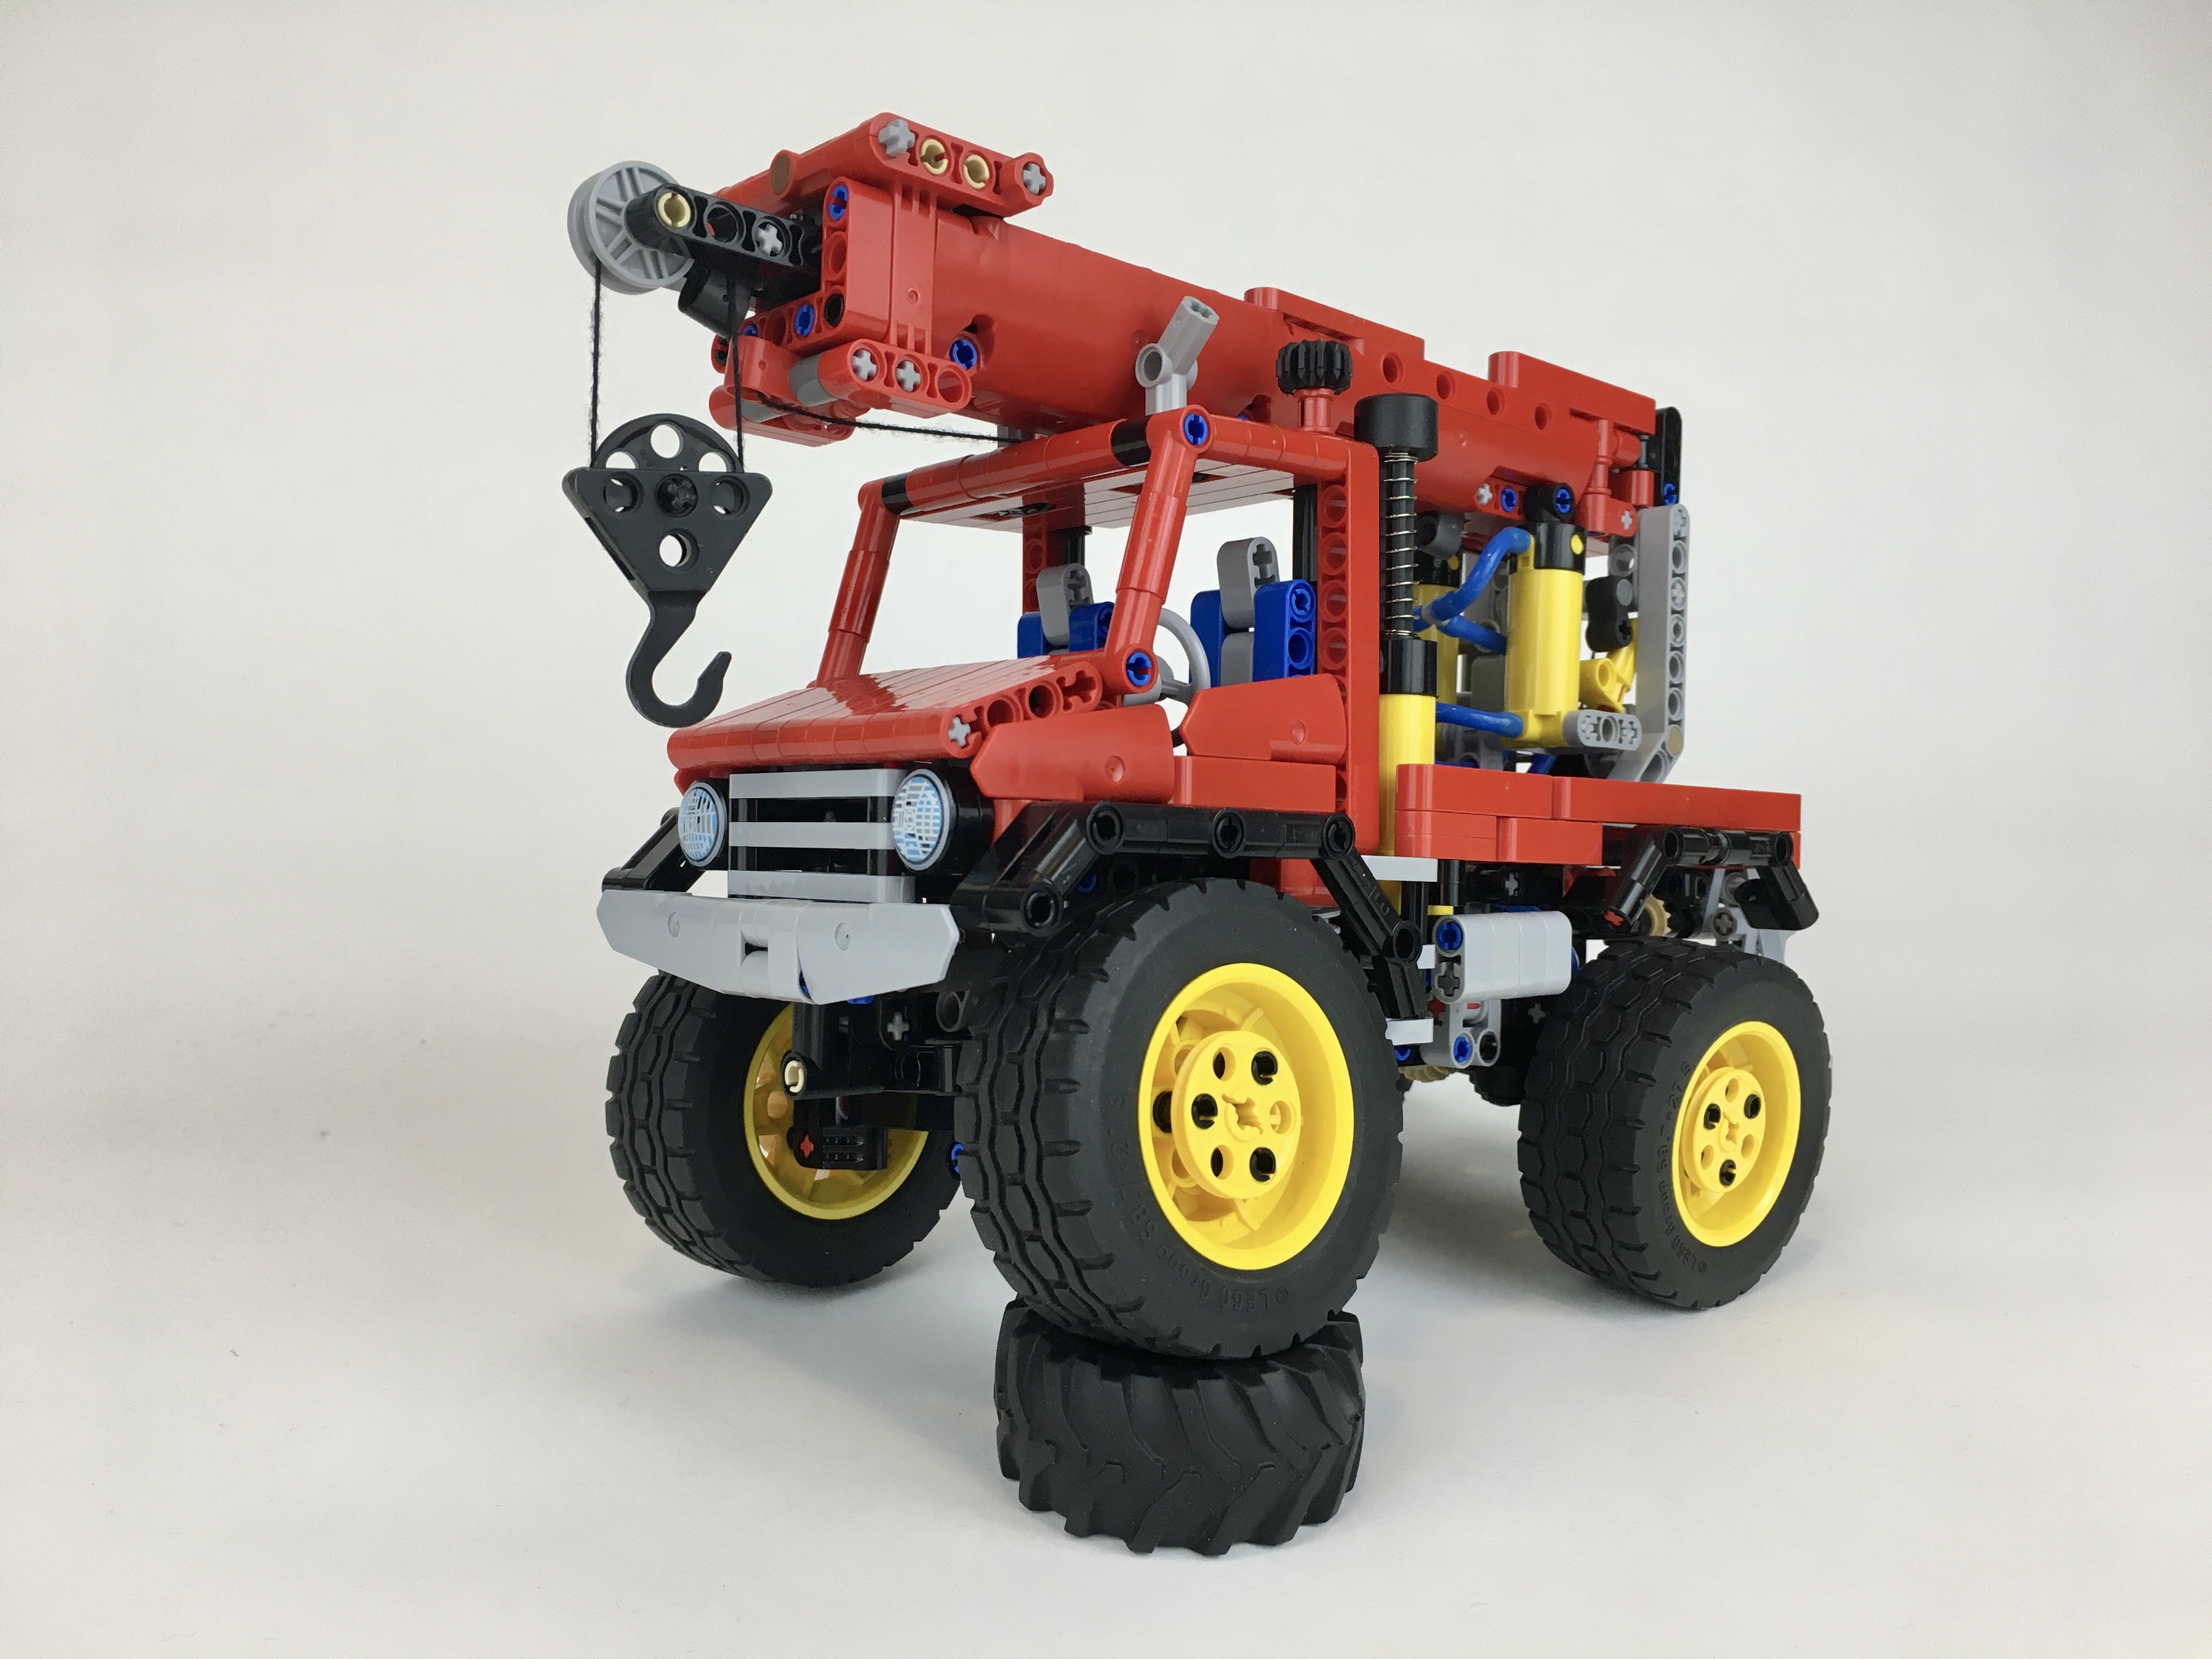
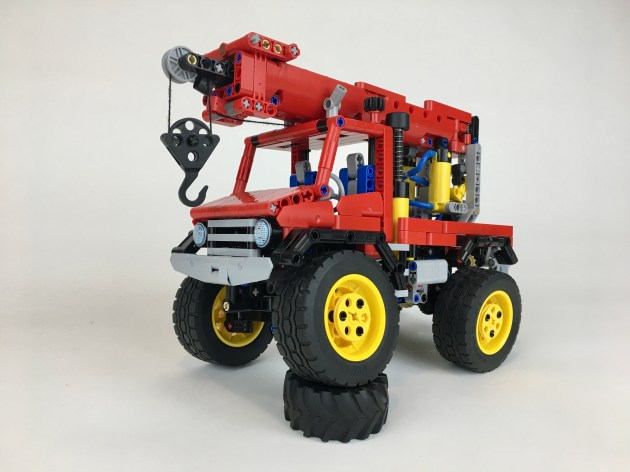
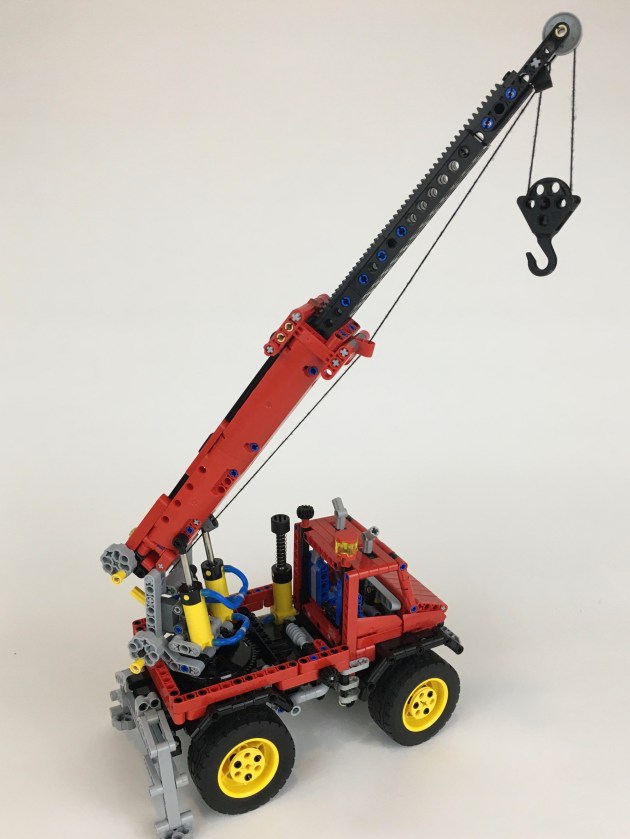
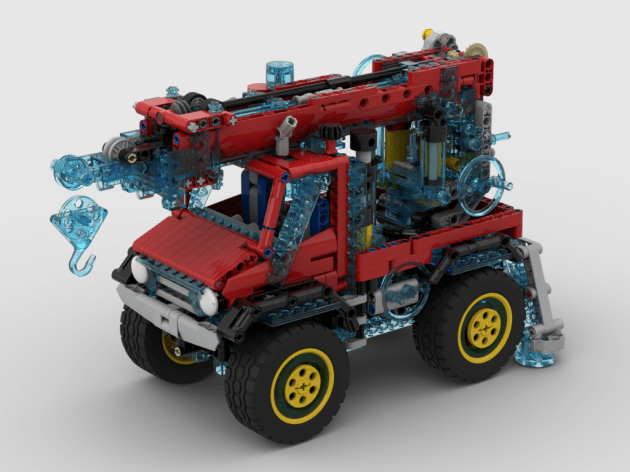
I am not sure why I did not settle on 8854 right away. I love building Unimogs, and when I do updates I like to add some features. 8854 was missing suspension and an engine, so everything was right for me to recreate this iconic set. I had made my decision and I started posting my progress. First, I had to decide the scale. I made the decision to use the newish Batmobile tires in the build, which make the tires a little larger than the original 8854. I added a stud to the wheelbase to compensate, but otherwise the scale would remain the same.
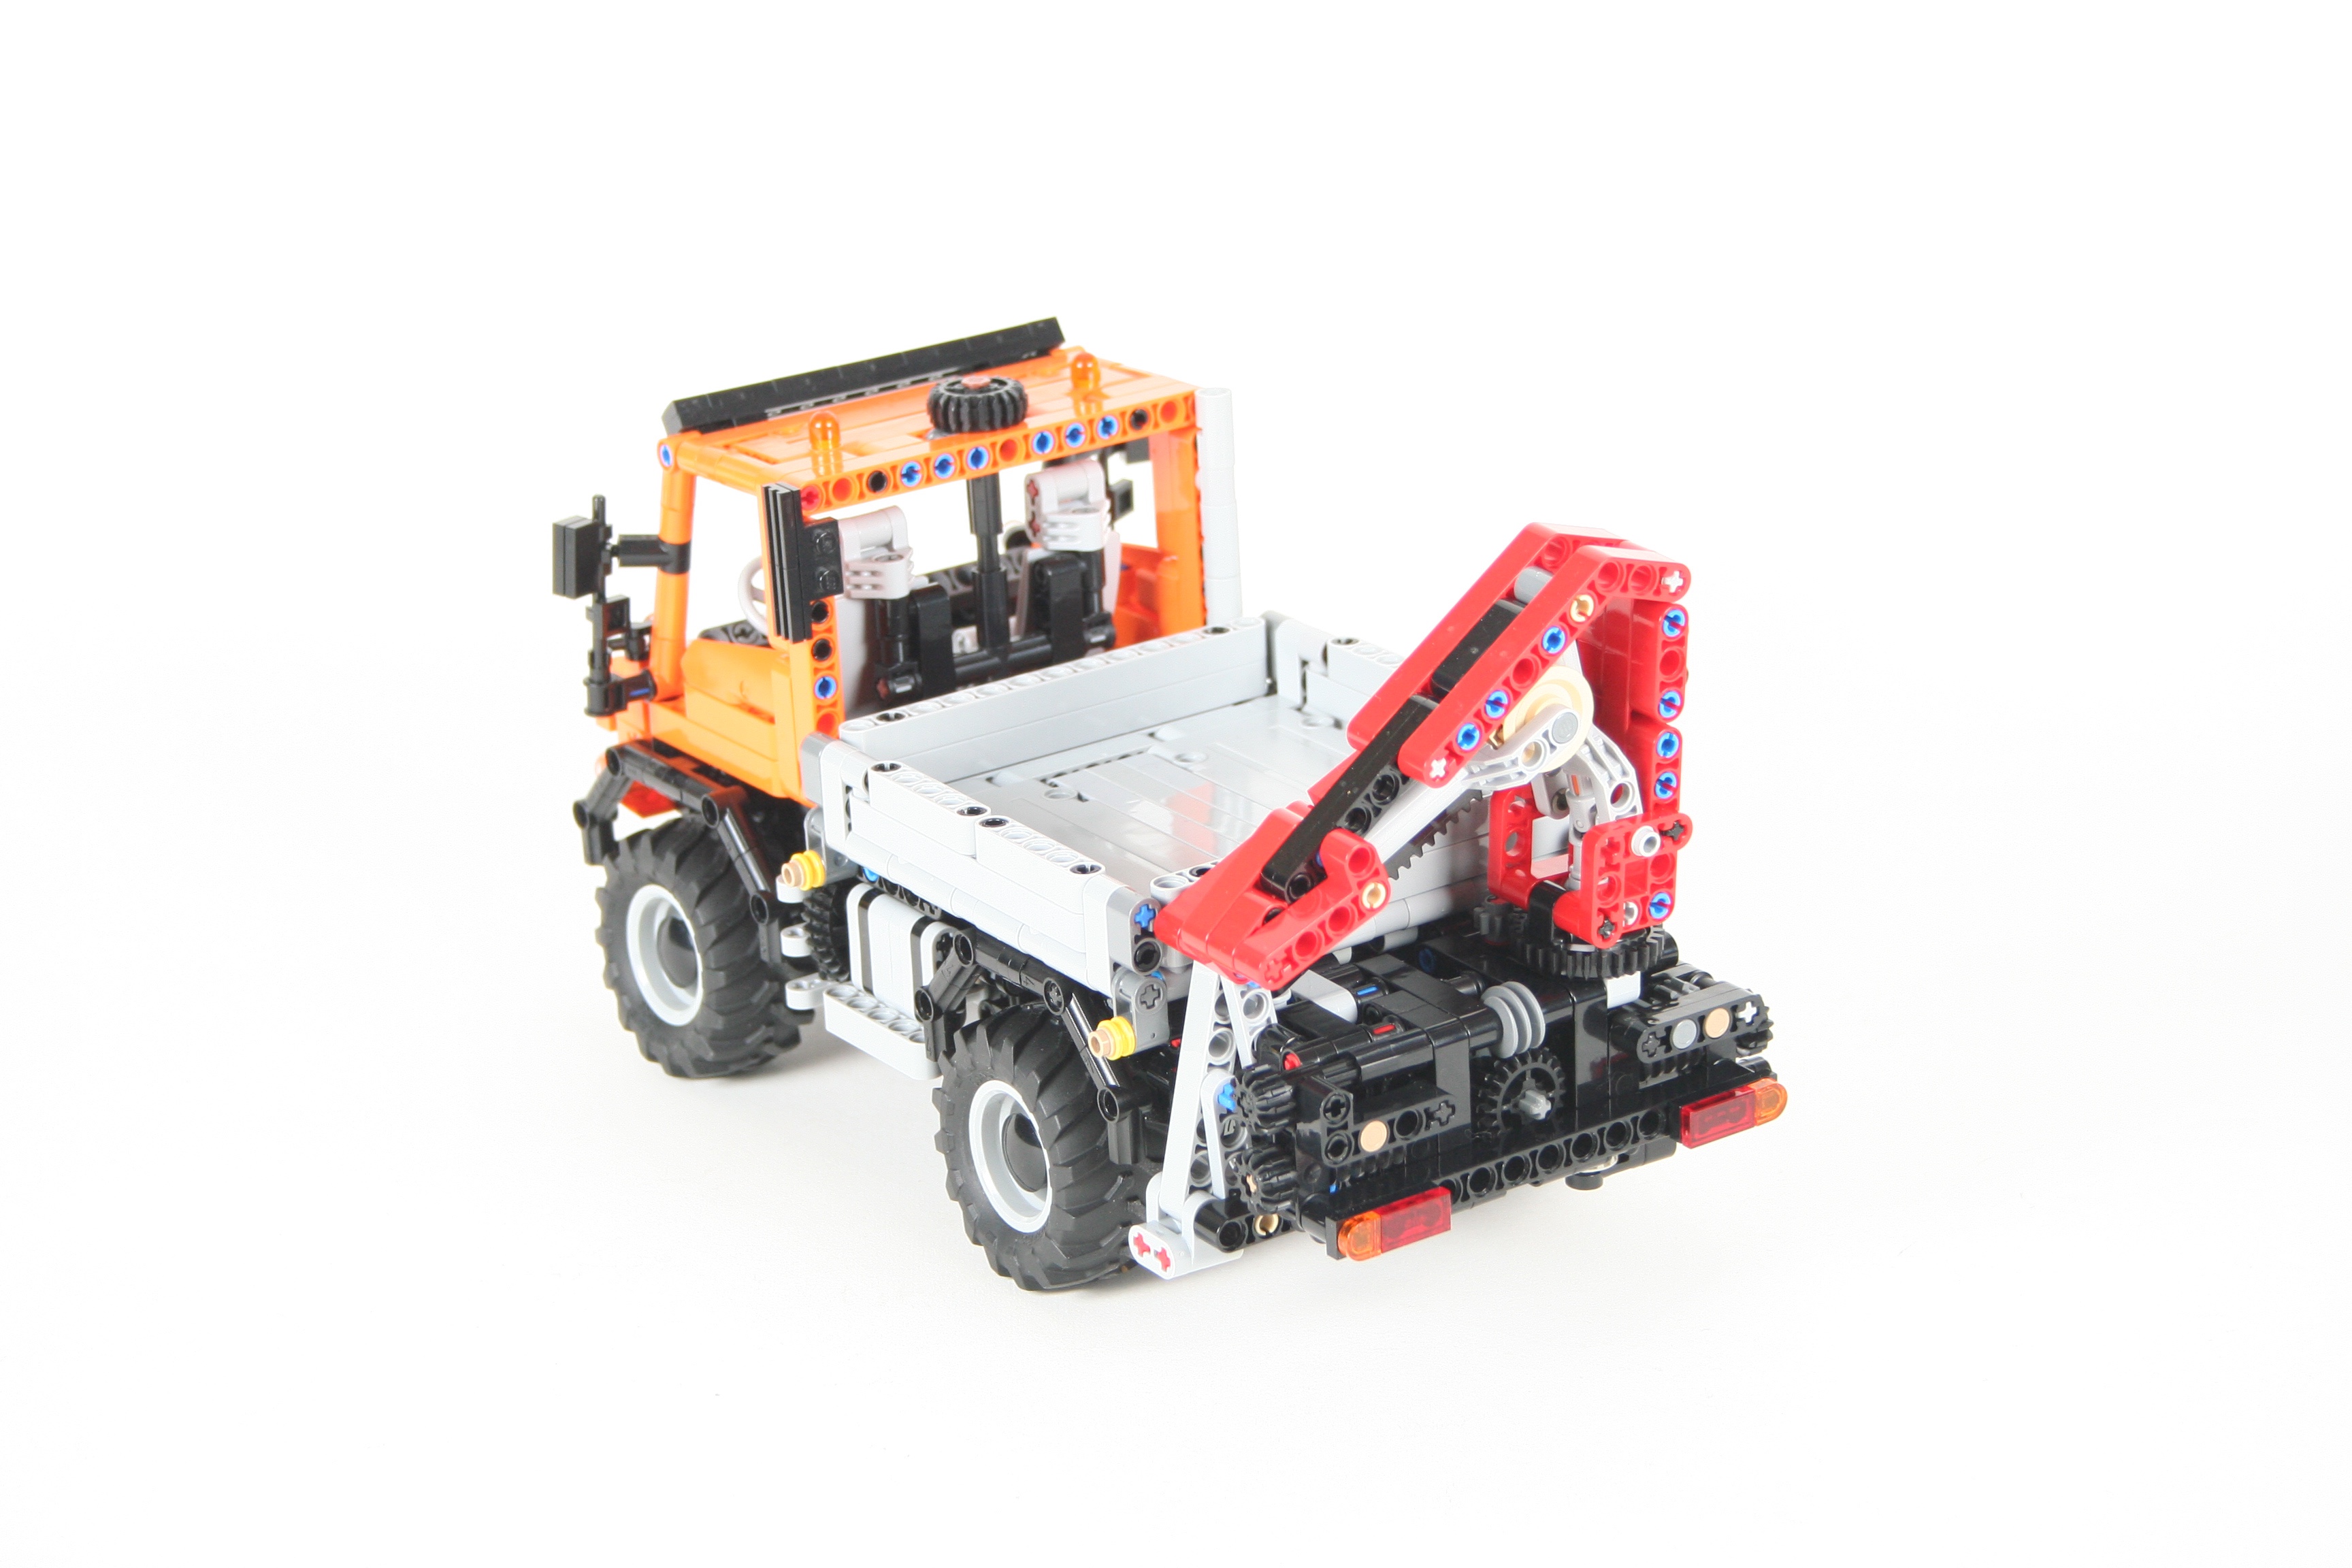
Next, I had to figure out how to add all the features I would want, while keeping all the original features. HOG for the steering would remain on the top right side of the cab, naturally as a beacon. I then added a control gear for the outriggers on the top left side of the cab. The rotation of the crane would be on the right of the truck driven by a worm gear, and all other crane controls would be on the crane itself.
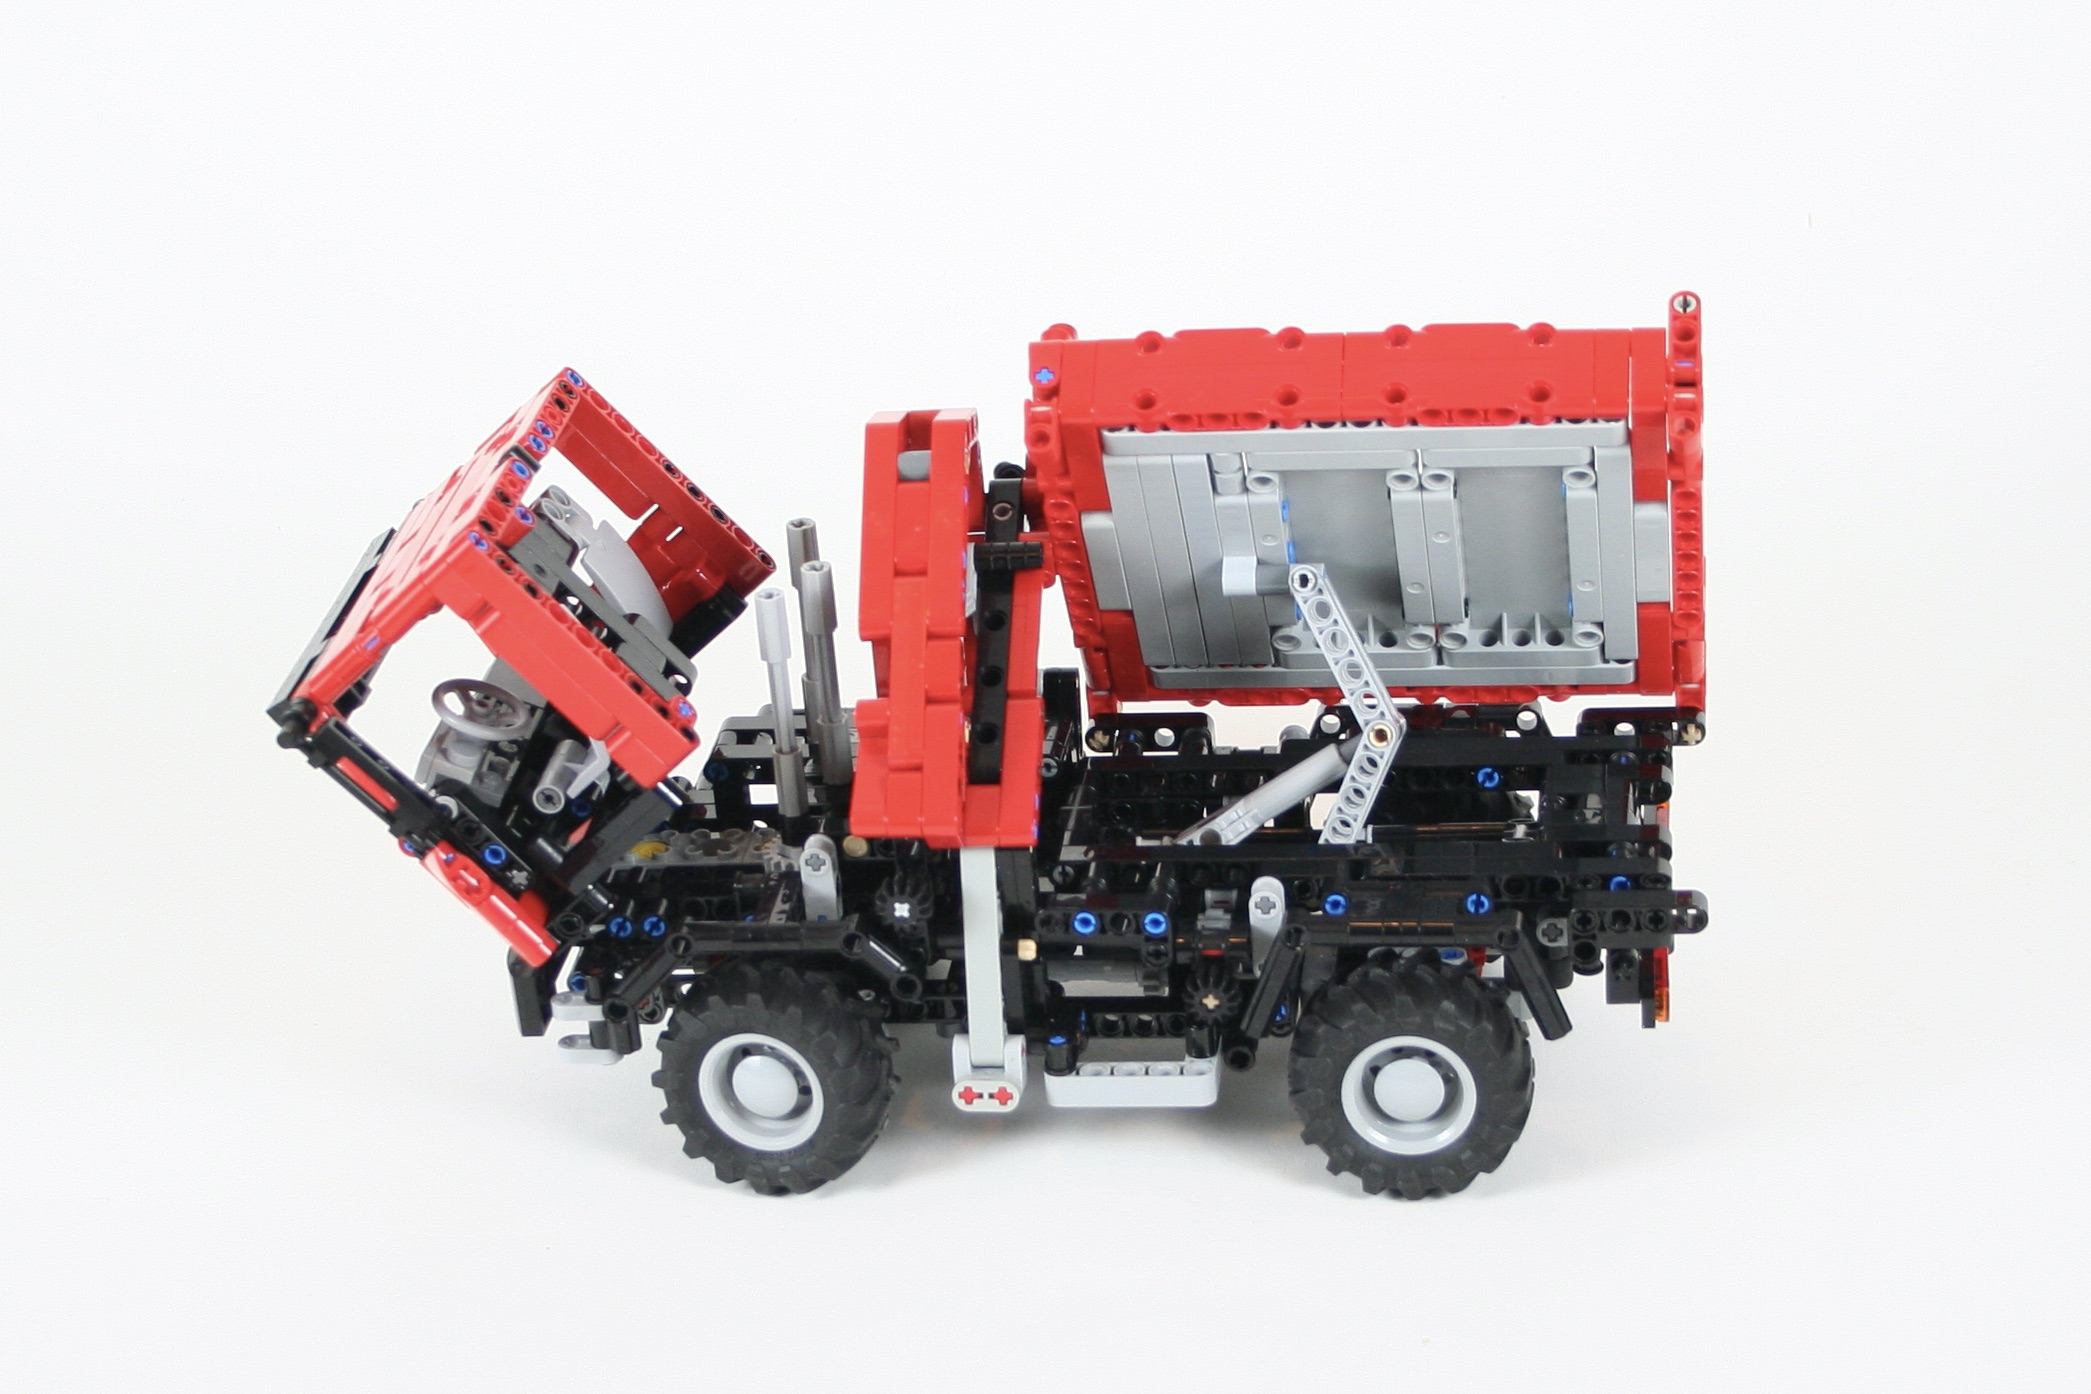
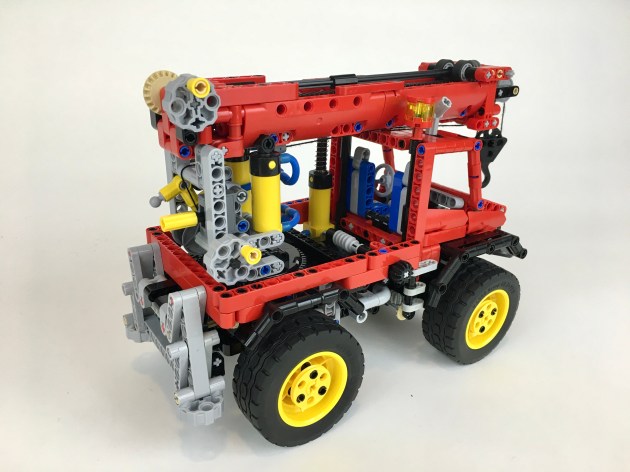
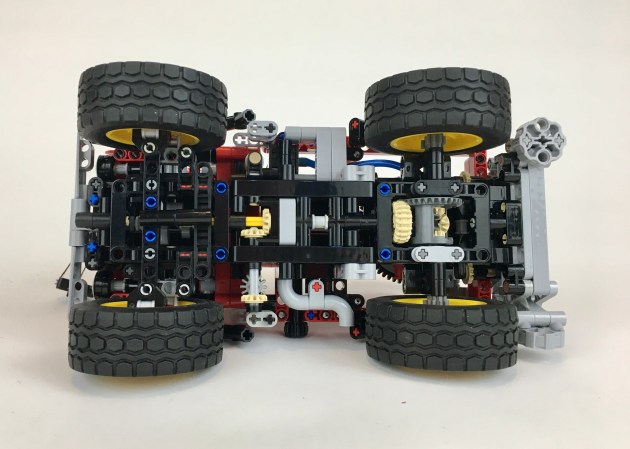
Fitting in the suspension and engine was a little tricky. Adding the engine was simple enough. There is a differential on the rear axle with portal axle. The driveshaft goes forward to drive a I4 mini engine. Suspension is a dual pendular axle setup: both axles pivot side to side. The front and rear axles are linked together so that when one axle pivots right, the other axle pivots left. It is a simple design that functions well.
LEGO 8854 Engine
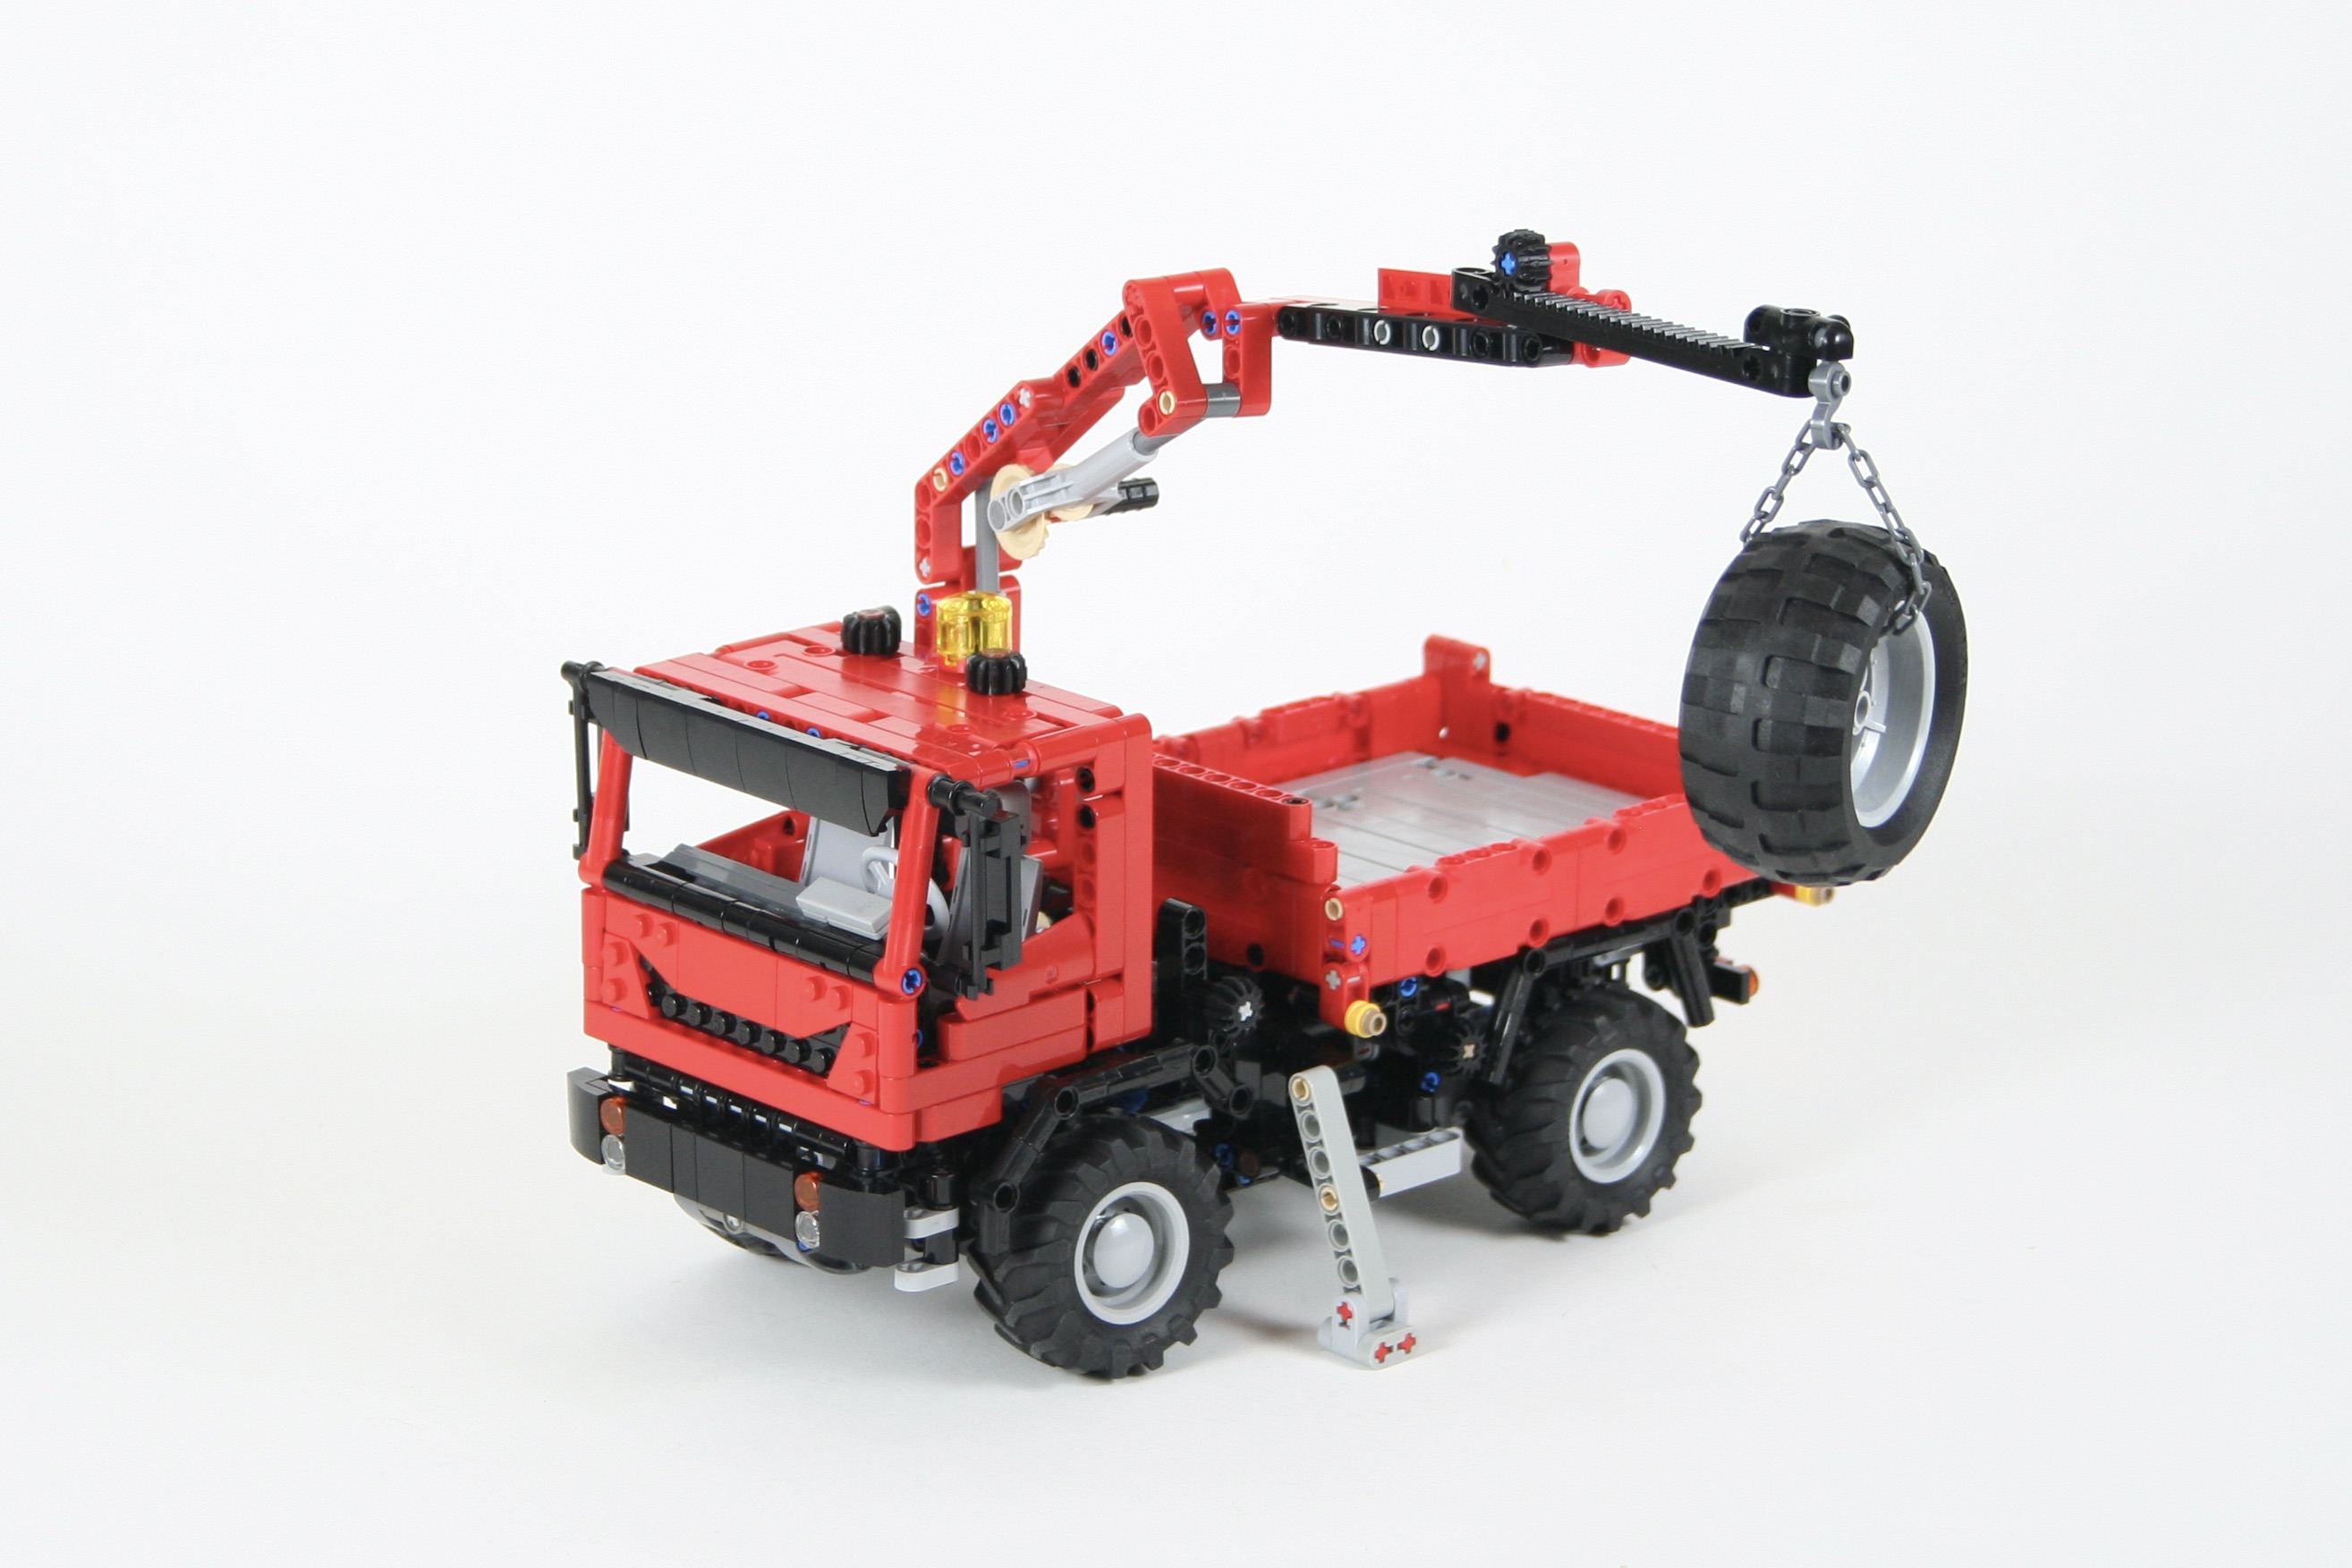
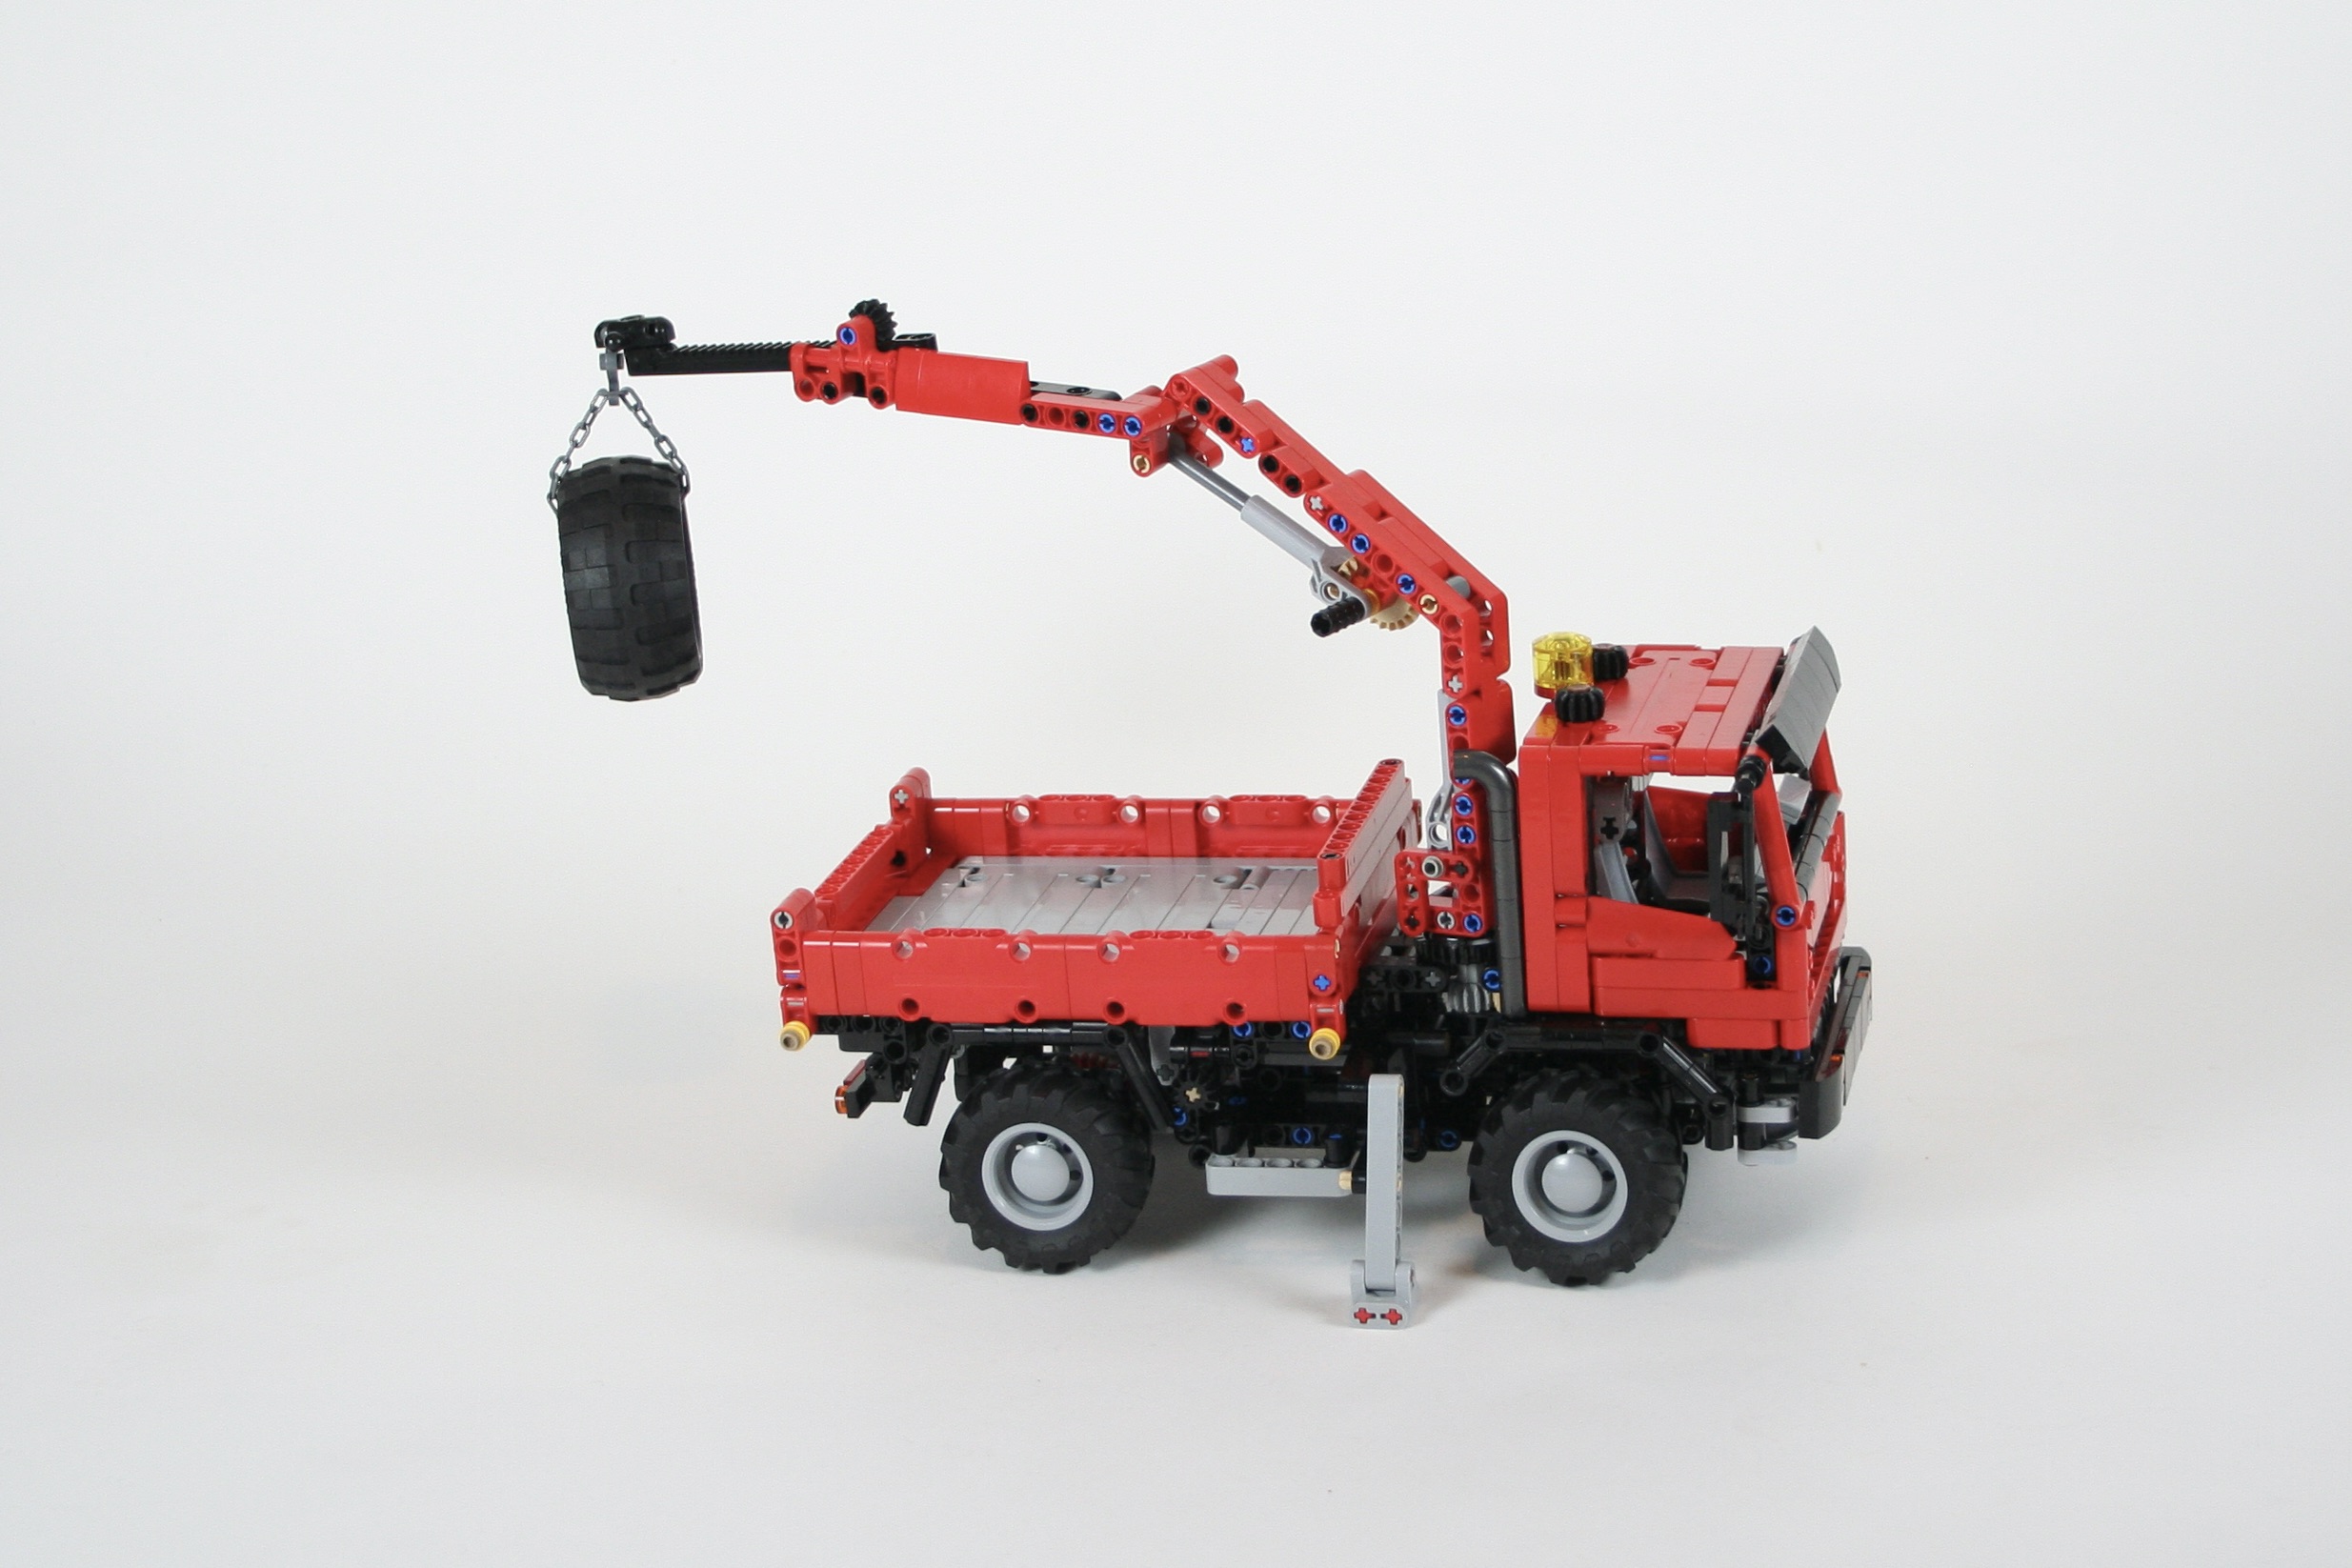
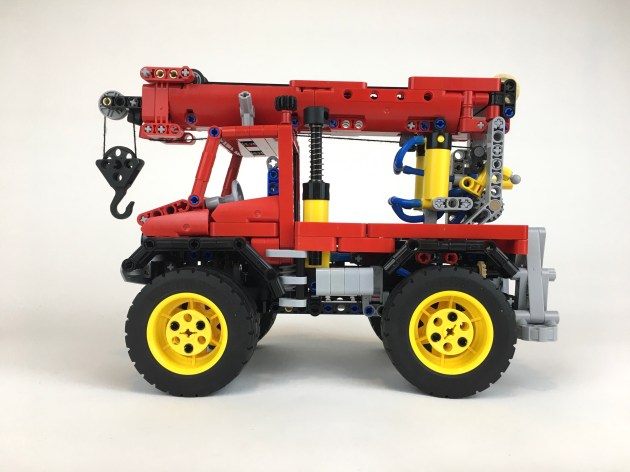
Designing the crane was the easiest part. Panels form the base of the arm, and a simple extending boom as created using studded technic beams and some rack gears. A worm gear extends the boom.
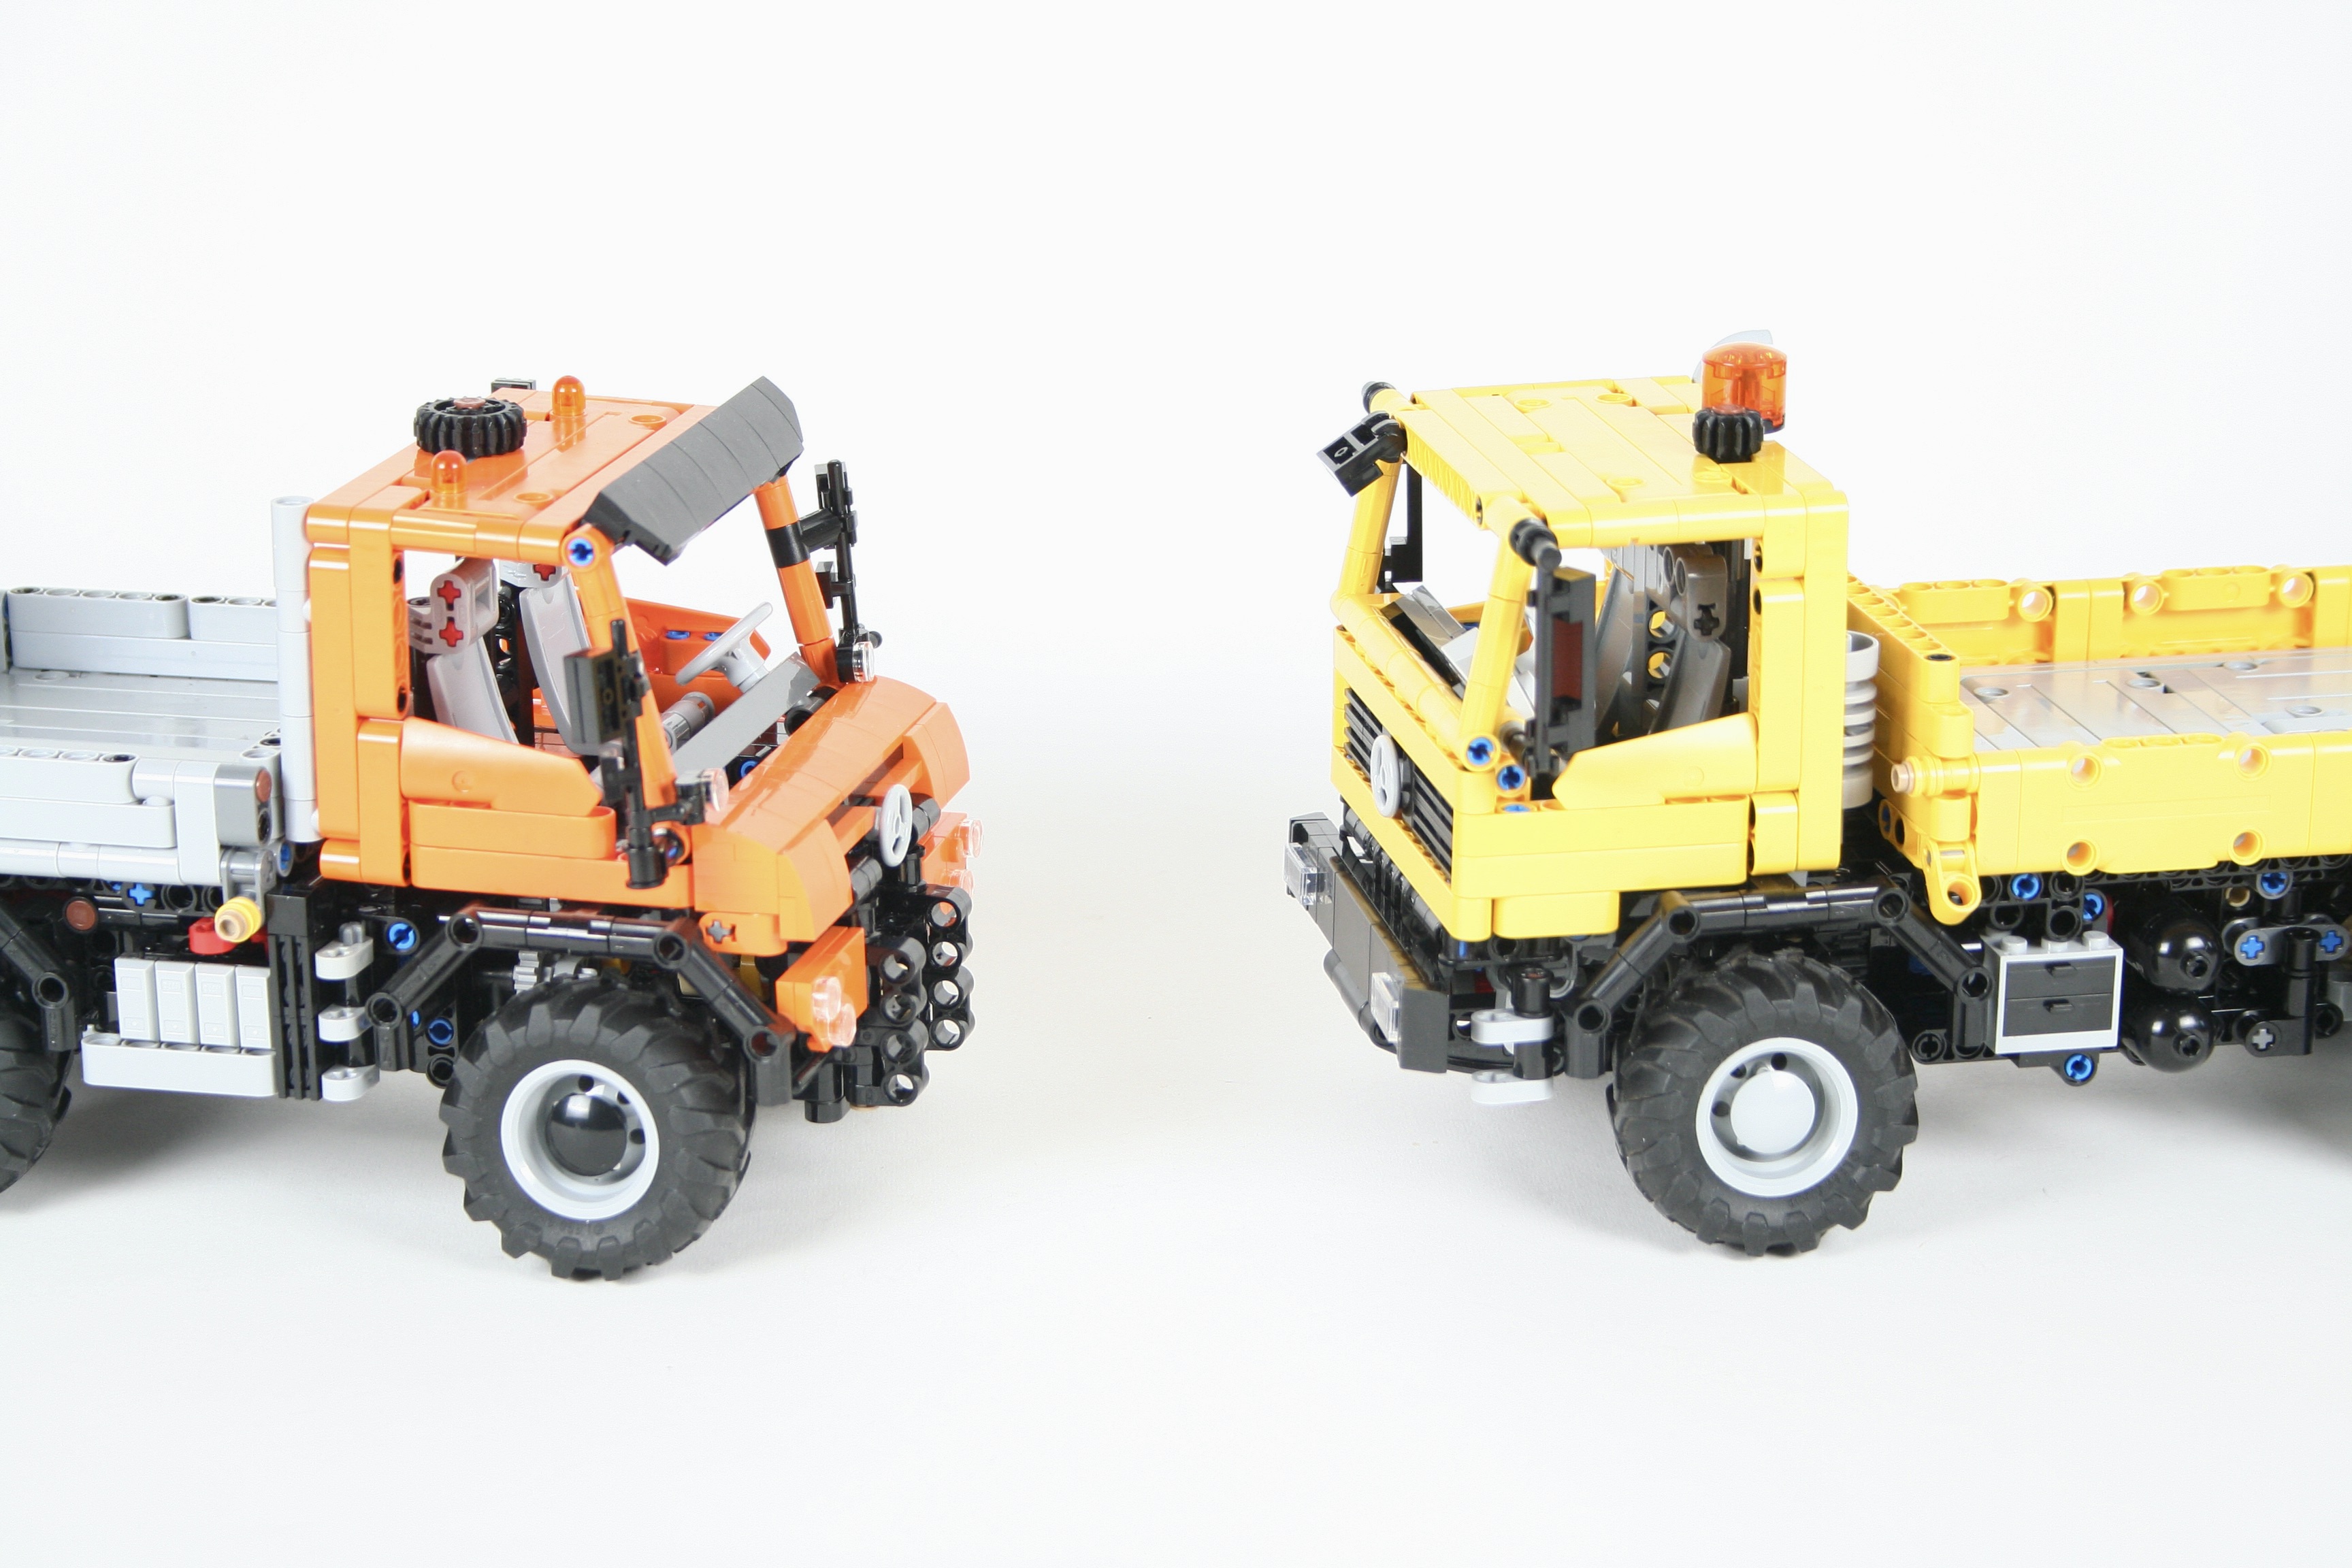
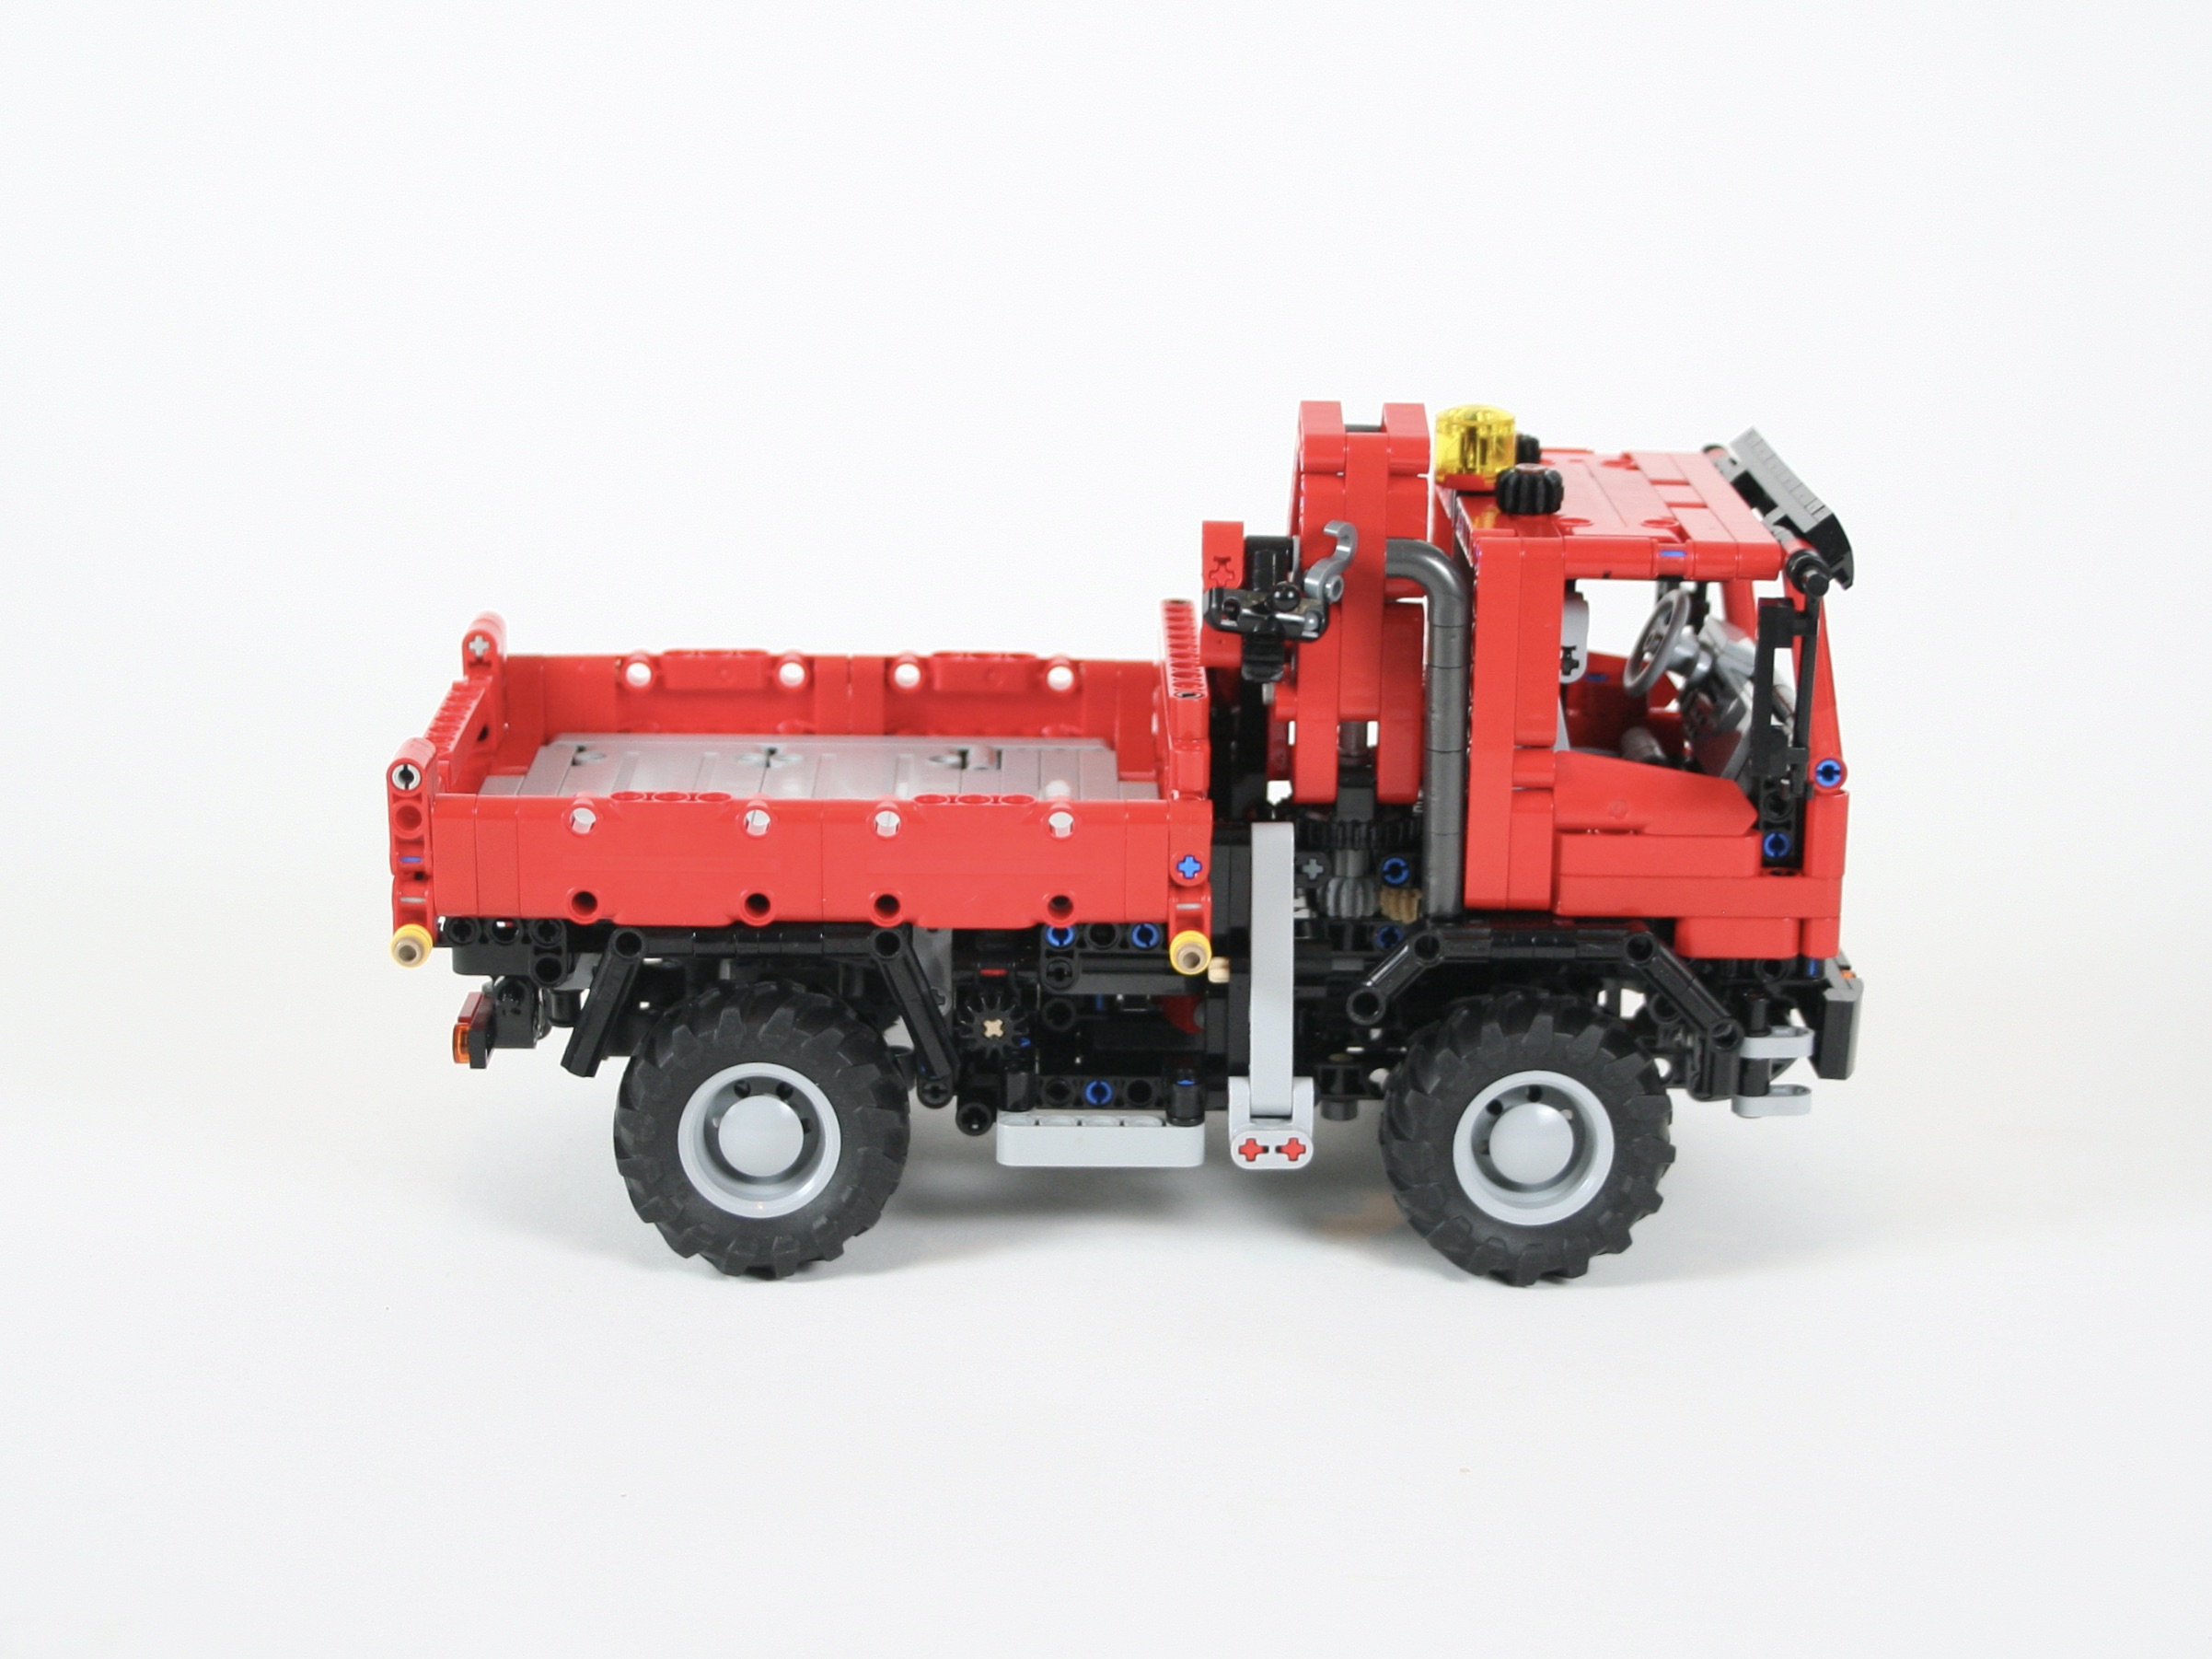
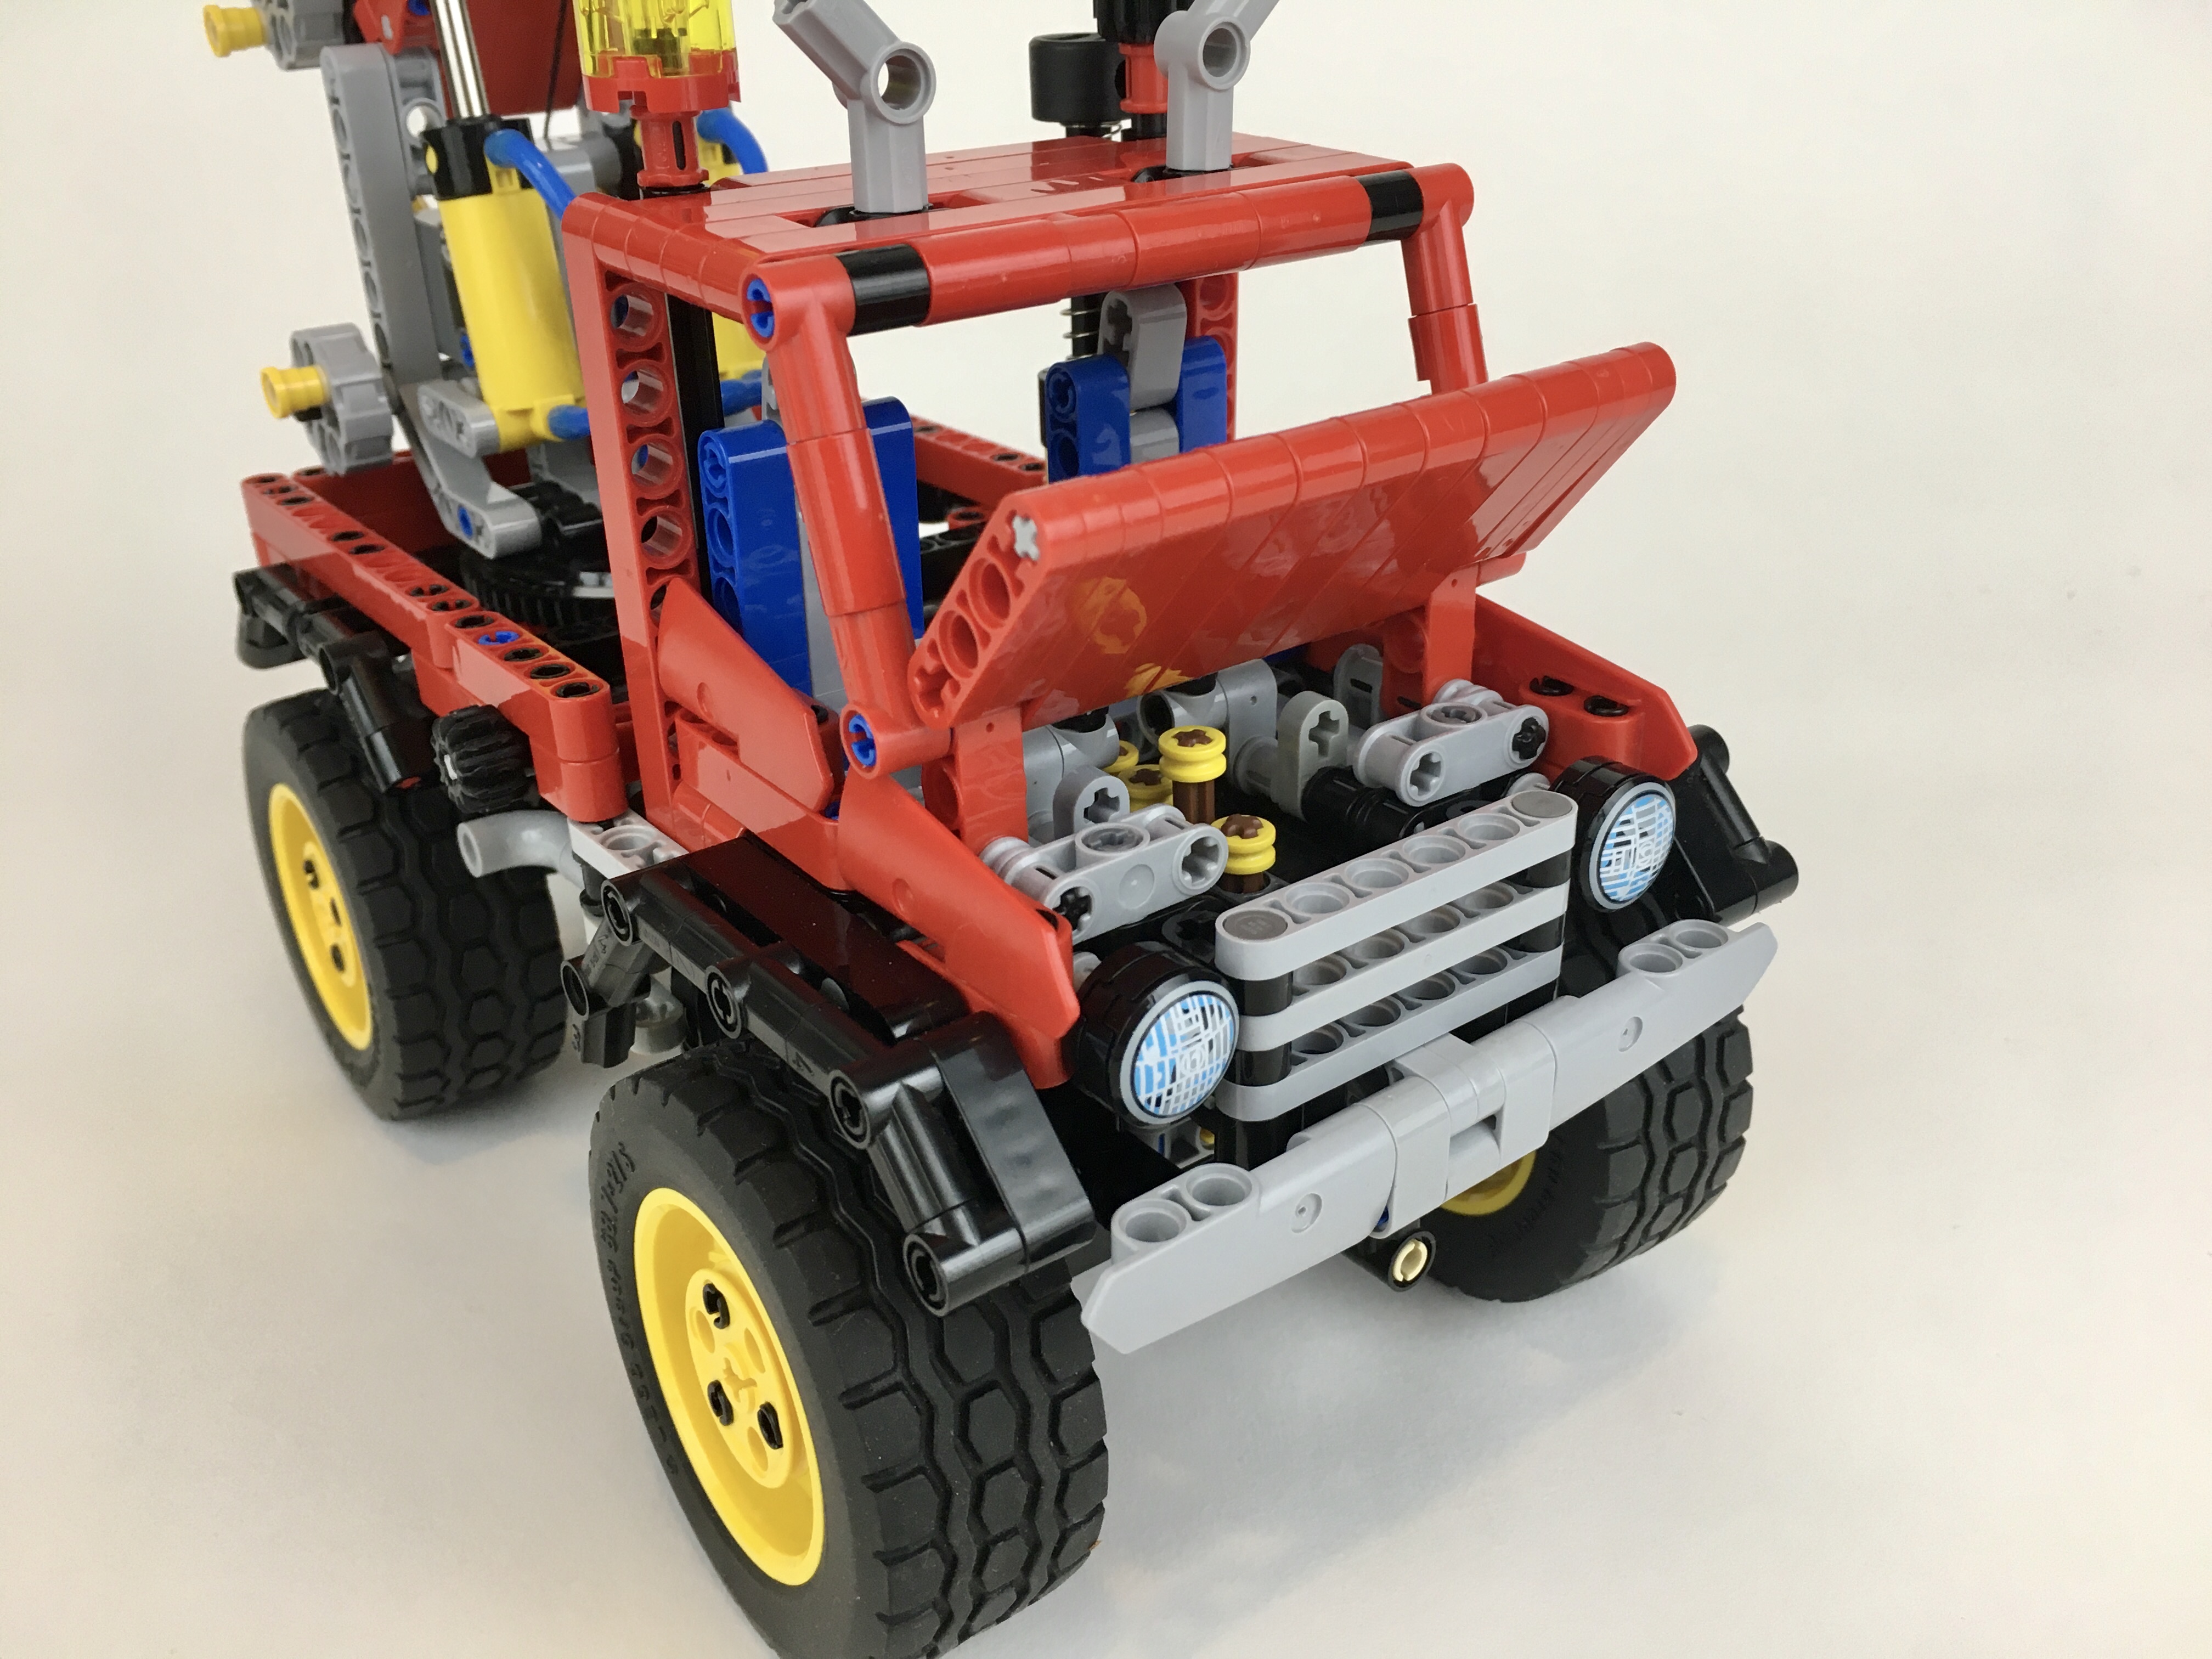
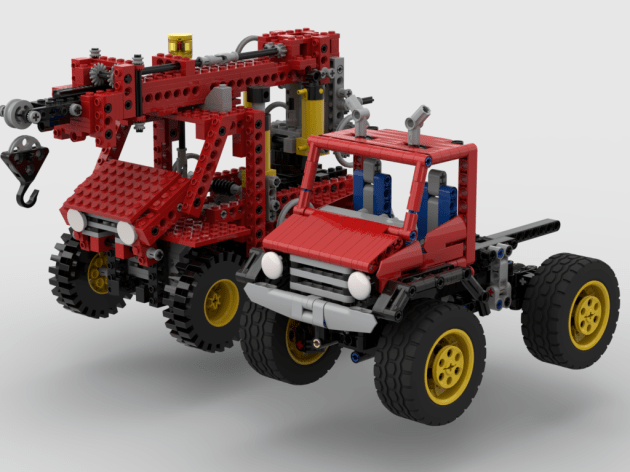
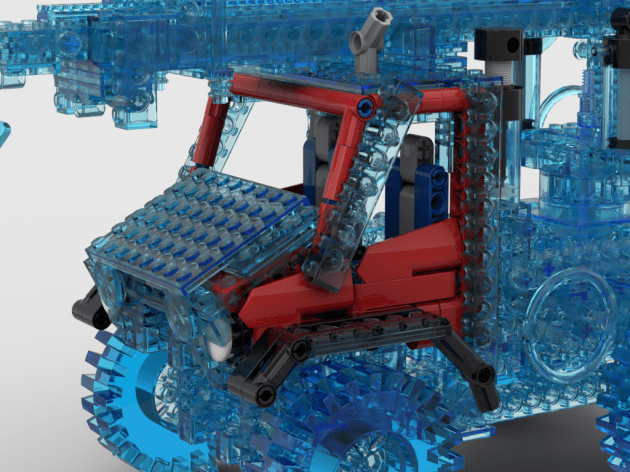
The cab is where I had some trouble. 8854 has a funny shaped cab to my eyes. First, it is very narrow. Second, the hood slopes very steeply. Third, the windshield is not very steep, more car shaped than truck shaped. I rebuilt 8854 in Bricklink Studio to help me compare the two designs over each other. I found this to be a helpful step, and allowed for some good feedback from other Eurobrick members. I ended up making the hood a little more flat and slightly shorter. The roof was made a little longer, which made the windshield a little more steep. Then added the fenders that wrap around the wheels a little better, and headlights and a grill that referenced the original grill. I was pleased with the final design. Oh, and I added seats, opening doors, and a dashboard.
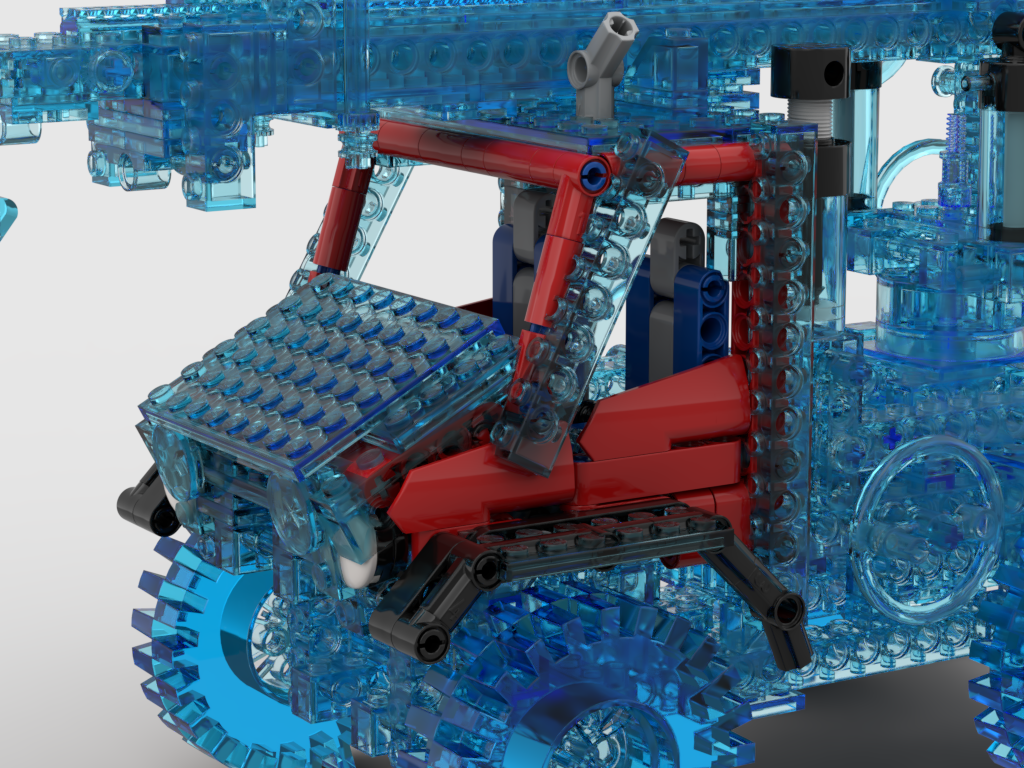
Being able to compare the two versions side by side helped me feel comfortable with how the build was going. Most of the time I use Studio when the build is complete, as do not like to tinker in Studio. However, being able to see changes in real time, was immensely helpful. I could ask was the new version staying true to the original? If not, what was the specific part that was making it feel/look off? Being able to overlay both versions on top of each other was helpful, and a step I will do again in the future.
Cab Comparison Overlay
It turns out the design was good enough for a first place! I was thrilled that through both a voting and jury stage, this update was picked over 46 other designs. In addition to that affirmation, I was pleased with how the MOC turned out as well. The functions all worked well, and the control of each was simple and effective. I only wish the suspension was little more stable, but this was only noticeable when the crane was fully extended. I’ll use the suspension again in other MOC soon. If you love 8854 as much as I do, I hope you will give this update a build as well.
Sometimes I plan out a build, and other times, a build just kind of happens. This was the latter.
You may find free instructions for this MOC at Rebrickable.com.
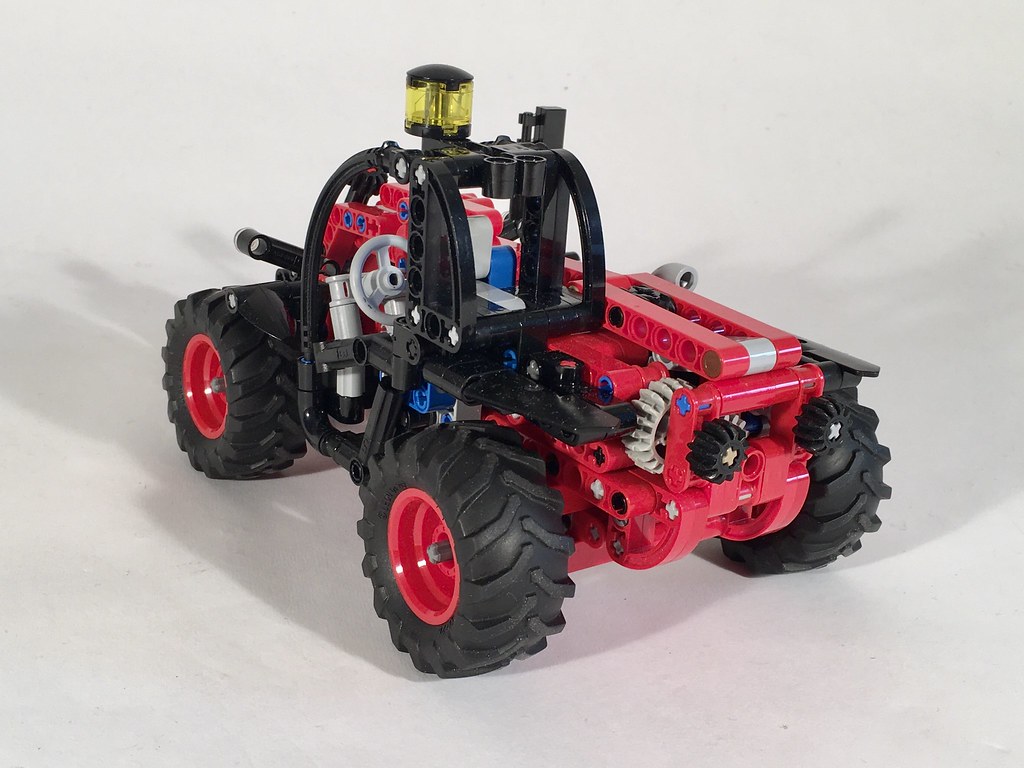
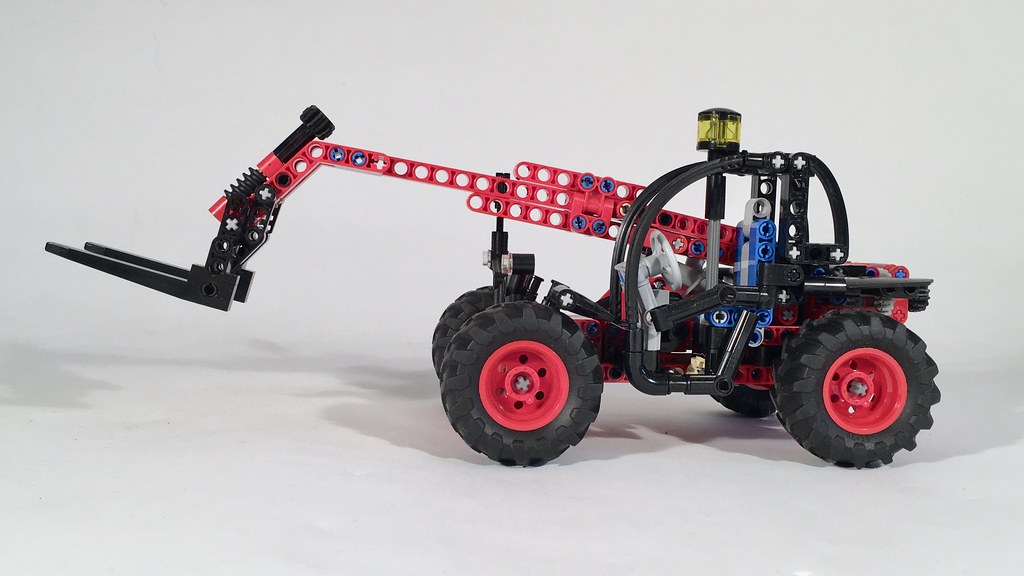
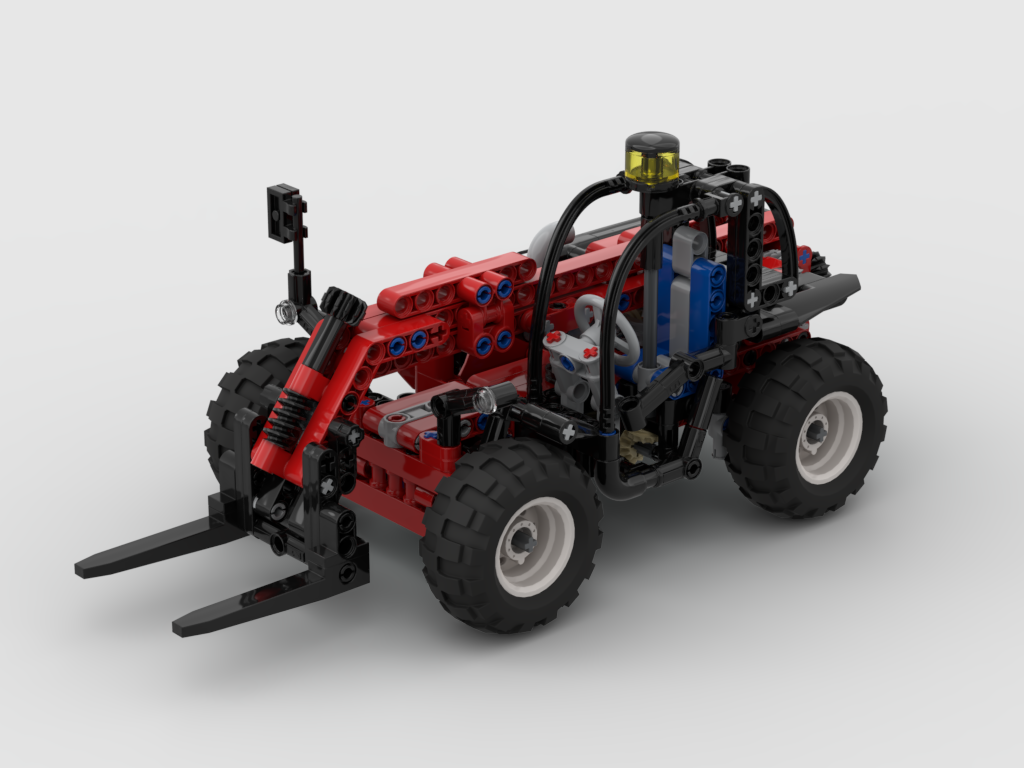
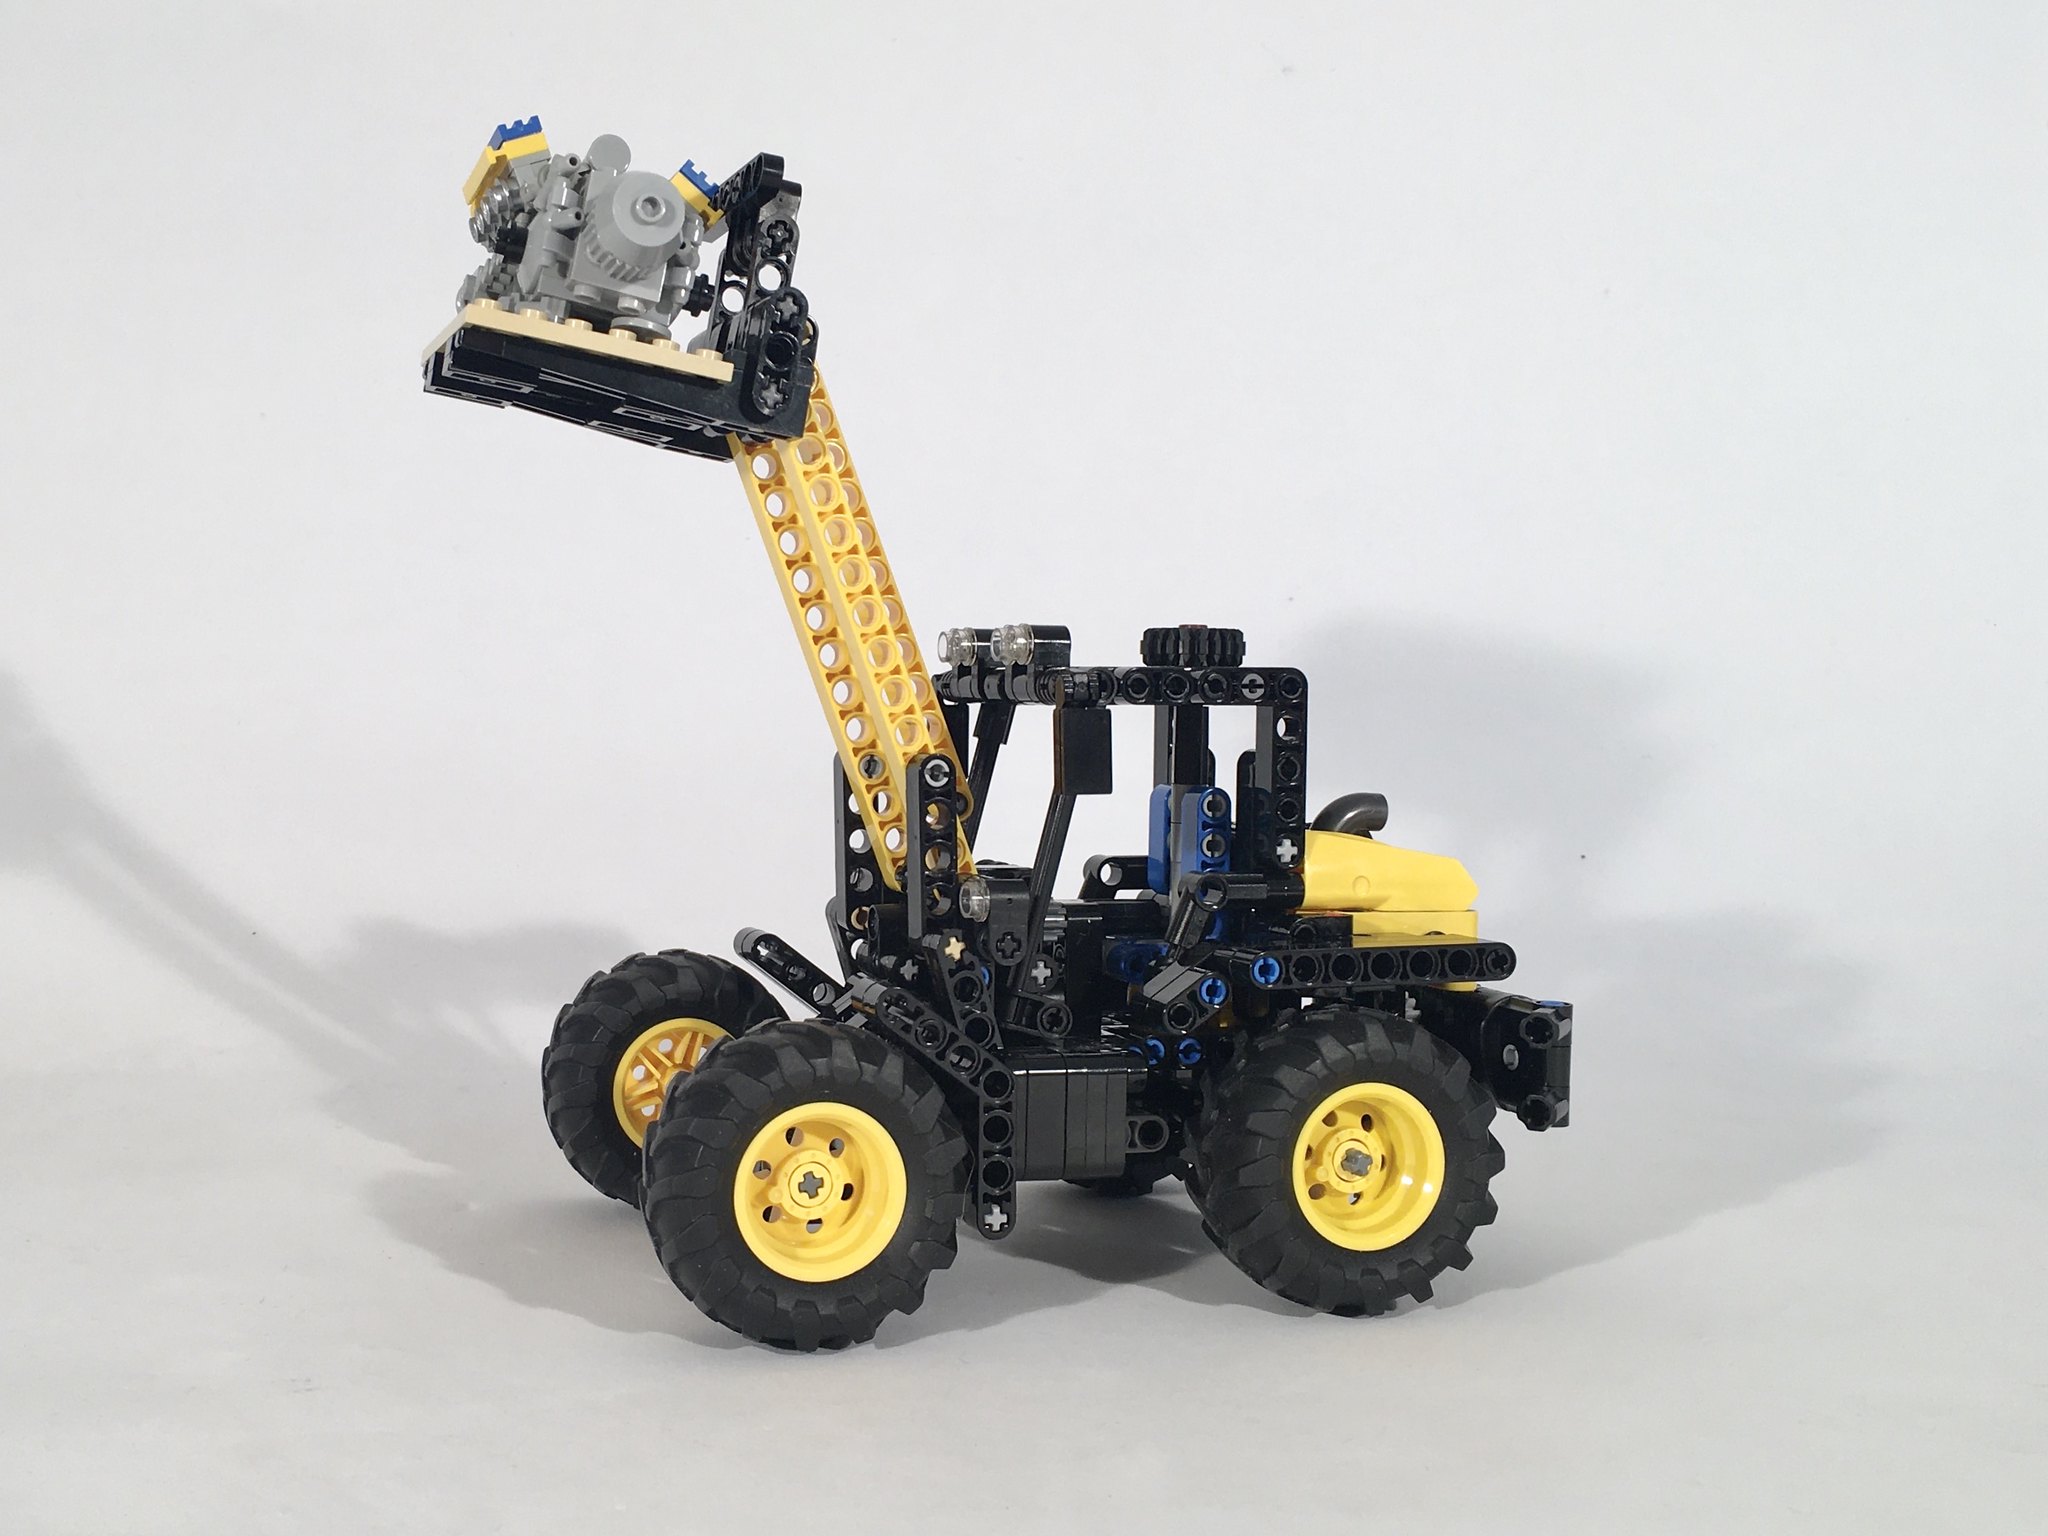
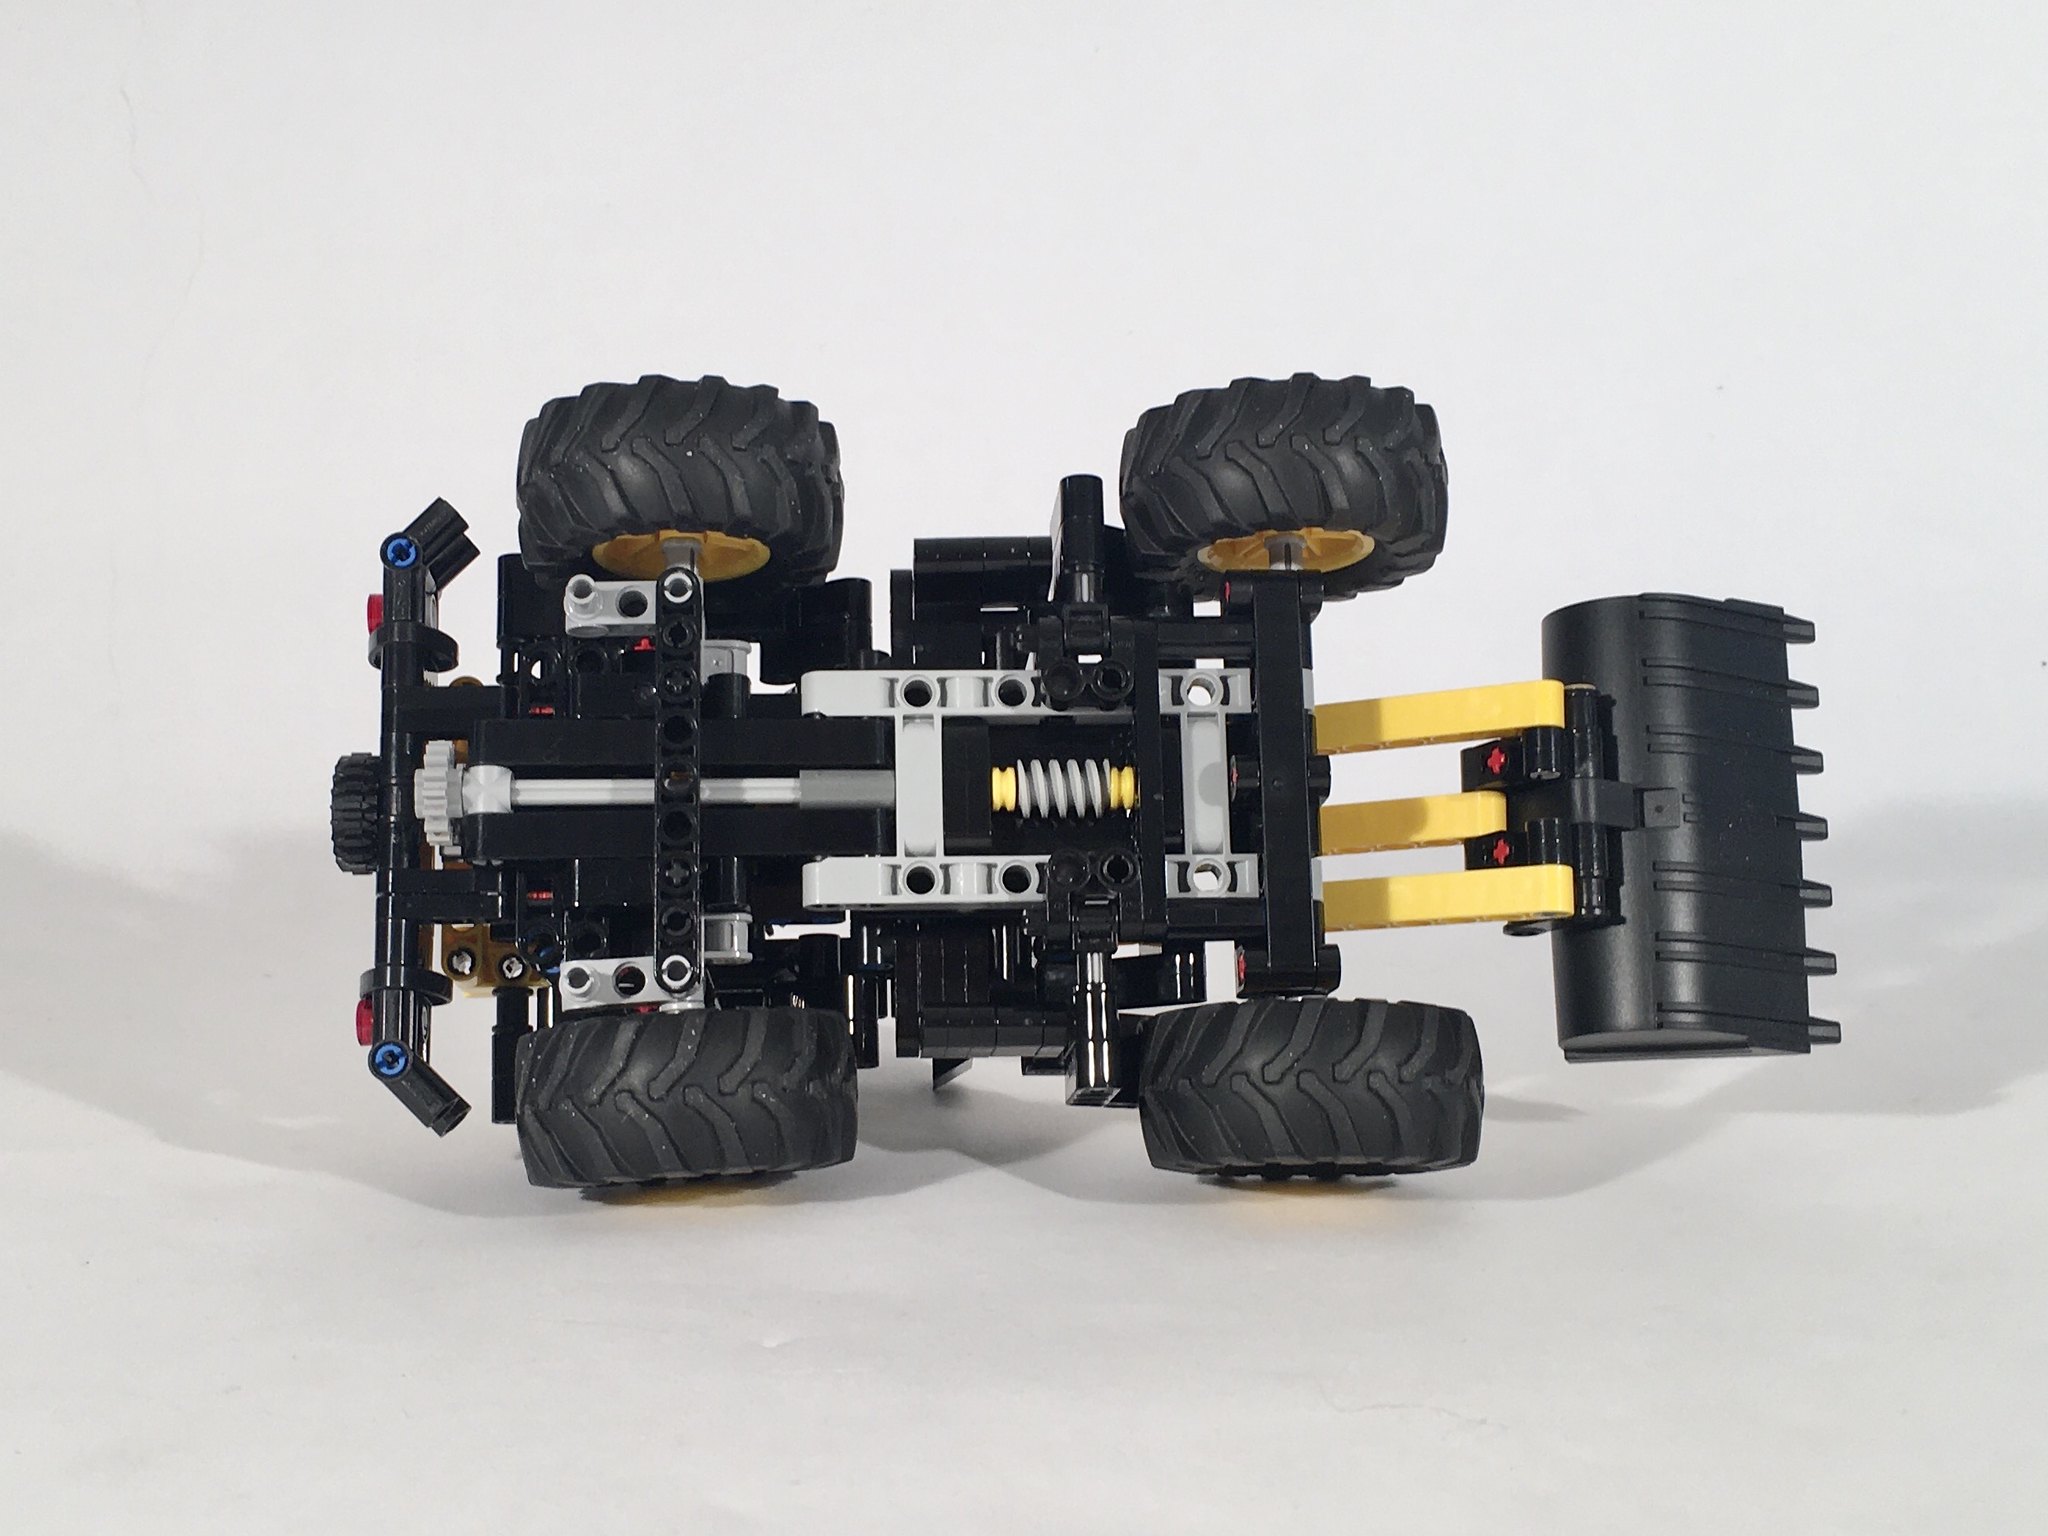
After building the Atmos Tractor, and then a gazillon implements, attachments, and trailers, I started branching out to other machines that could be used at the Thirdwigg Farm. The Compact Loader was a result of this. I was playing with the new LEGO 42122 tires, and quickly came up with a little four wheel steering idea. I added a fork boom, and decided to see where the project would go.
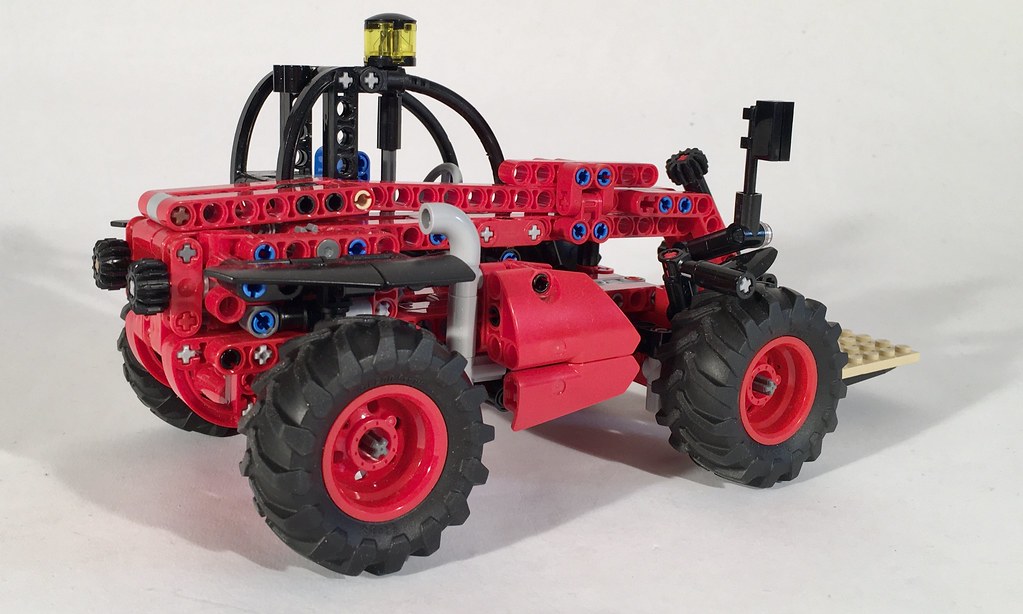
I am quite fond of LEGO 8283, and the rest of the design was influenced by this little set. I tried a couple of boom extension designs, but each looked a little too “overweight” for the little tractor. So I came back to the extension design that was used on 8283. A mini linear actuator is used to lift the boom. Both functions are controlled by two separate gears on the back of the telehandler.
The cab came together pretty quickly, though I had to make sure the new tires had a clear range of motion. I added some lights, and front fenders which brought a little visual weight to the front. I had a tricky time finding rear fenders that I liked, but I eventually found a solution I liked. In my move towards increasing the readability of my instructions, I have published a PDF with step-by-step instructions that list required parts for each step. I hope they are clear for you, and they bring value to your own build.
The Compact Telehandler worked just as I hoped. The steering is great; it’s fun to drive this little tractor around on a small desk. The boom lift works well, and has a great range of motion. The extension works smoothly, though since it is driven by a worm gear, if the extension is in the wrong position while trying to lift the boom, the boom will bind. The fork tilt mechanism is smooth, and is easily accessible in all boom positions. We will see what next build come from just playing with a couple of parts.
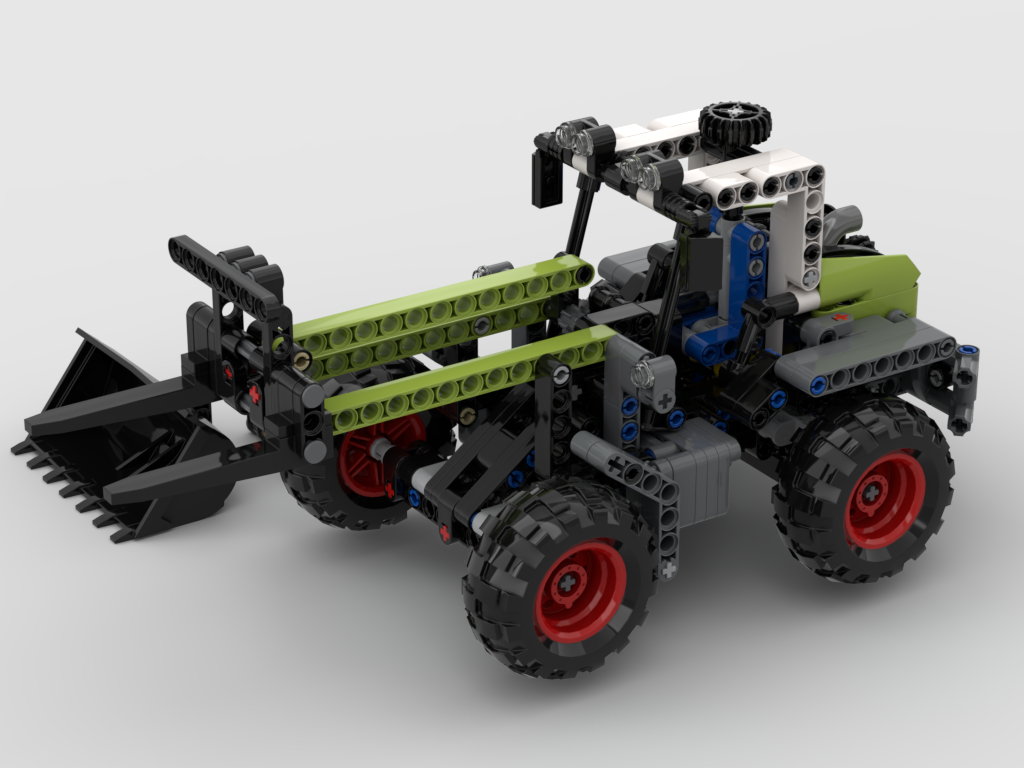
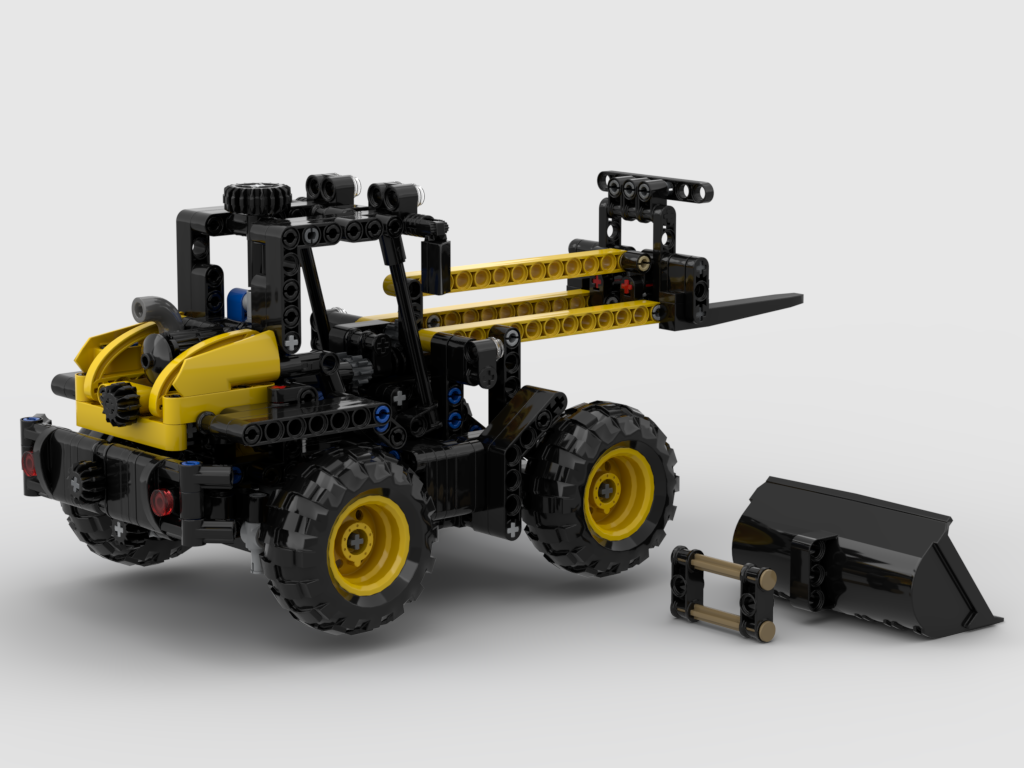
This small loader came together rather quickly. I decided to use rear wheel steering rather than articulation as this would keep the mechanics of the bucket/fork simple. Additionally, I wanted to use the new tires from LEGO 42122, and they take up a little more room while turning. Finally, I wanted to allow the tractor to switch easily from forks and a bucket, so this simple feature was the second part to figure out.
The next part of the build required a little more trial and error. End Loaders are tricky in that they have a wide range of motion, and have to fit within a little given space due to the front wheels, cab, and ground. It become clear that at this scale, a mini linear actuator was not going to work. So I used a worm gear and 24z gear with a small linkage to the boom. This gave a wide range of motion, including a very high lift height. The motion was controlled by a 20z gear at the rear of the loader.
The bucket/fork tilt was a little more tricky. A 8z gear and worm gear control the movement. I add this mechanism in many of my builds because it works well for many needs; and it is small. In this build, I needed to redesign the frame for this mechanism as the standard build would not allow for the bucket and fork to fully tilt at ground level. But with a little modification, I was able to get it to work. At the high end, the bucket tilt can bind, which is not great. The tilt stays consistent as the boom lifts, which was a requirement for me as the fork was going to be a center part of the build. Control for the tilt is at the rear of the tractor. Pulling two axles allows for quick change between the bucket and the forks.
Finally, I built this MOC with the singular focus of developing my skills with Bricklink Studio; with the goal of improving the instructions that I make available. I have made photo sequencing instructions for years, but with the 800 pound gorilla that is Rebrickable.com, more and more people are contacting me directly saying some form of “I am confused when I try to build ______.” So, after trying a couple of 100-200 part builds, I launched into this Compact Loader, and built the file in Studio. Studio takes a little time to get used to, but it is slick. And the instructions that are generated are very slick.
But it does take time. Many of my instructions have been free, and I continue to value this for many reasons, but I’ll be reevaluating this the deeper I get into this transition. Either way, enjoy the many MOCs of mine that you can build for free.
I am pleased with how this MOC turned out, and what it taught me about building in Bricklink Studio has been valuable. The model fits my design language, and functions as I expect my models to function. And now, you can clearly figure out how to build it as well. I hope you will enjoy the build as well.