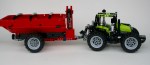
I have never made an alternative model, until now!
The popularity of alternative models has been increasing in the past couple of years as Rebrickable has allowed for an easy way for people to see what they can make from the sets they own. I tend to be more interested in making the machines I want, but I figured I should learn how to do an alternative model at some point, and this summer I was ready for a little challenge.
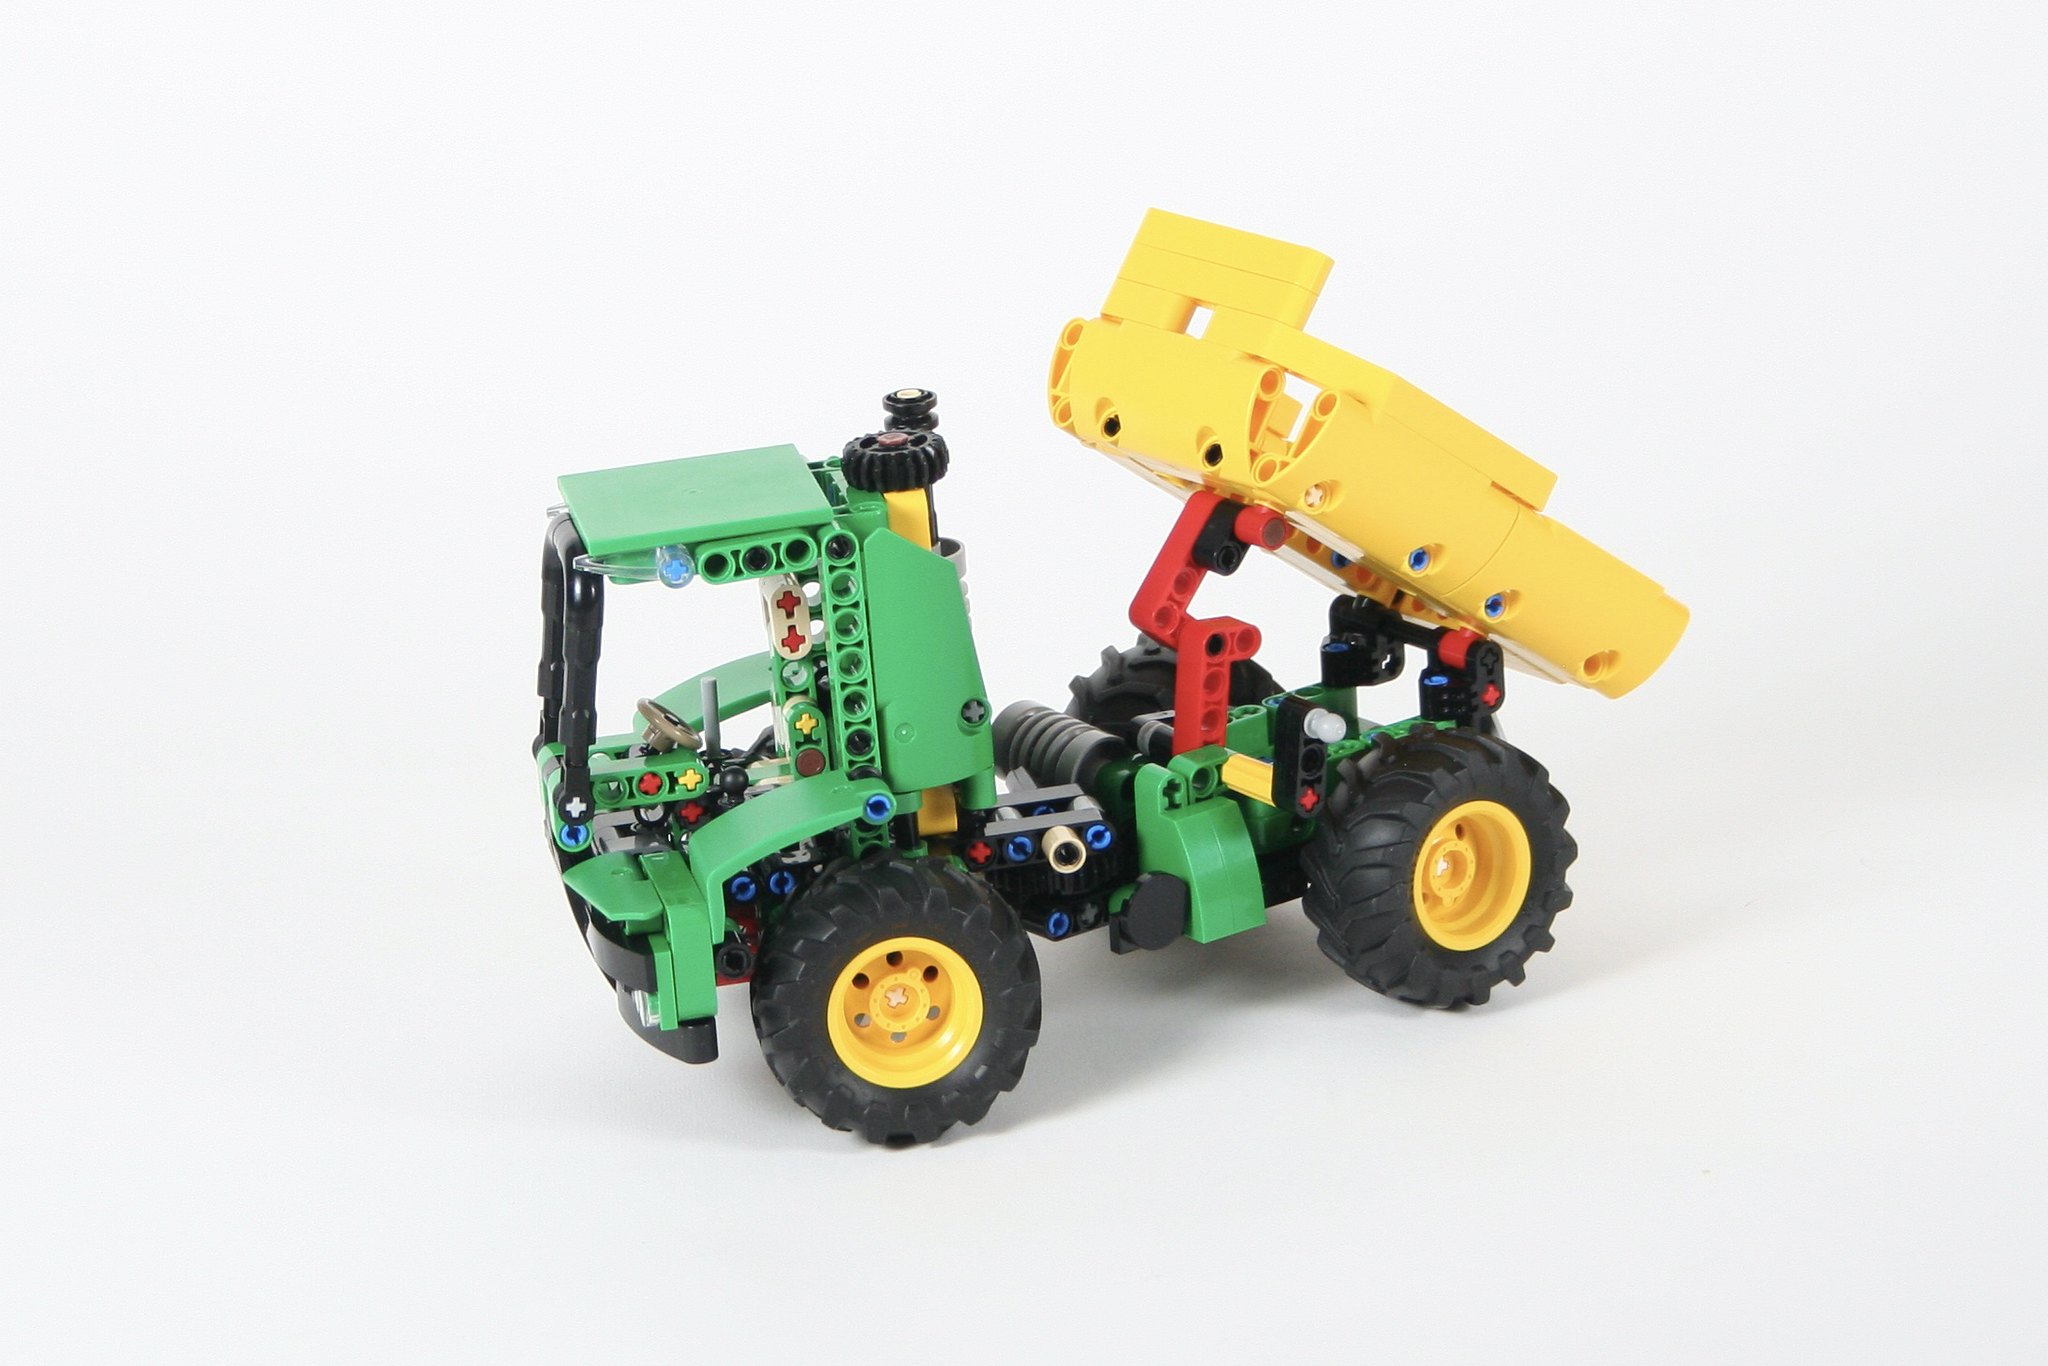
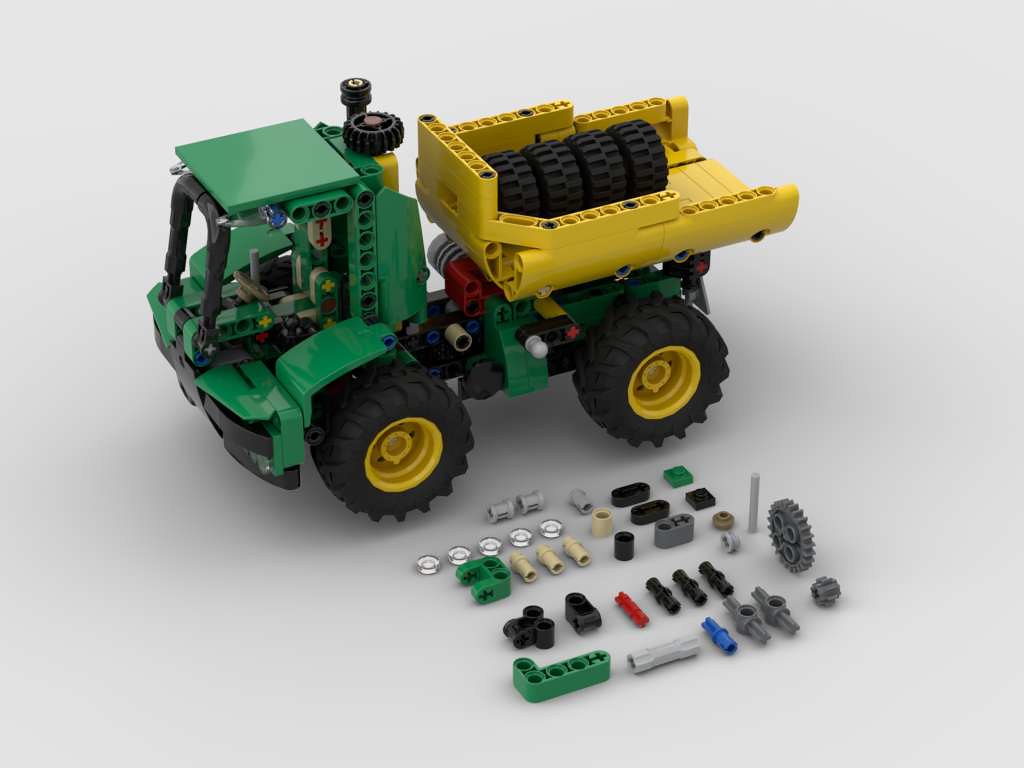
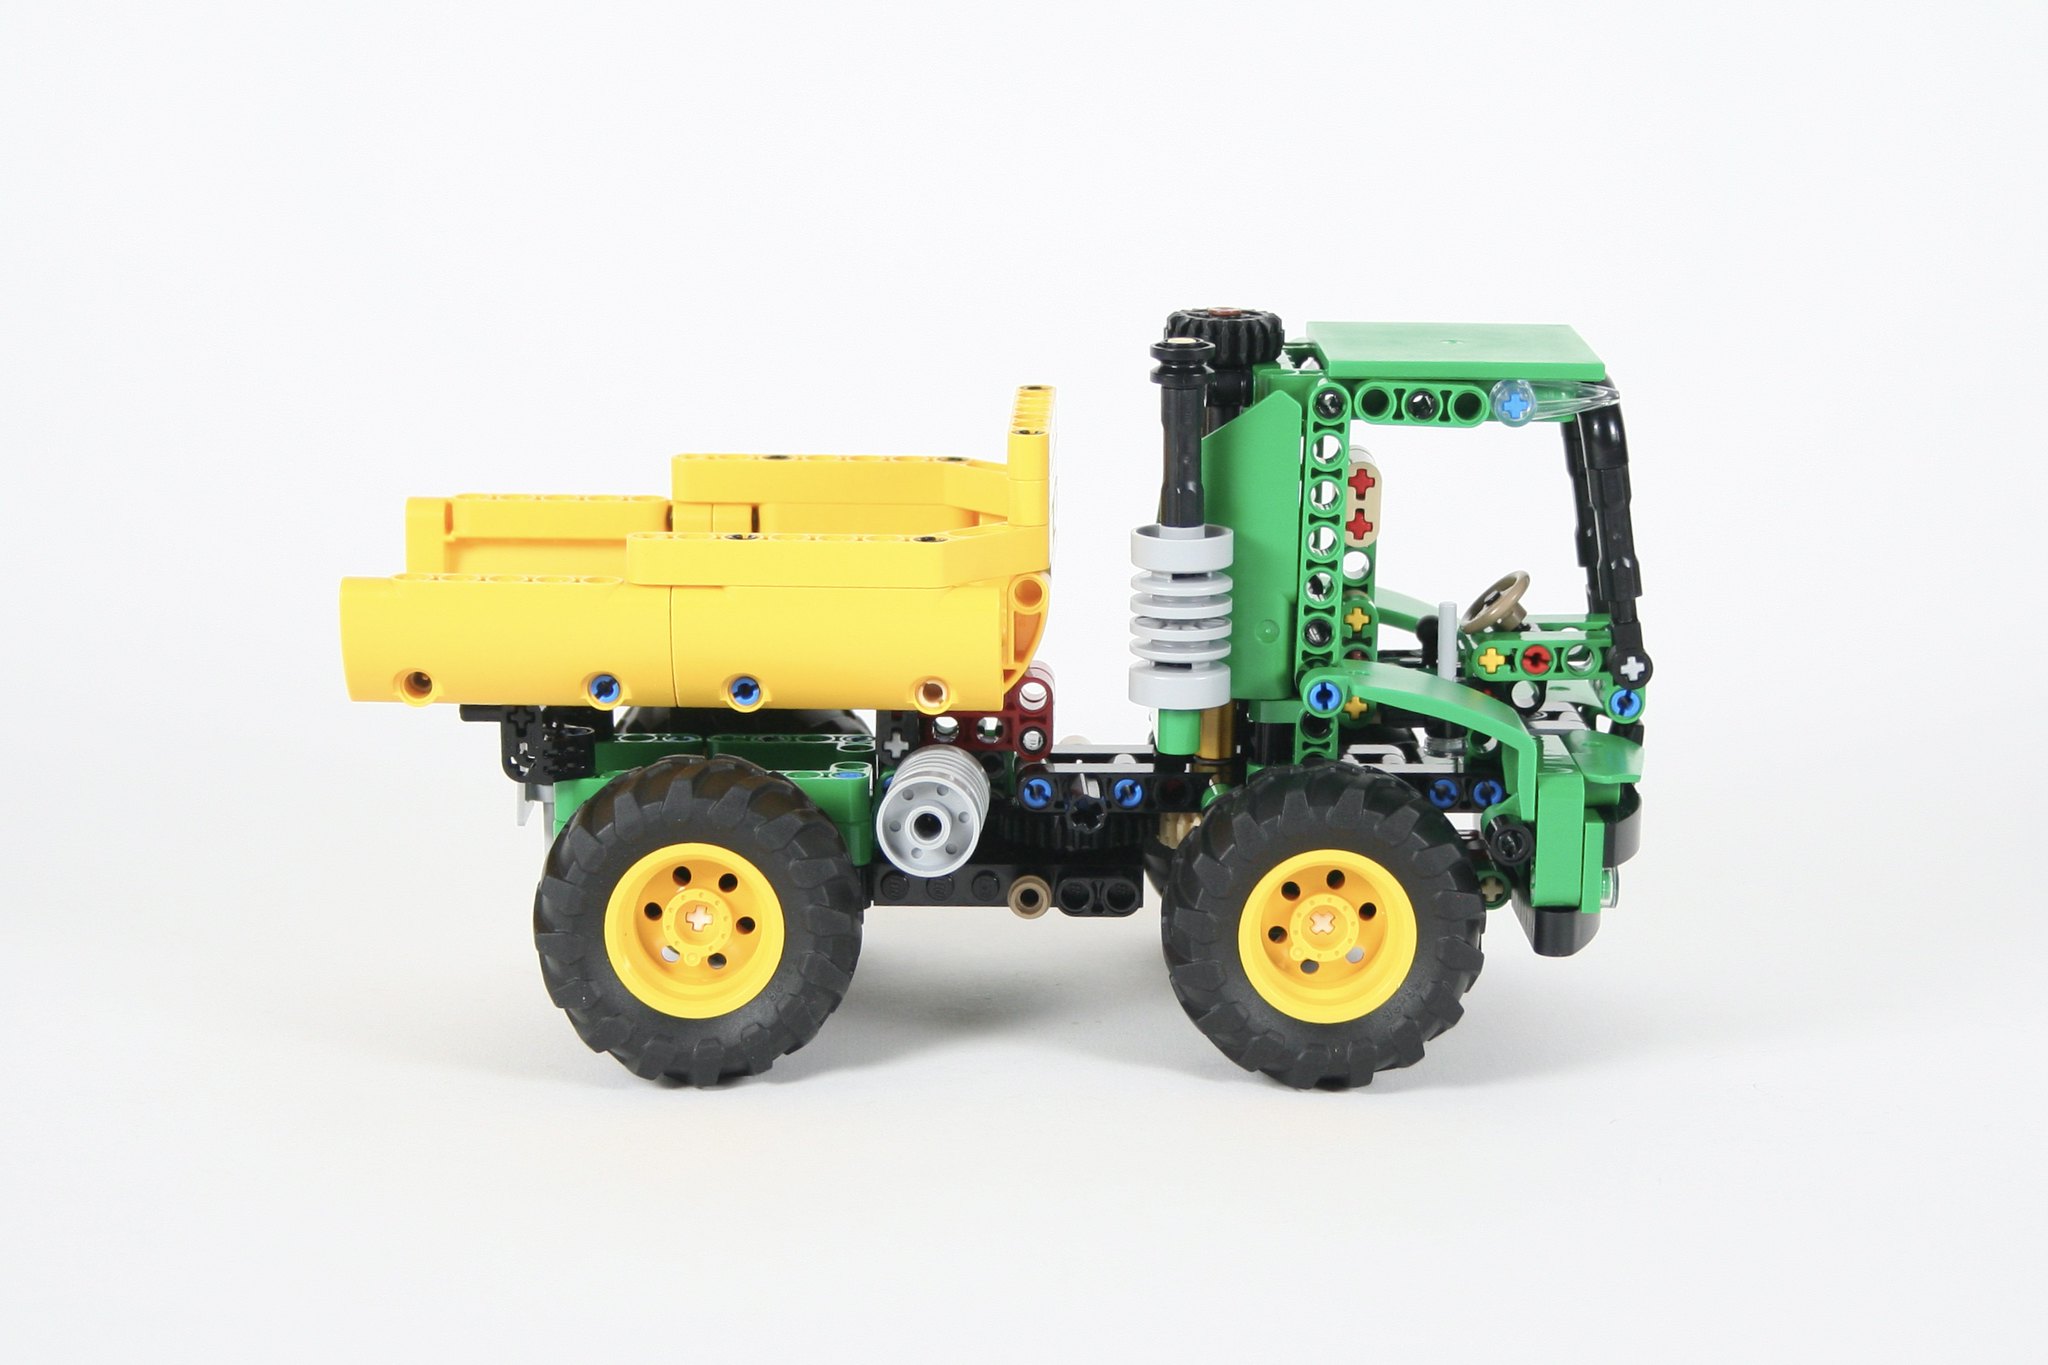
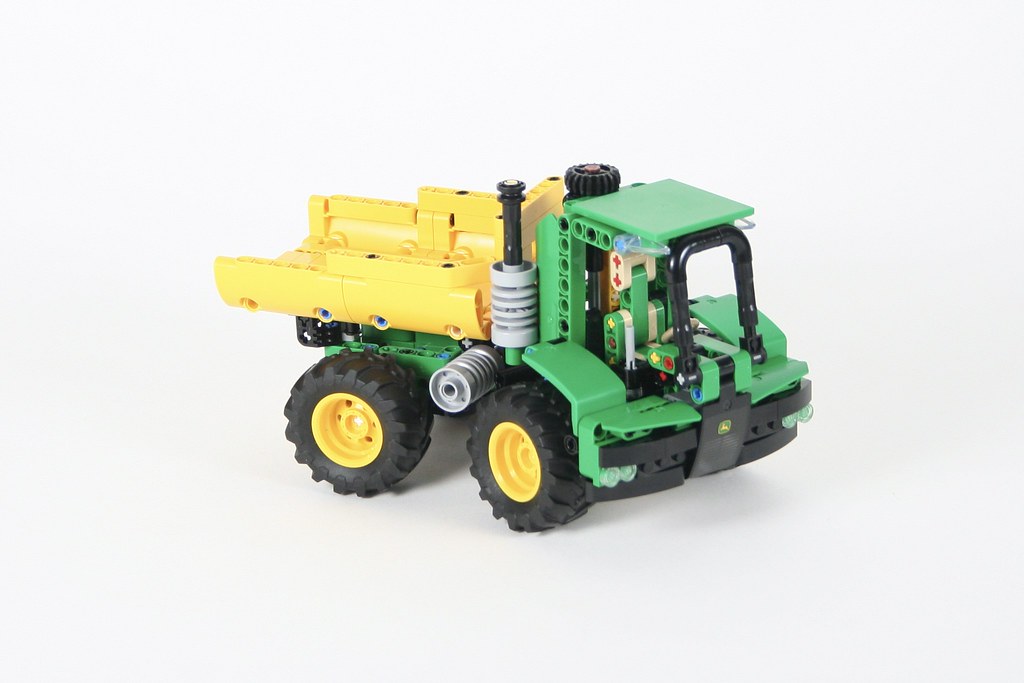
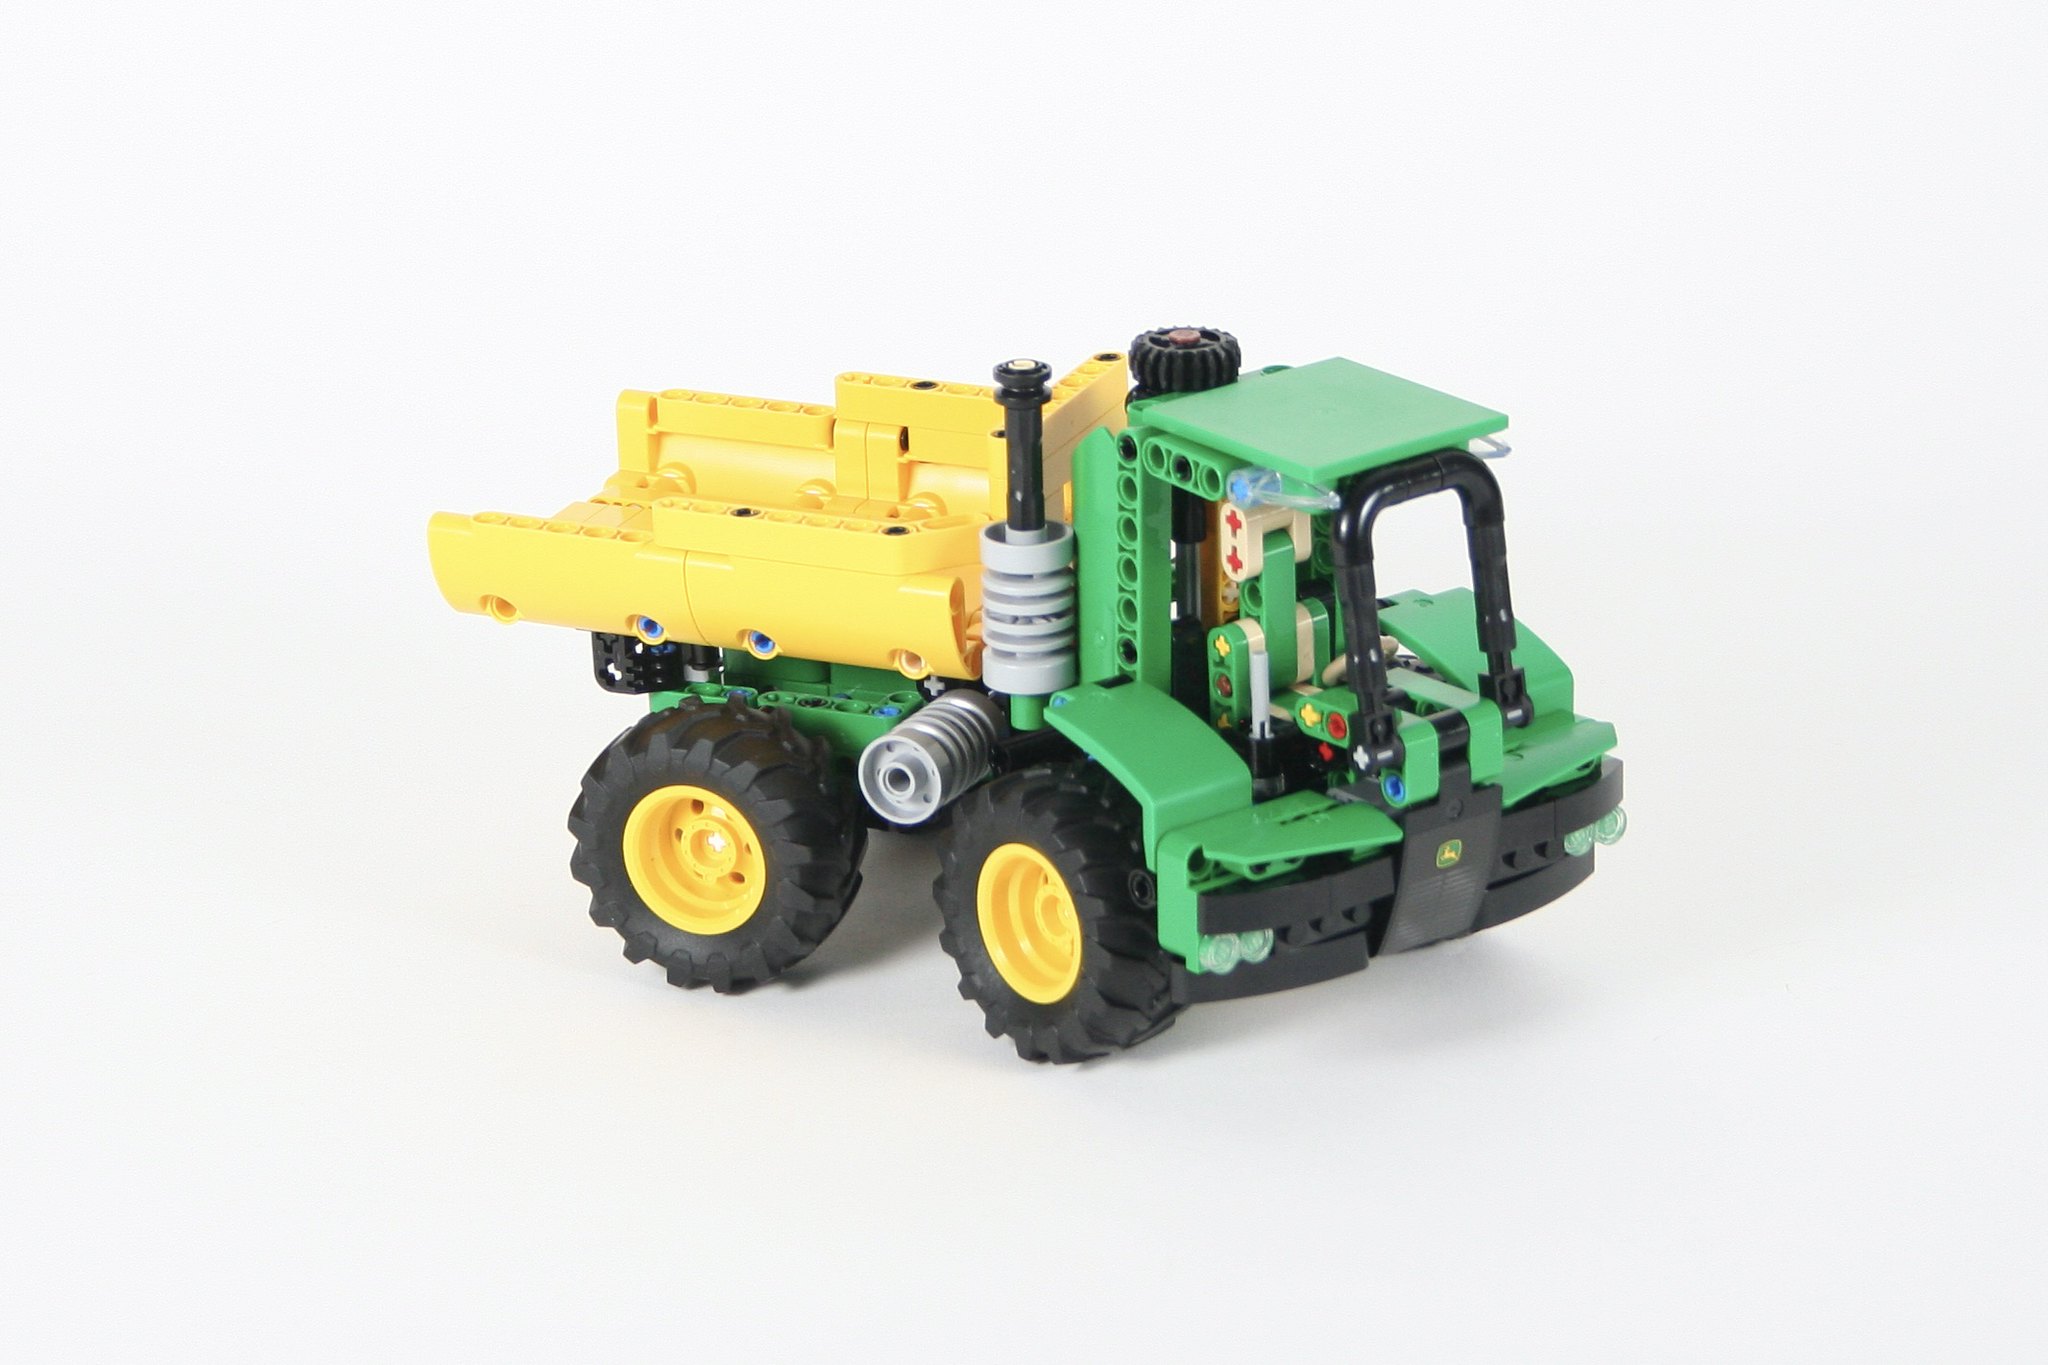
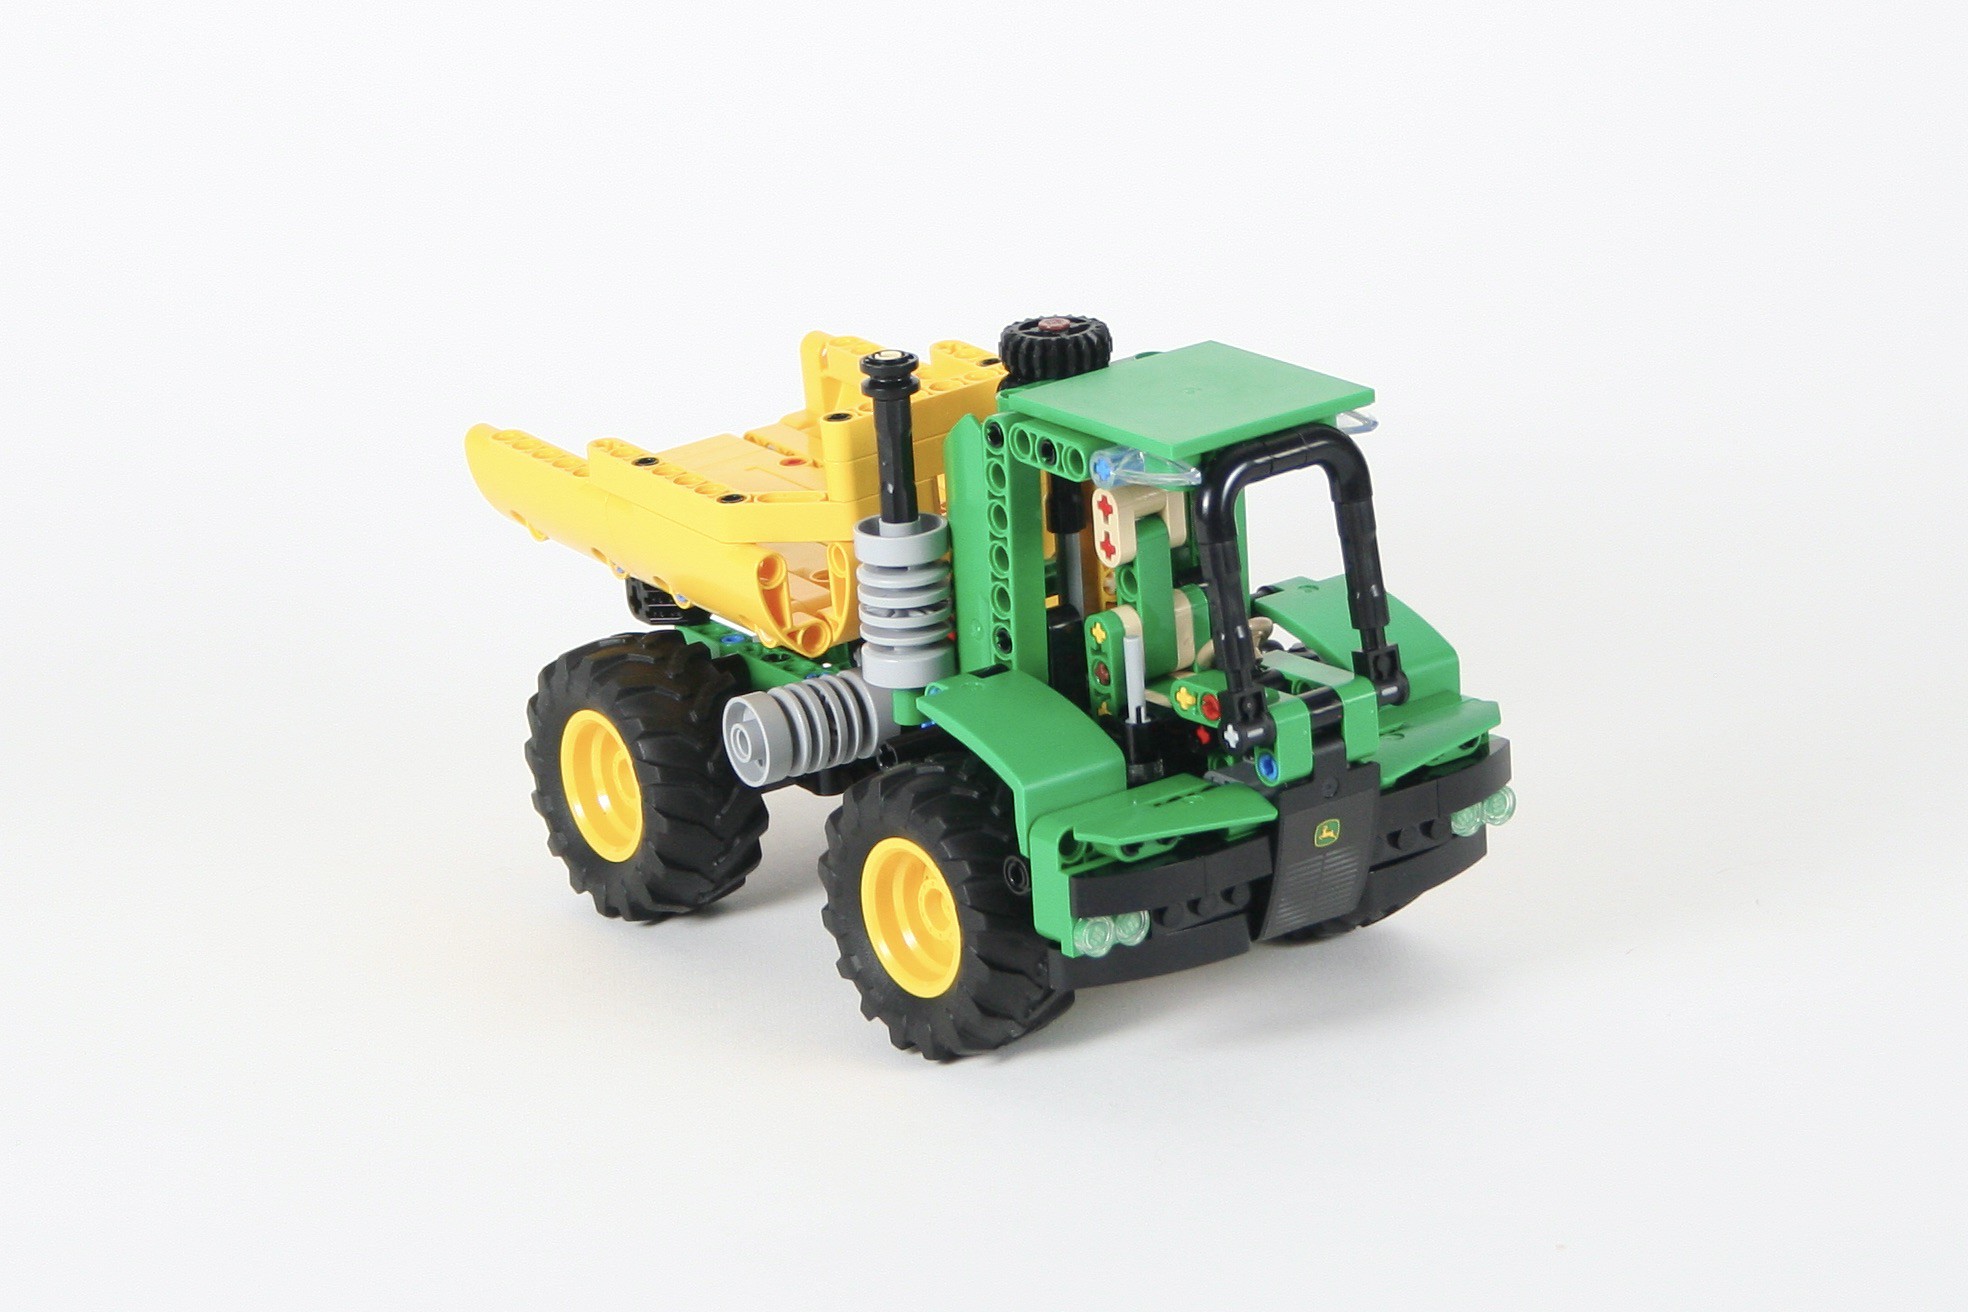
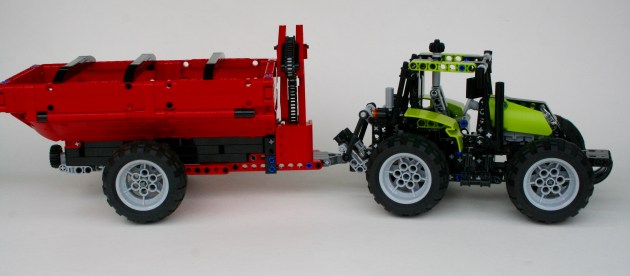
LEGO set 42136 is a decent little set with some simple functions and an accessible cost. After I purchased the set, and put it together, I thought about what I could turn it into. Making an alternative model means you need to think right away about the special parts you have how they could be used in another MOC. For me, the important parts were the yellow panels, the turntable, and the wheels/tires. I wanted to keep the yellow and green well integrated, otherwise the build would look messy. Going through my Pinterest account, I came across the Hydrema Dumper, and I immediately knew it would work. I got to work.
I made a draft with the tires, bed, and major panels placed. Then it was just build, rebuild, rebuild to make sure all the parts were well supported and color matched with the parts available. Sometimes I just wanted another simple connector, and I had a use another solution with the parts I had left. Looking over the remaining parts, I wish I would have used the gears, and the little tires from the trailer. The tractor finished with steering and a tipping bed, and a cute little face.
I was happy to finally do an alternative build. This one looked clean, and the functions worked well. There has been some interest in the MOC, as some people have already built it themselves. You can too! It was a fun little challenge, so I’ll make some more alternative builds in the future.
I loved LEGO set 8081 because it gave me a lot of modification ideas, and LEGO 42126 is similar.
Instructions may be found at Rebrickable for the SVT10 and the SVT8.
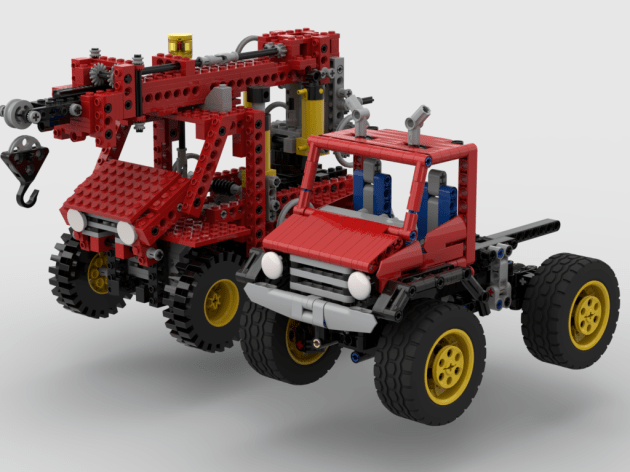
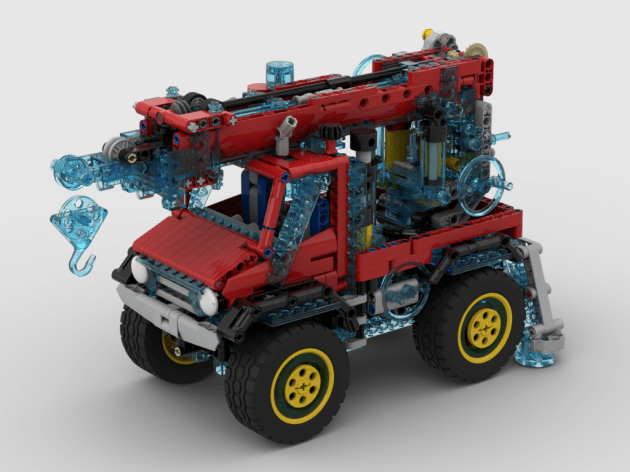
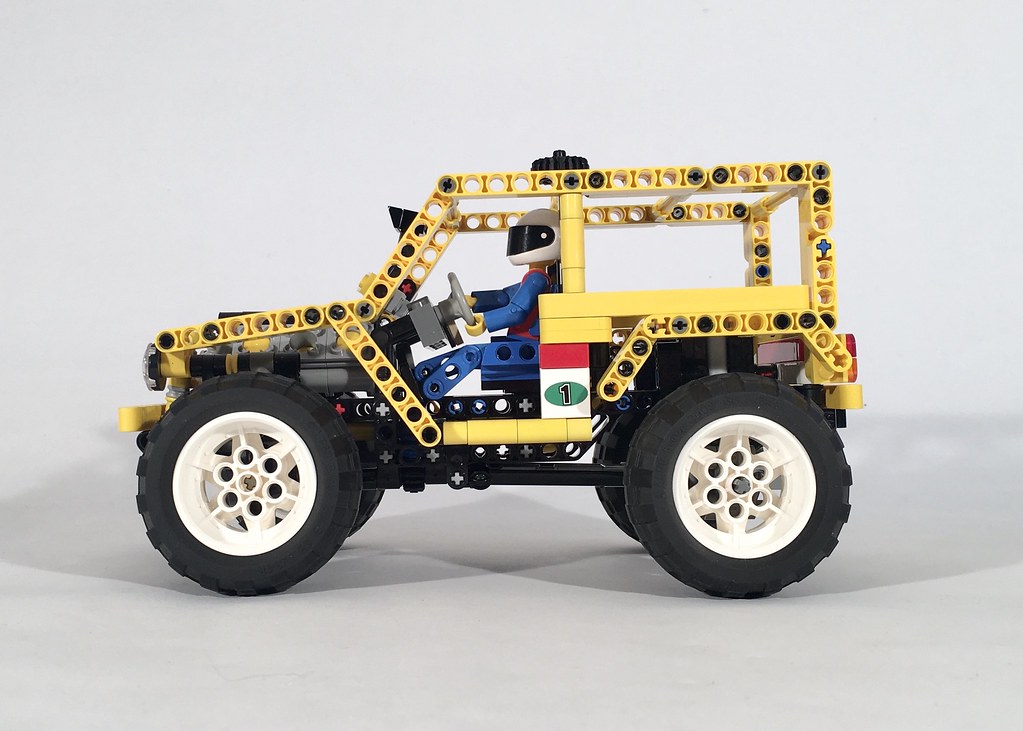
LEGO 42126 SVT10 Front
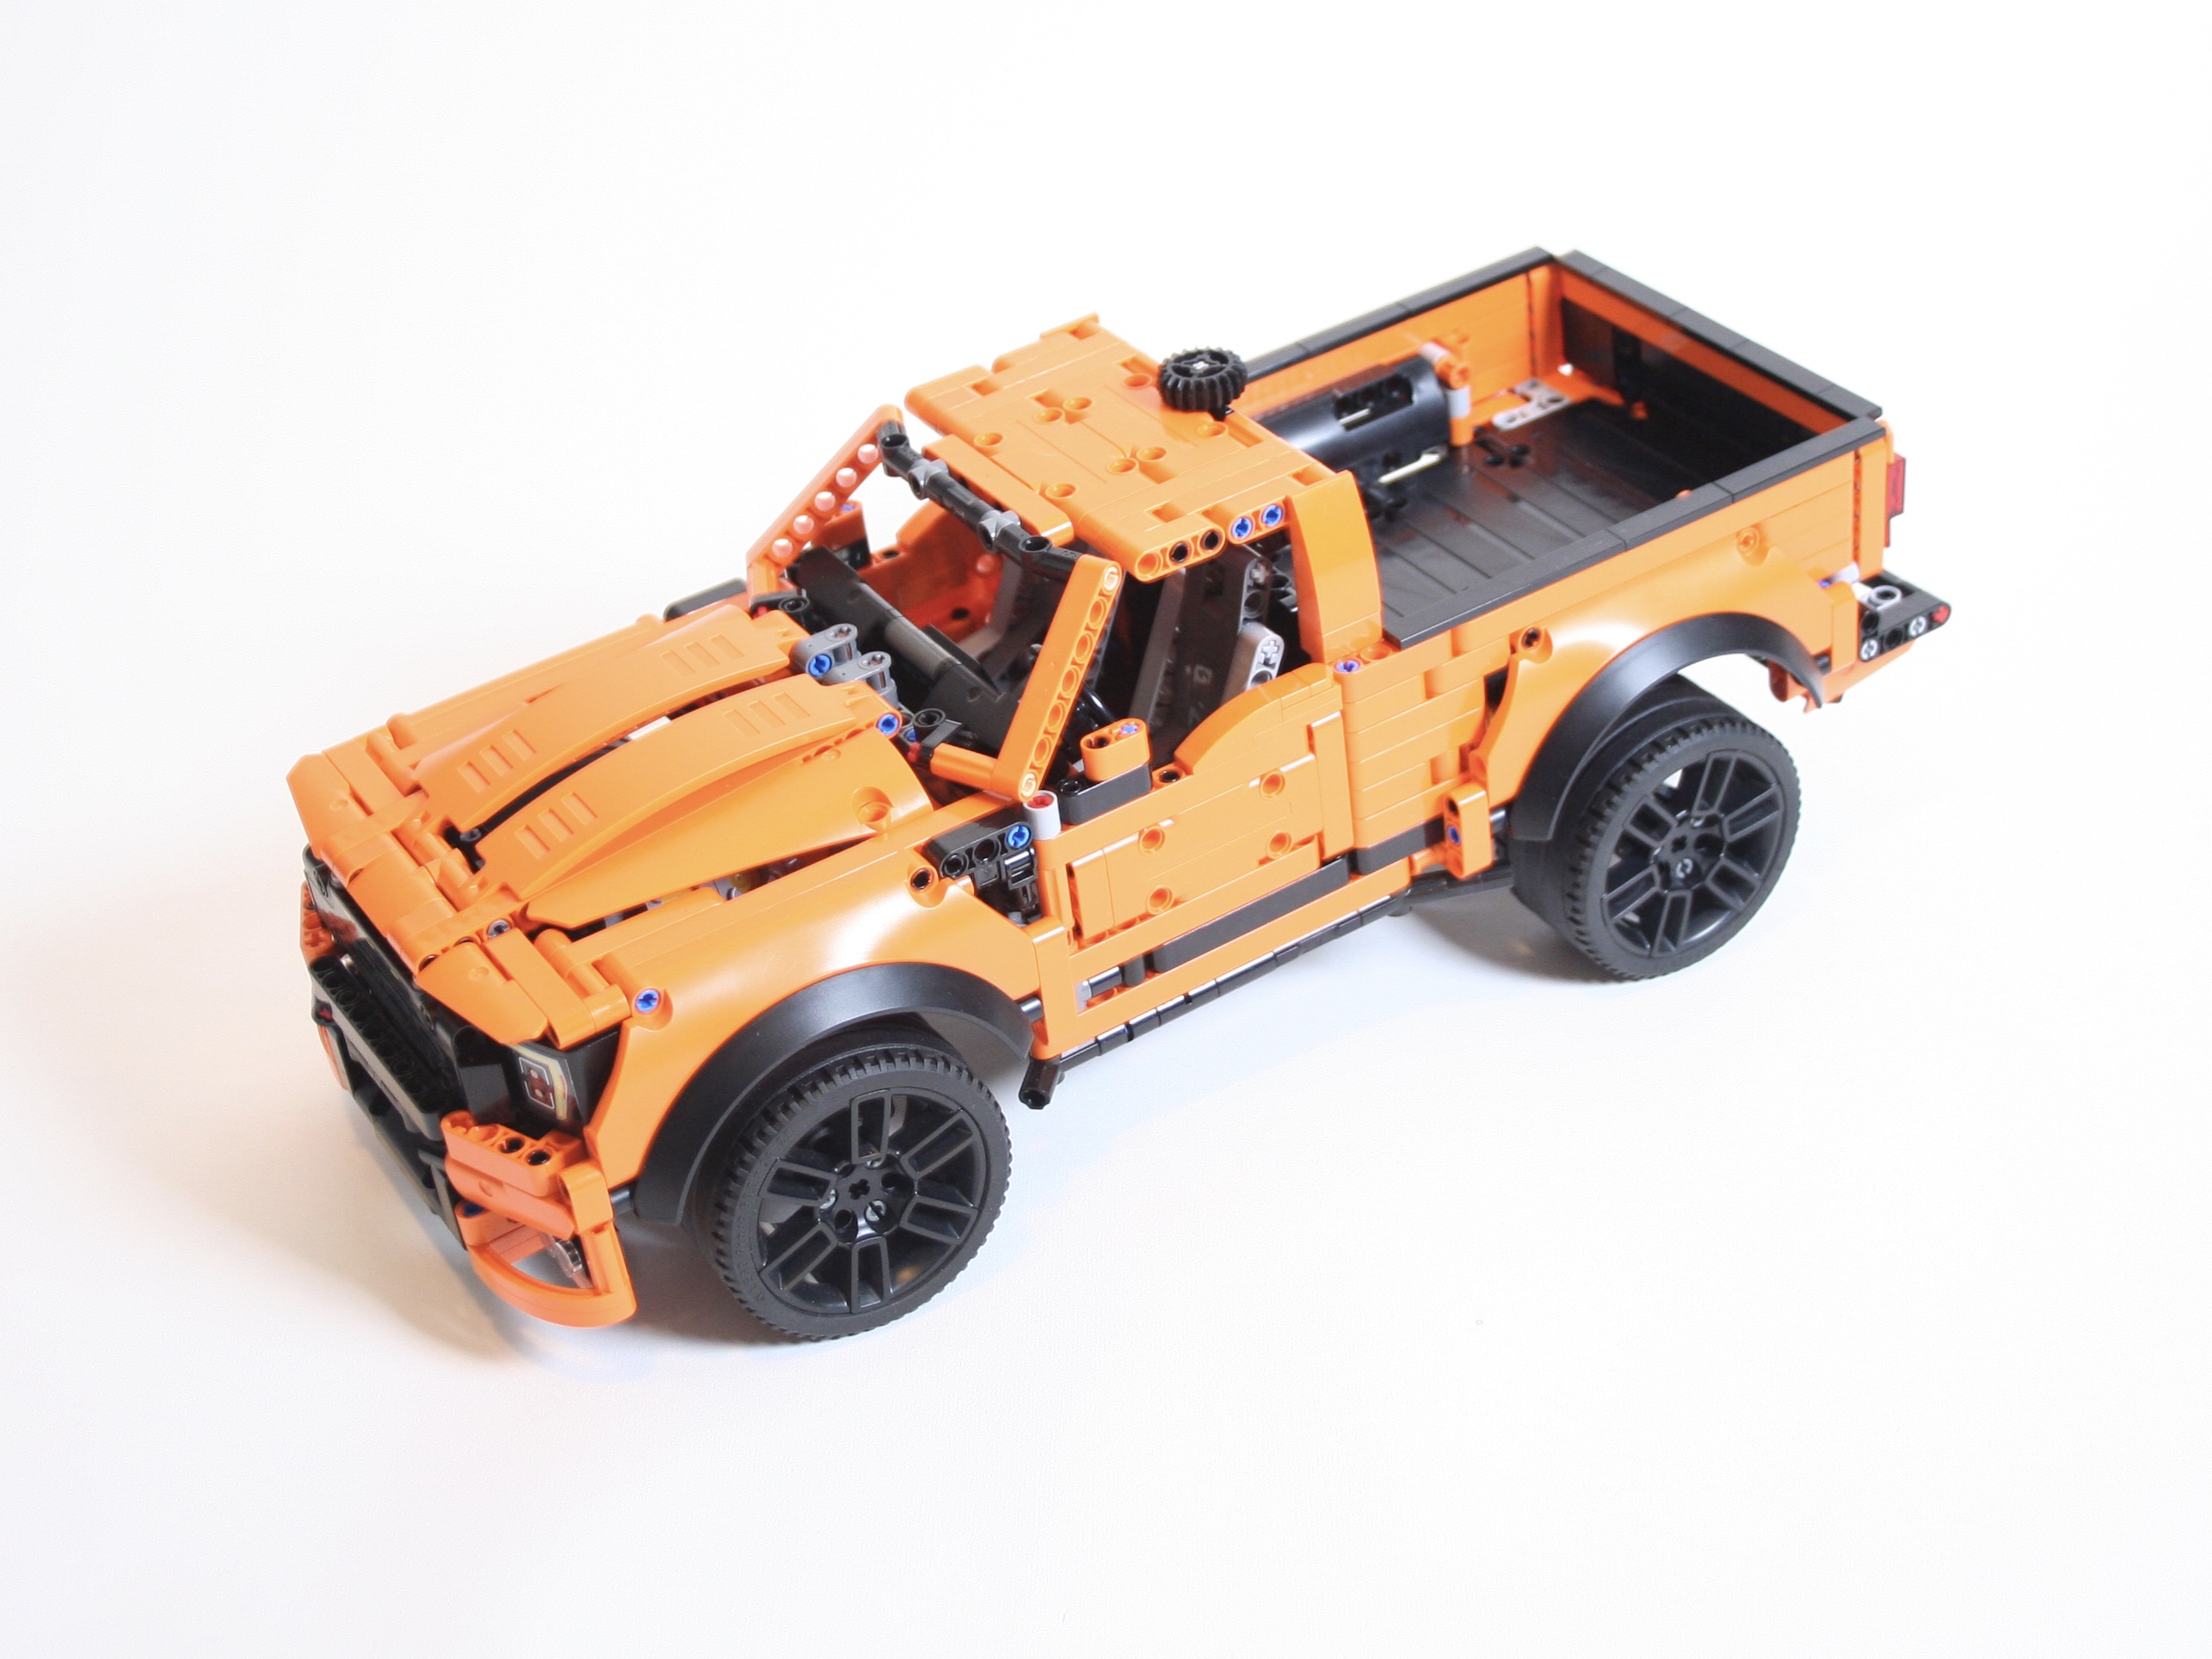
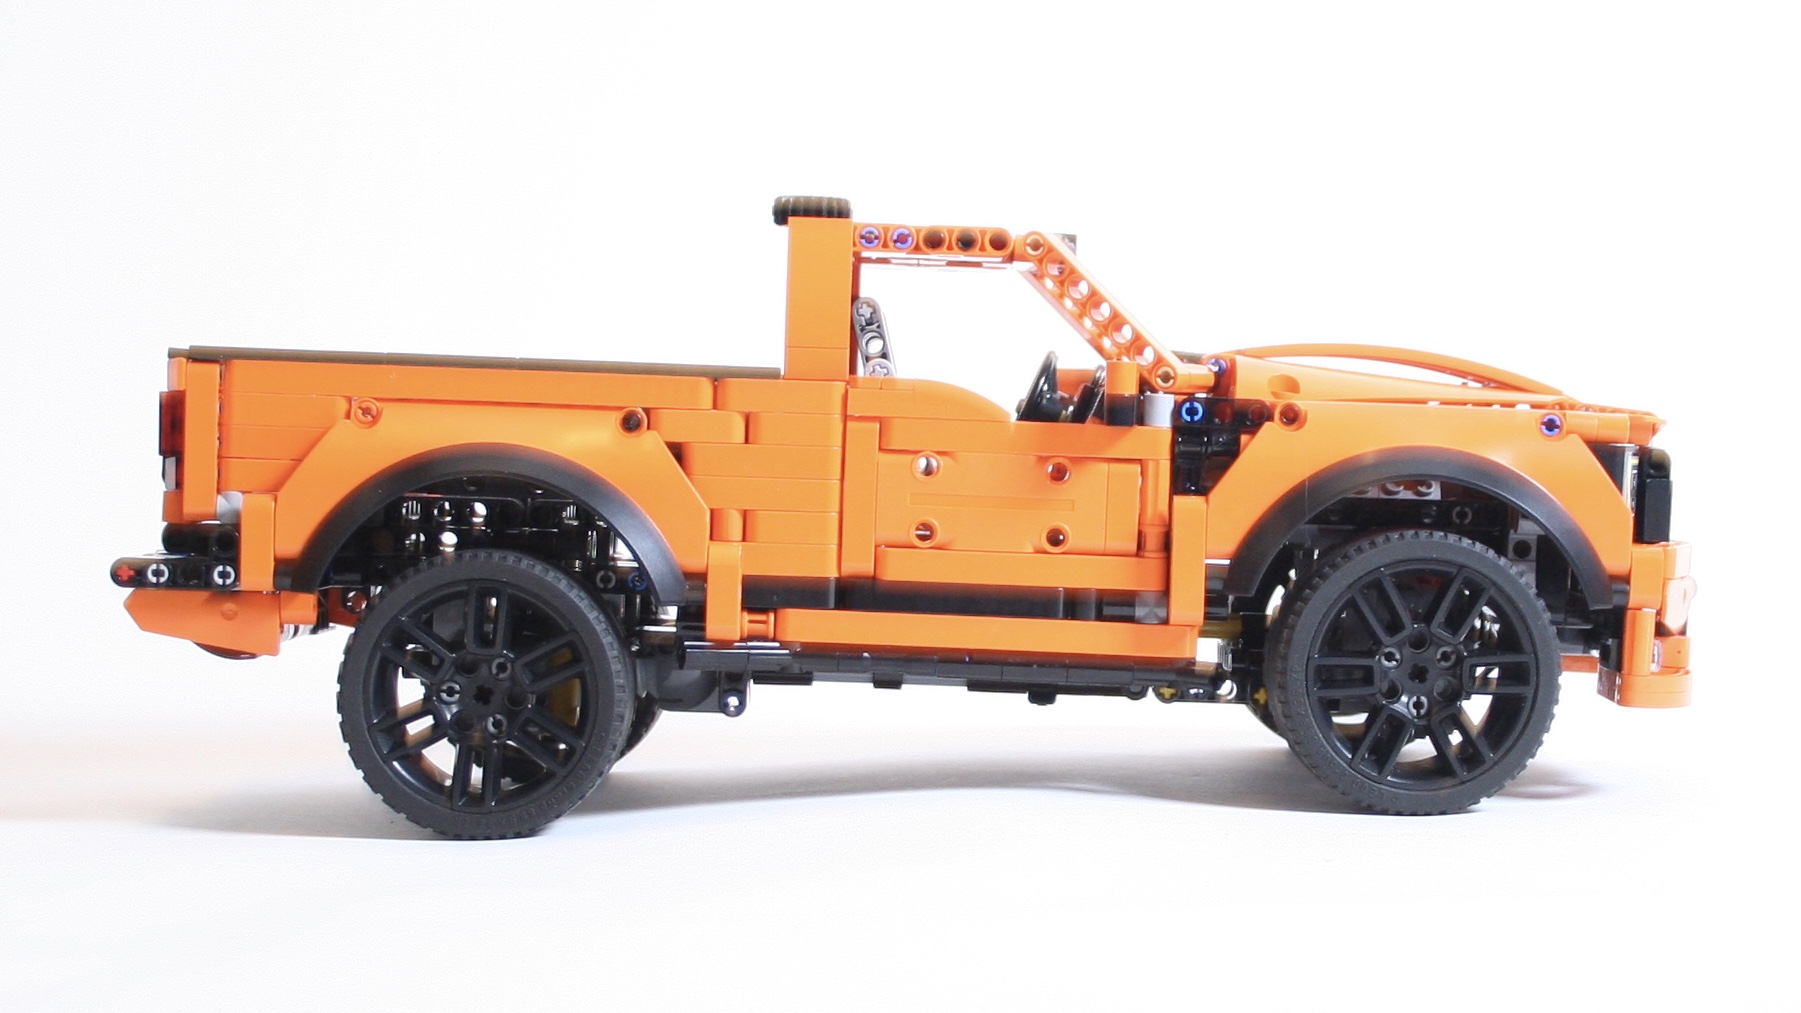
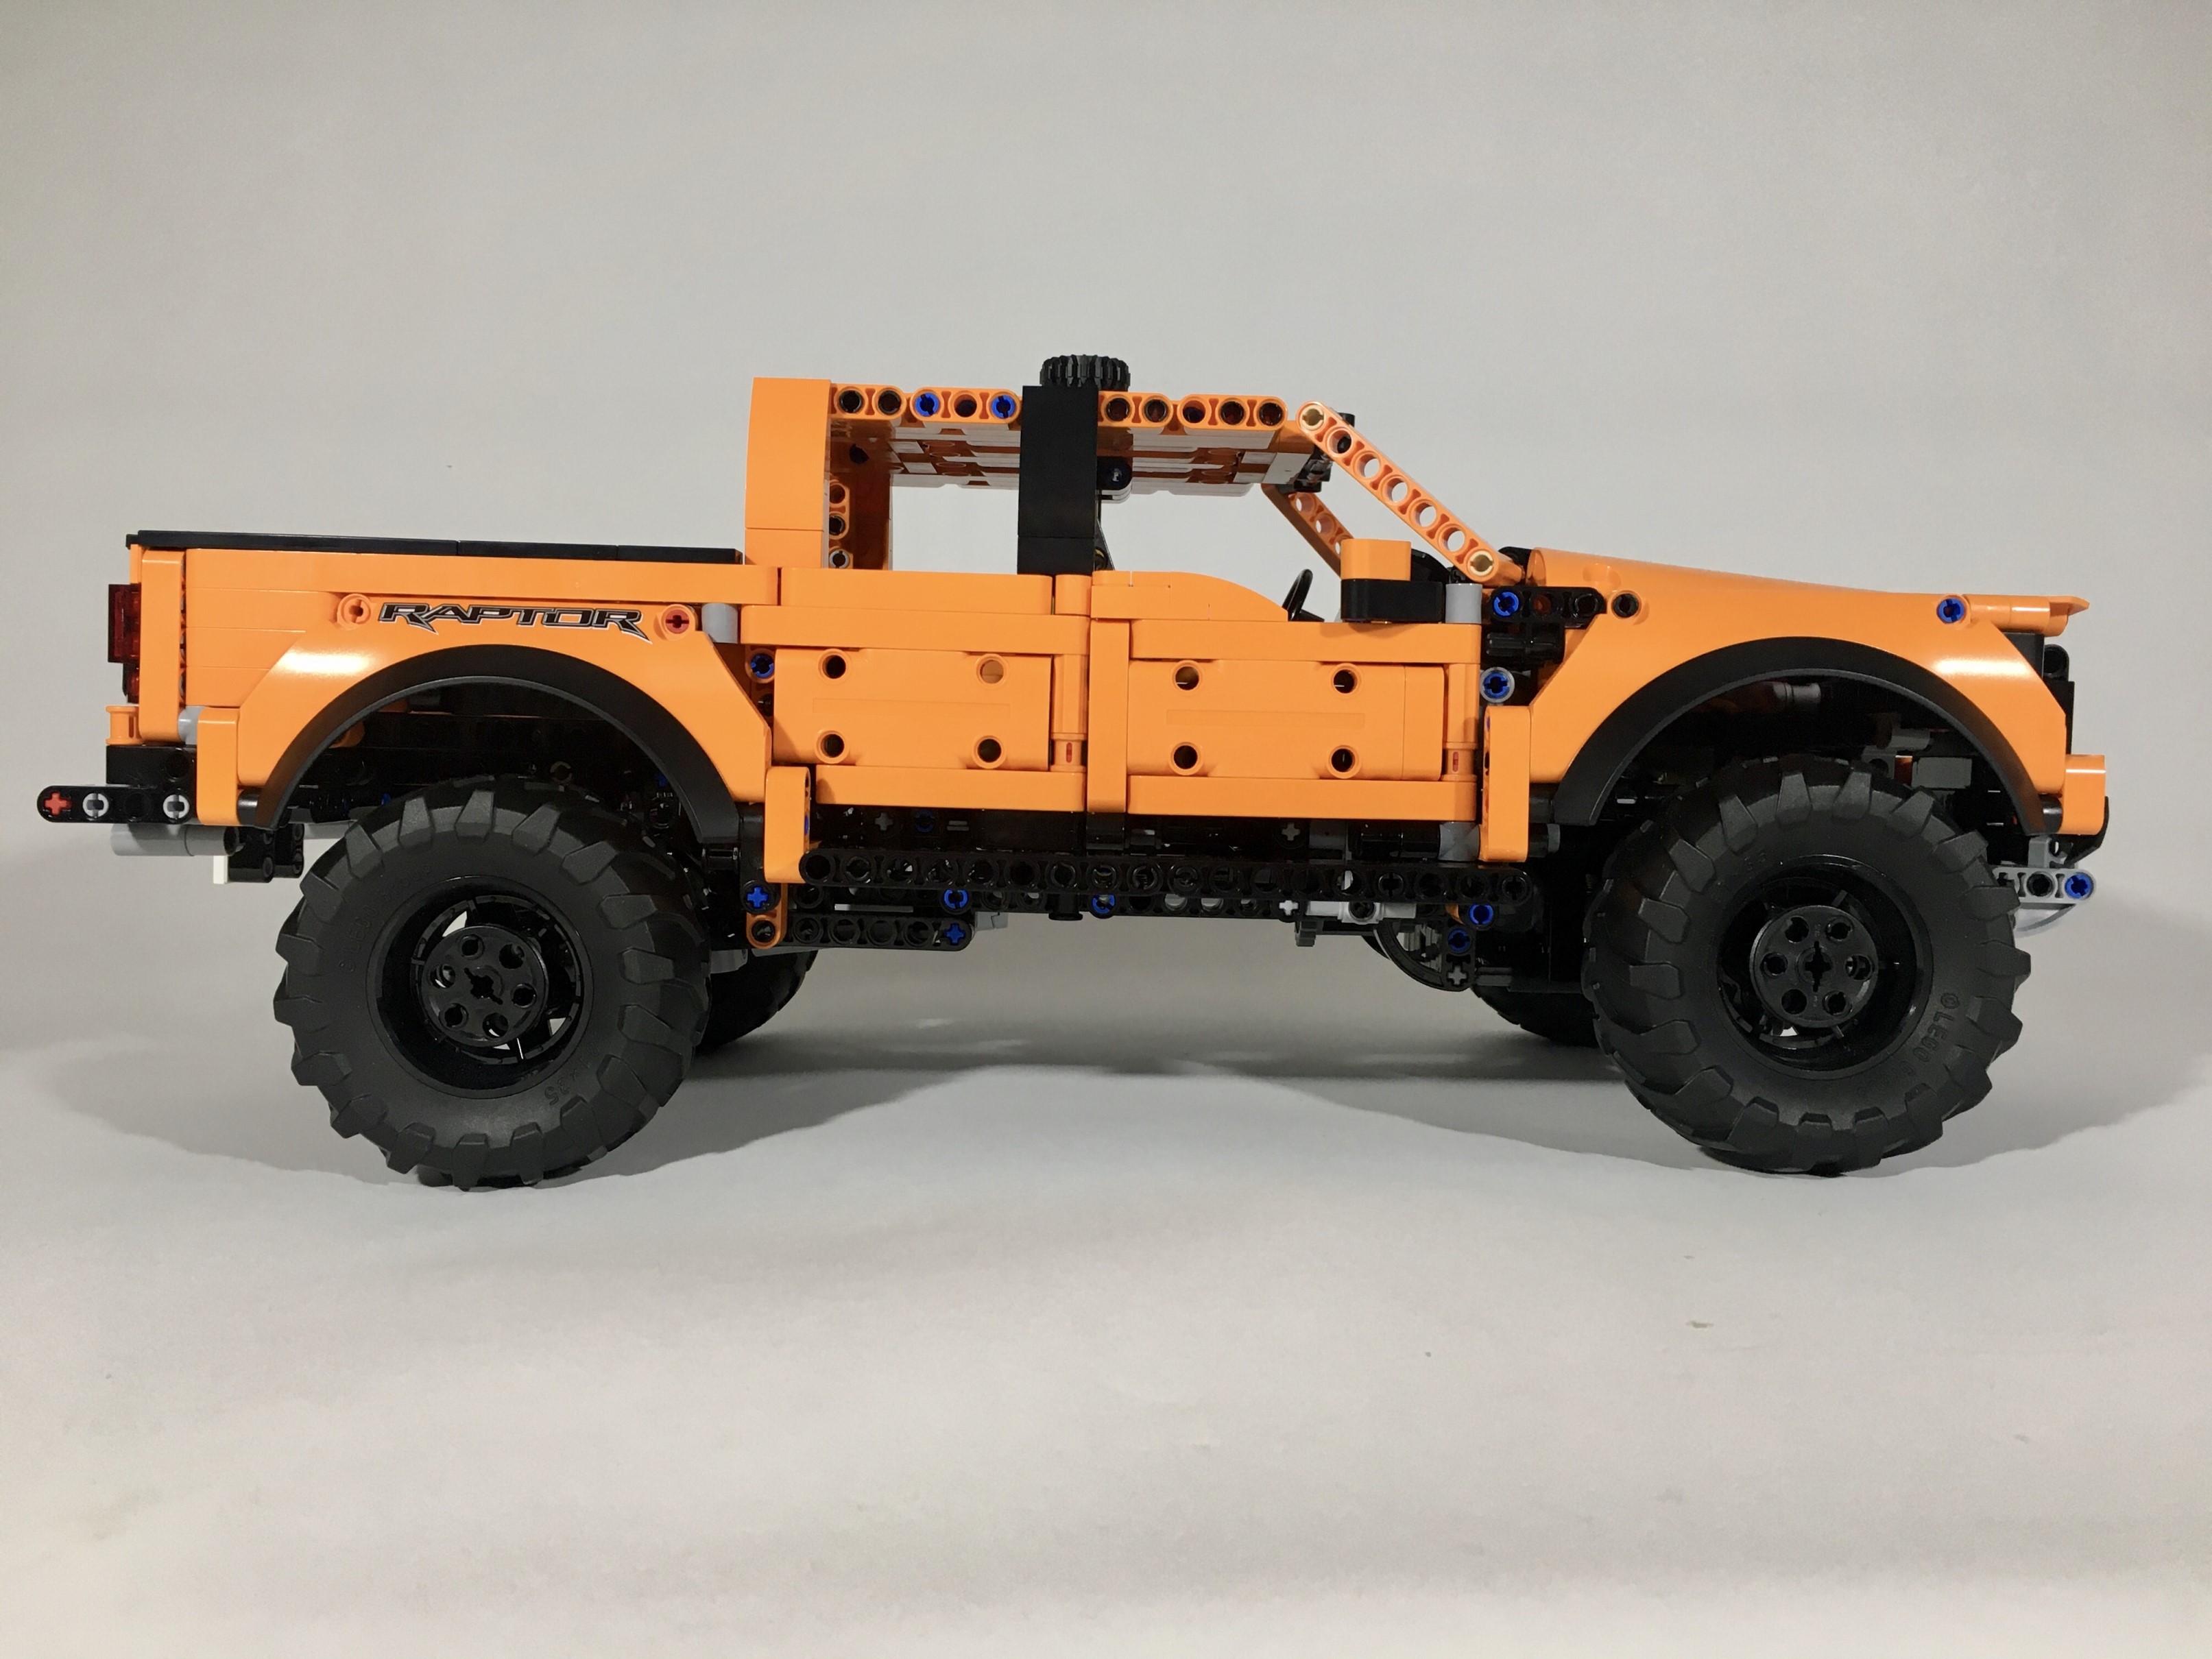
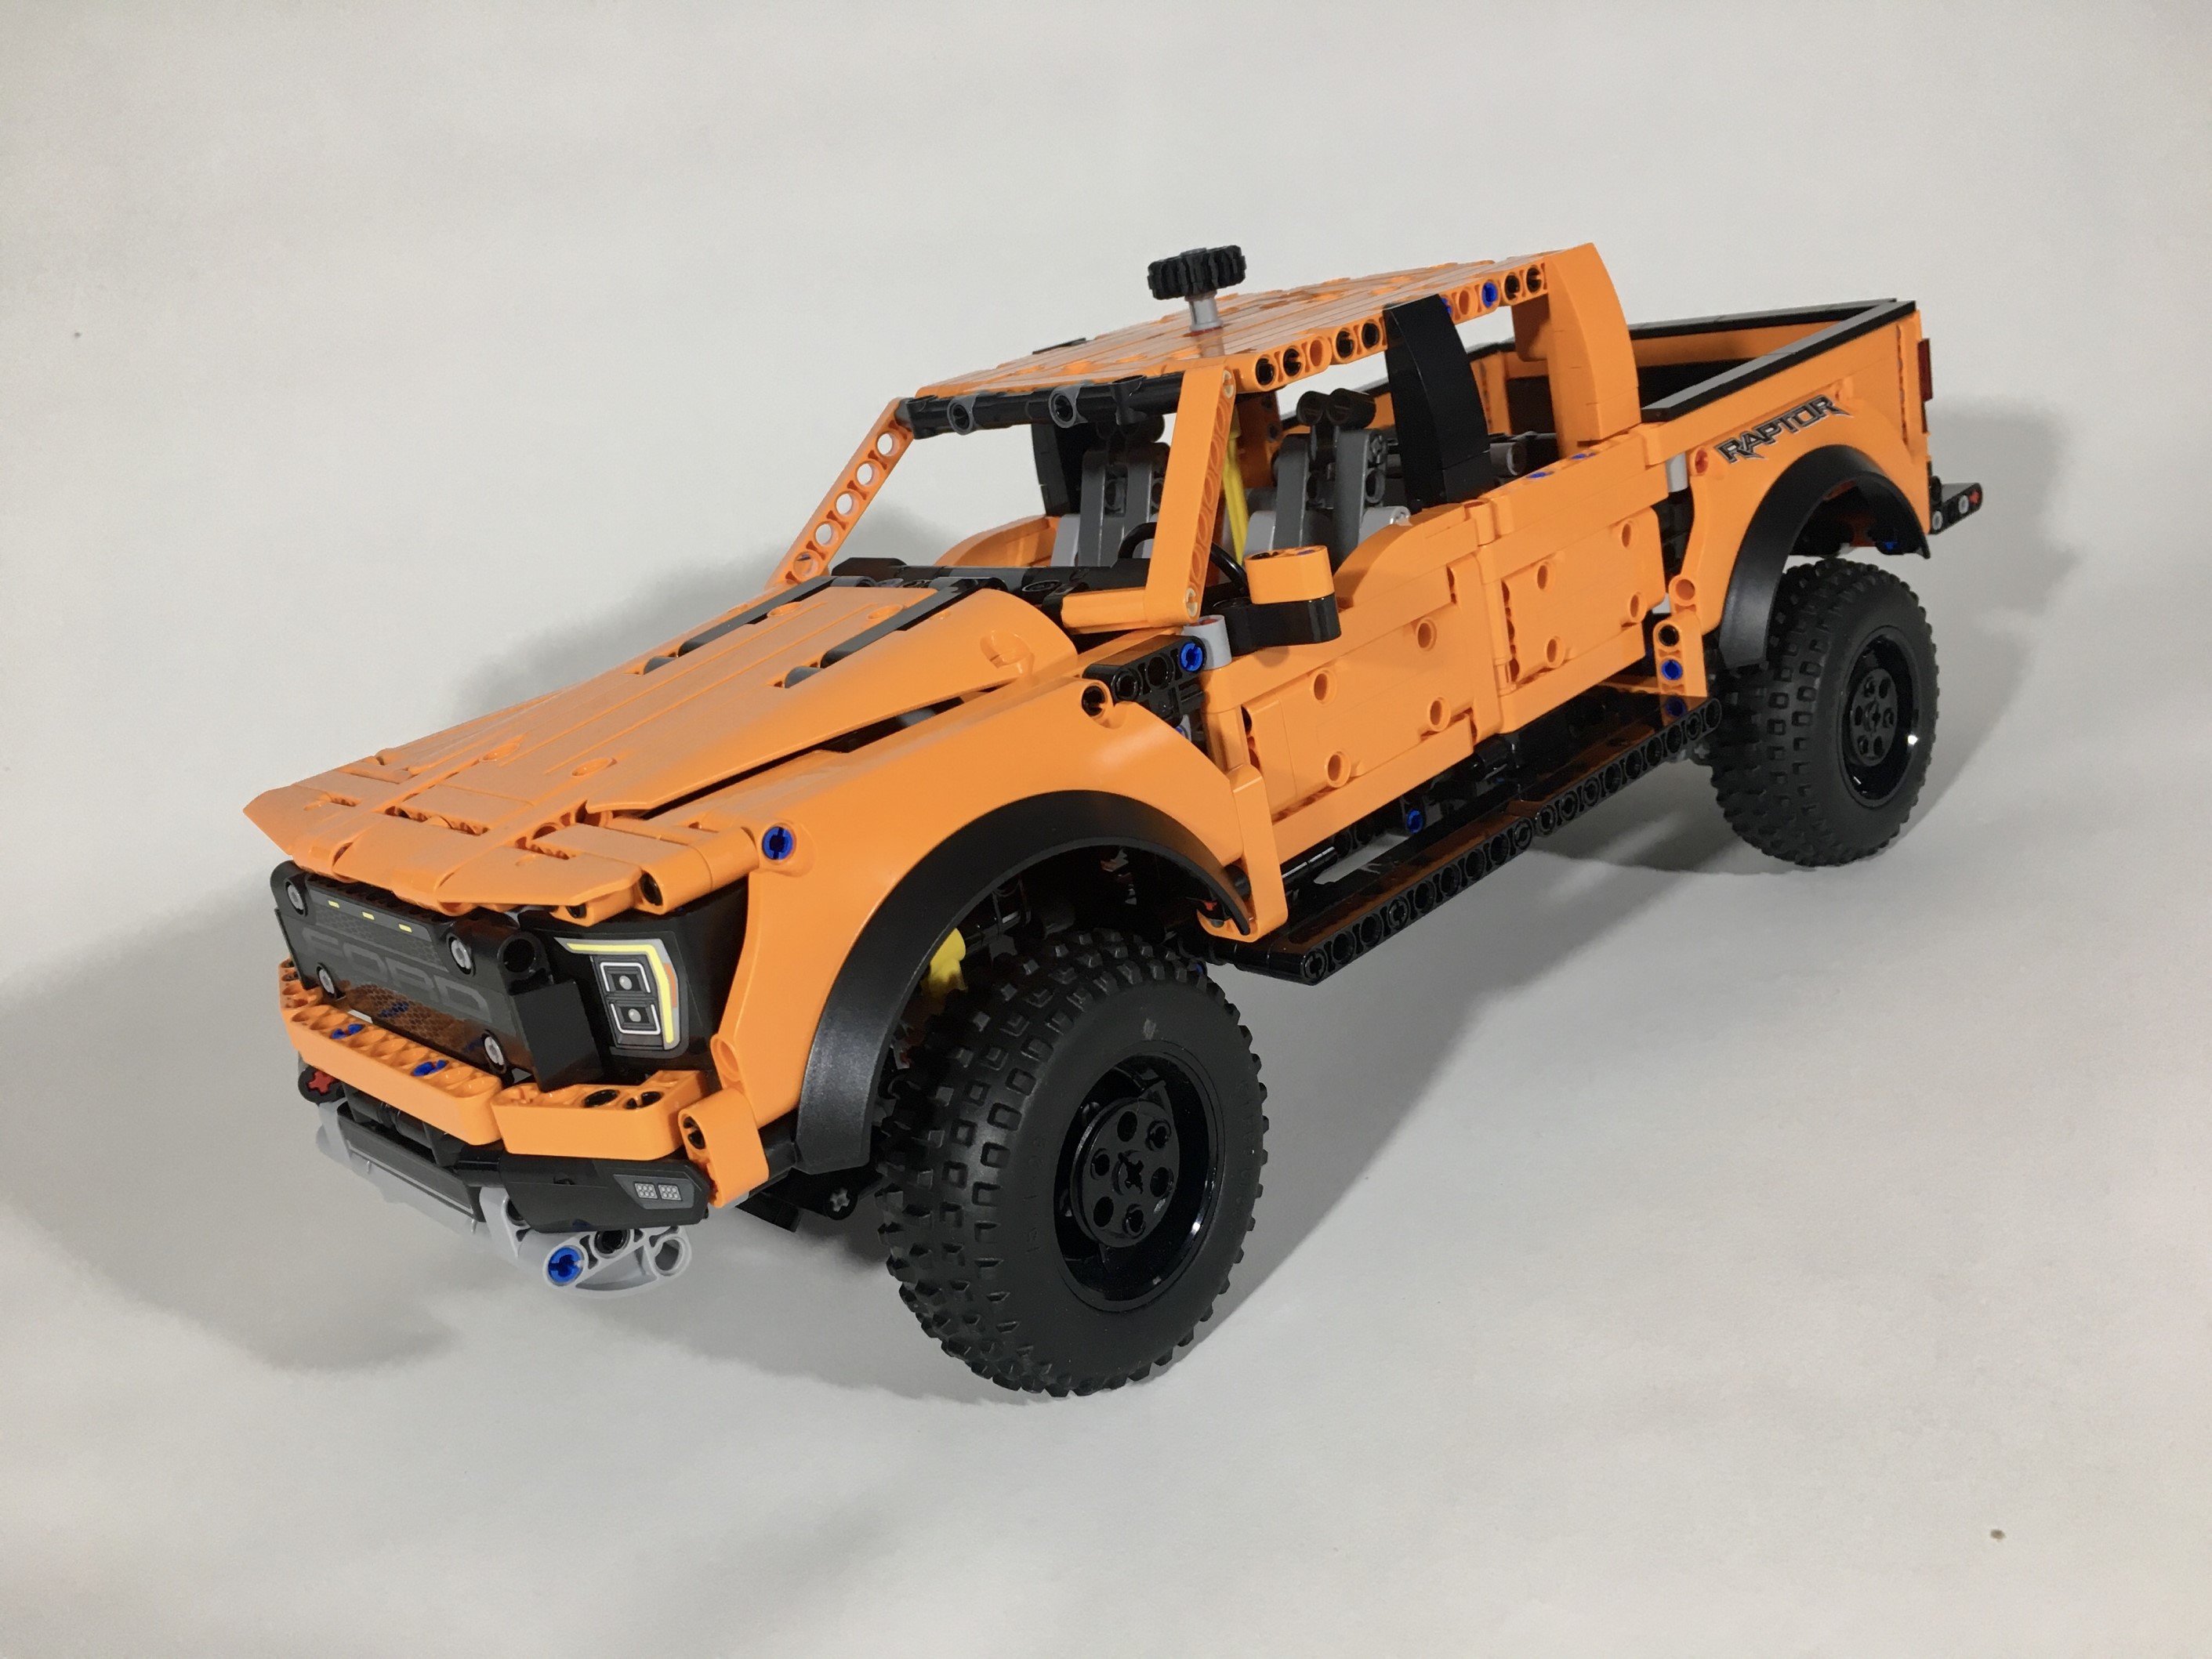
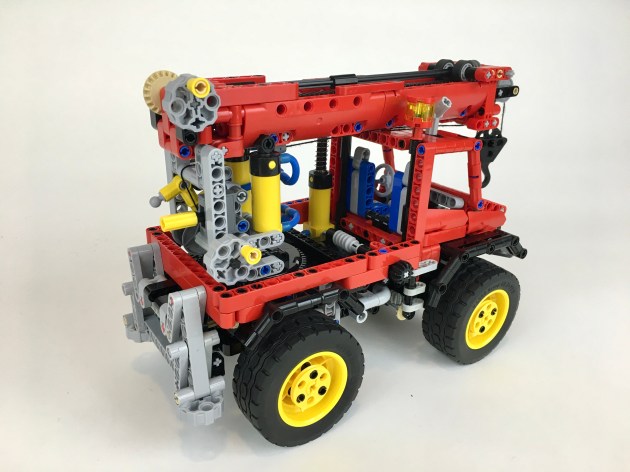
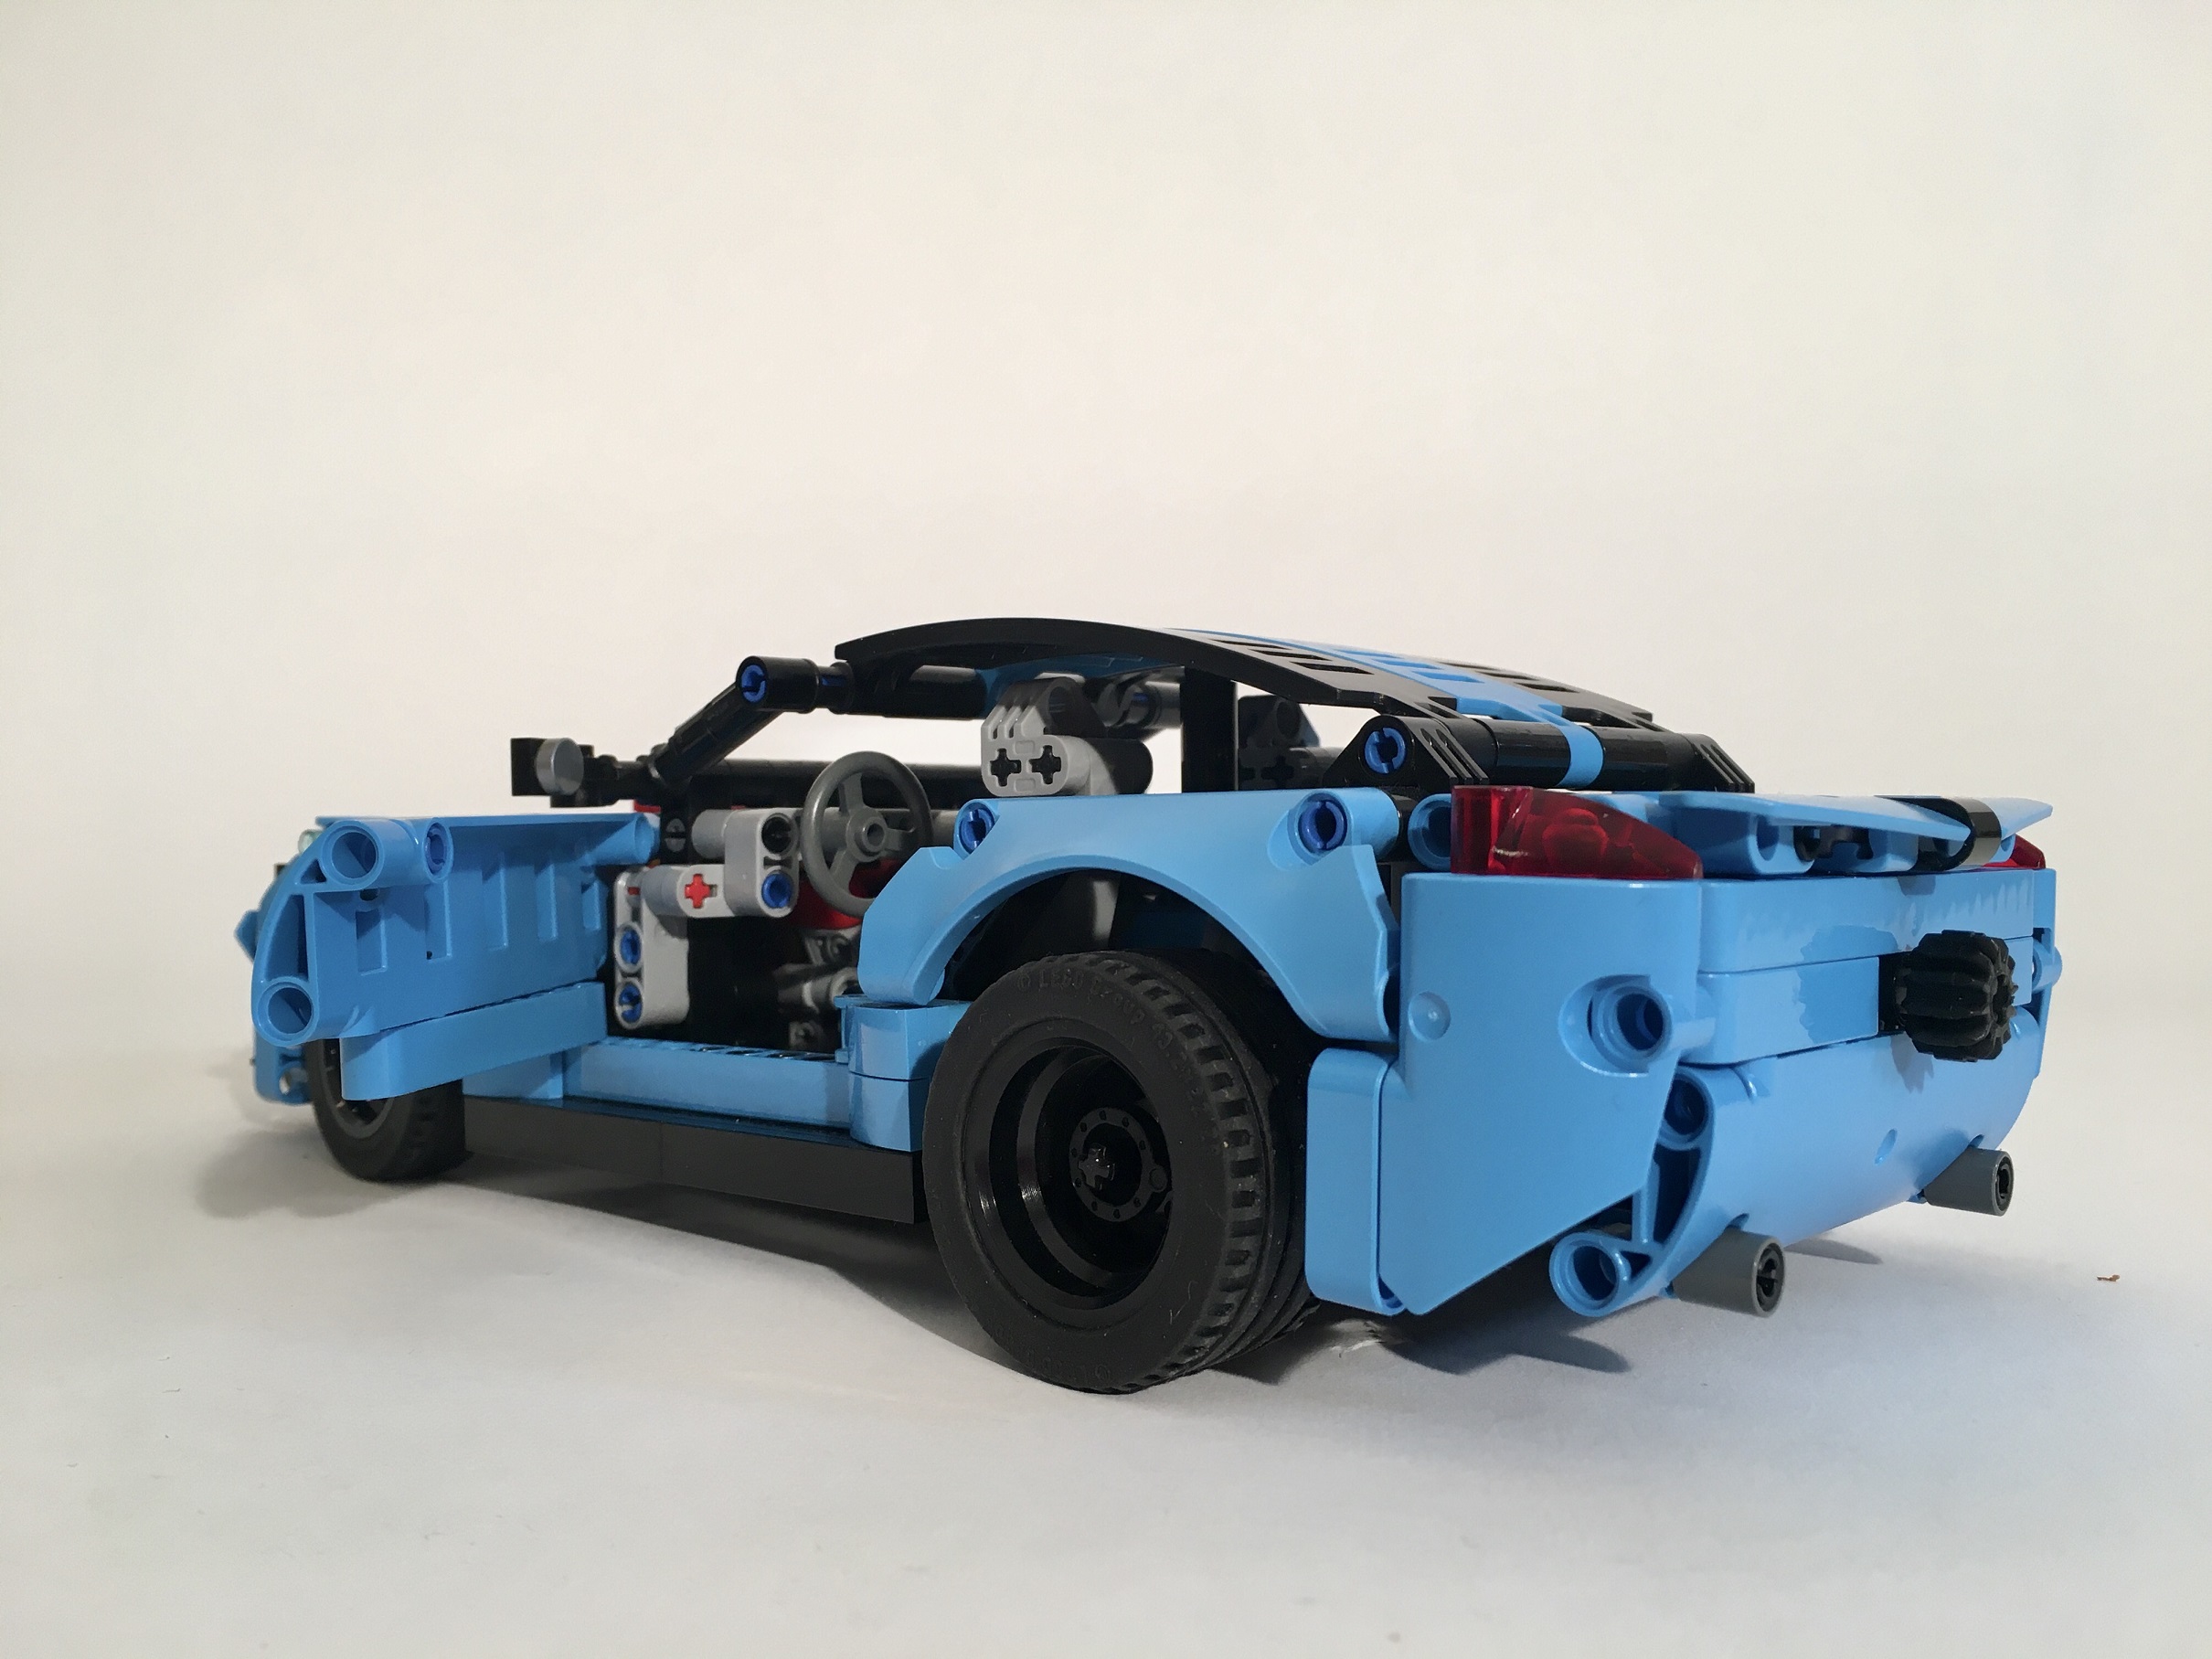
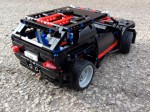
In addition to the 4×4 version of 42126, I was immediately interested to making a sport version of the pickup. The sport pickup is one of those silly American contributions to the automotive landscape, so naturally I had to turn the most American of vehicles, the F-150, into a sport truck.
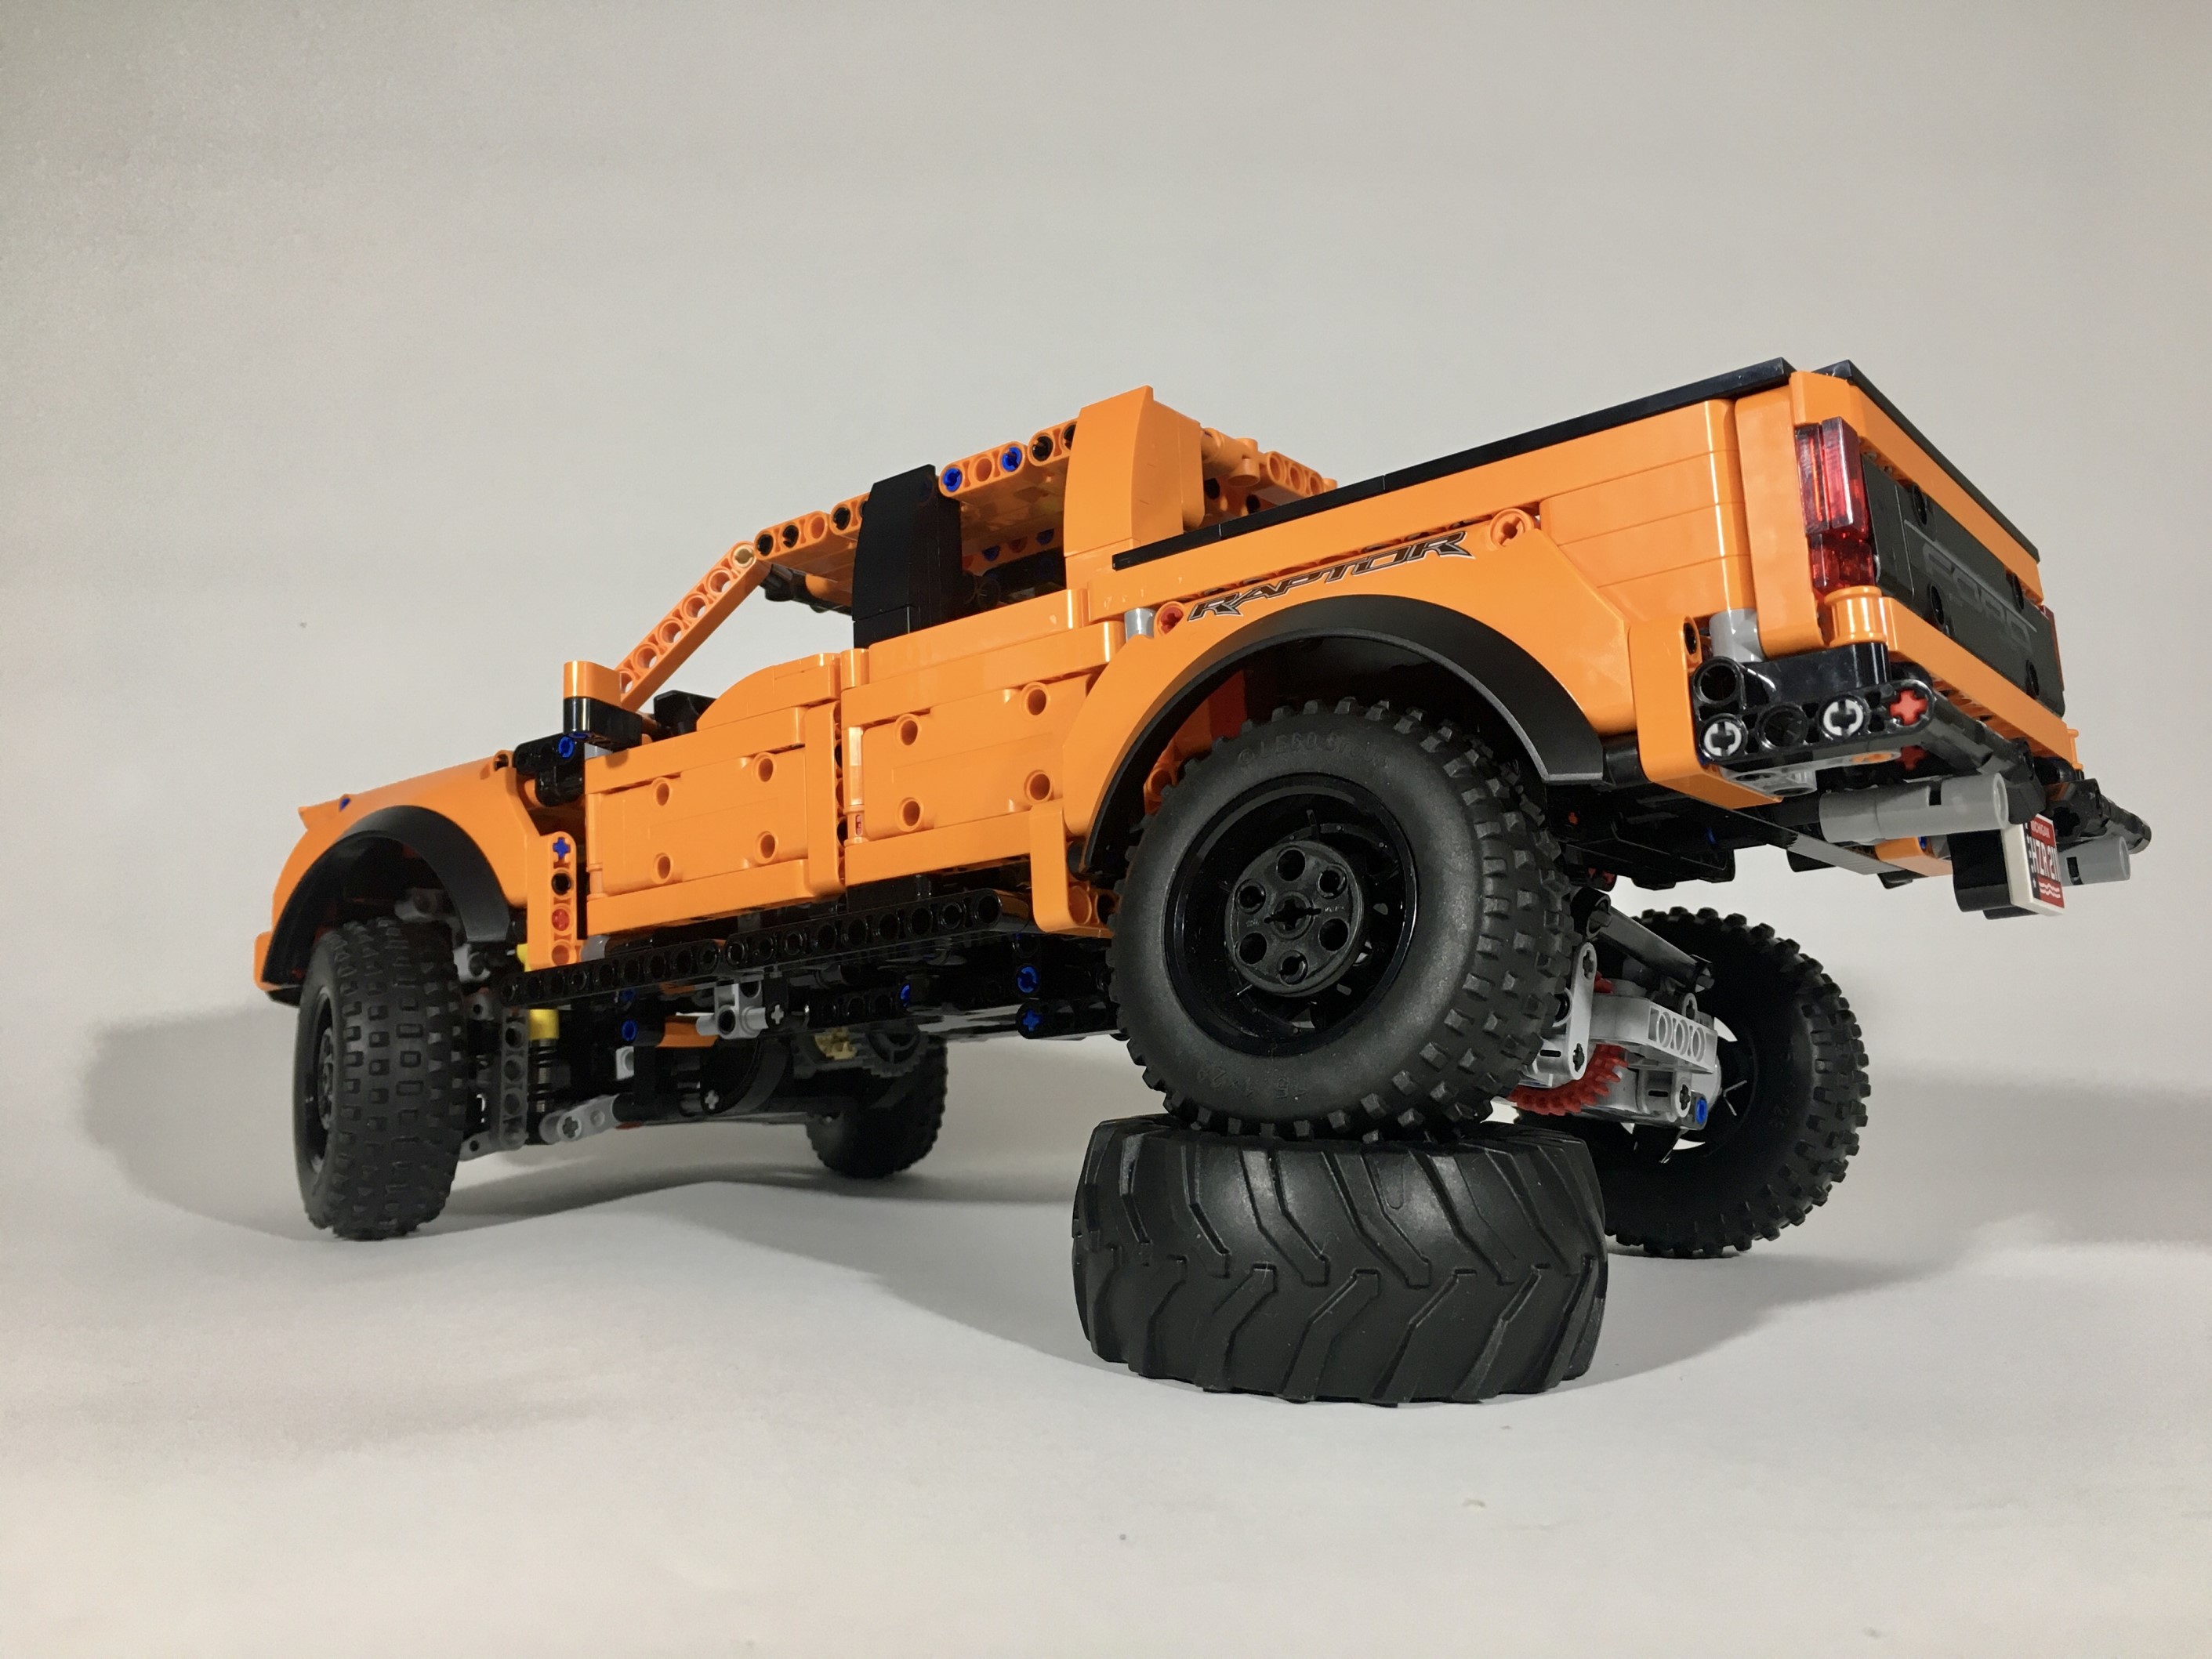
First, I had to figure out how to set the ride height. I decided on the wheels for the truck right away, so it was clear the truck had to come down a little bit. It was clear this would be a significant modification. Since I was already changing the whole frame for the ride height drop, I decided early that i would change the rear suspension to an independent design.
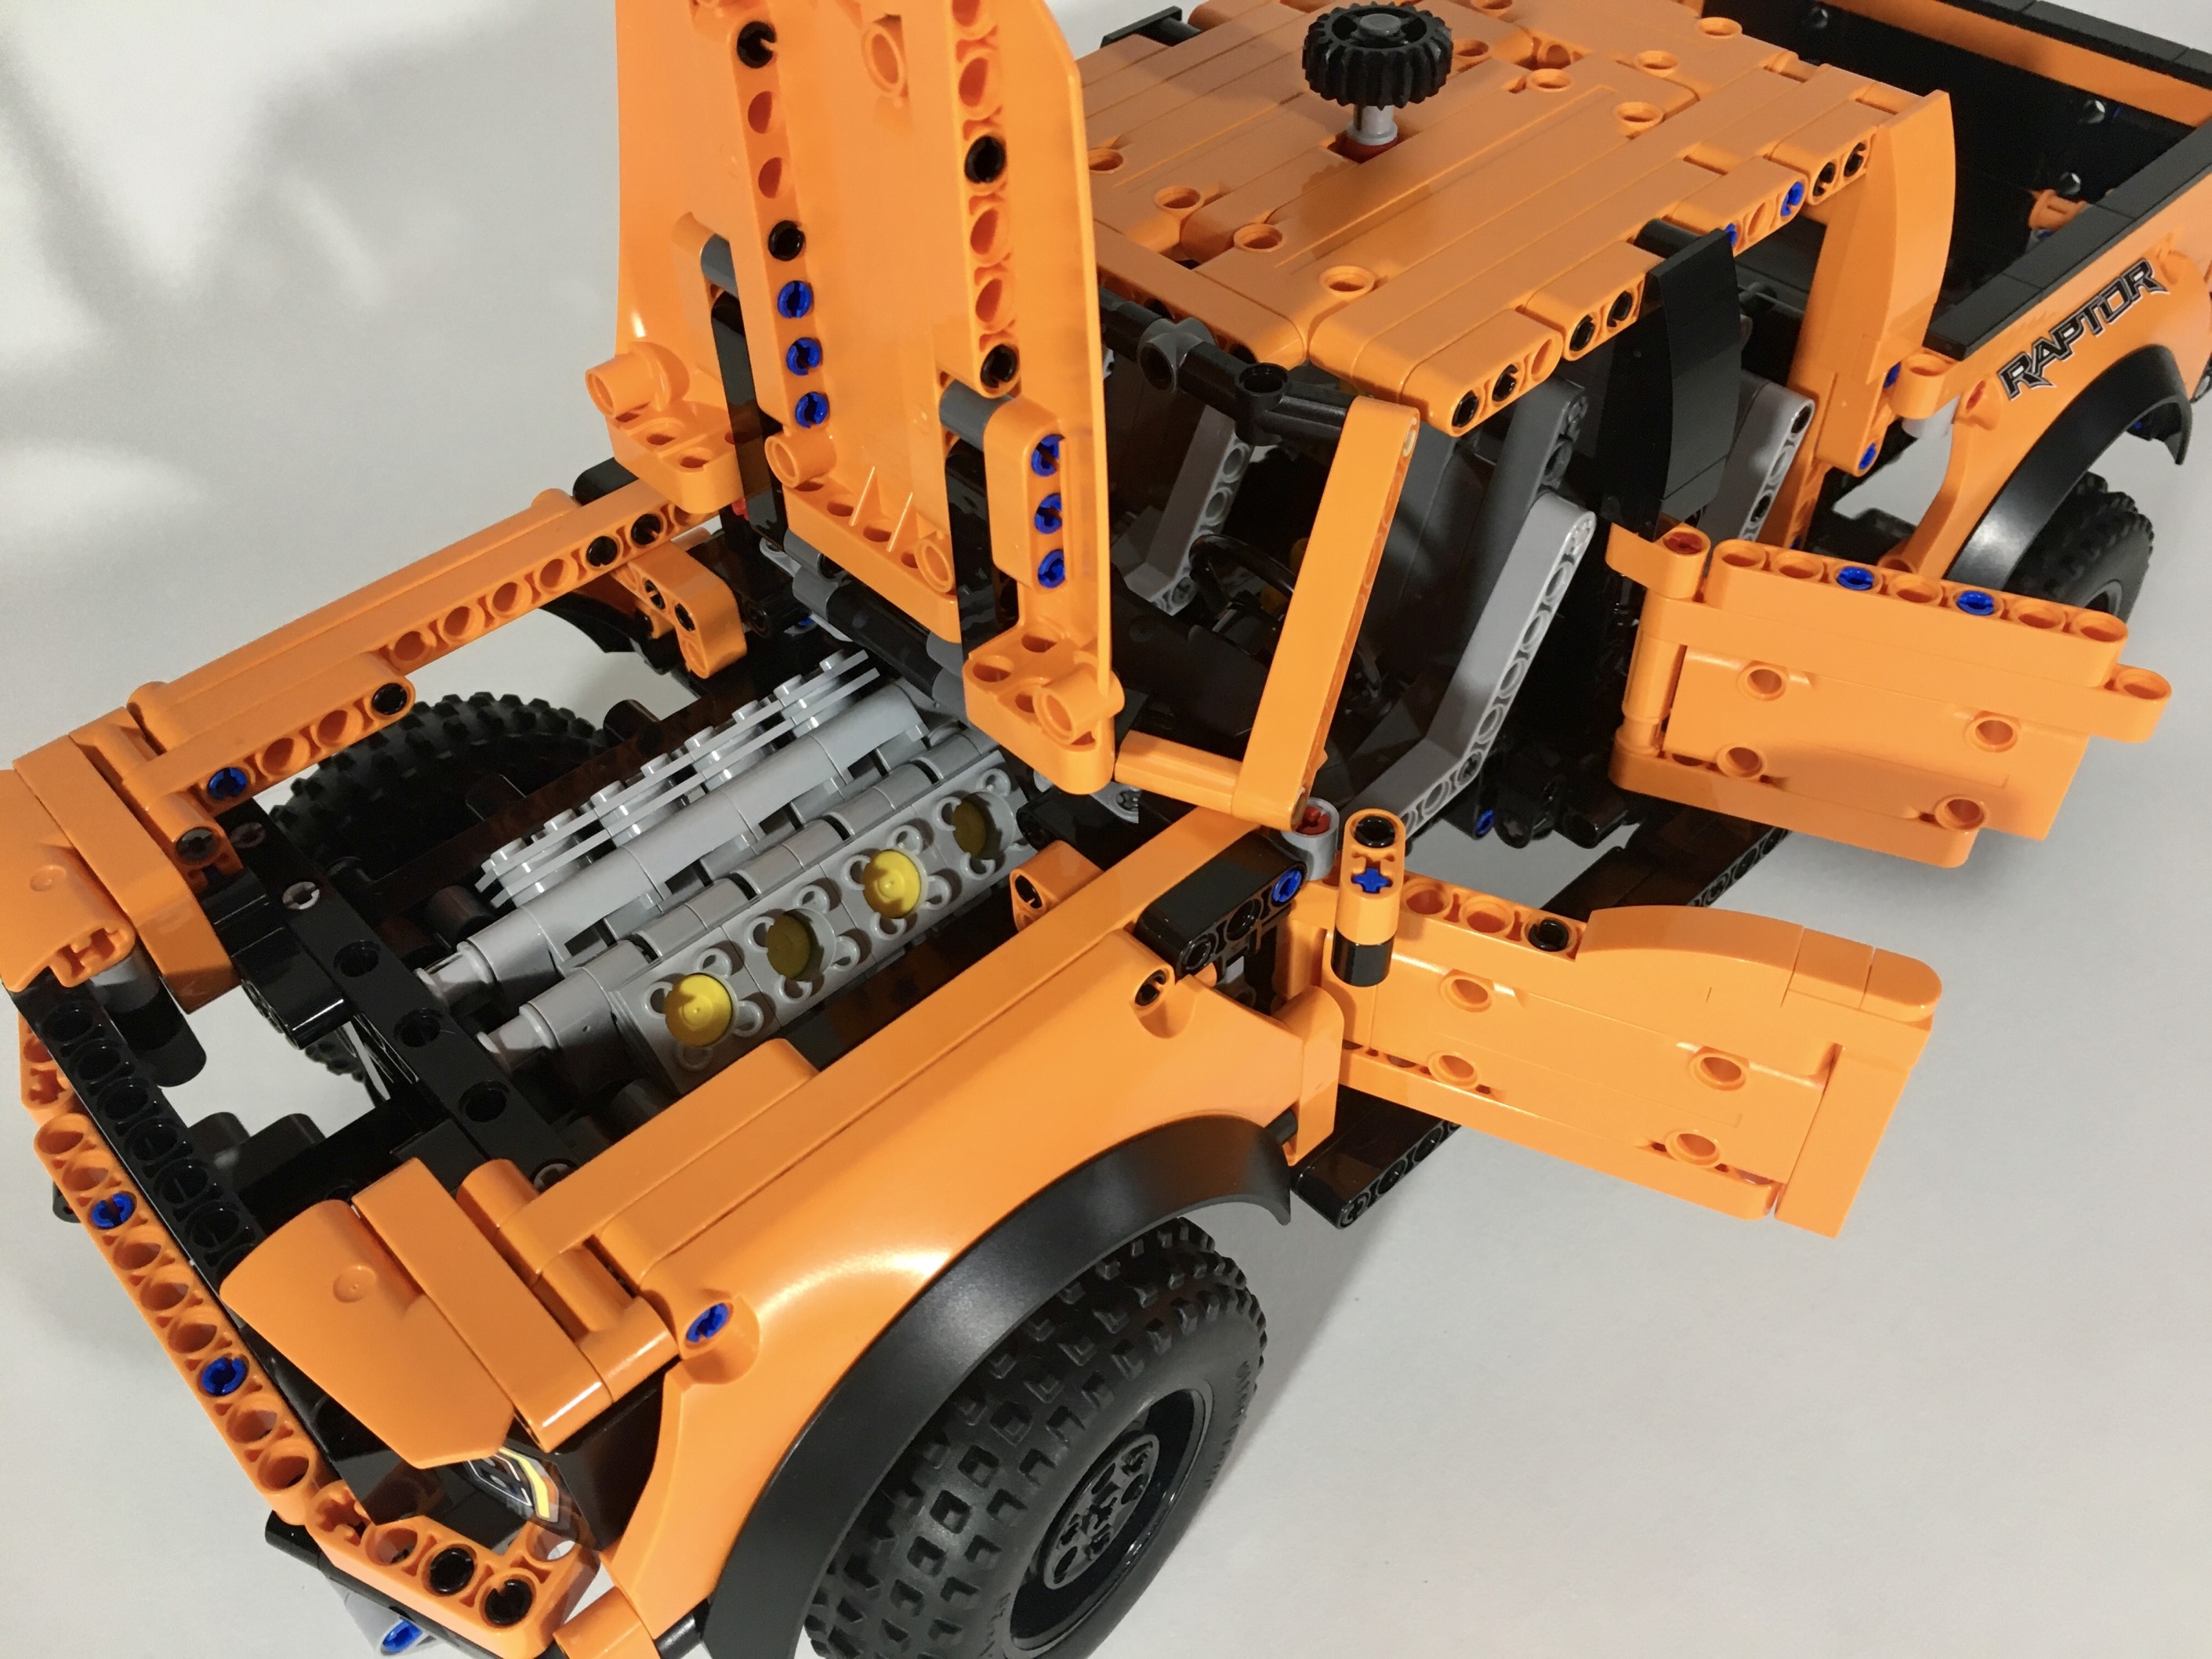
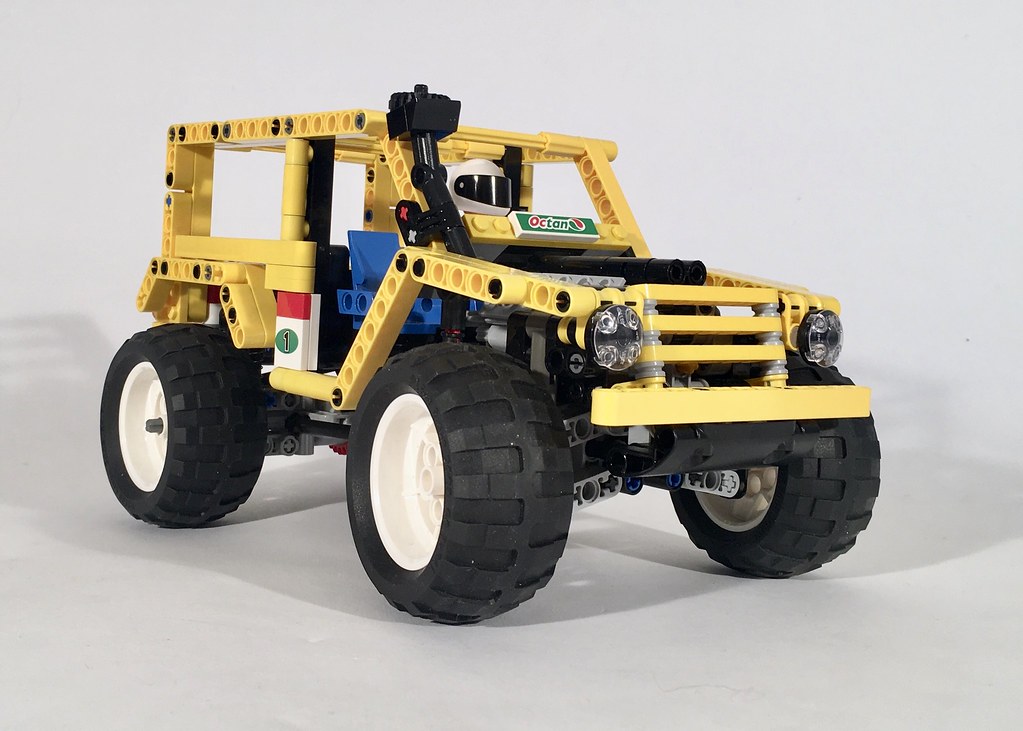
Second, I had to decide on what engine I would use. It was clear at this point, I would have a two door and four door version so I decided a V8 for one, and a V10 for the other. 42126 has a lot of space under the hood, so both would fit without a lot of changes. I added a chain driven supercharger for the V8 to give it a little different look.
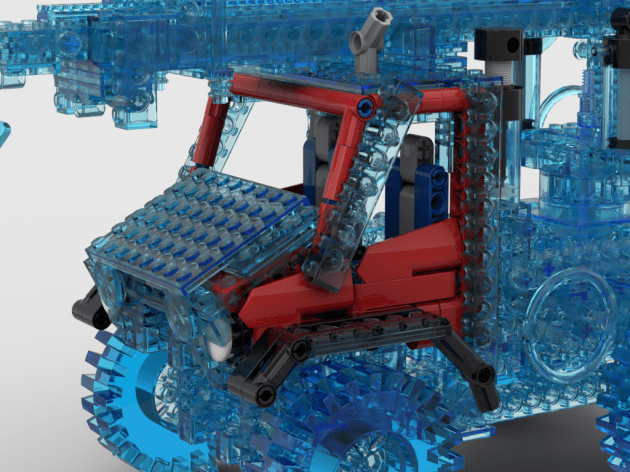
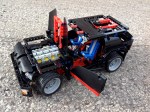
LEGO 42126 SVT8 Open
Finally, I wanted to keep the bodywork similar to 42126, but with a sporty look. I designed a new front bumper that is lower, and looks less rugged. I removed the side steps from 42126, and replaced with some simple panels. A new hood was also designed.
Video for the SVT10.
Video for the SVT8.
Functionally, the truck worked better than the Raptor. The suspension worked very well, thought the rear ride height was a little high. The steering worked well, and the front wheels tracked better than on 42126. I liked the look a little better as well, as the wheels and tires make 42126 look out of scale with itself. I pleased with how the updates turned out, so we’ll see if I come up with another MOD to do at some point.
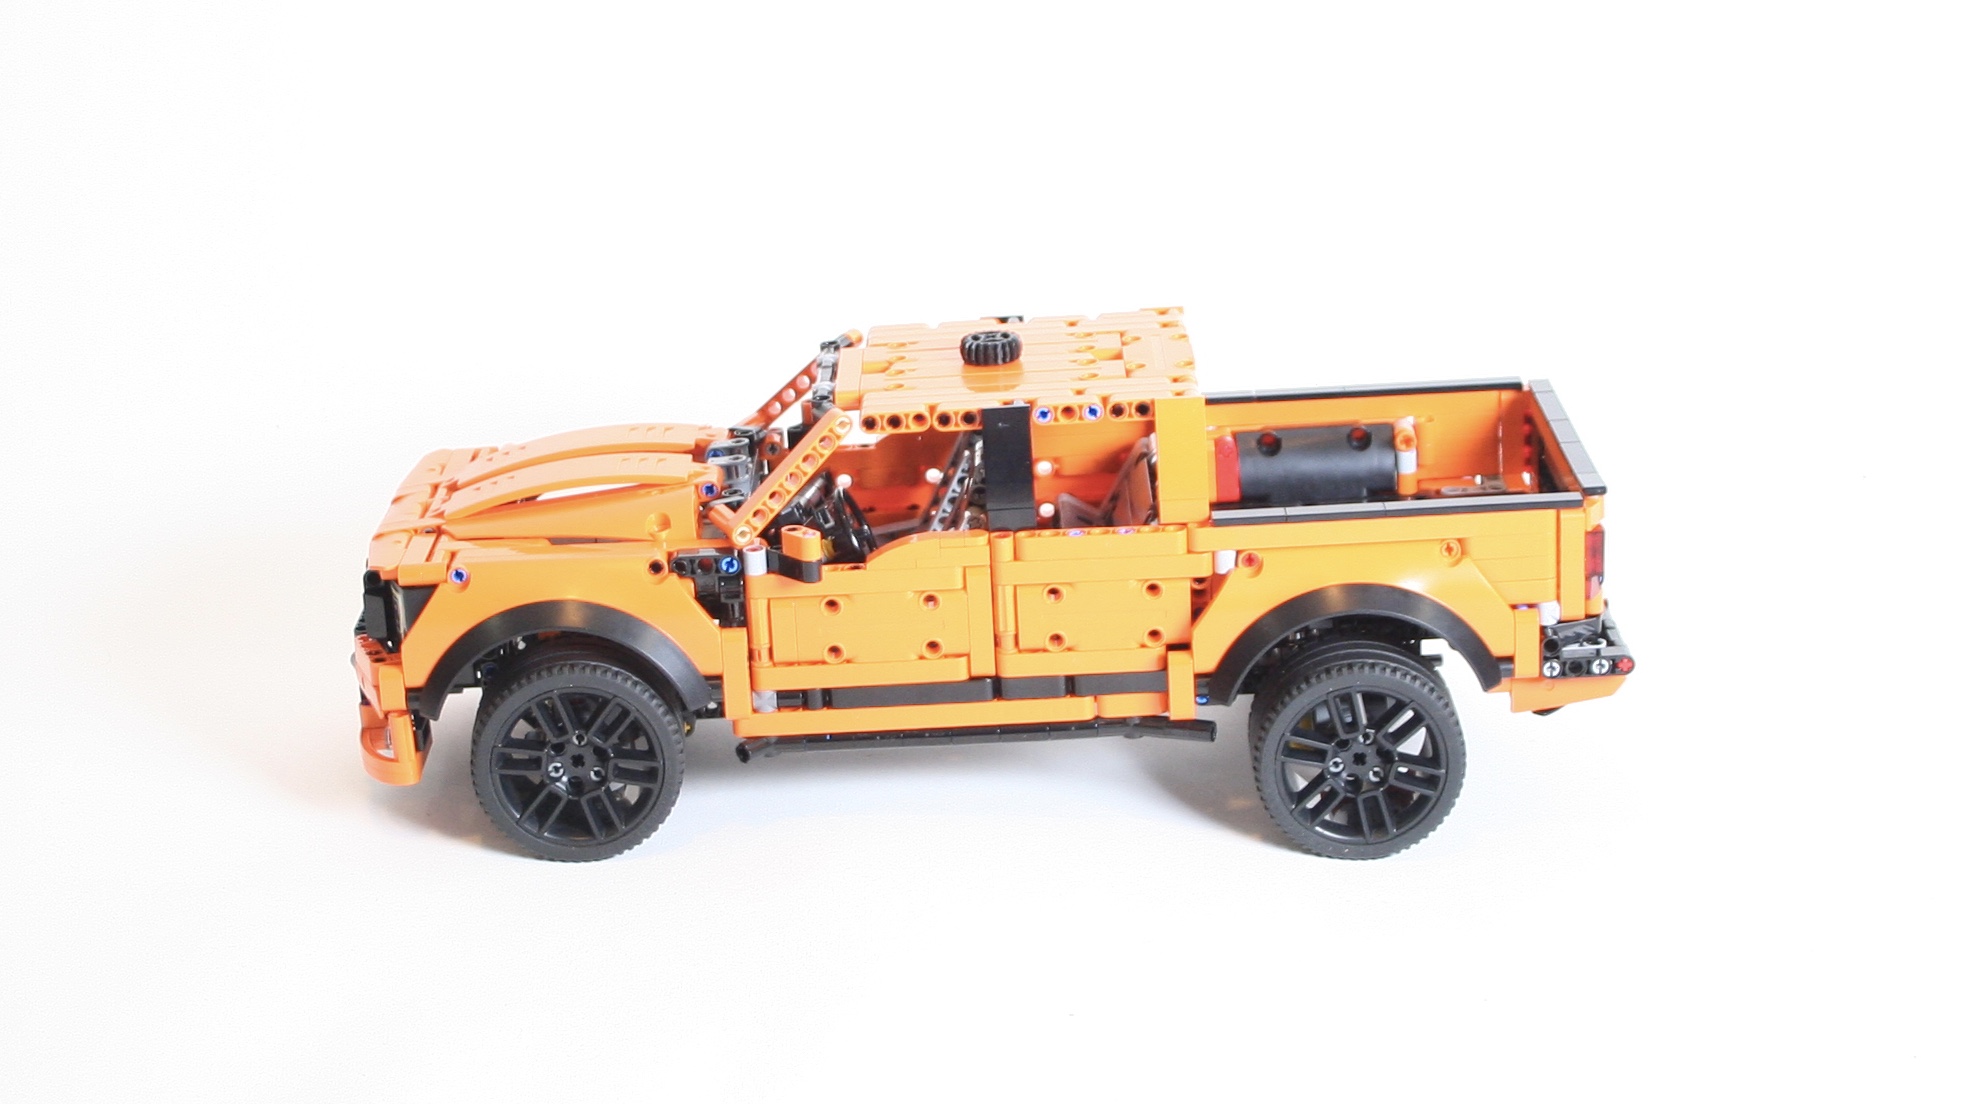
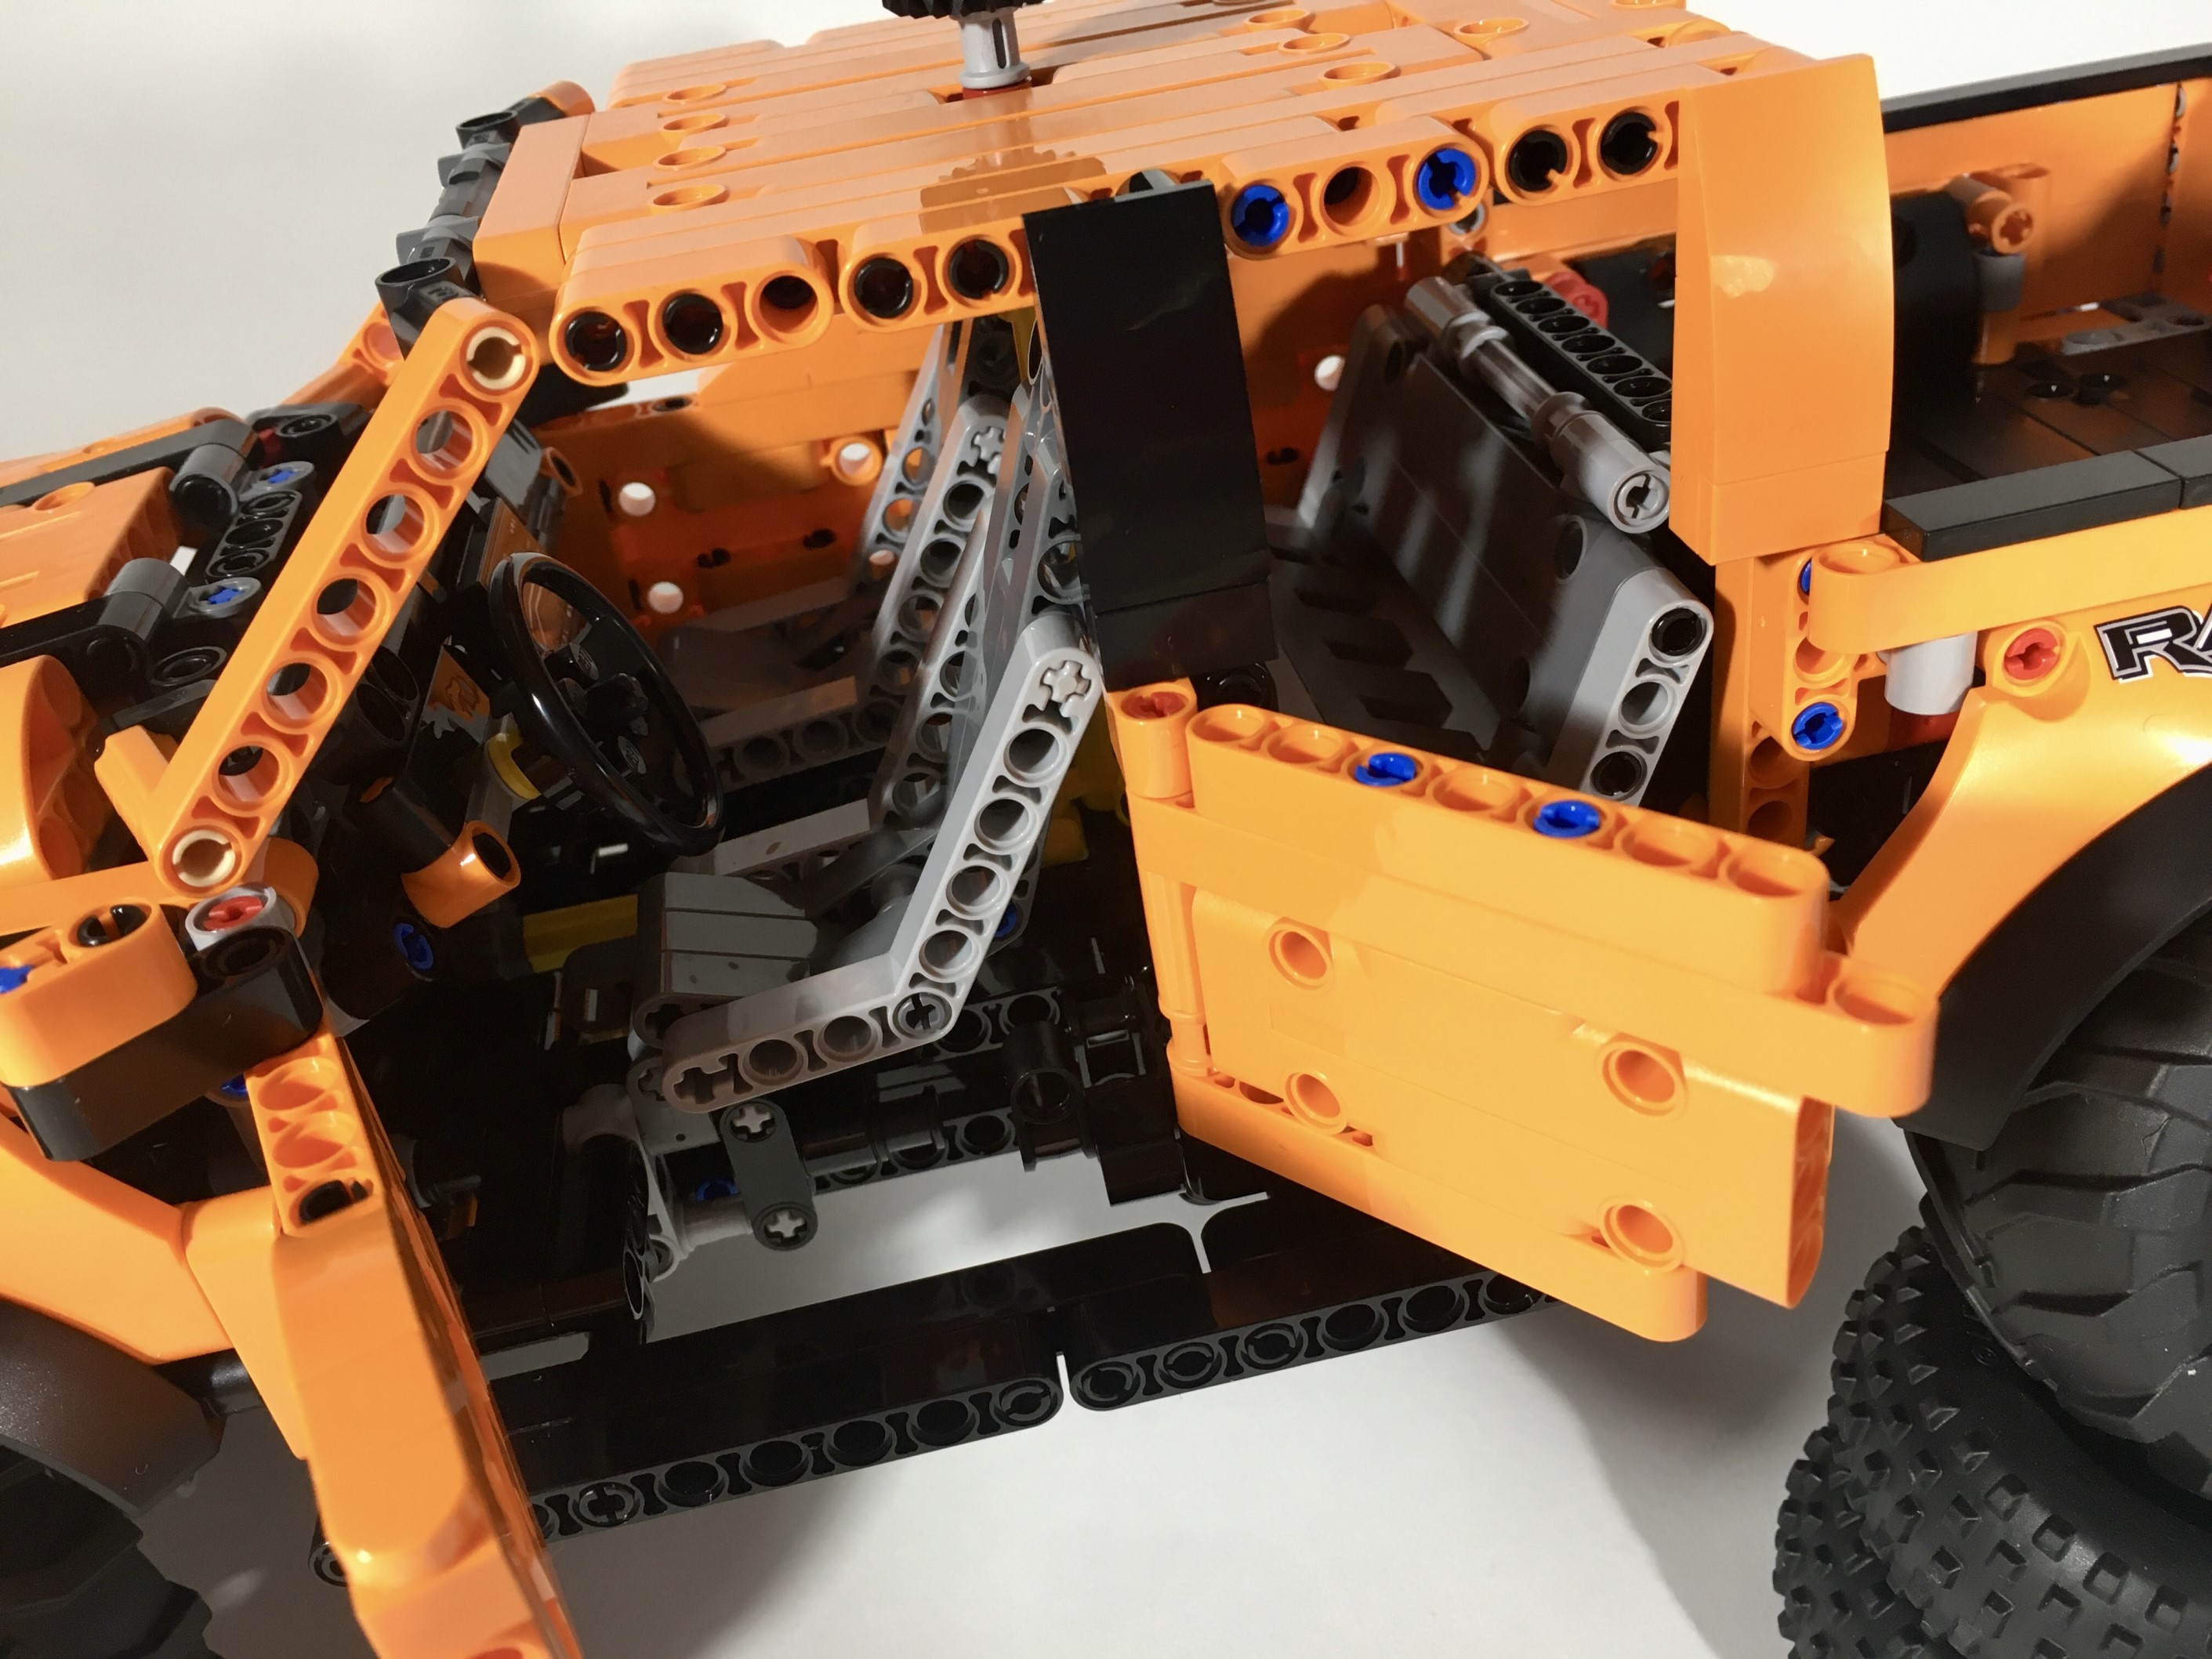
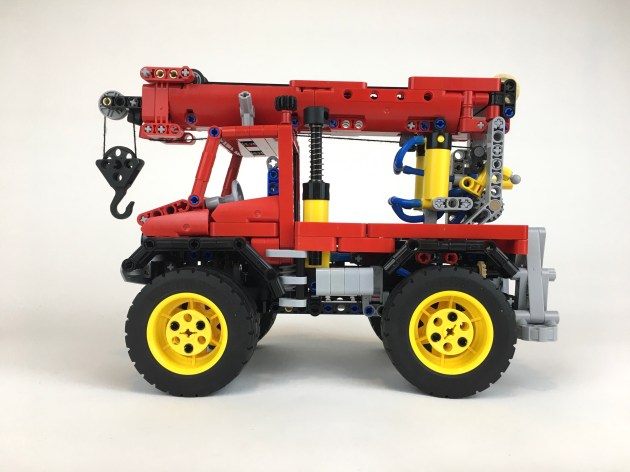
LEGO 42126 was introduced in the Summer of 2021, and I was immediately drawn to the pickup as it included some features I like, such as steering, suspension, a decent (at least in the USA) price, and it’s Orange! But there were serious features lacking such as four wheel drive, a V-8 (I know, I know, a Raptor, and many of Ford’s F-150s use a turbo V-6), and the rear suspension geometry was weird. I agree with others, that some parts of the design like the rear taillights and the front headlights are a little off. But, like 8081, I saw some potential here, and I ordered the set.
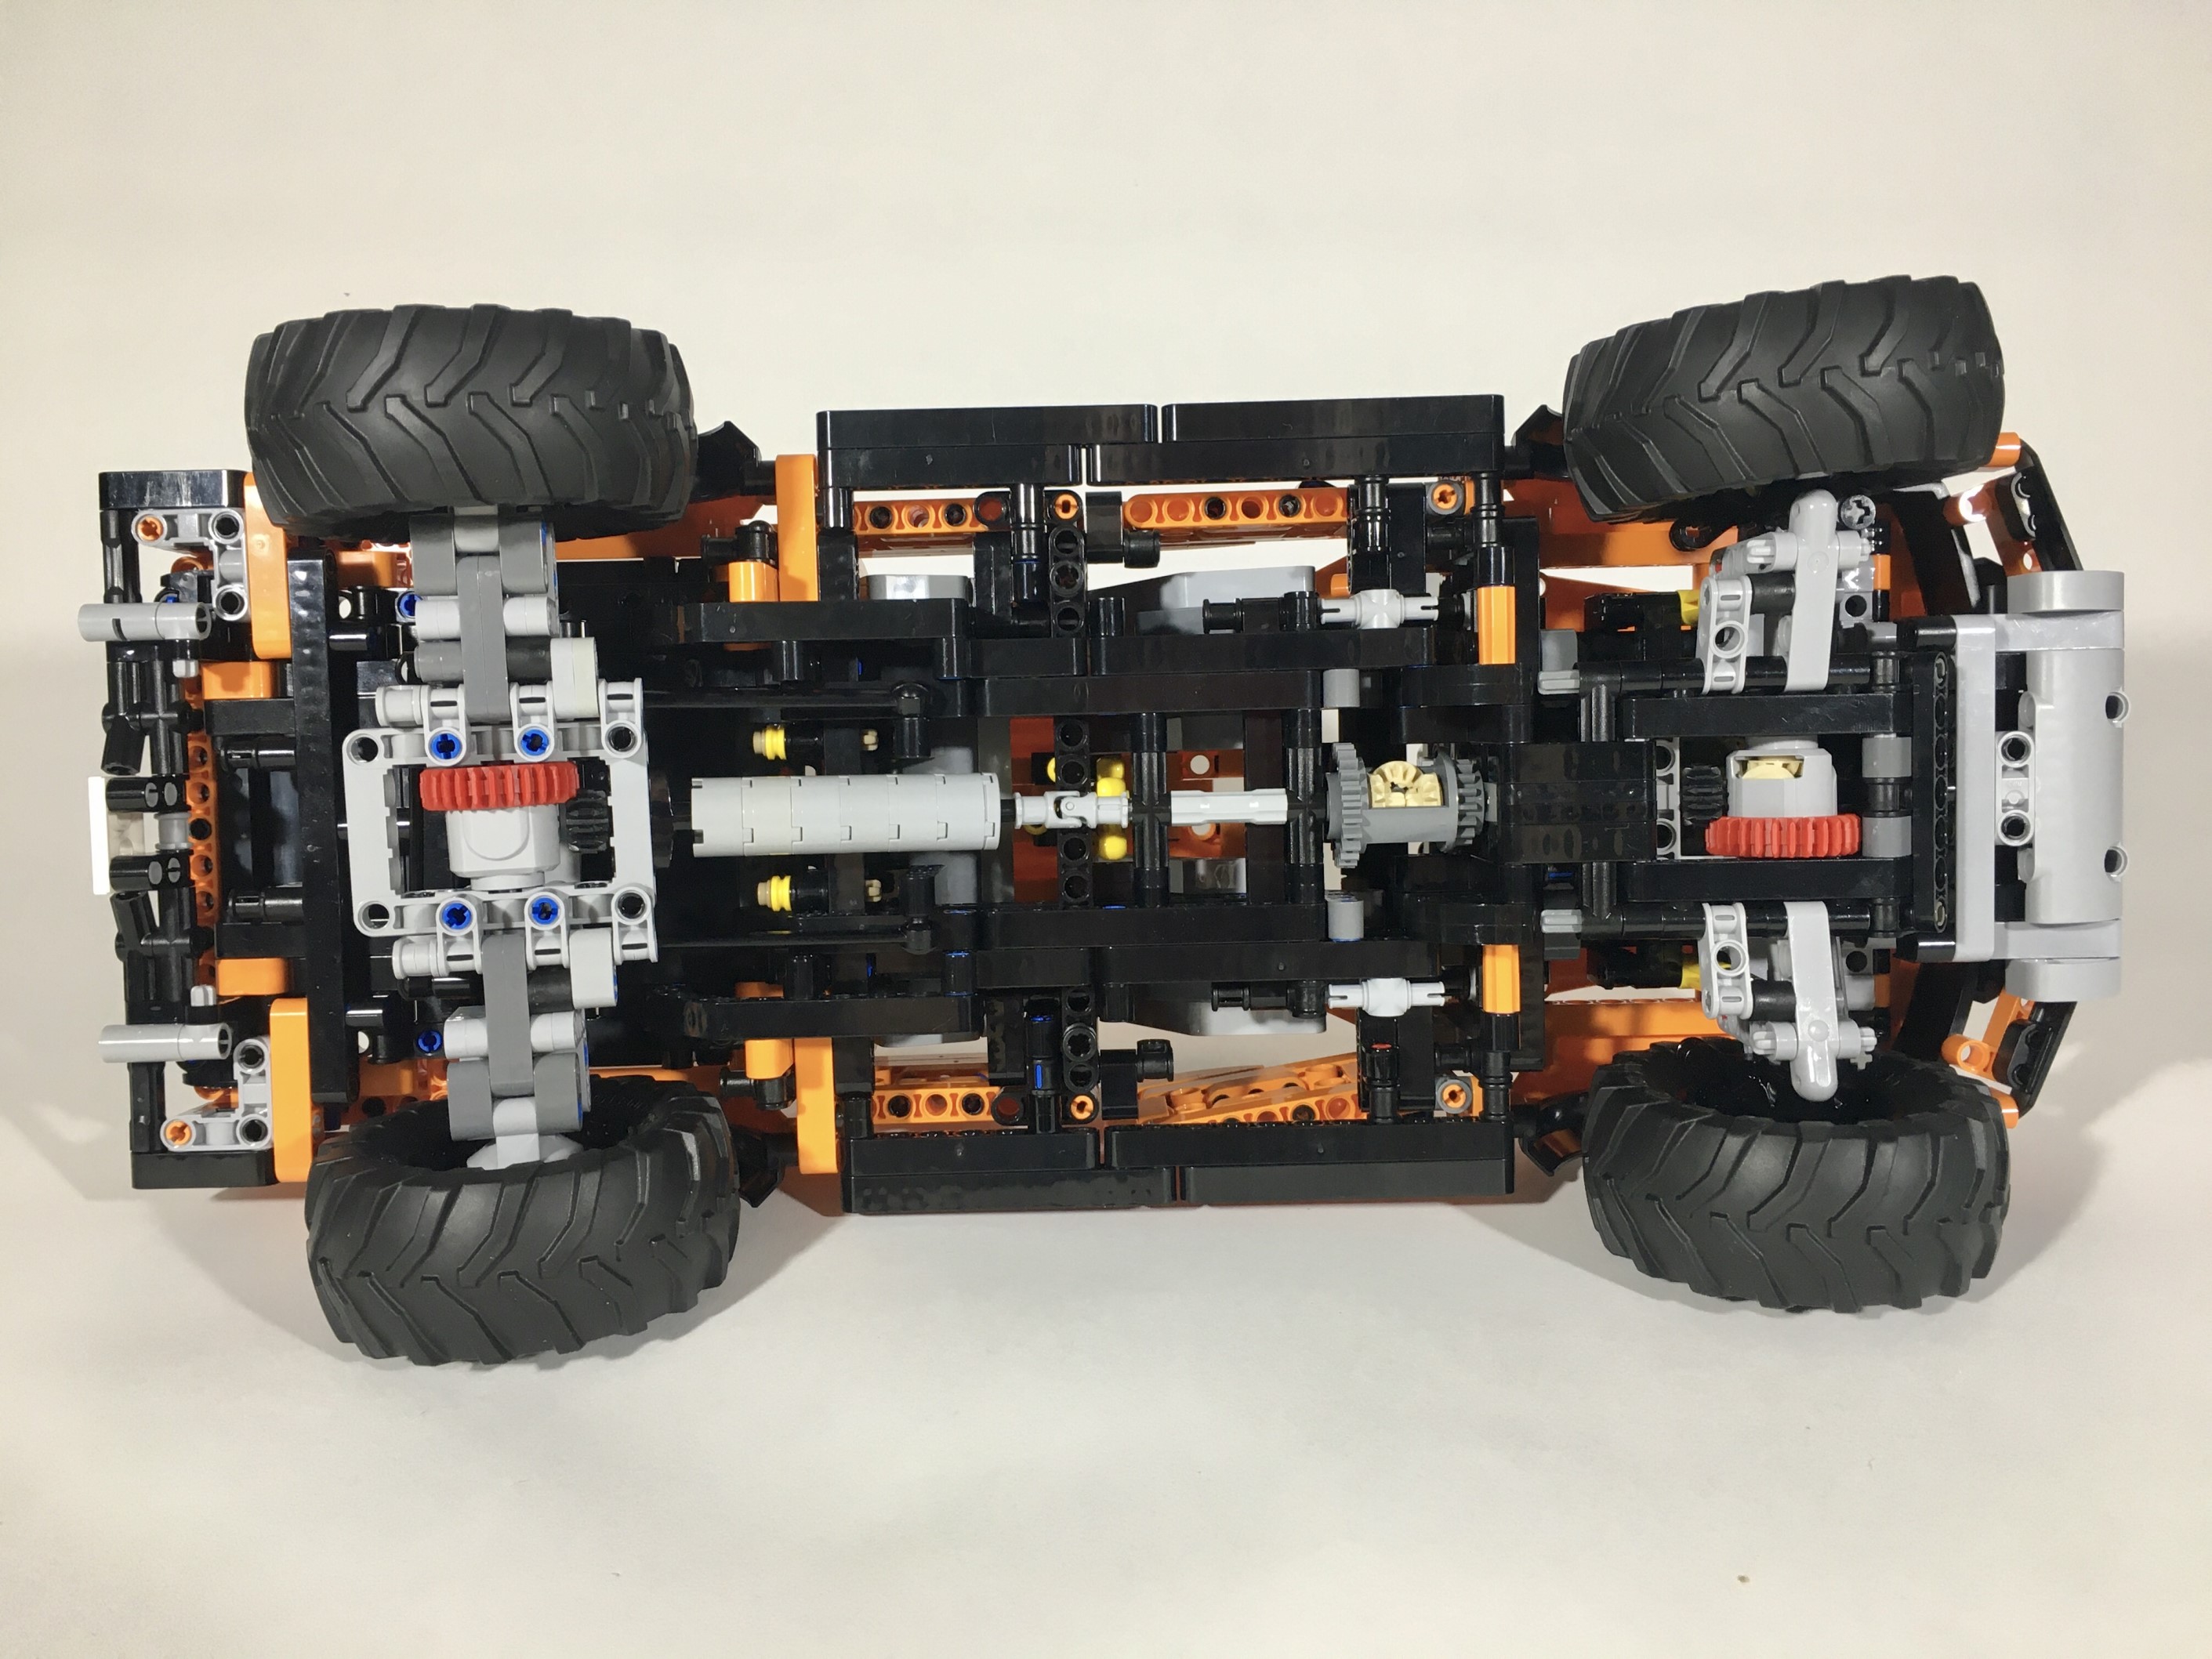
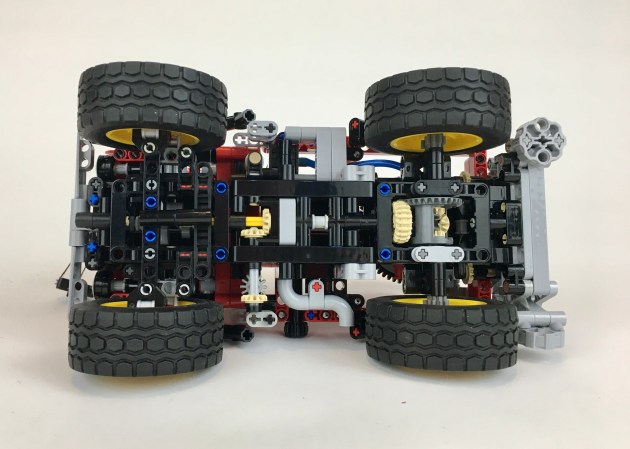
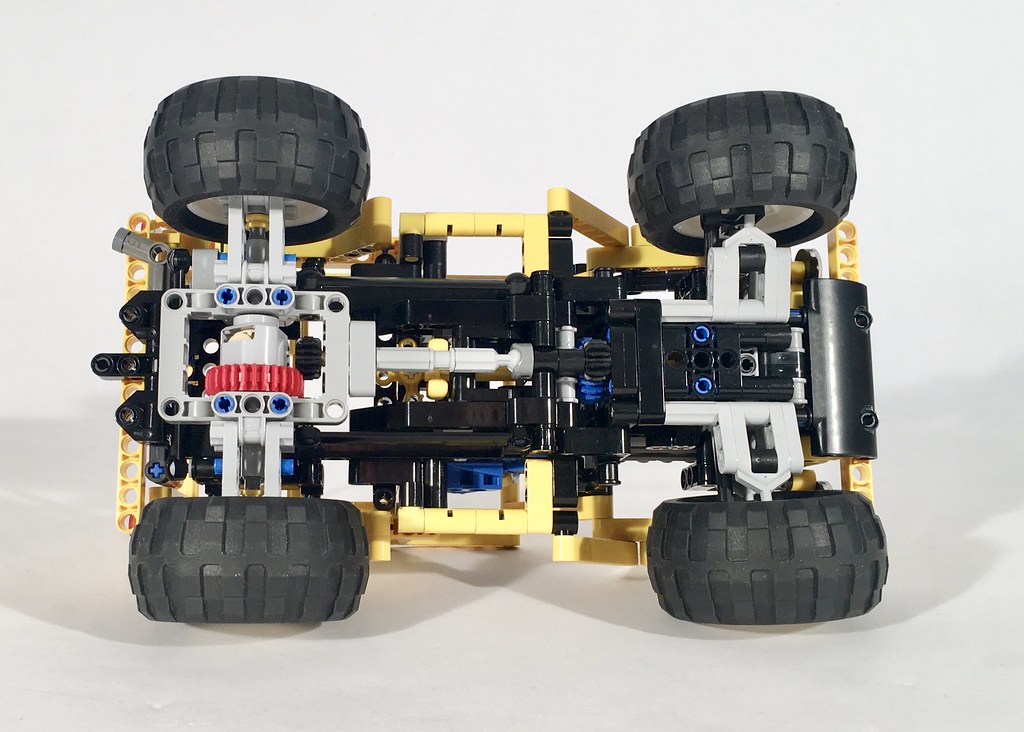
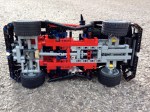
In fact, before I even received my copy of 42126, I was designing and a building a new chassis. The V-8 was easy enough to add, as the space under the hood is extensive. Adding in a front drive axle was a little more complicated. To keep the width, steering geometry, and suspension travel the same as 42126, adding a front drive axle would take a little work. I used a floating differential design, which allows the differential to move freely as the suspension travels through its movement. The steering link was flipped upside down, and relocated in front of the drive axle. The suspension swingarm and shock absorber mounds did not change.
42126 V-8 4×4 Chassis
Immediately behind the engine firewall a differential that connects to the V-8, and the rear axle. The rear axle is changed to replicate a better movement of the rear Raptor. LEGO noted how the half module offset of 42126 was a feature they had to work on to get the placement of the axle correct. However, this feature was only needed as the pivot point of the rear axle was so to the rear of the pickup. By moving the pivot point of the rear axle farther forward, the travel pivots less, and creates a better axle movement of more up and down. This also helps place the axle better when one side is up, and the other down.
While I made no changes to the exterior, I made minor changes to the interor. The colors of the seats have been changed so they match one another a little better. Finally, with a little bit of cross frame bracing, the pickup was done. When 42126 finally arrived, I removed the bed, the doors, the hood, and the roof from 42126, and my F-150 was done.
I like making modifications of sets more than I like making B or C models of them. As such, this project was an enjoyable one for me. I worked fast, and I liked the improvements I was able to make to the original. I like the look of 42126, so keeping this consistent was fine for me, and the additions of the V-8 and the four wheel drive was a fun challenge to pursue. Now to see if I can do a Sport Truck version of 42126. Stay tuned….
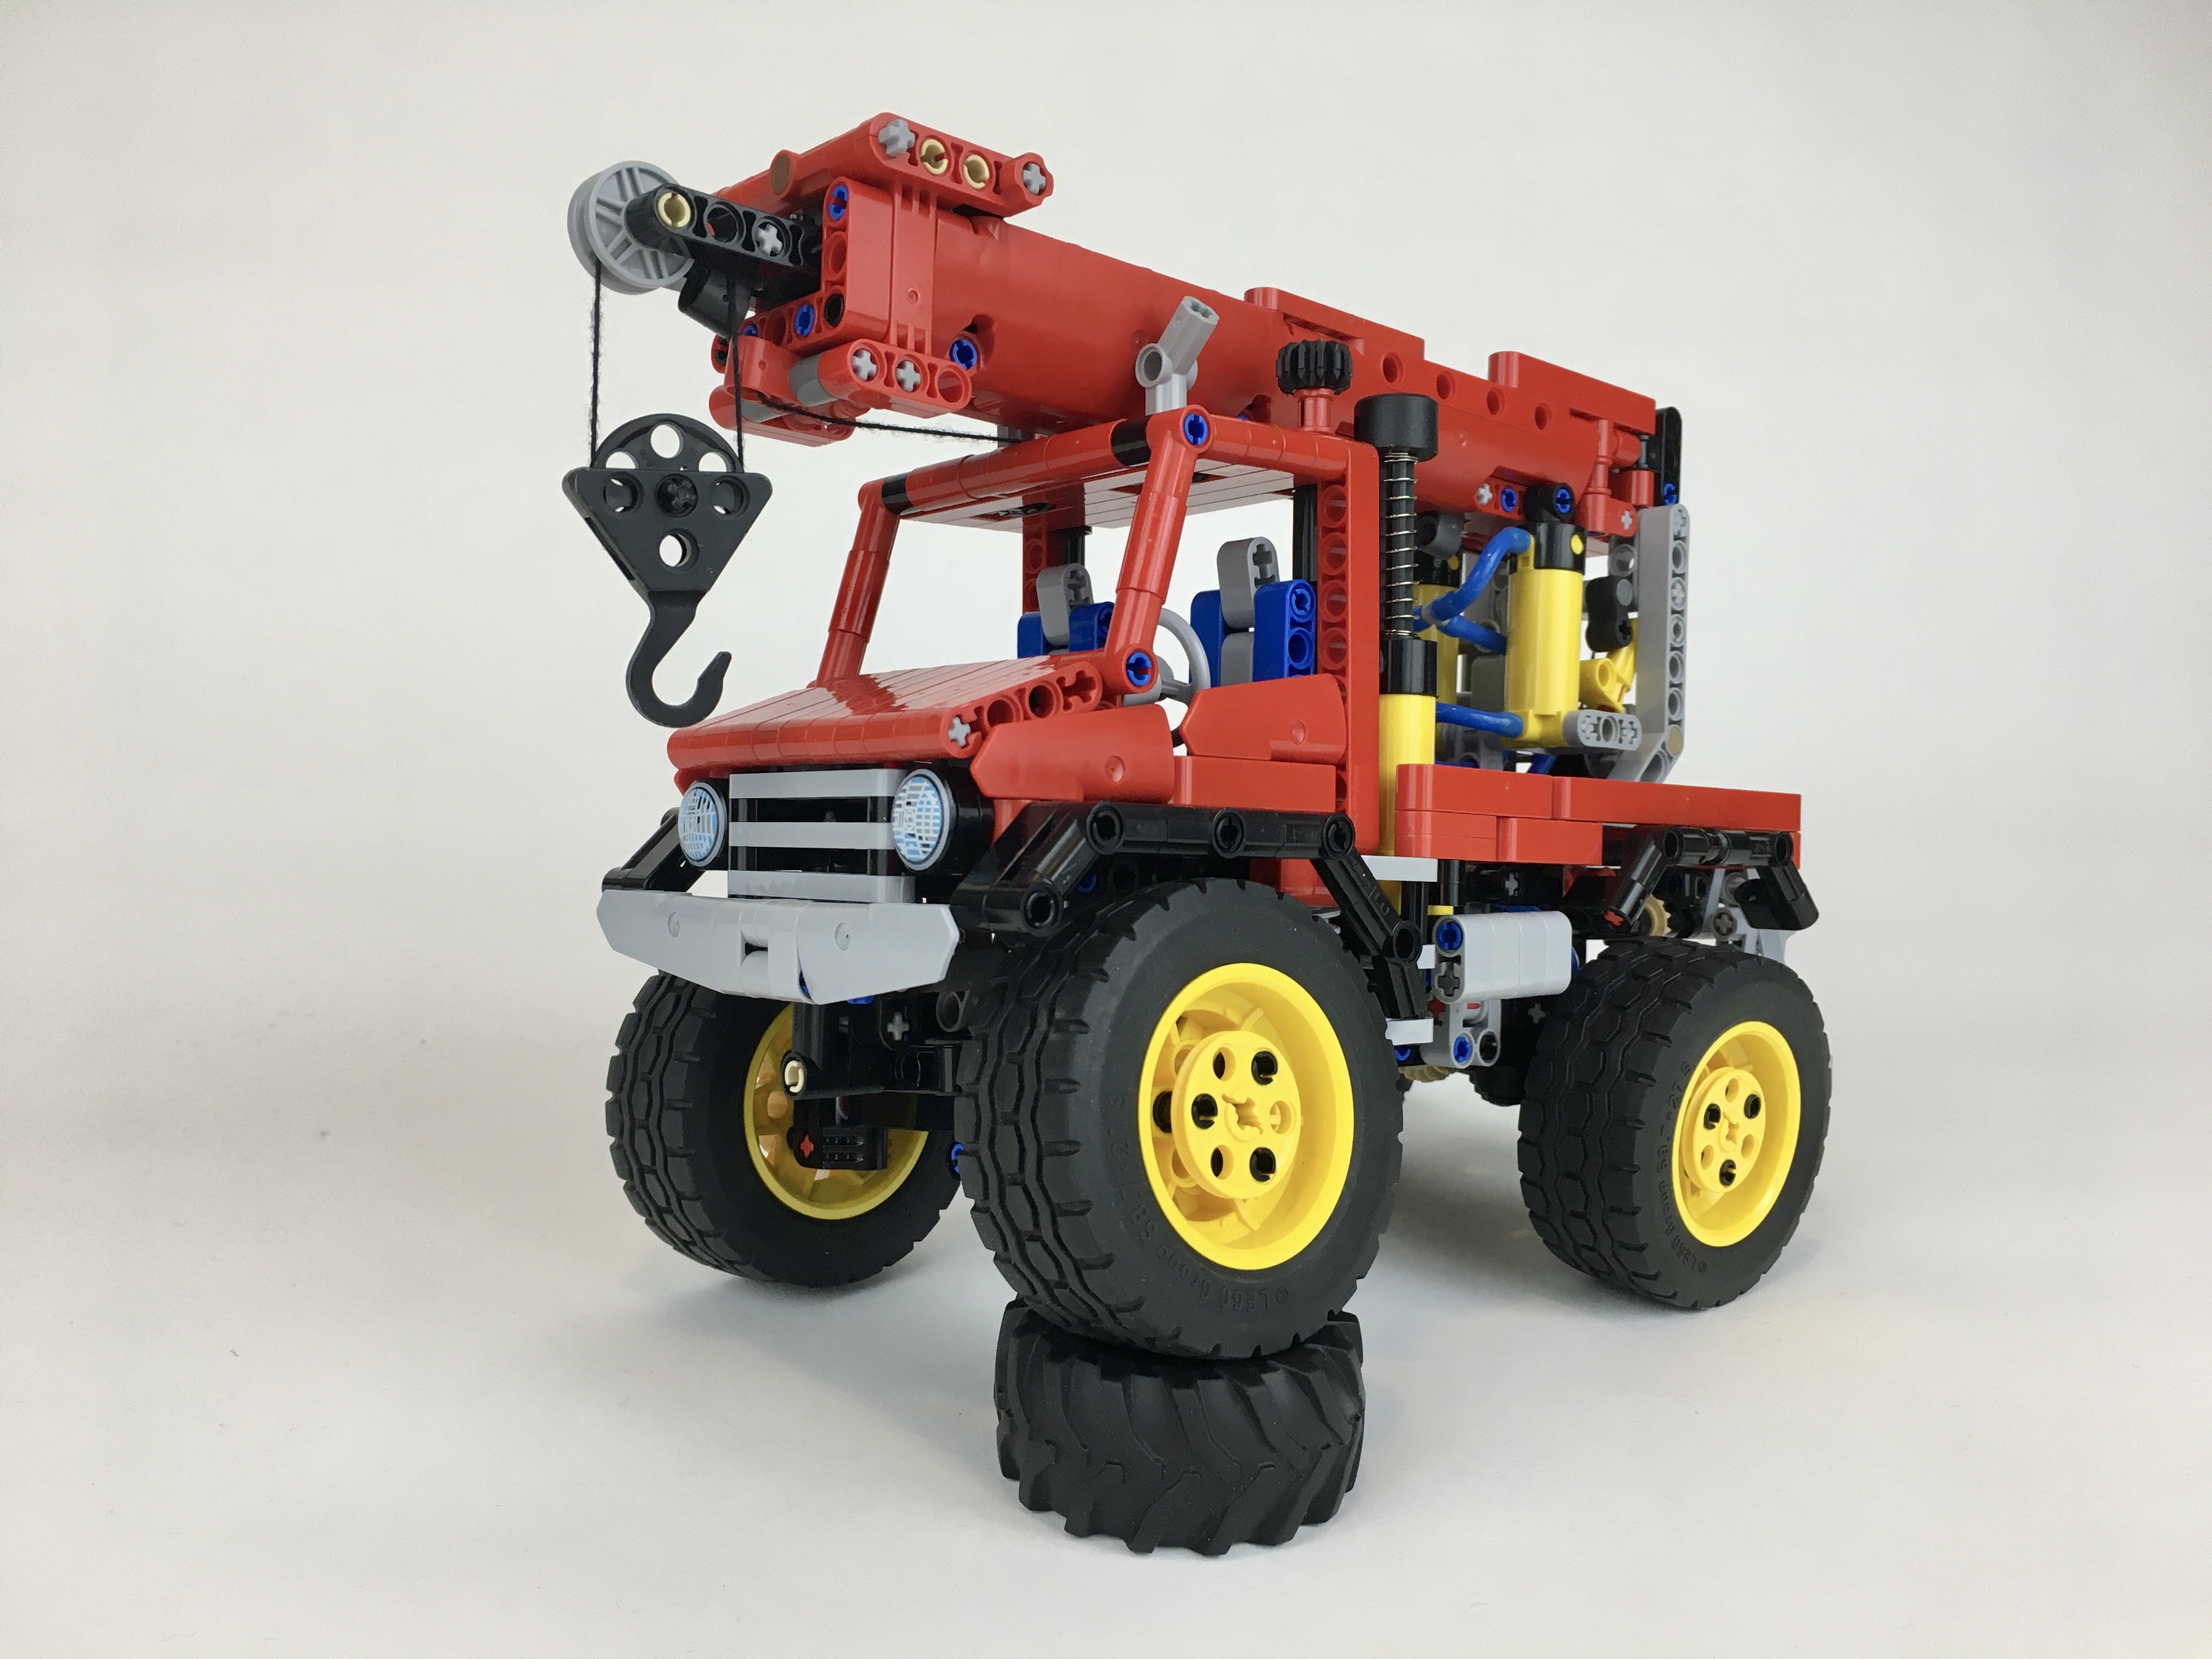
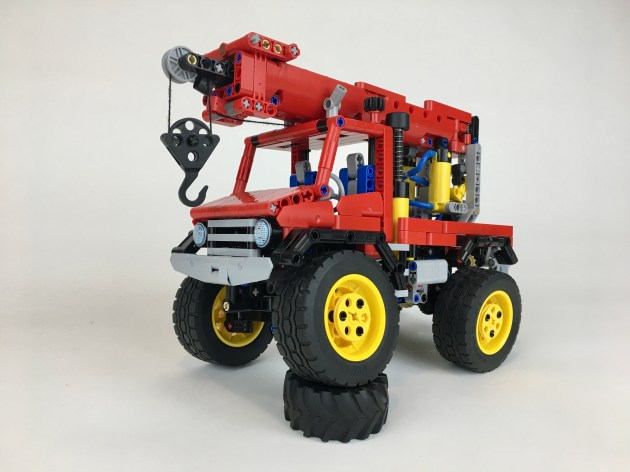
I often participate in online LEGO contests, and most of them are on Eurobricks.com. In the summer of 2021, Eurobricks announced TC20, Technic Studless Recreation. I participate in many, but not all, of the contests that Eurobricks offers. The requirement was to pick an old studded set, and recreated it in studless Technic. I couldn’t sit this contest out, as it checked all the right boxes for me. Entries would be smaller to stay in scale, the builds would be feature packed, and it they would have a deep nostalgic connection. I was in.
Choosing a set to recreate took some time. I started with a list of 32 sets, and started to whittle it down from there. Quickly I removed some of the sets for various reasons: interest, size, not right now, too sacred (8880). I ended with a top three of 6357, 8855, and 8854. 6357 would be interesting to me, but after doing 8640 a couple months back it could wait. 8855 had some opportunity. It is a classic set, and instantly identifiable. I built a little mock-up, and let it sit for a couple of days. I didn’t come back to it.
I am not sure why I did not settle on 8854 right away. I love building Unimogs, and when I do updates I like to add some features. 8854 was missing suspension and an engine, so everything was right for me to recreate this iconic set. I had made my decision and I started posting my progress. First, I had to decide the scale. I made the decision to use the newish Batmobile tires in the build, which make the tires a little larger than the original 8854. I added a stud to the wheelbase to compensate, but otherwise the scale would remain the same.
Next, I had to figure out how to add all the features I would want, while keeping all the original features. HOG for the steering would remain on the top right side of the cab, naturally as a beacon. I then added a control gear for the outriggers on the top left side of the cab. The rotation of the crane would be on the right of the truck driven by a worm gear, and all other crane controls would be on the crane itself.
Fitting in the suspension and engine was a little tricky. Adding the engine was simple enough. There is a differential on the rear axle with portal axle. The driveshaft goes forward to drive a I4 mini engine. Suspension is a dual pendular axle setup: both axles pivot side to side. The front and rear axles are linked together so that when one axle pivots right, the other axle pivots left. It is a simple design that functions well.
LEGO 8854 Engine
Designing the crane was the easiest part. Panels form the base of the arm, and a simple extending boom as created using studded technic beams and some rack gears. A worm gear extends the boom.
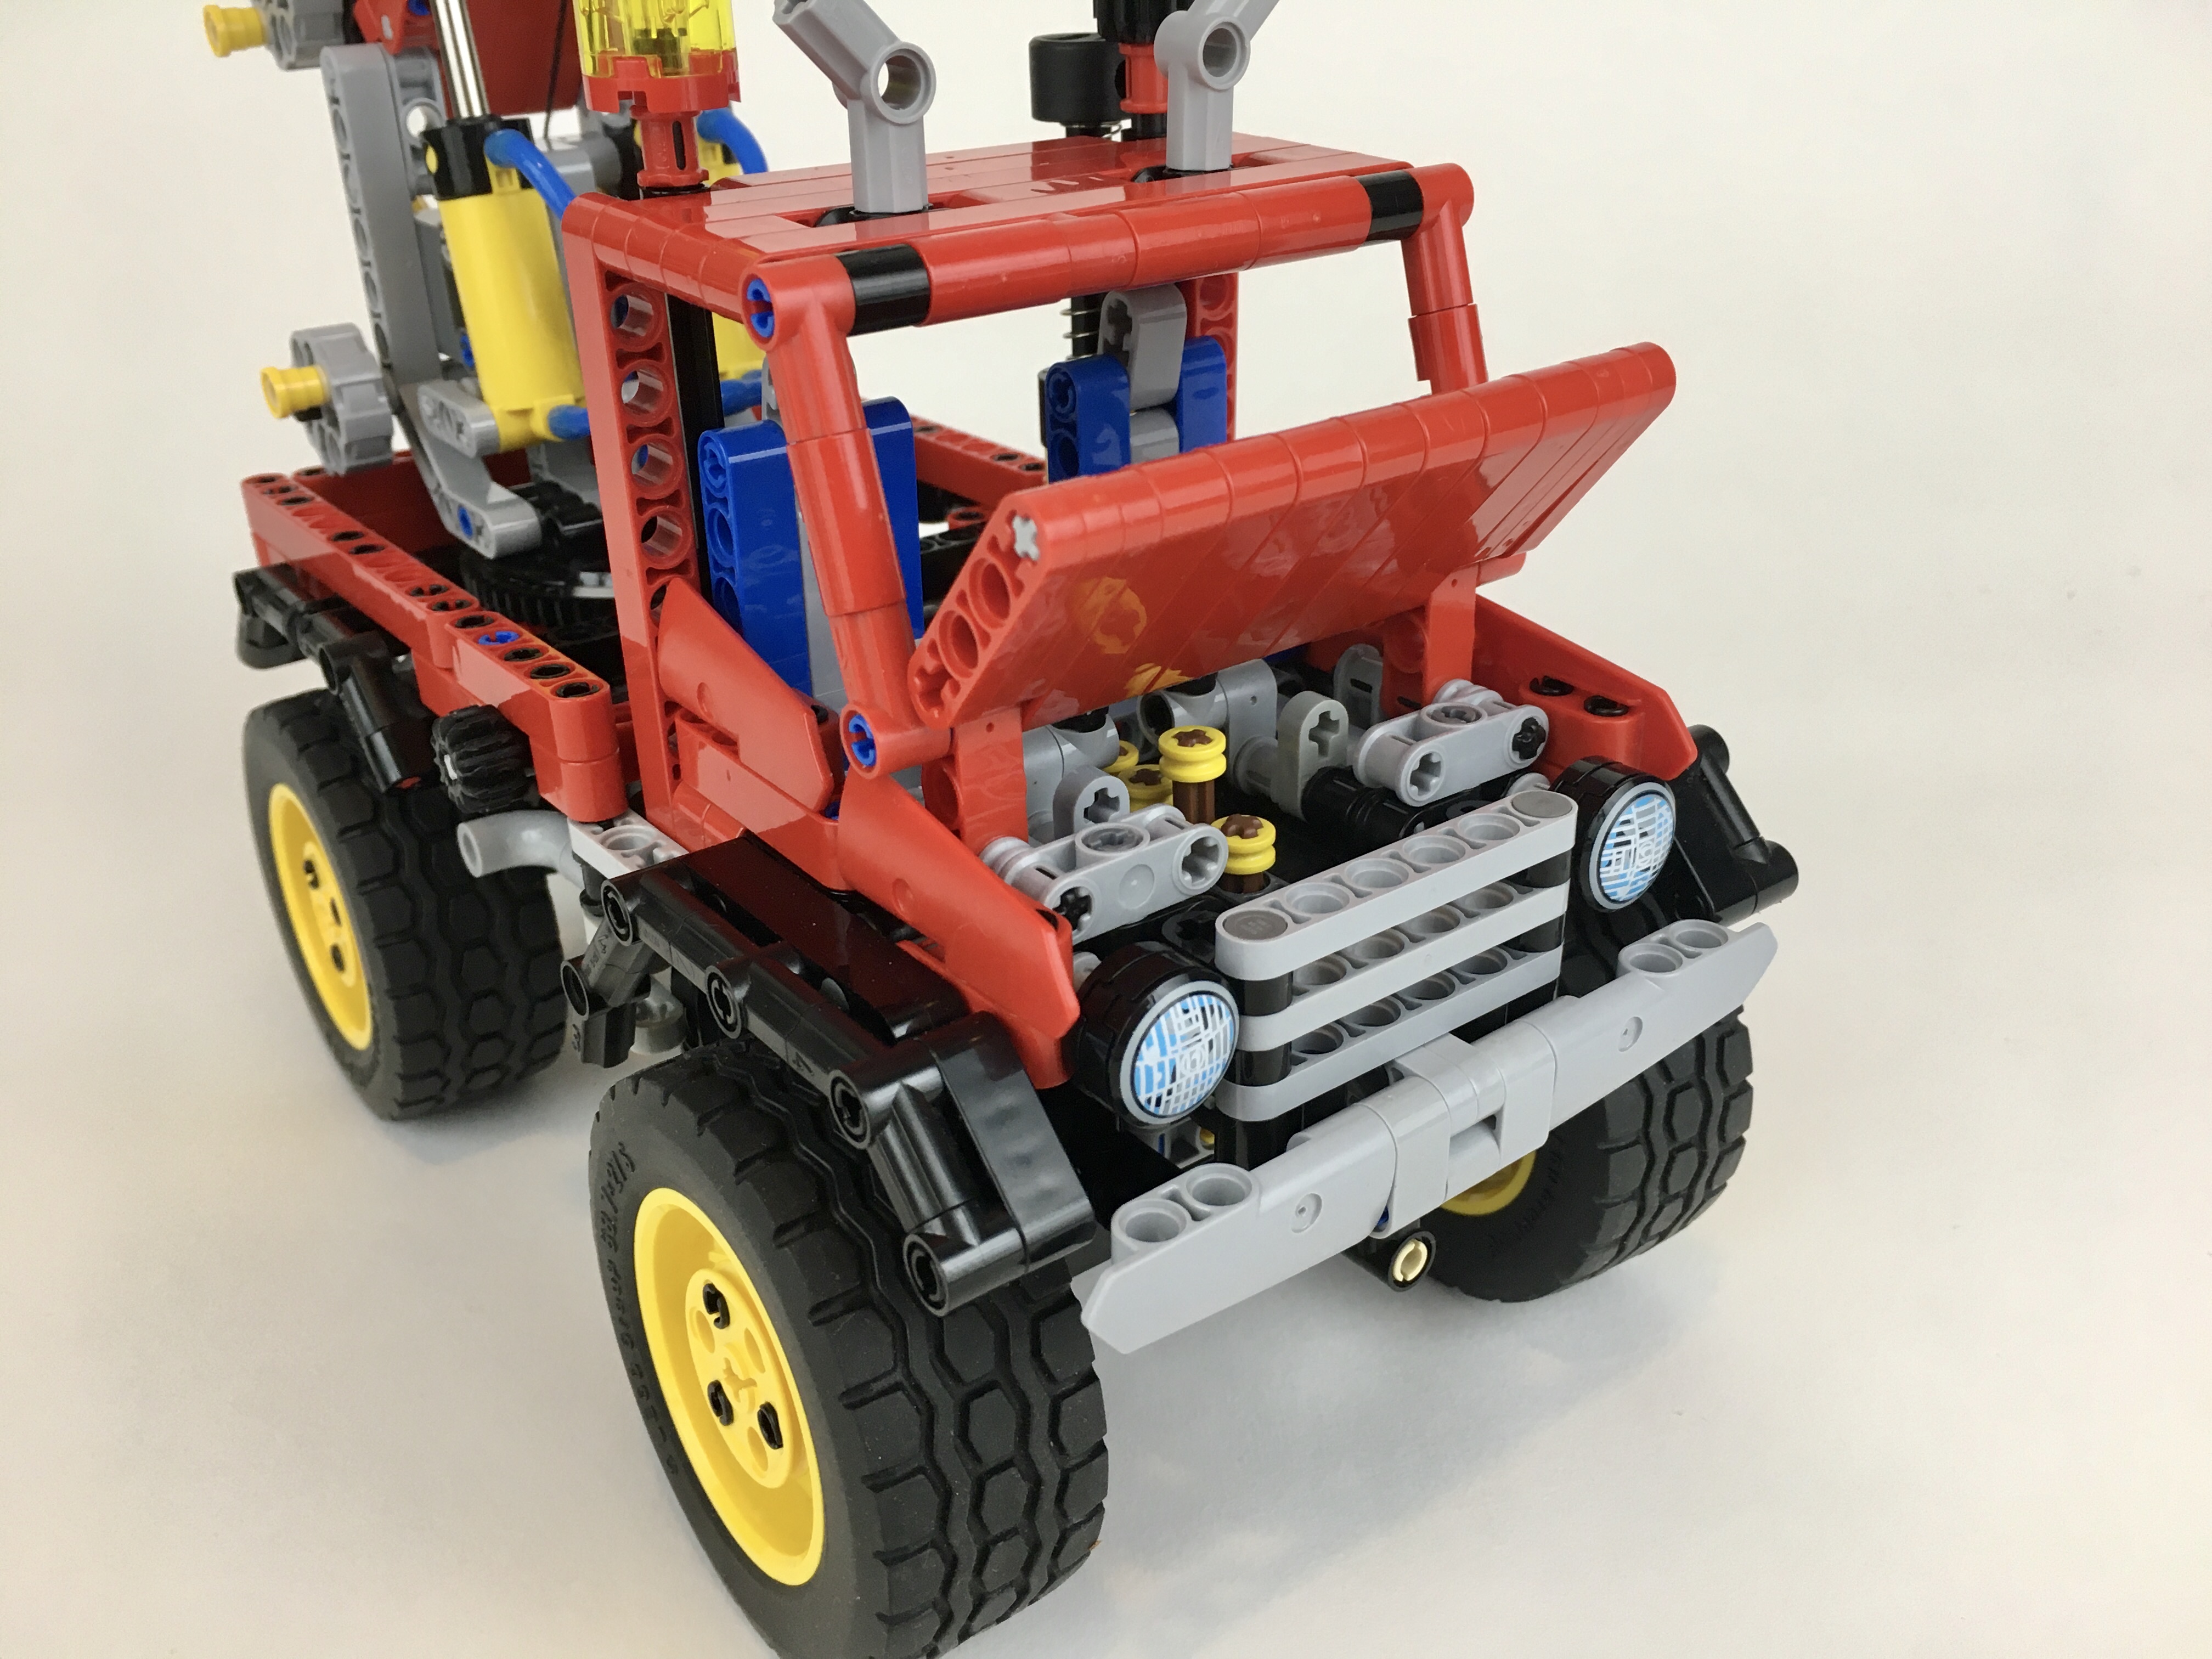
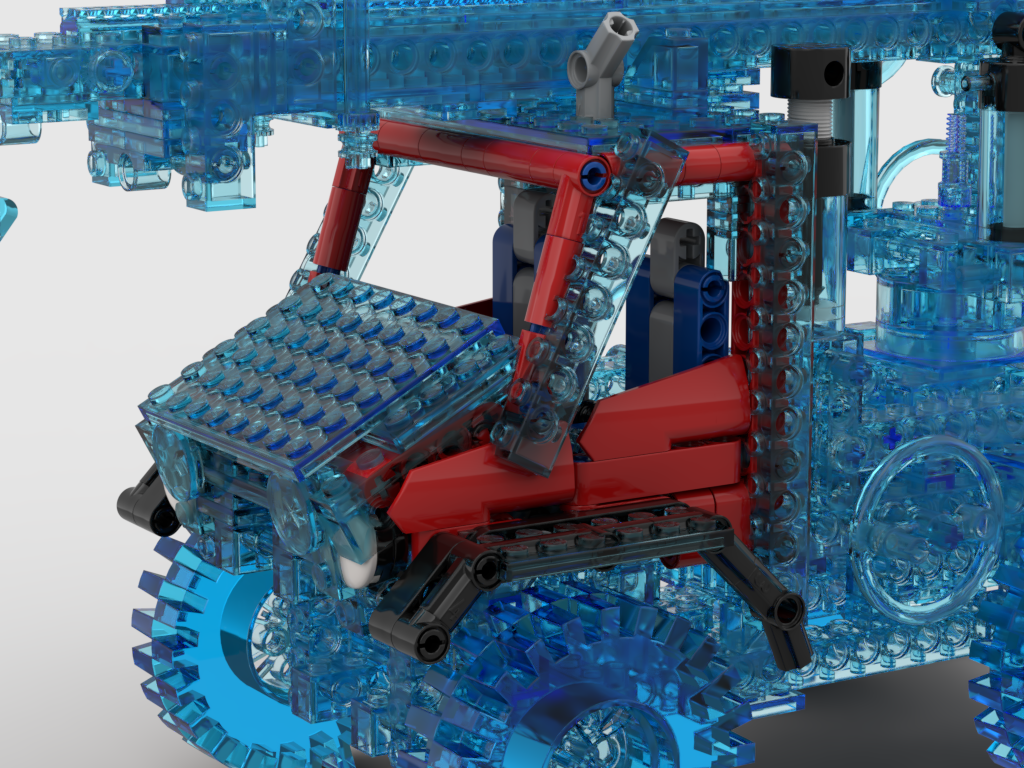
The cab is where I had some trouble. 8854 has a funny shaped cab to my eyes. First, it is very narrow. Second, the hood slopes very steeply. Third, the windshield is not very steep, more car shaped than truck shaped. I rebuilt 8854 in Bricklink Studio to help me compare the two designs over each other. I found this to be a helpful step, and allowed for some good feedback from other Eurobrick members. I ended up making the hood a little more flat and slightly shorter. The roof was made a little longer, which made the windshield a little more steep. Then added the fenders that wrap around the wheels a little better, and headlights and a grill that referenced the original grill. I was pleased with the final design. Oh, and I added seats, opening doors, and a dashboard.
Being able to compare the two versions side by side helped me feel comfortable with how the build was going. Most of the time I use Studio when the build is complete, as do not like to tinker in Studio. However, being able to see changes in real time, was immensely helpful. I could ask was the new version staying true to the original? If not, what was the specific part that was making it feel/look off? Being able to overlay both versions on top of each other was helpful, and a step I will do again in the future.
Cab Comparison Overlay
It turns out the design was good enough for a first place! I was thrilled that through both a voting and jury stage, this update was picked over 46 other designs. In addition to that affirmation, I was pleased with how the MOC turned out as well. The functions all worked well, and the control of each was simple and effective. I only wish the suspension was little more stable, but this was only noticeable when the crane was fully extended. I’ll use the suspension again in other MOC soon. If you love 8854 as much as I do, I hope you will give this update a build as well.
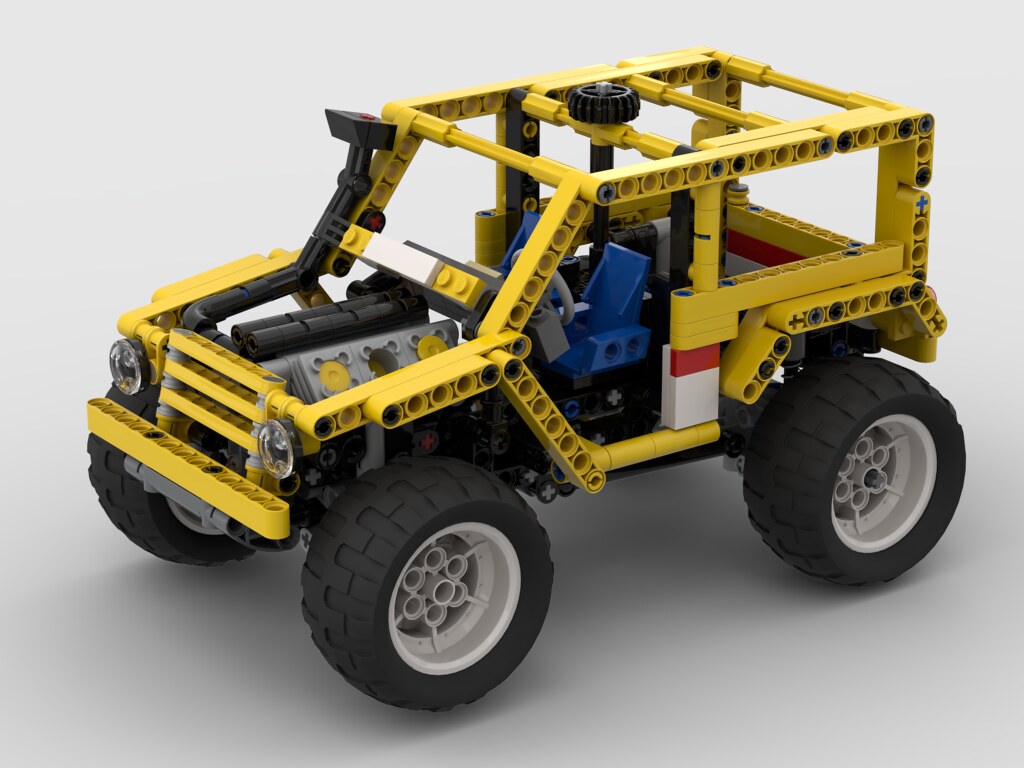
Every once and a while I return to an old LEGO set, and try to modify and improve what was offered by The Lego Group when the set was released. I like to harken back to some of these influential sets because it helps me take stock of all the improvements that have happened in parts and design in LEGO Technic. 8850 was one of the first sets to use the, then new, cylinder and piston parts that have been used ever since. The set also had a driver, steering, and a robust design. When I set to work on this MOD, I placed the following constraints: keep the size, keep the engine, keep the steering, add suspension, update the bodywork, and keep the driver. Make it yellow.
8850 Rally Support Truck Update
The chassis came together quickly, as it is not too complicated, and utilized features I have used before. The rear live axle is simple, and linked forward by two links, and laterally by a Panhard rod. I used the new differential to increase the final engine speed. The front suspension is another simple design; double A-arms with a rear steering link. The steering mechanism travels under the engine, through an idler gear, and moves upward towards the HOG gear on the top of the truck.
8850 Update Chassis
The body work was quick as well, though I needed to slow down to be conscientious to the original design. Liftarms replaced Technic bricks, and the lines were kept. I added some engine detail including a intake, and gave a new grill design. I removed the headlights on top of the A-pillar, because they look silly to my eyes. I played with some ideas for the front bumper including a bull-bar, and other colors, but this simple design ended up being the one I like the most. I gave a little tailgate on the rear with some color, and a little exhaust pipe. Finally, I gave a little OCTAN coloring to highlight the race focus of the truck.
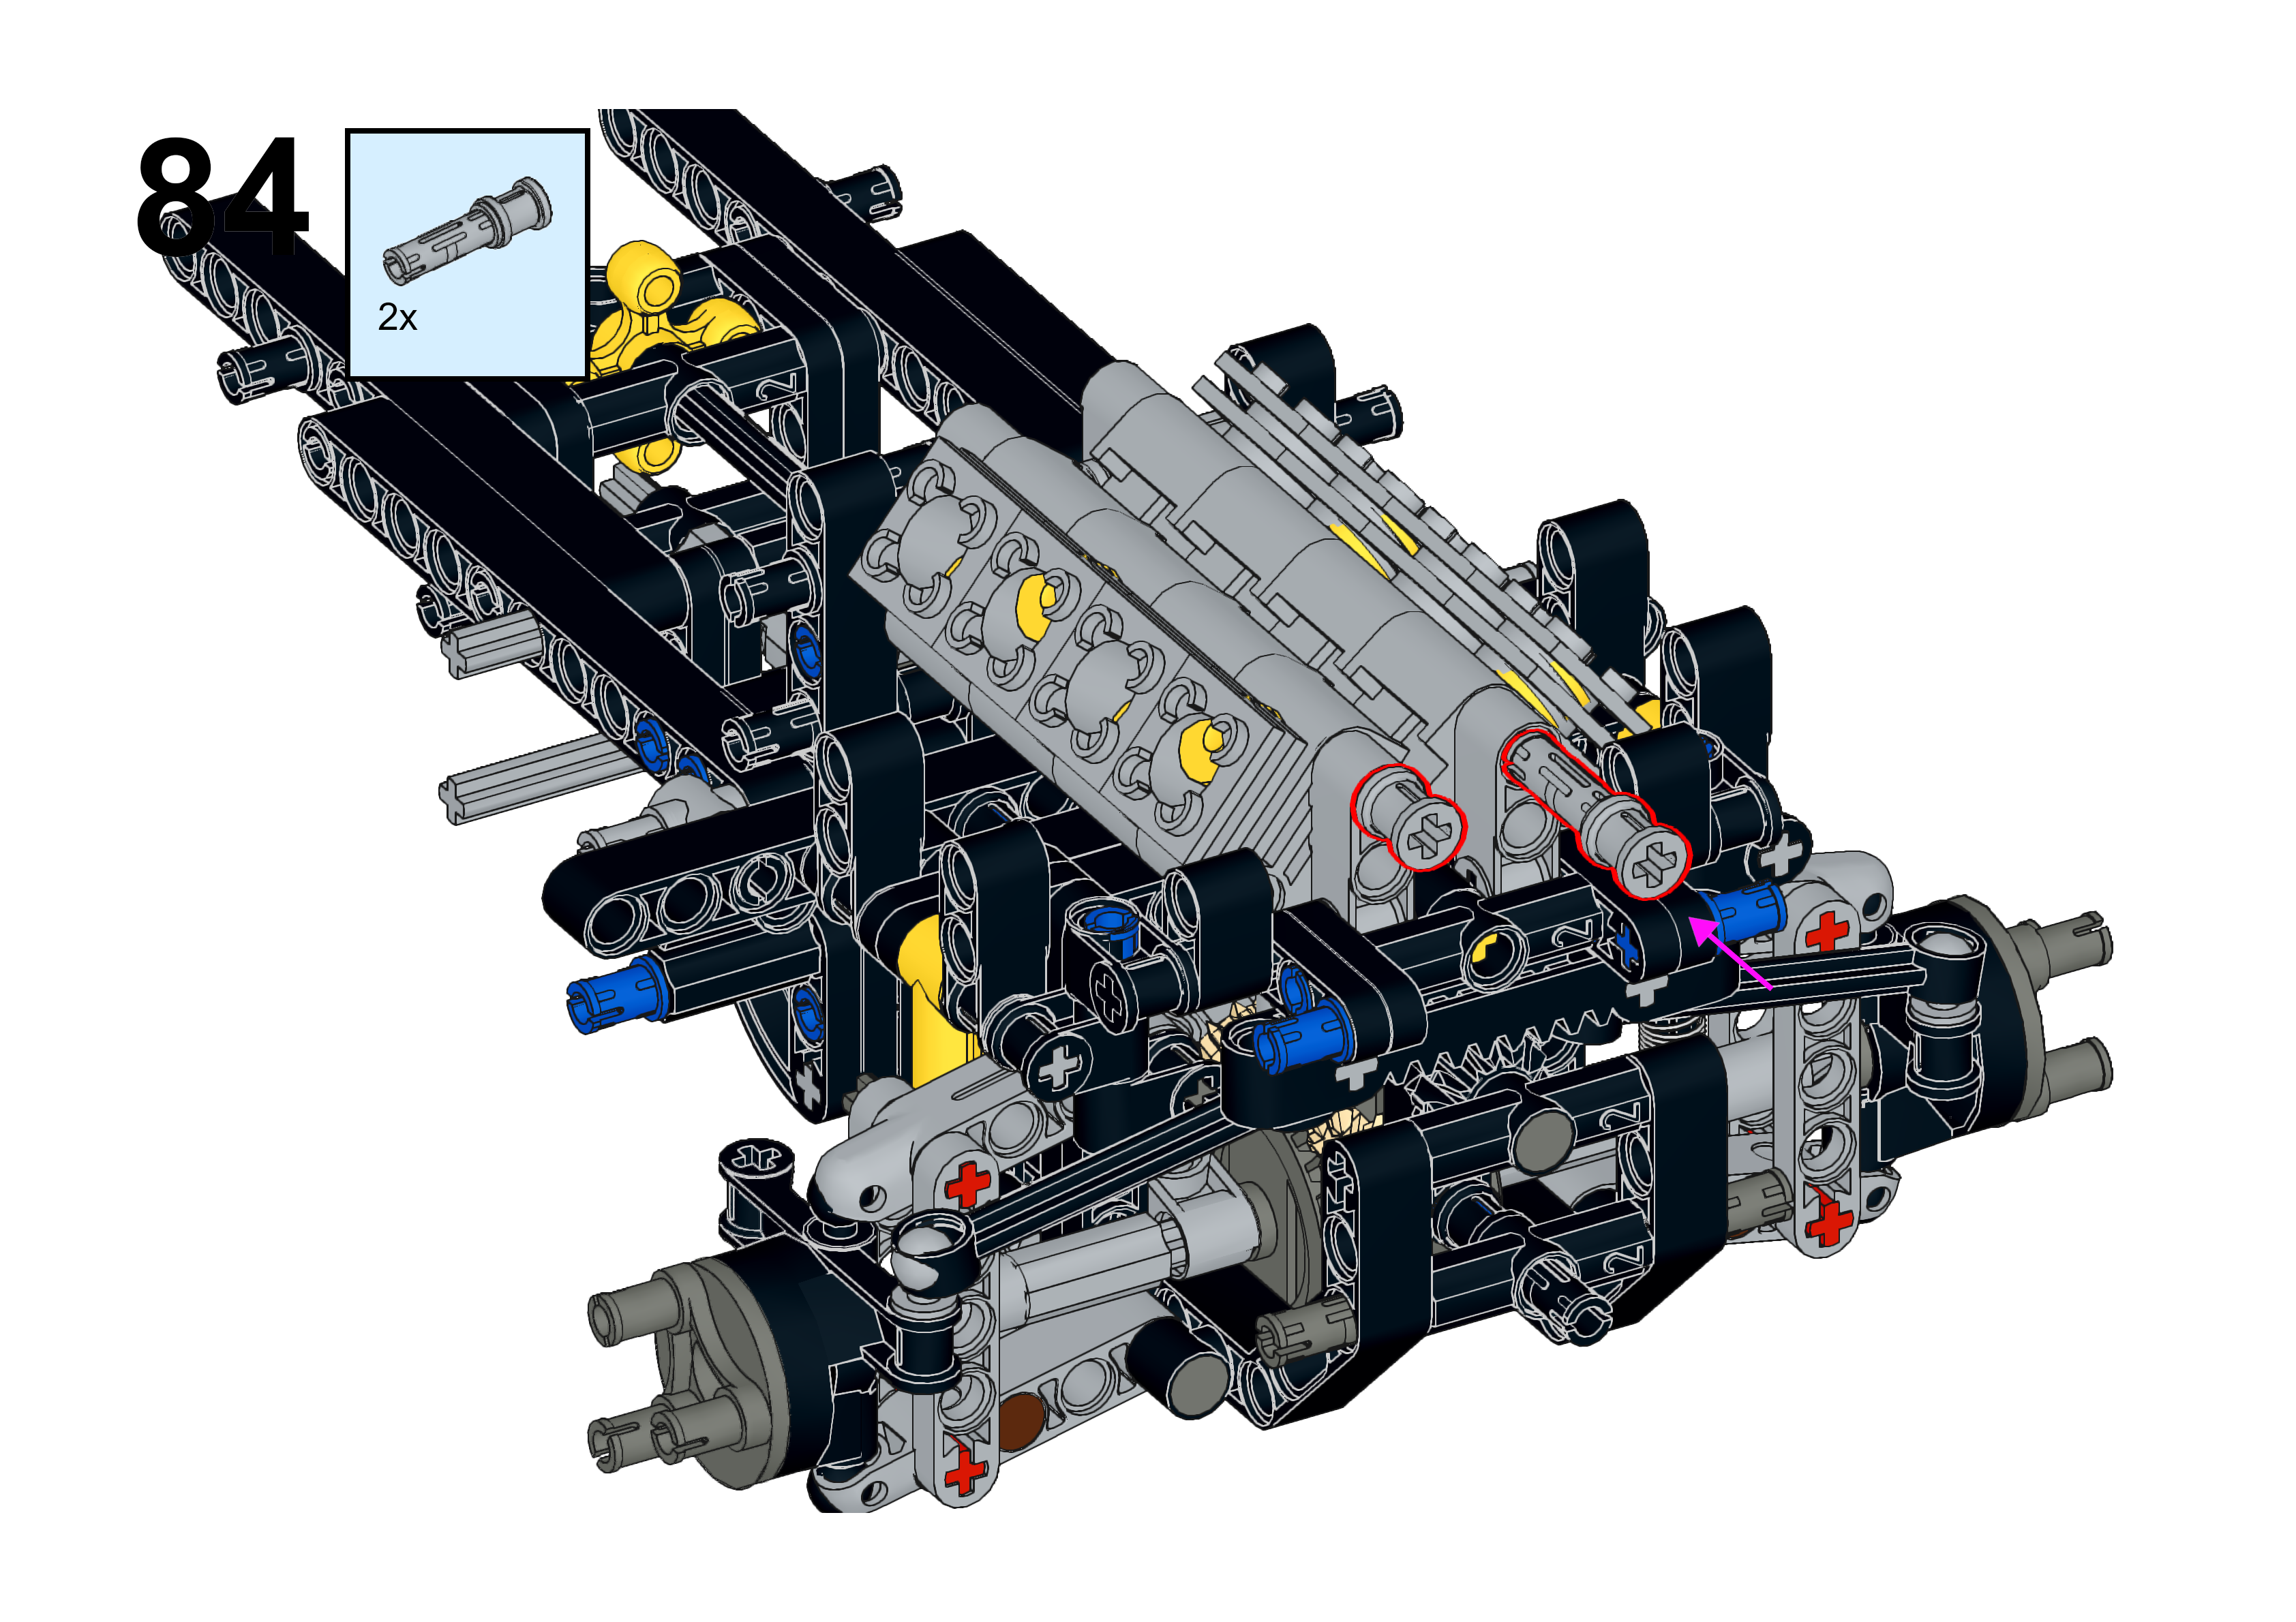
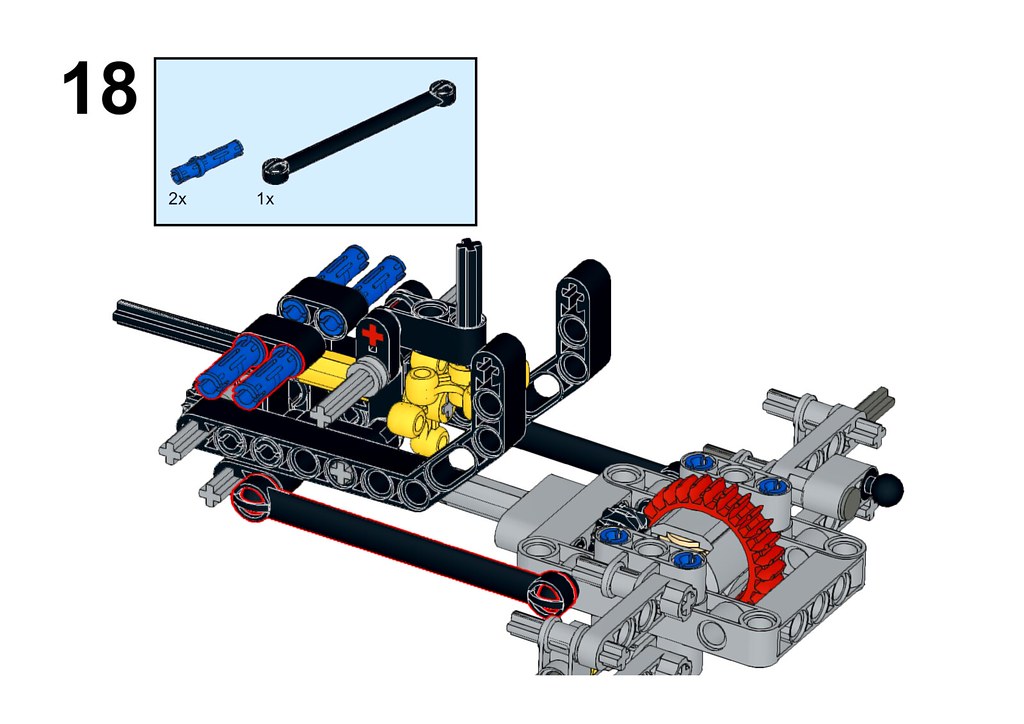
In my effort to improve access to my builds, I have created this MOD in Bricklink Studio, and have made instructions that are a little more clear than the photo sequence instructions I have done in the past. You may find a partlist and download the instructions PDF at rebricklable.com. Send me a photo if you enjoy the build.
Sample of the Instructions
8850 is a tricky set to update, because it has some defining features that I find unattractive, such as the front bumper, the rear, and the upper A pillar headlights. With this in mind, I think I carried the themes through to this build well. The OCTAN livery while keeping the main yellow with white highlights worked very well for my eyes. Functionally, keeping what 8850 had, and adding suspension was a fun project. I am already thinking about how to convert this build into an overland version with 4×4 and more bodywork. Stay tuned…
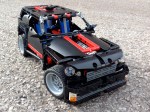
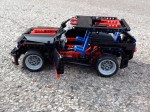
A couple of years ago I did my first MOD of 8081, the 8081 4×4. It was the same bodywork of 8081, but I added 4 wheel drive, a front mounted V-8, and rear seats. It was a substantive change to the set. Likewise this MOD is so different from the first set, I am not sure if this is a MOD, or a MOC. I keep the design features of 8081, but not much from the original set still remains.
I took from front end of the 8081 4×4 which mounted the V-8, and the front bumper. Then I lengthened the chassis to accommodate a 4 stud longer wheelbase. The rear axle is the same, but the front axle needed to be modified to handle the increased weight of the truck. The center differential powers the V-8.
Both axles are live axles that are suspended with a hard spring at each corner. Each axle has two stabilizing links on the bottom, and a Panhard rod for each. Steering is on the front axle. Combined with the Fischertechnik tires, the truck has significant suspension articulation.
I added the bodywork last, but this did not take long as much of the design work followed themes determined by set 8081, though the pickup body style was planned from the beginning. The truck looked too big and black when I was done, so I added the roof rack/roll cage, the running boards, and a bull bar (though its little clunky).
The truck works well, and looks pretty tough. The suspension works much better than the first 8081 4×4. The new wheel hubs help the front a lot. Also the front suspension is better supported laterally than the first iteration. The Fischertechnik tires work great on this model, and while not LEGO parts, they are quickly becoming a favorite addition to my builds.
Throughout the whole project I kept asking myself, when is a build a MOD, and when is it a MOC. This project felt a lot like the later, but still connects to 8081.
I do not buy many sets these days, mostly due to the fact that the space required for a gazillion new parts every year is not priority I am willing to resource. But some sets are a fun opportunities to MOD.
The little car from 42098 caught my eye. While the truck was neat, it was not what I was interest in, so after a query of my own part collection, and a quick order from LEGO, I got the parts I needed. Upon completion, there were a couple parts of the car that bothered me, and a couple of parts I thought I could improve. So I started taking apart the car to see what I could do.
First, I made a mock-up of the side of the car to see if opening doors could work without lengthening the car. Turns out by moving the curved panel forward one stud, it works easily.
Next, I was off to the rear axle. It was easy enough to design a simple live axle and connect it to the V-8. What become tricky was mounting the shocks. 42098 has low rear deck, and I do not like how the rear wheels are pushed down away from the wheel wells; it make the car look tilted forward. So finding an appropriate ride height to lower the rear while mounting the shocks in the limited space available took the rest of the time. Once this was in, I added the bodywork back on with a couple of changes to the 1950s rear and the side sills and the car was done.
The car worked well enough, though any live axle setup is a little silly when there is not suspension on the front. The engine still worked smoothly. The steering HOG on the back is still not optimal, but adding one on the roof would take away from the fantastic roof-line. Another round of edits may be needed to add back in the nominal opening hood. It is a pretty basic feature in the original car, but since opening doors were added in this MOD, the opening hood is missed. We’ll see what I end up MODing next time.
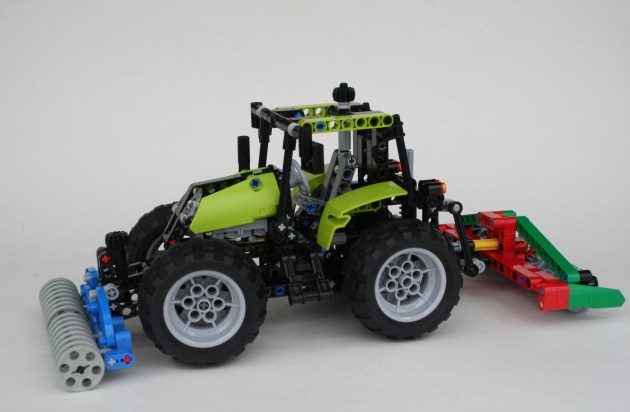
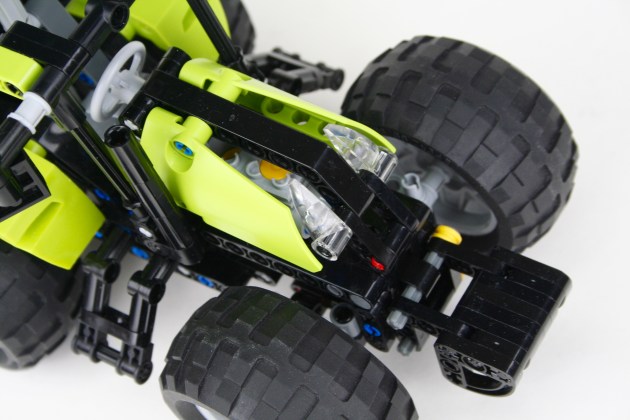
Every once and a while, I find myself building an older set from my collection. I find it relaxing not to think about design and simply follow instructions. Recently, I built LEGO’s 2012 set 9393, and after a couple of days, I thought, it needs something else.
The full gallery may be found on Flickr and Brickshelf. Instructions may be found here.
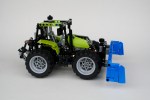
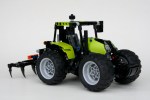
The LEGO set was simple with steering, lime green color scheme, a mower implement, and a system to raise and lower the implement. I decided it needed a fake motor, front suspension, a drive differential, and some bigger front wheels. I started building. Adding the motor proved to be more difficult than I thought it would be. By adding the larger front wheels, I was able to get the steering axle lower by one stud. This allowed space for the engine to be added, but did not solve the structural problem of how to mount the front suspension. I ended trying a number of solutions, but ended with one with many connectors, axles, and two liftarms running over the front axle beside the fake engine. I would prefer it to be a little more stiff, but it works. As I built the front of the tractor, I found myself adding an implement attachment point. I thought, maybe I should make another implement for the front.
This is where the project grew, and grew….
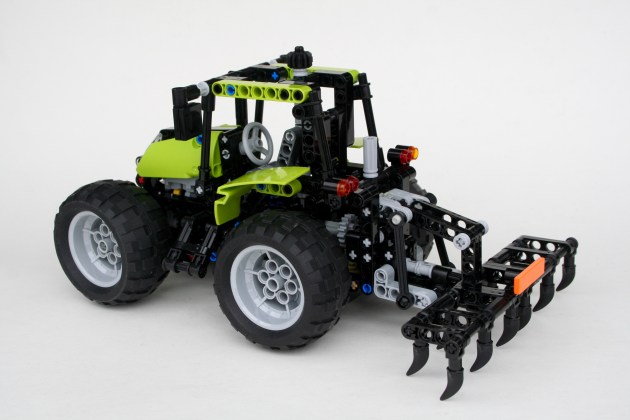
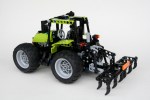
Now, only the mower implement was not enough. The tractor needed a plow, counterweights, a furrow, a harrow, a tiller, and a grain cart. All of a sudden this project became much bigger. I started with the snow plow. It is a simple design with a little worm gear lift attachment. Using this type of mount, I constructed a simple furrow implement as well. The multiple wheels are meant to smash larger clumps of dirt, and push stones down under the soil. I added a basic group of curved liftarms for front counterweights. All three implements are attached by removing two axles.
Most tractors have a three point attachment on the rear. The base 9393 has a two point attachment, which does not allow for a parallel movement as the impliment is raised. I went back and forth on changing this attachment point. In the end, I decided adding a parallel linkage would require a another PTO universal joint. I was not willing to add this, as it would put the implements too far behind the tractor. As such, I kept the stock 9393 motor implement the same. Using the same attachment point, I build a small harrow. The harrow is driven by the PTO shaft. Finally, I build a tiller with the fun little claw parts. I added a drawbar and a pivot, so this impliment would stay parallel to the ground.
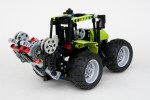
Because I still did not think this was enough, I added a hitch to the tractor, and built a grain cart. It is a simple single axle design, with sloped sides. There is a conveyor on the bottom, and a folding auger for grain extraction. Both are geared together and can be opperated by a rear HOG gear. OK, I realize it is not an auger, but rather a chain. At this scale, I could not figure out a good auger solution that did not look clunky.
Before I could think of more implement, I said “I’m done.” I was please with how it turned out. All the implements were fun, and give the MOD much more playability. The grain cart was fun to build, and made the tractor look grand. I wish the chassis of the tractor was a little stiffer for the front suspension. I had a lot of fun with this build. I am going to build another tractor before this year is done.
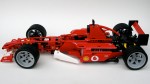
On December 18th, 2004 I bought 8386 here in Cologne, Germany. It was the first LEGO set I bought in 7 years, and thus was the end of my Dark Ages. It was my return to LEGO. Today marks ten years since I bought this set. This is a celebration of that event 10 years ago.
A lot has happened in the last ten years. When I think about that time I pause to reflect on where I have come. I have lived in 10 different places, including three states, had a number of different jobs, and increased my family unit by a factor of three. But people don’t come to this website to read about me, they come for LEGO. Over the last ten years we have gained much. The Technic line has improved both in terms of functional abilities, but also in the frequency and quantity of models offered. We have gained Power Functions. We have Linear Actuators, CV joints, more suspension parts, and so many more wheel options. We have favorite elements that did not exist ten years ago. Colors now include green, blue, white, and orange. LEGO made a Unimog. Bricklink started not much more than 10 years ago. Let that sink in for a moment. All of these developments have made so much of my building possible. It only makes sense to celebrate with a MOD of the set that reminds me of my return.
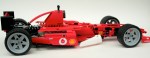
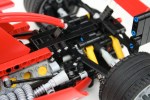
8386 was a rather basic set. It was modeled after the F2004 car #1 or #2 of the 2004 Scuderia Ferrari team through a licensing agreement with Ferrari. The cars were rather successful during the 2004 season at the hands Michael Schumacher and Rubens Barrichello. 8386 included working steering, a working V-10, and a removable engine cover. And that’s about it. Oh, and a lot of stickers. As I did with the 8081 4×4 my goal was to keep what was there, and improve what I could. I would add some additional features, namely suspension and a gearbox. Since 2004, LEGO has added a number of elements that made these goals easier than they would have been ten years ago.
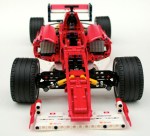
First, I built 8386 as is. After a good hour, I had the stock 8386 complete. I had my constraints, so now I needed to modify the set. I started with the front suspension, as I thought that would be rather difficult. Turns out it wasn’t. I removed a couple of axles, and added in two hard shock absorbers. The geometry made the suspension adequate. It could have been a little harder, and could have been a little more aesthetically pleasing, but it worked.
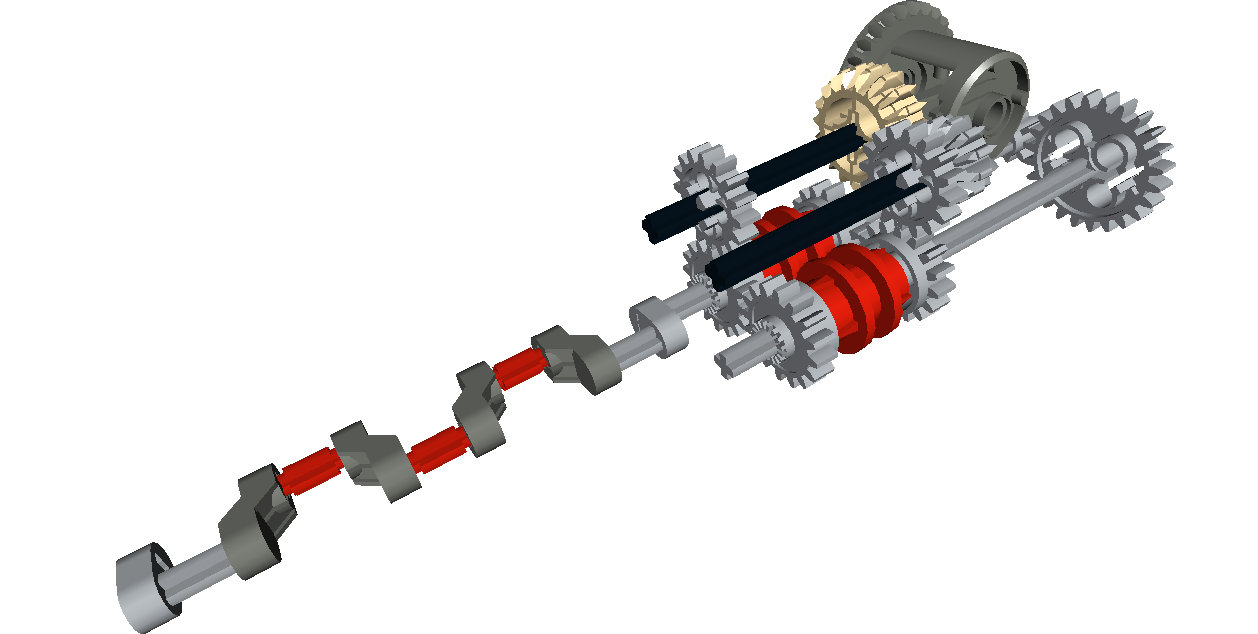
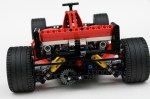
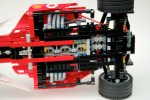
On to the rear. First to go was the trans-clear engine. Ugh. I knew I wanted to add rear suspension, but I was not sure I wanted to add a gearbox due to the limited space. I played around with some designs, and decided I should give it a go. I came up with a design that would need only 7 studs of space. The design would be off center of the car, which would present some changeover problems, but saved 3 studs of length. One axle would connect directly to the new style differential, and the other axle would connect directly to the crankshaft of the V-10. At first, I set the gearbox behind the differential, but I found that option to be rather unsightly and added some complications to the gearshift linkages. With some modifications to the chassis, moving the V-10 forward a stud, and increasing wheelbase by moving the rear axle back 1/2 stud the gearbox would fit.
Once the gearbox was designed, I worked on the rear suspension. The gearbox got in way of the suspension design I wanted, but that was a cost I was willing to pay. I used the same upper arms as 8386, but created a liftarm design for the lower arm. Two shock absorbers connected from the chassis to the slightly modified wheel hub. While a pushrod design would have been nice, this setup worked well enough for me. I added a simple linkage to the gearbox that connected to levers in the cockpit. It looks a little clunky, but it allow all the controls to be at hand. I then made some modifications to the exhaust system so it would fit the added features. I made some modifications to the body work to give the car some visual lines that matched F2004, and added a little more white. The car was done.
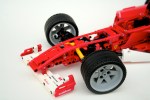
End of the V-10, beginning of the cramped transaxle.
All in all the design worked well, and required less time than some of my more fancy builds. It was a restful project, and one to which I enjoyed returning.
Maybe in another ten years, I’ll update this again with new features made possible with 10 years of LEGO changes and developments. I look forward to it.
Happy Building.
End of the V-10, beginning of the cramped transaxle.
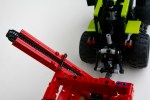
I have said it before; I really like set 8081. It has so many possibilities for improvement. After talking a look at RM8‘s design, I thought I should do a street version of the 8081 to follow up on the 4×4 8081 I built a while back.
The full gallery can be found here, and free instructions can be found here.
I took the existing bodywork and frame of the 8081, and chopped out the rear suspension unit to revise the rear suspension design. I wanted an independent setup with a differential. As I have used a couple of times before, I used a floating differential design. The differential is attached to the driveline much like a live-axle set up, but is connected to two independently mounted wheel hubs. I have used this before, and I like the way it works. It allows for a driven axle with independent suspension in a very narrow setup. This way each wheel can move independently, but it does not require two universal joints on each side of the differential. Since the differential is not fixed to the chassis, it has to be braced to the driveshaft. While this set-up is not often used in real cars, it works well for LEGO designs. I used the new wheel hubs, and attached them via a short upper arm, and a long lower arm so the camber would change through the suspension travel.
Moving to the front, I kept the V-8 as in my 4×4 8081, and built the rest of the front around the motor. I used a suspension design similar to 8081, where there are two equal length arms holding the steering pivot. A single shock absorber is used for each side. All told, the car is about two studs lower, due to the new suspension, and the new tires.
It is not much of a redesign, but sometimes I need a project that is not a significant, and allows me to just build something simple.