Porsche 714


My Entry for the LEGO Rebrick Porsche Contest.

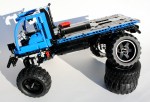
This year, it seems like everything about LEGO Technic is about Porsche. LEGO created a 911, and started a contest for creating your own Porsche. Porsche is all everyone is building and talking about.

714

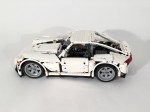
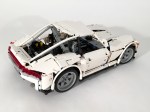
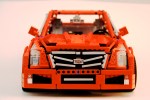
So I made one too. The Rebrick team posted a contest to design your dream Porsche, and thinking of the words of Mr. Porsche, “I couldn’t find the car I dreamt of, so I decided to build one myself,” I set to work. My dream Porsche lives in the spirit of the 914 and the 924: A compact, lightweight, mass-market, rear-wheel-drive sports car. It has a long hood, short overhangs, and a roofline that alludes to Porsches of today and yesterday.

714 Rear

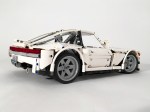
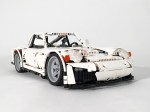
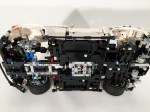
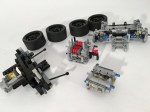
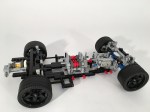
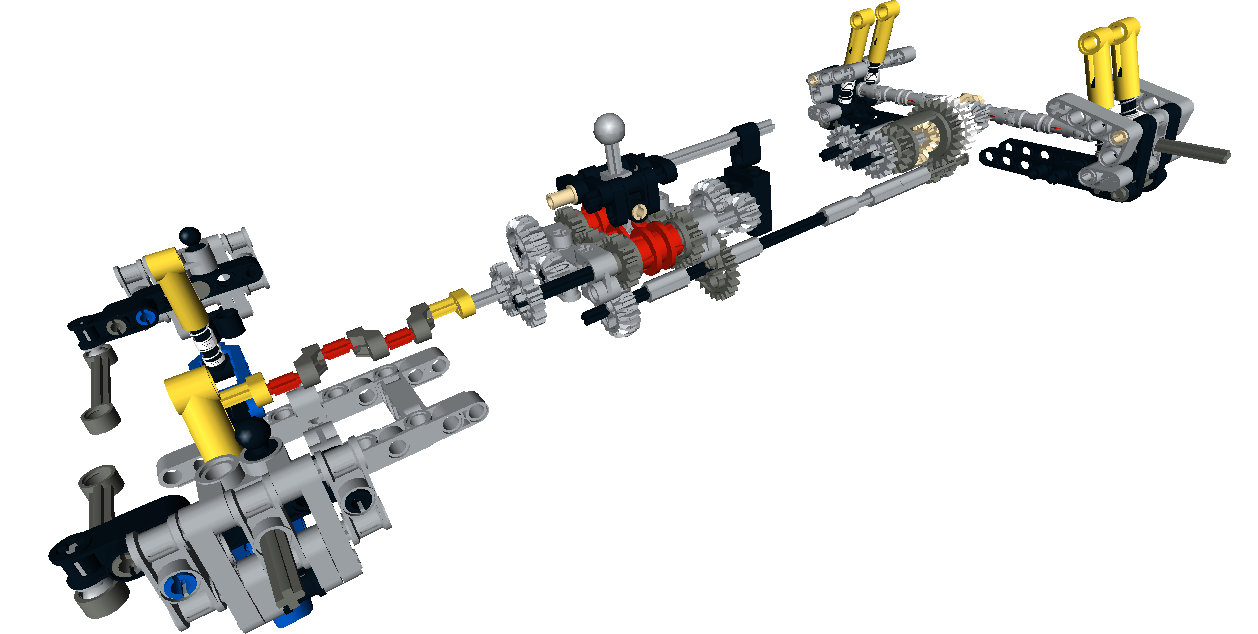
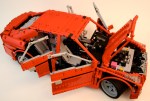
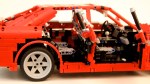
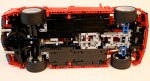
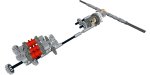
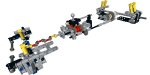
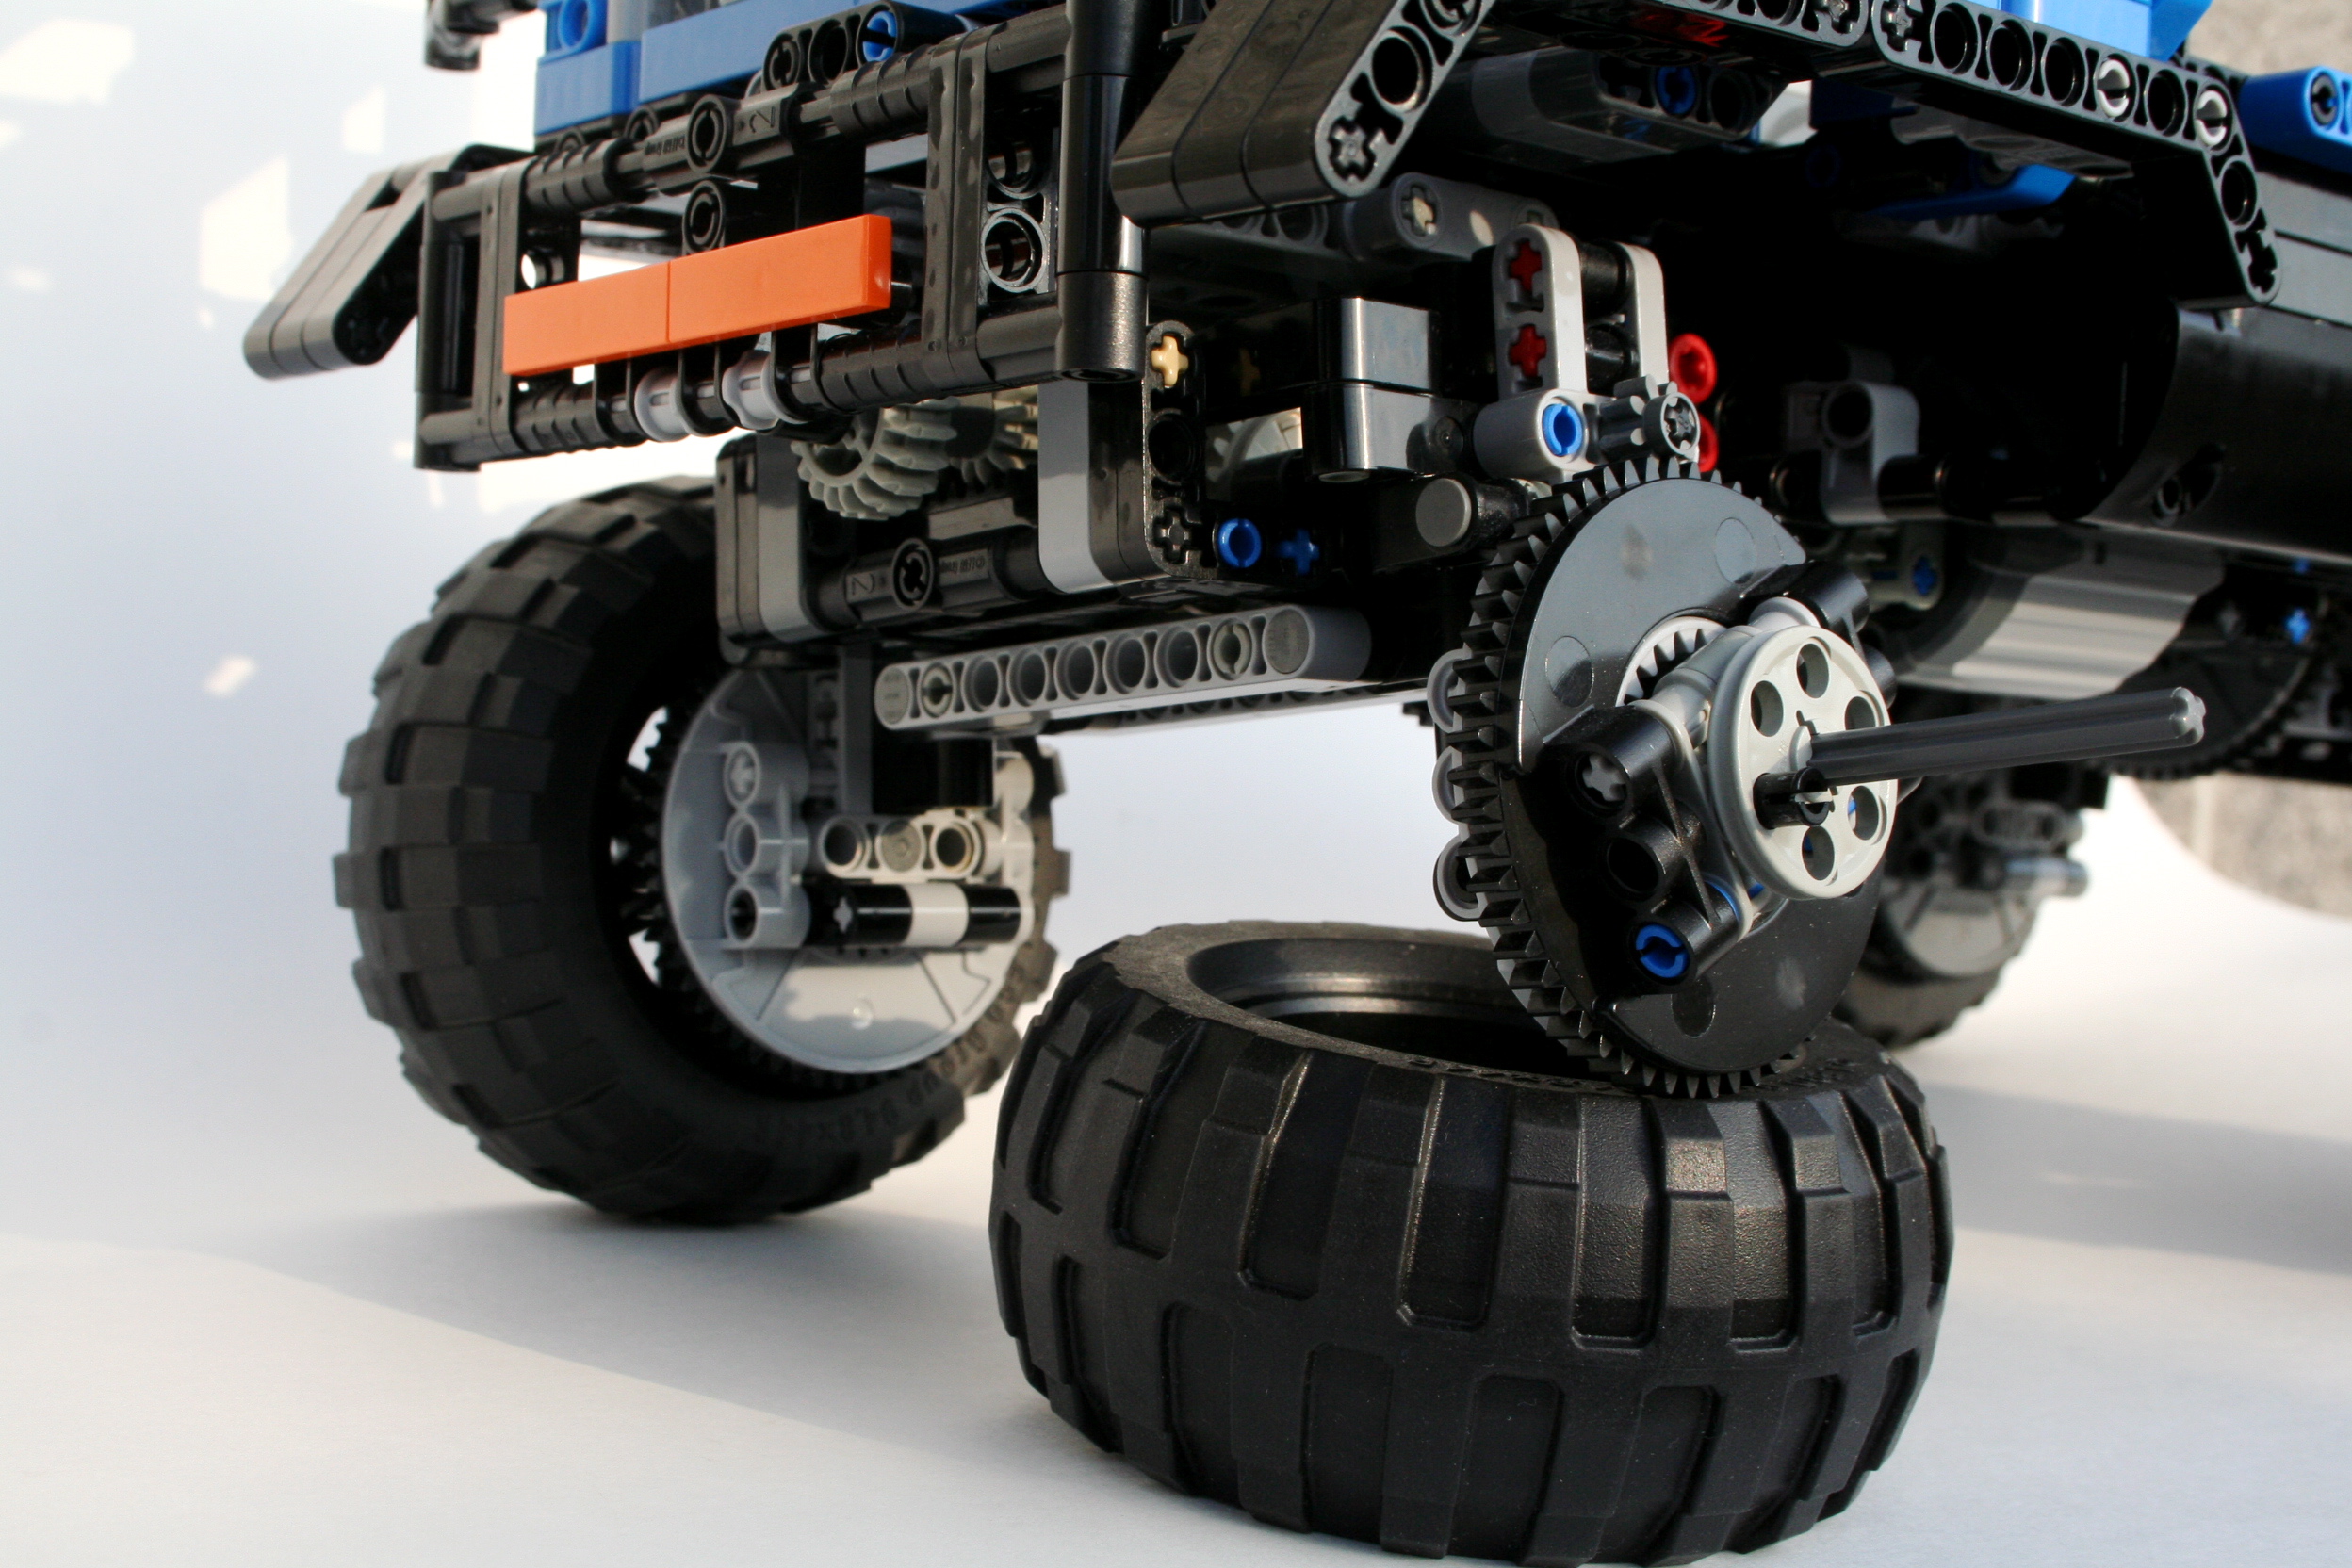
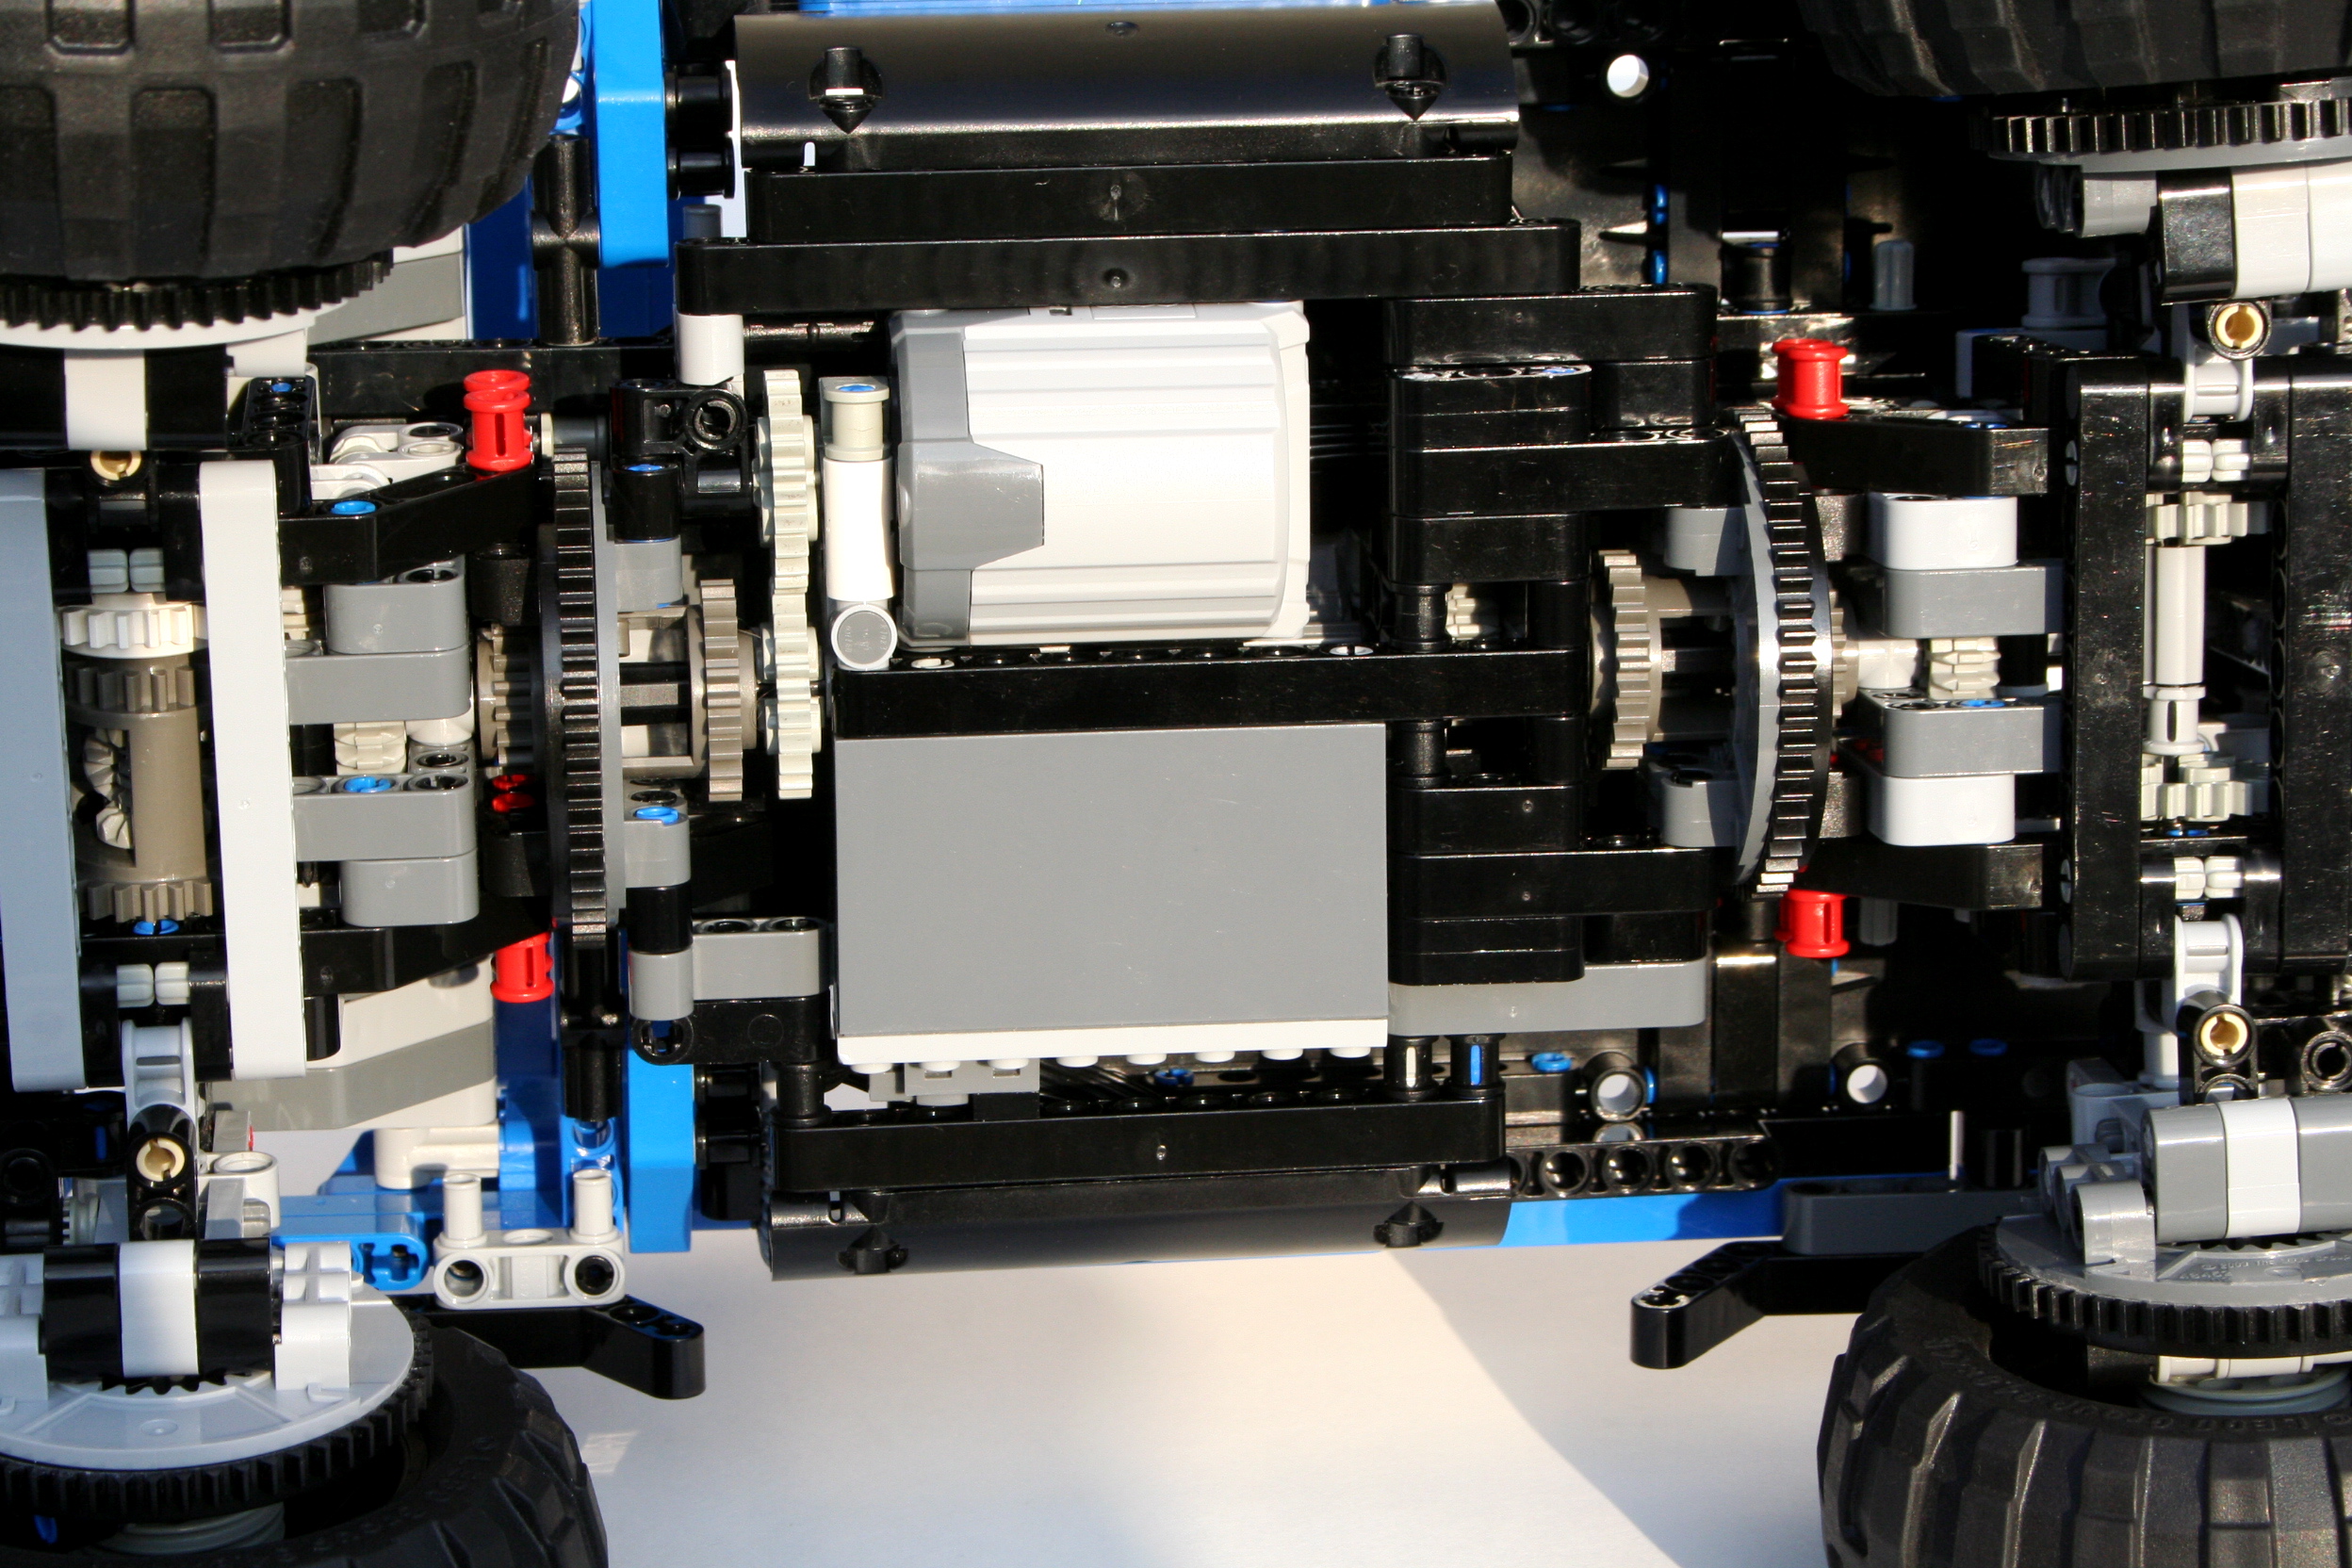
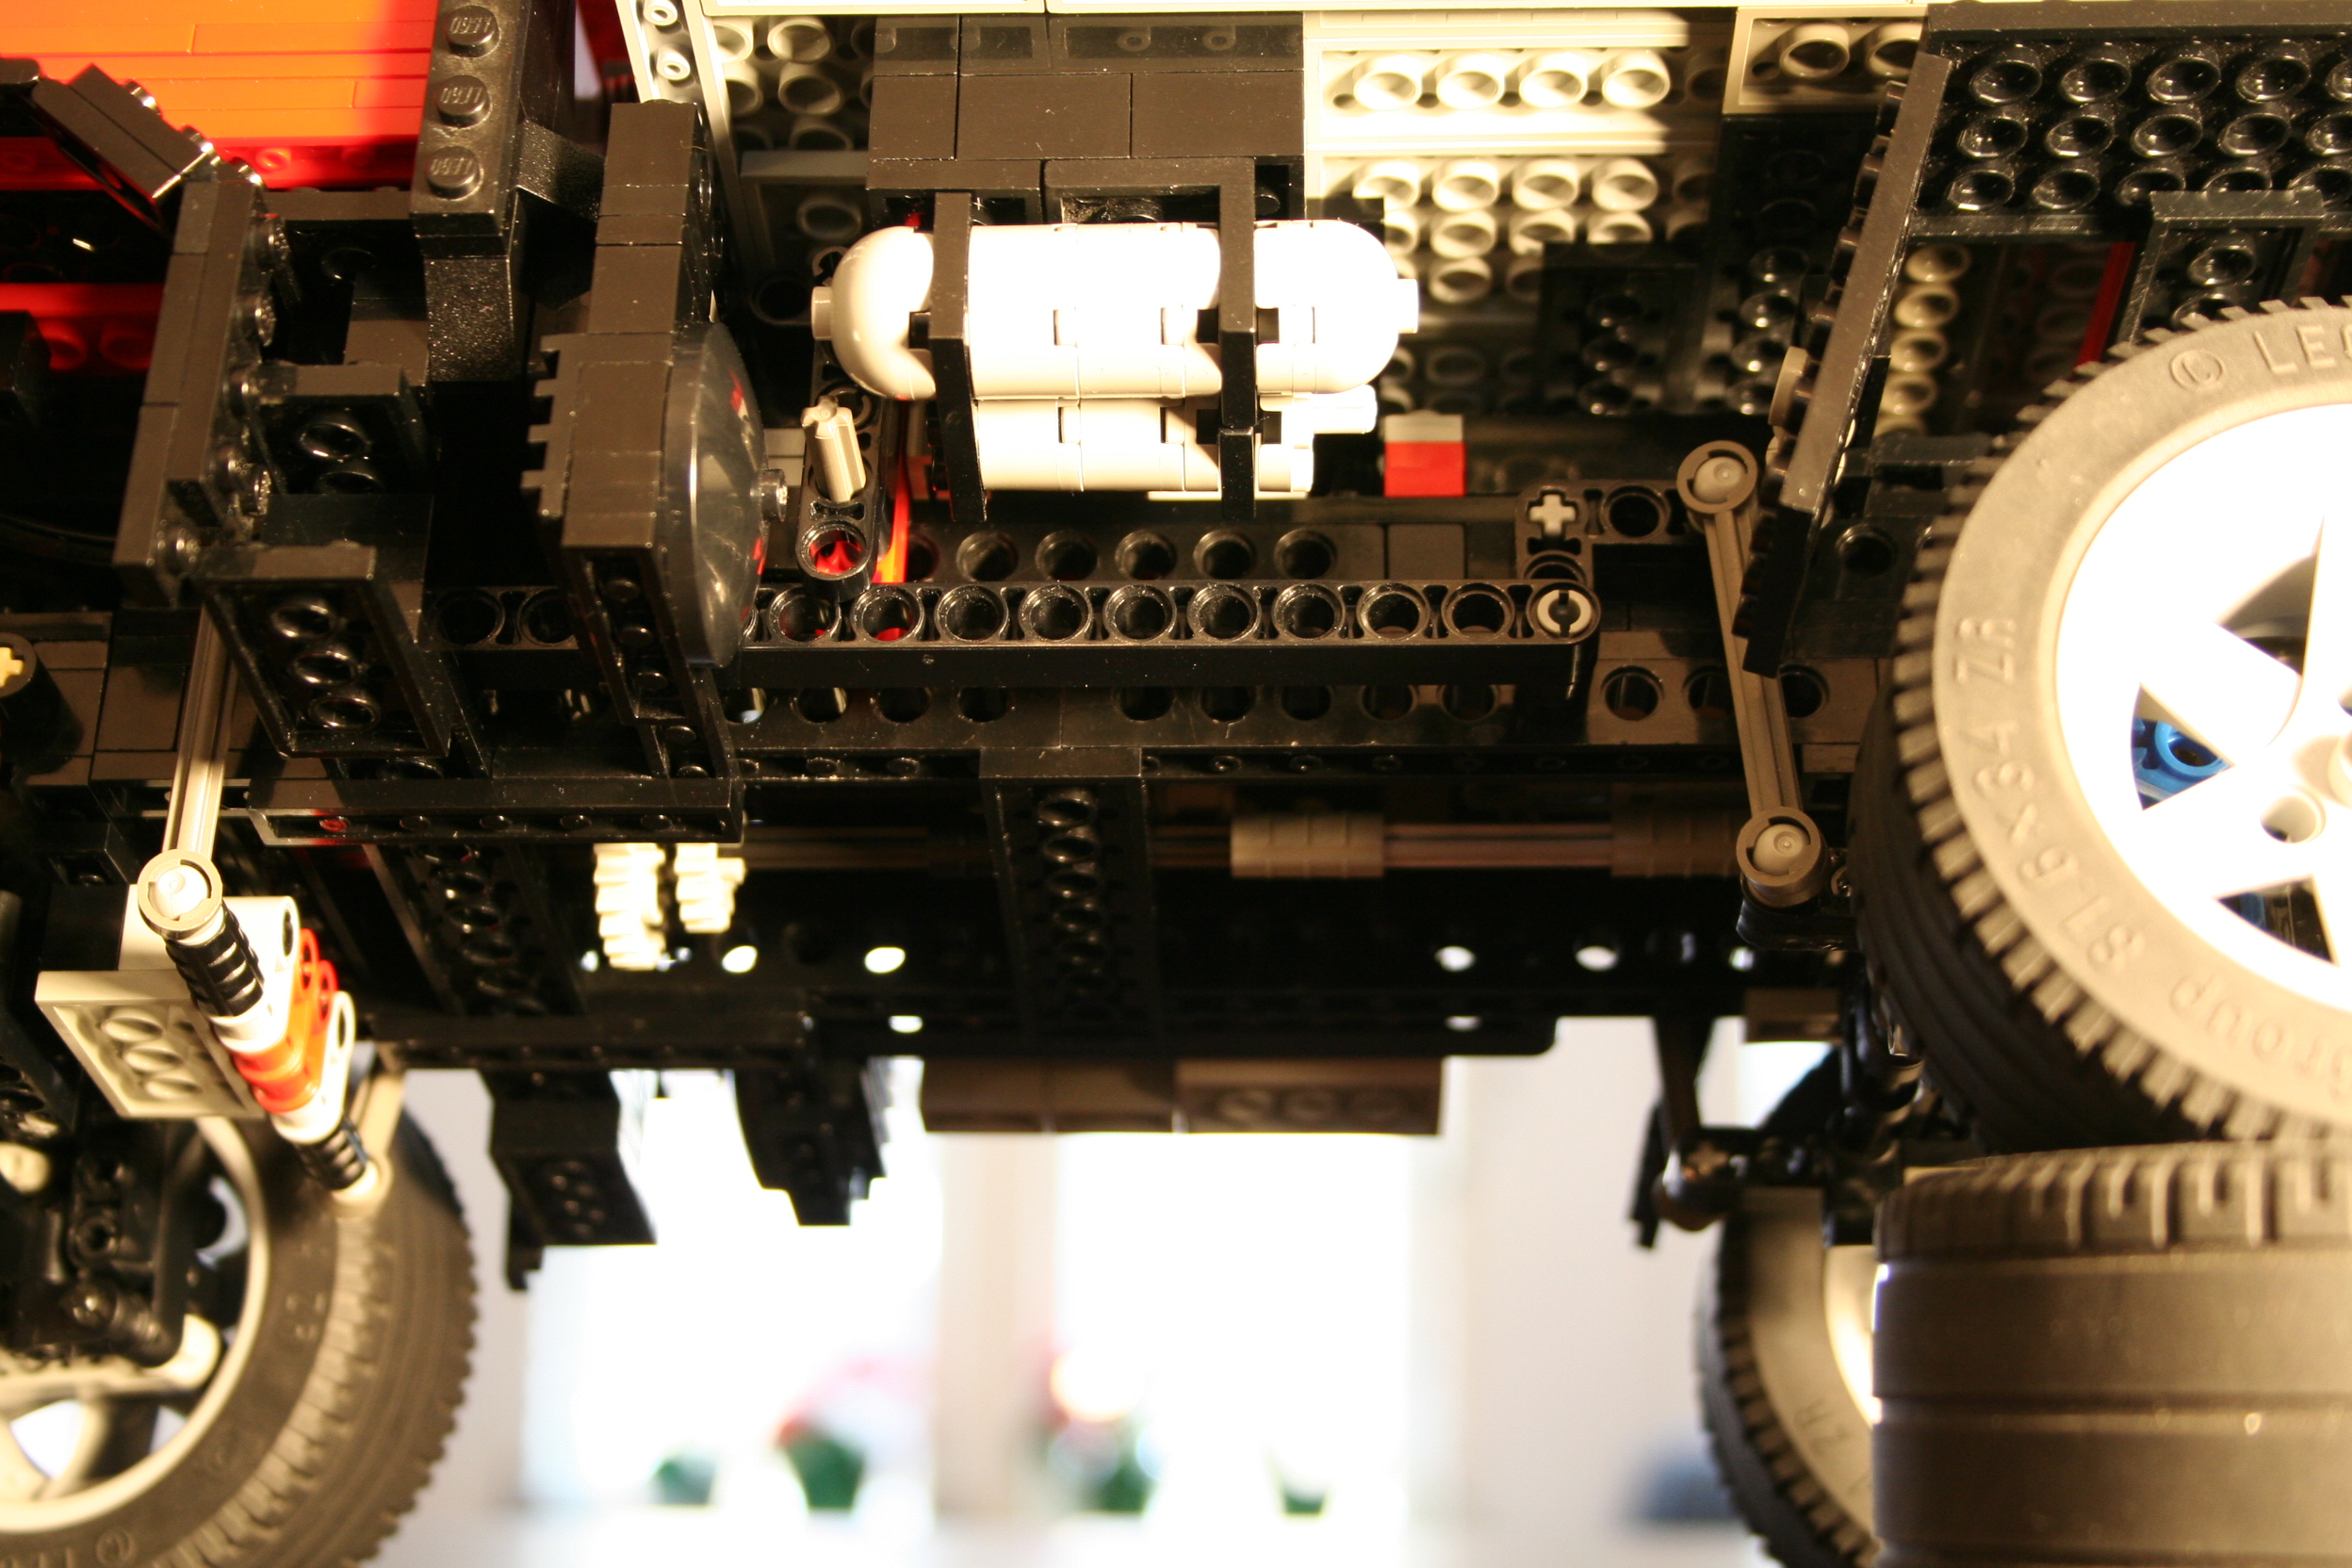
I had six weeks to design a car. In a week I had the front and rear axle, and the transmission. The transmission is a similar unit to the one I had in the ATS. Six speed manual, with a single point shift lever. It keeps the gear changes quick with short throws. The rear axle is an independent suspension design, with short upper swingarms, and long lower swingarms. This changes the camber of the wheels as they move through the suspension travel, to keep a consistent contact patch around a corner. The limited slip differential is mounted longitudinally behind the axle. The front suspension is also independent with short upper and long lower swingers. The are mounted to a steering uckle that gives both Ackerman and caster geometry.

714 WIP1

Because it was my dream car, I wanted a car that would be inexpensive, and teach me how to drive fast. A front engine, rear wheel drive is a less expensive car to design and build. Additionally, my car would have a Boxer 4 for lower cost, and an option for Boxer 6 for more performance. Since I can use some training to be a better fast driver, I though a roll cage would be necessary.

714 WIP2

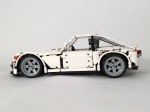
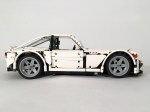
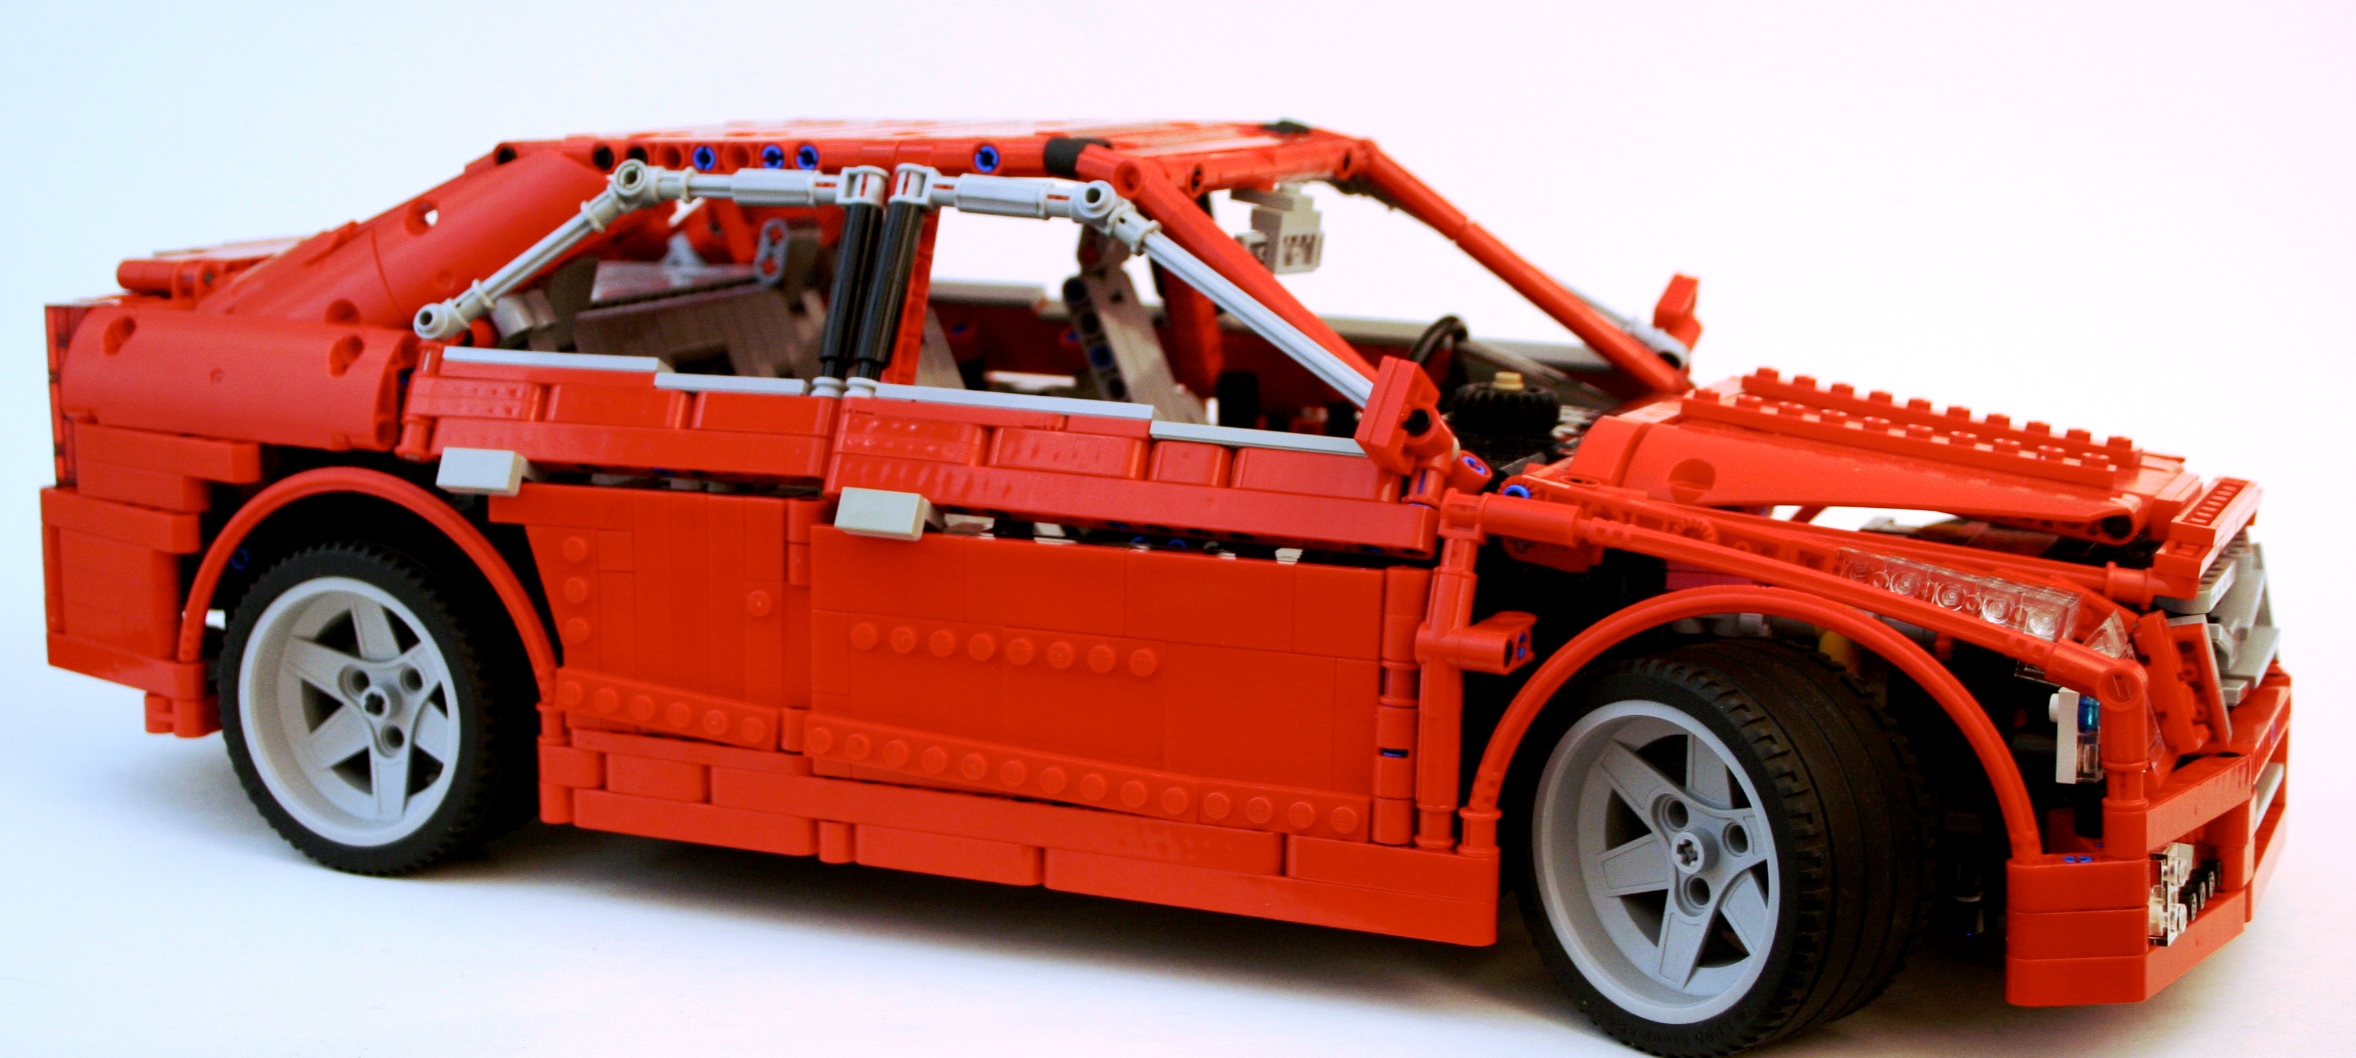
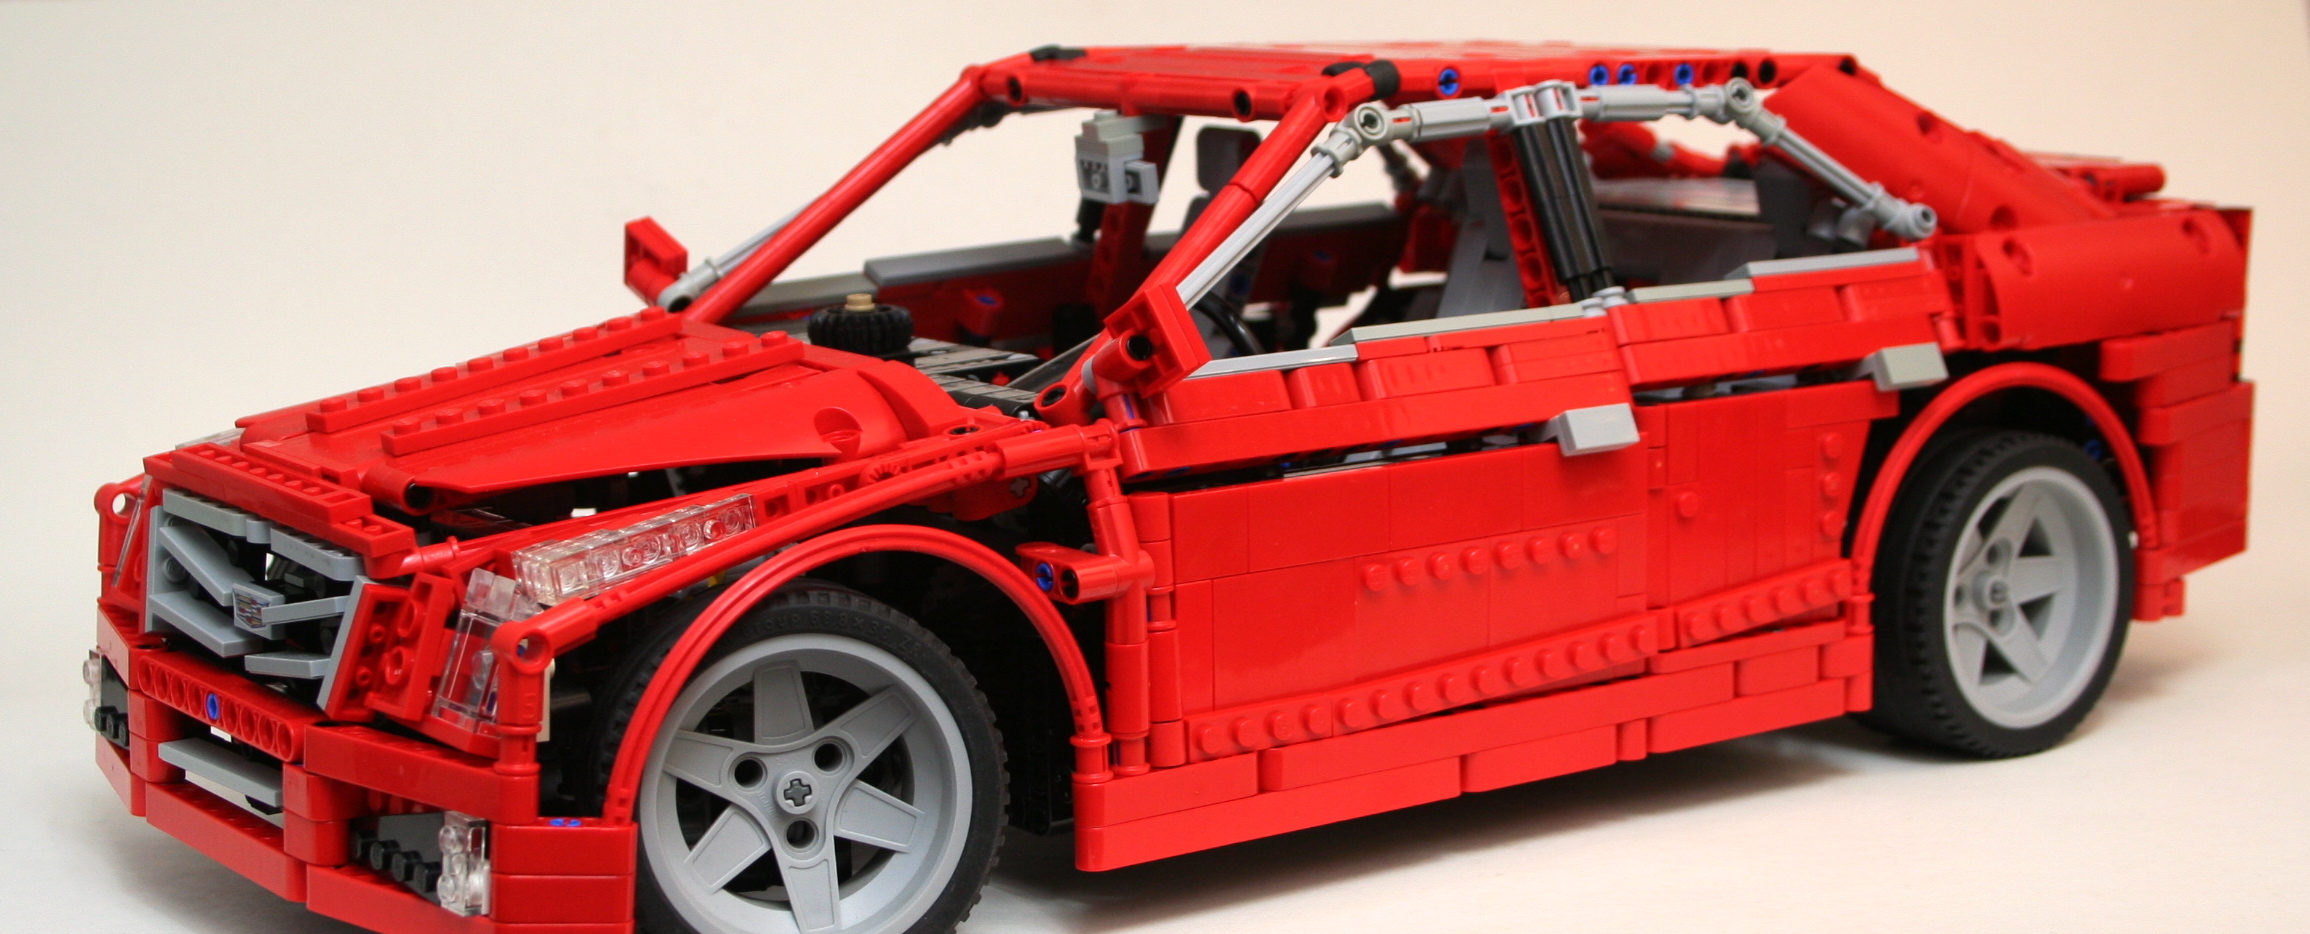
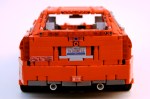
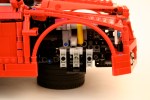
The remaining five weeks were spent working on the bodywork and the interior, which always takes more time than you think. I fit the cabin in around all the mechanical bits, and was able to add a glovebox and a manually adjustable tilt steering wheel. The seats are simple, but match the car interior well. I wanted to keep a couple of features that were iconic in my mind with Porsche cars: Round headlights, a full width thin taillight, a curvaceous roof, hunches over the rear wheels, and a taller greenhouse. After many drafts, I was able to get a design I was pleased with.

The car turned out how I wanted, and I felt it was a good contribution to the contest. The front of the car did not turn out how I envisioned it in my mind. The rear did not look as clean as I wanted. Mechanically the car works great. The suspension works perfectly, and the steering works flawlessly without hitting the wheel fenders. The transmission is great, and the limited slip differential continues to do the trick.

After all this talk about Porsches, I’ll take some off and build something different.

Happy Building.

Cadillac ATS


A while ago I decided I was going to do a proper new school supercar. Something with all the features that are to be expected in the LEGO Technic Community. You know what they are; suspension, a gearbox, opening doors, a working engine, steering, and something fast looking. Probably red. It was time to test my chops and throw my hat into the ring.

The full gallery can be viewed here, and instructions may be purchased for $9 USD. Partlist

Buy Now Button

Cadillac ATS

It has been a long time since I have built a supercar. While I enjoy many of the cars others make, I long for exceptional creativity in suspension design, gearboxes, and body style. It was time for me to build another one and contribute to these areas. About two years ago I set out to create a six speed gearbox that would have a more realistic gear change movement. I tried linkages, springs, and so many gears. In a bit of a breakthrough, I offset the two outside changeovers vertically by 1/2 stud. This allowed for the changeover lever to connect all three changeovers as it rotated from a single center pivot point. Once this design was completed, it needed a home.

ATS Transmissions

I have a preference for sedans rather than coupes. Plus too many two-door supercars have been created. Forgive the slight nationalism, but I thought it would be fun to do an American sports sedan, so a Cadillac was the best choice since the demise of my beloved Lincoln LS. The ATS was new, and at the scale would be a little more manageable than the CTS. I worked a little on the scale of the car. Some parts would be a challenge to convey the look, but I was ready to start building.

I started with the front suspension. The new suspension arms allowed for a short/long arm setup. The two different arm designs allowed for a increasing negative camber as the suspension moved through its travel. Additionally, the pivot points on the steering hub allowed for a kingpin inclination to provide an improved caster angle. Finally, I added Ackerman geometry to the steering link. After some work mounting the suspension, and the rack and pinon steering, I had the front suspension done.

ATS Front Sus

The rear suspension was more simple, but still had some unique features. While the real ATS uses a 5 link setup in the rear, I was not too impressed with the results I came up with as too much flex was found at the wheel. I started with a transversely mounted limited slip differential that I have used before. This connected directly to the two half-shafts for the rear wheels. I applied a short/long arm setup for the rear suspension so the tires would keep their contact patch as the body would roll through a corner. Like the front, this created increasing negative camber as the suspension moved through its travel. Normal in real cars, not often replicated in LEGO.

ATS Chassis

Tying all of these parts together was a little bit of a challenge. I wanted the steering wheel to be connected to the steering as well as a HOG knob on the dashboard. In addition, the doors, trunk, and hood should all open. Naturally, the car had to have a spare tire, and various engine options which could be easily removed. The chassis had to be stiff enough for the suspension to function well. Packing this all together took some time. About 9 months, but who is counting?

ATS Left Front

But what took the most time was the body work. This is the part for which I have little motivation, and the important part that would identify the car as an ATS. I had a lot of work to do. And my palmares have not trained me well for this task. After major parts were placed, and the dimension were set (37 stud Wheelbase, 60 stud Length, 25 stud Width), I worked on one section at a time. As the front bumper was part of the chassis, this part was developed early. As did the rear bumper. The headlights are unique for the ATS, so this was done early as well. After the roof was placed I worked on the trunk, which came together rather easily. I worked on the hood of the car, and after two designs I was happy with the result. I then worked on the grill, and after tinkering with a couple of SNOT techniques, I was able to get most of the distinctive Cadillac grill in my design.

Cadillac Grillz

Then off to the doors. I made seven designs. Most sedans these days have various creases that identify their sedan as different than any other sedan. You will notice the ATS has two, one on the bottom that rises slowly to the rear, and one midway up to the windows that moves along the length of the car from the hood to the trunk. The top line was accomplished by having the angle for the windows start a little lower on the front door and higher by a 1/2 stud on the rear door. The bottom crease was added by attaching some angled plates to the bottom of both doors, which cant slightly inward. Finally, both doors have an upper pivot point that is 1/2 stud inboard to bring the upper part of the doors toward the center of the car. Once I got a design I liked, I had to bring it all together to make sure everything fit well. I adjusted the roof, modified the hood, tightened up the dashboard connection to the doors, and made some changes to the rear quarter panels. There were still some areas where improvement could be made, but I was running out of ideas. I was pleased with the result. Pleased enough to say I was done.

All in all, I was pleased with the result of the car. As this is my first studless supercar, I was happy with how it turned out. The functions were up to my standards, and nothing was compromised as the car came together. While I was overwhelmed with the bodywork, I was pleased with how it turned out. Because it took me a long time to get it to work, it may be a long time before I do another one. I was happy I did a sedan, and hopefully a new moniker can begin in the LEGO community. #supersedan.

Happy Building.

Kenworth T55


Traction.  It’s all about traction when designing a trial truck.  Because of this, many builders have tried a number of different solutions in designing their own trucks: differentials, gearboxes, various numbers of wheels, various gears ratios, countless suspension designs, and on and on.  So why would it be any different for my trucks?  Every truck I make is a reaction to some set of problems I have encountered with a previous truck.  This is my current solution.

The full gallery is here. Instructions are here.

The Kenworth T55 started as a proof of concept, and turned into a design of a fictional truck.  I wanted to somehow see if there was a way to use differentials in a successful trial truck.  For this to work, two things had to be accomplished.  First, there had to be a way to keep the tires from spinning uncontrollably when they lost contact with the ground.  And second, the torque going through the differential had to be low enough that it would not shred the gears inside the differential when the truck encountered an obstacle.   Could I make axles that had a limited slip differential while having all of the gear reduction at the hub?

Enter turntables.  I have seen some ideas before, most sigificantly from Borec, including this truck, so I went to work.  I designed a mount for the wheels and tires, and placed the universal joint as close the wheels as I could.  Then I used a limited slip differentail design, and sent the driveshaft back to the body.  A simple steering design was used, and the two fuctions passed through the common design of using a differental body through a turntable.

The chassis was designed to keep the weight low, both is mass and location.  As is common, I used the Power Functions XL motor for drive, and I decided to use the 8878 Battery box as it was significally lighter than the other design.  In addition, I would have a drive shaft and a steering shaft running the length of the truck, so the motor and power pack needed to set on both sided of the truck.  Also, because I used the turntables, the drive shaft was very high.  This gave great ground clearance, but I needed to keep the heavy components low.  By having both large components on the side, I was able to keep a short wheelbase of 30 studs, and keep the mass centered and low.  The driveline was complete.

Ever since my GMC 2500, I have held to the belief that a linked suspension is the most efective setup for four wheel trial trucks.  The design keeps all four wheels firmly planned, and does not have the wobbling feel of many pendular suspension designs.  But as is often the case, I ran out of room to place a link rod between the two wheels so I opted with useing the rubber connectors to keep the axles level.    I added a body, and a steering motor, wired everything together, and I was done.

So how did it work.  As you can see in the video, the suspension was effected by the steering and drive shafts.  This further confirms my thoughts on the linked suspension.  Second, the turntables did not really add much.  They added a lot of friction to the driveline, and though they kept the differentials safe because of the tall final gear they did not really isolate the forces on the differential as much as I would have liked.  Third, the limited slip differentials worked well, but still allowed for too much wheel slip.  I ended up replacing the rear with a locked axle, which seemed to work well.  So, for the next truck, bring back the linked suspension, and find a better differential solution.  Maybe then I can find some more traction.