BMW E30
January 31, 2024 Leave a comment
Who doesn’t like a BWM sedan?
Instructions are available for free at Rebrickable.com.

I go through stages of inspiration like so many other builders, and sometimes when I idea is working, you just need to follow where it leads. I had the idea to do a little 15 module wide sedan, and after a simple little draft looked like a boxy, old sedan, I decided to embrace that direction. From there I determined, with a little bit of effort, I could turn this little sedan into a trio of MOCs.
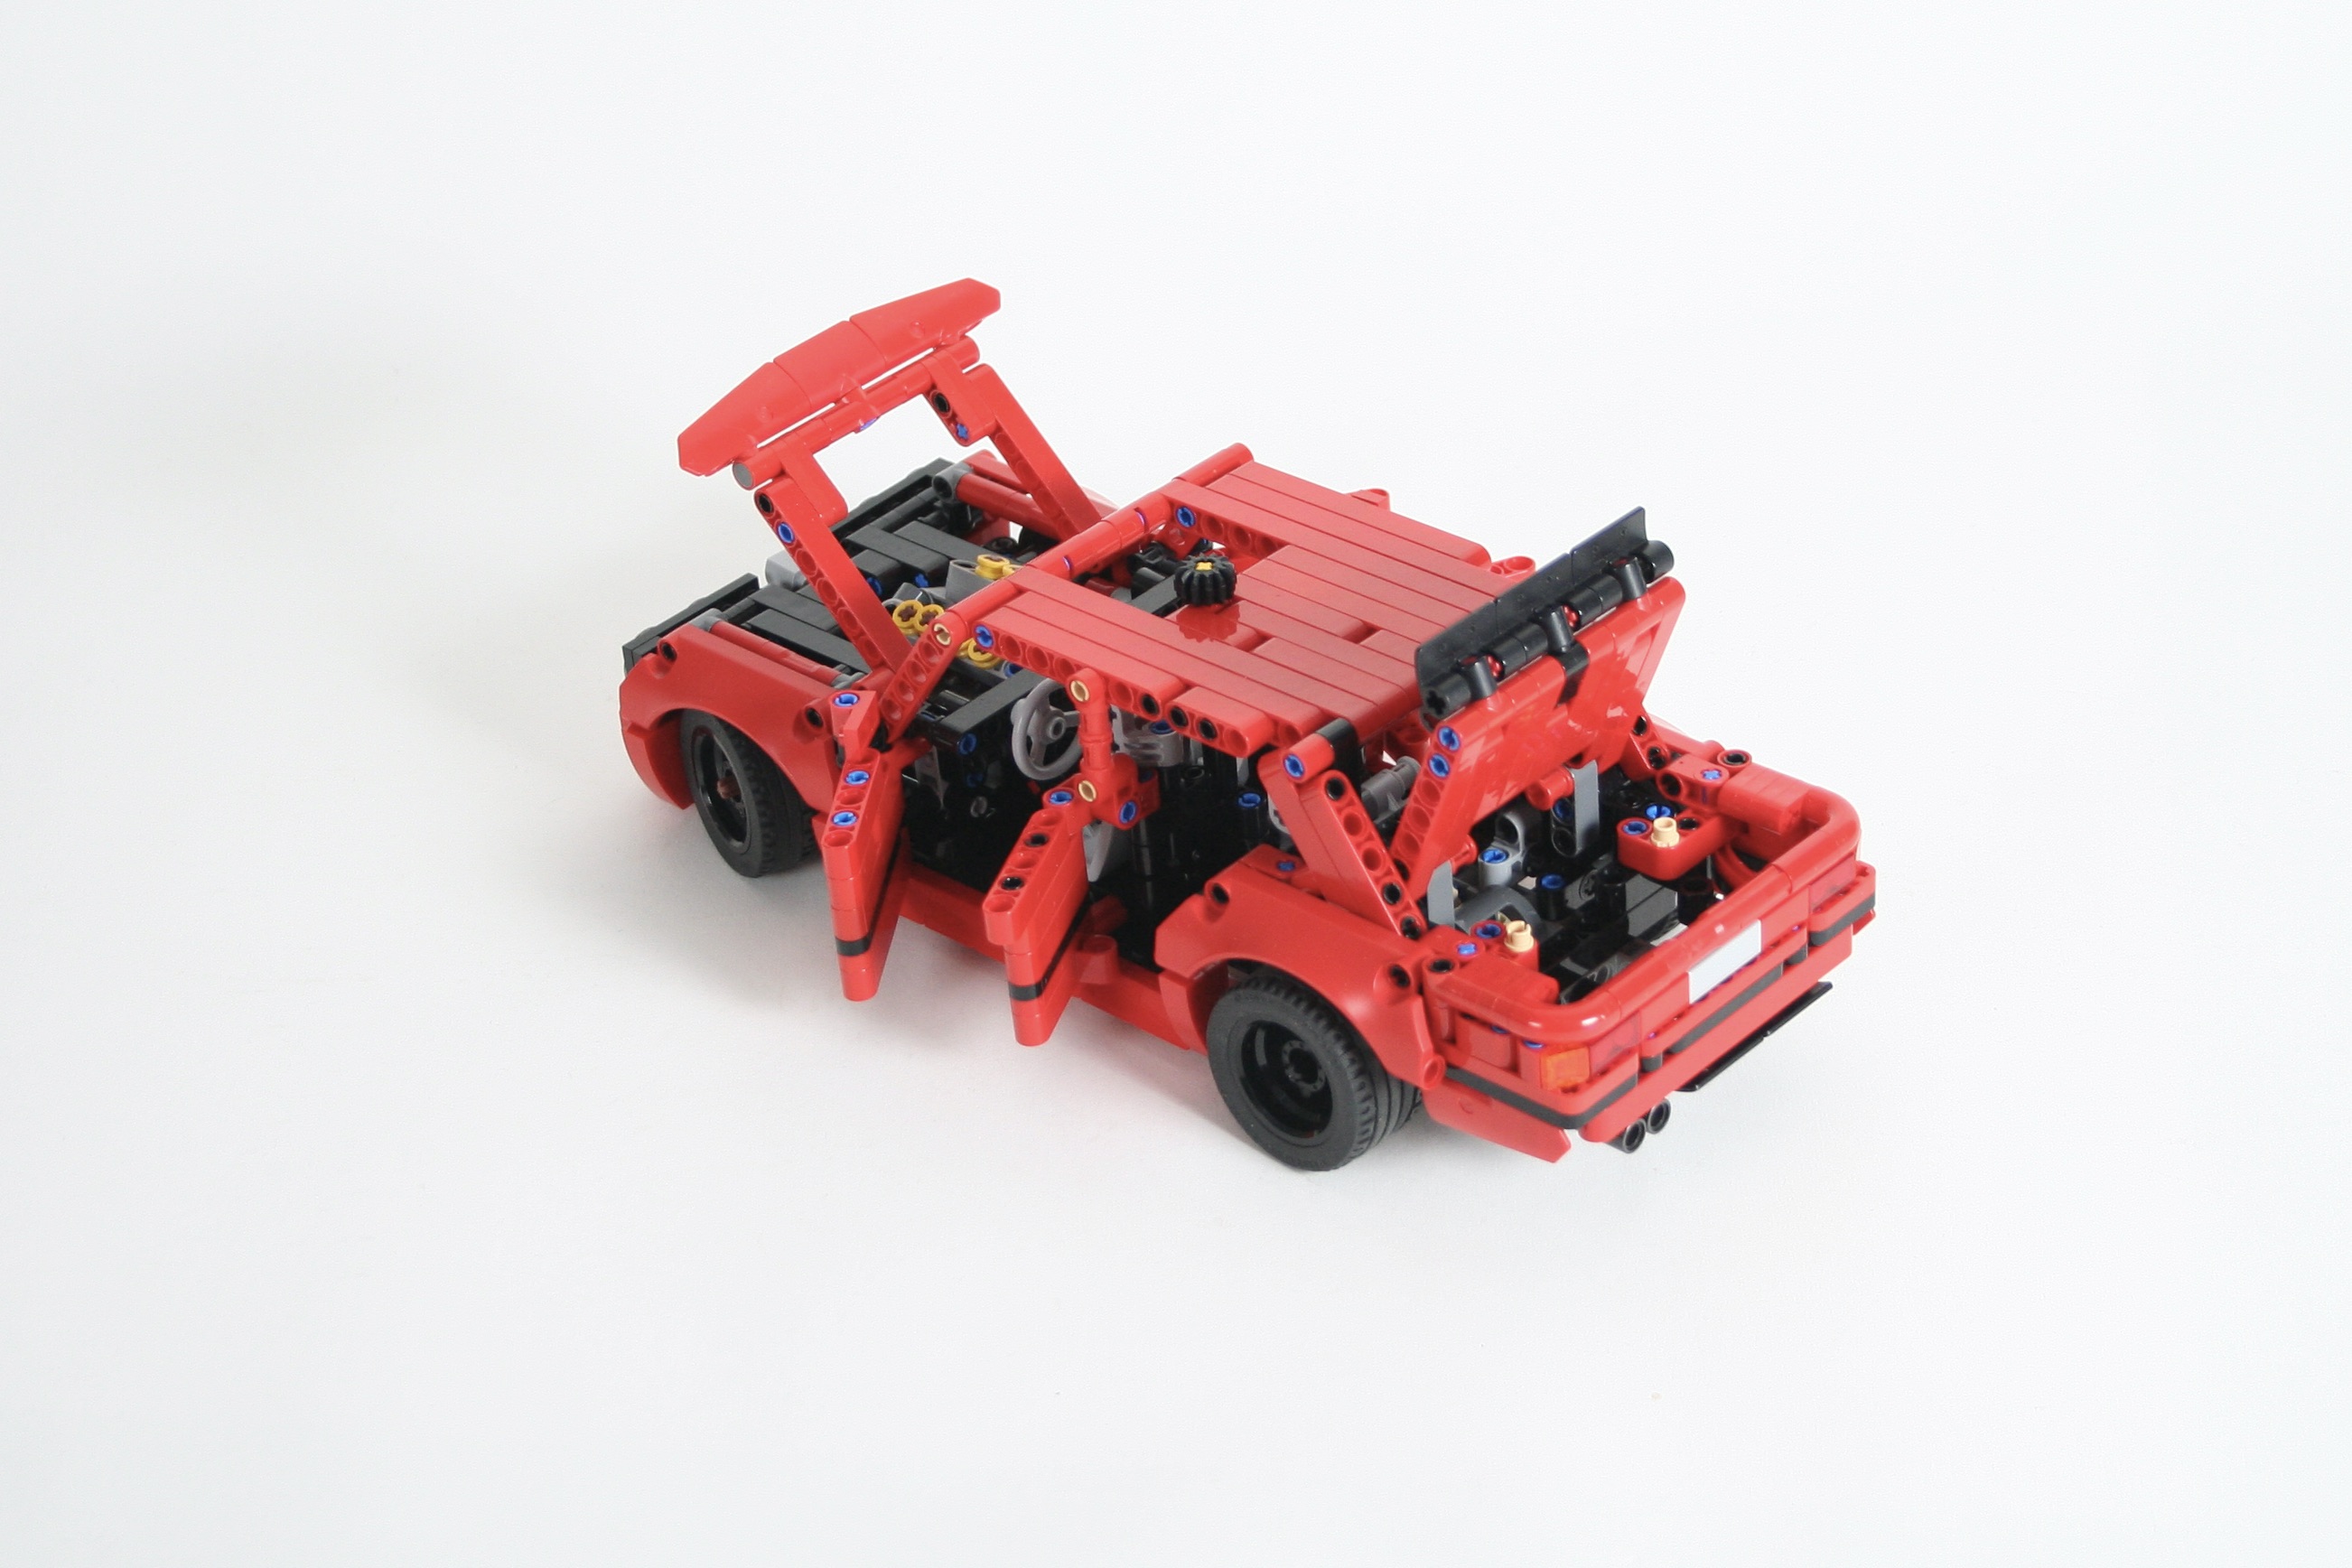
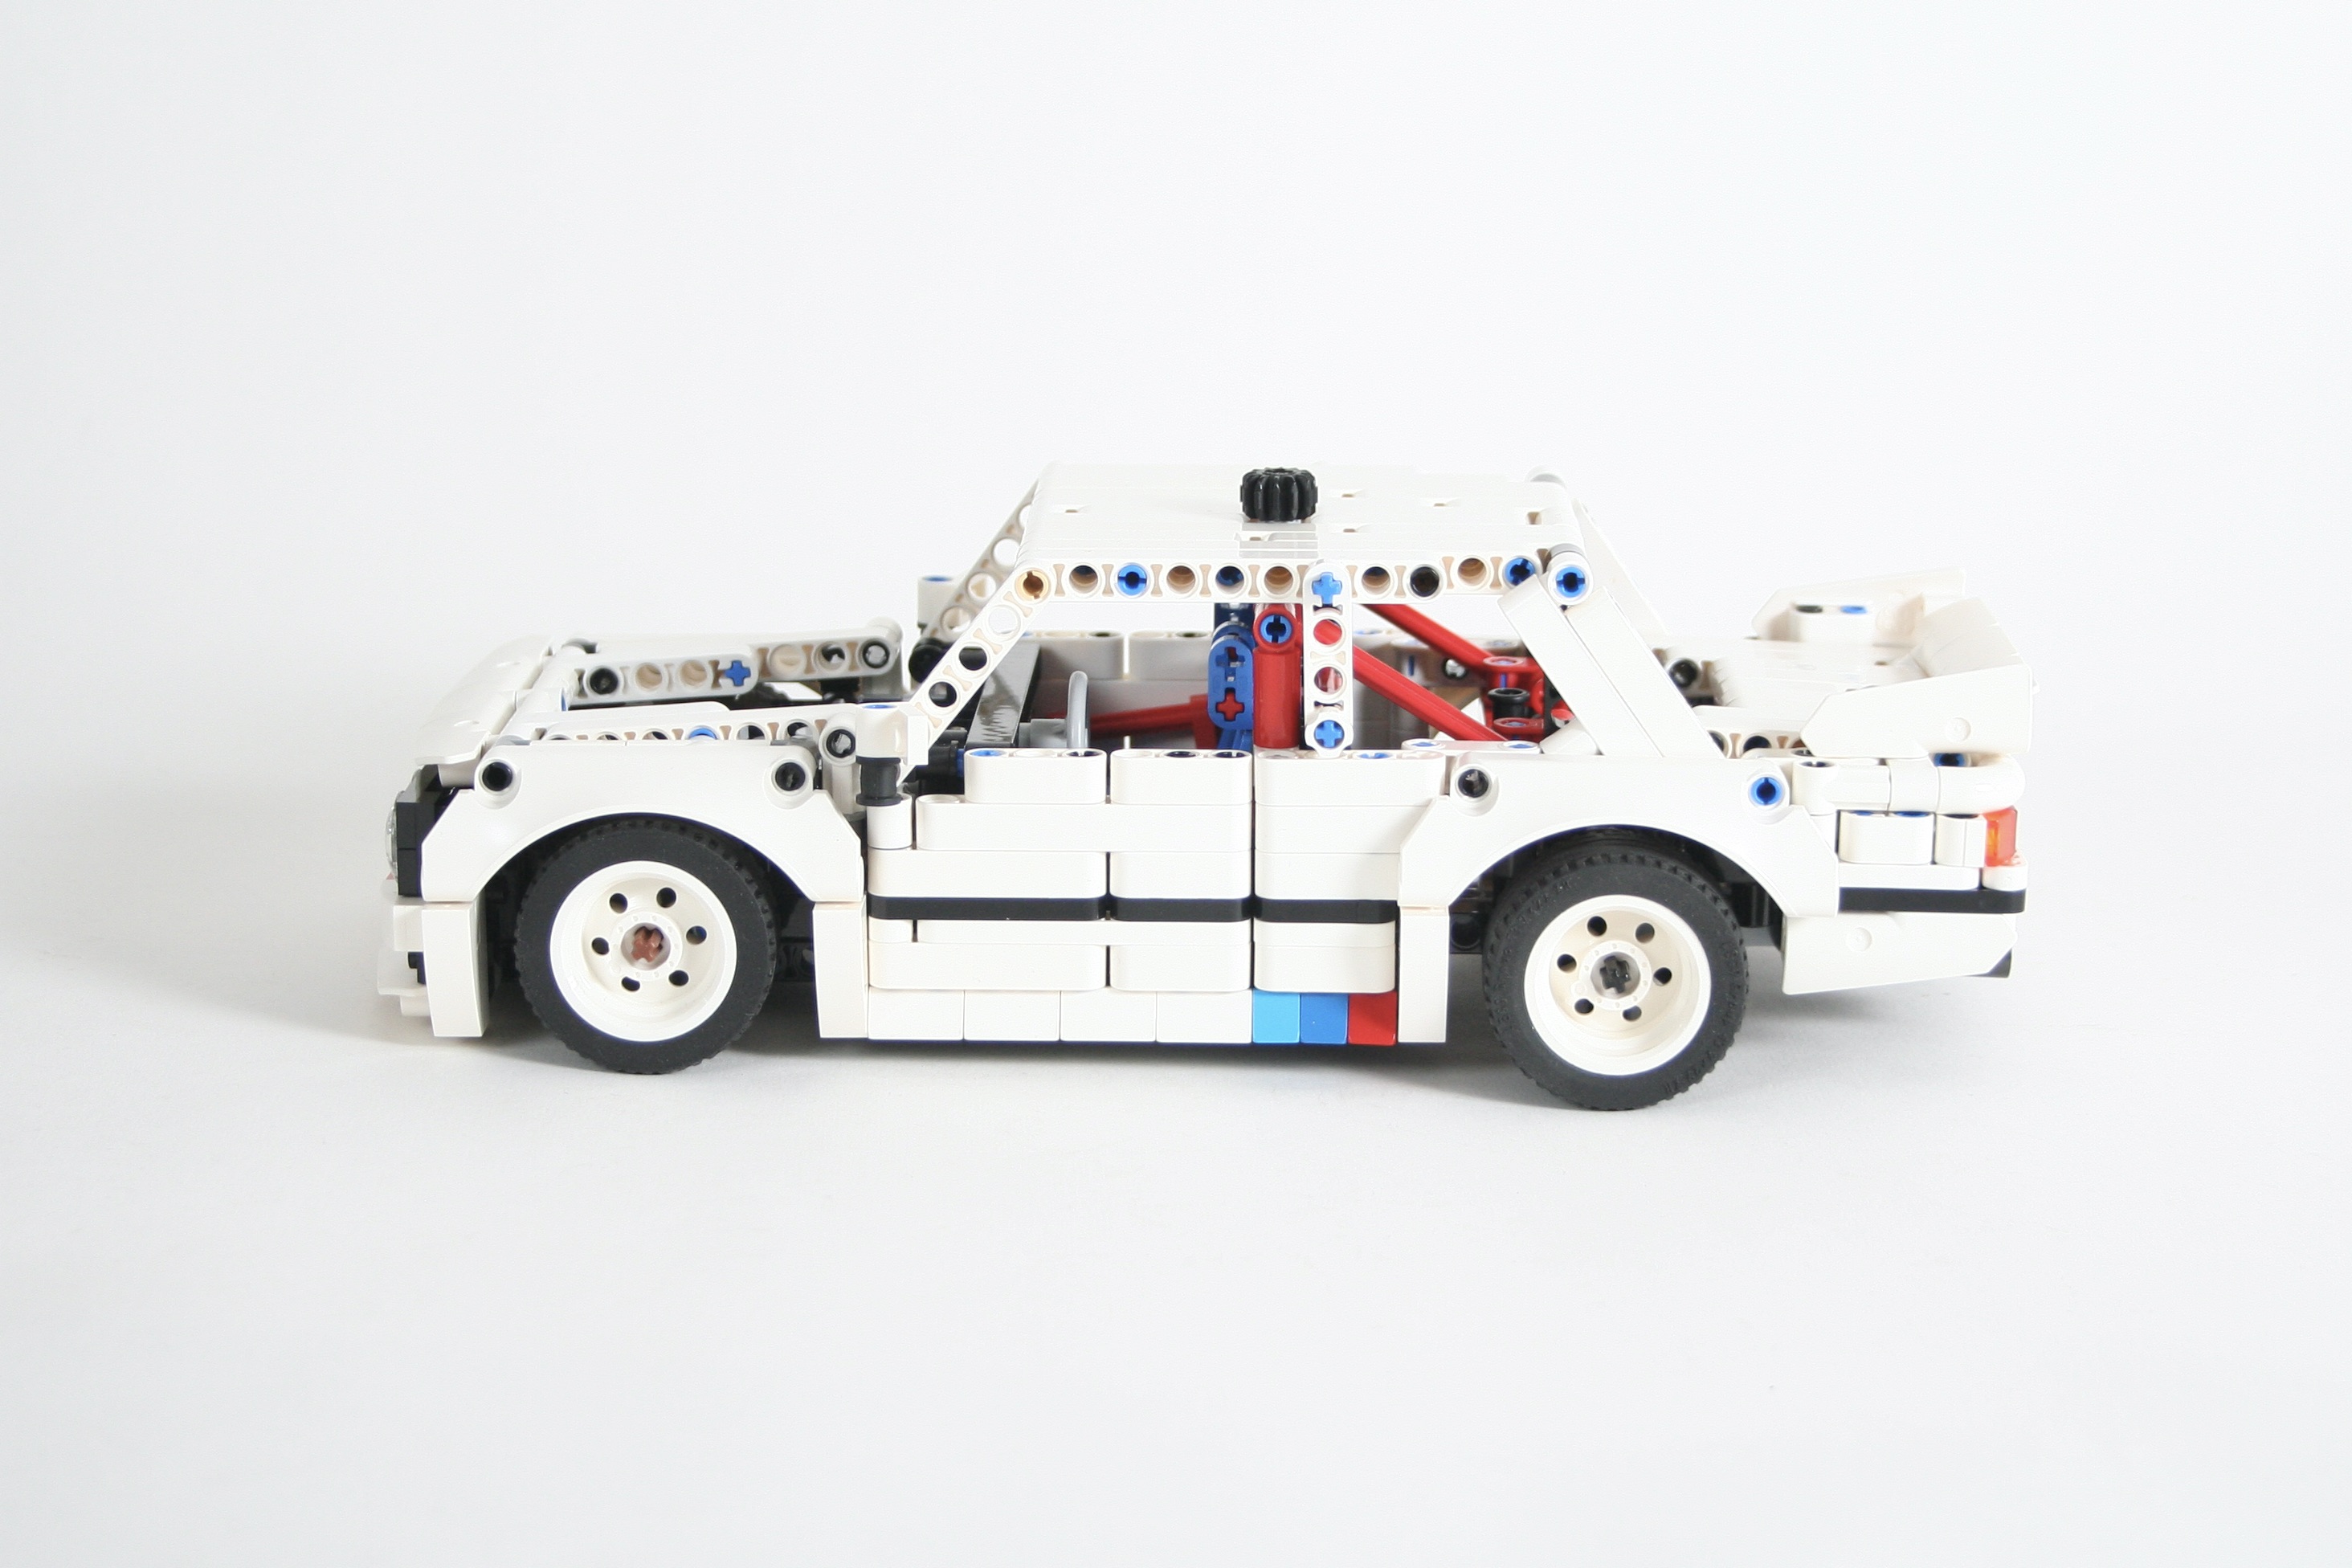
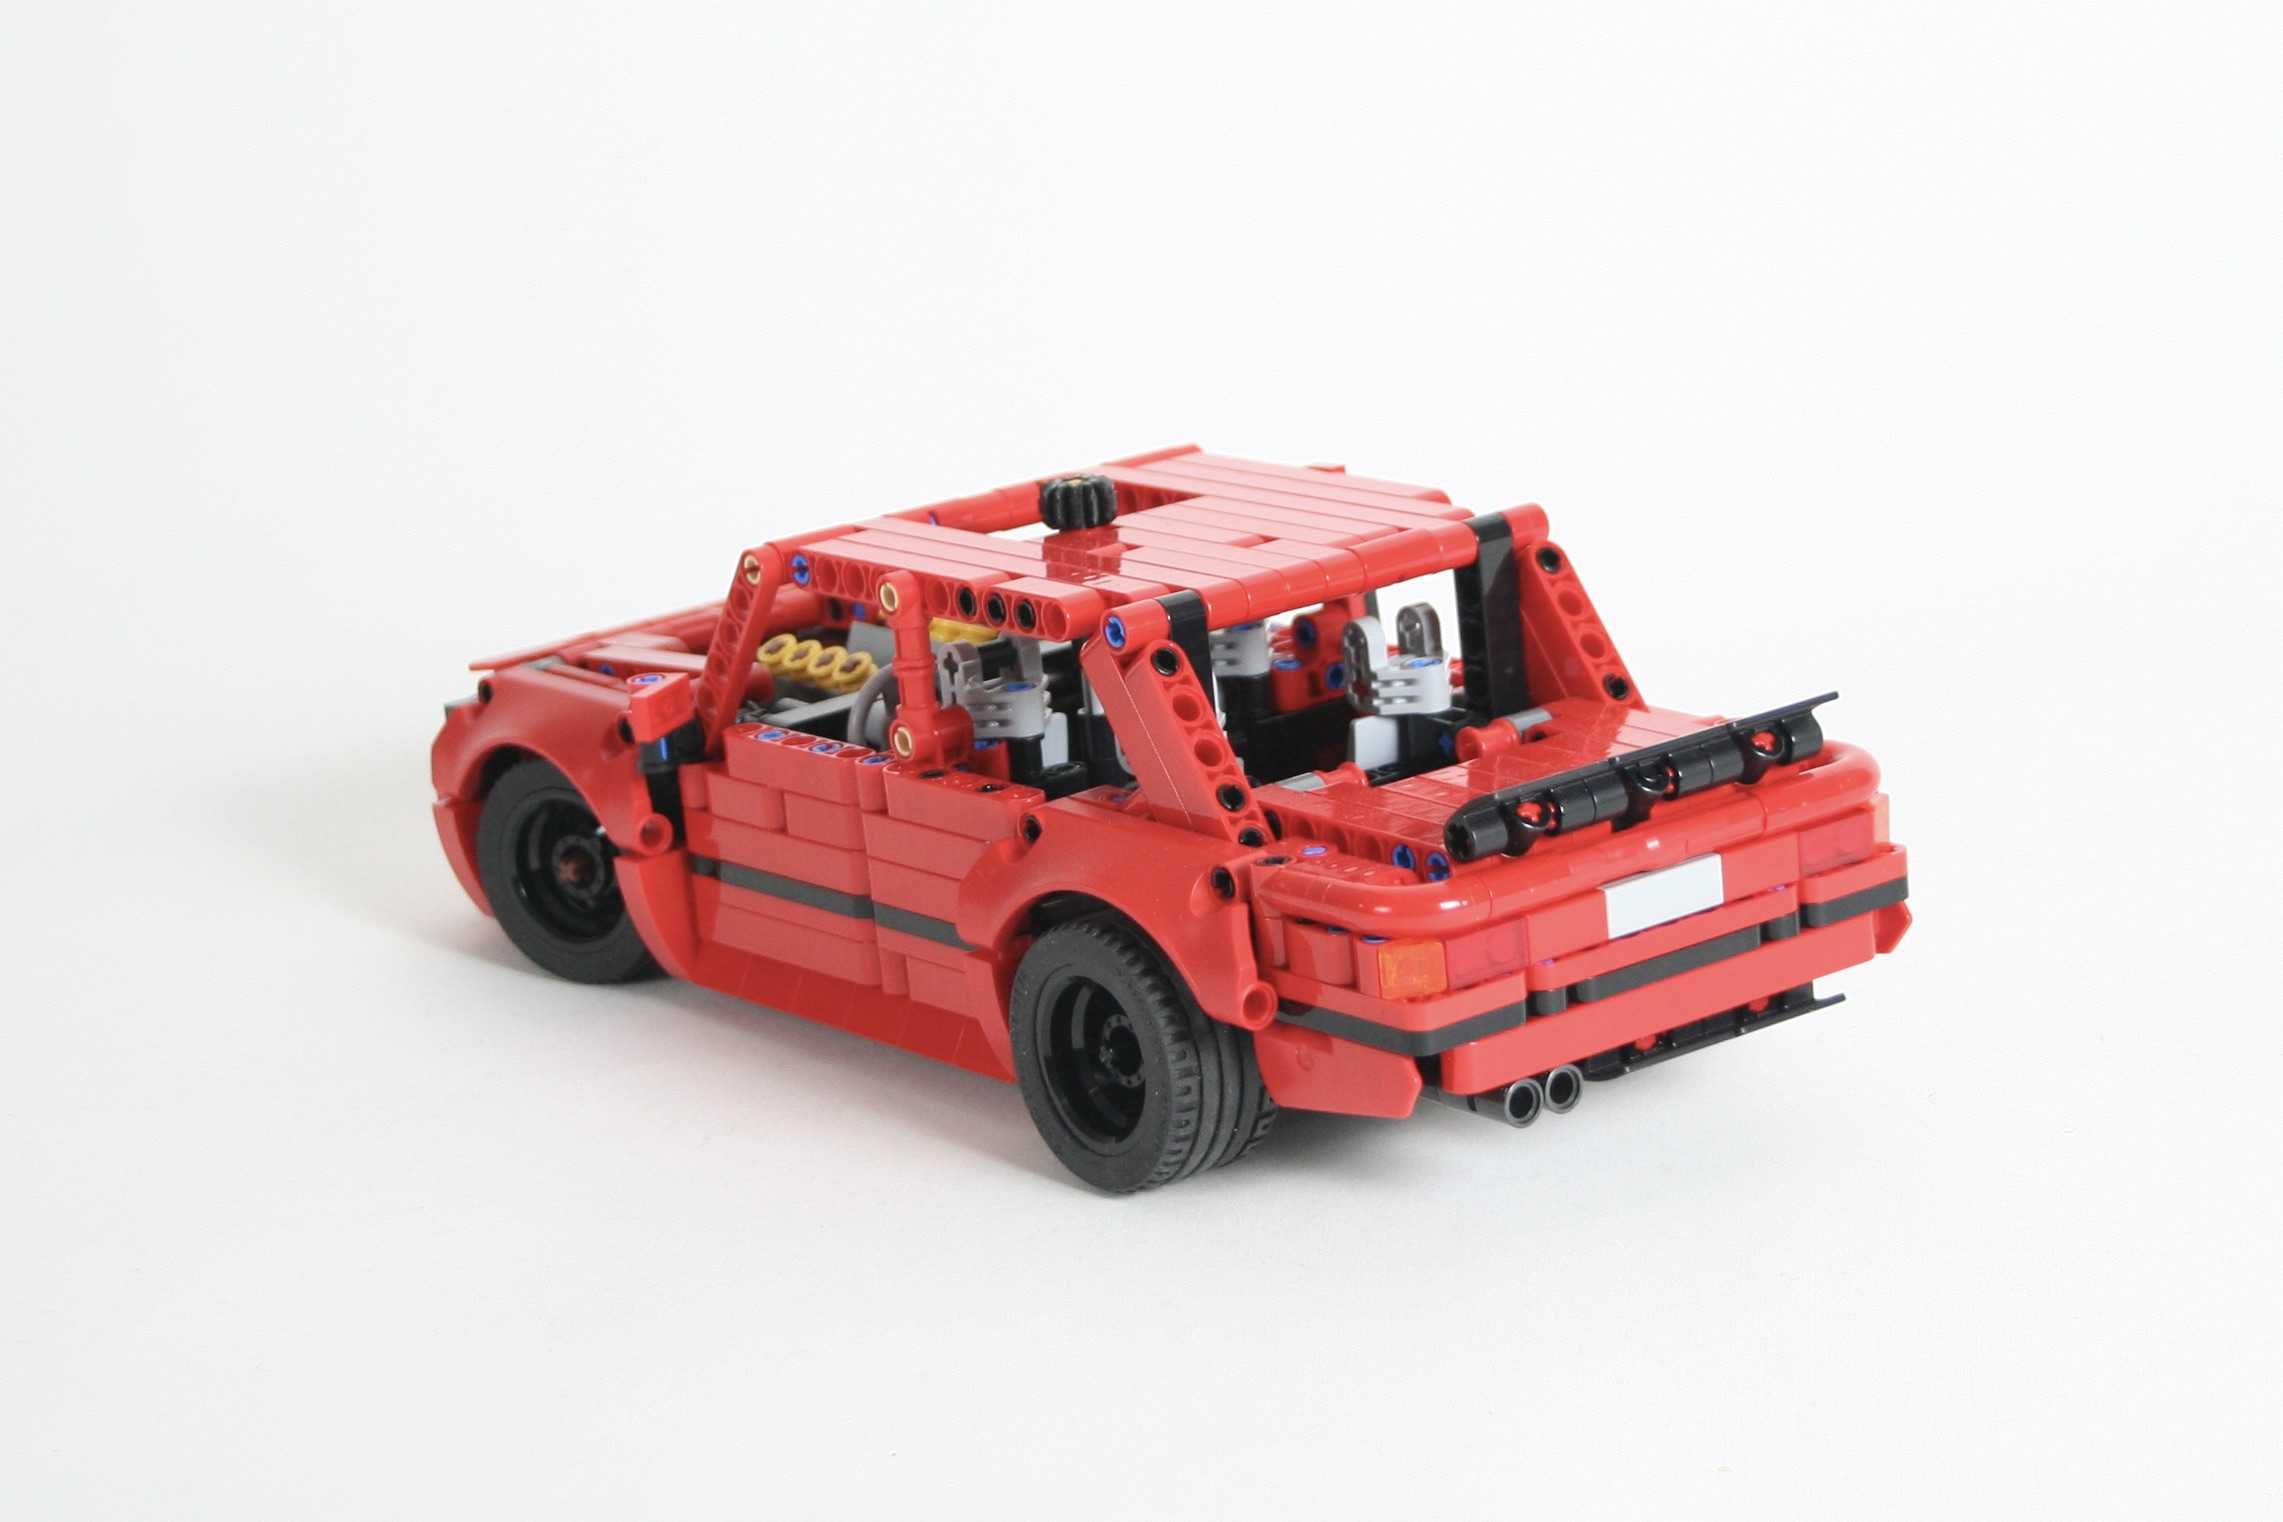
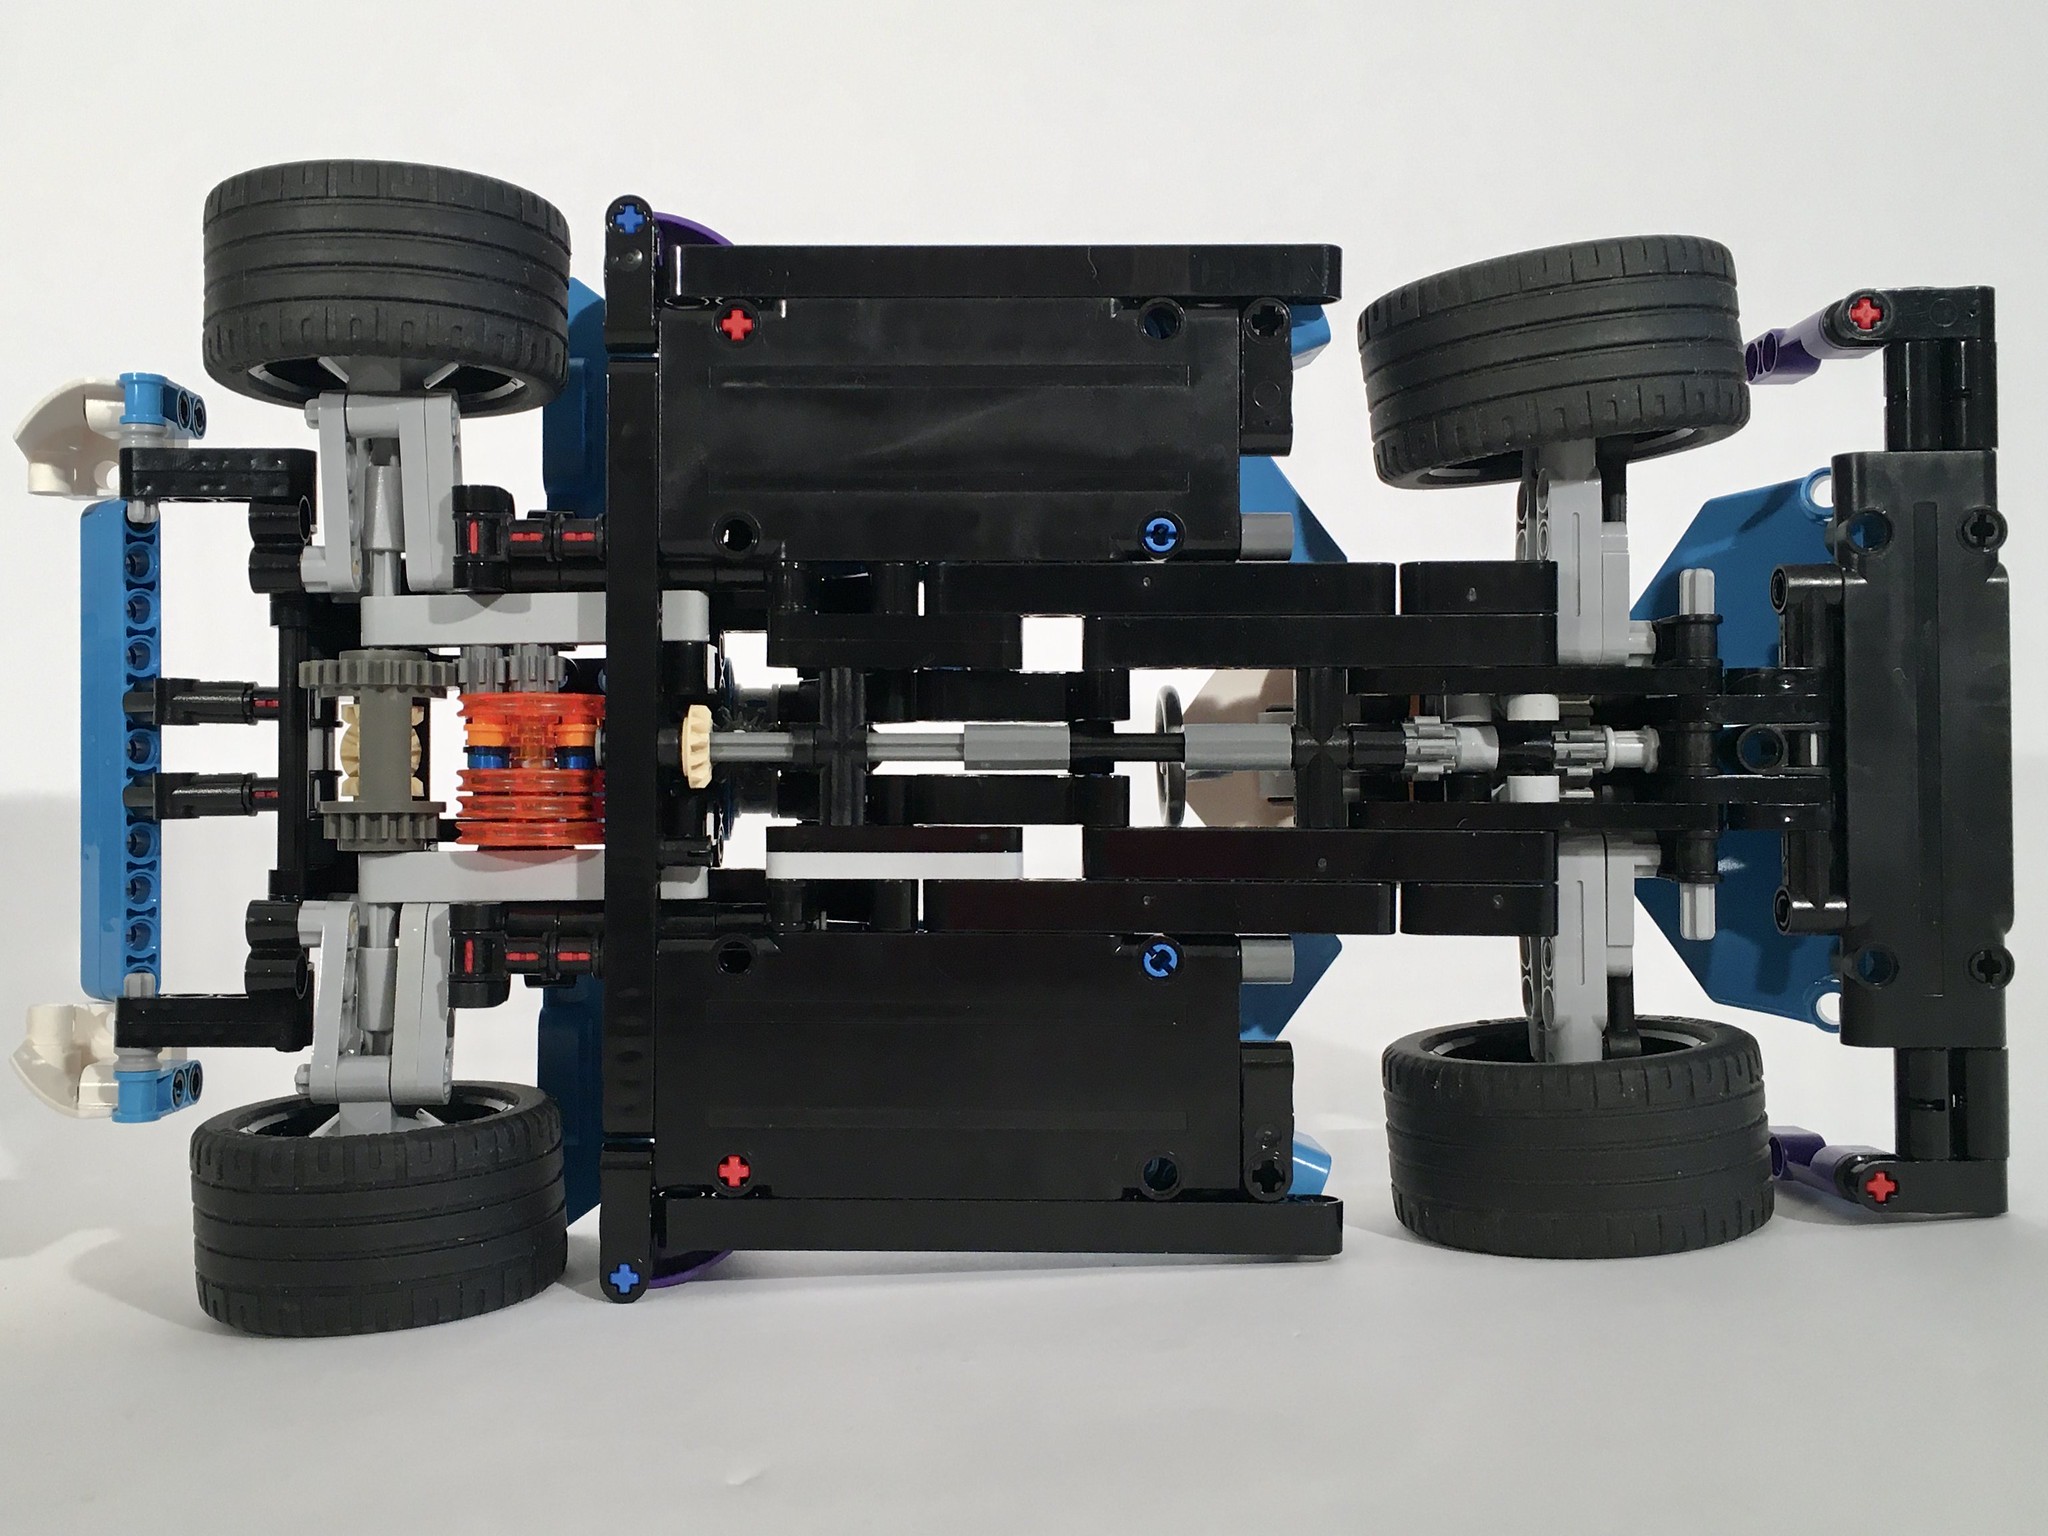
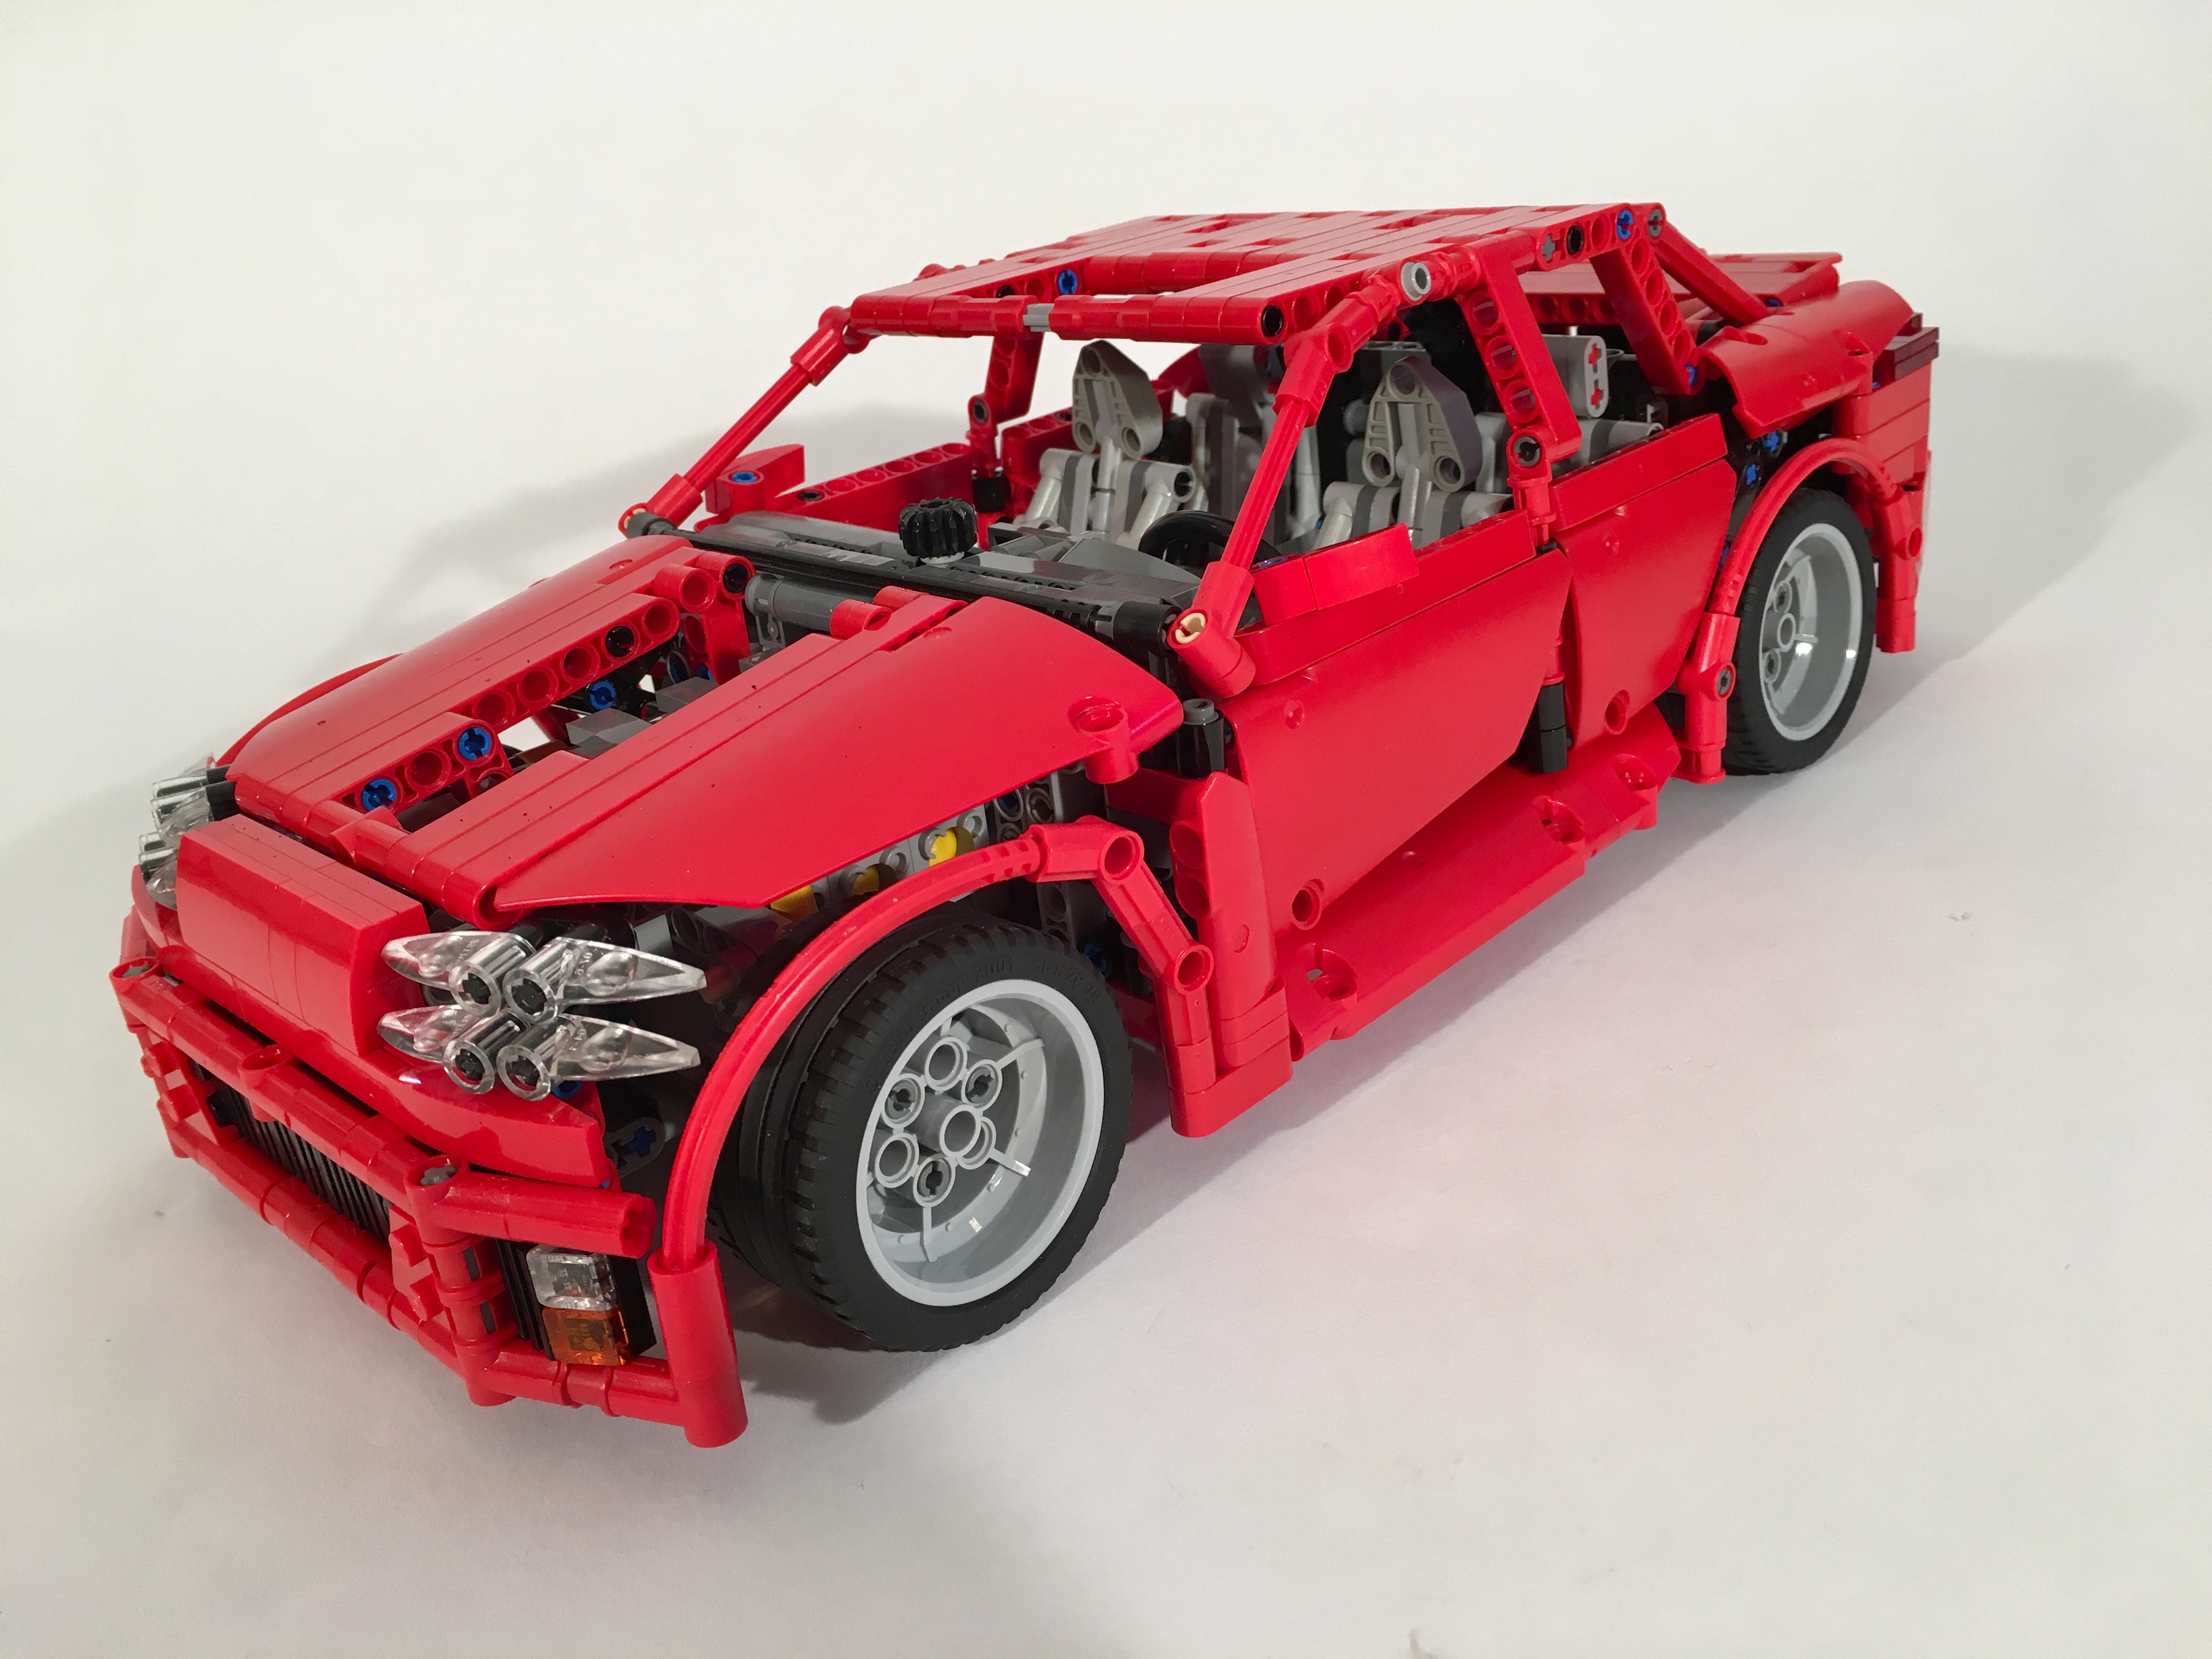
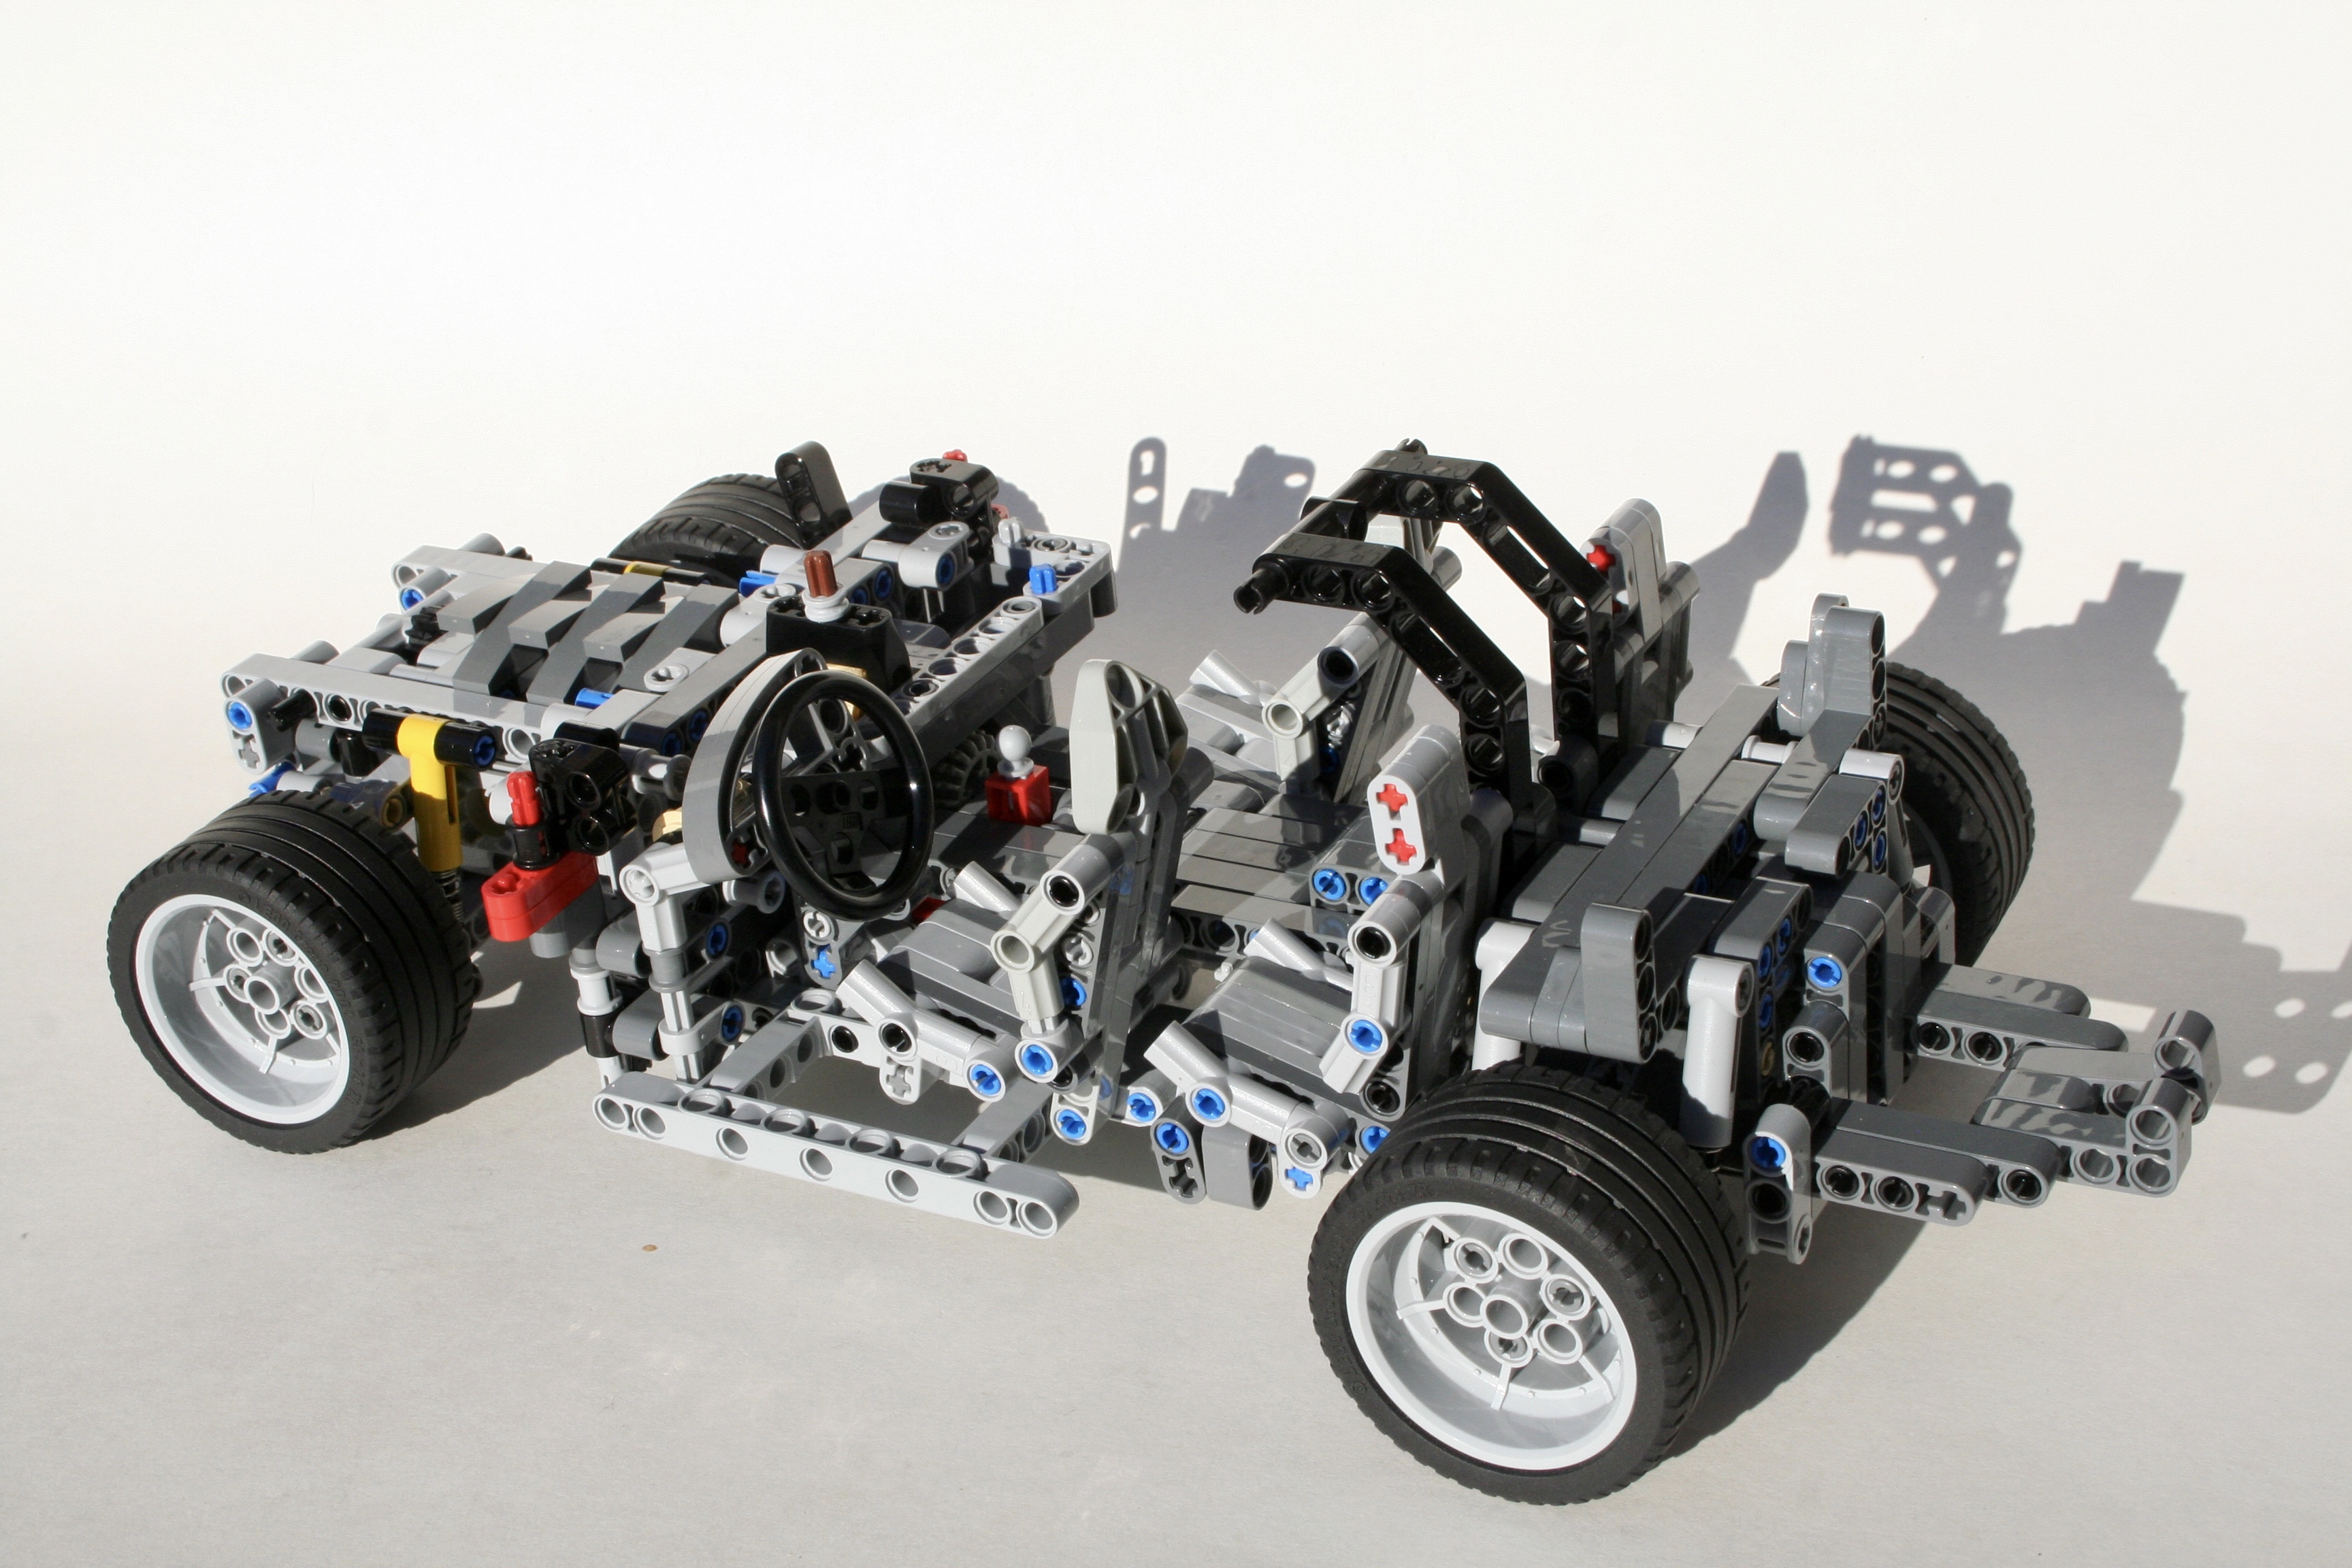
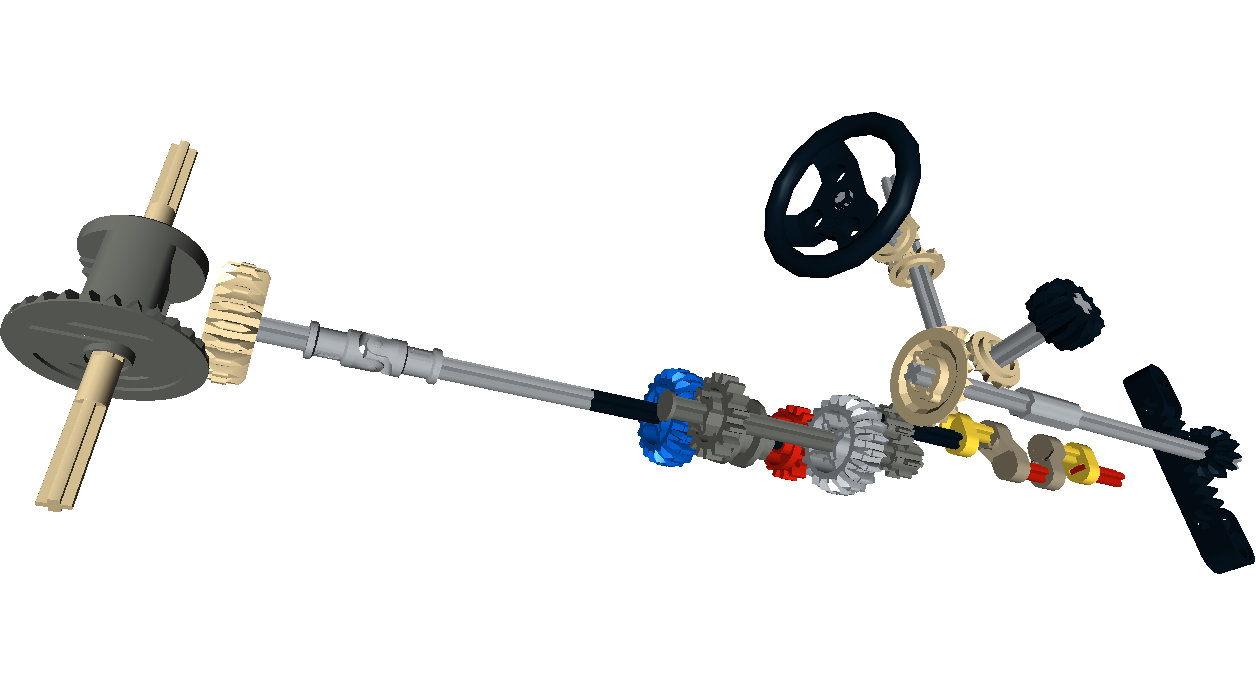
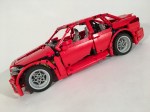
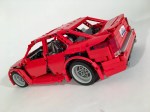
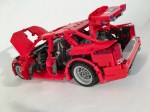
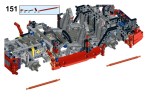
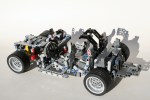
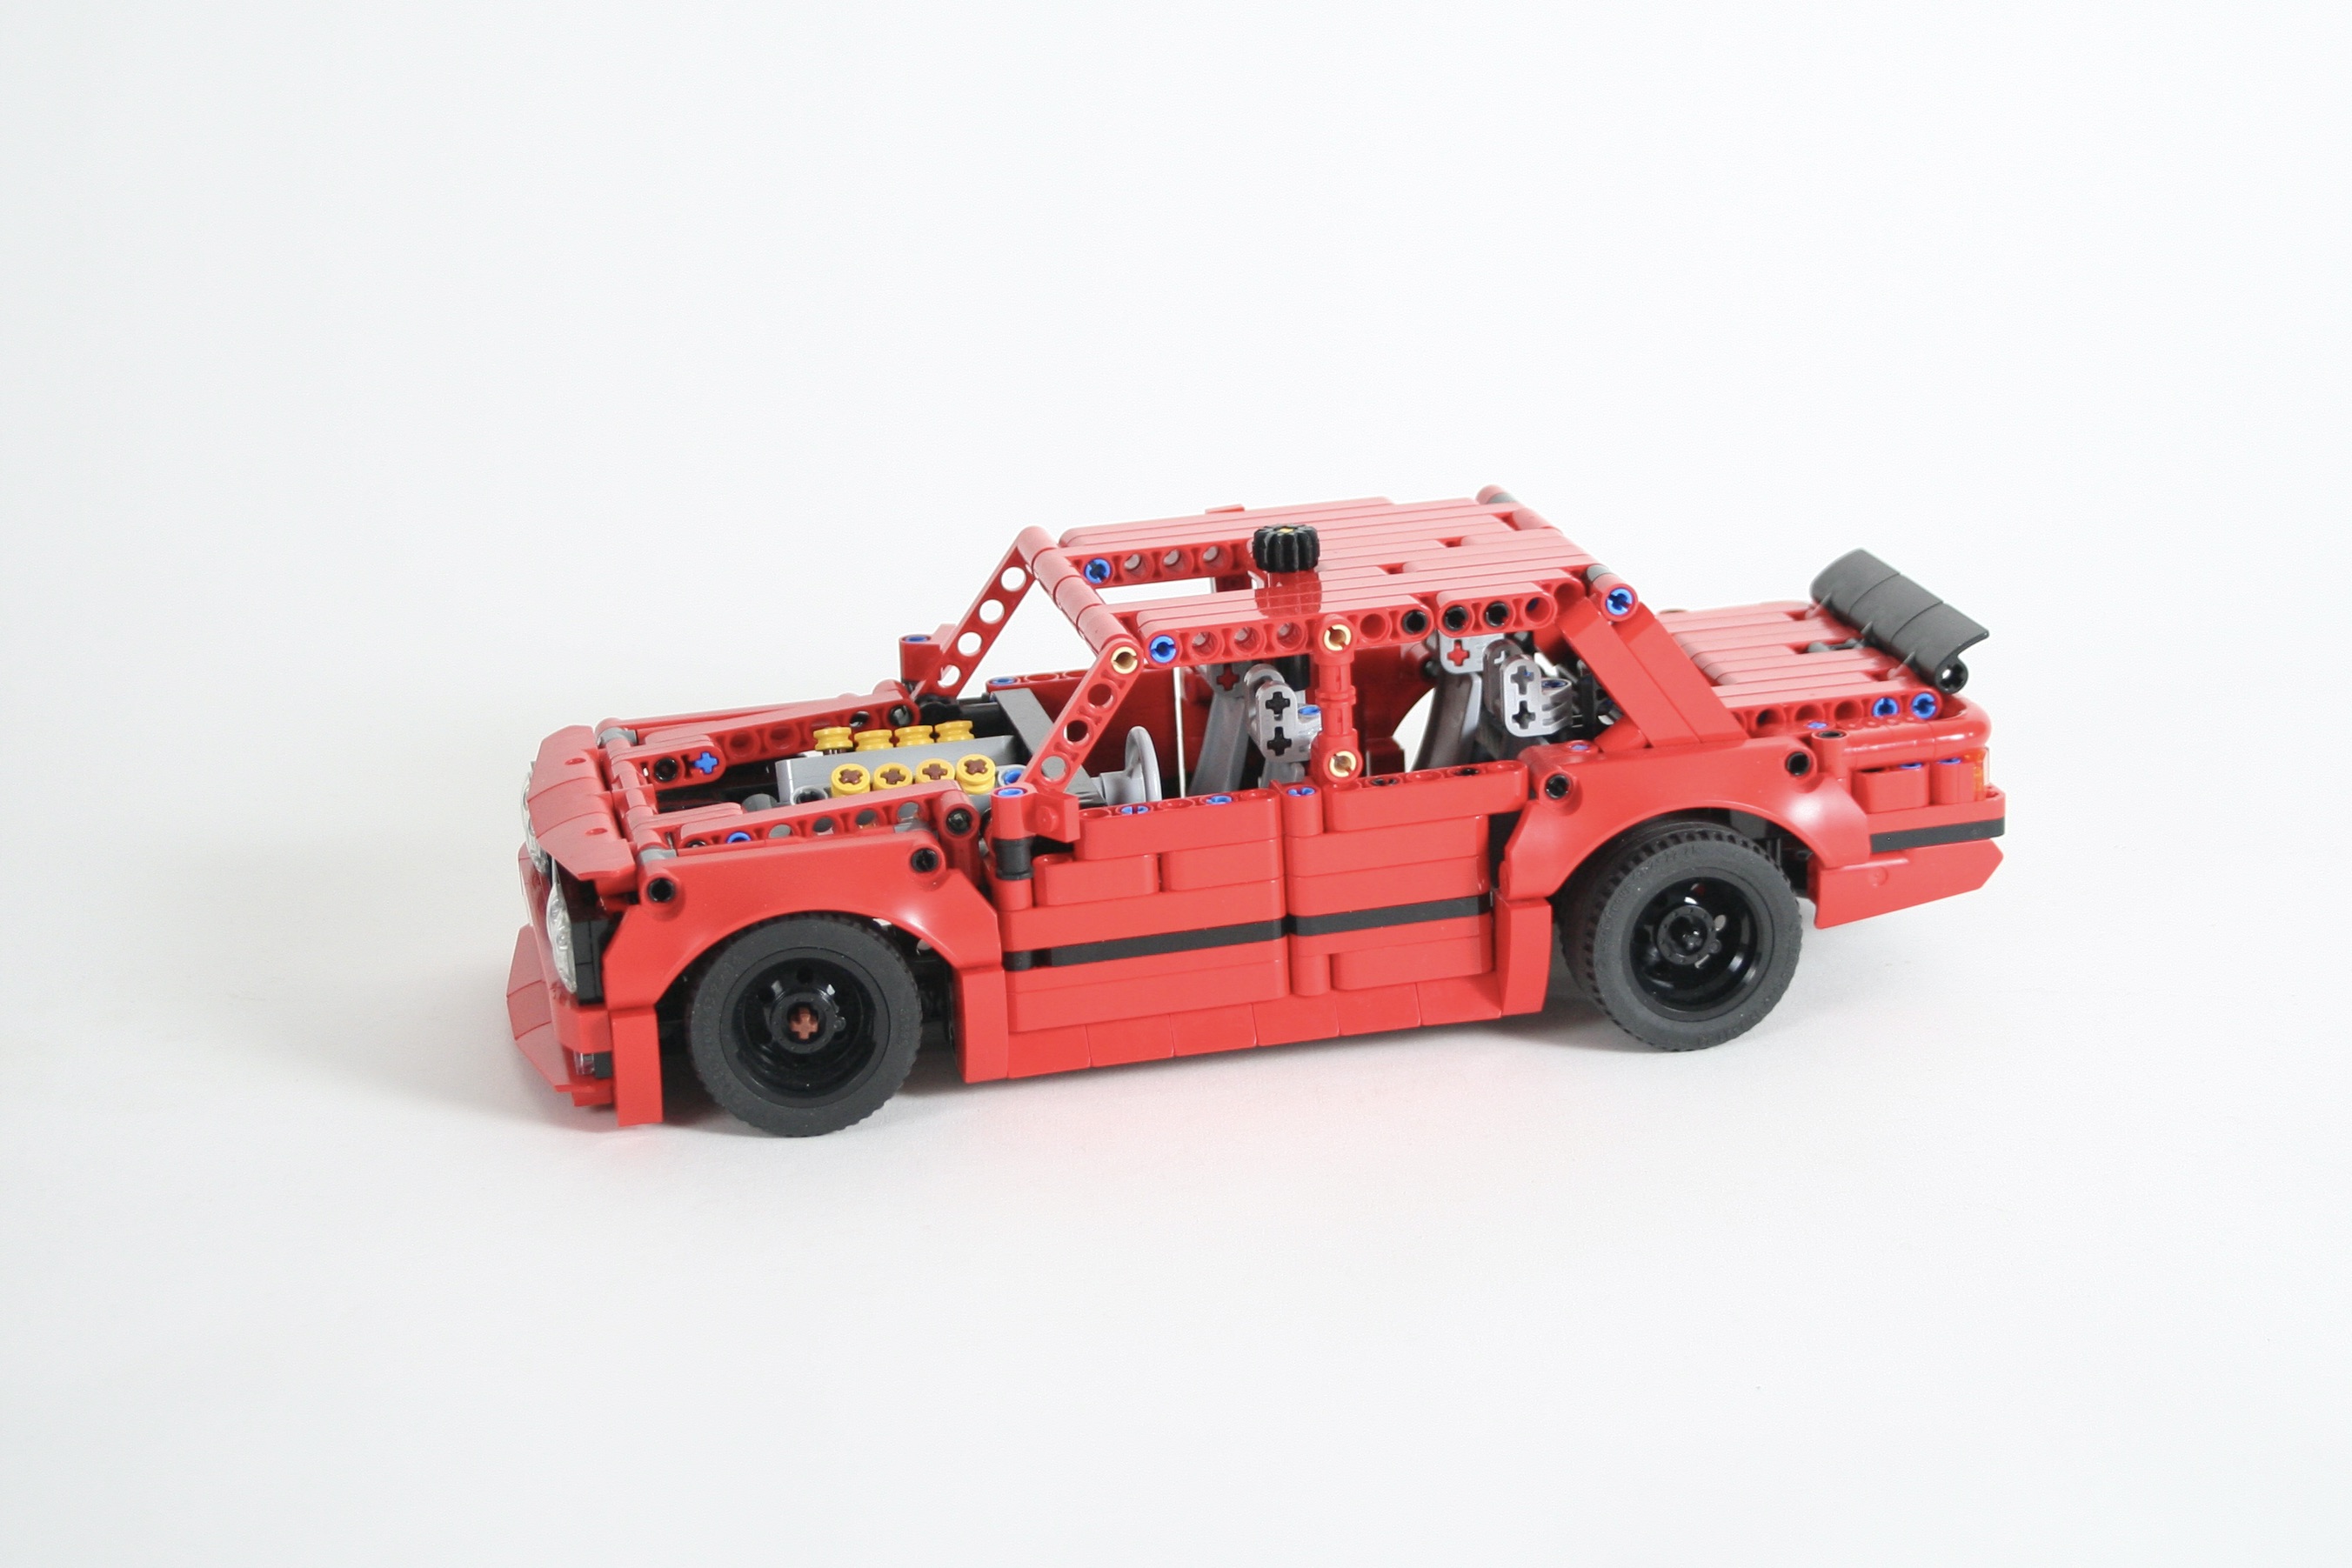
Like many a car enthusiast, I have a soft spot for BMW sports sedans of the past. The E30 translates to LEGO well as that generation 3 Series is a little bit boxy, and has some great fender flairs. I started with a sedan in Red, and the project expanded quickly. As suggested by LEGO set 42138 Shelbey GT500 Mustang, I was convinced that every 15 wide car going forward should have a half stud front axle drop to give the car a little forward leaning stance. I was able to develop a steering system that would work well for this, which would also give space for an engine. I used the standard axle based V-8 for the sedan, and gave it a spoiler that was just a little too big.
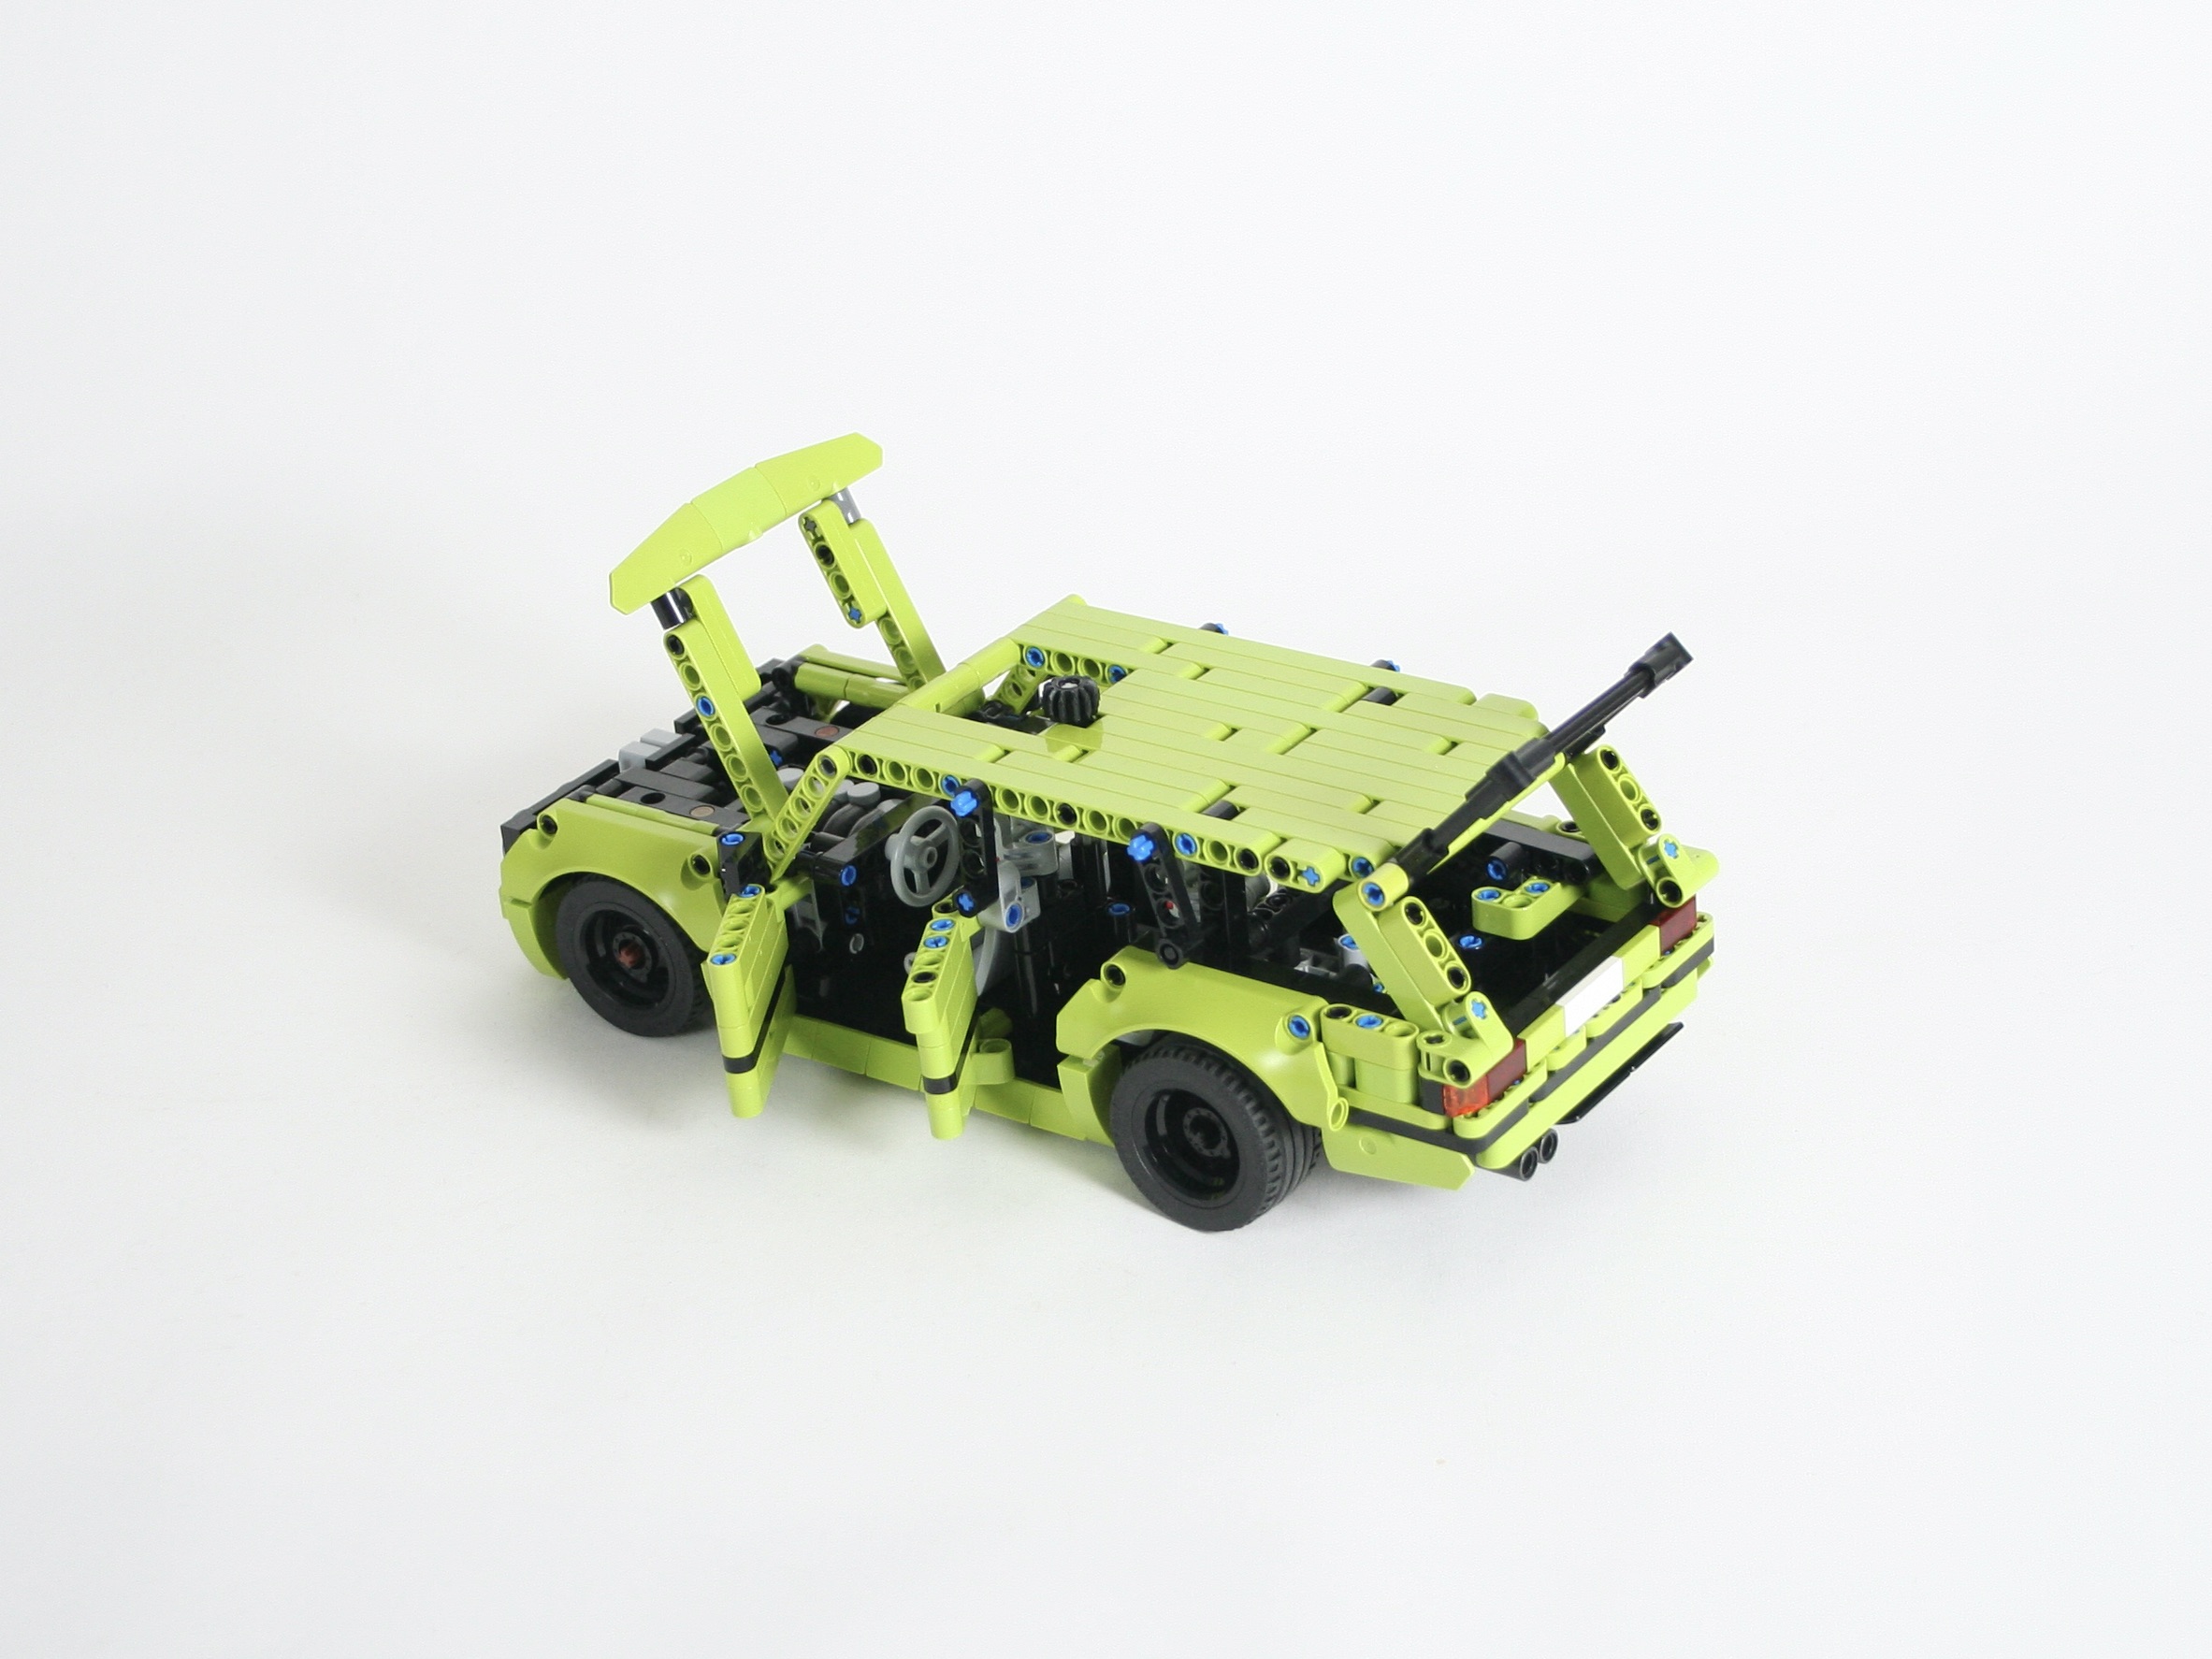
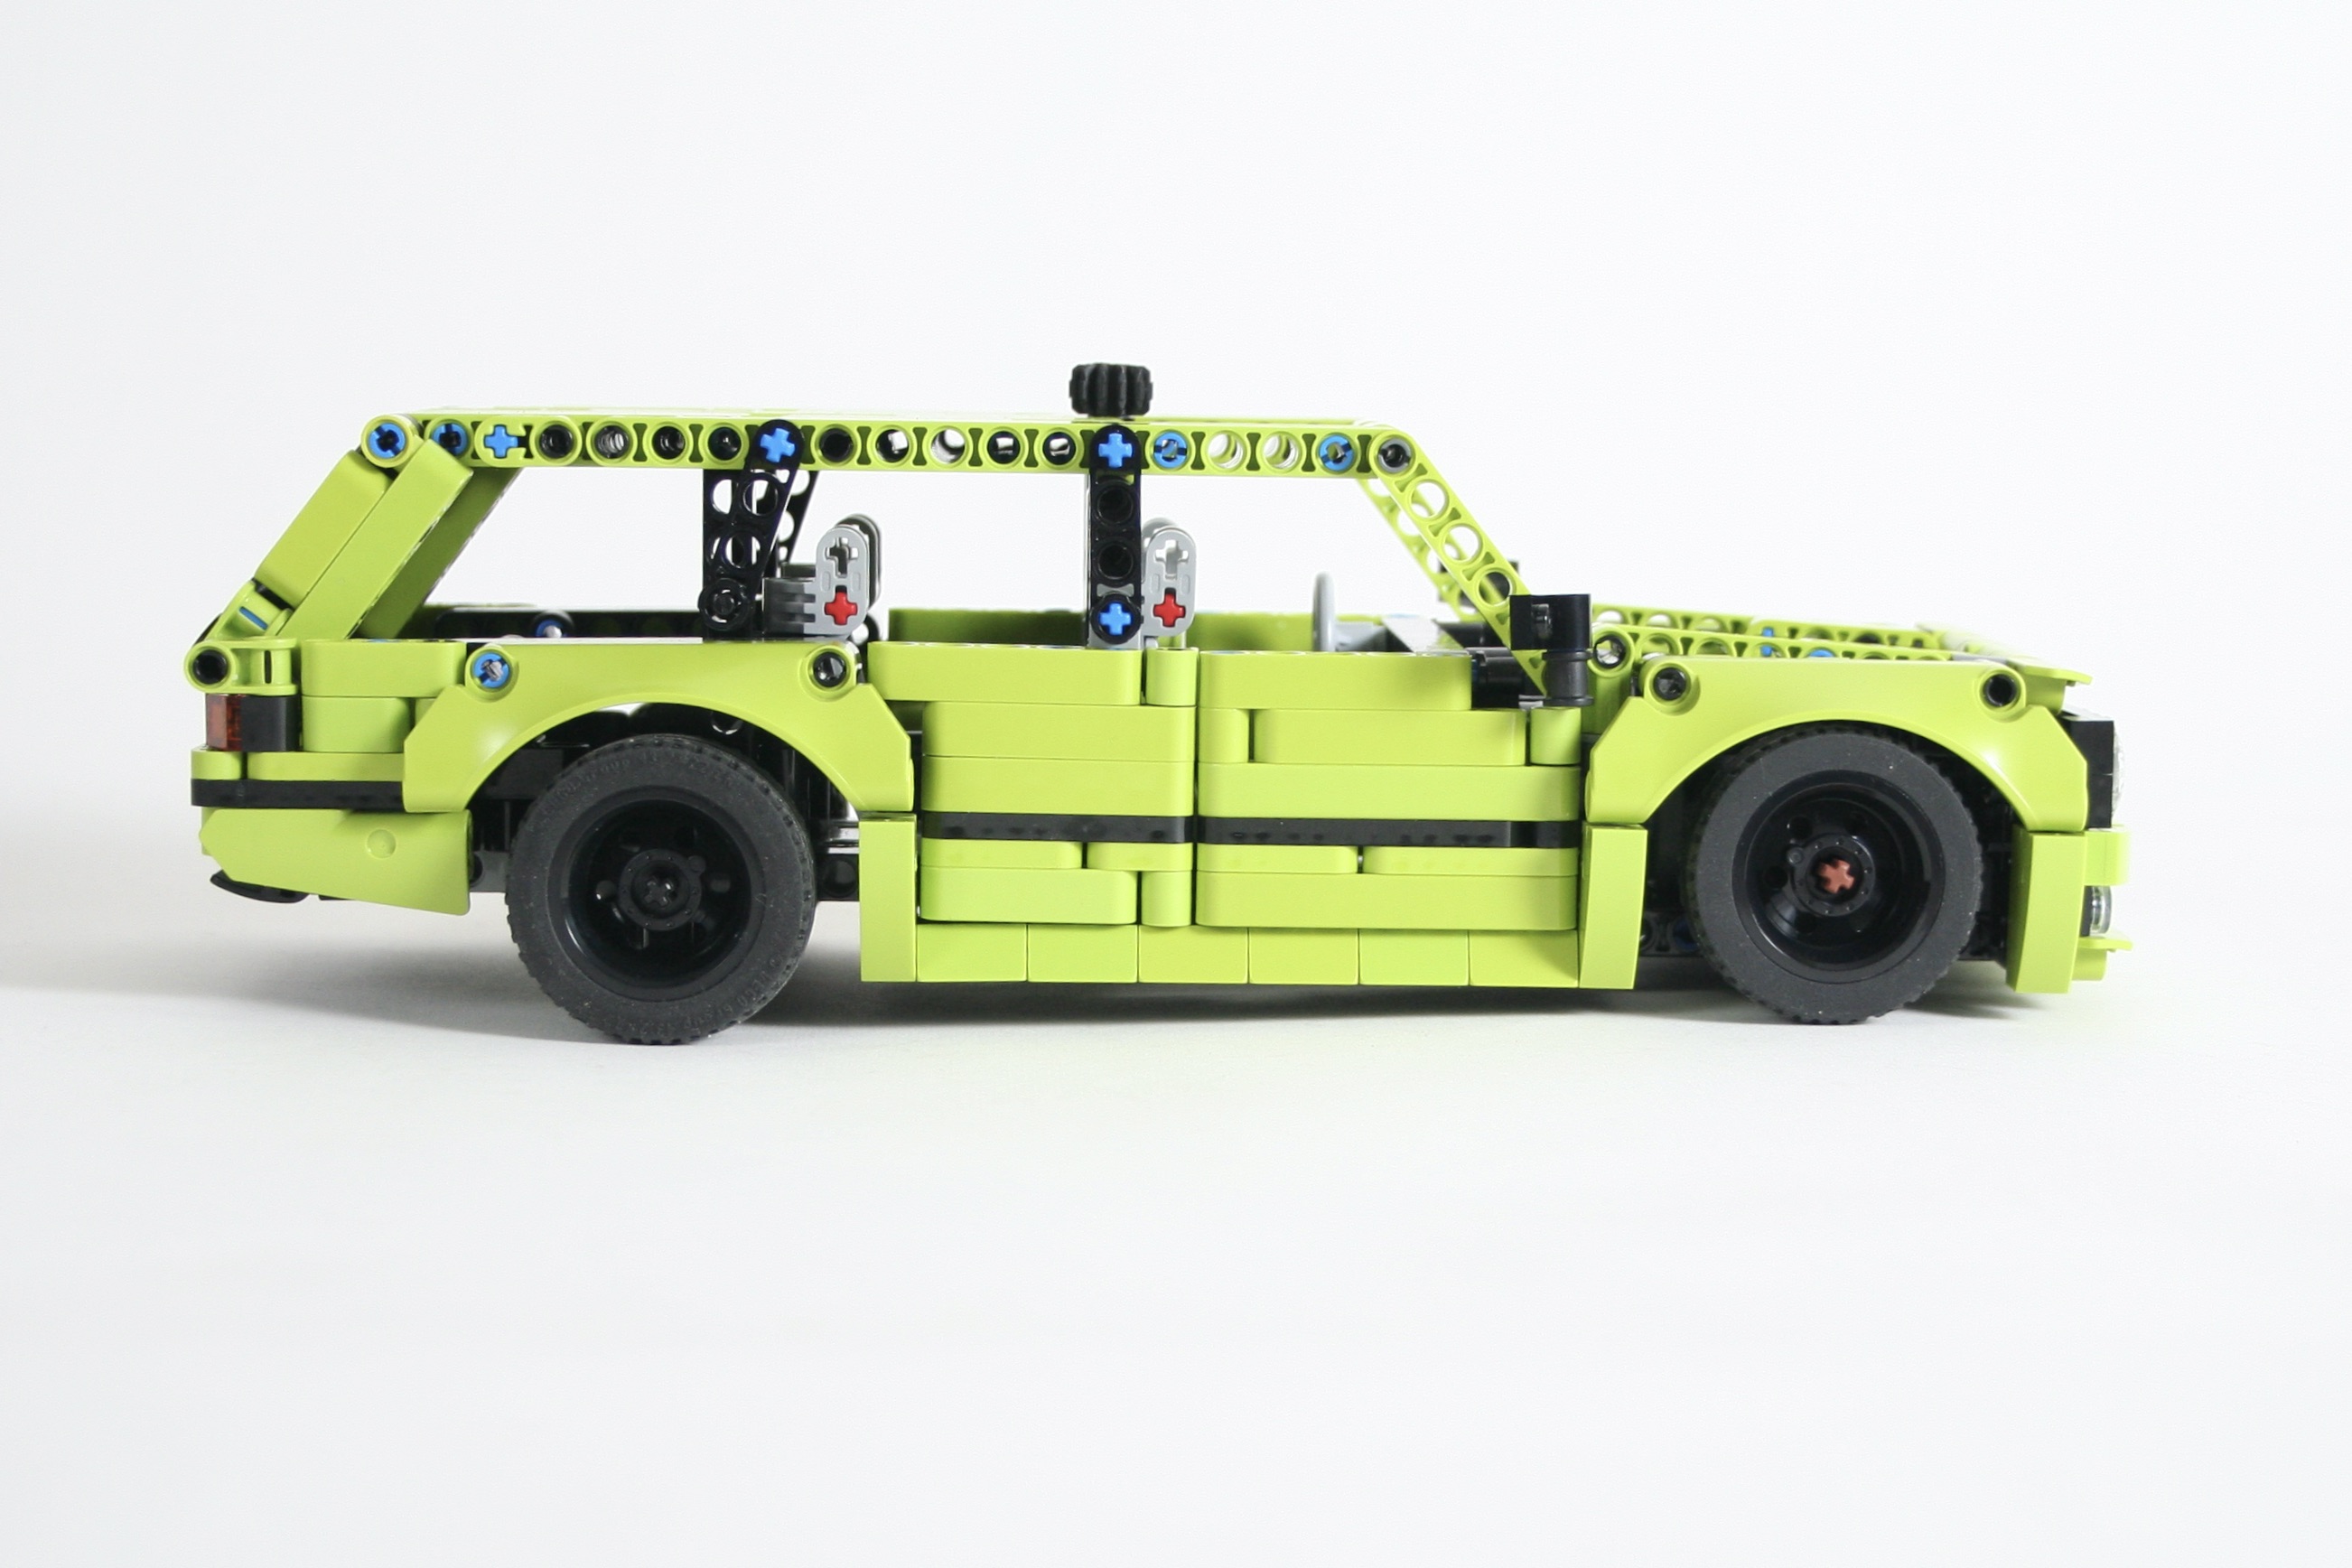
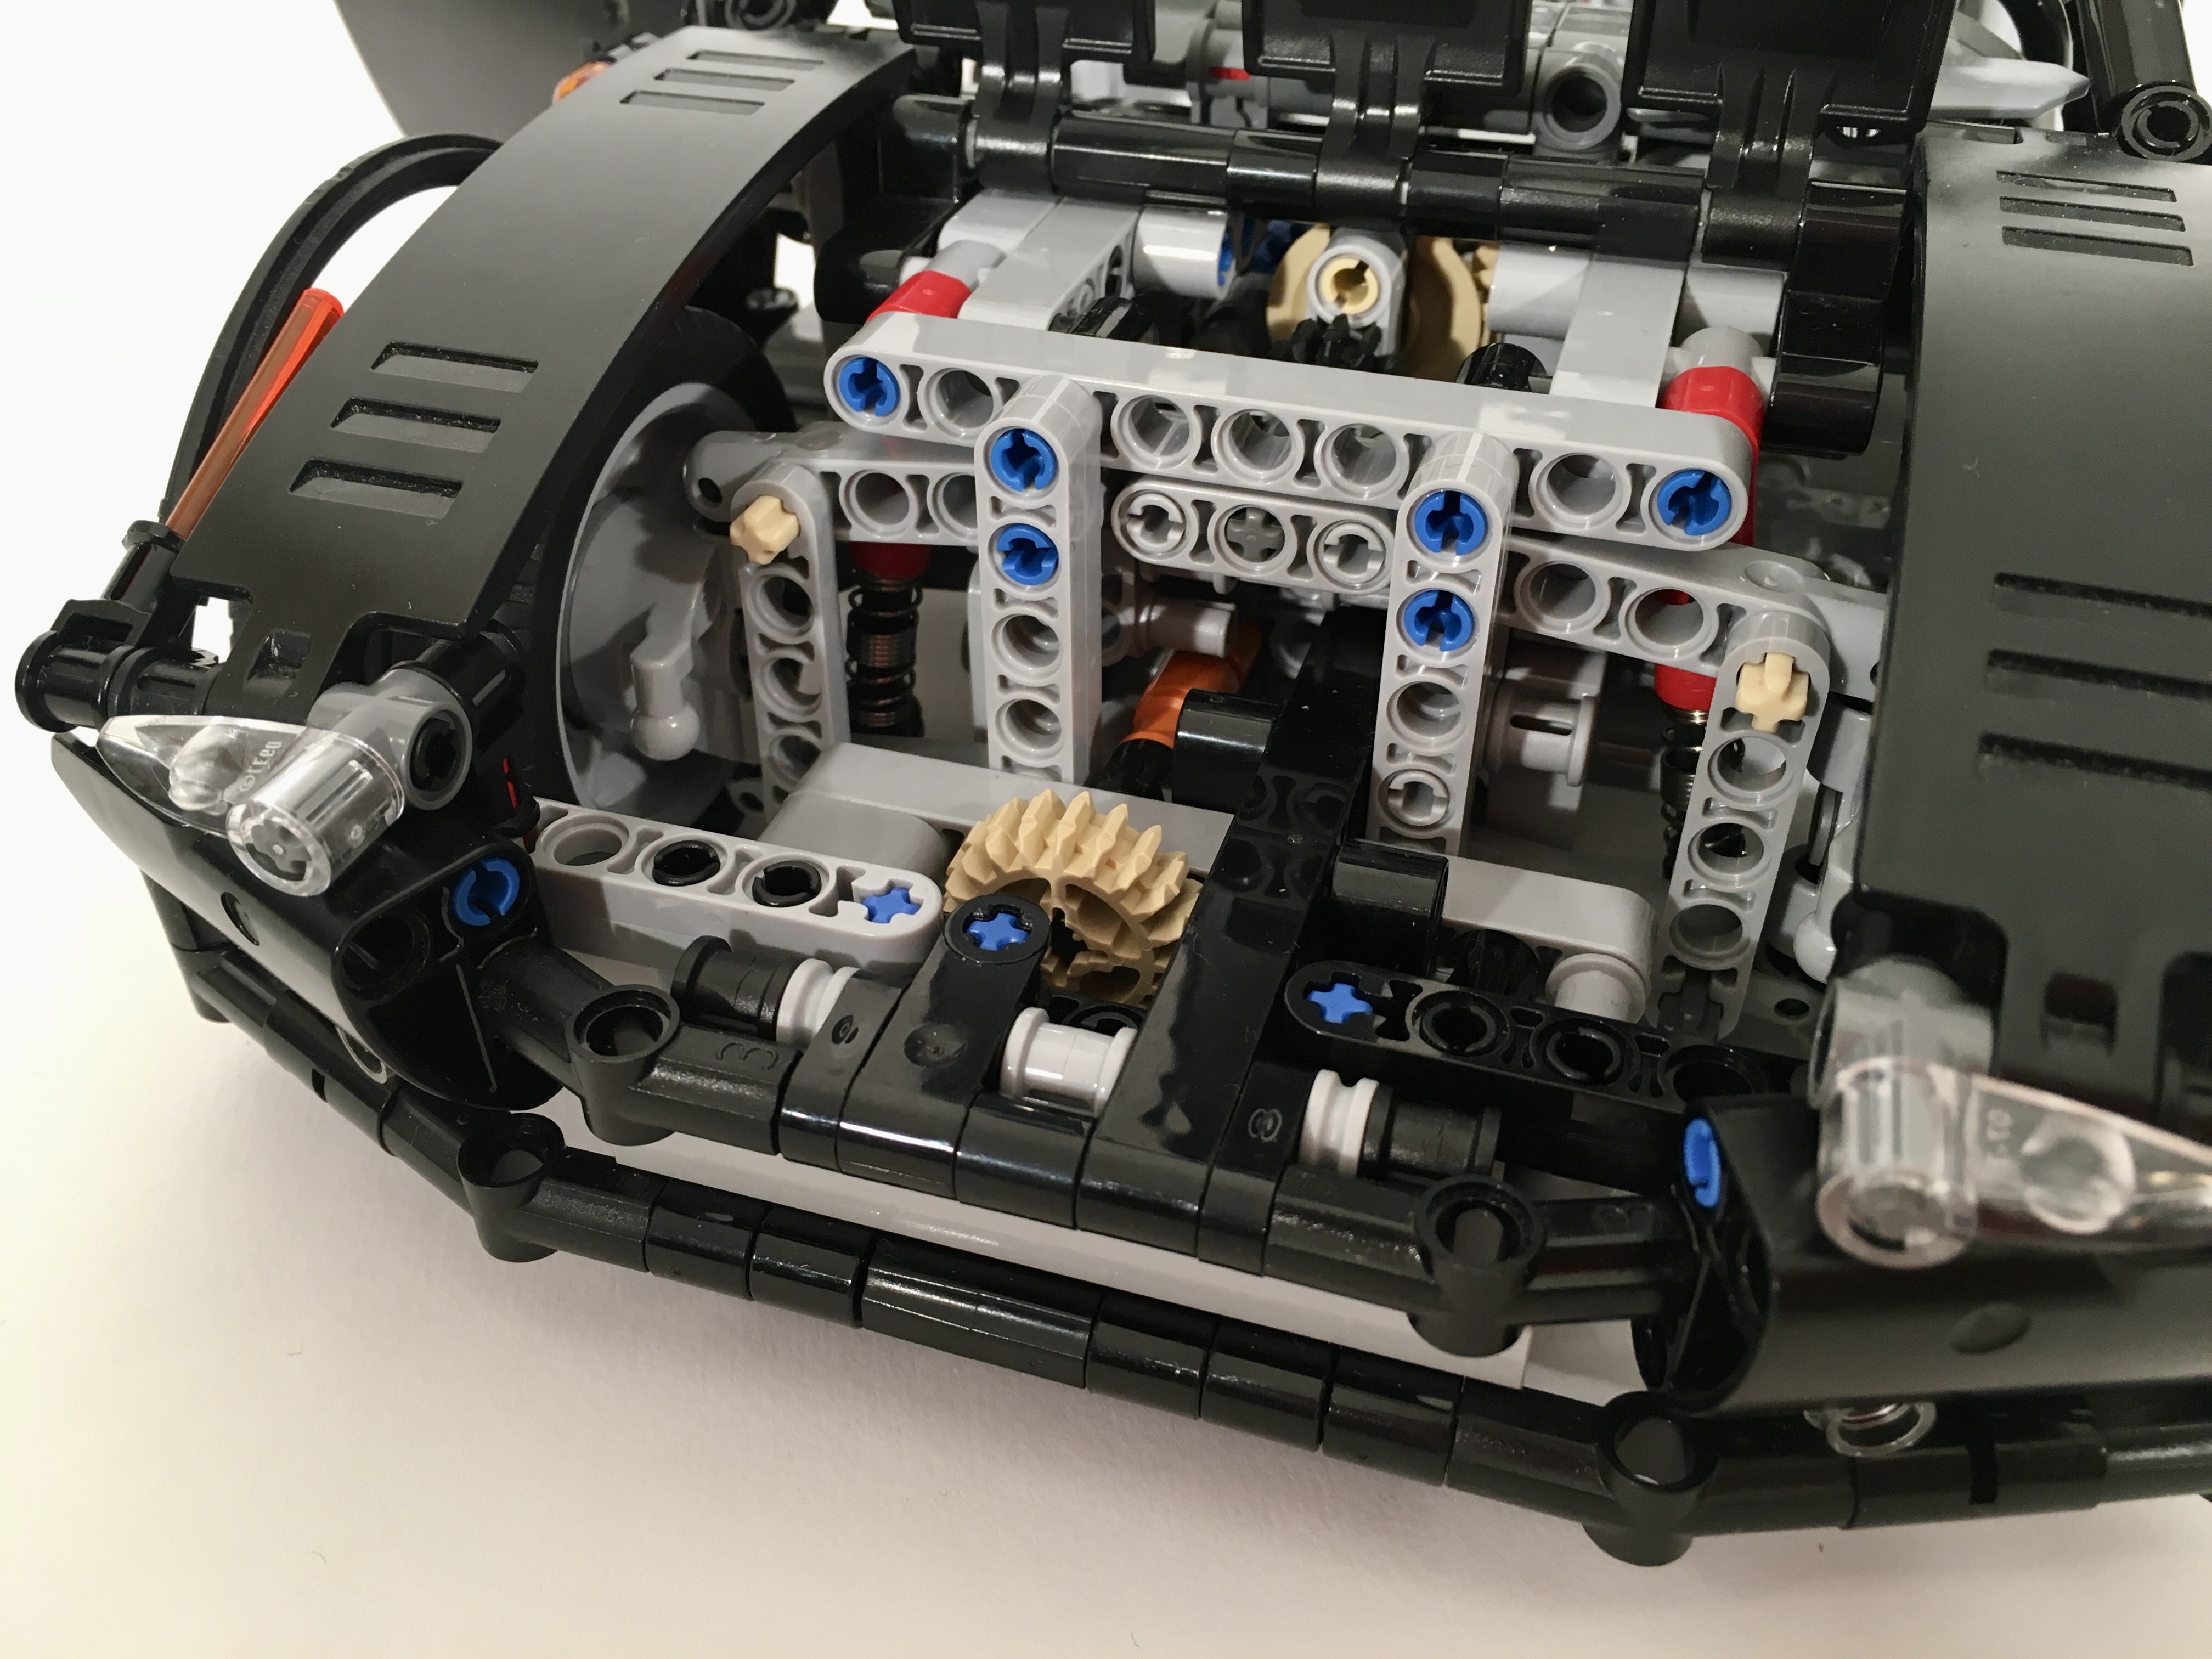
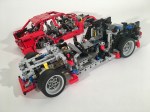
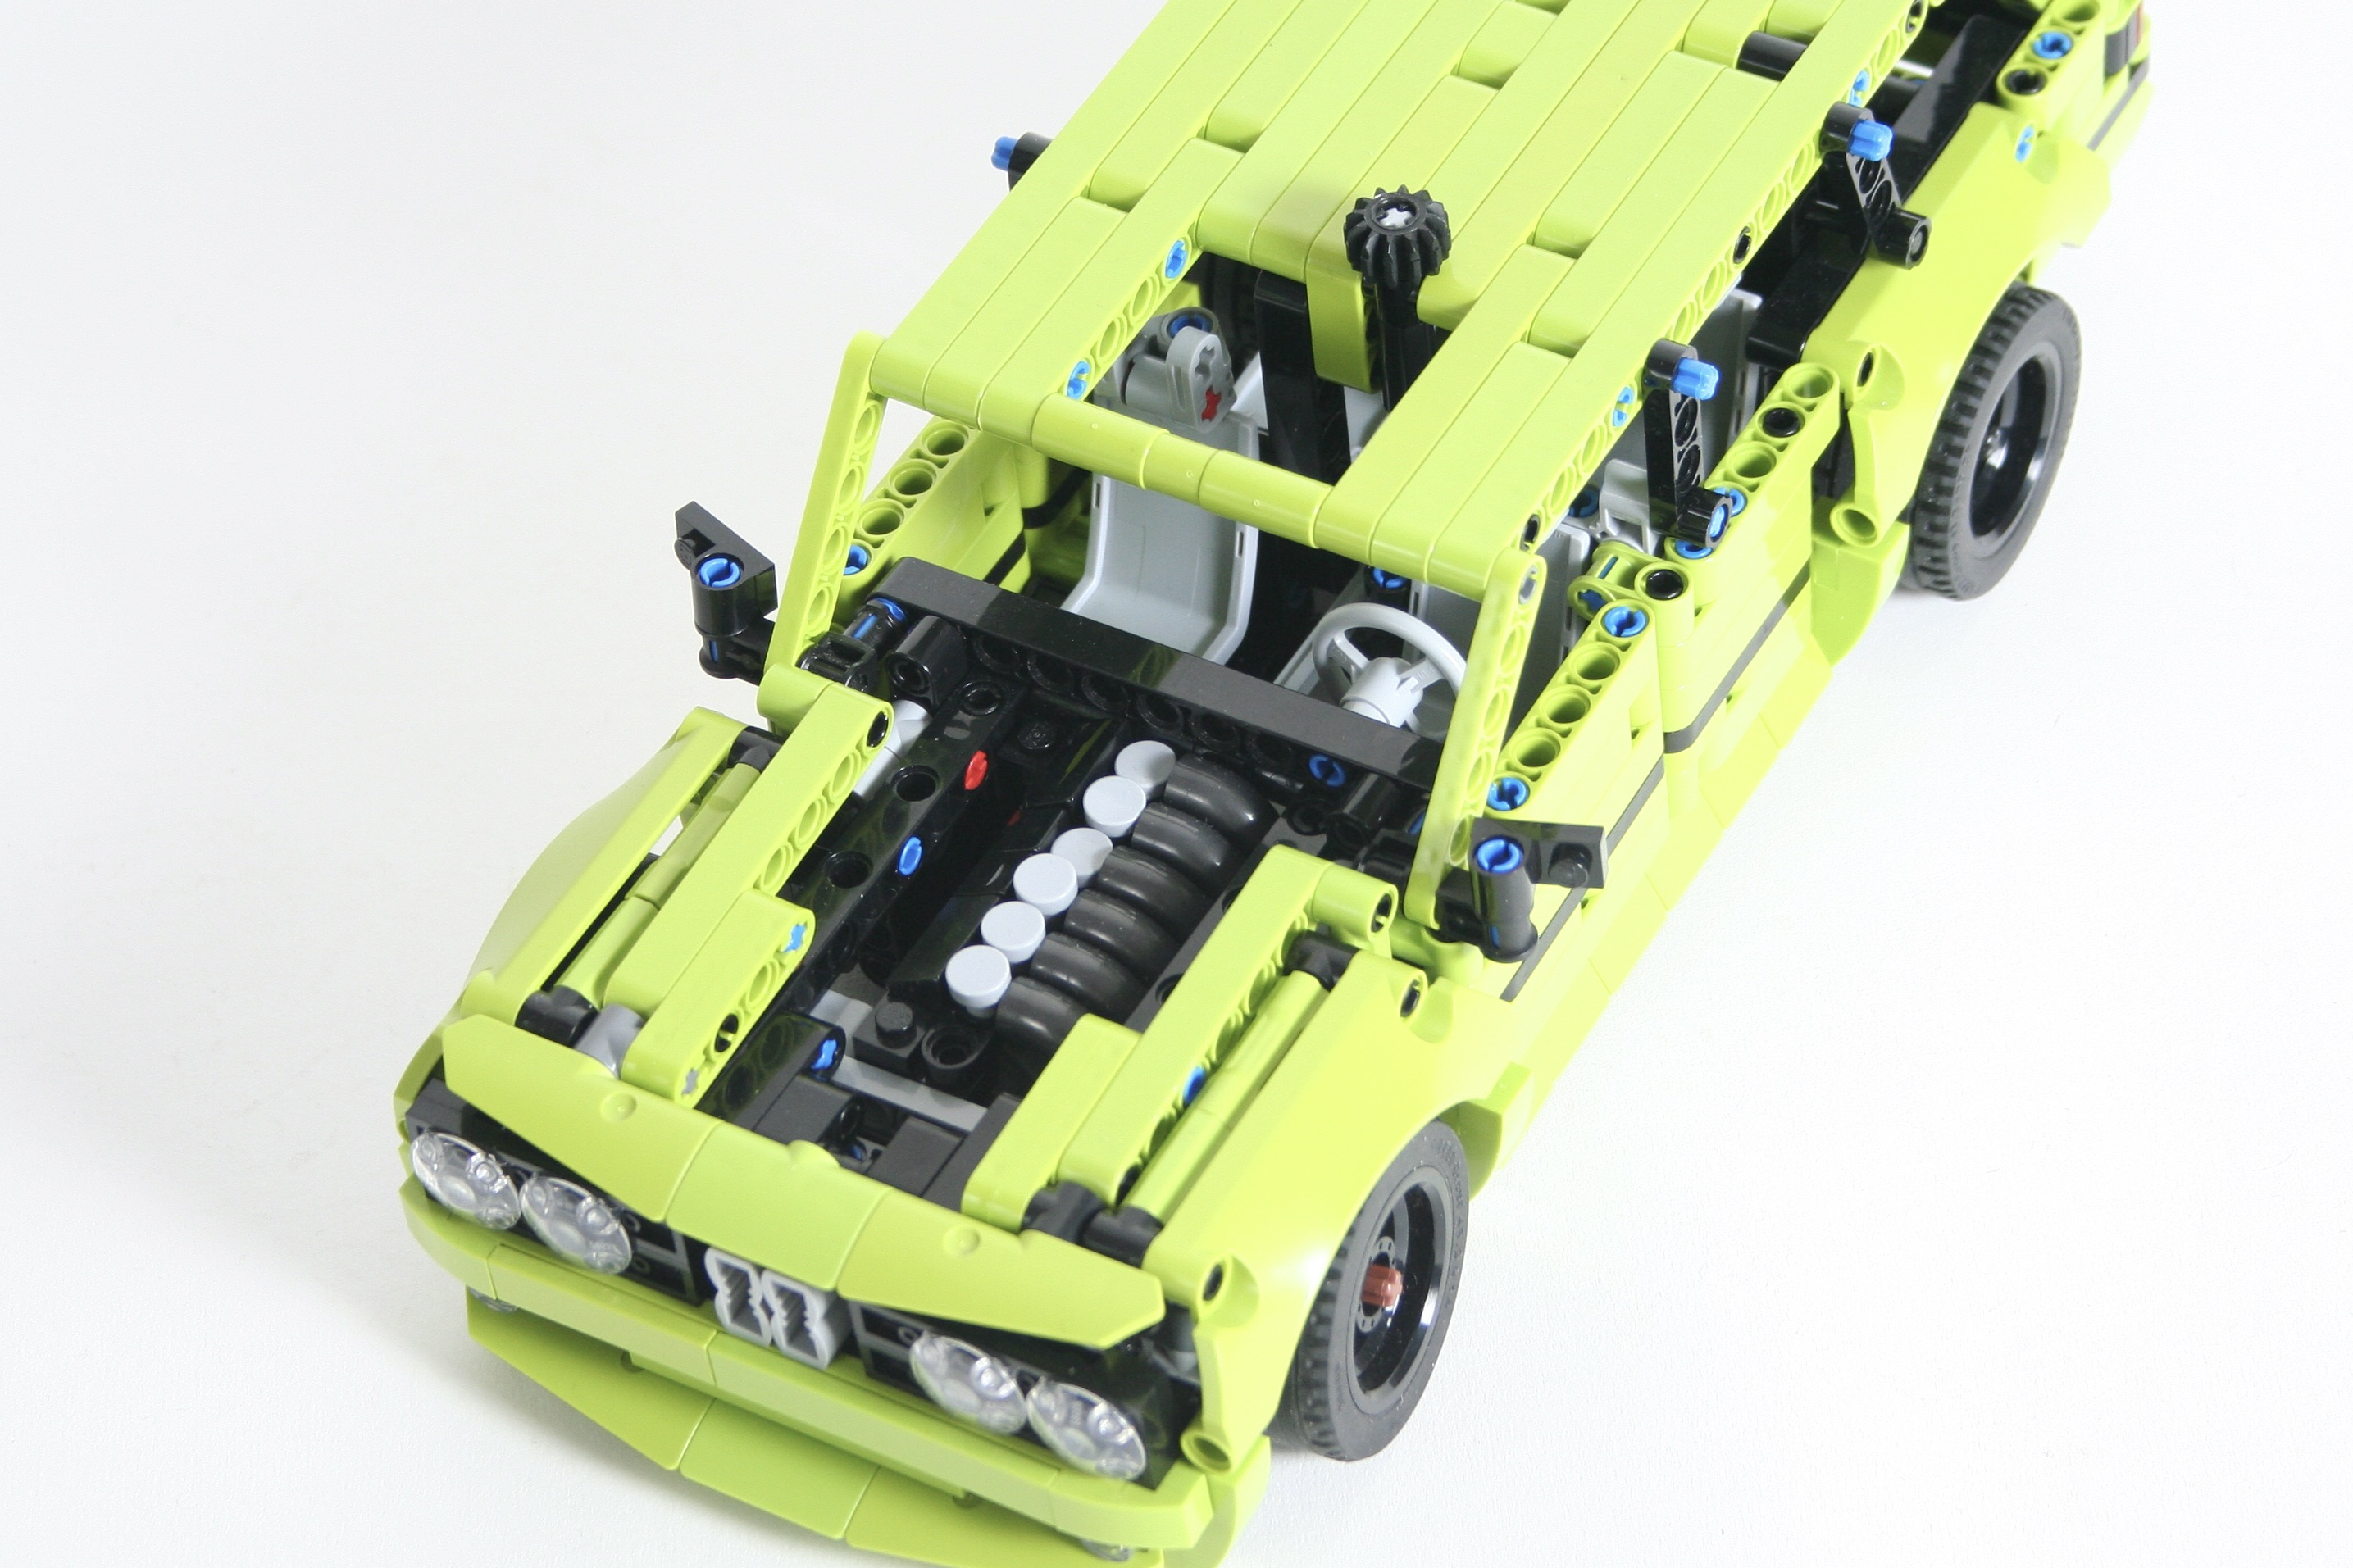
I loved the car so much, I couldn’t stop! I started making a lime version, and then I saw a Touring in my neighborhood, and decided this version would be a wagon. In lime! Then with a little more tinkering, I was able to change the V-8 for a Straight 6, like all perfect cars have. (Don’t tell your friends, but only 5 of the 6 pistons move) The chassis of the sedan and the wagon are the same.
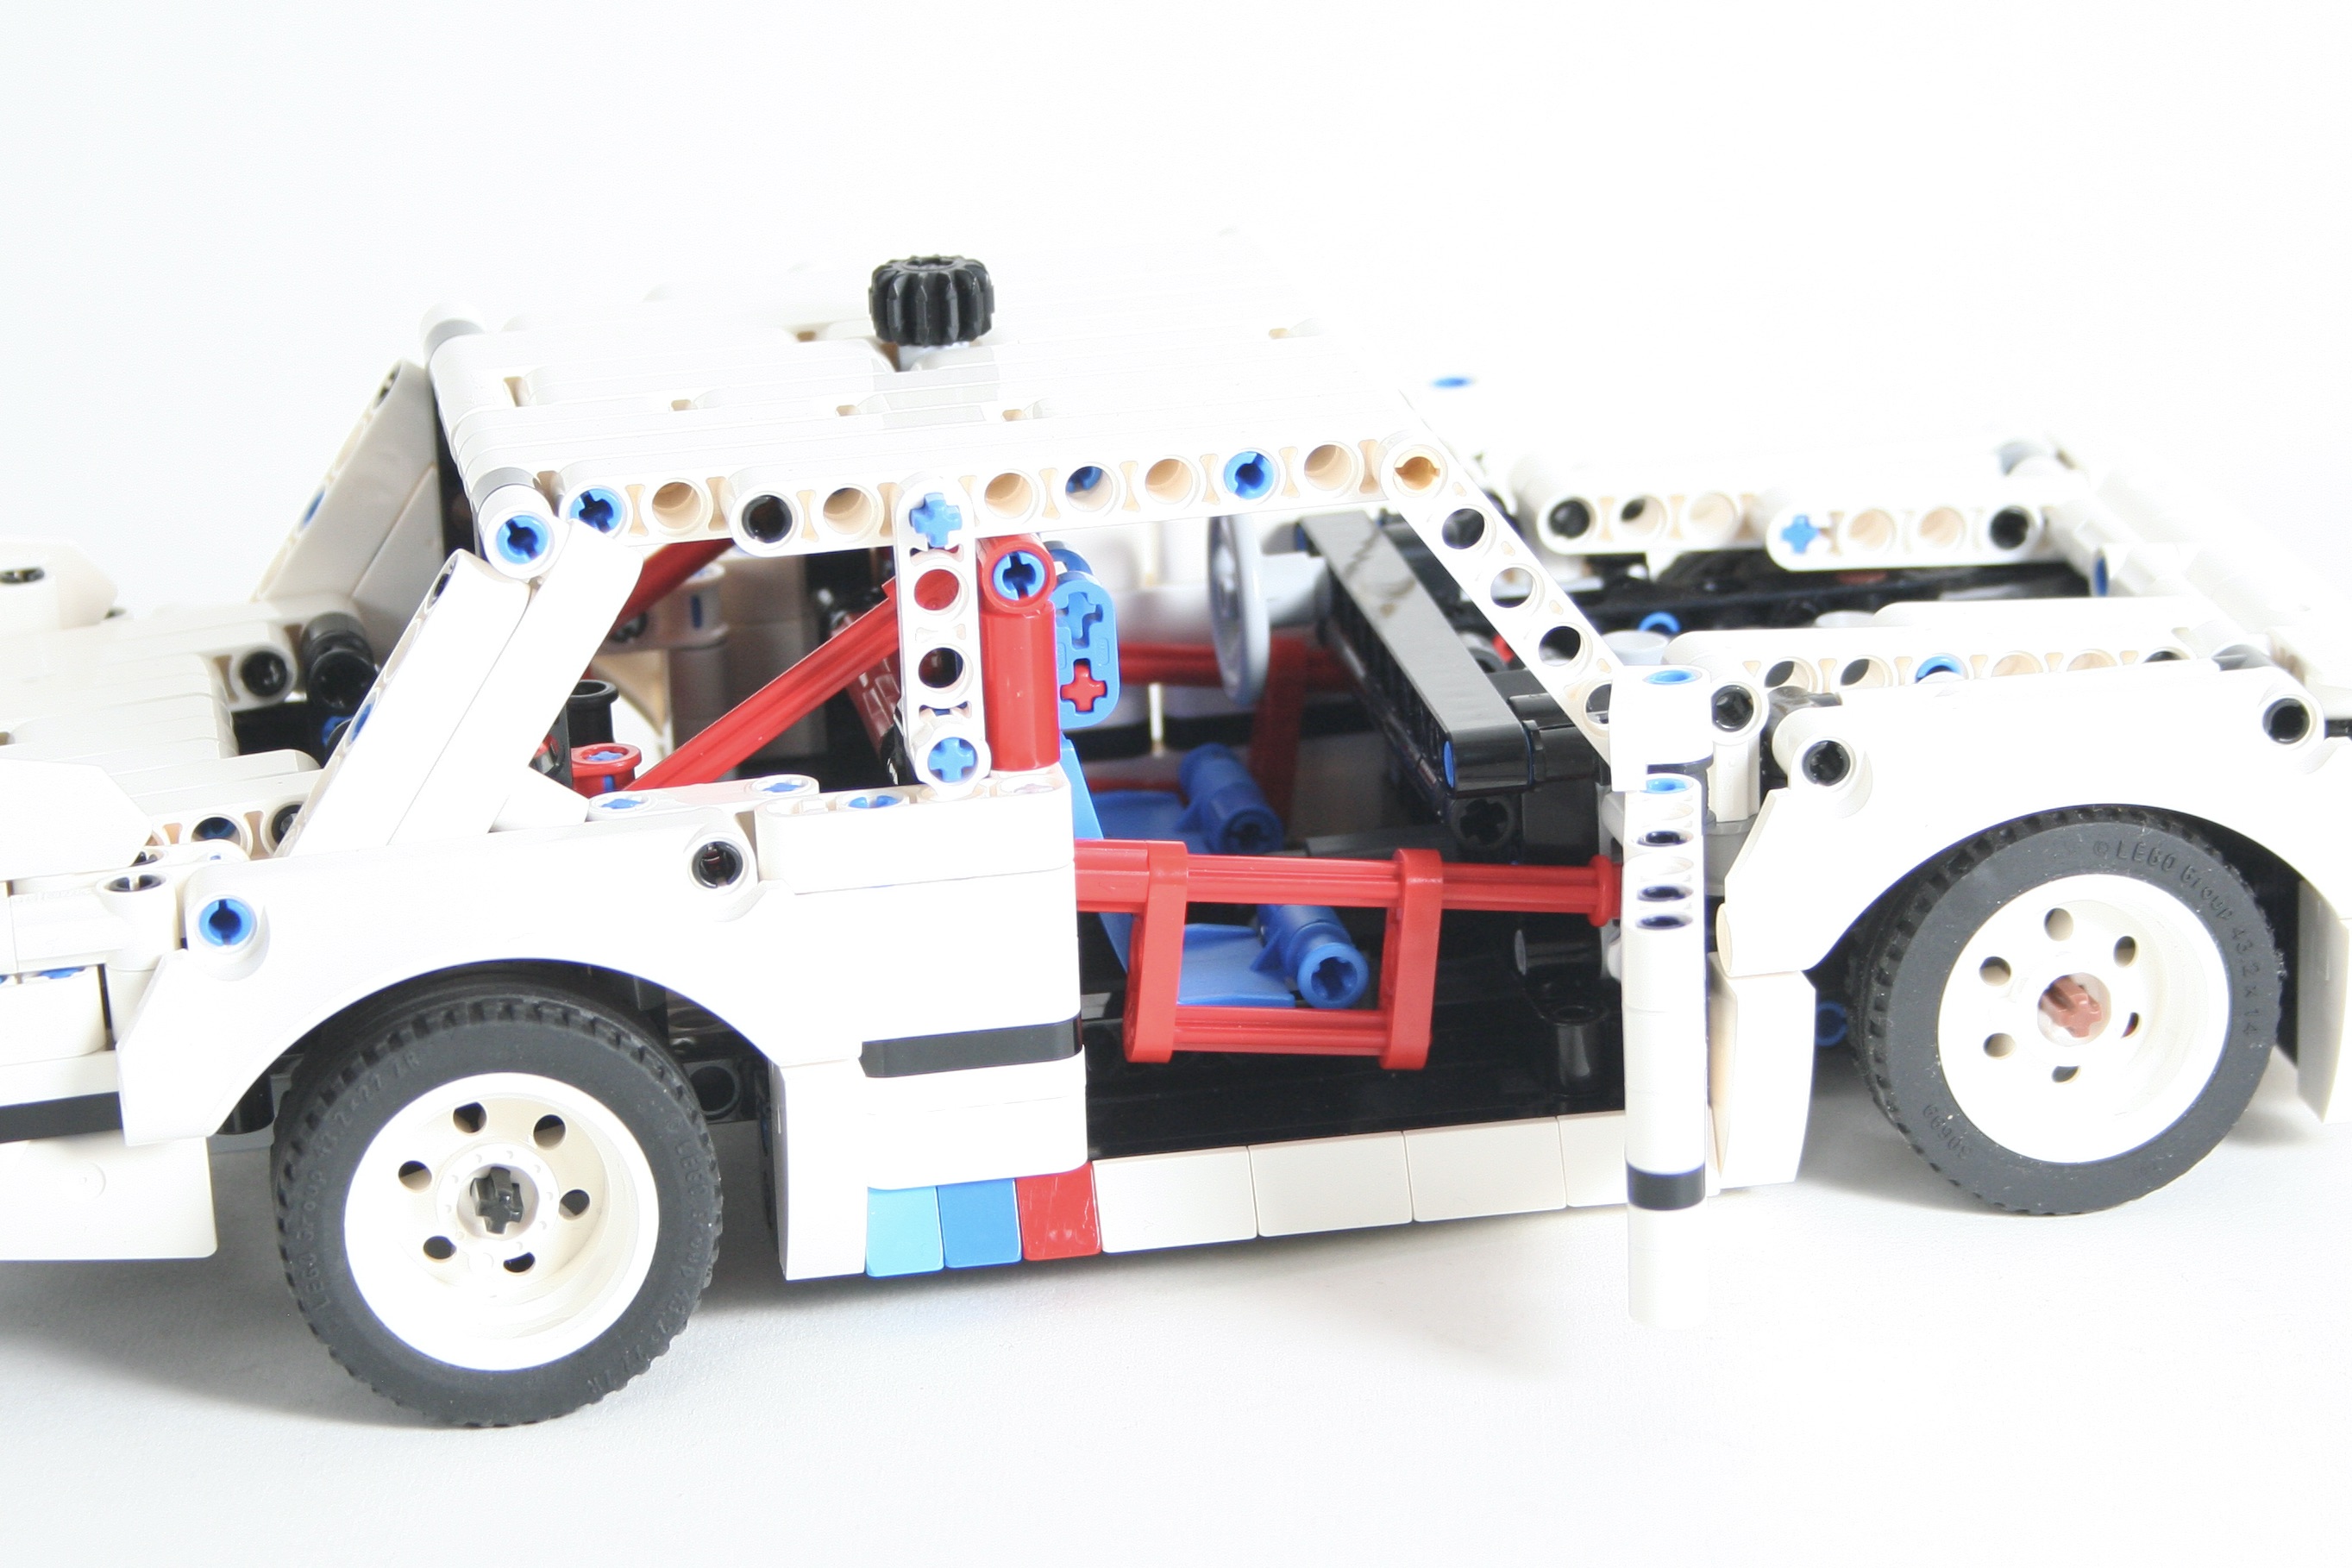
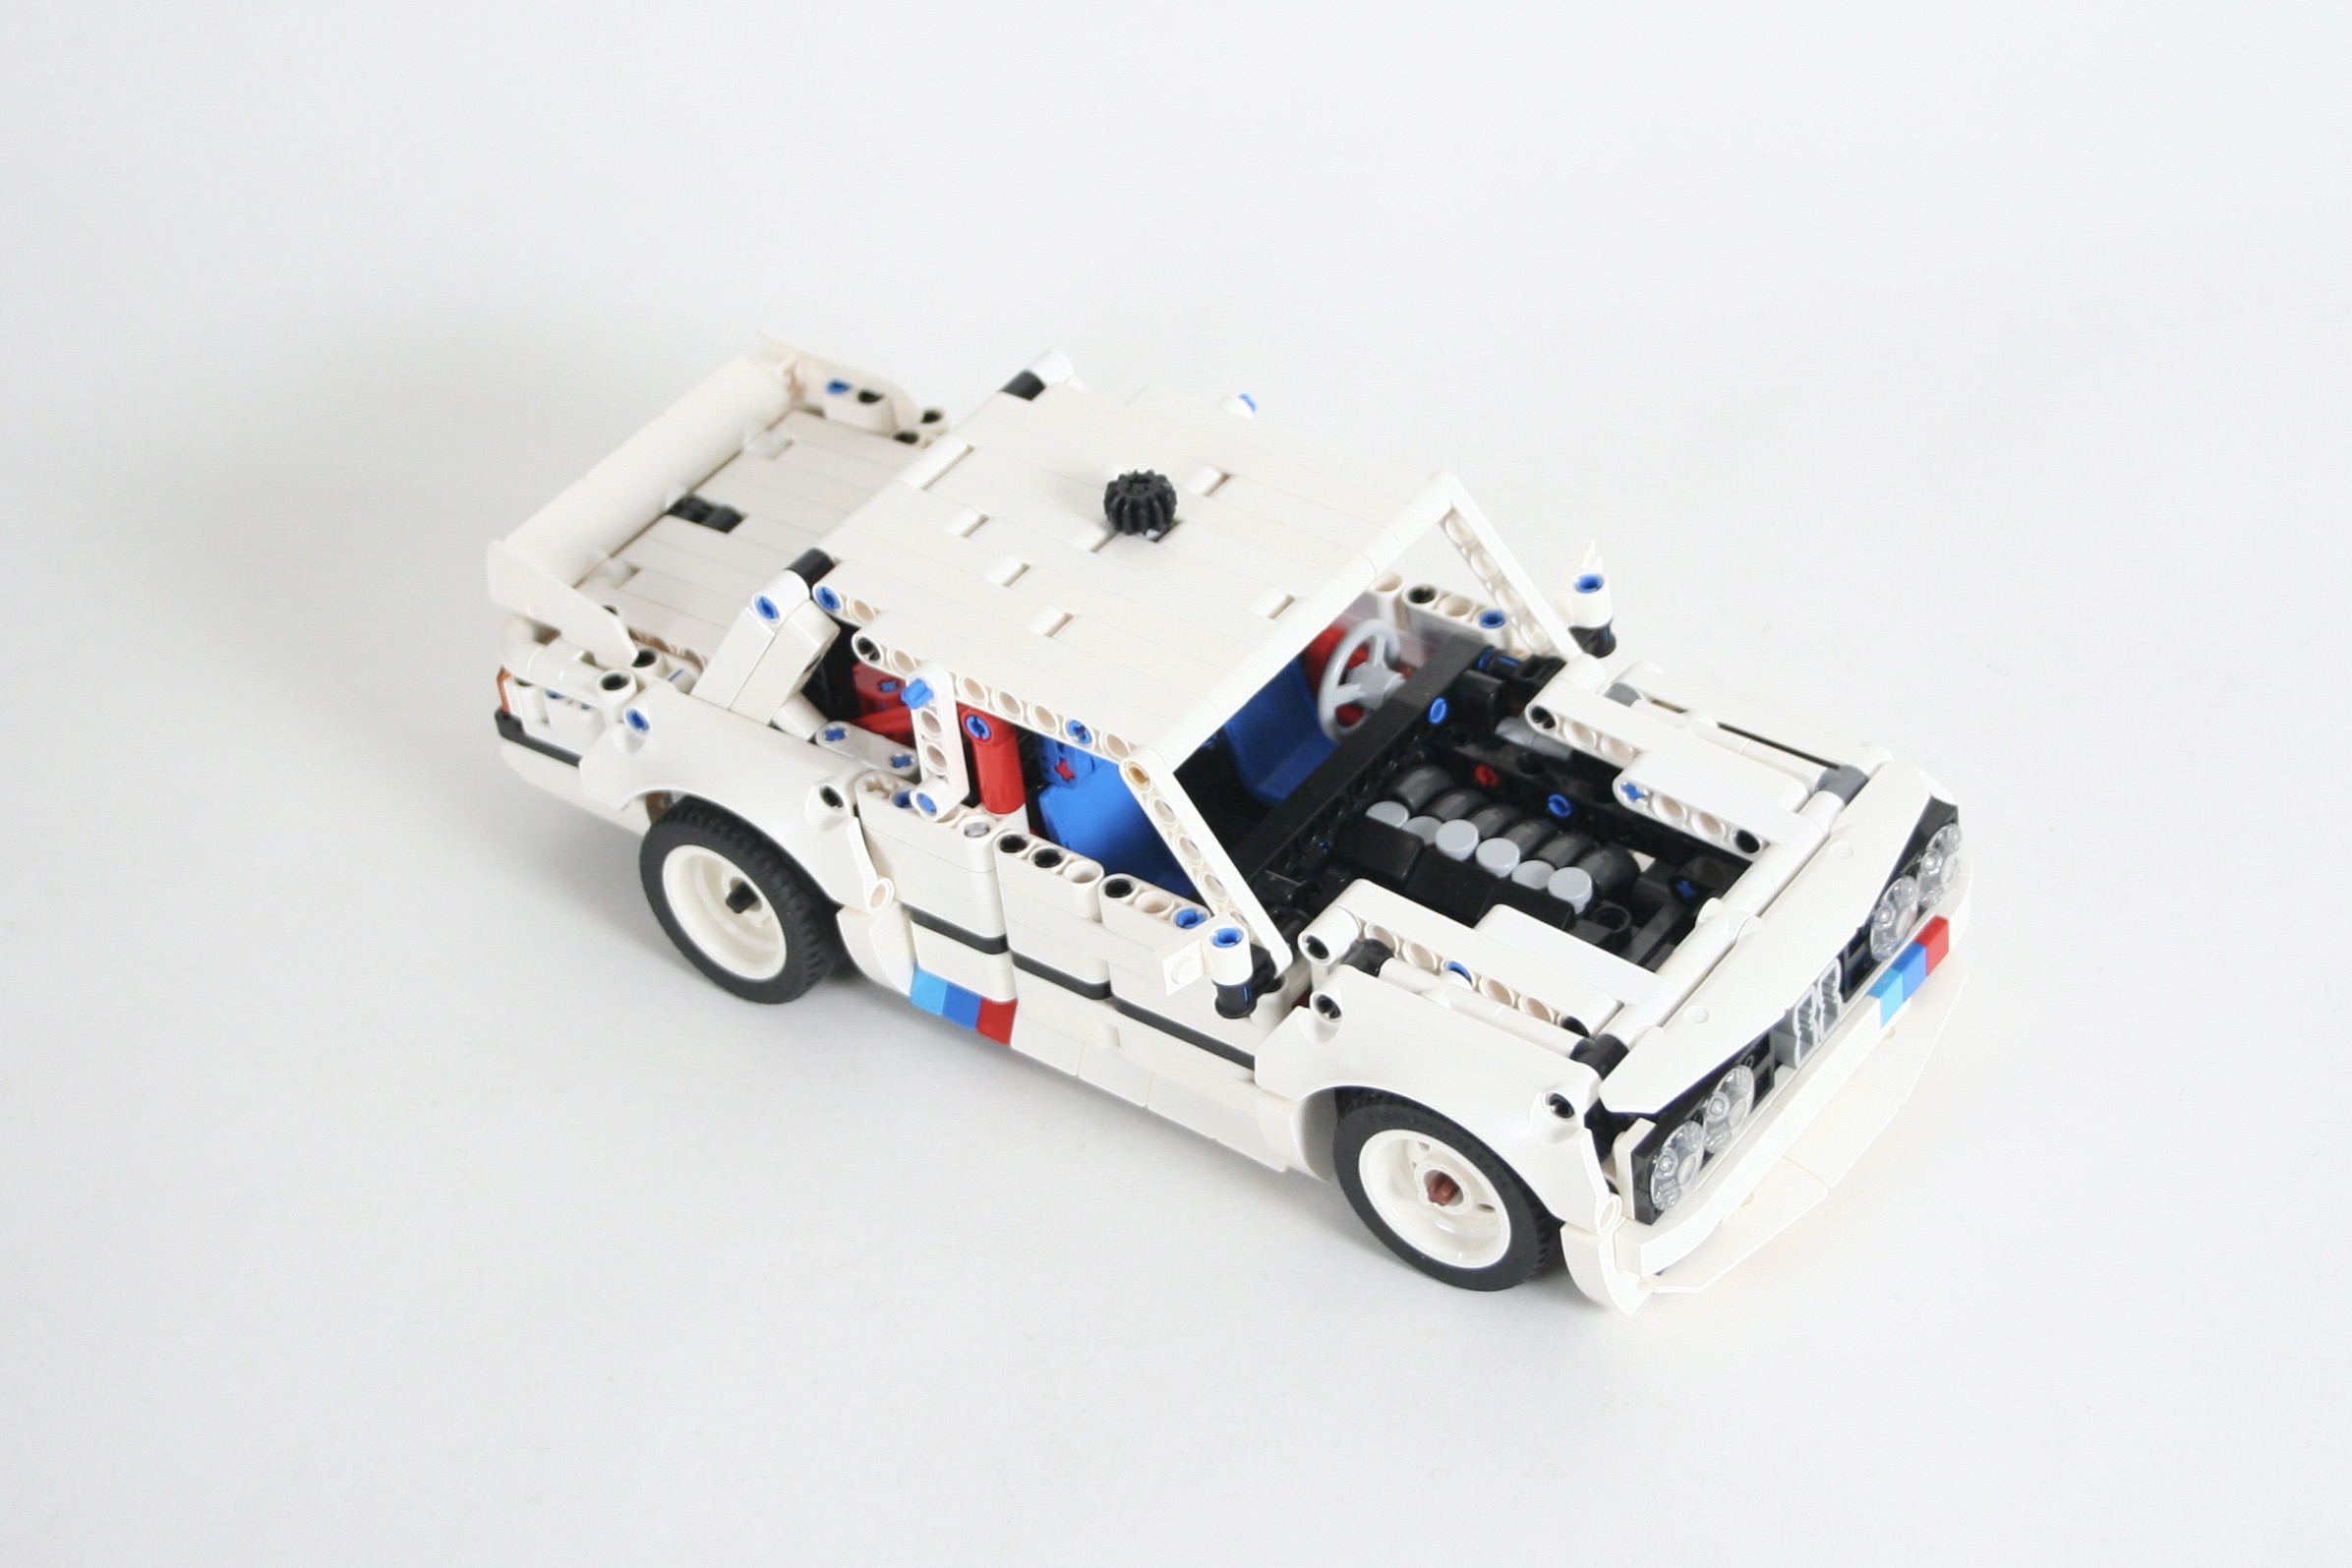
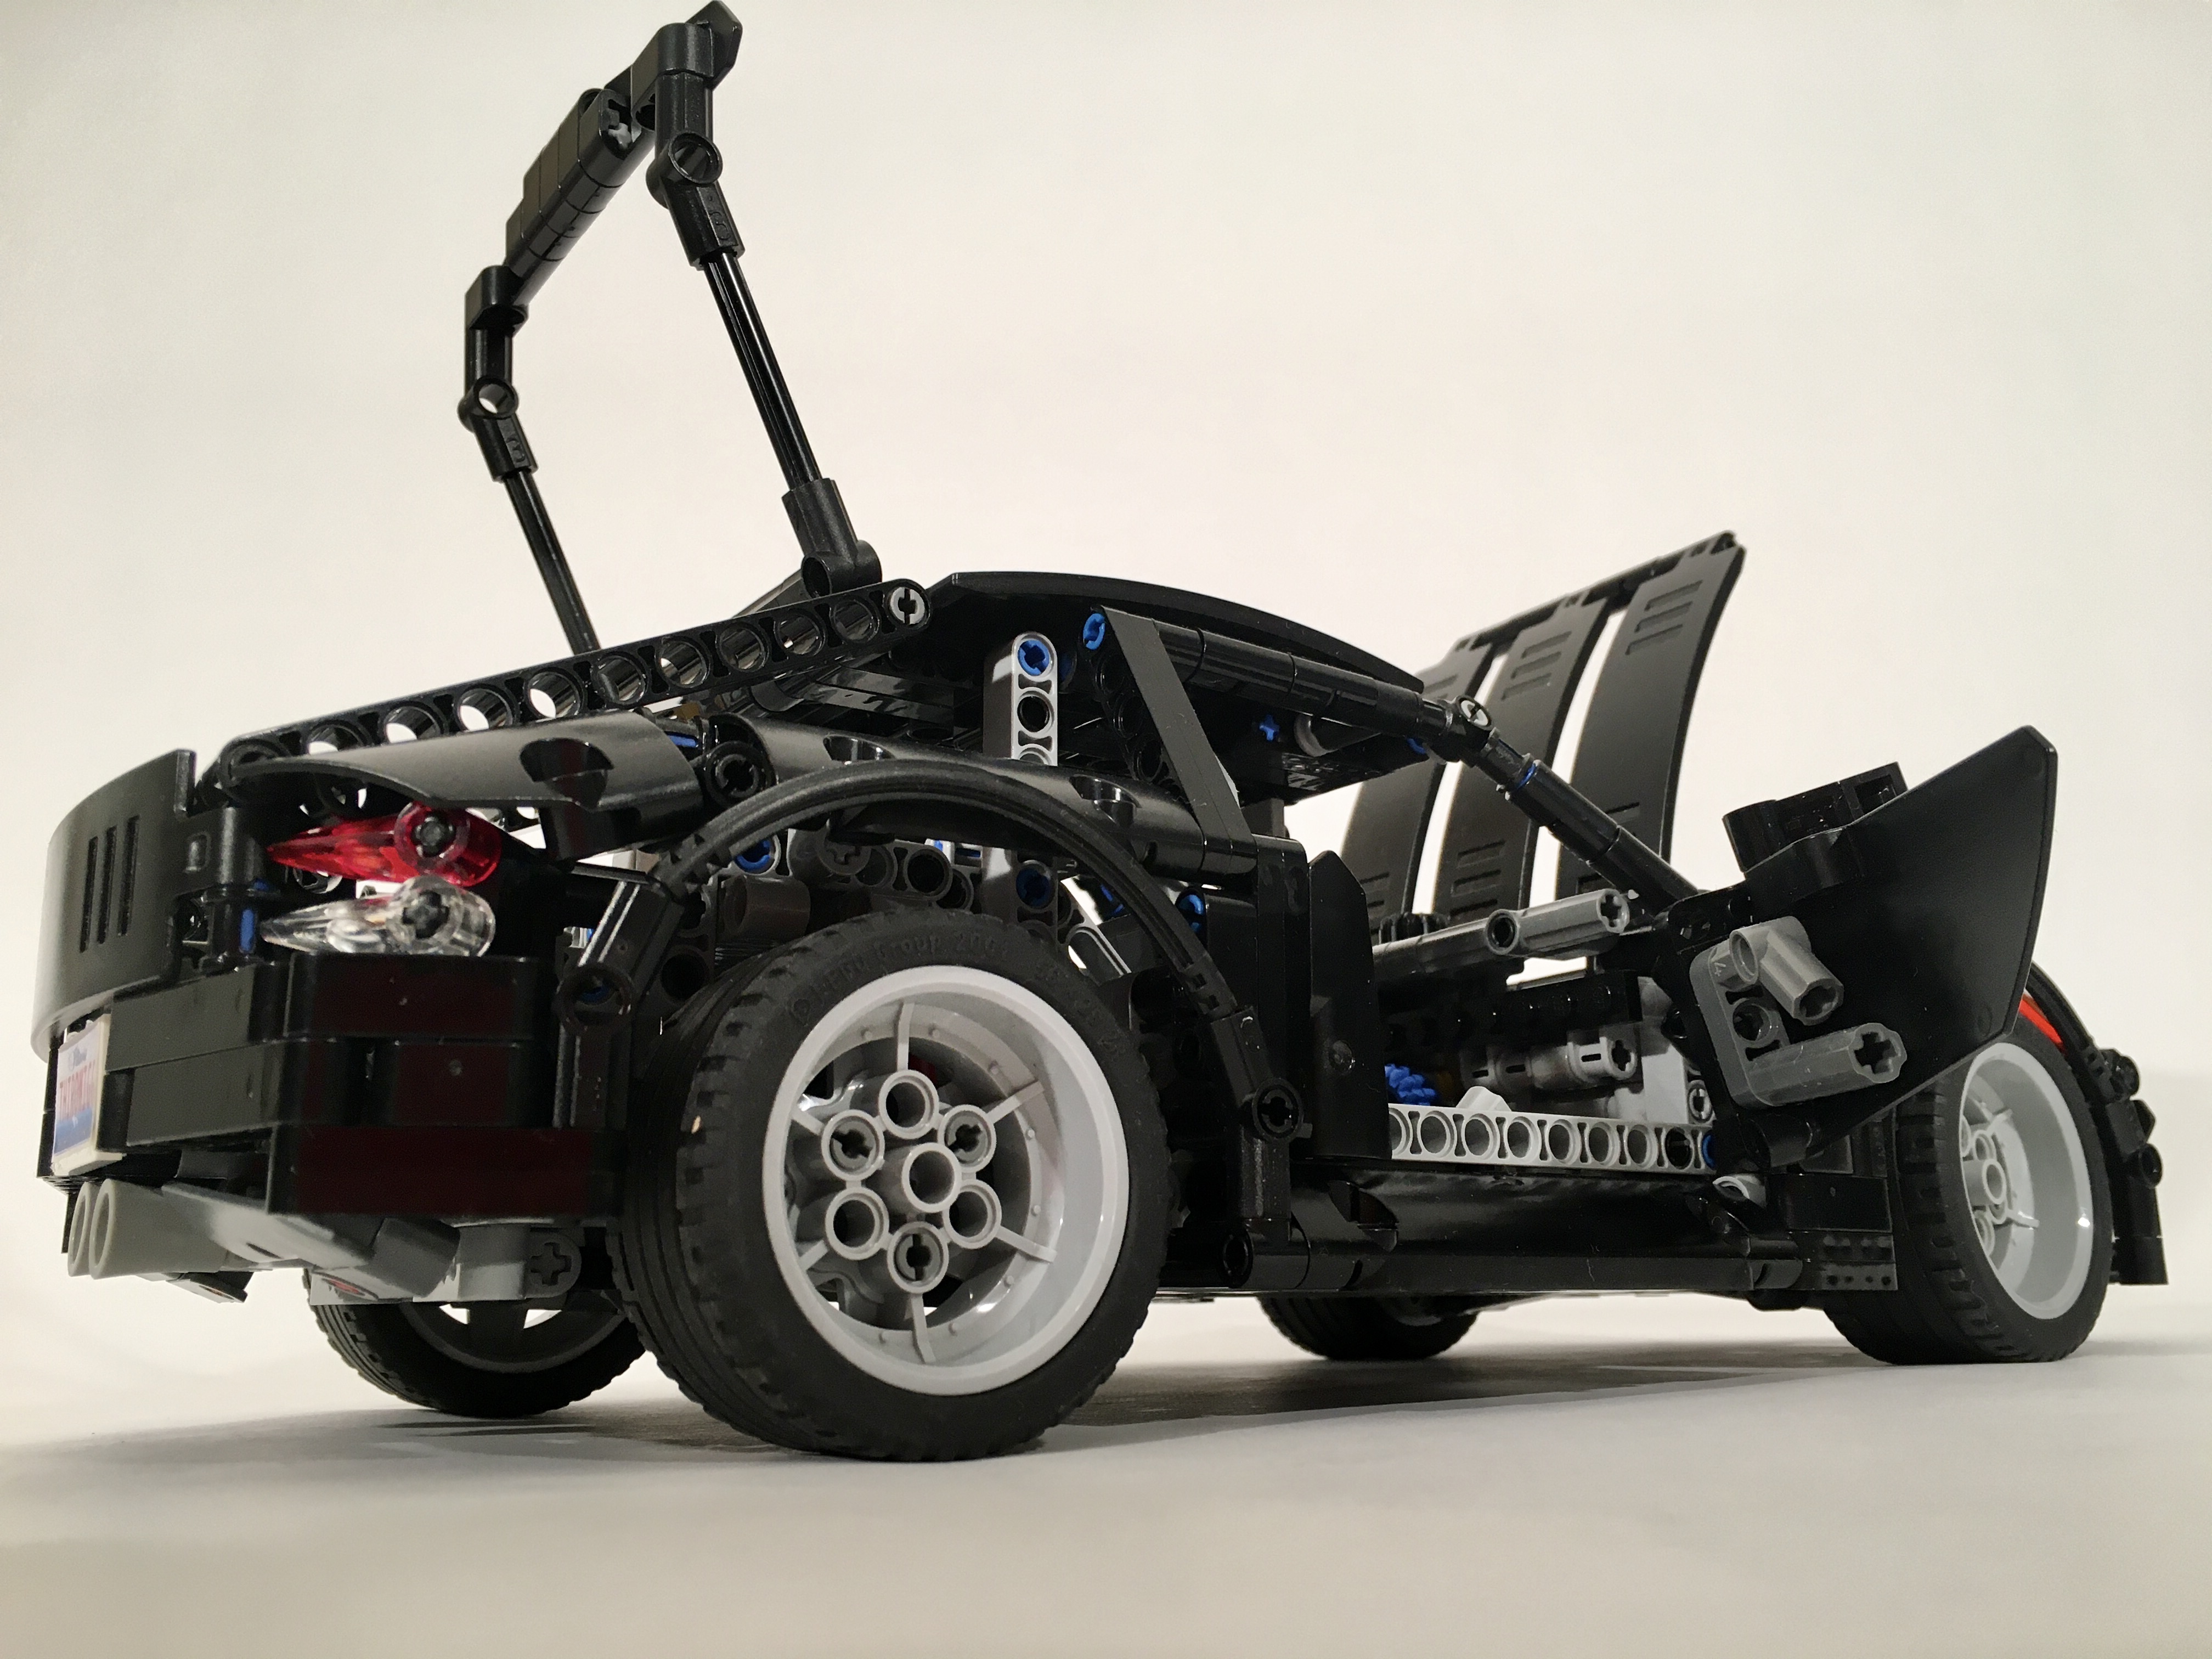
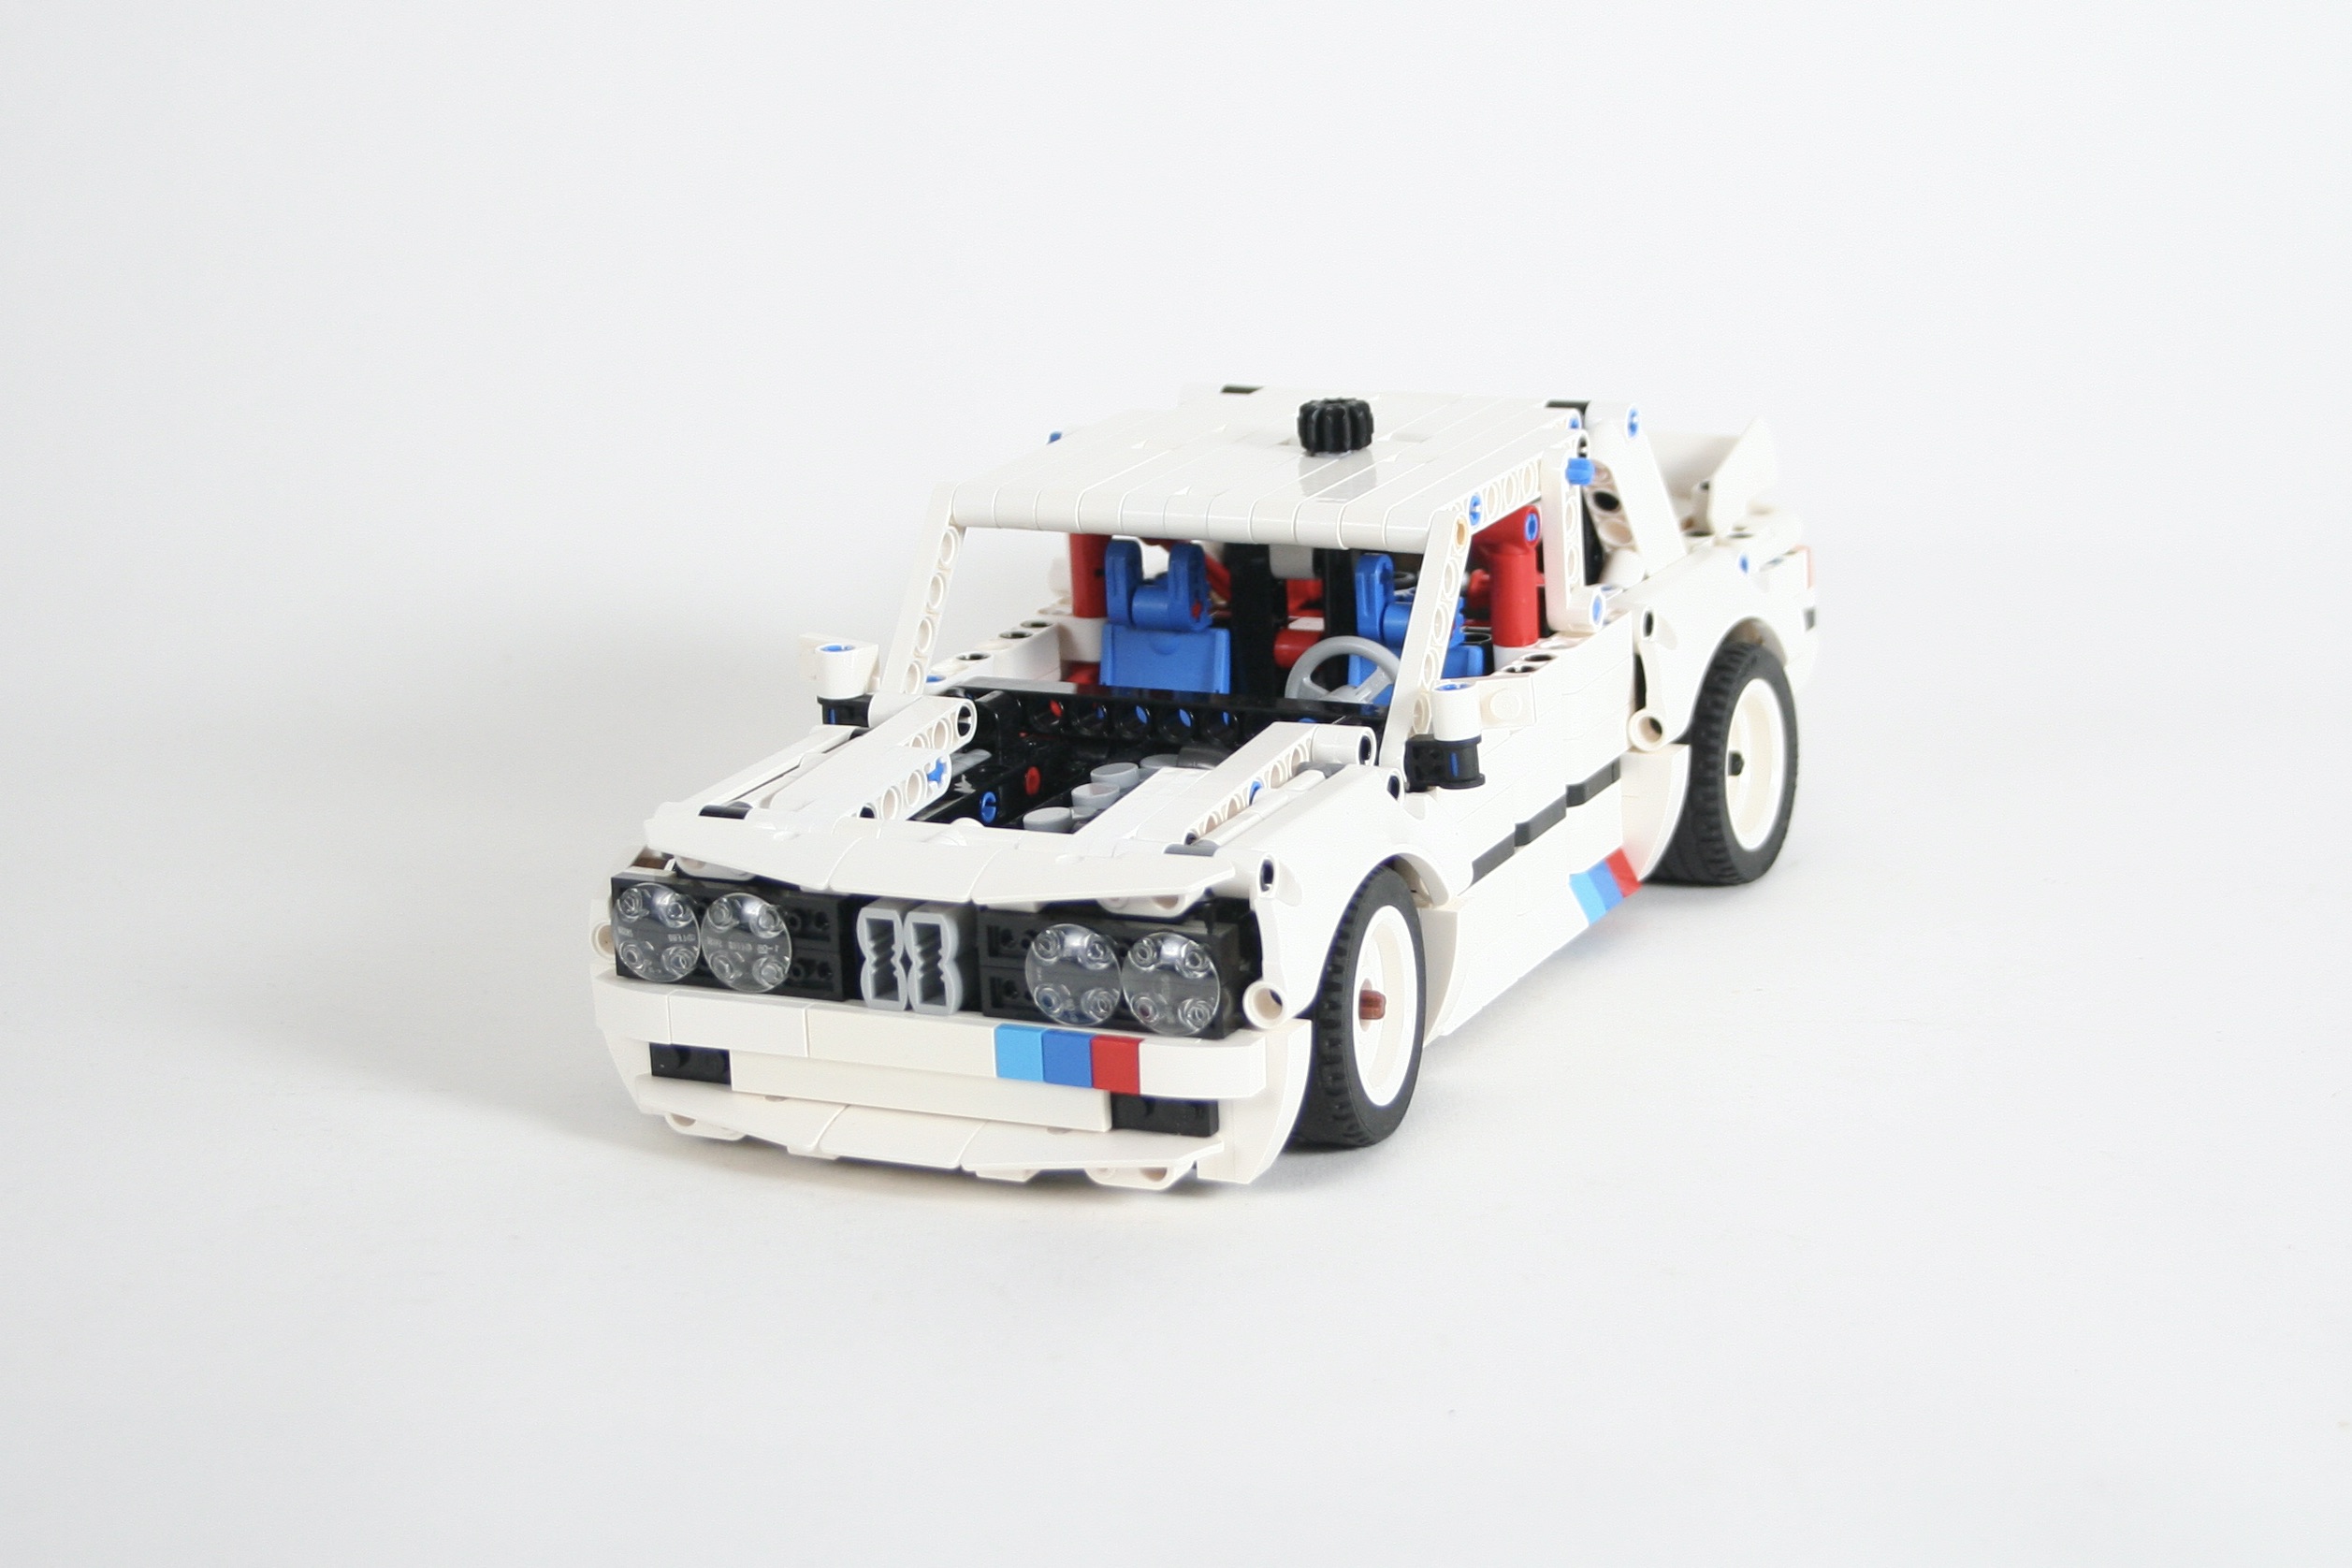
Finally, as BMW Motorsports has an iconic livery, I decided a racing version would be complete the group. This car is mostly the same, but the wheelbase is 1 module shorter, and features the I6 engine. And BWM racing colors. I added a little roll cage, and white wheels and took out a door.
This build is a fan favorite. When I presented these at a local show, many people came up and wanted to talk about the BWMs. They are simple, playable, highly robust, and visually interesting. I loved this build, and will be doing more cars at this scale. They are a lot of fun. Until next time,
Happy Building!