3T Sports Sedan
October 7, 2018 5 Comments
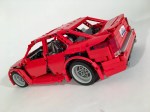
The sport sedan is my favorite kind of car. You can have your McLaren, if I can have four doors and a long hood. One with the proportions of a C-class, the suspension of the ATS, the engine of a Mazda 6, the suede interior of the M3, and the value of the G70. Don’t worry about me, I’ll be set. But there are few good sedans in LEGO, and even fewer smaller ones. Let’s change that.
Instructions may be downloaded here.

When I set out to make a sedan, I wanted it to be smaller. What were the features I could add in a smaller LEGO car? It had to have some style, suspension, a gutsy engine, steering, and a transmission. Finally, it had to be strong. So I got to work. The scale was set on a 3 Series that was a little wide, so I set the hardpoints and set off to work.
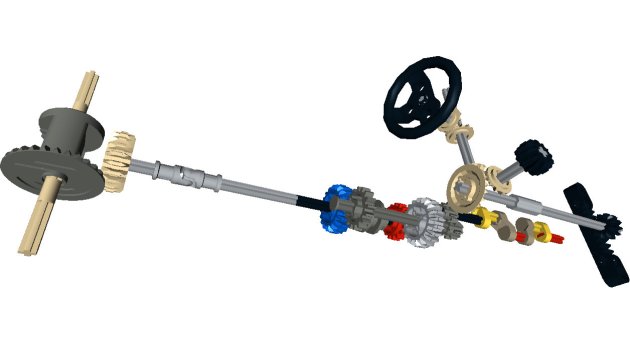
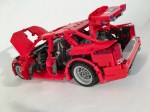
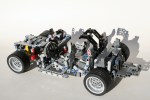
I first set the two axles and suspension. I have built a couple cars with a floating rear differential, and this setup has worked well in the past, so it would work well for this car. Each side had a dual arm independent setup with two shock absorbers. The front suspension used a dual A-arm setup and a wheel hub with only one hard shock absorber. Before adding the steering, the driveline would need to be finalized.
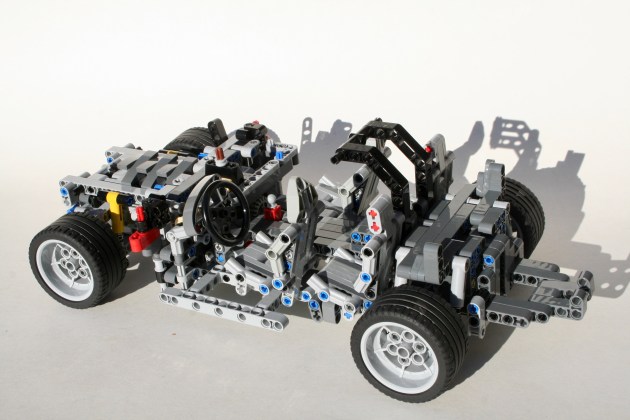
I played around with a number of transmissions, but settled on a simple two speed design for a number of reasons. First, it was smallest as something else would take a lot of space from the interior. Second, something better would take away from the rigidity of the model. Sedans need a lot of support through the transmission tunnel as you lose a lot of rigidity near the doors. Finally, anything more complicated than 2 speeds would be tricky to manually operate (play with) in this scale. About half way through my work on this project, some fun new gears came out which improved the design.
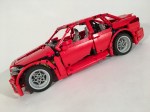
Next, I moved on to the bodywork. This is the part that causes me the most problems in my car builds, and this car was no exception. I set the doors first as I wanted to use two panels for each side. Then I worked on the front and rear bumpers. The rear came together quickly, but the front took a little more time. I wanted something that was sporty, and with a simple grill. I think it worked out well. Finally was the roof and the rear quarter panels. This part took a long time, as I wanted something strong and stylish. The result is strong and has the C pillar split into a D pillar. It is not perfect, but it is stronger than all the panel ideas I tried.
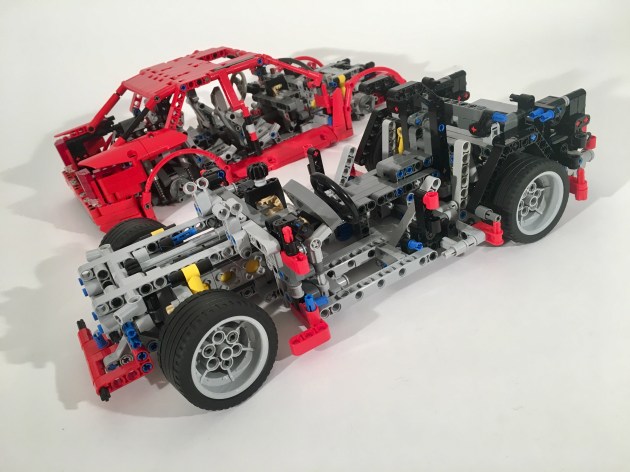
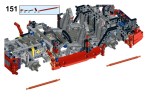
After the bodywork was set I did something I have never done before, I rebuilt a second whole car. This time, I knew all the final features, and where all the body work would attach so I could focus on creating a strong frame that would best support the whole design. I am happy I did this, as it cleaned up the inside, found some new solutions, and made the whole car stronger. Building this way also helped me think through how clear instructions could be made.
In the end, I was pleased with the final design. It accomplished all the goals I wanted, and it is an accessible design for others to recreate. I love building in this scale, and cars are a lot of fun, so I will need to do another small car design again.
Until the next time, happy building.

-
- 3T Sports Sedan


Pingback: Supercar Sedan | THE LEGO CAR BLOG
Pingback: 2018 | Thirdwigg.com
Pingback: 2019 | Thirdwigg.com
Pingback: 1E.R Track Car | Thirdwigg.com
Pingback: Ionos Sport Sedan | Thirdwigg.com