Unimog U4000/5000


Time for another Thirdwigg Unimog!

Instructions are available at Rebrickable.com.

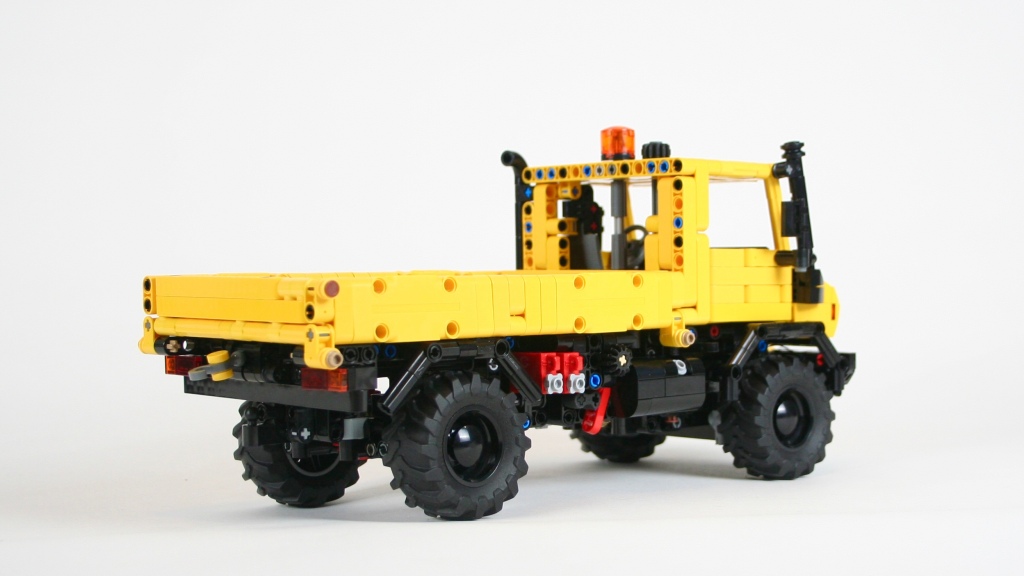
I am now averaging about one Unimog a year now, so it was about time for me to make another one. The 1:21 scale truck is now fairly common, for good reason: it’s a playful size, it does not take too much space or too many parts, and yet gives plenty of space for functions. The popularity of the U423 led me to try a U4000/5000 version.

As I started designing, I wanted to have the standard functions: steering, a drivetrain, an engine. But once I placed these functions, I was left with a lot of space, and the truck was missing something to set it apart from all the other Unimogs. I added a simple two speed transmission, but I still wanted another function. After some looking at a number of photos of the U5000, I started noticing a common feature: a winch.
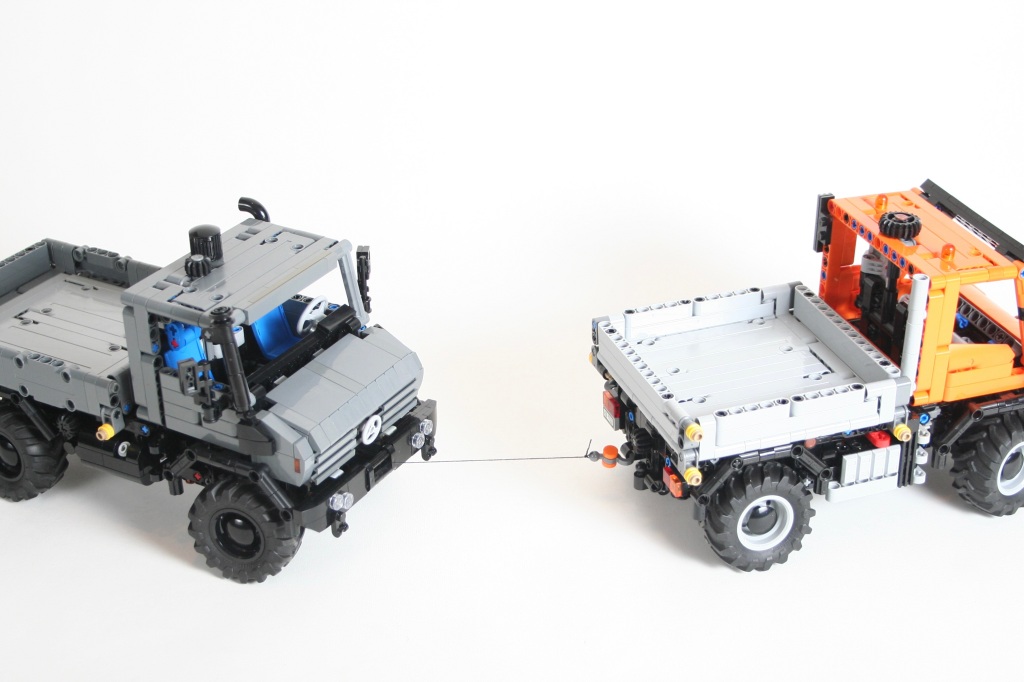
With a little bit of work, I was able to add both a front and rear winch. The front is mounted to the right of the engine with a HOG on top of the cabin next to the steering HOG. The front winch has a lock, which can be released by moving the step on the right of the truck. The rear winch is controlled by a HOG on the right of the truck, with a lock under the fuel tank.

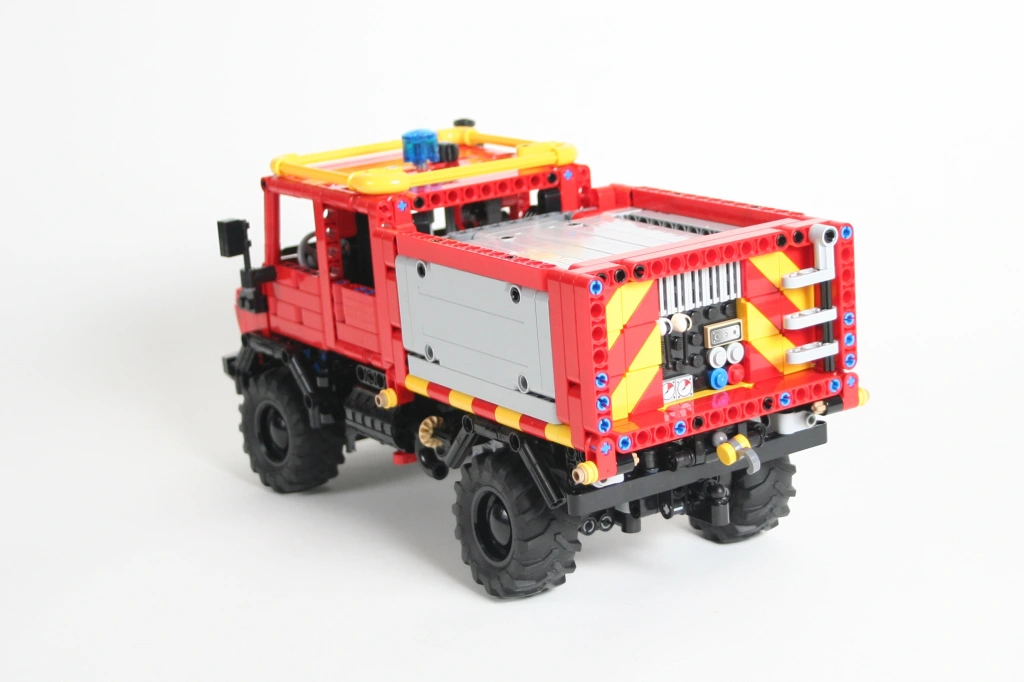
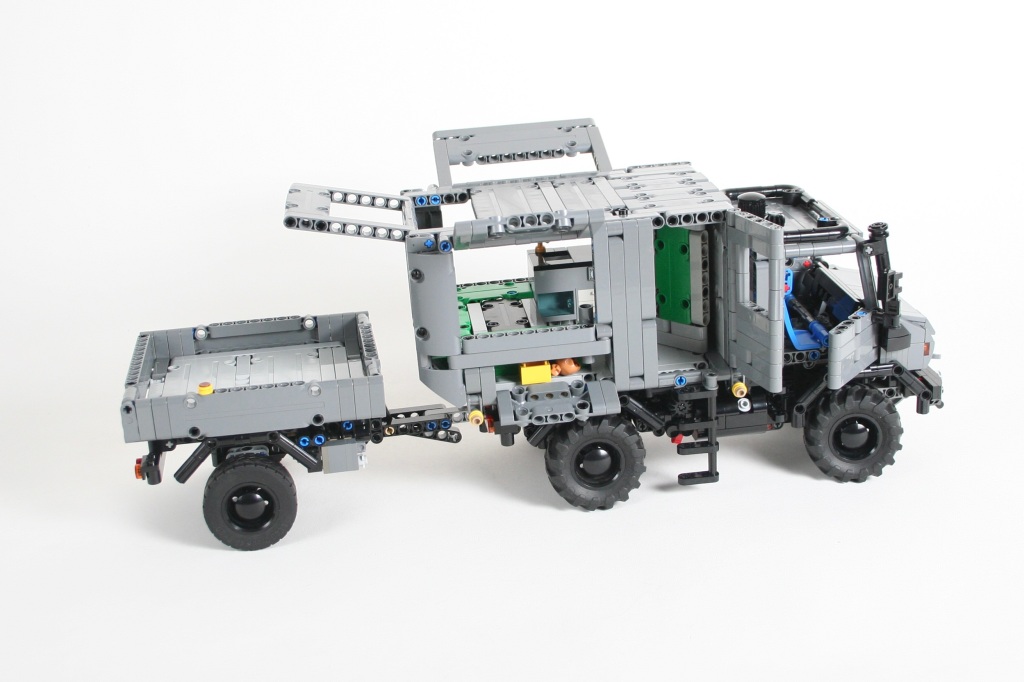
In addition, I wanted some options for bodies, so I created two chassis lengths. The short wheelbase (U4000) has a 19 stud wheelbase, and the long wheelbase (U5000) has a 24 stud wheelbase. Both are similar in design, but have different bed lengths. The U5000 version also allows for both a standard, and four door cab. For the long wheelbase version, I built a fire truck box, and a long bed. For the short wheelbase version, I built a bed and a little camper. The camper features a bathroom, little kitchen, and a table to converts to a bed. Also, plenty of storage compartments are both inside and on the outside of the camper. Finally, a little tipper trailer is available. I built it to match the Dark Bluish Grey U4000, but it can be made in many colors.

I have created instructions for each of these versions, and each can be found at Rebrickable.com: U4000 SWB Truck, U5000 Fire Truck, U5000 LWB Truck, Trailer, Camper.

Just like the U423, I was very happy with how these trucks turned out. The Dark Bluish Grey version is my favorite. The trucks work well, and have all the functions a 1:21 scale truck should. I love all the functions; playing with the winch is great fun! The hood is a little too fragile for my liking, but it looks just like it should. Also, it was a great reason to finally build a camper, and this won’t be the last time. But first, we may need to do another Unimog in 2024. Stay tuned….

Happy Building…
Unimog U423


For my 100th Rebrickable MOC I had to celebrate with a Unimog.

Free Instructions can be found at Rebrickable.com.

So it turns out that I have built a lot of MOCs over the years, and many of them have instructions posted on Rebrickable. Late last year, I recognized I was going to post my 100th MOC on Rebrickable, so I wanted to celebrate the occasion in some meaningful way. After a little thought, it became clear that building another Unimog was the only way to celebrate!

I have build a number of Unimogs over the years, but if one thing has happened during this time, it is the consolidation of the 1:21 scale truck that has become a standard in the LEGO MOC community. LEGO sets like 42098, 42078, and 42128 have helped to standardize the 1:21 scale truck, and many other MOCs have followed suit. Building a Unimog in this scale seemed like a good idea.

I planned right from the beginning that multiple implements would be available for the truck, so the design would need to be able to accommodate each attachment. To support this, a front, rear, and center PTO would be needed, and mounting points on the front, rear, and bed would need to be easily accessible. Once these standards were set, I measured the scale, and made a draft with all the set points fixed. As I built, the steering was finalized as well as the 2 cylinder fake engine. The truck used a rear wheel drive setup, and the rear axle has portal axles and a pendular suspension. Right above the rear axle, I placed a linear actuator to move the tipping bed. After some tinkering, I decided to use a large 36z gear on the left of the truck to move the bed up and down. It is placed just behind the steps, and looks like the left side radiator. Finally, there is a PTO on/off switch on the right of the truck that turns the rear and center PTO on and off.

As I was building the truck, I built the attachments as well, which allowed me to make sure the attachment connection points were ridged, accessible, and standardized. From the beginning I planned on the following attachments: plow, gritter, front winch, rear crane, and bed crane. The front attachments are connected using a 5l axle with stop, and the bed mounts are connected using four 3l axles with stop.

The front plow has worm gear lift and can tilt left and right. Free instructions for the plow may be found here. The rear gritter attaches at the rear and connects to the center PTO gear. When the PTO is turned on, the center auger and the rear spreader both turn. The top of the gritter can open to drop small 1×1 round plates to use as salt. Free instructions for the gritter may be found here.

The front winch and center crane and bed can be easily attached as well. The front winch has a locking mechanism that allows the winch to be locked as needed. The rear bed has a knuckleboom crane that folds up for transportation. Instructions may be found for both here.

Finally, a rear knuckleboom crane is also available. This crane uses the same crane as above, but uses a different attachment point. A small interior cam mechanism that is worm driven is used to connect the rear crane to the truck. Two outriggers are on both sides of the crane and are locked by worm gears as well. The crane folds completely and extends as needed. Again, free instructions for the crane can be found here.

Maybe I will find additional attachments, trailers, and implements for the truck but for now I am done. This project worked just a well as I had hoped and was perfect for my 100th MOC. The truck is just the right size, and has all the features I wanted it to have. The functions work well and integrate with each other well. Each attachment was great addition as well, and gave the truck lots of distinctive styles and looks. I hope you enjoyed the build as well.

Happy building!

Unimog U400/U430


I frequently build another Unimog after it has been a couple of months since the last one, so here is another TWO!

You may find building instructions for both the U400 and the U430.

I generally find myself building a Unimog about every year, and this year, I built three. Kindof. Early in 2021, I built a Short Wheelbase U500 in blue, and I loved it. So, I wanted to see if I could take the build a little further. I’m partial to the U500, but the U400 seems to be a little more popular, and the current U430 was another challenge I wanted to try.

Instructions available for both.

The chassis for both is a modification of the U500. The wheelbase is 2 studs shorter, so I removed the winch and the PTO on/off switch, and modified the bed tipping mechanism. The rest is the same, including the front and rear PTO, the four wheel drive, and the I4 engine. Both the U400 and the U430 have a manual pneumatic pump with a front/rear switch for attachments.

The tipping bed is the same for both, and can tip in three directions. The three sides drop as well. And the cab for both is generally the same, with a slight change to the front to address the styling differences for both. You can see the similarities between both in the videos below.

I’m pleased with these MOCs, and how they worked. The U400 is the most beautiful MOC I have made in a long time. It currently adorns my desk at work, and will continue to do so for some time. While I wish both would have portal axles, the stability of the drivetrain, and the flawless reliability is worth tradeoff. The U430 looks great as well, especially with the tires, the orange is my favorite. Hopefully I am able to make some attachments for the front and rear. Stay tuned.

Until then, happy building!

Unimog U500 (405.201)


Every couple of years I build another Unimog; they tend to be a favorite subject.

Instructions may be found here.

Unimog U500 (405.201)

Right after the LEGO Batmobile 76139 was released, I saw the front tires, and immediately planned this Unimog. The tires were perfect for a U500. I stared working on a draft before I had acquired the tires. I wanted the build to be in the theme of my Unimog 437 in that it was about 1:18 in scale, and had modular cabins and bed options. But I wanted to take this idea to the next level so that front and rear attachments could be added, as well as trailers. Many of my builds as of late are more system focused, in that a main build supports lots of other attachments, trailers, and versions of the same build. With this one, standard attachment points on the front, rear, bed, cab, and hitches allow for a variety of versions and attachments to be added quickly. I’ll make more of these soon.

Rear Hitch, Attachment point, PTO, and PPTO

I quickly set up a front and rear suspension using what was learned on the 437. The MOC has front and rear live axle suspension, four wheel drive, and front steering. A I4 engine is placed under the cab, over the front axle. Unlike the 437, I added a front and rear PTO. The rear PTO has an on/off switch. A center PTO is present as well for attachments that go in place of the rear bed. Finally, I added a Pneumatic pump behind the cabin to run pneumatics on the front or rear of the truck. A value determines if the preasure goes to the front or rear.

U500 Chassis

I added a three way tipper bed on the rear of the chassis, and created a way for the cab to be tilted. Both can be released by pulling a couple of axles out to allow for the tipping. The cab has seating for three, and both doors open. Finally, I added a front winch that is released and wound up using the fake air tanks on the left of the truck.

In the coming months I will make some attachments and trailers for this truck and for a U400/430 version that use the chassis of the U500 with some adjustments.

2016 Unimog U430

The truck turned out how I wanted it too, and had the features work the way as intended. The suspension is a little hard, but that supports various attachments well. This tipper bed and winch are a little addictive to play with. I did not spend much time making attachments for this truck, but I hope to do so soon. Until the next build or Unimog, Happy Building.

Unimog U90


About 3 months ago I purchased a set of four Fischertechnik tires from ebricks.ru. After seeing a review of them by RM8, I reached out to him, and he mailed me a set. After a little time, I finally have something to show with them.

Unimog U90

After playing with a number of ideas, I decided to do another Unimog. It’s easy to motivate myself to build a vehicle I love. This time, I wanted to do the unloved U90 (418) version. It was not a terribly successful version, as many find the hood…not one of the best. But few people have built this version, so I was up for it. I put to to a vote on Eurobricks, and the decision was to build it in green. Off I went.

The scale required a 27 stud wheelbase and a 19 stud width. I built the front and rear axles and tied them together. Through a couple of edits, I finally added the suspension and figured out how to get portal axles into the truck. The Power Functions XL motor was mounted just over and in front of the rear axle driving power to all four wheels. The Servo motor was placed directly ahead of the XL for the front axle steering. I added a four cylinder fake engine over the front axle. The rechargeable battery box was placed over the rear axle.

Unimog U90 Driveline

The suspension is a live axle setup, with four hard shock absorbers at each corner. Each wheel has about 2 studs of travel. Not much for a Unimog, but enough for a 418. At this point I started a draft of the cab, and a draft of the bed. At this point the truck had an identity crisis. Move forward with green or find another option.

Unimog U90 Bed Tilt

Building LEGO Technic with green is not the easiest. The color lacks 1×5 and 1×11 beams. Both of the these parts would be needed for the bed and the cab. I could make some things work for the 1×11 in the hood, but there was no other option (read, inexpensive option) for the 1x5s needed for the bed. I toyed with other colors for the bodywork; orange, white, blue, yellow. None of them had the right pop I was looking for. Other than the orange, but, as other have said, orange has been done too many times. Then it dawned on me, “why not use plates?” I had my solution. With one bricklink order, I was done.

The truck drives well, and is easily controllable. The front portal axle can use a little strengthening, so serious trial abilities are lacking with this truck. Both the bed and the cab can be easily removed. I ran out of space for a ram to elevate the bed, but it can tilt three ways. I was pleased with how the truck turned out. It looks great. The driveline coule use some improvements, so I will make those improvements on the next truck.