On December 18th, 2004 I bought 8386 here in Cologne, Germany. It was the first LEGO set I bought in 7 years, and thus was the end of my Dark Ages. It was my return to LEGO. Today marks ten years since I bought this set. This is a celebration of that event 10 years ago.
A lot has happened in the last ten years. When I think about that time I pause to reflect on where I have come. I have lived in 10 different places, including three states, had a number of different jobs, and increased my family unit by a factor of three. But people don’t come to this website to read about me, they come for LEGO. Over the last ten years we have gained much. The Technic line has improved both in terms of functional abilities, but also in the frequency and quantity of models offered. We have gained Power Functions. We have Linear Actuators, CV joints, more suspension parts, and so many more wheel options. We have favorite elements that did not exist ten years ago. Colors now include green, blue, white, and orange. LEGO made a Unimog. Bricklink started not much more than 10 years ago. Let that sink in for a moment. All of these developments have made so much of my building possible. It only makes sense to celebrate with a MOD of the set that reminds me of my return.
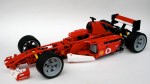
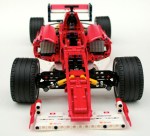
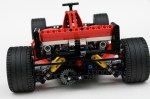
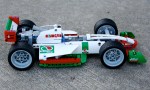
8386 was a rather basic set. It was modeled after the F2004 car #1 or #2 of the 2004 Scuderia Ferrari team through a licensing agreement with Ferrari. The cars were rather successful during the 2004 season at the hands Michael Schumacher and Rubens Barrichello. 8386 included working steering, a working V-10, and a removable engine cover. And that’s about it. Oh, and a lot of stickers. As I did with the 8081 4×4 my goal was to keep what was there, and improve what I could. I would add some additional features, namely suspension and a gearbox. Since 2004, LEGO has added a number of elements that made these goals easier than they would have been ten years ago.
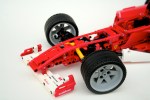
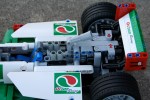
First, I built 8386 as is. After a good hour, I had the stock 8386 complete. I had my constraints, so now I needed to modify the set. I started with the front suspension, as I thought that would be rather difficult. Turns out it wasn’t. I removed a couple of axles, and added in two hard shock absorbers. The geometry made the suspension adequate. It could have been a little harder, and could have been a little more aesthetically pleasing, but it worked.
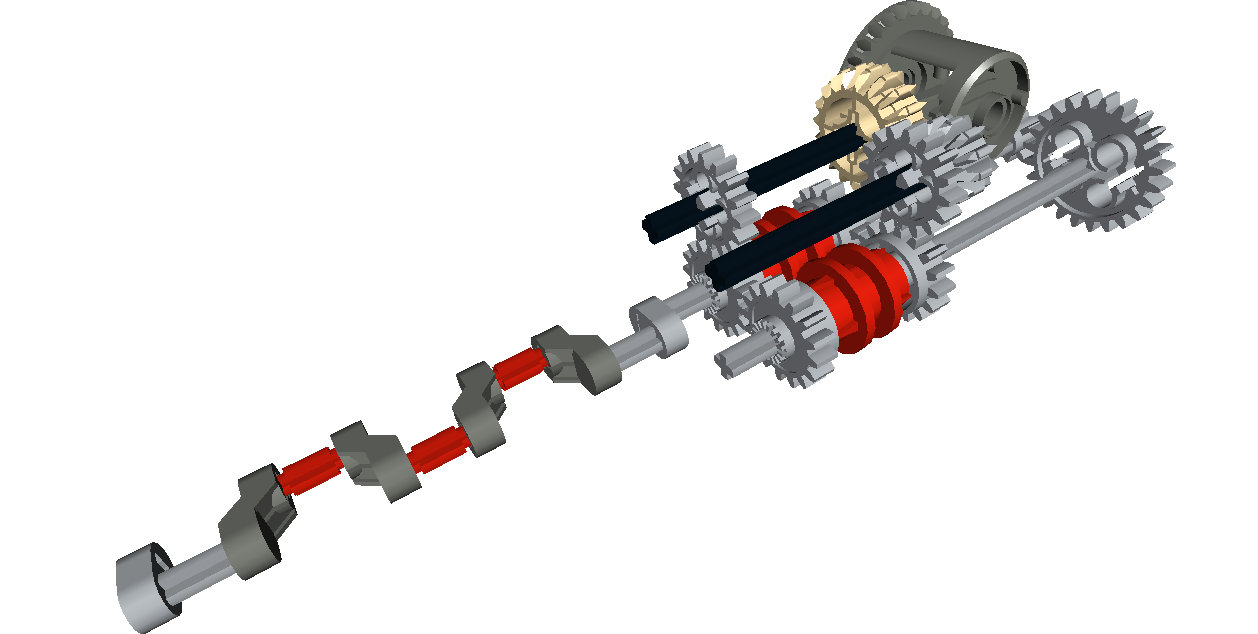
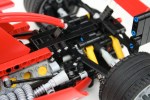
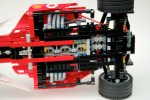
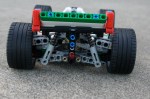
On to the rear. First to go was the trans-clear engine. Ugh. I knew I wanted to add rear suspension, but I was not sure I wanted to add a gearbox due to the limited space. I played around with some designs, and decided I should give it a go. I came up with a design that would need only 7 studs of space. The design would be off center of the car, which would present some changeover problems, but saved 3 studs of length. One axle would connect directly to the new style differential, and the other axle would connect directly to the crankshaft of the V-10. At first, I set the gearbox behind the differential, but I found that option to be rather unsightly and added some complications to the gearshift linkages. With some modifications to the chassis, moving the V-10 forward a stud, and increasing wheelbase by moving the rear axle back 1/2 stud the gearbox would fit.
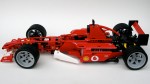
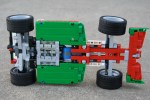
Once the gearbox was designed, I worked on the rear suspension. The gearbox got in way of the suspension design I wanted, but that was a cost I was willing to pay. I used the same upper arms as 8386, but created a liftarm design for the lower arm. Two shock absorbers connected from the chassis to the slightly modified wheel hub. While a pushrod design would have been nice, this setup worked well enough for me. I added a simple linkage to the gearbox that connected to levers in the cockpit. It looks a little clunky, but it allow all the controls to be at hand. I then made some modifications to the exhaust system so it would fit the added features. I made some modifications to the body work to give the car some visual lines that matched F2004, and added a little more white. The car was done.
End of the V-10, beginning of the cramped transaxle.
All in all the design worked well, and required less time than some of my more fancy builds. It was a restful project, and one to which I enjoyed returning.
Maybe in another ten years, I’ll update this again with new features made possible with 10 years of LEGO changes and developments. I look forward to it.
Happy Building.
End of the V-10, beginning of the cramped transaxle.
The Kenworth T55 is my favorite Trial Truck I have built. It’s not the best looking, or the most capable, or the most reliable, or even the most popular but it’s the one I keep coming back to. My latest truck is a continuation of the Kenworth series of trial trucks. The T55 would pull a stump, the T47 is quicker, has better steering, and more compliant suspension.
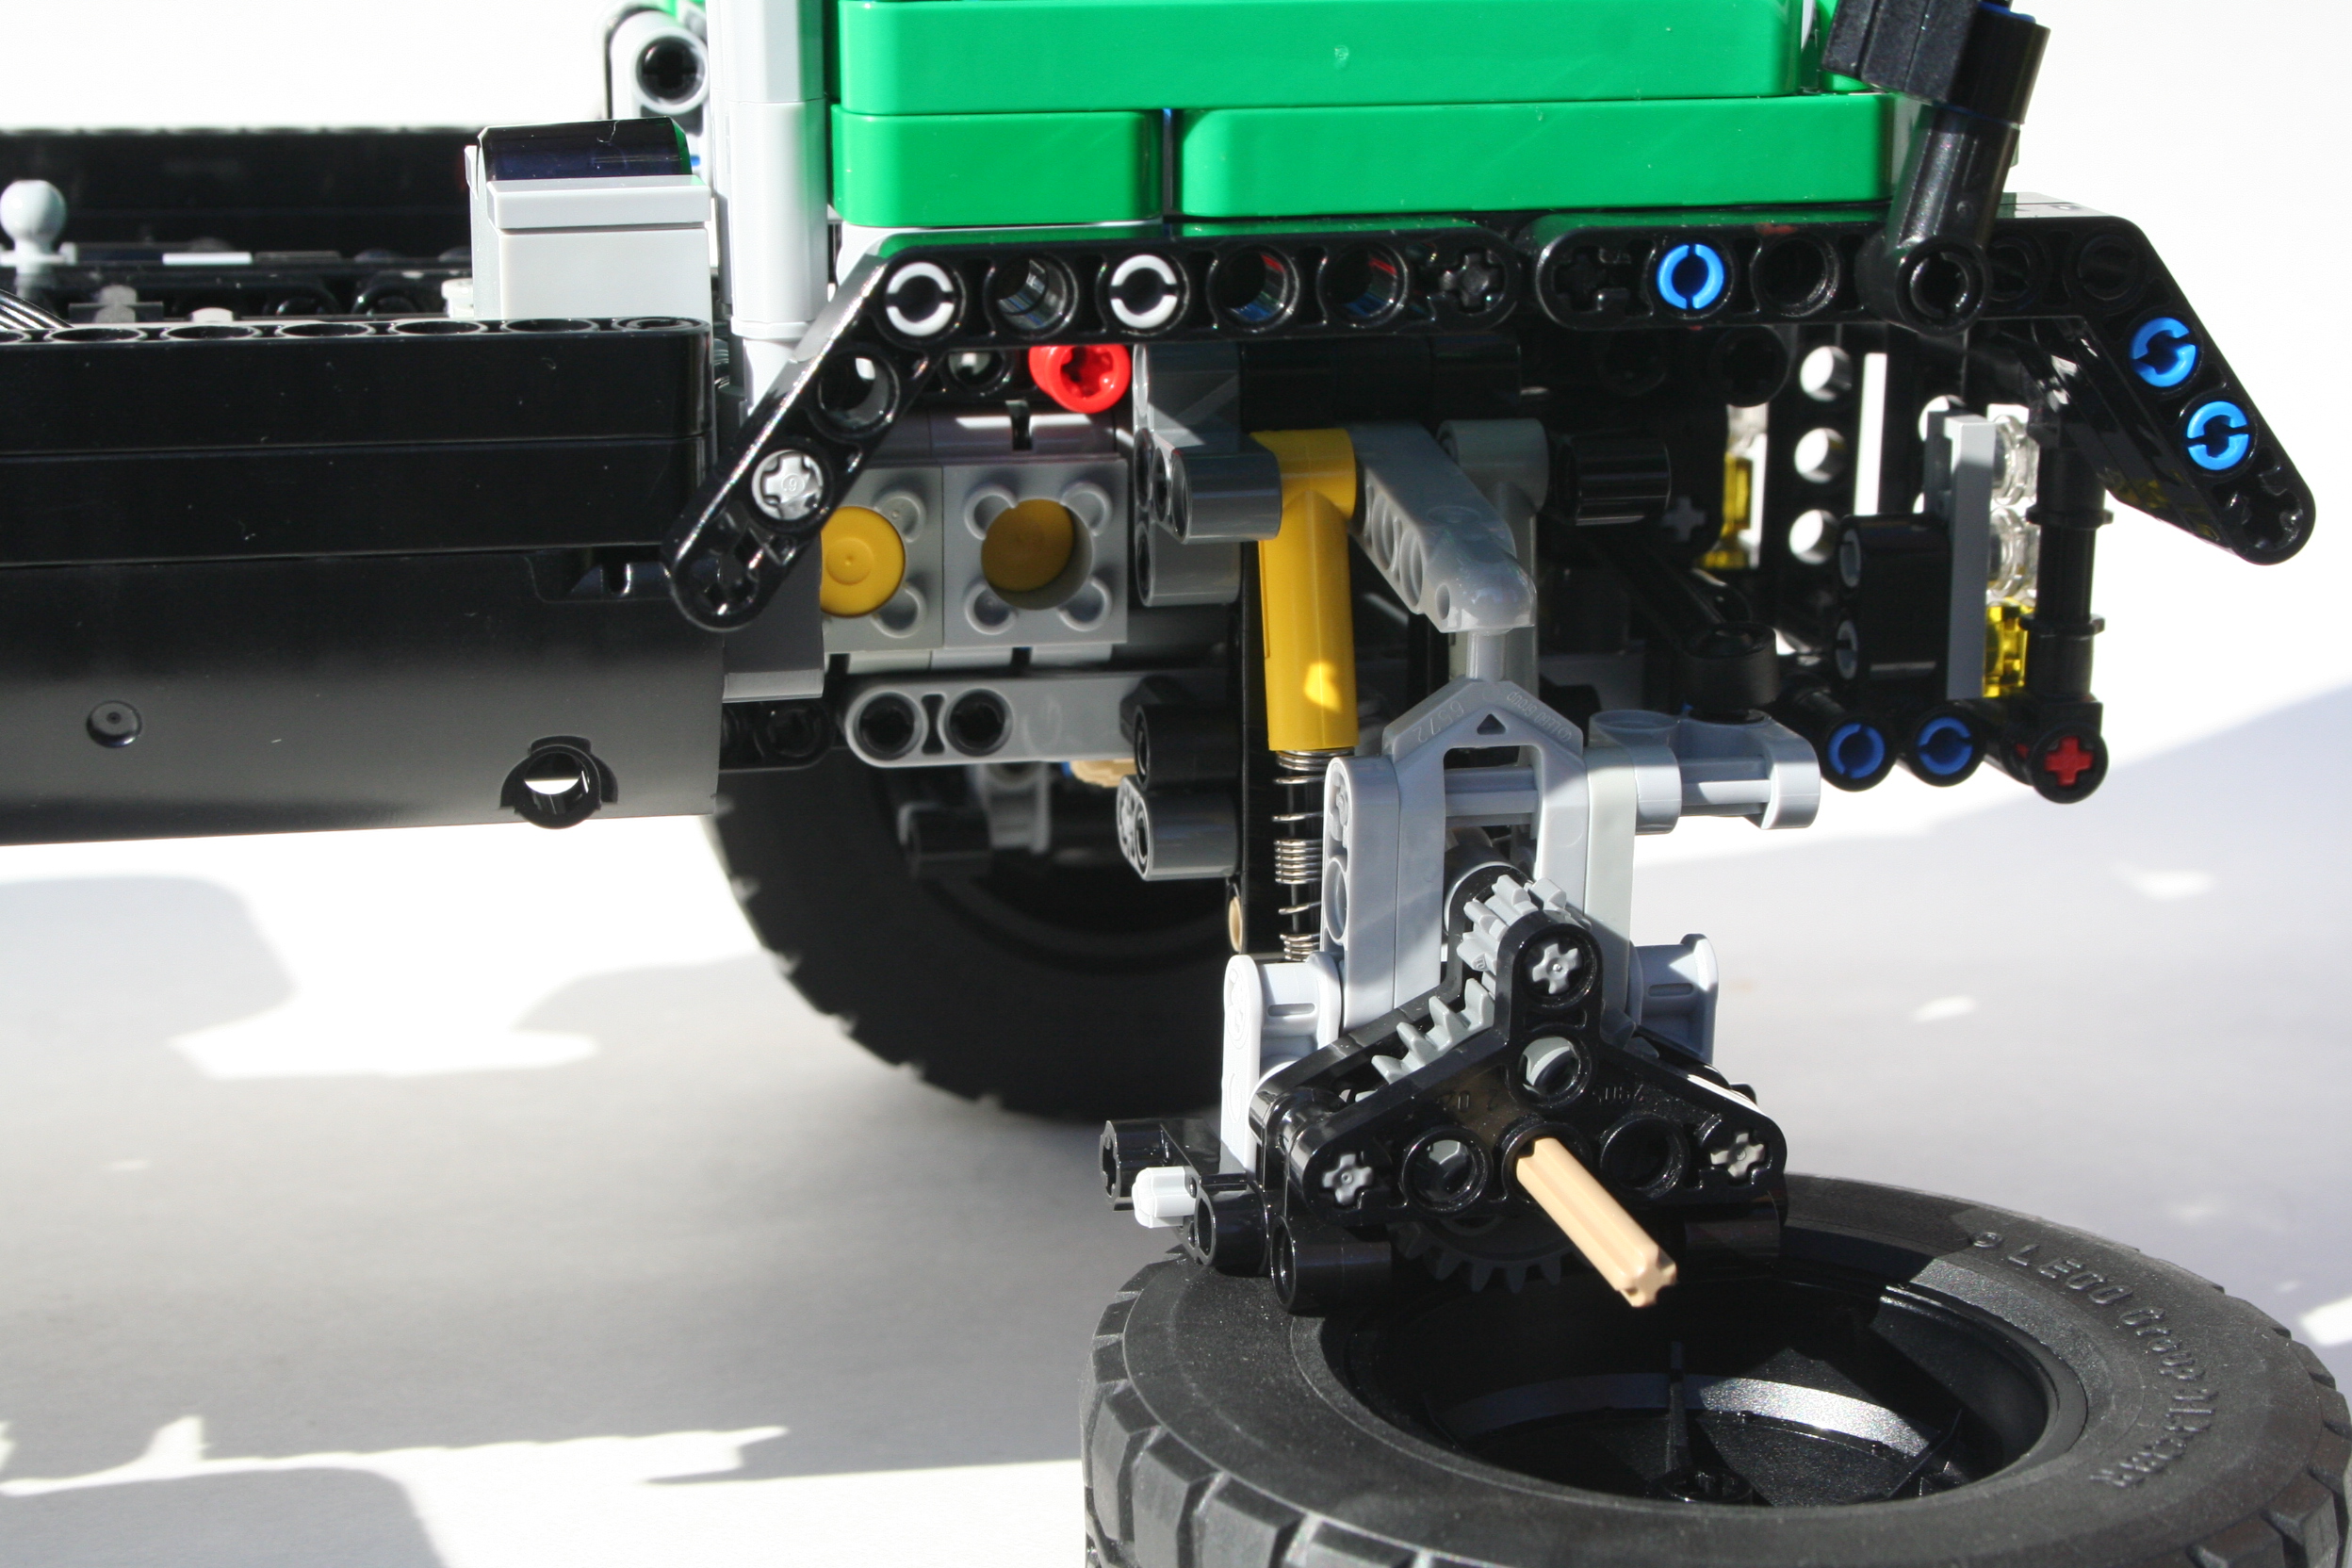
Right from the beginning I knew the truck would have a similar cabin at the T55. It would continue with the four wheel steering, and I added an independent suspension. The dimensions would stay close to the same. From there anything else was fair game. I started with the axles. The new suspensions arms made it a little bit easier to make a good independent design. A CV joint was used at the steering knuckle, which allowed for the steering pivot to be near the wheel. Each wheel had about three studs of travel.
The XL motor was placed on the left of the center line and the rechargeable battery box was placed on the right. A newly acquired Servo Motor was placed rear on the centerline directly in front of the rear axle. I had a little more space left, so I added a simple two speed gearbox. A little more space remained so I added a flat six engine.
Part of my attraction of the T55 has been it’s coloring, and it’s shape. I wanted to keep the attraction similar, but in a way that would differentiate the trucks. I have been acquiring some green lately, so I thought would be a great color. The cab is basically the same, but now it can tilt so you can work on the engine.
The off road performance was not great on the T55, and the T47 was similar. The independent suspension had too much play at the wheels to be great at steering, and the articulation was not very supple. The truck was great to drive around my house, but when I took it outside it did poorly. The suspension design is better than my last independent set up. There was no slipping of the gears. I think my next design will use the same knuckle, but design a different steering connection. This truck again proves the use of knob wheels rather than a differential for a trial truck. Feel free to make your own, and let me know what improvements you developed.
In a bought of inspiration (or distraction) at work, I noted my old 6546 sitting on my desk. After years of looking at this small car I thought, I could make this bigger, and in Technic. Done.
The full gallery including instructions can be found here.
I decided the car should have a simple engine, four wheel suspension, and working steering. Recently, there was a good design that gave me an idea about how to do a smaller scale driveline for the car. I worked on the rear first, and once I had the suspension setup, I added a small flat four engine place directly on the bottom of the car. This would be the basis for the rear of the chassis.
I then started the front suspension design which would utilize the new suspension components from 42021. I first tried adding shock absorbers. Then I added rubber connectors. The first was too big, the second did not work to well. After monkeying with it for a while, I developed a simple torsion bar setup. The torsion axle is a 10l and provides the pivot point to the bottom control arms. They connect to the chassis behind the suspension to a fixed point under the steering wheel. The set up works well. Frankly, it works a little better than the rear as the rear could benefit from stiffer arms and suspension mounts.
Next came the body work. As I wanted to keep things similar to the 6546, the coloring would have to be white, green, and red. And it would need some stickers. I used the stickers from set 60025, so the car number would have to be changed from the original #4 to #5. The coloring and markings turned out well. I tried to make sure it was not too busy. Easy enough, and everything is easily acquired so you may build your own.
Fitting with my yearly planning I have now completed the two small builds I wanted to complete. It was quick, fun, and a MOC that is accessible for other builders. Feel free to build your own (make some new colors, and we can then have a race).
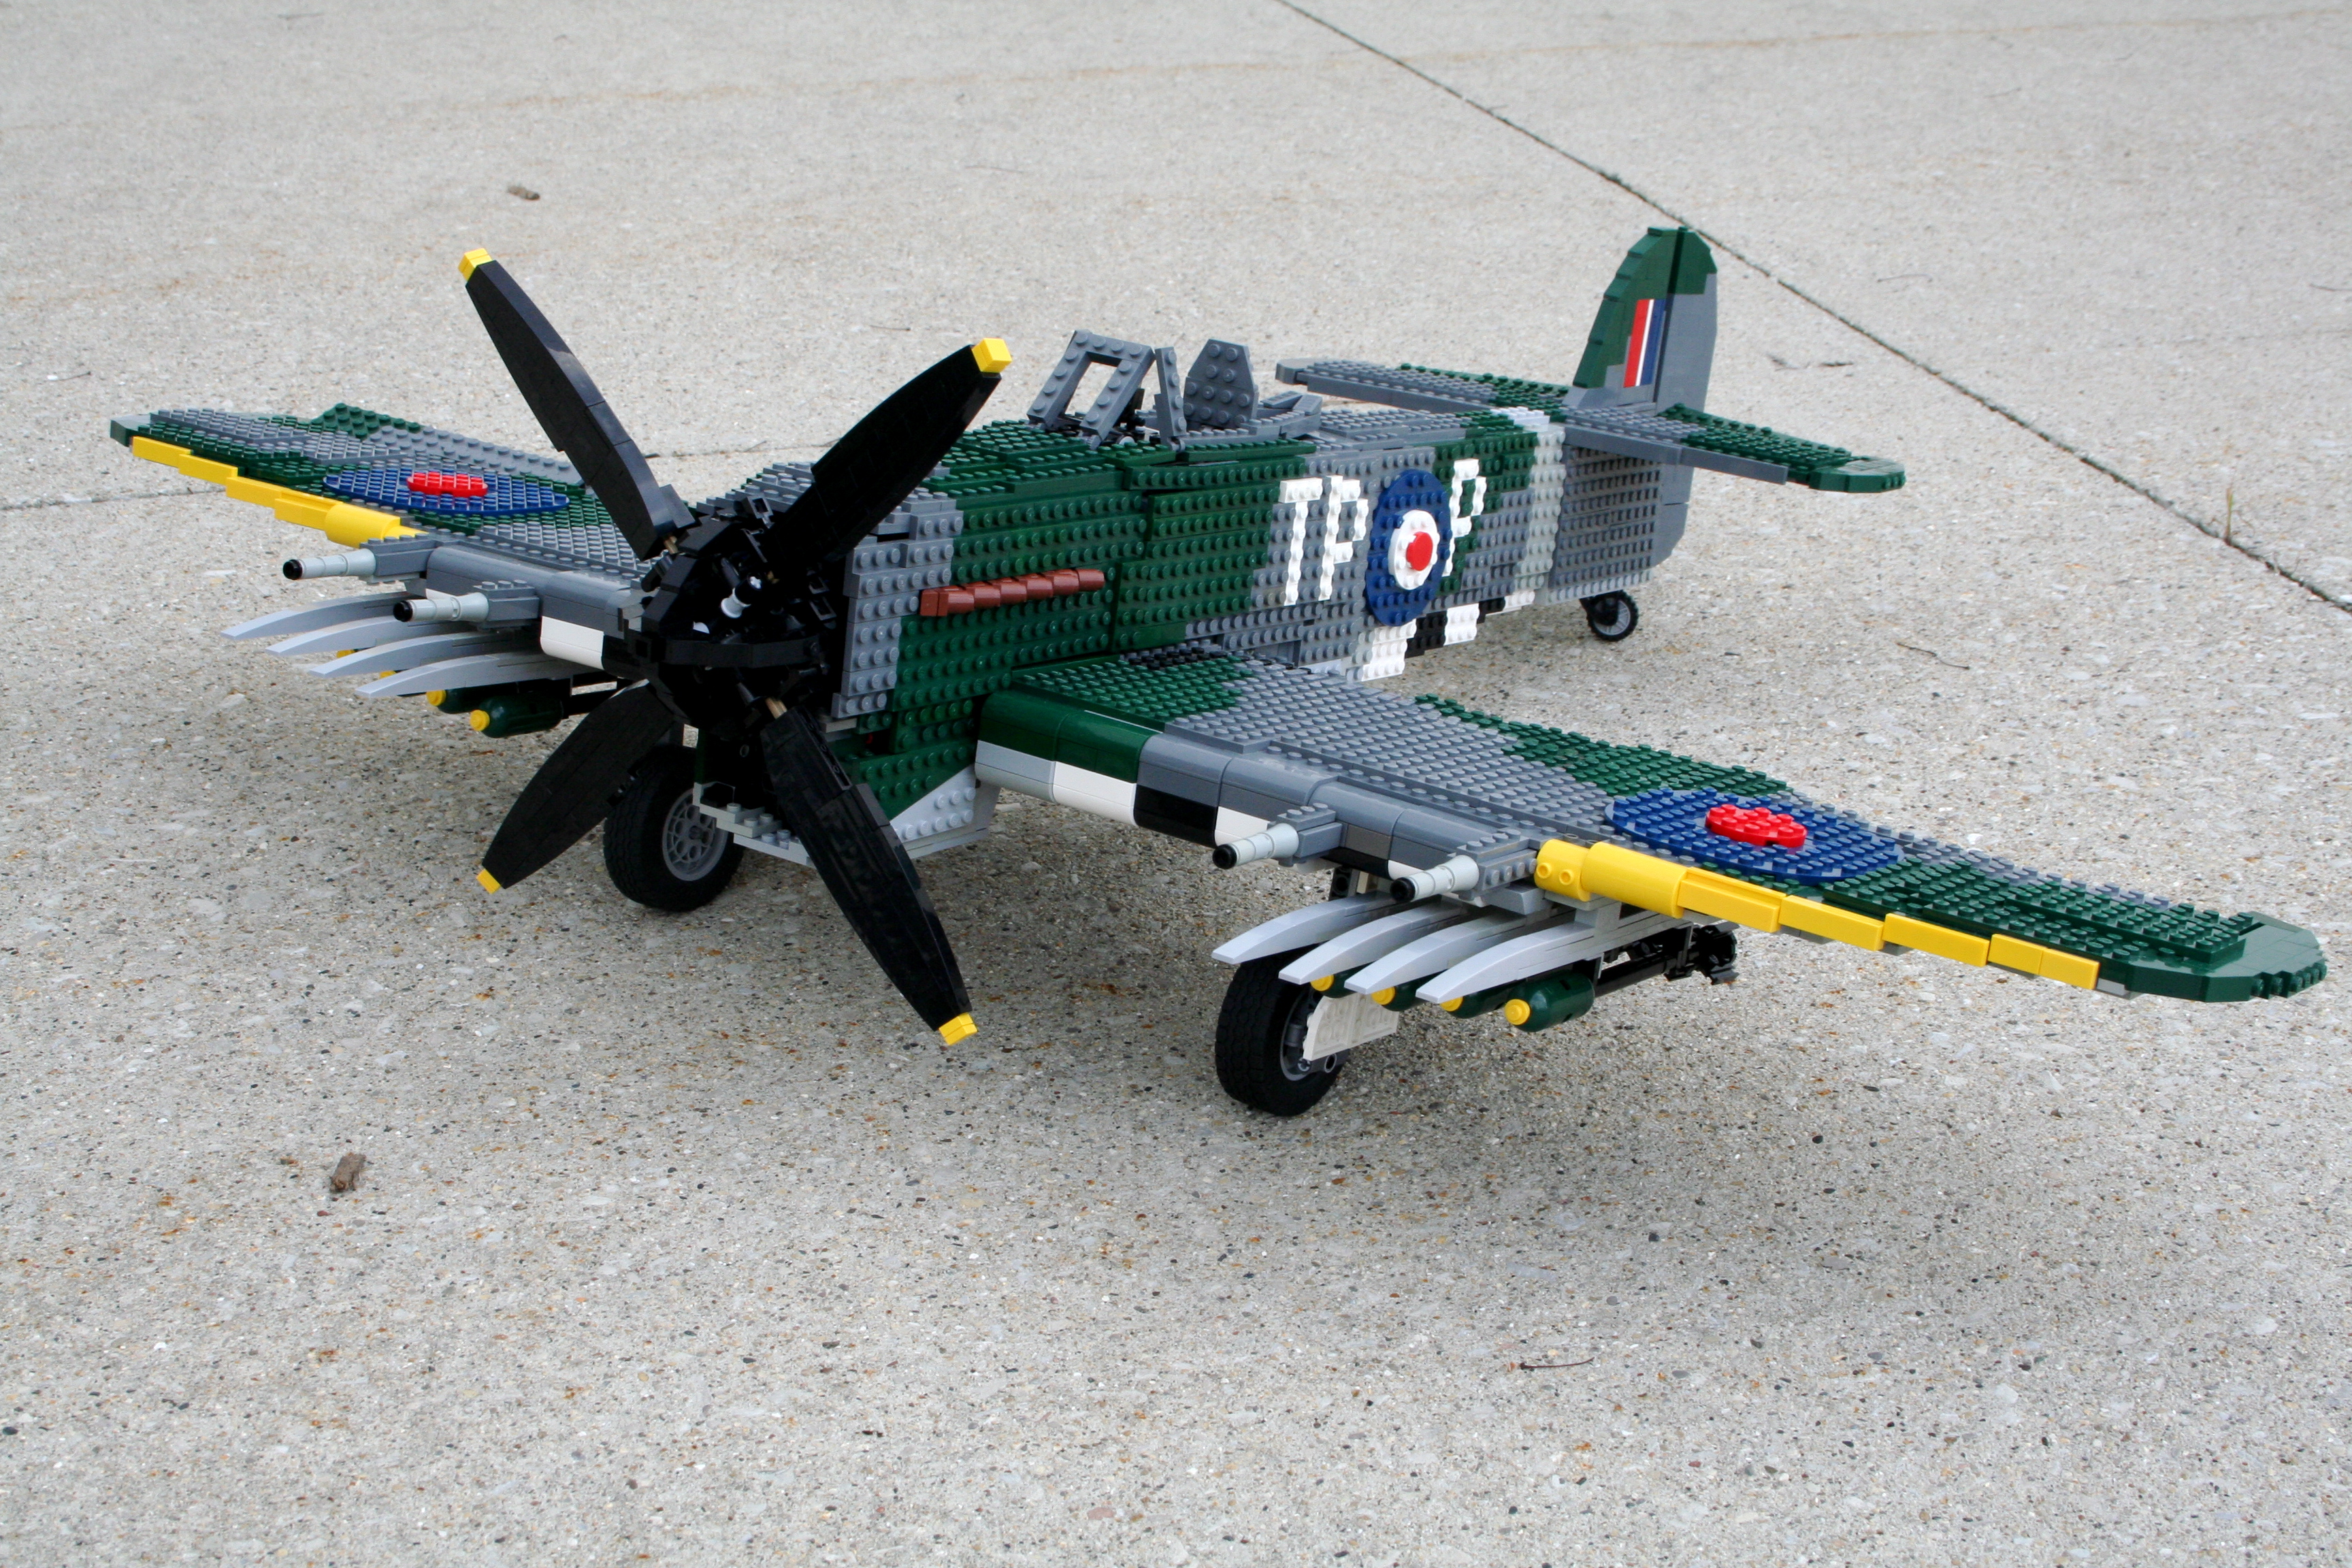
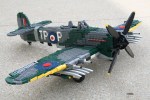
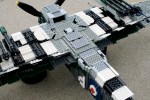
Two years ago I built the Spitfire MkIIa. It remains one of my more popular builds, and one of which I am still quite proud. It was not my first large plane, though when I completed it, I said it would be my last.
I learned a lot of great things from the Spitfire. Large scale building is exciting, and challenging in that you have to think about significant structural considerations, placement, and shaping before and while your build.
With this in mind, I wanted to develop what I have learned, but allow myself the ability to take a large scale aircraft to the next level. I wanted to improve the function of the control surfaces, design my own propellor, use four Power Function channels, and use the boatload of Dark Green parts that I had recently acquired. I considered a number of airplanes, including doing the FW-190 again, but I finally settled on the Typhoon. Time to get building.
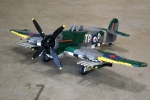
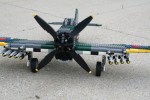
After some planning, I had my scale. 1/13 was an appropriate size for me to replicate the plane and its functions, while still keeping the plane from getting too large. This scale would also allow for LEGO wheels for the landing gear, and a worker able propellor spinner design. As I learned from the Spitfire, placement of large components needed to be done early, and placed in the MOC to its exact final location. As the structure of the fuselage and wings would be stressed heavily, large components could not get in the way. Once I placed the engine block, the landing gear, the power functions, and the control surfaces, I was able to start putting together the robust structures that would support the final plane. One of the major challenges of this plane was the outset landing gear on the wings. Because they were located 42 studs apart, the wings needed to be strong. But due the the space taken for the control surfaces, and the massive 24 cylinder power pack, the wings still sag a little under load.
The control surfaces were activated with strings with studs on each end. I found this to be a better system than the axle controls for the Spitfire. It kept the controls more smooth, and reduced the amount of play in the controls. The elevator and ailerons were controlled with the joystick, and the rudder was controlled by two foot pedals in the cockpit. The remaining functions were controlled via Power Functions. An XL motor powered the massive 38 stud diameter propellor, as well at the 24 cylinder Napier Sabre engine. A M motor controlled the pitch of the propellor. Another M motor powered the landing gear, and still another adjusted the flaps. All four motor were mounted in the chin of the aircraft; I had to use that huge chin for something. The two IR receivers were mounted in under the windscreen, and the rechargeable battery was mounted behind the cockpit.
Finally, I had to make sure all the markings were accurate. Again, due the limits of dark green parts, it was not an easy task. I started with wings, and made sure to add invasion stripes, and work my way out to the tips. The roundels were a little different than the Spitfire, but were a little larger. The fuselage took a little work to make sure the panels could be easily removed, but I eventually got there. The fuselage roundel should have a yellow ring around the outside, but the strip is so small, I could not figure out a good way to do it.
The plane worked almost perfectly. The ailerons were a little sticky, but other wise everything else managed to work for an 8 hour shift at Brickworld. The plane was liked enough to be nominated for Best Air Ship. While it did not win, it was validation that the the model was a success.