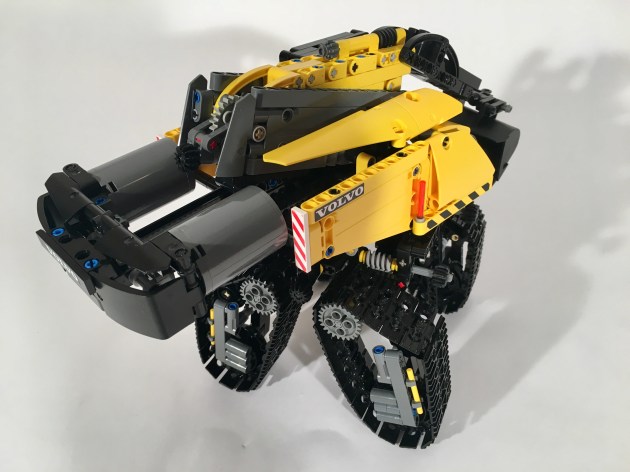
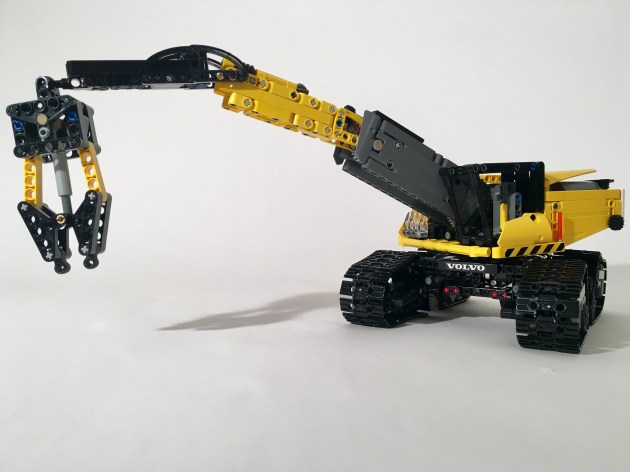
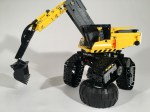
Another contest, another build. LEGO Ideas posted a contest to build your idea of the Volvo construction vehicle of the future using LEGO Technic bricks. This was my entry for the contest, which did not win, but was a design I was happy to complete.
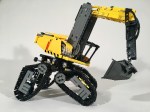
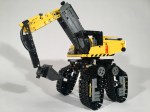
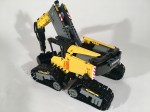
The design was inspired by the Volvo Sfinx and the Hyundai HFex Concept as I was interested in trying the various tracks, and a foldable boom. I started with the track sections, with four idetntical modules. Each are connected to the center turntable with a worm gear assembly for individual track movement. The system is enough to hold the full MOC, but not overly strong.
Next came the superstructure. I created a conventional cab on the left, and added some fuel cells on the back. These cells can slide out the back of the superstructure to be easily replaced. Next came the boom. I wanted a three section boom that would fold, and extend in a variety of directions. Each of the three pivots is operated by a worm gear mechanism. The best manage the length of the boom, the main boom used a worm and 48z gear, the second used a worm and 24z gear, and the final boom used a worm and 8z gear. I added a ball join at the end of the boom to allow for multiple attachments.
The entry did not win the contest, but I was happy with the result. It was creative, and functioned well. I like the way it looked, and was happy with the track setup.
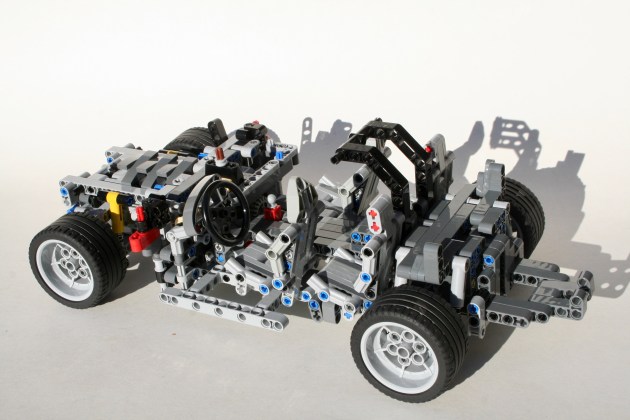
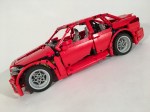
The sport sedan is my favorite kind of car. You can have your McLaren, if I can have four doors and a long hood. One with the proportions of a C-class, the suspension of the ATS, the engine of a Mazda 6, the suede interior of the M3, and the value of the G70. Don’t worry about me, I’ll be set. But there are few good sedans in LEGO, and even fewer smaller ones. Let’s change that.
When I set out to make a sedan, I wanted it to be smaller. What were the features I could add in a smaller LEGO car? It had to have some style, suspension, a gutsy engine, steering, and a transmission. Finally, it had to be strong. So I got to work. The scale was set on a 3 Series that was a little wide, so I set the hardpoints and set off to work.
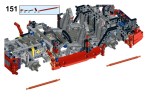
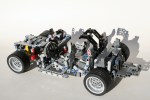
I first set the two axles and suspension. I have built a couple cars with a floating rear differential, and this setup has worked well in the past, so it would work well for this car. Each side had a dual arm independent setup with two shock absorbers. The front suspension used a dual A-arm setup and a wheel hub with only one hard shock absorber. Before adding the steering, the driveline would need to be finalized.
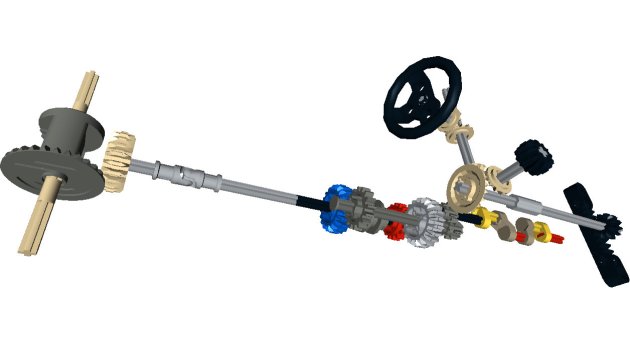
I played around with a number of transmissions, but settled on a simple two speed design for a number of reasons. First, it was smallest as something else would take a lot of space from the interior. Second, something better would take away from the rigidity of the model. Sedans need a lot of support through the transmission tunnel as you lose a lot of rigidity near the doors. Finally, anything more complicated than 2 speeds would be tricky to manually operate (play with) in this scale. About half way through my work on this project, some fun new gears came out which improved the design.
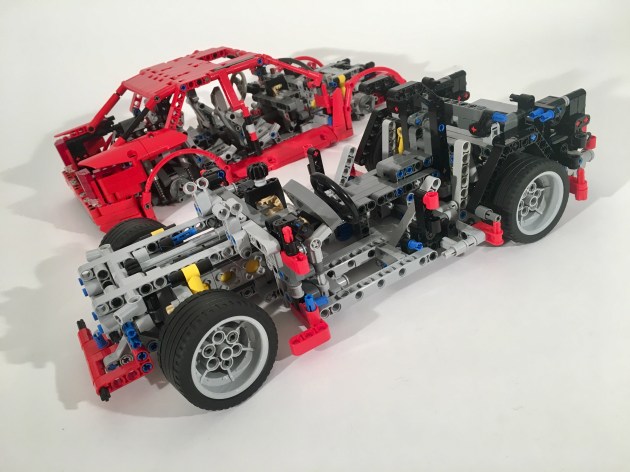
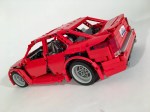
Next, I moved on to the bodywork. This is the part that causes me the most problems in my car builds, and this car was no exception. I set the doors first as I wanted to use two panels for each side. Then I worked on the front and rear bumpers. The rear came together quickly, but the front took a little more time. I wanted something that was sporty, and with a simple grill. I think it worked out well. Finally was the roof and the rear quarter panels. This part took a long time, as I wanted something strong and stylish. The result is strong and has the C pillar split into a D pillar. It is not perfect, but it is stronger than all the panel ideas I tried.
After the bodywork was set I did something I have never done before, I rebuilt a second whole car. This time, I knew all the final features, and where all the body work would attach so I could focus on creating a strong frame that would best support the whole design. I am happy I did this, as it cleaned up the inside, found some new solutions, and made the whole car stronger. Building this way also helped me think through how clear instructions could be made.
In the end, I was pleased with the final design. It accomplished all the goals I wanted, and it is an accessible design for others to recreate. I love building in this scale, and cars are a lot of fun, so I will need to do another small car design again.
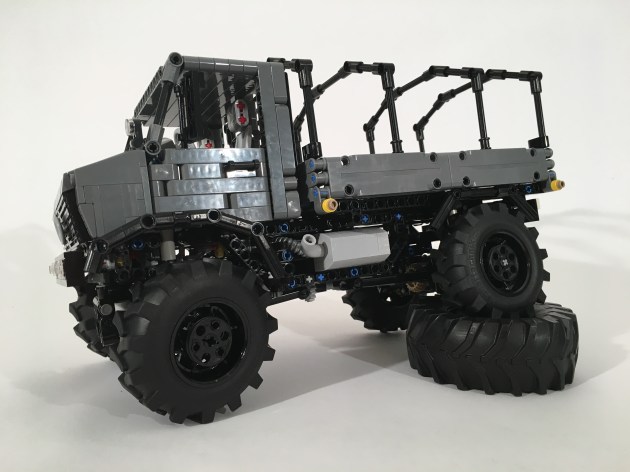
If my previous builds are any indication, I am a big fan of Unimogs. So it was just a matter of time before I built another one. Rather than building one this time, I built a modular system that allows for a number of different versions.
This build started with a desired to make another small build with the great Fischertechnik tires I acquired. I wanted to build something small and playful like RM8s FJ or Sheepo’s Defender. As has been happening with many of my recent builds, I wanted to give the MOC some playable options and easy modifications. A Unimog was a perfect option, and who am I to turn down a Unimog? So I gave myself the following constraints: 4×4, I4 fake engine, steering, manual and PF drive options, removable cabs, removable bed, and two chassis. I set off to work.
The axles came together fairly quickly. I decided quickly not to do portal axles, because I wanted the complexity of the MOC to be elsewhere. Both axles have a differential, two soft springs, and are stabilized longitudinally via steering links and laterally via panhard links. All for shocks are mounted on crankshaft parts to get the ride height of the Unimog just right. There is about 1.5 studs of travel for each wheel, which provides adequate articulation.
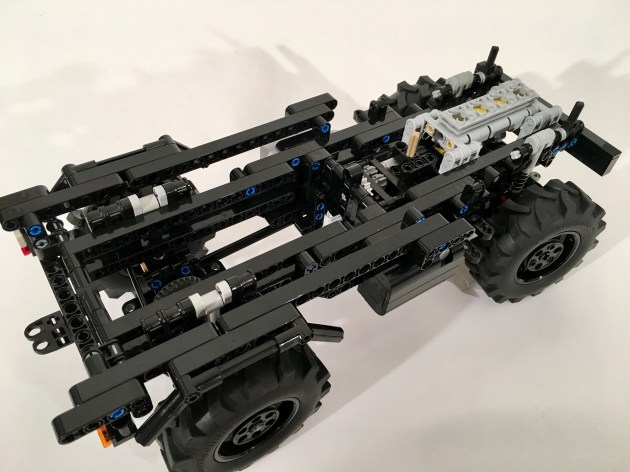
The axles are connected to a fixed axle that powers a I4 fake motor. Since I wanted the MOC to be easily switched between manual control and PF, the driveline got a little over-complicated quickly. The steering axle and drive axles cross each other twice. This allows for the steering to go to the top for a HOG, and backwards so a PF servo motor can be added. A 16t gear is available at the top of the chassis to power a PTO, or add a PF XL motor to give the Unimog propulsion. The long Chassis can fit a full a full Power Functions pack. When the power pack is not installed lots of open space is available for other additions. I added a three way tipper lift mechanism for both the long and short wheelbase chassis.
Attachment points were added for the rear bed and for the cab. I created three cabs, and each can be added to both chassis (though the Doka looks best on the LWB). Two axles with stop can be pulled to free the cab. I created three beds and a power pack. Four axles with stop are required at each corner to secure the bed. A camper and a crane bed are not far behind on my building queue.
The Unimog turned out exactly as I wanted. The suspension and steering are light and smooth under manual operation, and work great with PF. I am excited about the ability to offer and develop multiple beds and cabs. Instructions are posted, so I look forward to seeing other options people develop to make their own Unimog.
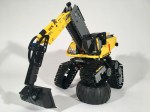
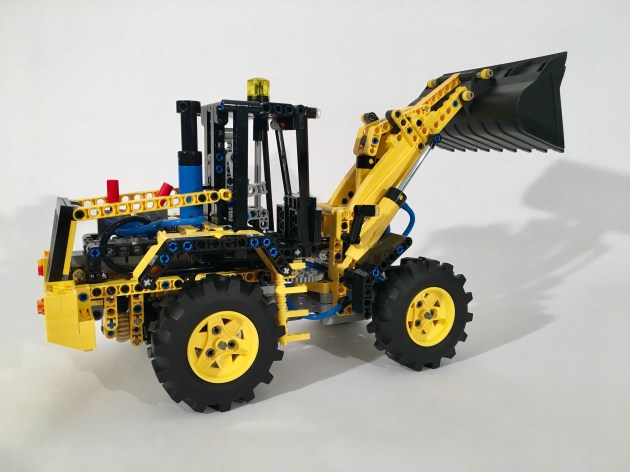
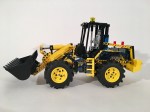
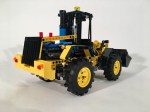
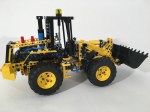
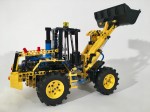
These days, some projects are taking longer than they have in the past. The little Wiggs in my house and a mirad of other reponsibilities are slowing my production. This loader was started a little over a year ago, and it was finally finished last week.
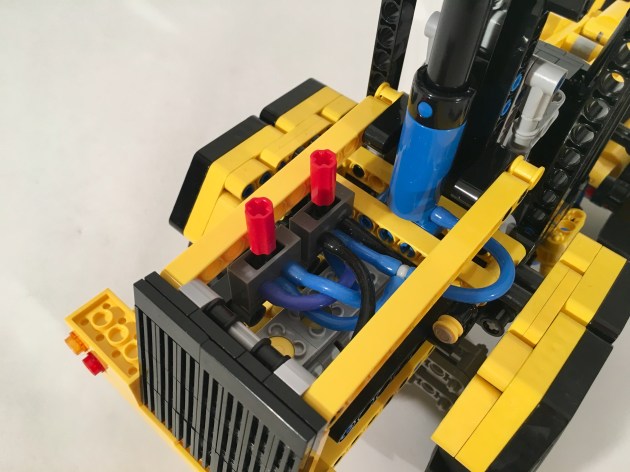
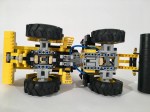
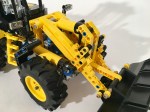
I was sitting on a train in Chicago, and saw a little CAT 914k out the window, and thought, “I should finally make a loader.” I got home and started to work. My collection recently added the Fischertechnik tires and the pneumatic parts from the LEGO 42053 Volvo, so I started calculating the scale. Once the scale was set I worked on the linkage for the bucket. I spent two full nights working on the linkage to take full advantage of the longer pneumatic rams. I used the longer ones on the lift, and a shorter one on the tilt.
After the bucket mechanism was set, I worked on the chassis. The size allowed for four wheel drive. The rear axle was set in a pendular setup, which allowed for some articulation over varied terrain. The rear differential linked to a small I4 motor that was placed in the rear. The pneumatic valves were placed over the motor. The light on the roof operated the steering.
While the project took a little too much time to complete, it was a fun project that turned out well. The linkage and bucket range worked well. It also held a load well. The stability of the loader could have been a little better when pumping the pneumatic pump, as the suspension took a lot of rigidity out of the rear. The design allowed for normal LEGO 81mm tires as well.
Not only are my builds becoming smaller, I am also enjoying builds that offer a little more modularity. Why build one thing, when the one thing can play a number of different tasks?
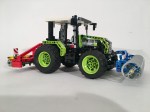
When I built the Snowblower a couple of years ago, I made a couple parts of the truck removable. So after the build was complete made a couple of other options: different cabs, other beds, a crane. This kind of building continued with the 9393 updated tractor. I was hooked. So, when it came time to make a tractor, I had this feature central to the build.
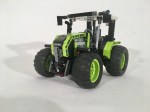
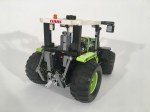
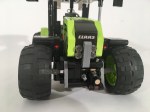
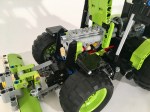
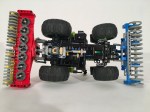
The Atos started a couple of years ago when I completed the 9393 update. I wanted a front PTO in a small tractor. Lime parts were becoming more prevalent (though we are still missing a red medium wheel), so I figured I could make something work. I started with the front axle, as it would need steering, a PTO shaft, and something to lift an implement. The PTO shaft runs directly forward from the rear differential under the steering rack. Another axle runs a stud and a half to the left, which drives a worm gear to elevate the front drawbar.
The engine is mounted on top of the steering unit, and is connected to the rear differential. Off the right side of the engine is a changeover that controls the raear PTO. This drive moves to the rear, and then powers another PTO for the rear. The changeover lever is in the cabin, to the right of the steering wheel. As in the front, a worm driven drawbar is on the rear to mount an implement. A simple hitch is there for a trailer.
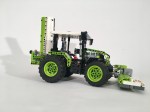
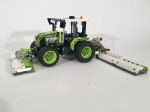
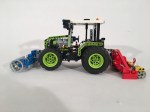
I build a front Lemken furrow, a rear Poettinger power harrow, and a front and rear Claas disco mower. I look forward to making other implements as well. Each attach to the front and rear by removing a 5l and 8l axle with stop. It’s simple, and allows for endless modification.
I am happy with the way the tractor turned out. It was strong enough to handle the play of my young kids, and all the functions worked well. I would have like to have an on/off switch for the front PTO. Other than that it turned out well.