Off Road Knuckleboom Truck


It was time for another truck! Free instructions can be found at Rebrickable.

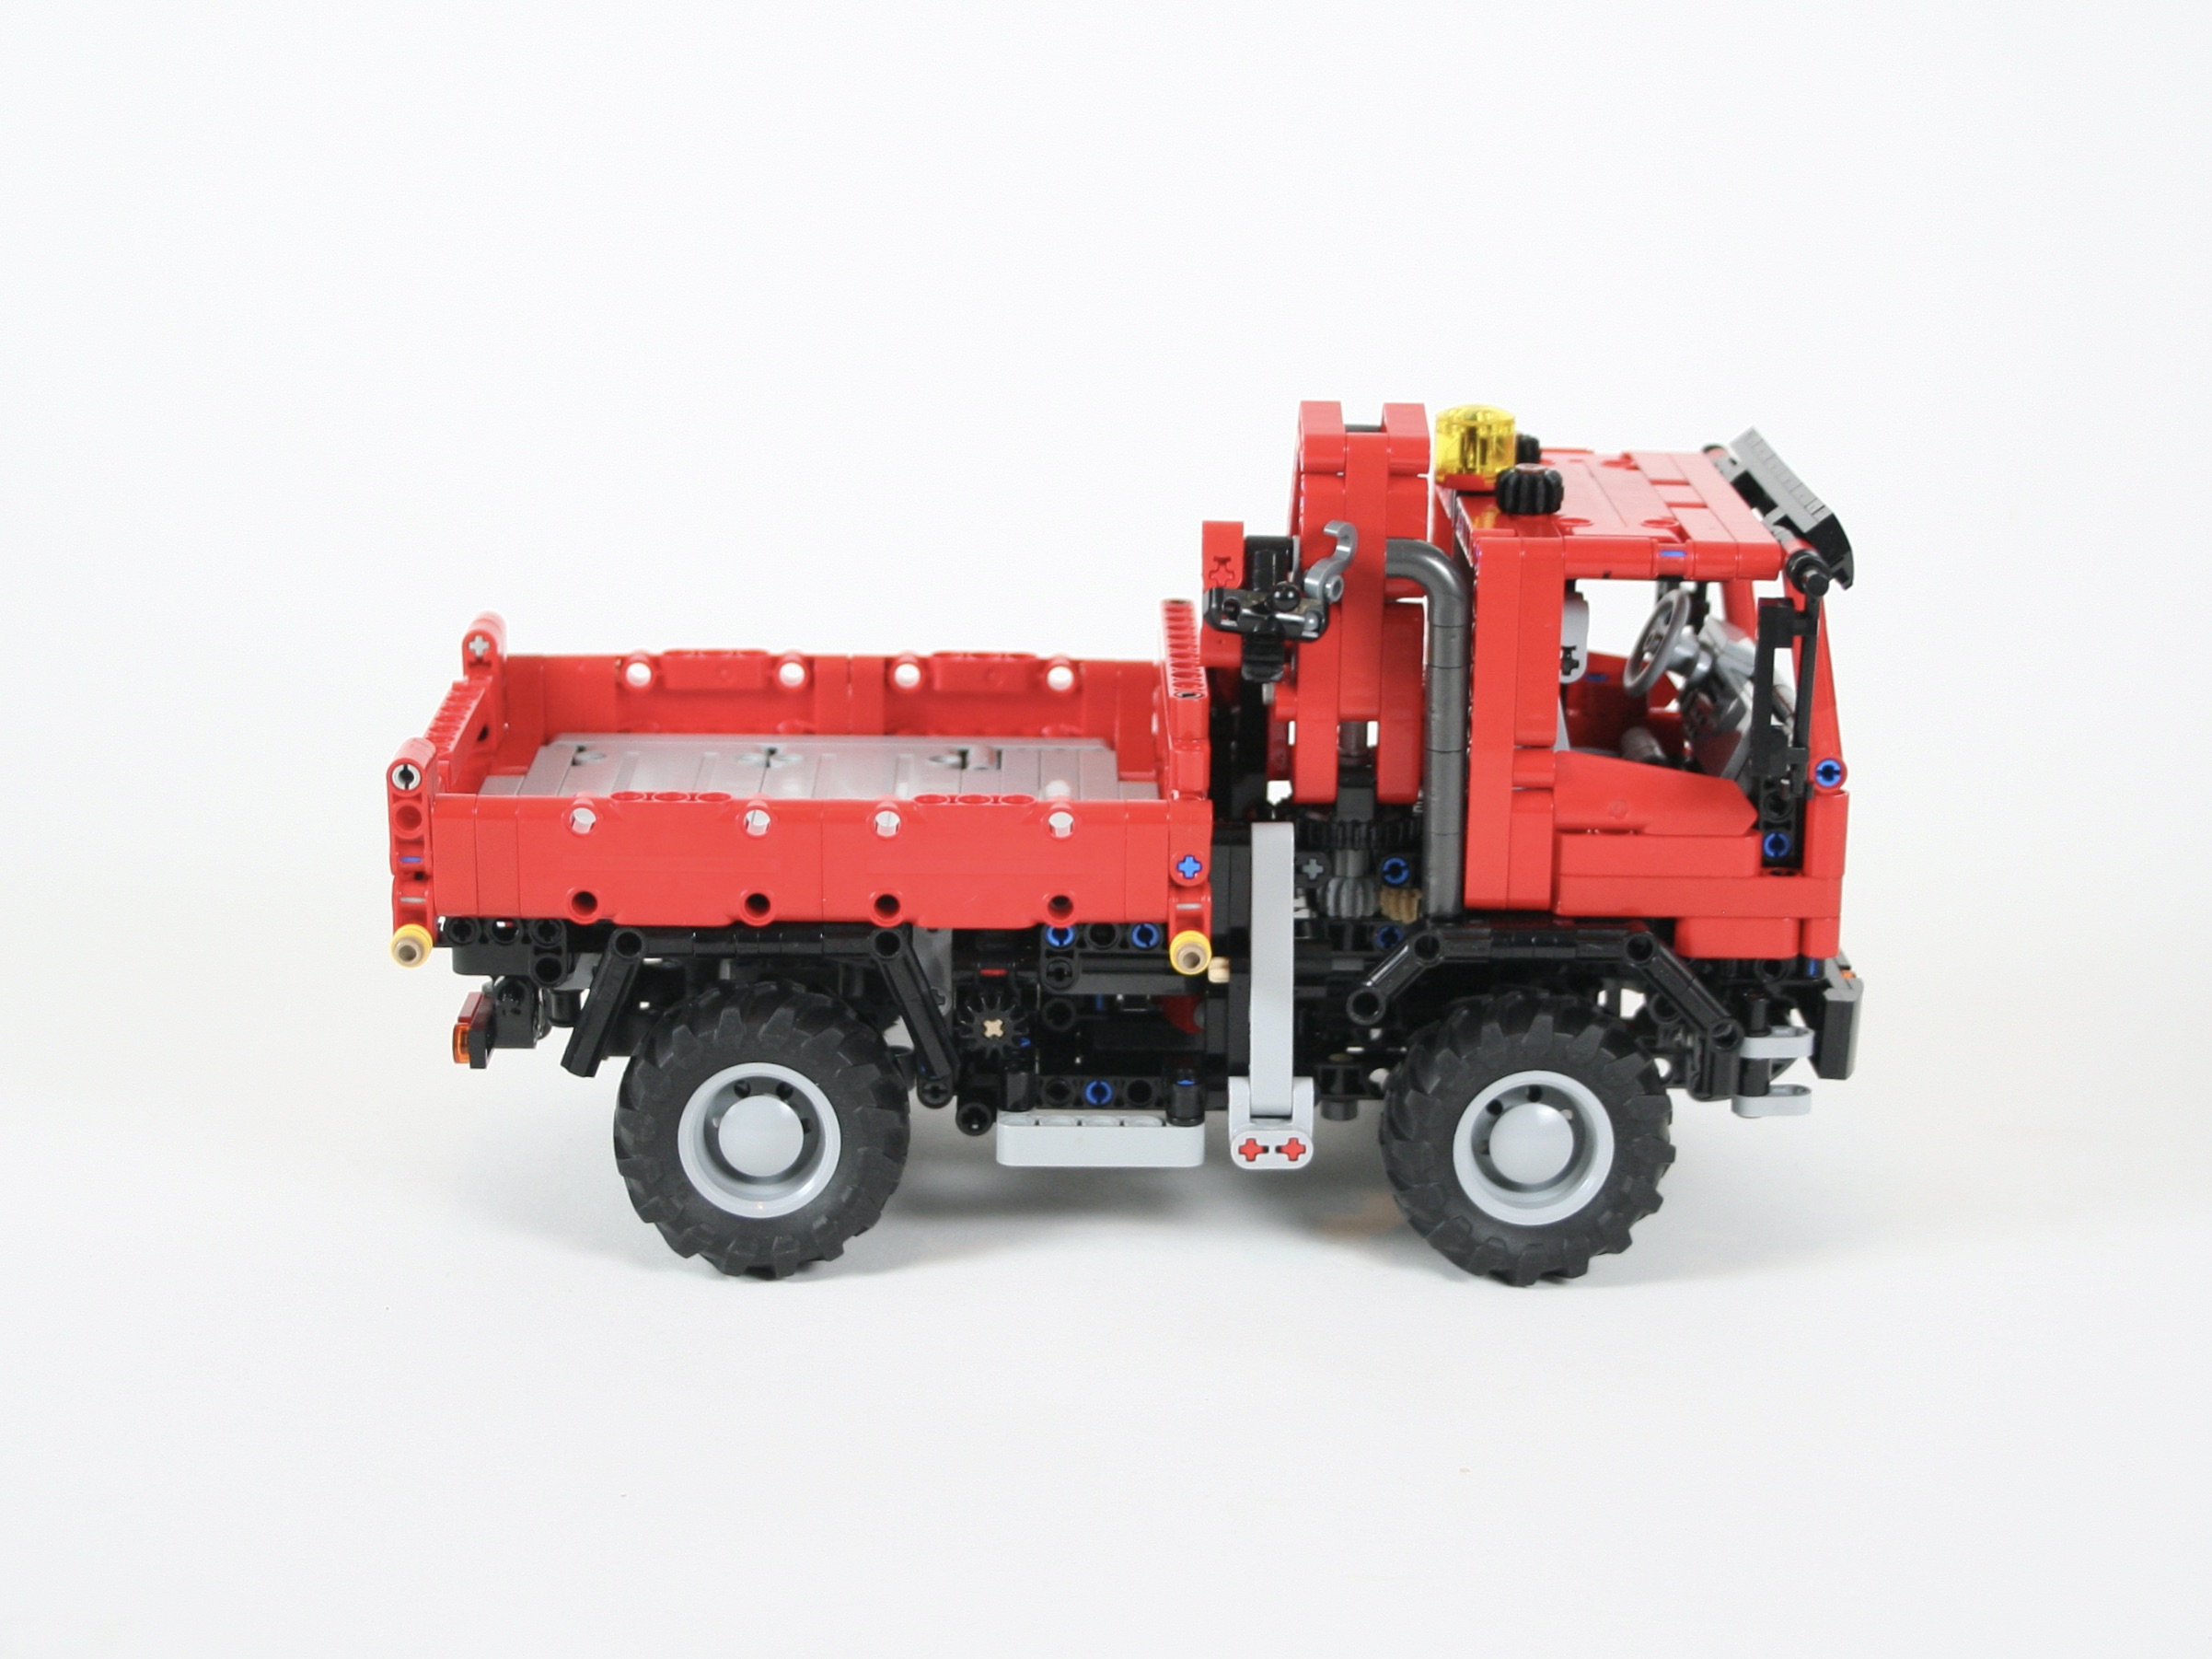
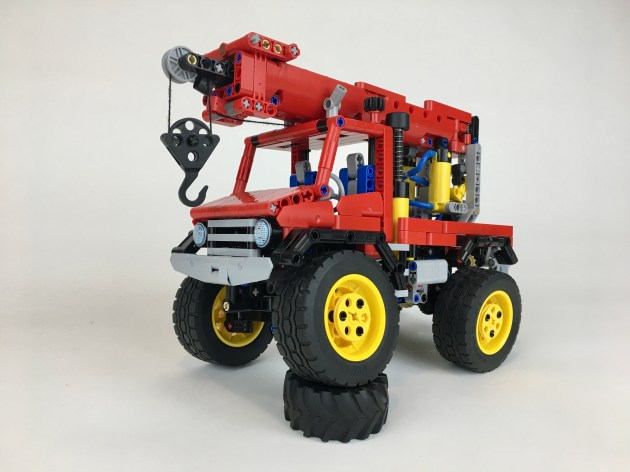
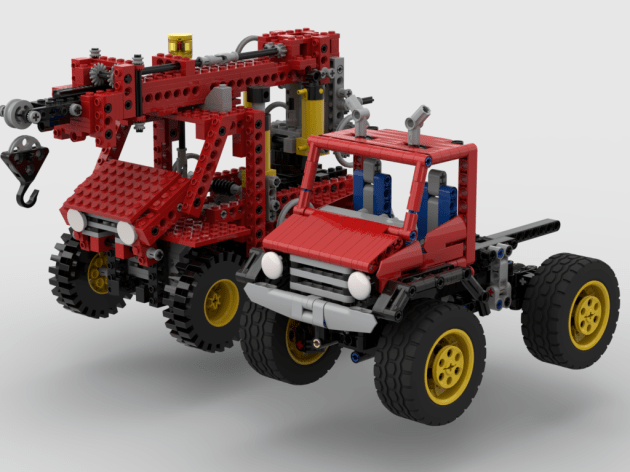
I have been building a lot of tractors and construction vehicles lately. I love building them as they offer a lot of movement and features. But it was time to build another truck. LEGO truck MOCs are beginning to coalesce around the “Mack Anthem standard” which is a 15 module wide truck in about 1:20 scale. Many MOCs are being designed in this scale as it is a good playable size, and fits the scale of some of the more recent LEGO trucks that have been released. I wanted to offer another truck in this scale, with some fun playable features.

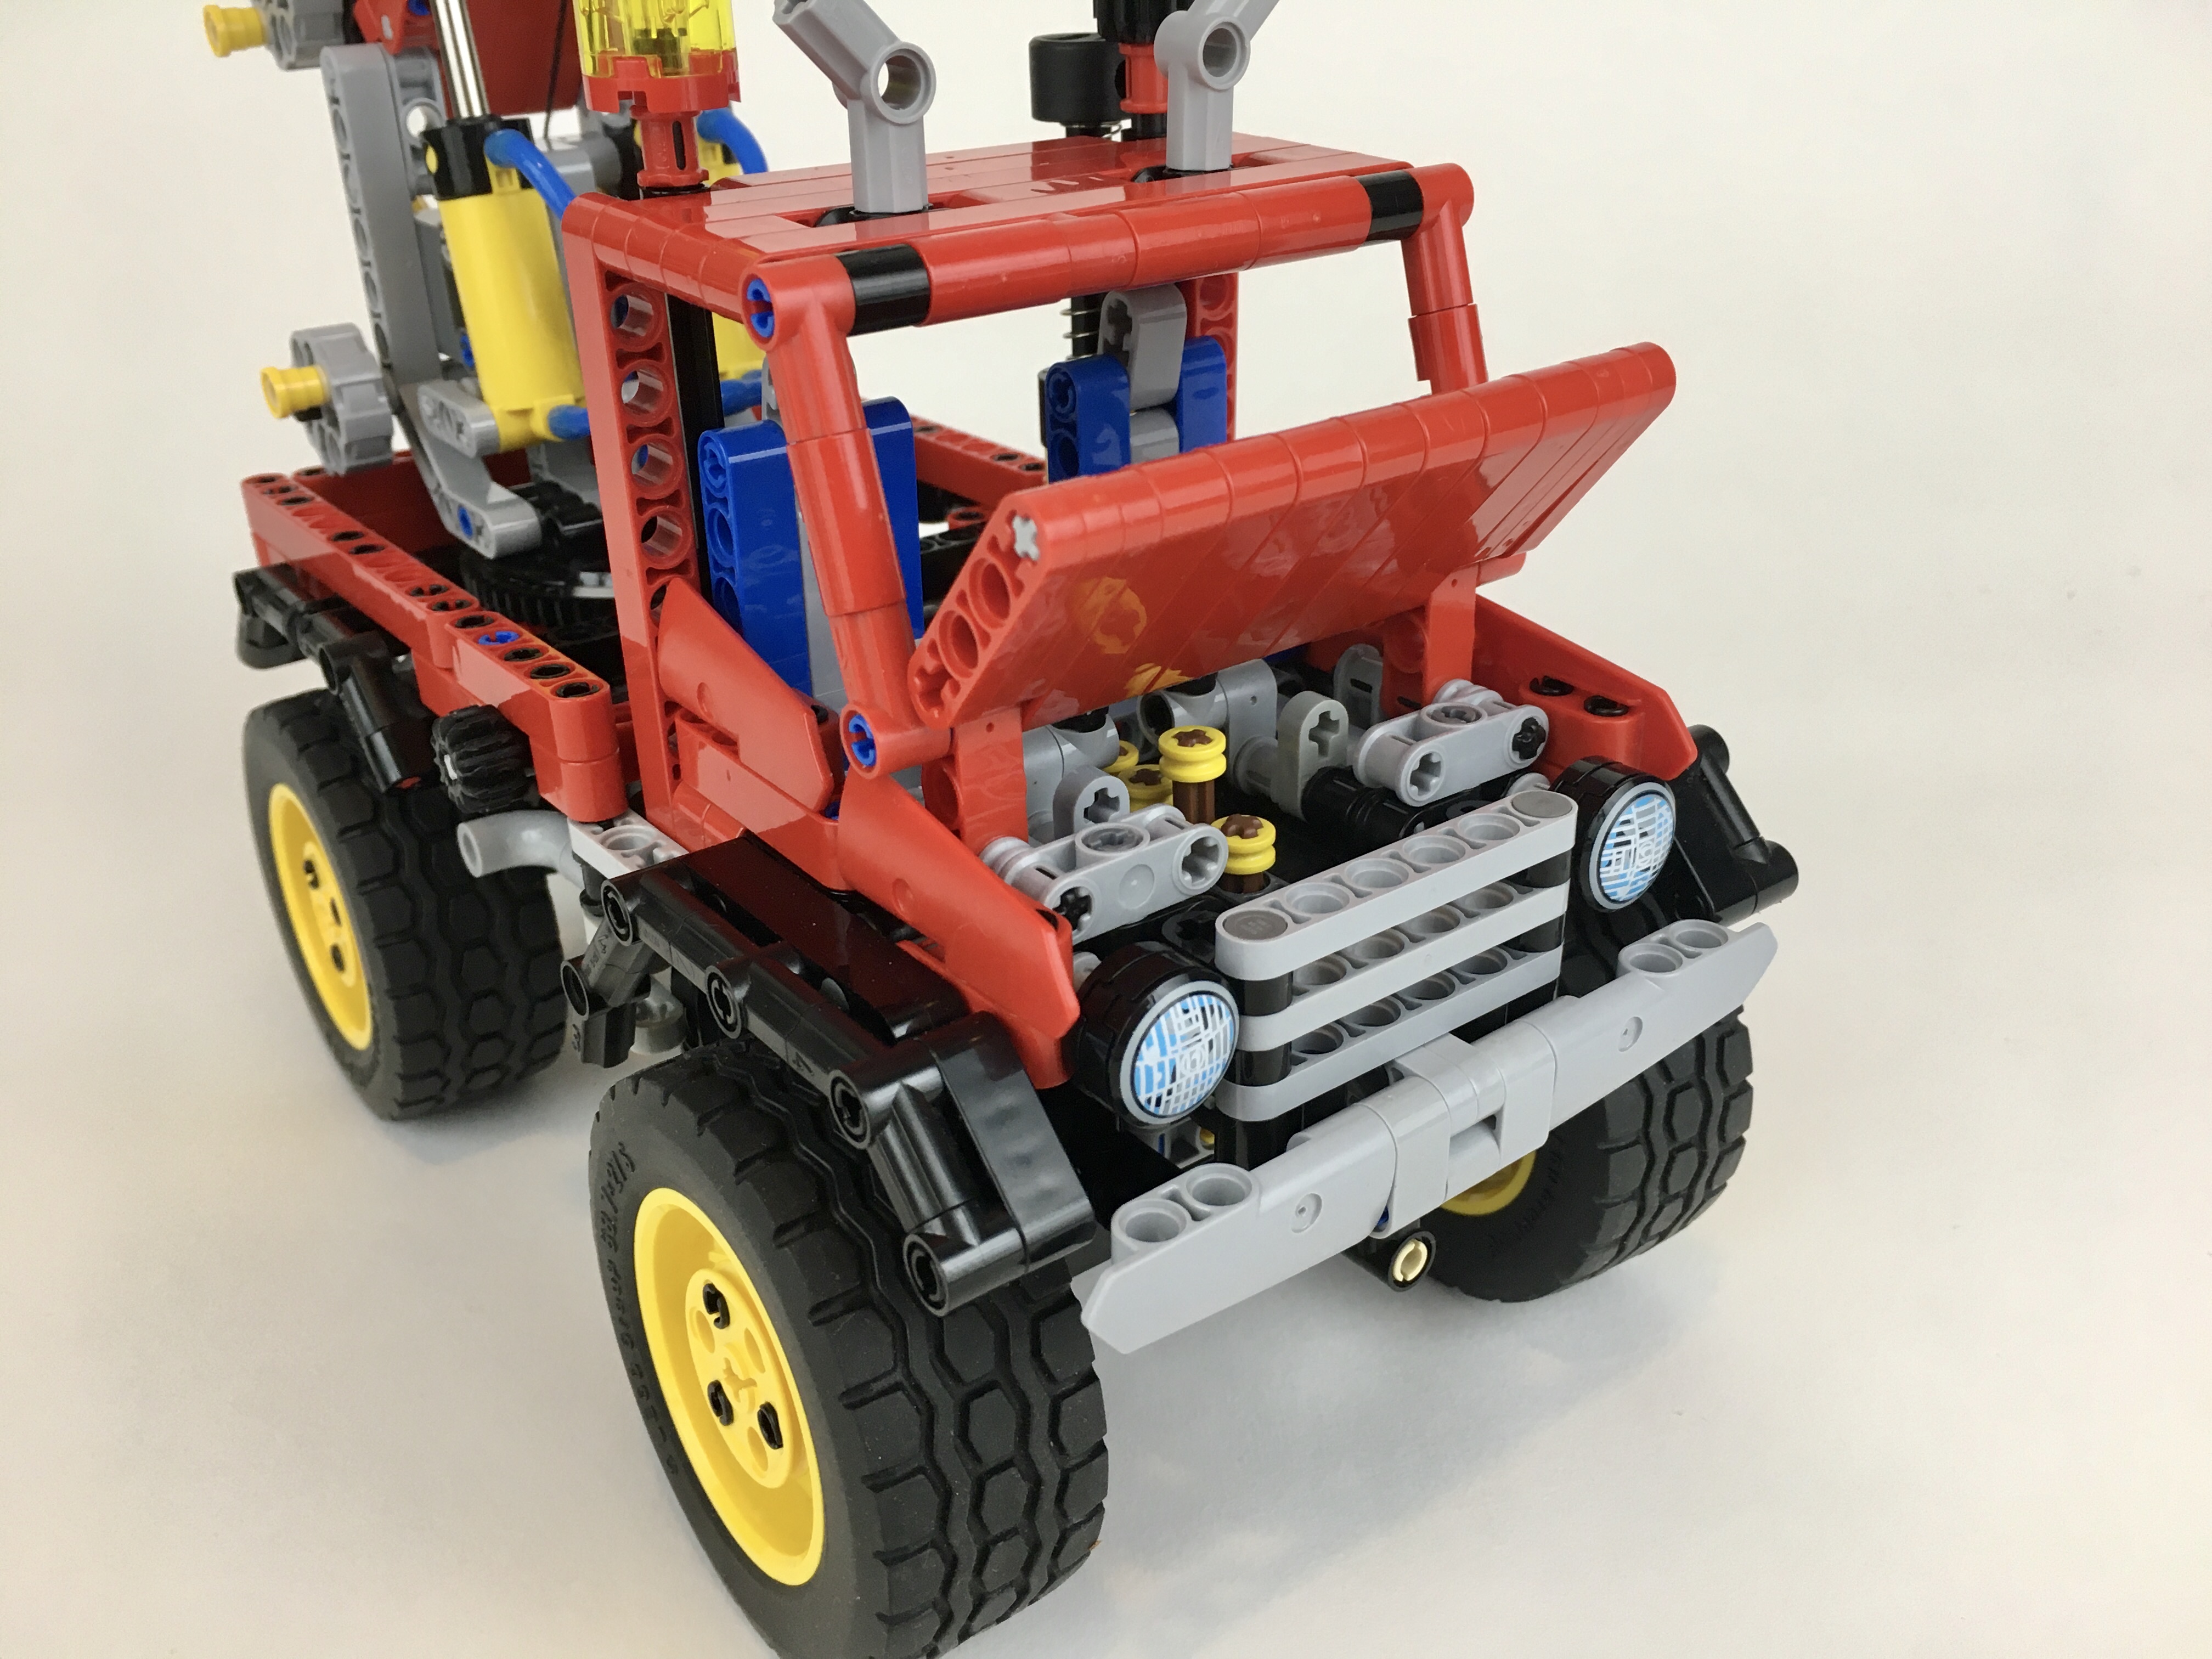
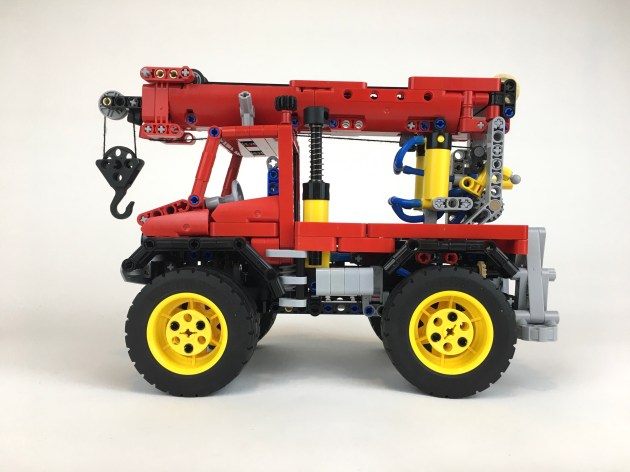
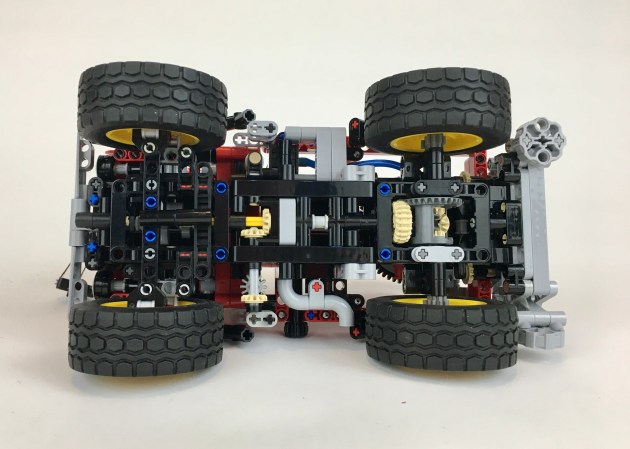
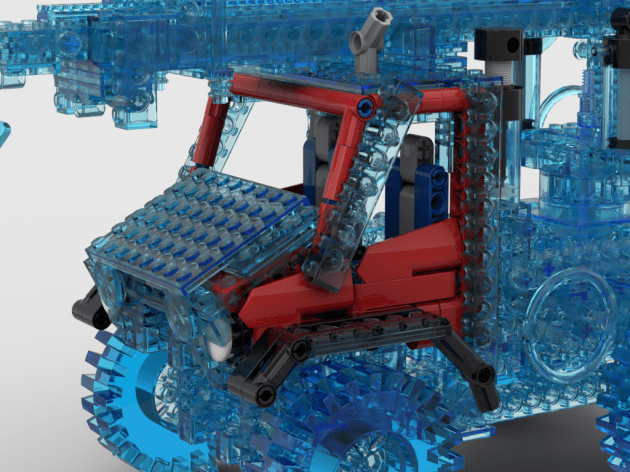
I started with a chassis that uses a simple pendular suspension on the rear axle, which is damped by 2×1 rubber connectors. The rear axle drives a simple I3 fake engine under the cab through a two speed transmission. The transmission changeover is on the right side of the truck. Front steering is controlled though the HOG light on the top of the cab.

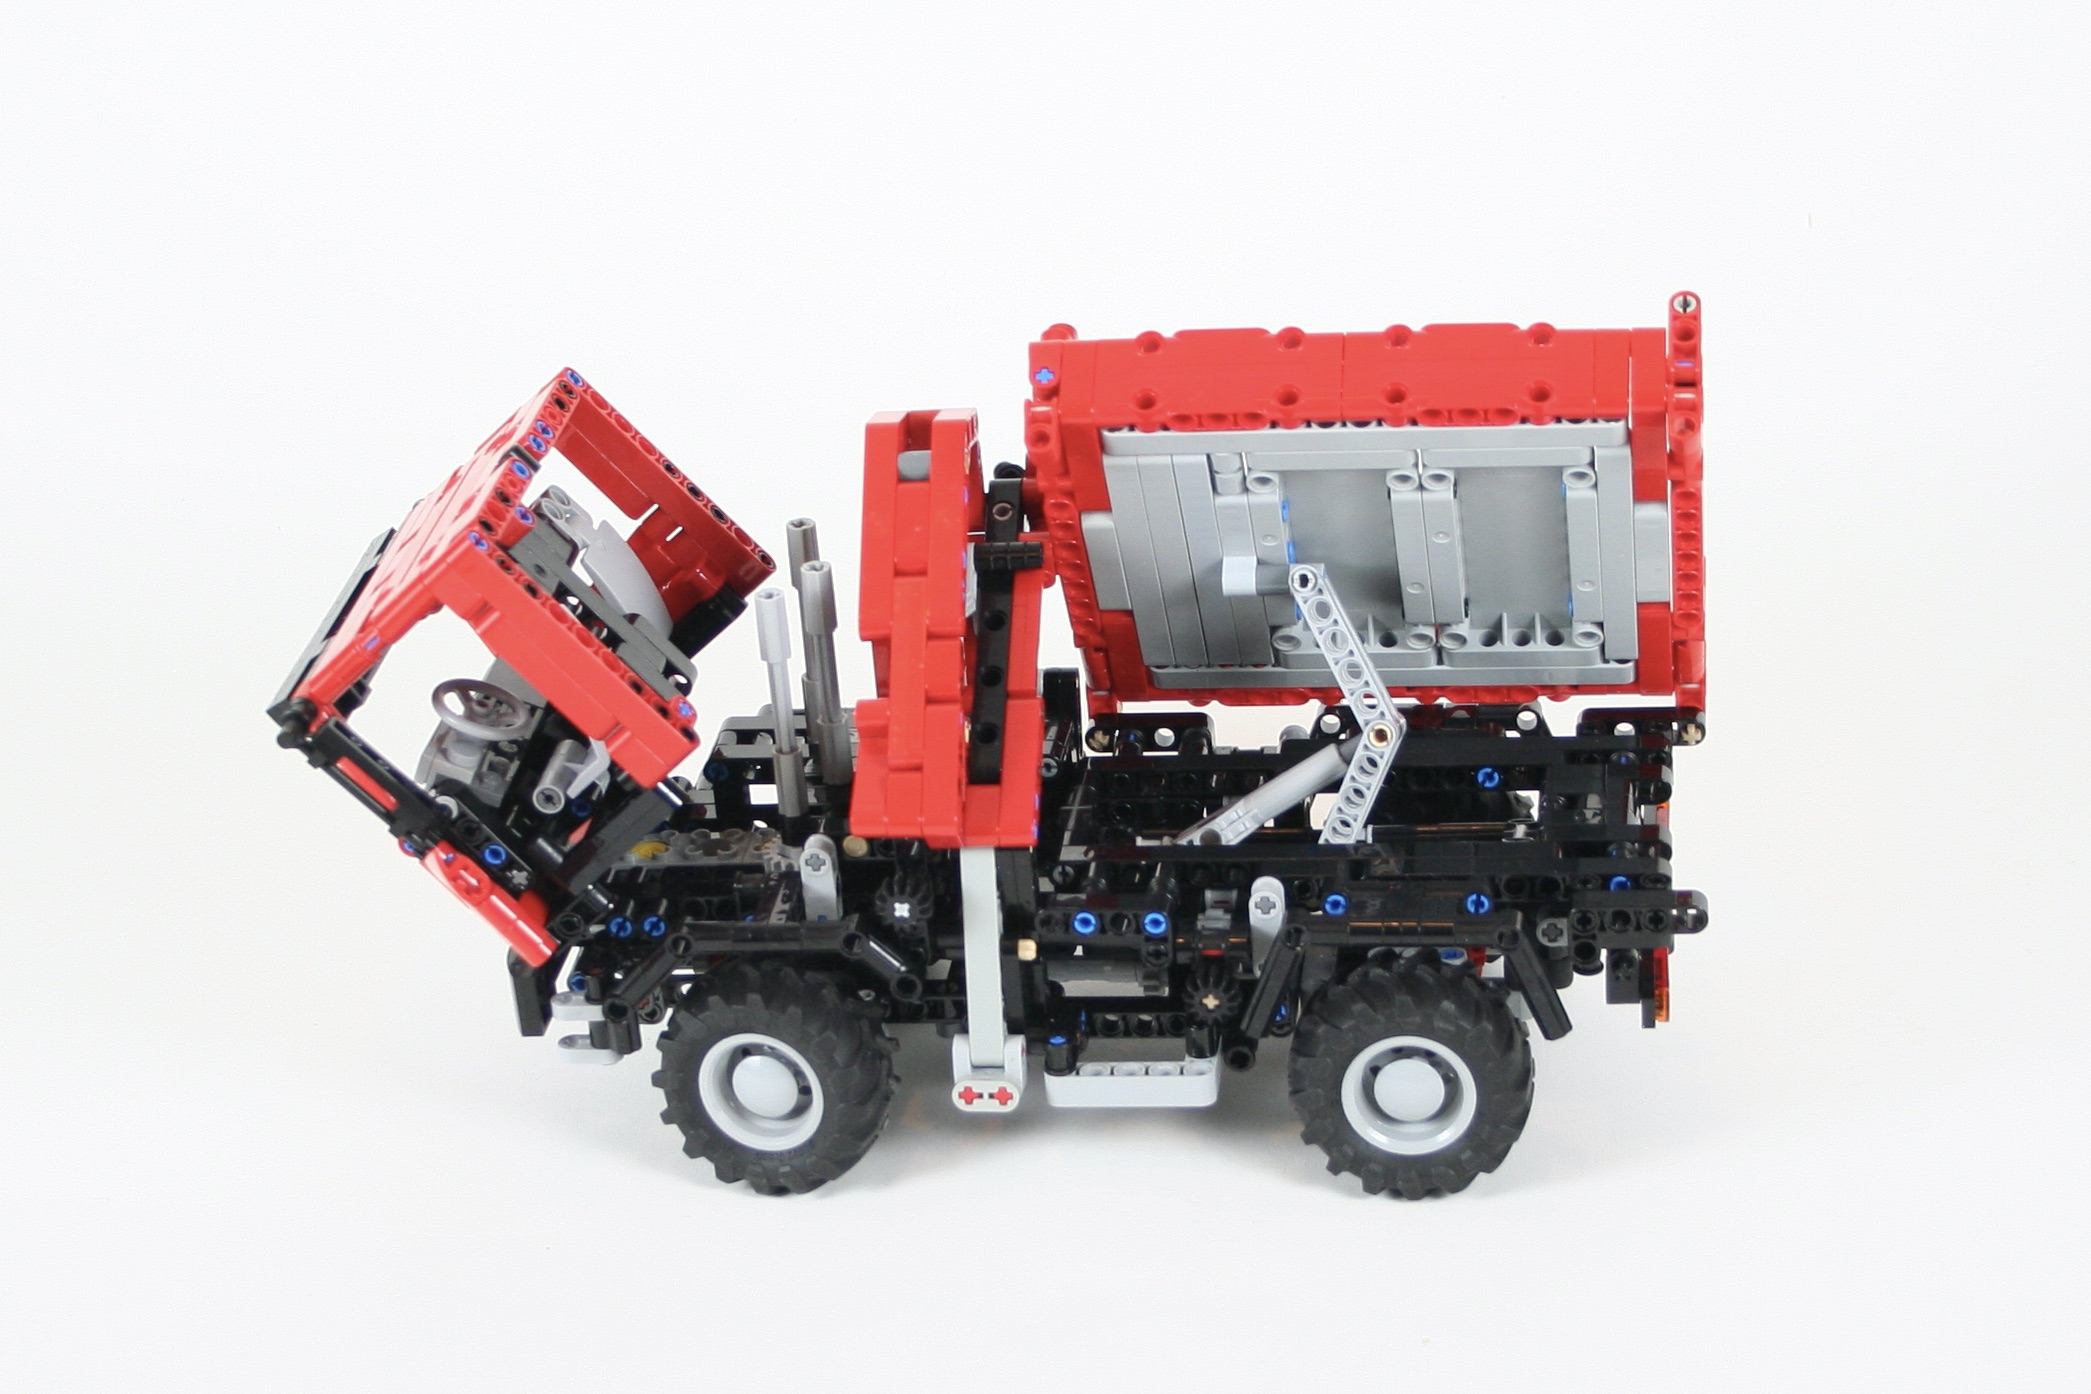
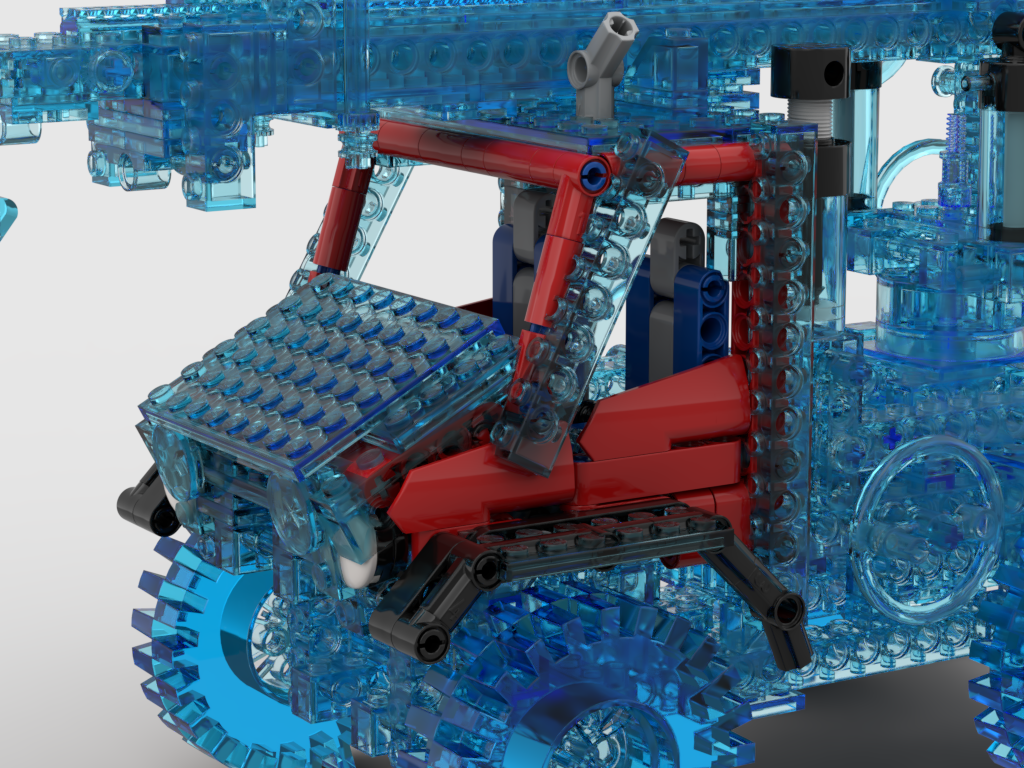
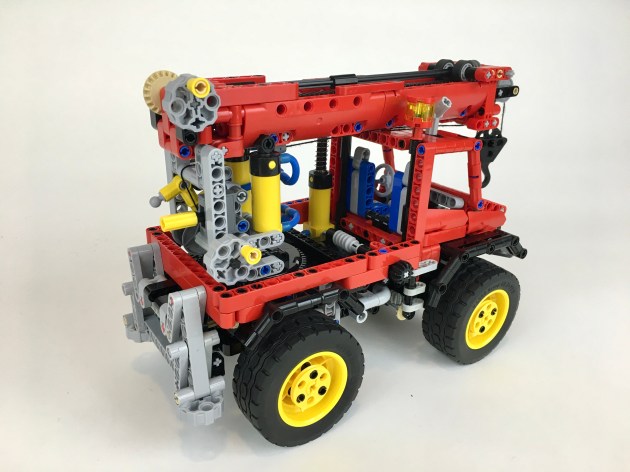
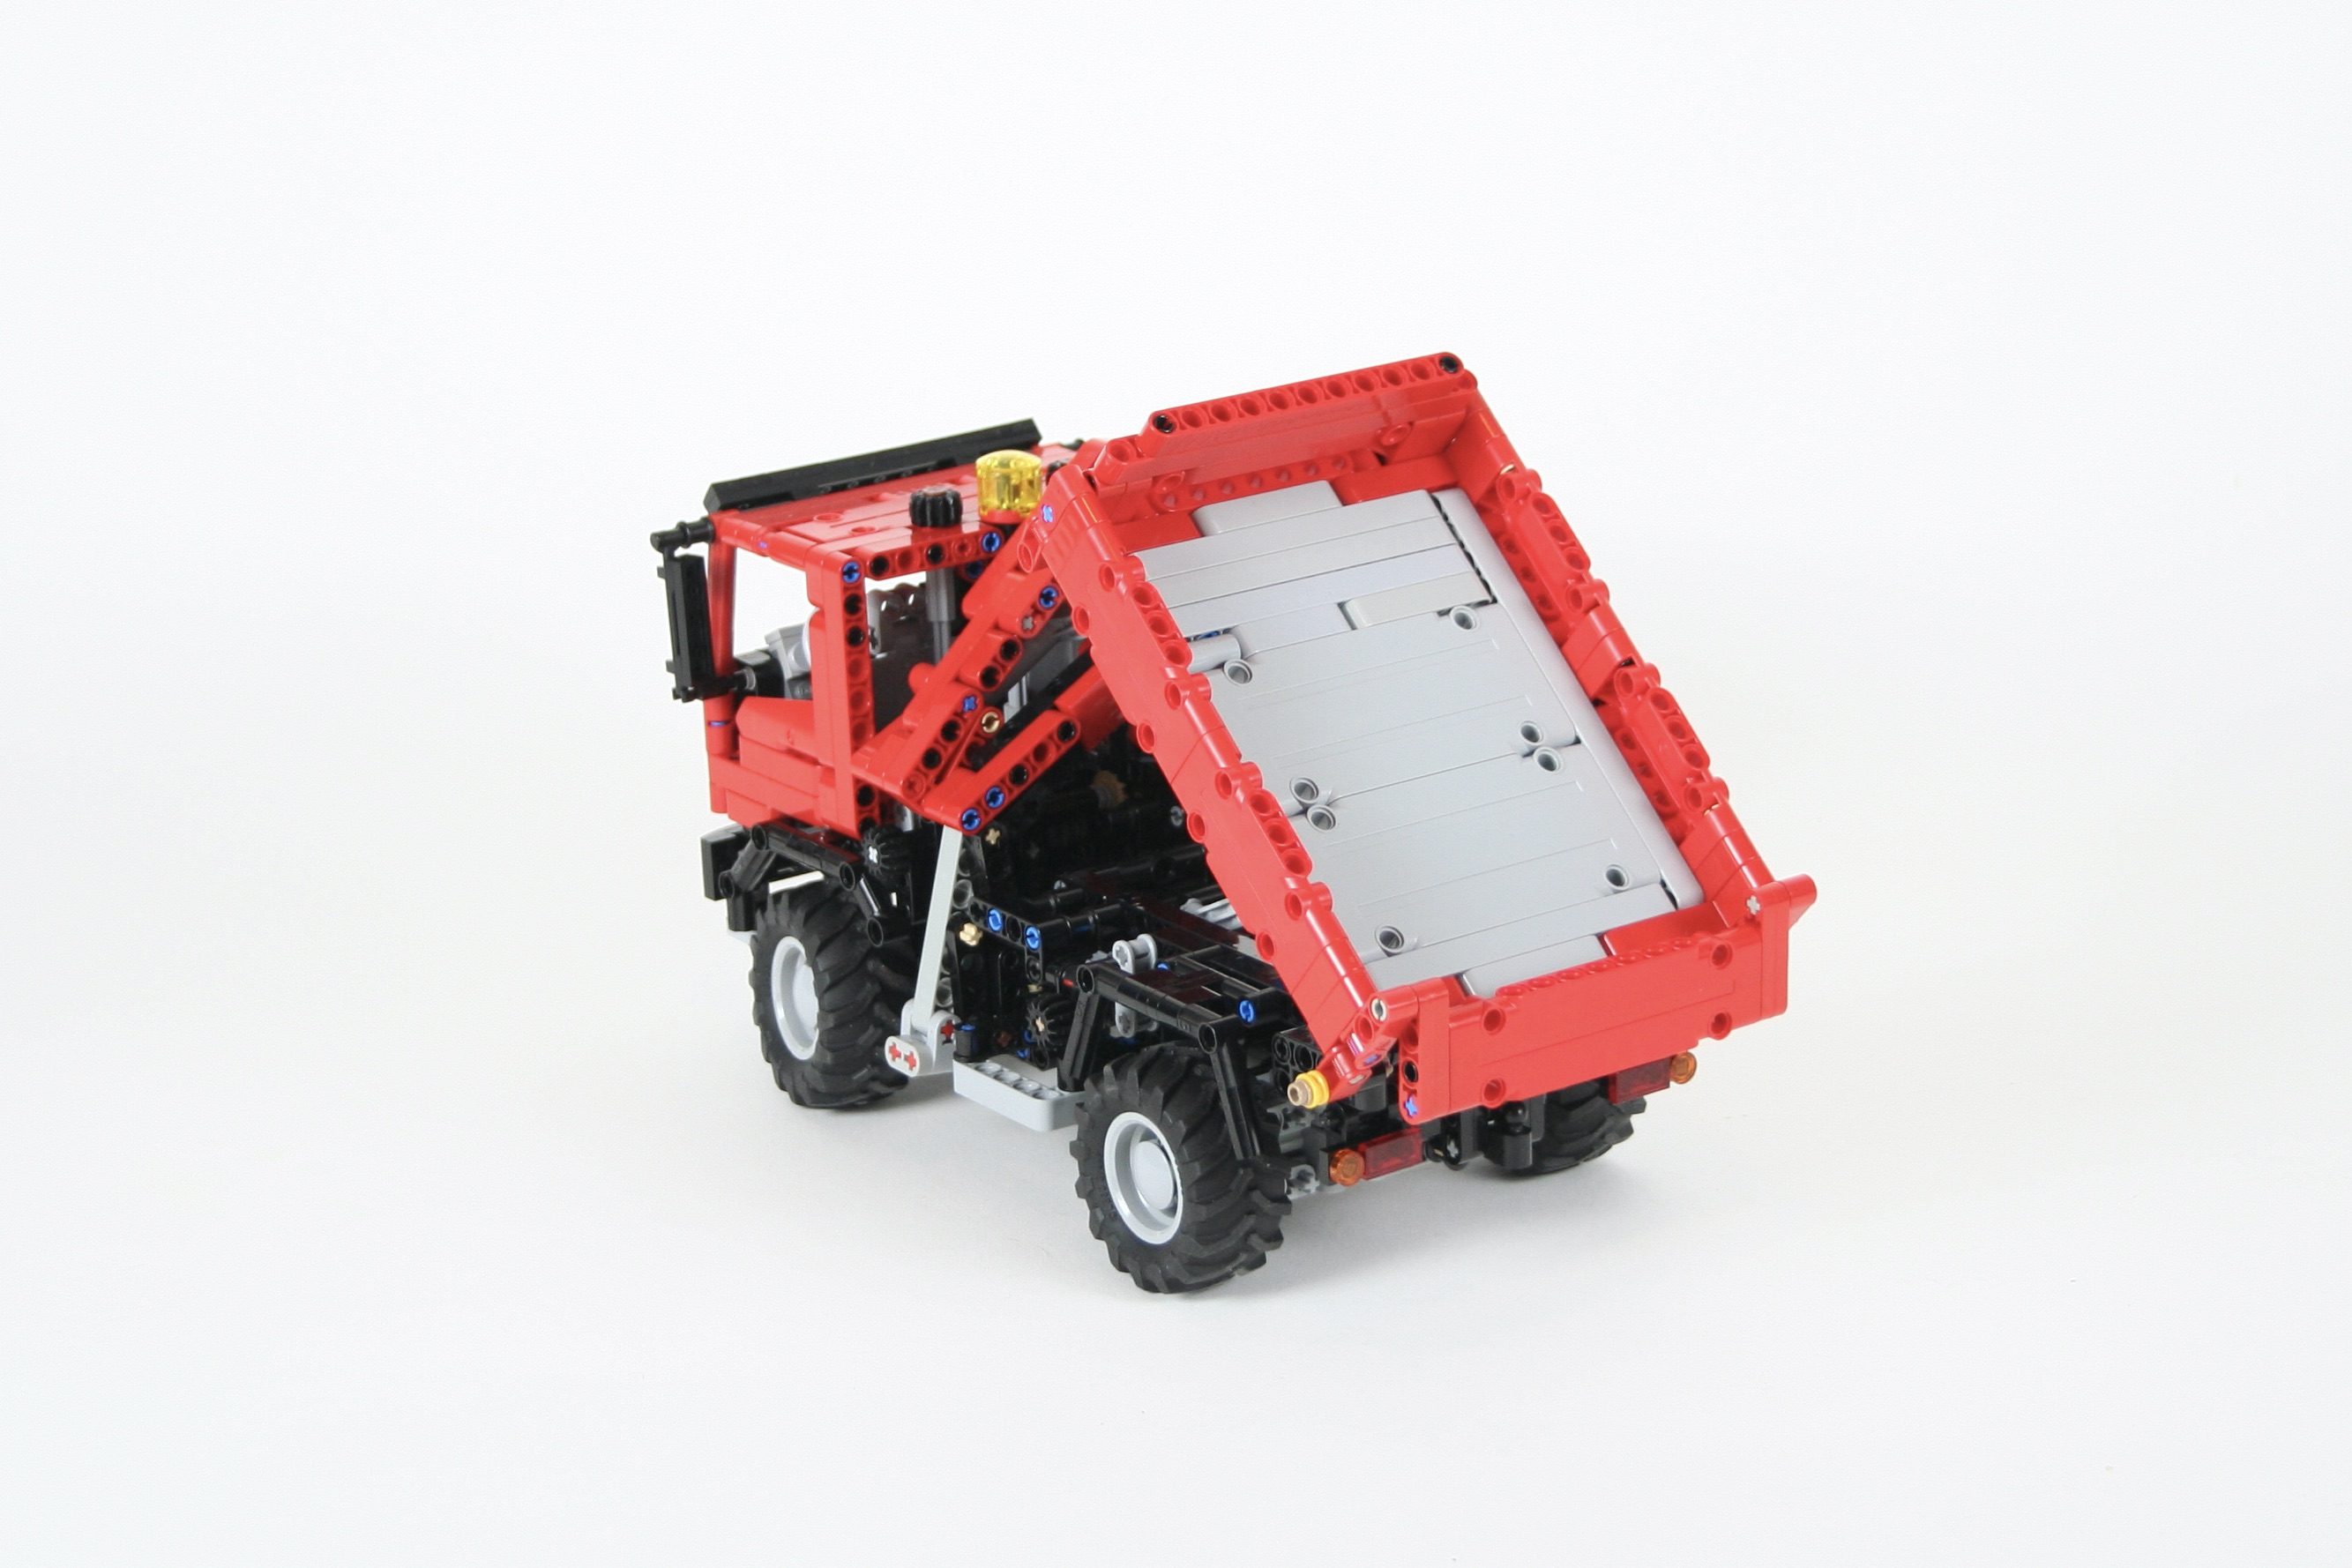
I have found a simple way to add a three way tipper bed in my trucks, and I have used it many times before. A mini linear actuator moves simple linkage under the bed that can pivot in three different directions. Each corner of the bed has a removable axle that allows control for which way the bed tiles. But in the past the control for this tipping function was in a tricky place to reach, so I wanted to route the control to the top of the cab. I managed to add this right next to steering light. I used a top pivot design on the bed sides and rear, locked by a 3/4 pin on the bottom.

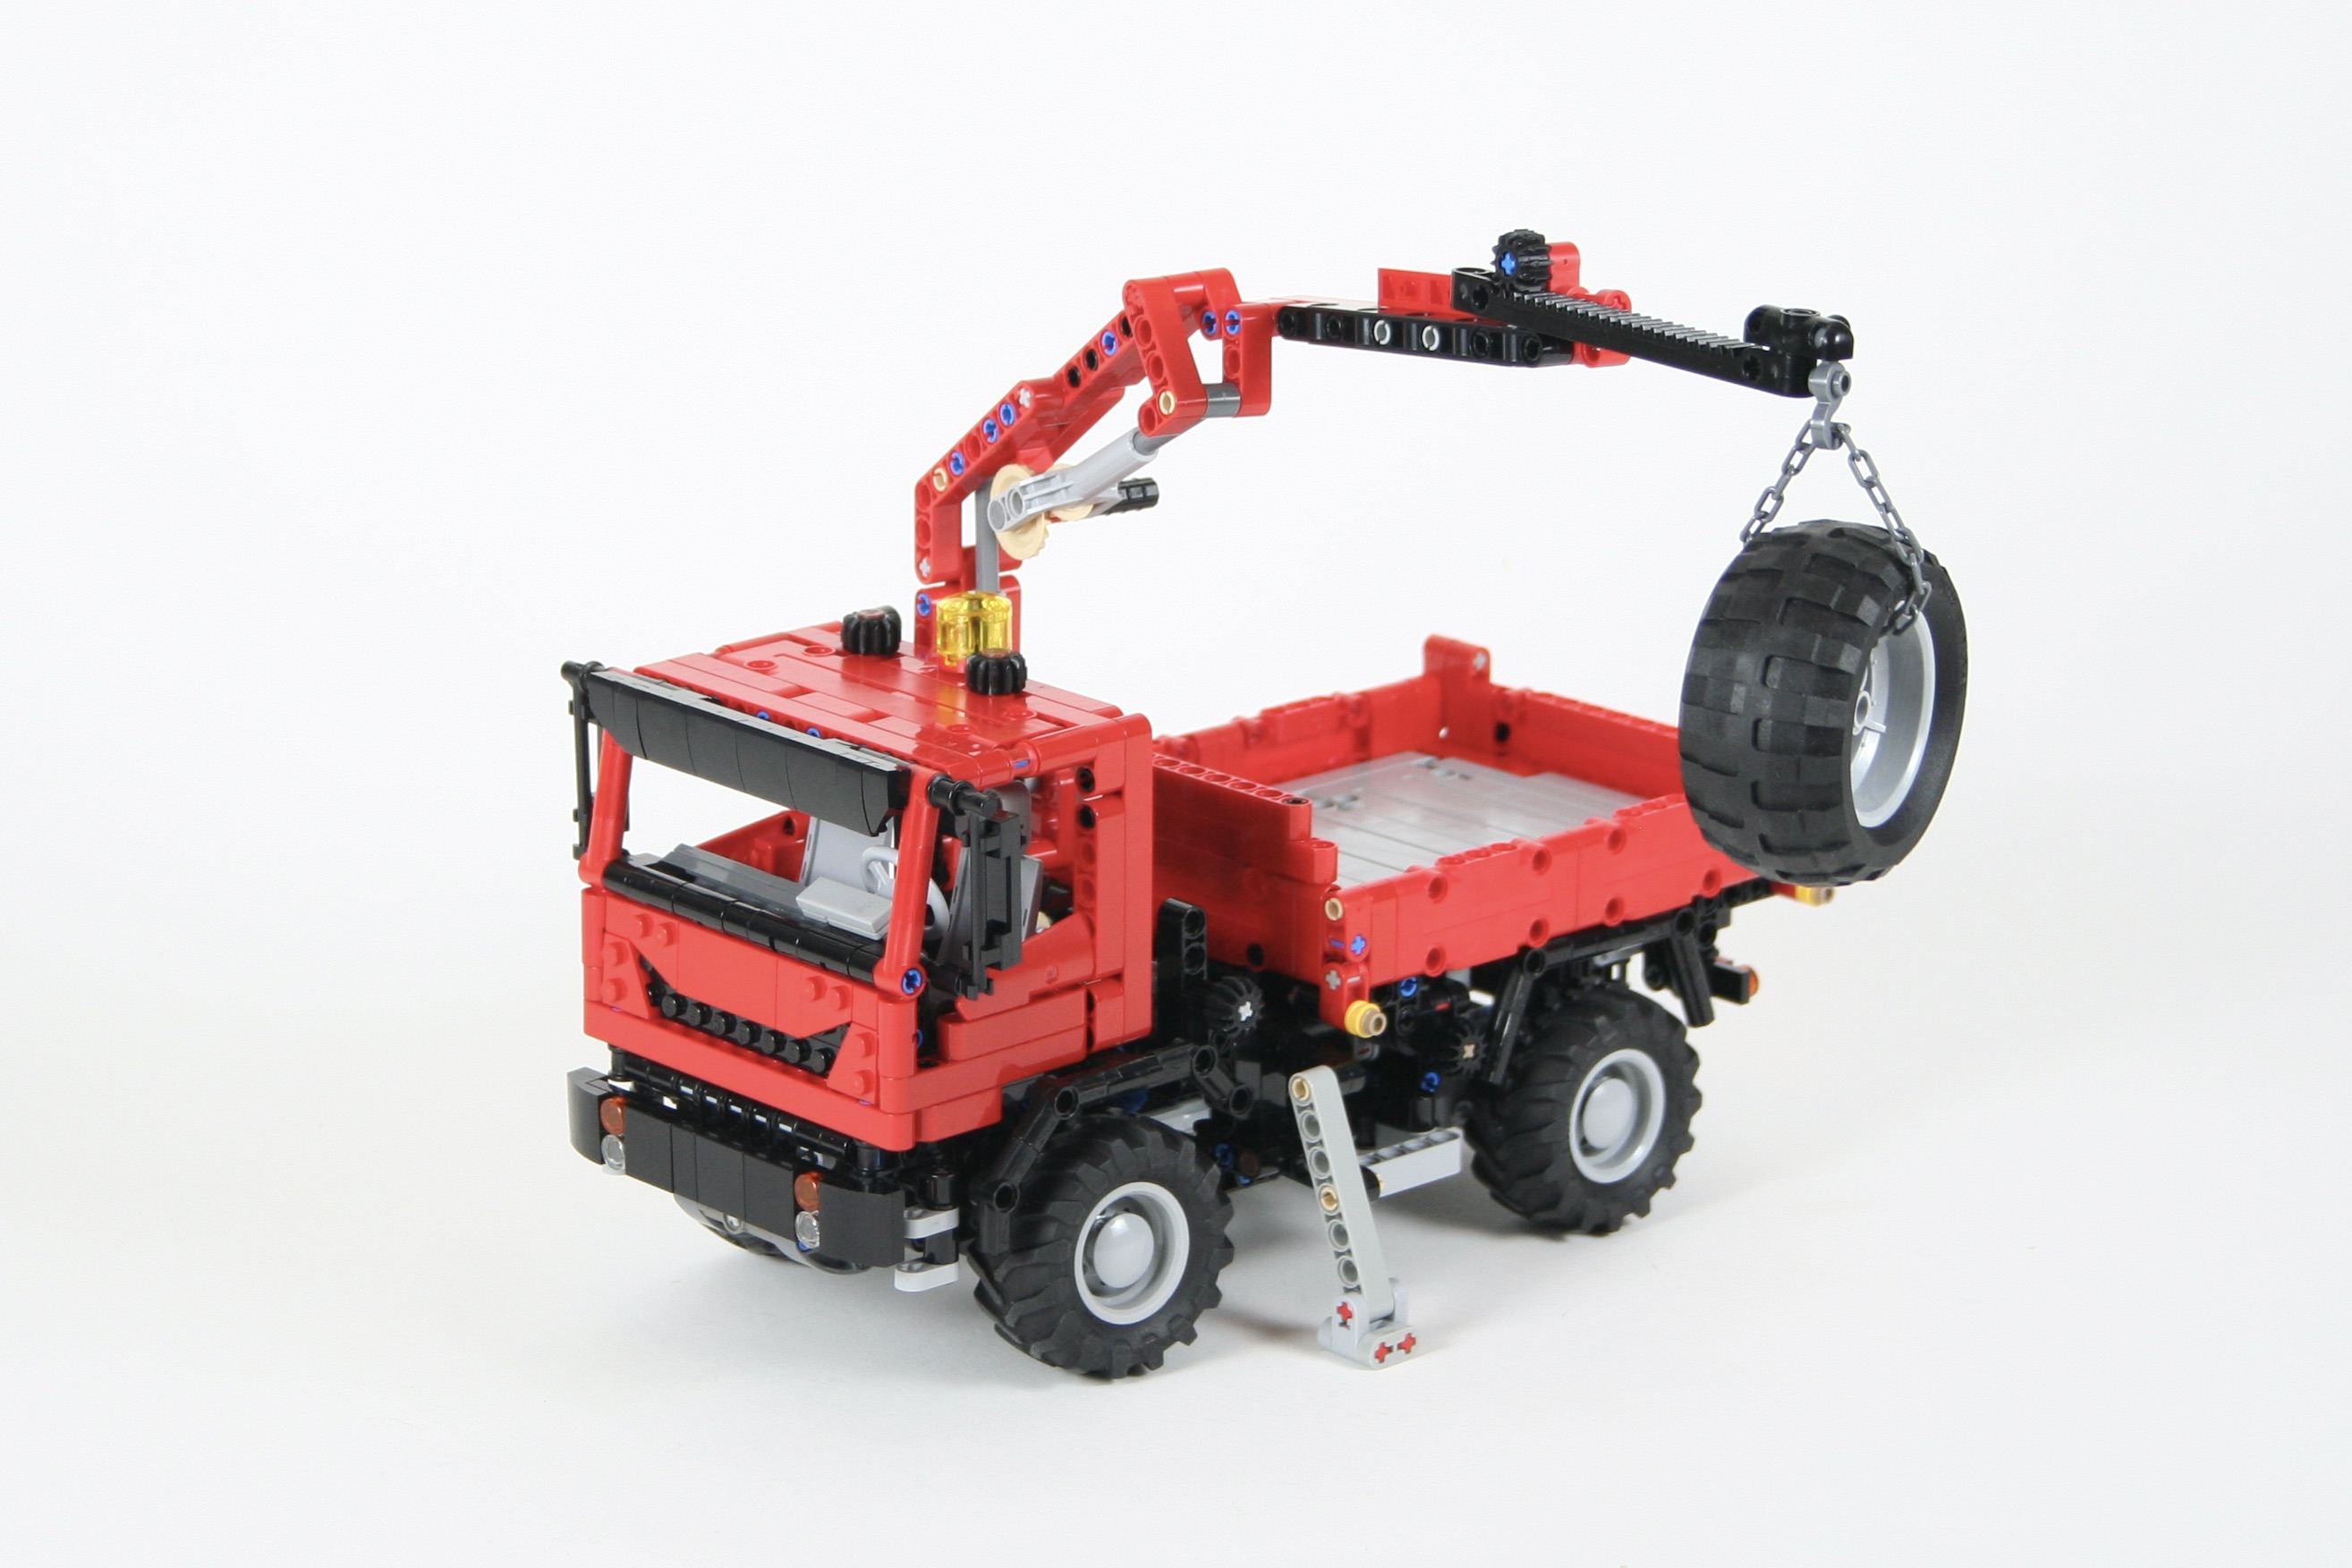
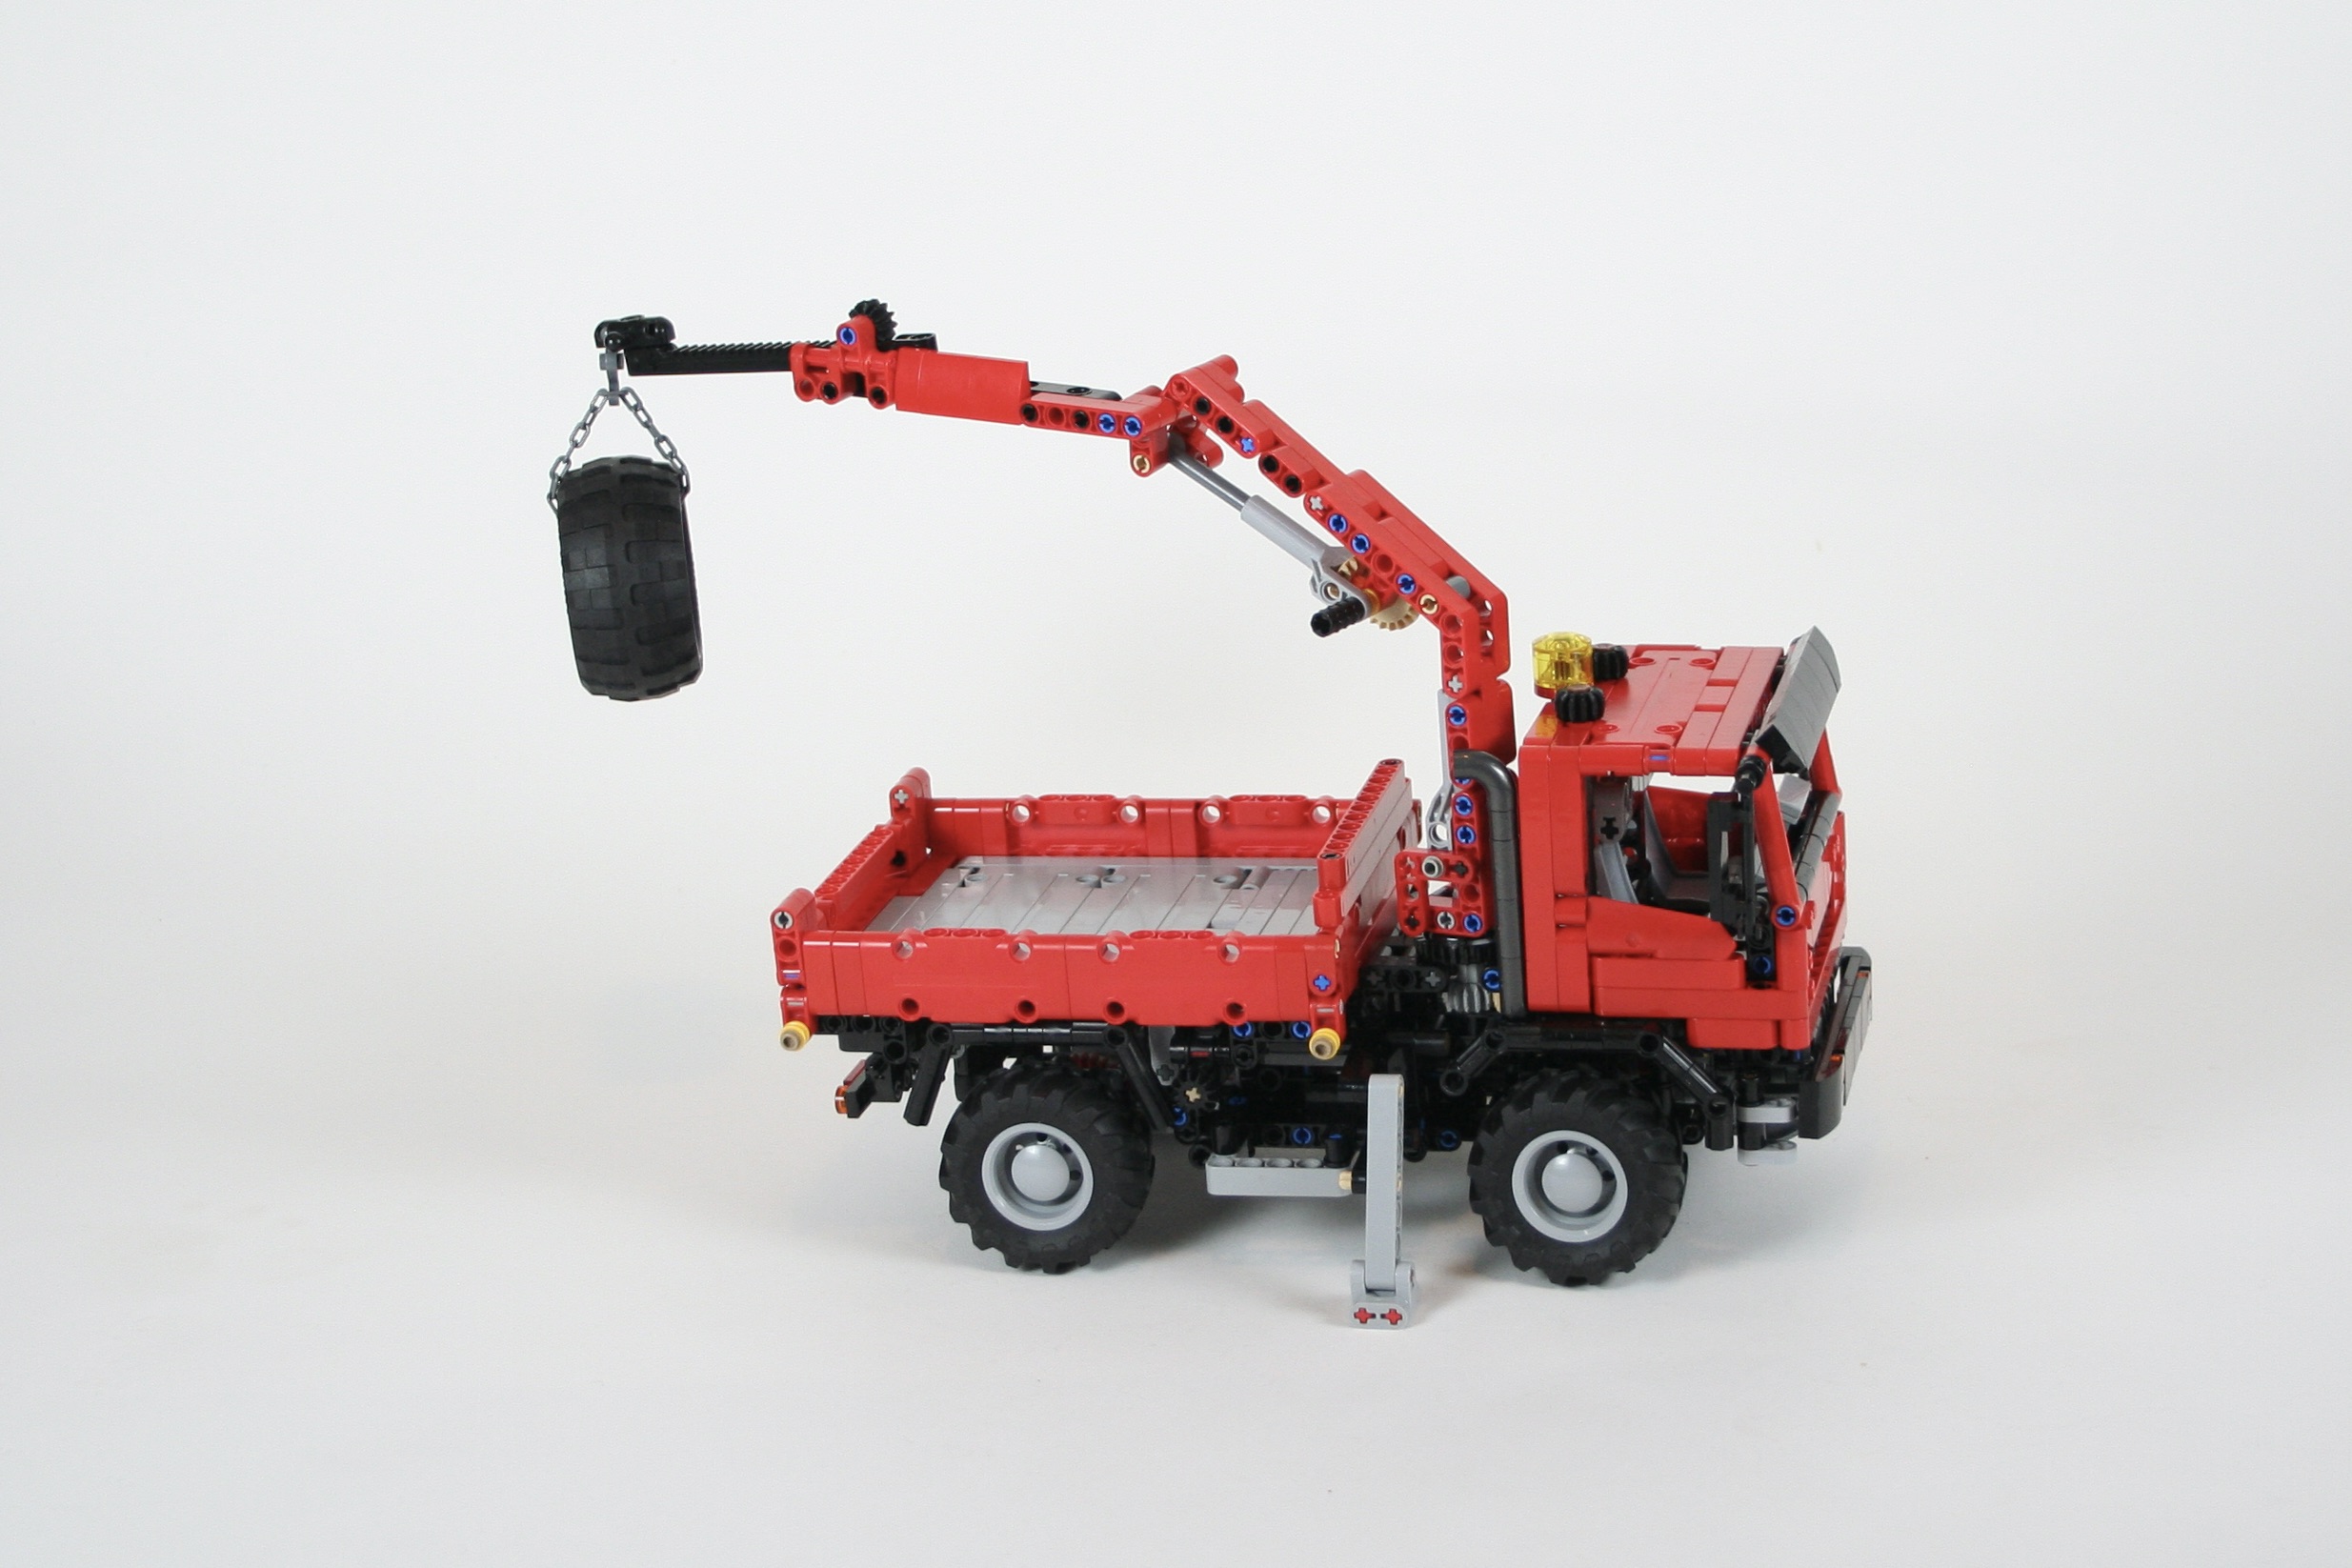
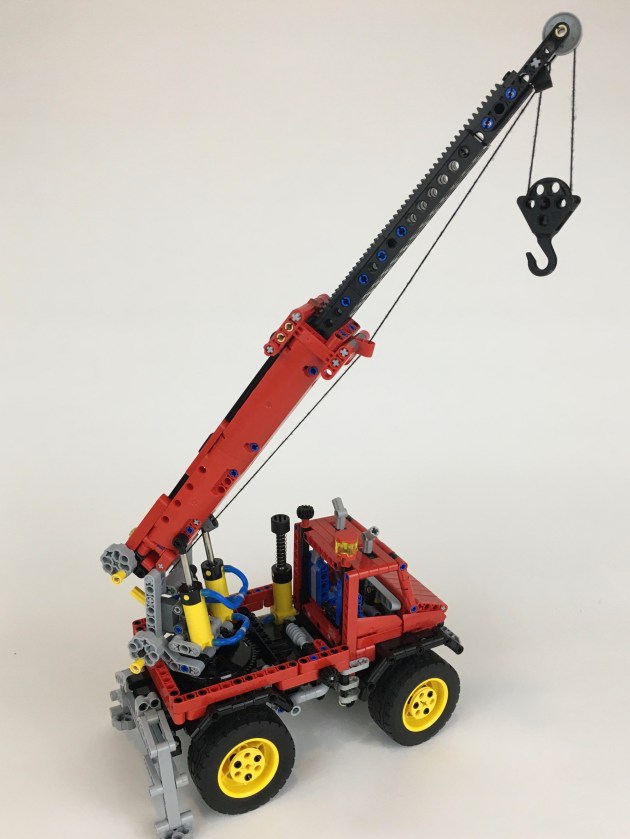
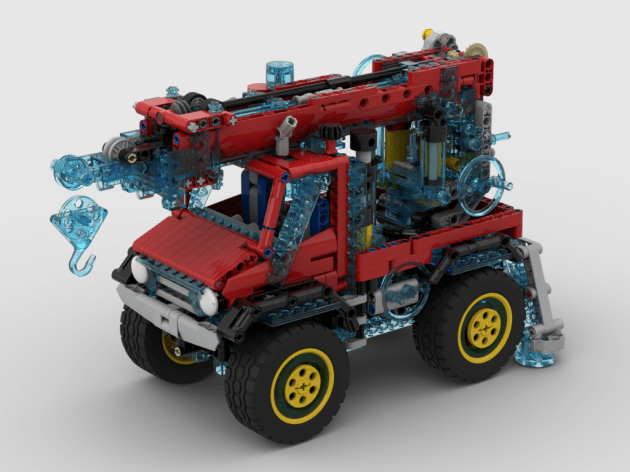
Finally, I added a crane, and since I had a little space left over, two stabilizing outriggers. The outriggers are a simple two link design that are controlled with a worm gear mechanism. The crane is a little more complicated. It is mounted on a small turntable with a rotation control on the left side of the truck. The first lift mini linear actuator is controlled by the third HOG on the top of the cab. The second lift stage is controlled by another mini linear actuator. Finally, the third stage has an extending boom that allows the reach of the crane to extend a little more. The crane can lift some; not a lot, particularly when the boom is fully extended. By removing the three HOG knobs, the cab tips to show the engine. Also, both doors open.

I loved the way this trucks looks. The beefy tires, and the cabover design give the truck presence and look of toughness. The crane was a lot of fun to play with even if it could be a little stiffer. However, this may be the last time I use this three way tipper design. I am happy I moved the control to the top of the cab, but the linkage does not have the power it needs at the start of the tip. I will have to come up with something better for the next truck.

Stay tuned, and happy building until then.

Advertisement

8854 Update


Winner, Winner, Chicken dinner is what we say in my house!

Free instructions are available at Rebrickable.com.

LEGO 8854 Update

I often participate in online LEGO contests, and most of them are on Eurobricks.com. In the summer of 2021, Eurobricks announced TC20, Technic Studless Recreation. I participate in many, but not all, of the contests that Eurobricks offers. The requirement was to pick an old studded set, and recreated it in studless Technic. I couldn’t sit this contest out, as it checked all the right boxes for me. Entries would be smaller to stay in scale, the builds would be feature packed, and it they would have a deep nostalgic connection. I was in.

Choosing a set to recreate took some time. I started with a list of 32 sets, and started to whittle it down from there. Quickly I removed some of the sets for various reasons: interest, size, not right now, too sacred (8880). I ended with a top three of 6357, 8855, and 8854. 6357 would be interesting to me, but after doing 8640 a couple months back it could wait. 8855 had some opportunity. It is a classic set, and instantly identifiable. I built a little mock-up, and let it sit for a couple of days. I didn’t come back to it.

I am not sure why I did not settle on 8854 right away. I love building Unimogs, and when I do updates I like to add some features. 8854 was missing suspension and an engine, so everything was right for me to recreate this iconic set. I had made my decision and I started posting my progress. First, I had to decide the scale. I made the decision to use the newish Batmobile tires in the build, which make the tires a little larger than the original 8854. I added a stud to the wheelbase to compensate, but otherwise the scale would remain the same.

Next, I had to figure out how to add all the features I would want, while keeping all the original features. HOG for the steering would remain on the top right side of the cab, naturally as a beacon. I then added a control gear for the outriggers on the top left side of the cab. The rotation of the crane would be on the right of the truck driven by a worm gear, and all other crane controls would be on the crane itself.

Fitting in the suspension and engine was a little tricky. Adding the engine was simple enough. There is a differential on the rear axle with portal axle. The driveshaft goes forward to drive a I4 mini engine. Suspension is a dual pendular axle setup: both axles pivot side to side. The front and rear axles are linked together so that when one axle pivots right, the other axle pivots left. It is a simple design that functions well.

LEGO 8854 Engine

Designing the crane was the easiest part. Panels form the base of the arm, and a simple extending boom as created using studded technic beams and some rack gears. A worm gear extends the boom.

The cab is where I had some trouble. 8854 has a funny shaped cab to my eyes. First, it is very narrow. Second, the hood slopes very steeply. Third, the windshield is not very steep, more car shaped than truck shaped. I rebuilt 8854 in Bricklink Studio to help me compare the two designs over each other. I found this to be a helpful step, and allowed for some good feedback from other Eurobrick members. I ended up making the hood a little more flat and slightly shorter. The roof was made a little longer, which made the windshield a little more steep. Then added the fenders that wrap around the wheels a little better, and headlights and a grill that referenced the original grill. I was pleased with the final design. Oh, and I added seats, opening doors, and a dashboard.

Being able to compare the two versions side by side helped me feel comfortable with how the build was going. Most of the time I use Studio when the build is complete, as do not like to tinker in Studio. However, being able to see changes in real time, was immensely helpful. I could ask was the new version staying true to the original? If not, what was the specific part that was making it feel/look off? Being able to overlay both versions on top of each other was helpful, and a step I will do again in the future.

Cab Comparison Overlay

It turns out the design was good enough for a first place! I was thrilled that through both a voting and jury stage, this update was picked over 46 other designs. In addition to that affirmation, I was pleased with how the MOC turned out as well. The functions all worked well, and the control of each was simple and effective. I only wish the suspension was little more stable, but this was only noticeable when the crane was fully extended. I’ll use the suspension again in other MOC soon. If you love 8854 as much as I do, I hope you will give this update a build as well.

Happy Building.