I have been working on a number of MOCs for the last couple of weeks, and each of them have been stuck on some part. Sometimes when I get into this situation, it is helpful for me to put each of them aside, and design something small, simple, and quick. It helps me feel like I still have some creative ability, and satisfies the accomplisher in me.
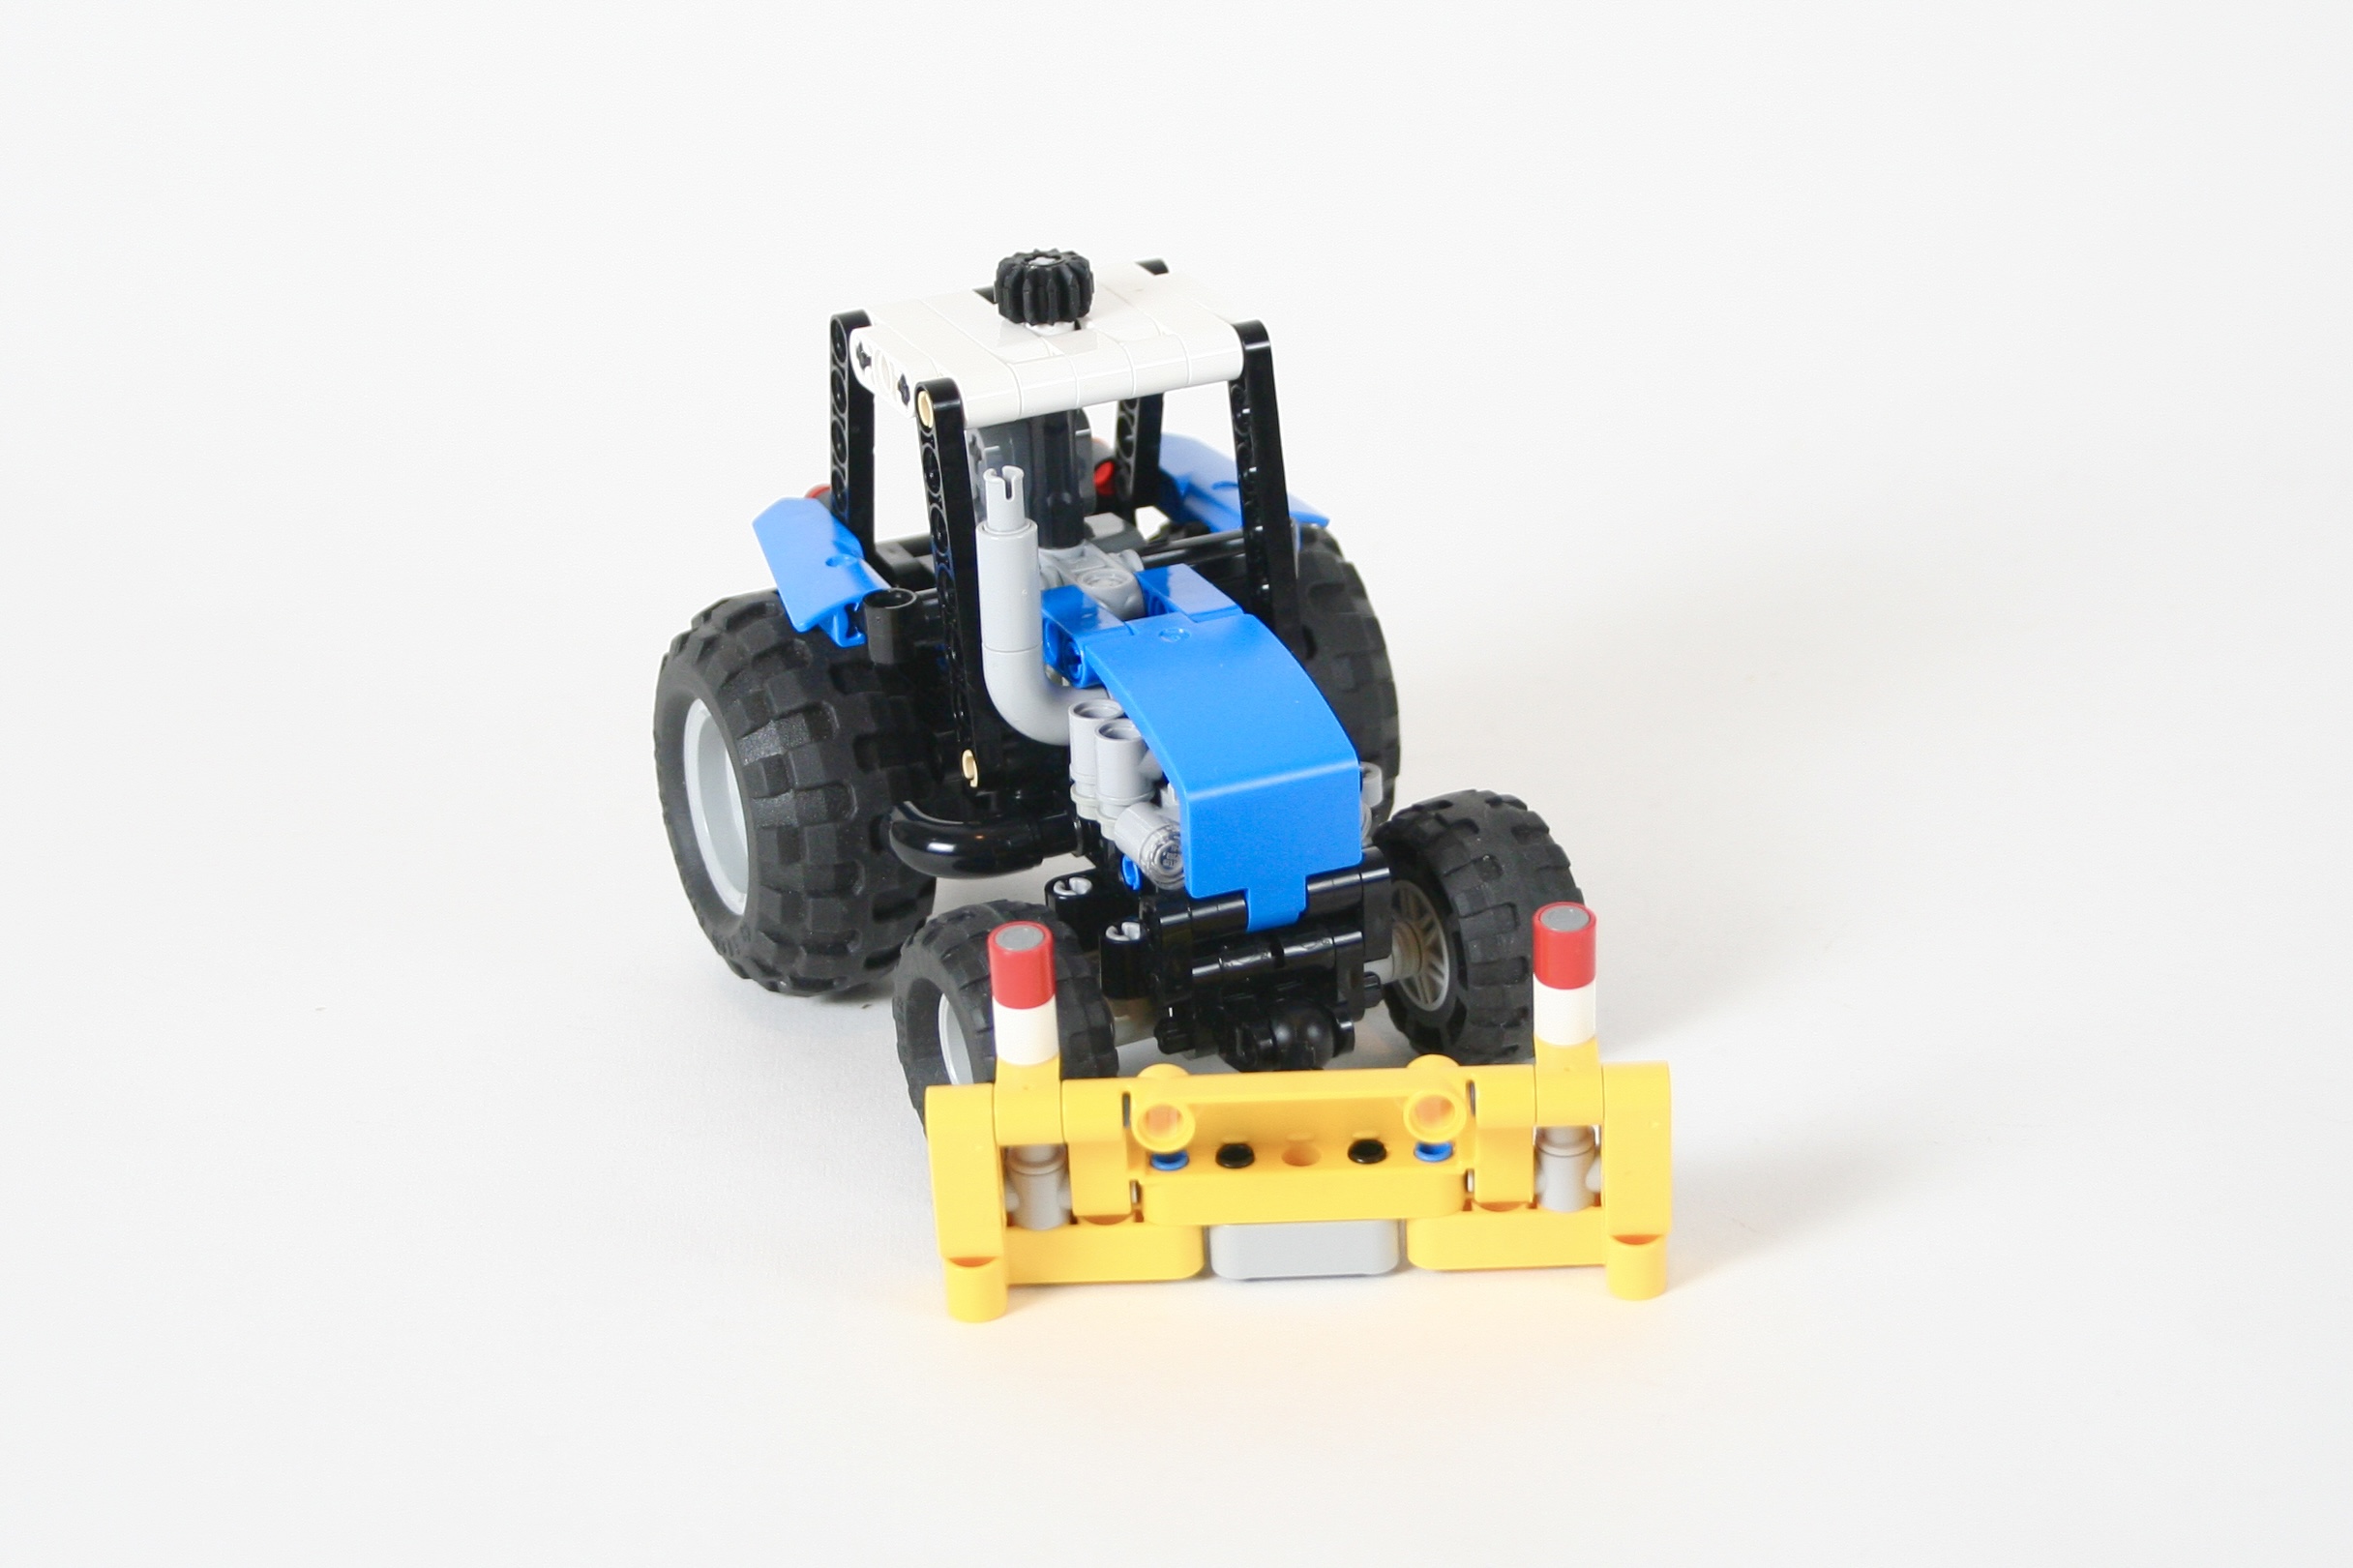
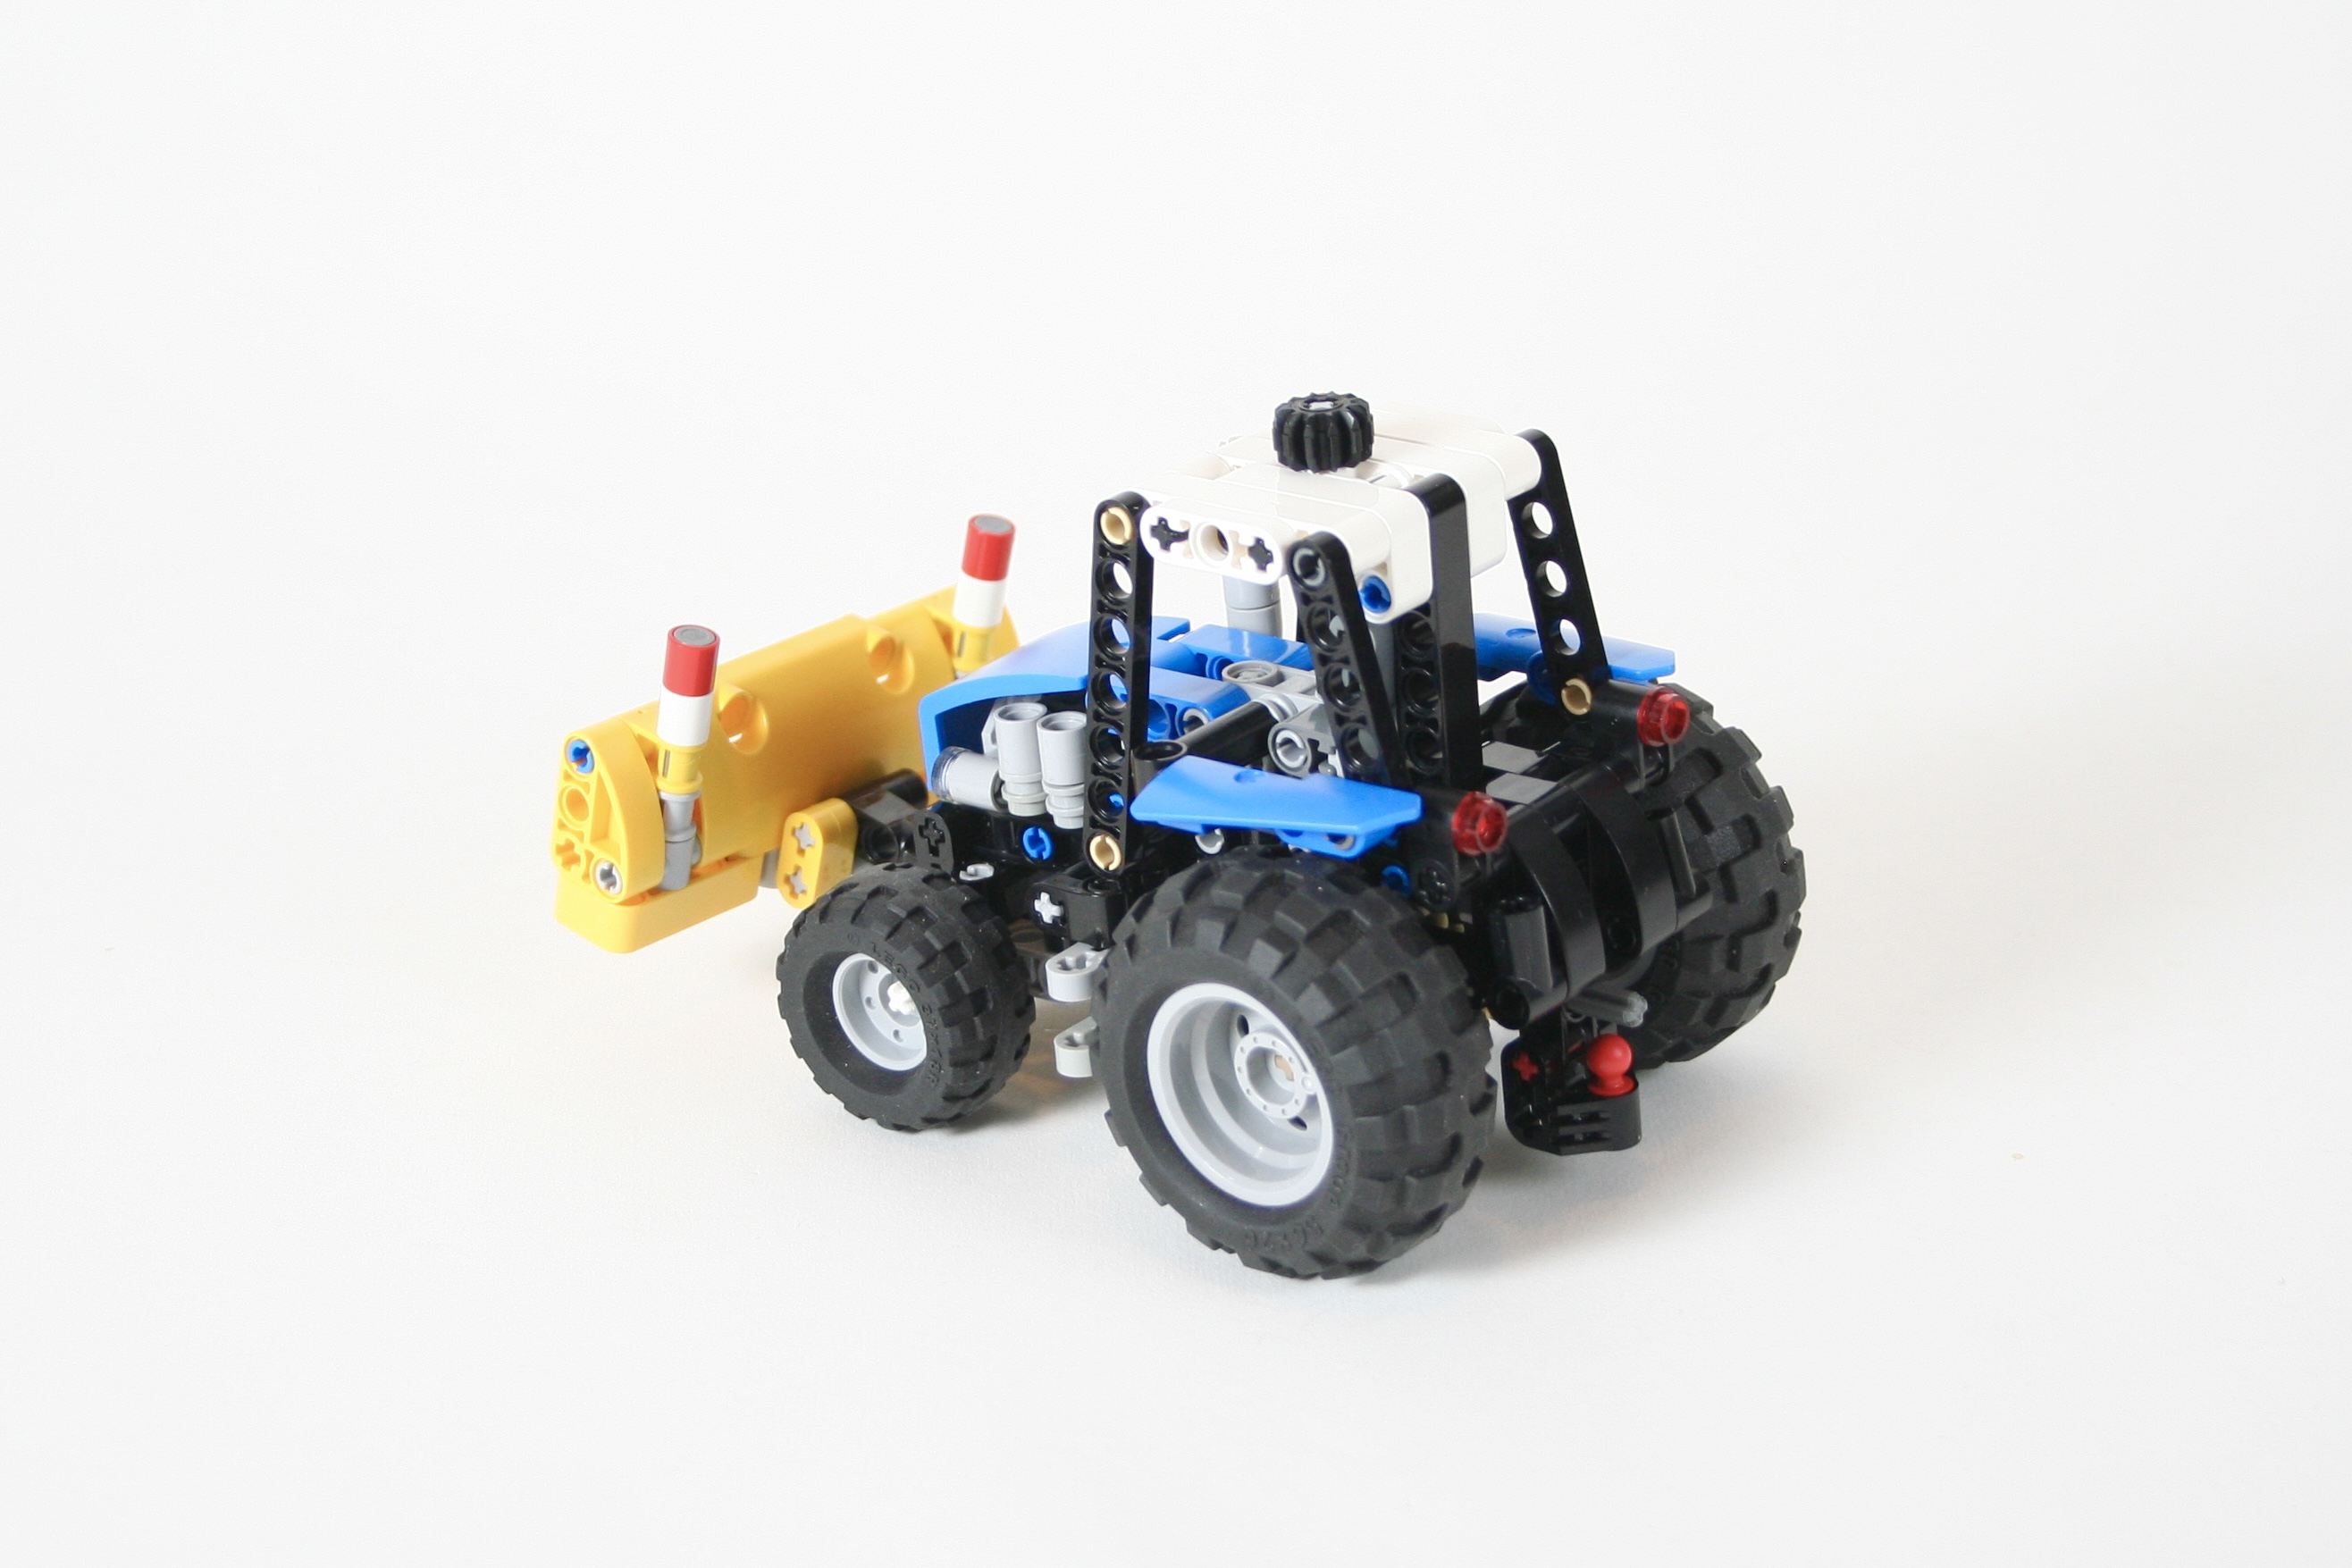
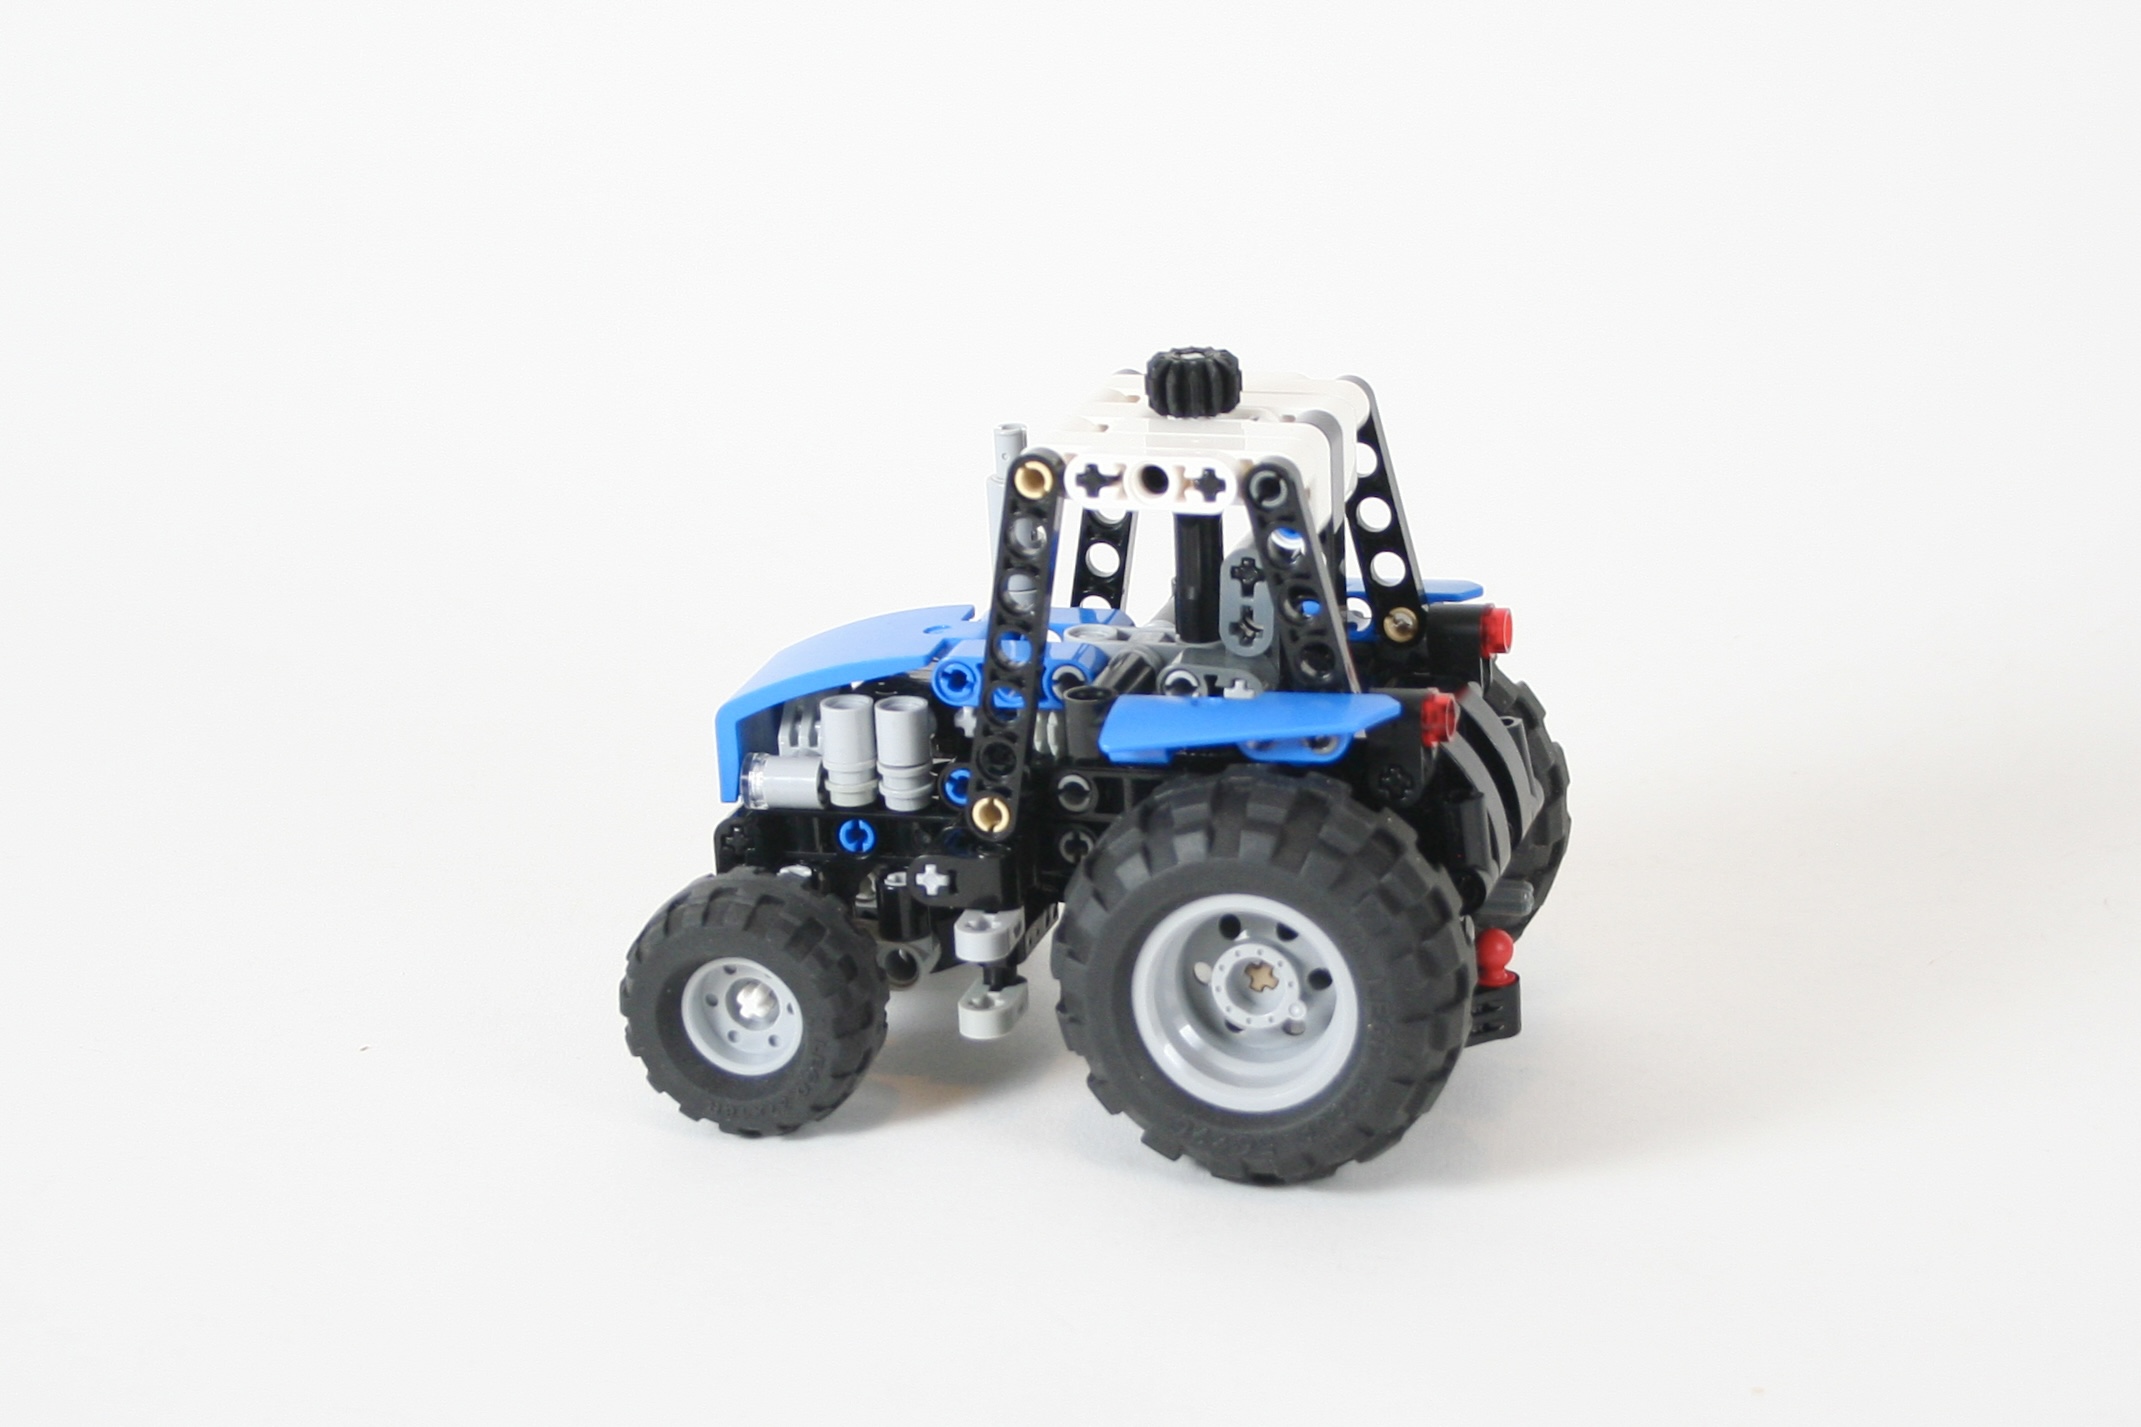
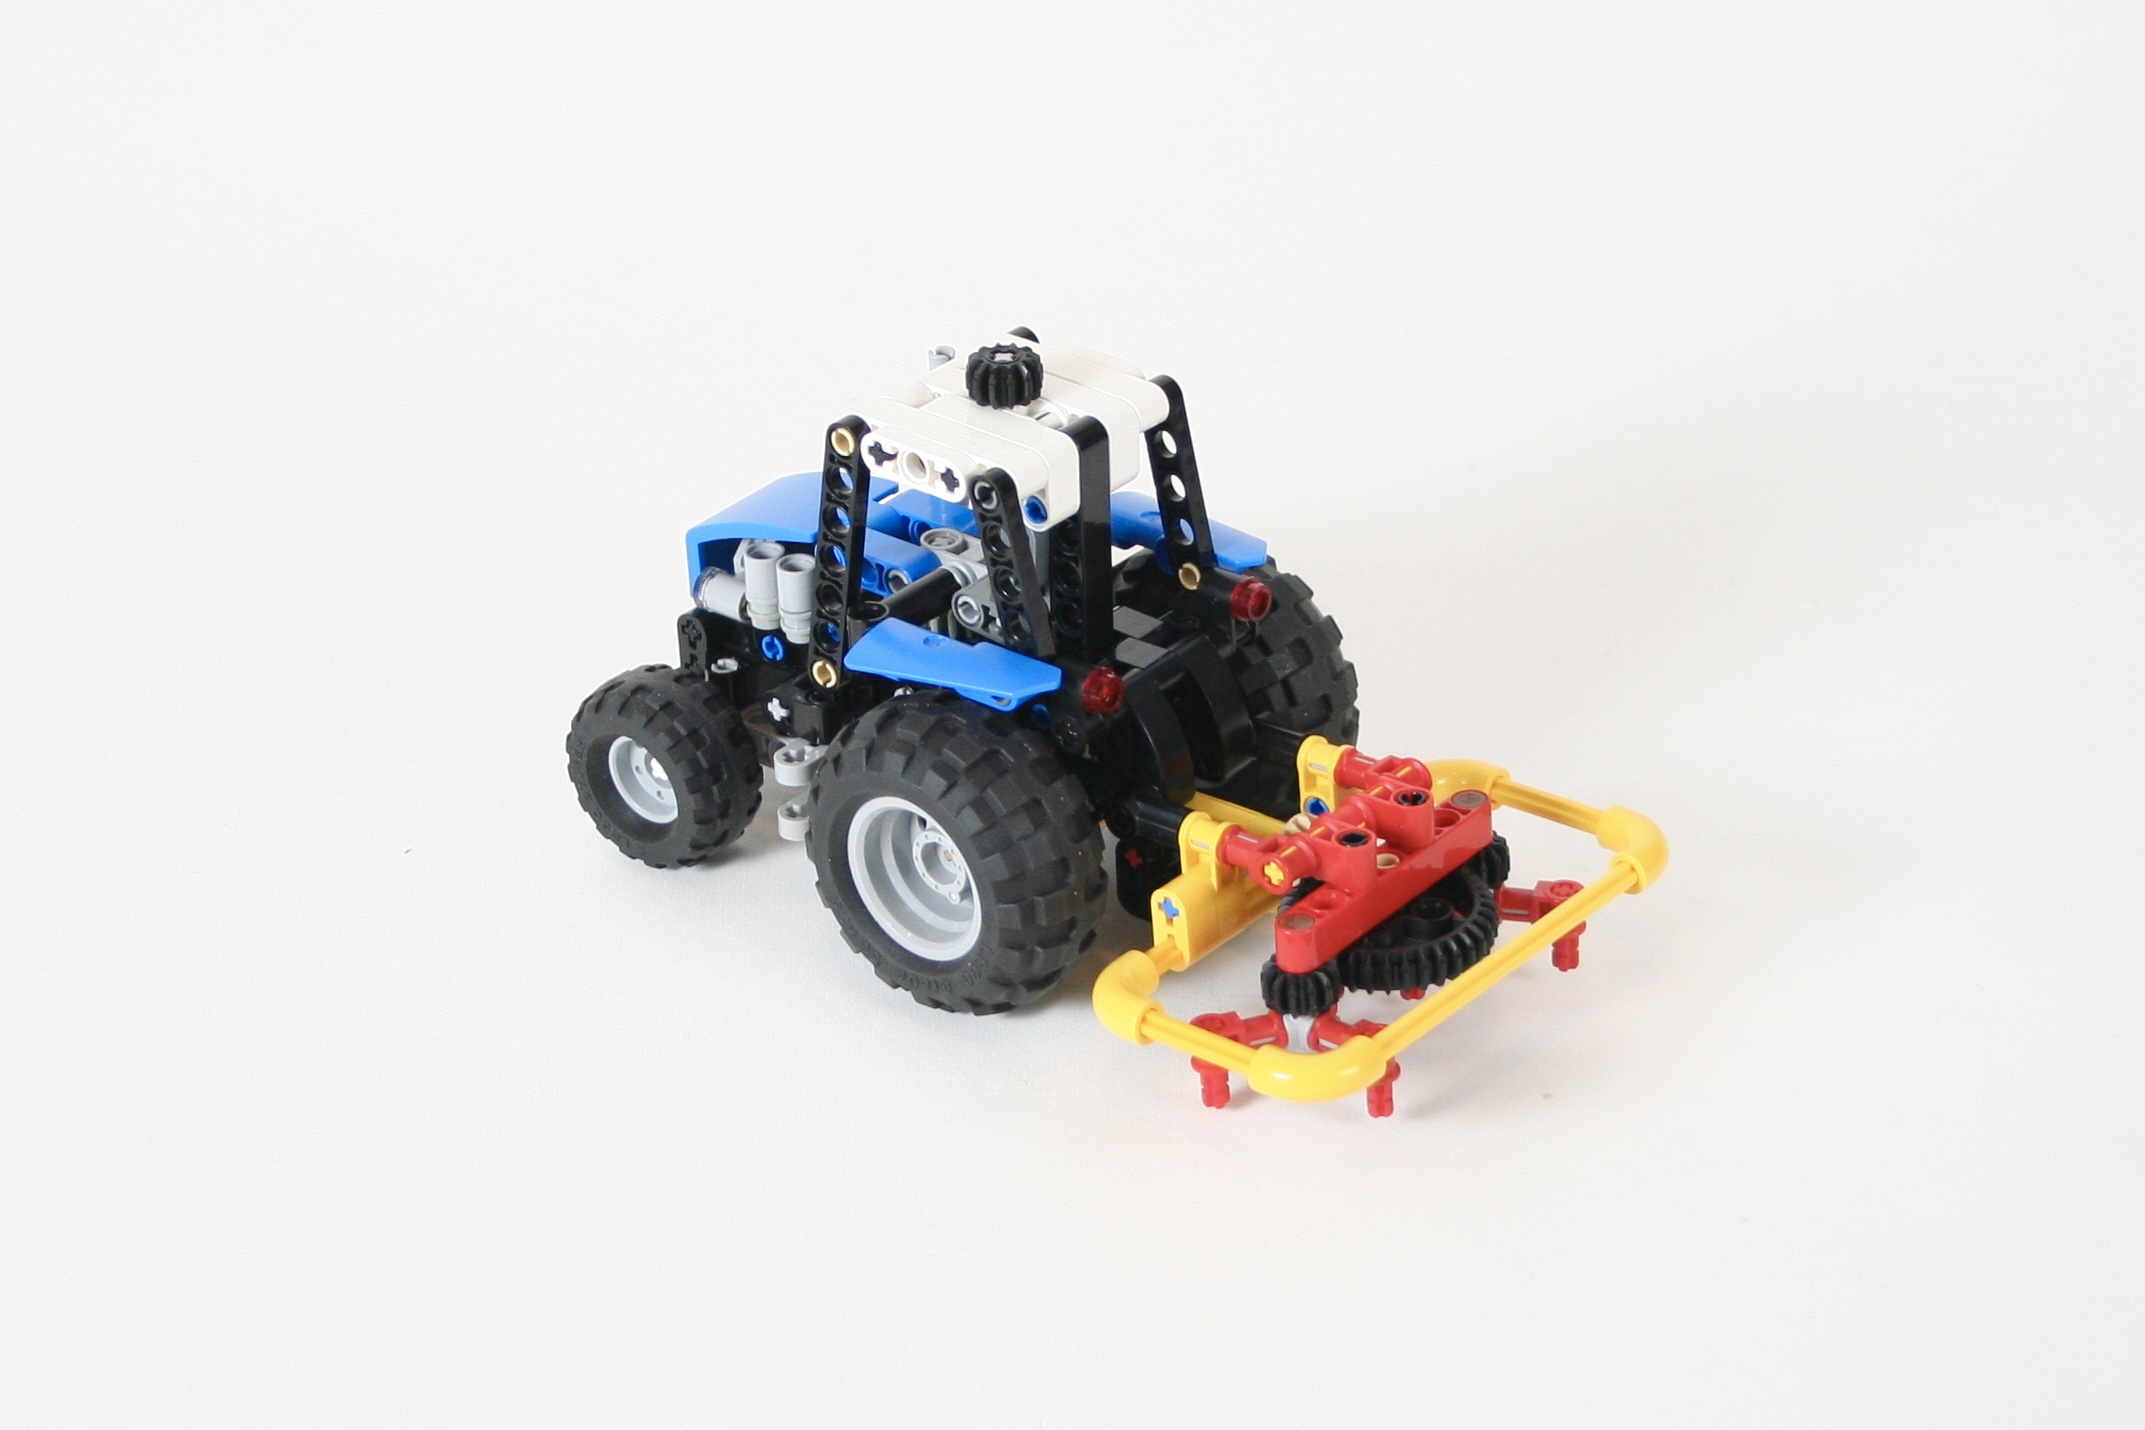
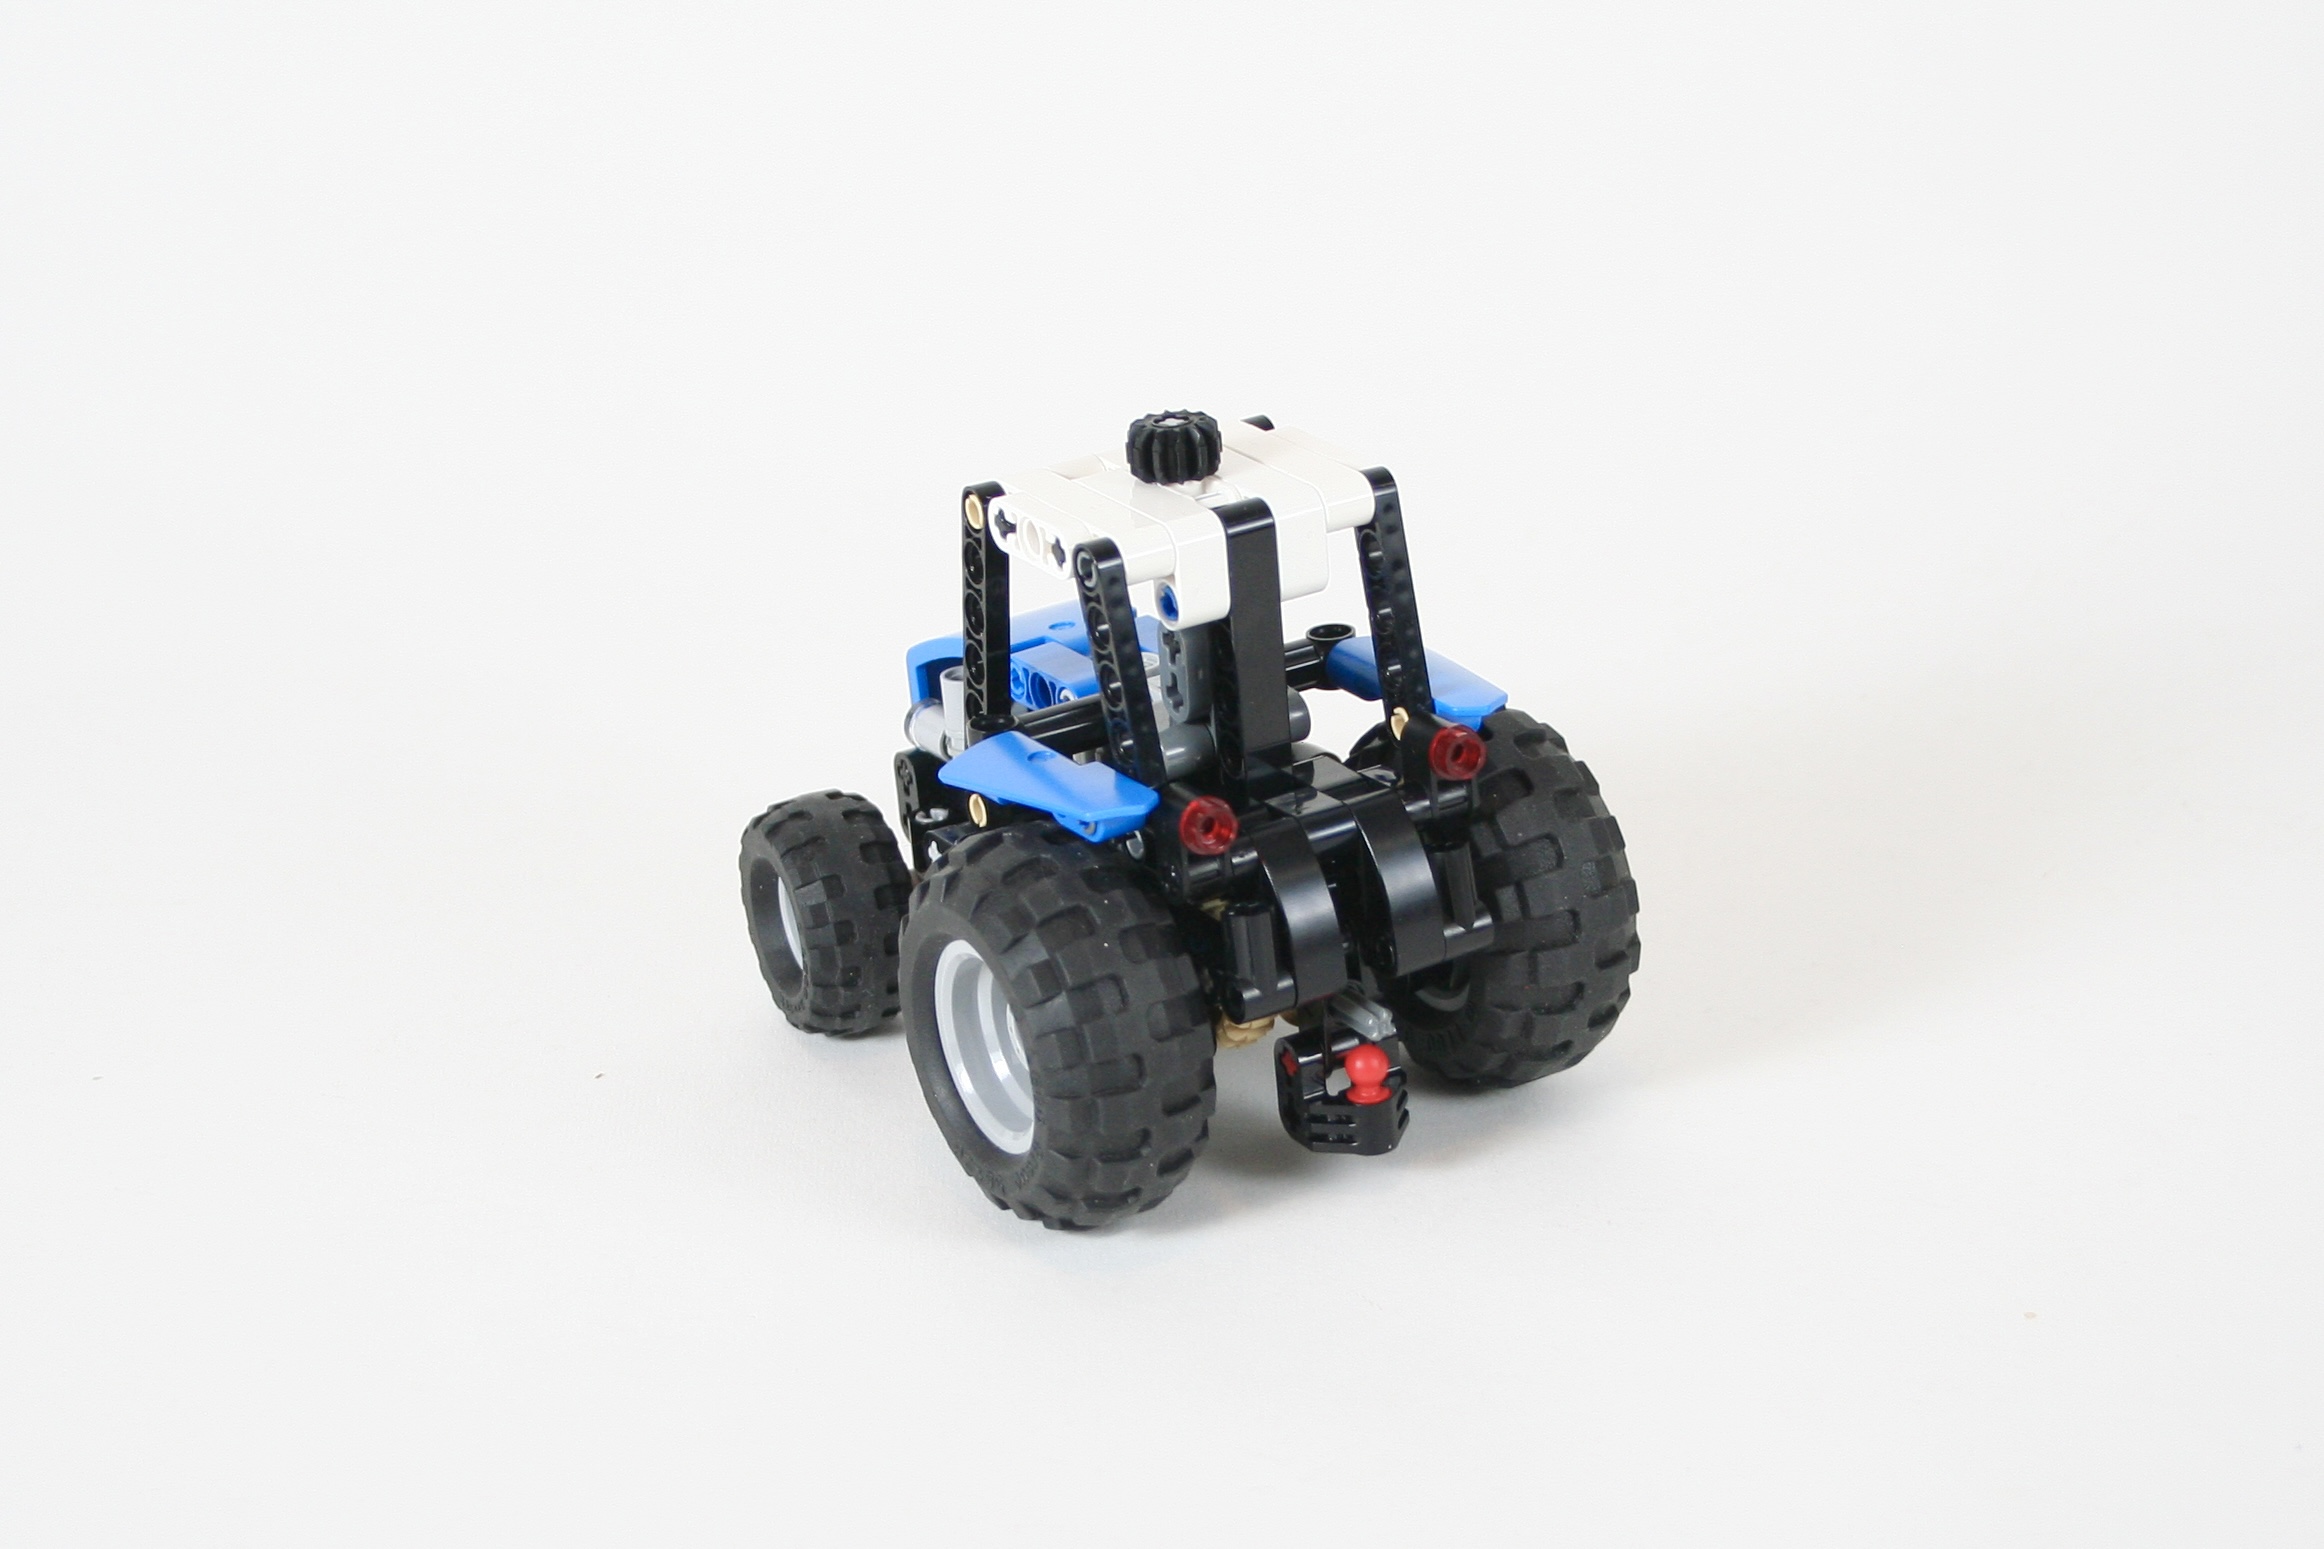
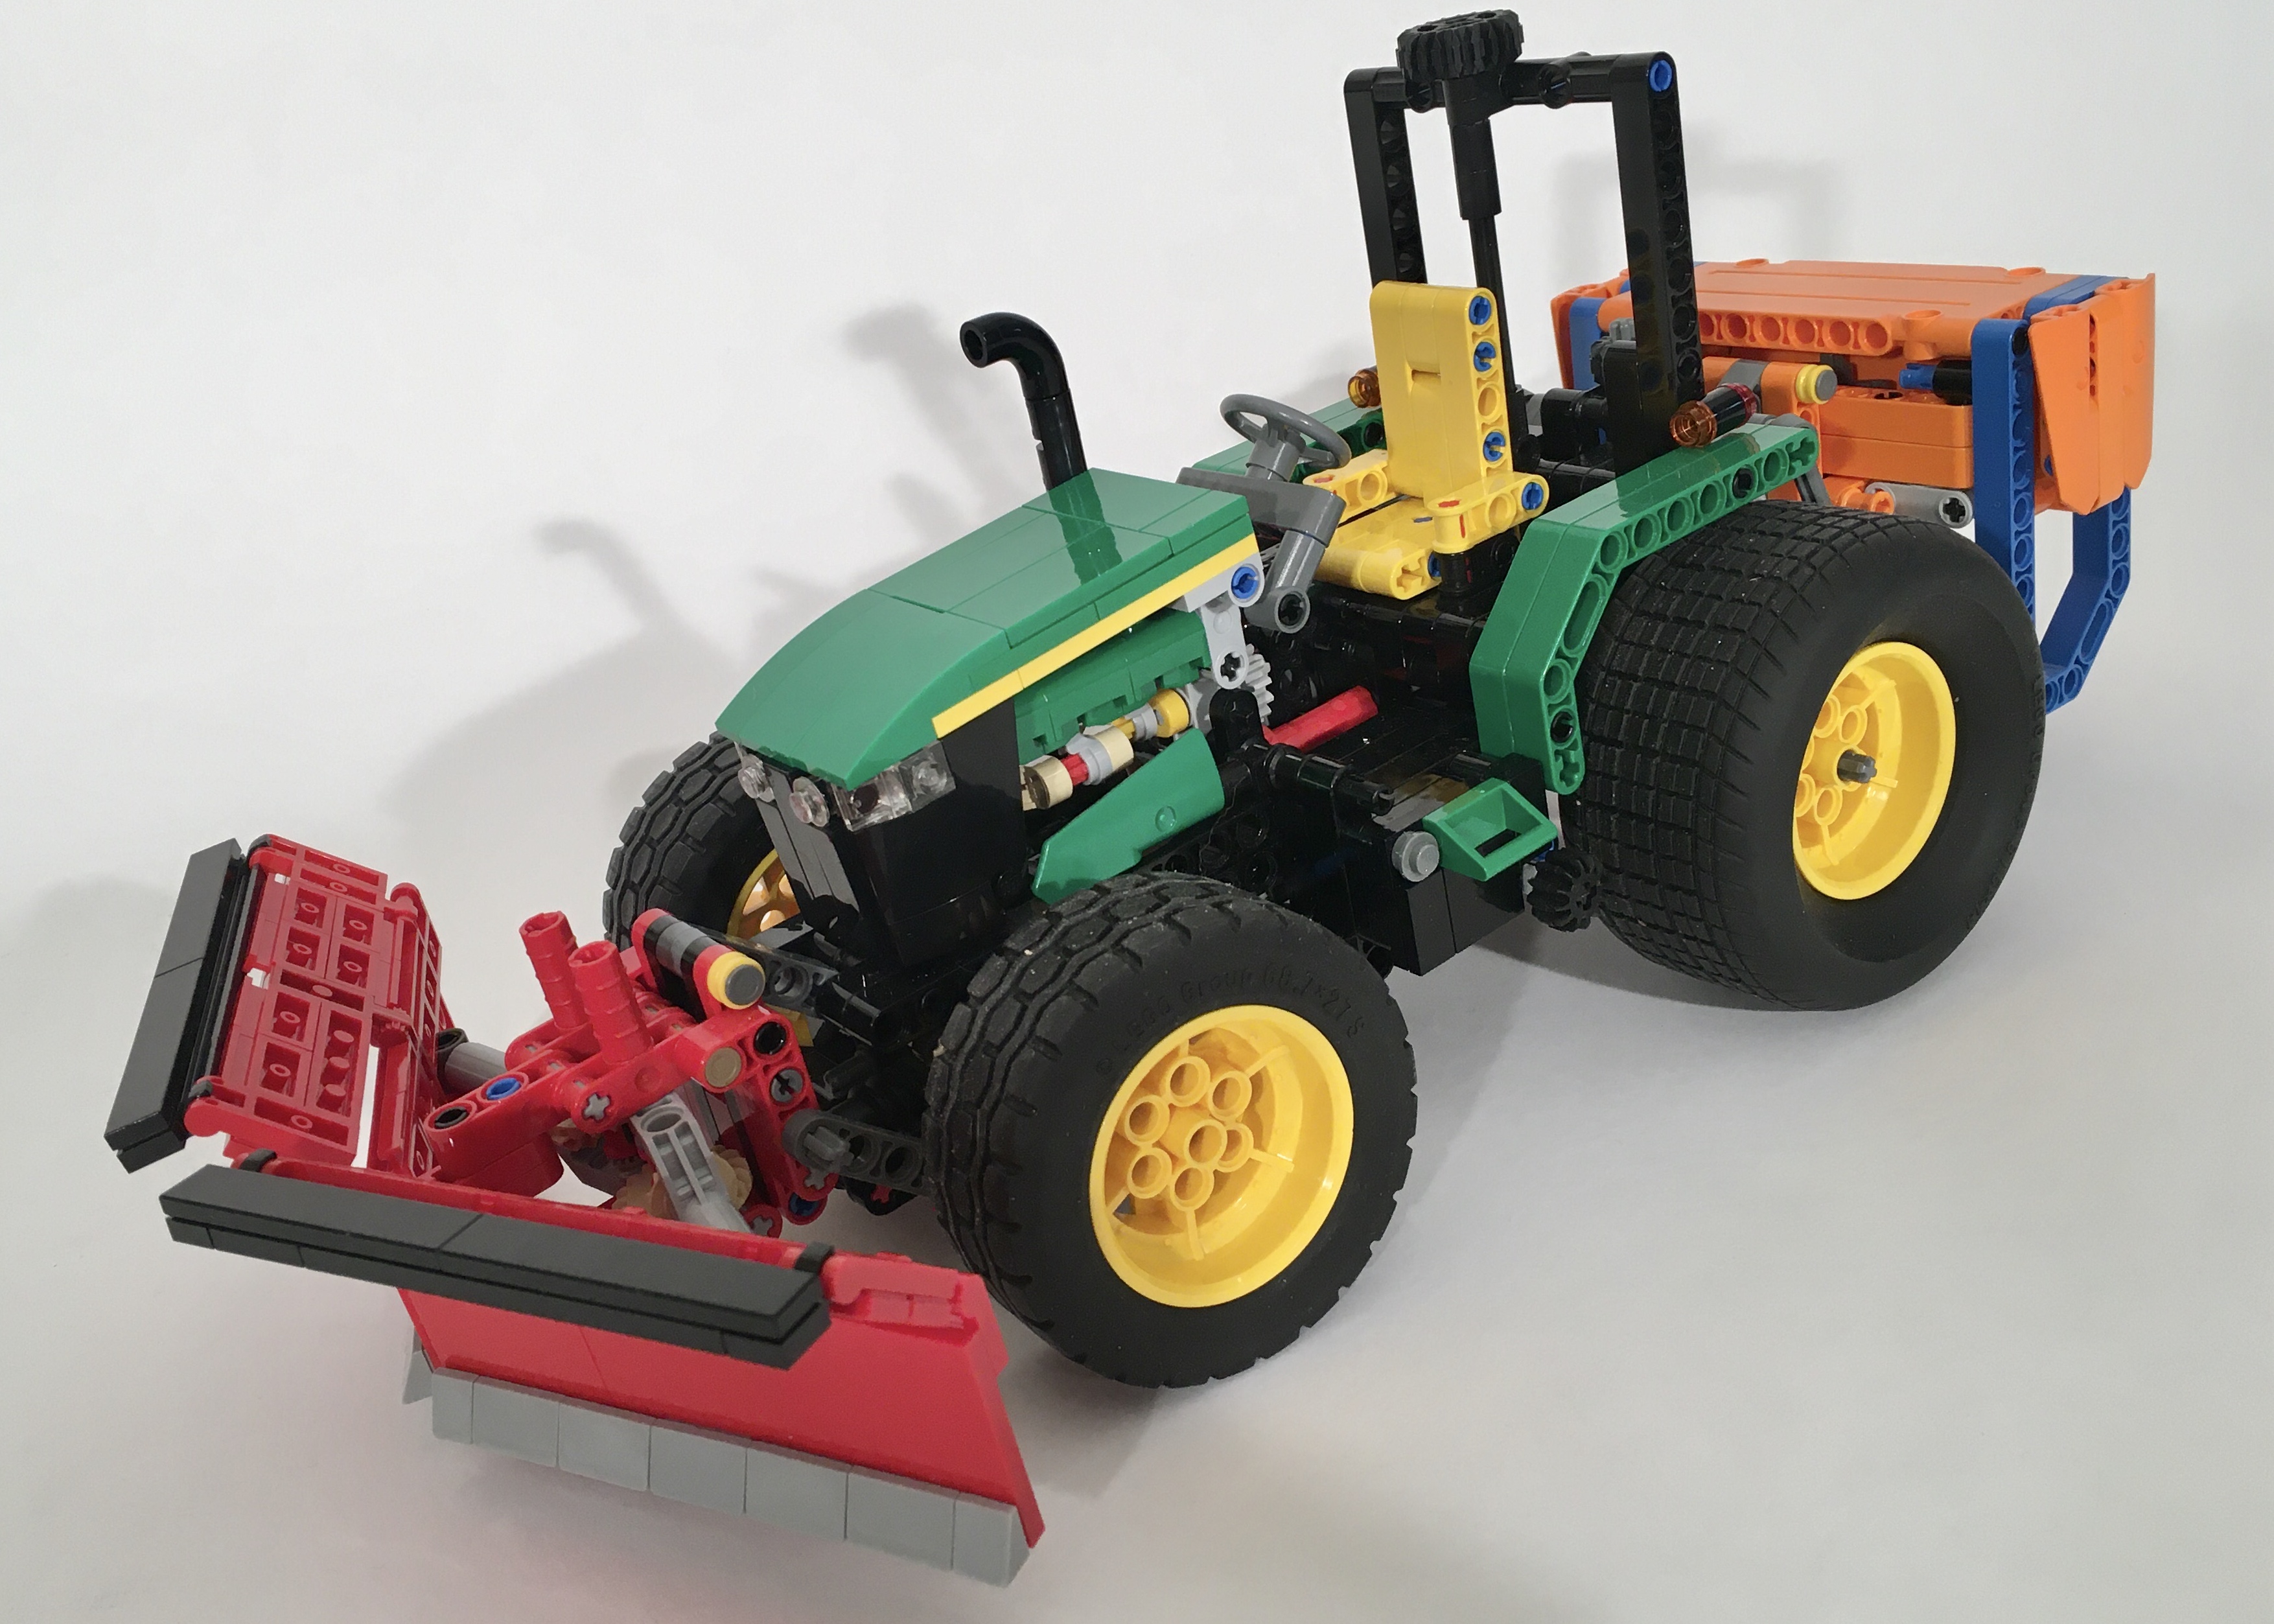
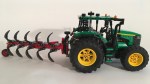
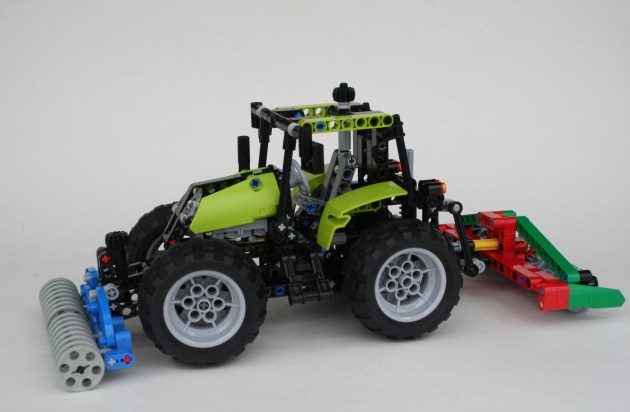
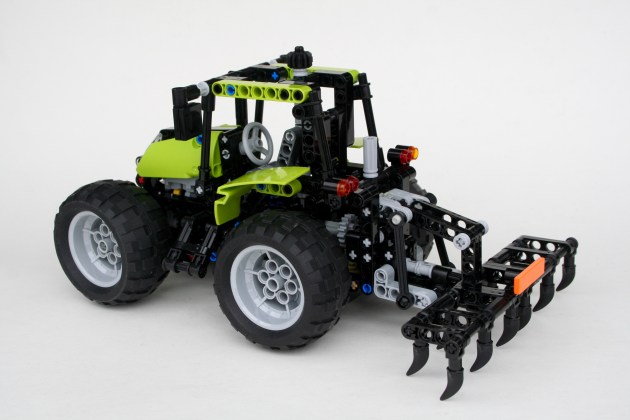
This little tractor was the result of three days of designing and building. It was modeled off the 6524 Blizzard Blazer set from 1988, which to the best of my memory, was the first set I ever acquired. This little tractor has a simple steering design, with a HOG on the top of the cabin. Additionally, a little PTO is run off one of the rear wheels and can power an attachment. Finally, a mount for a front attachment is included, as is an attachment and hitch at the rear of the tractor.
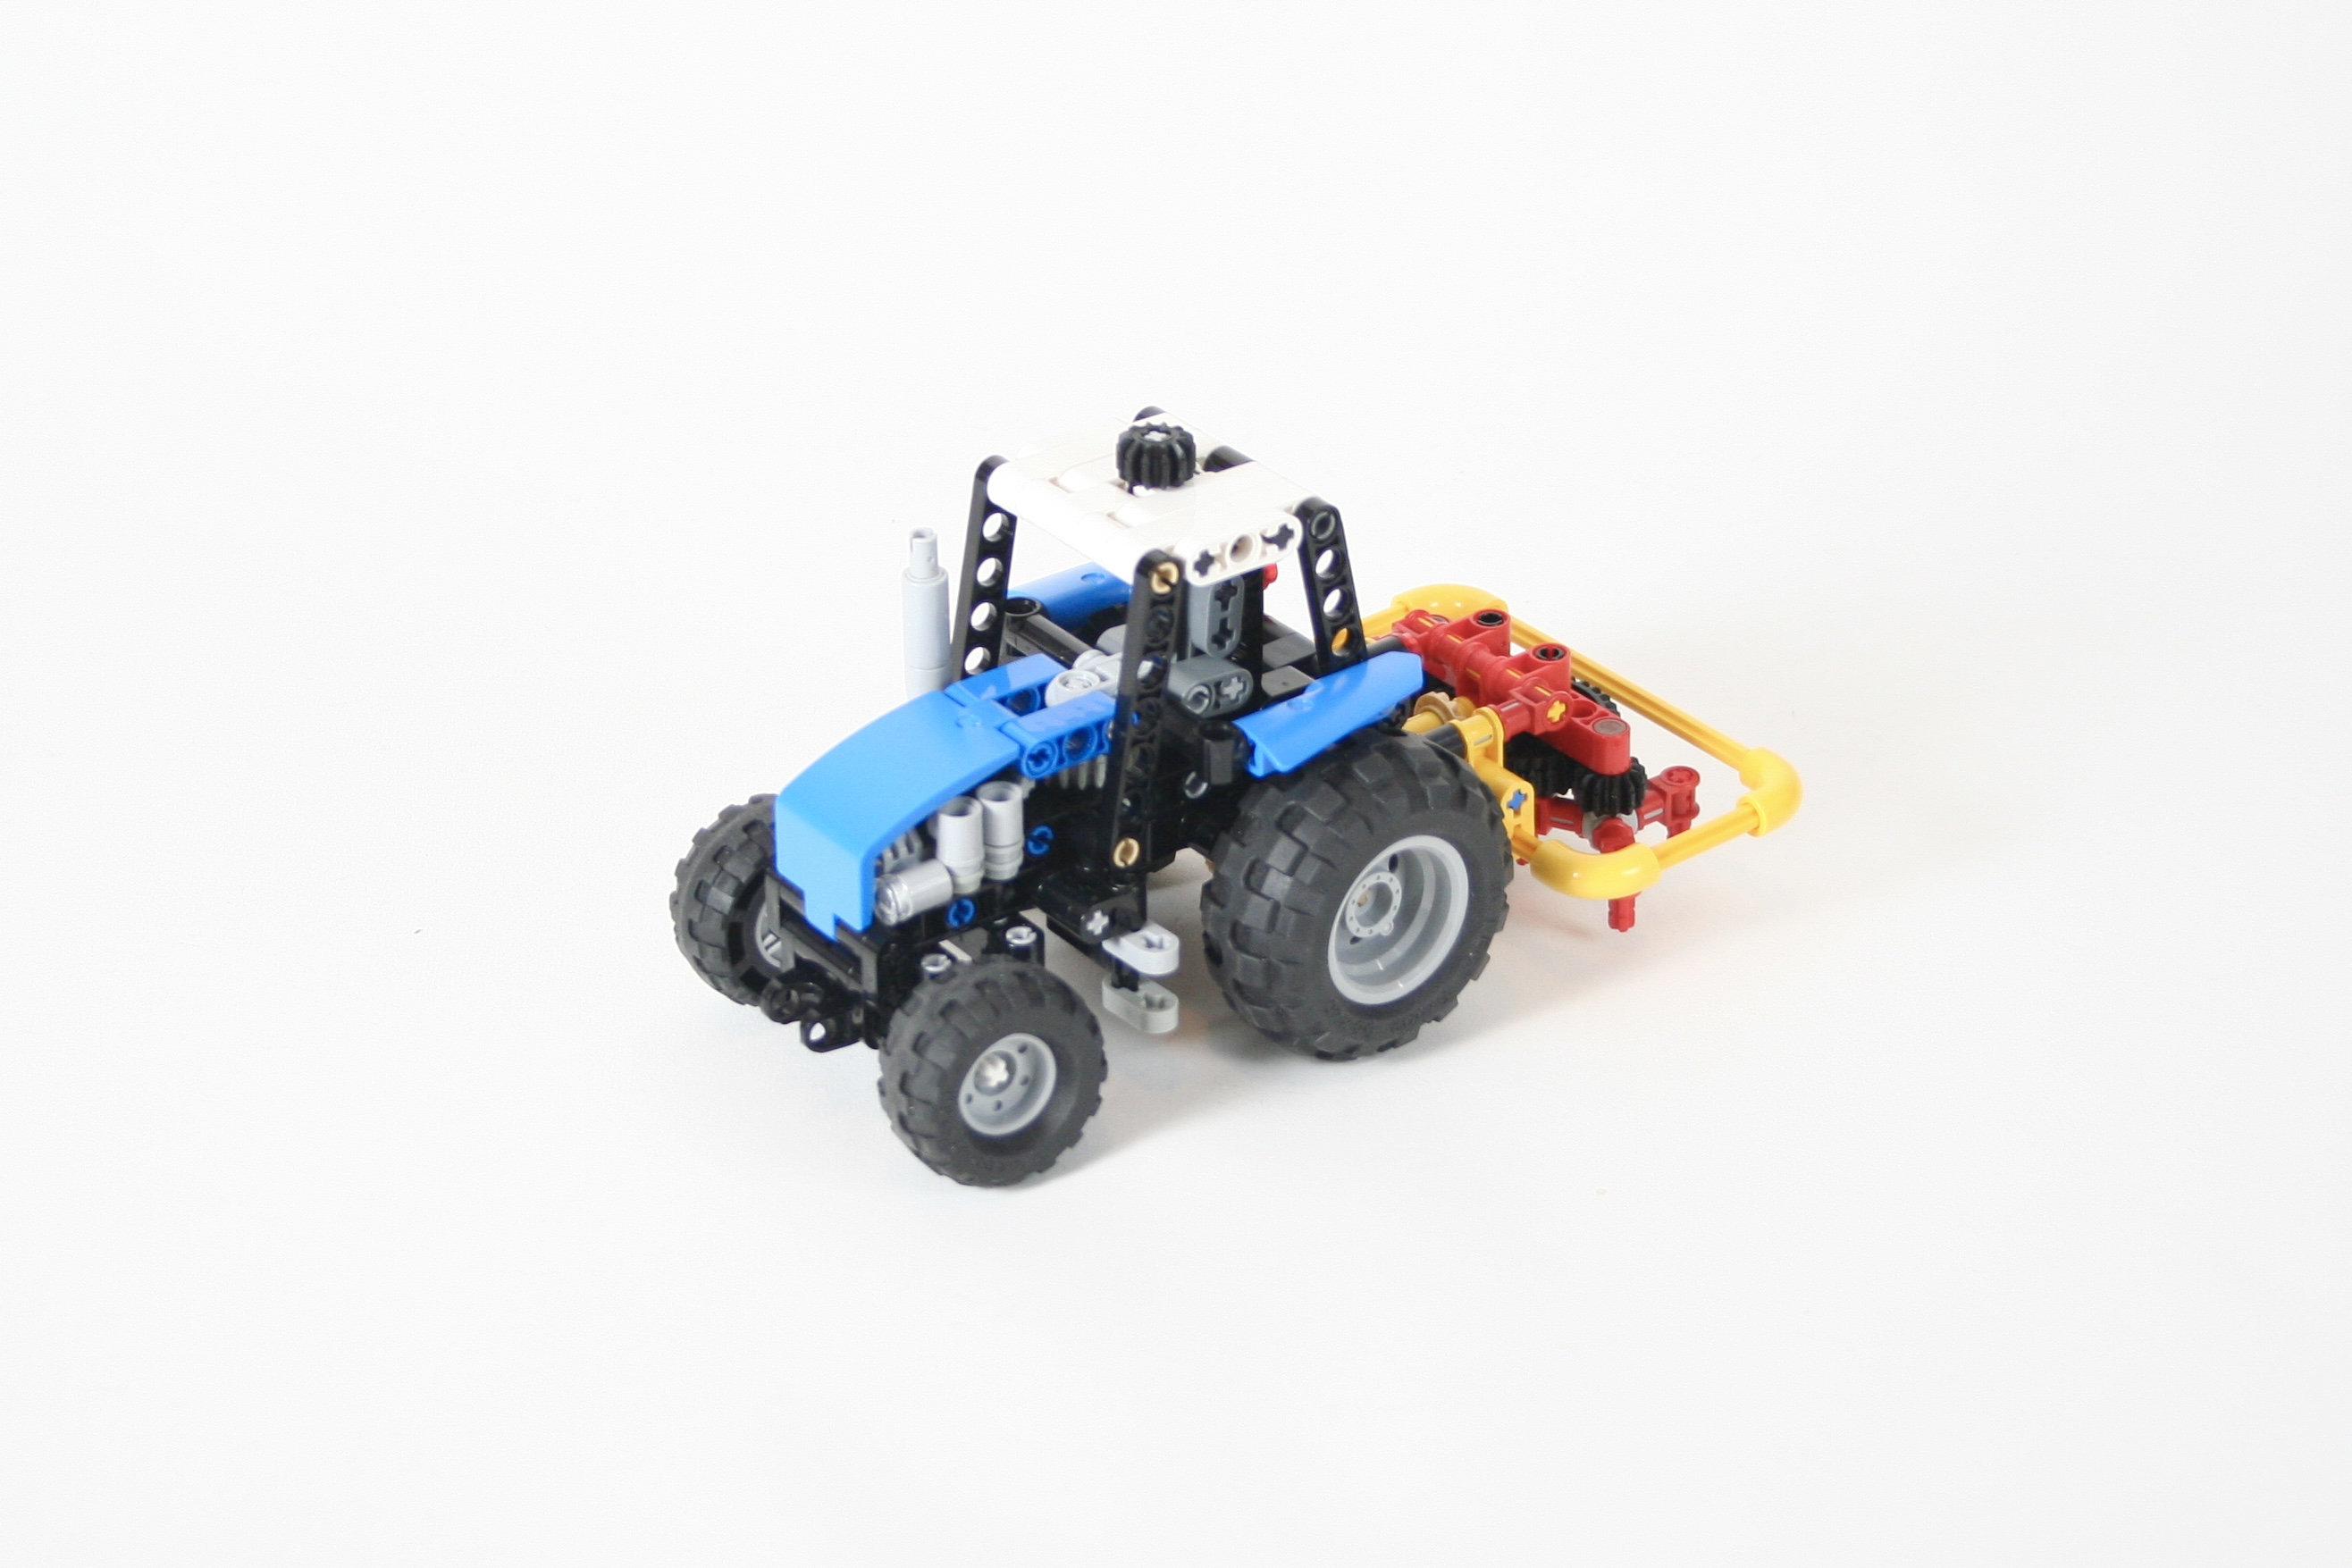
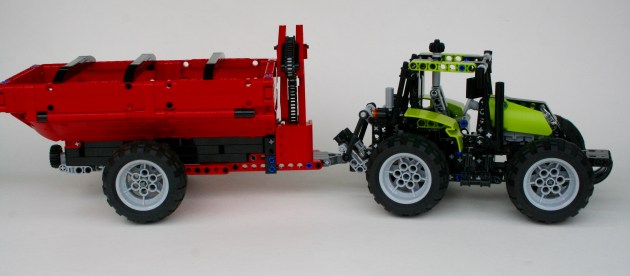
To demonstrate the versatility of this small tractor, I built a hay wagon, and two attachments. Naturally, a little snow plow was built for the front. A little hay tedder was built for the rear which is powered by the PTO. Finally, the hay wagon connects to the rear hitch and has a steerable axle. Free instructions for the wagon are also available at Rebrickable.com.
While this is not one of the best builds I have made in the last couple of years, it served a specific function of clearing my creative head. It accomplished this. It was a fun little build, and I’m sure there will be more like it in the coming years.
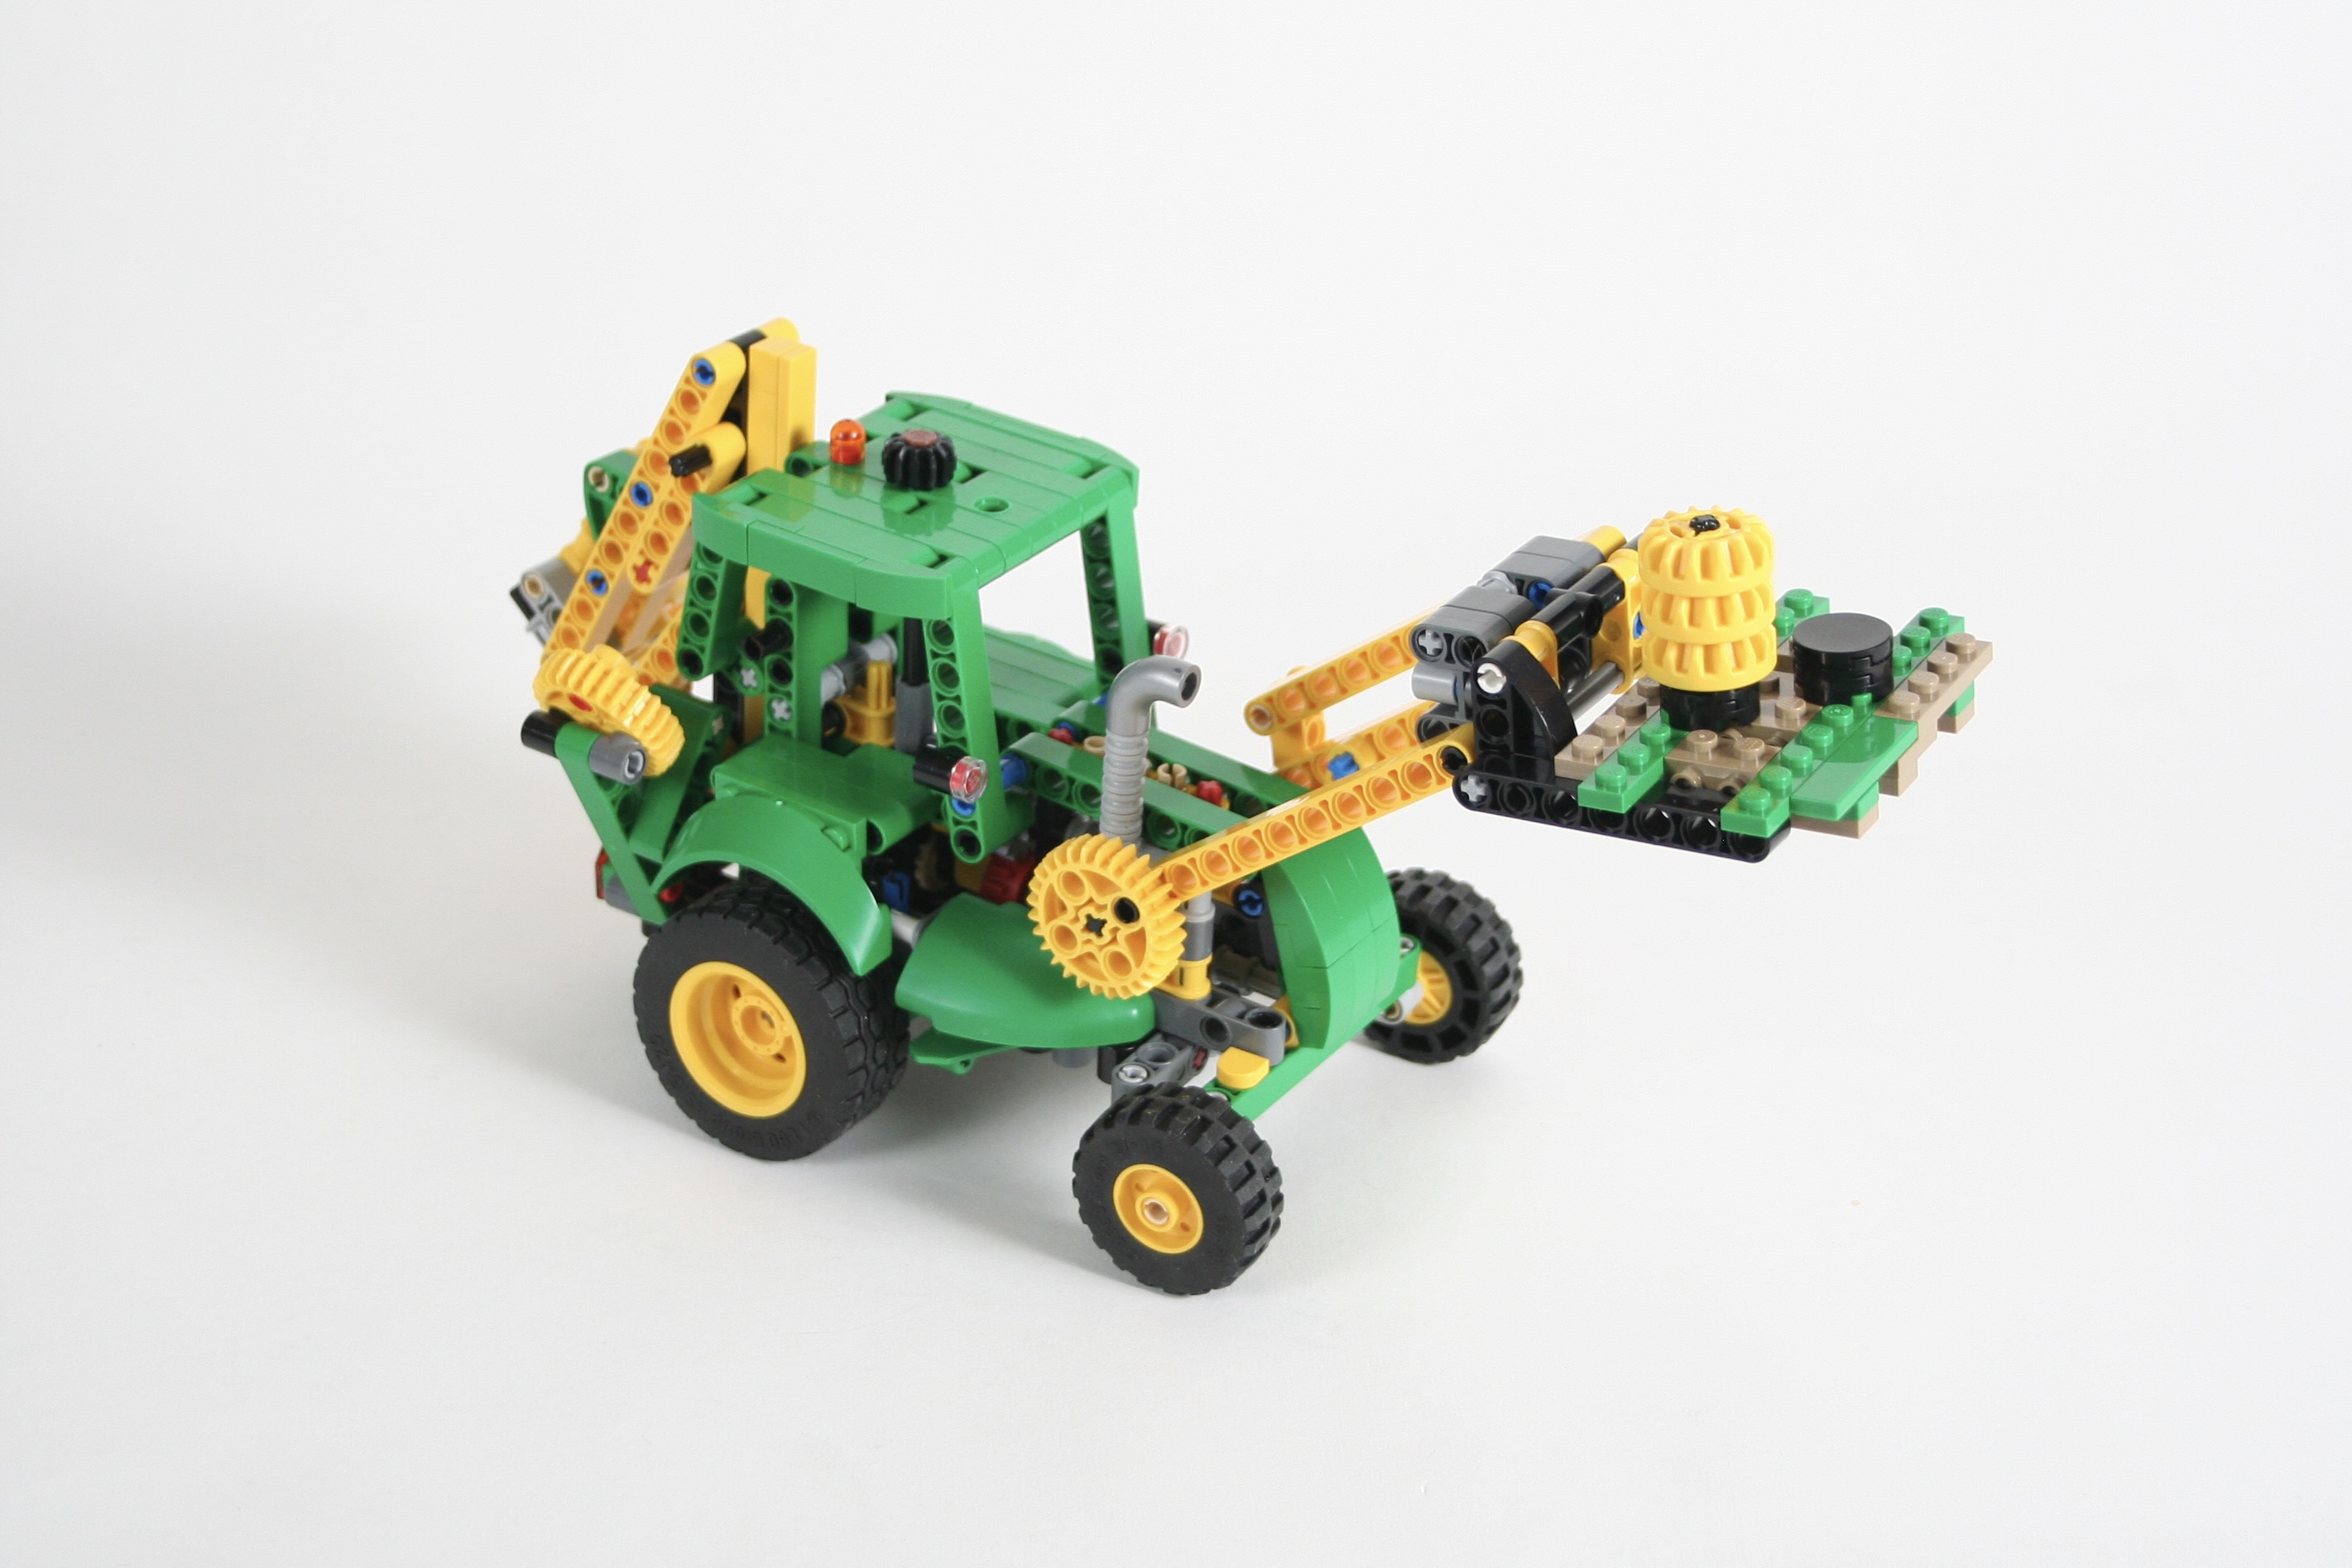
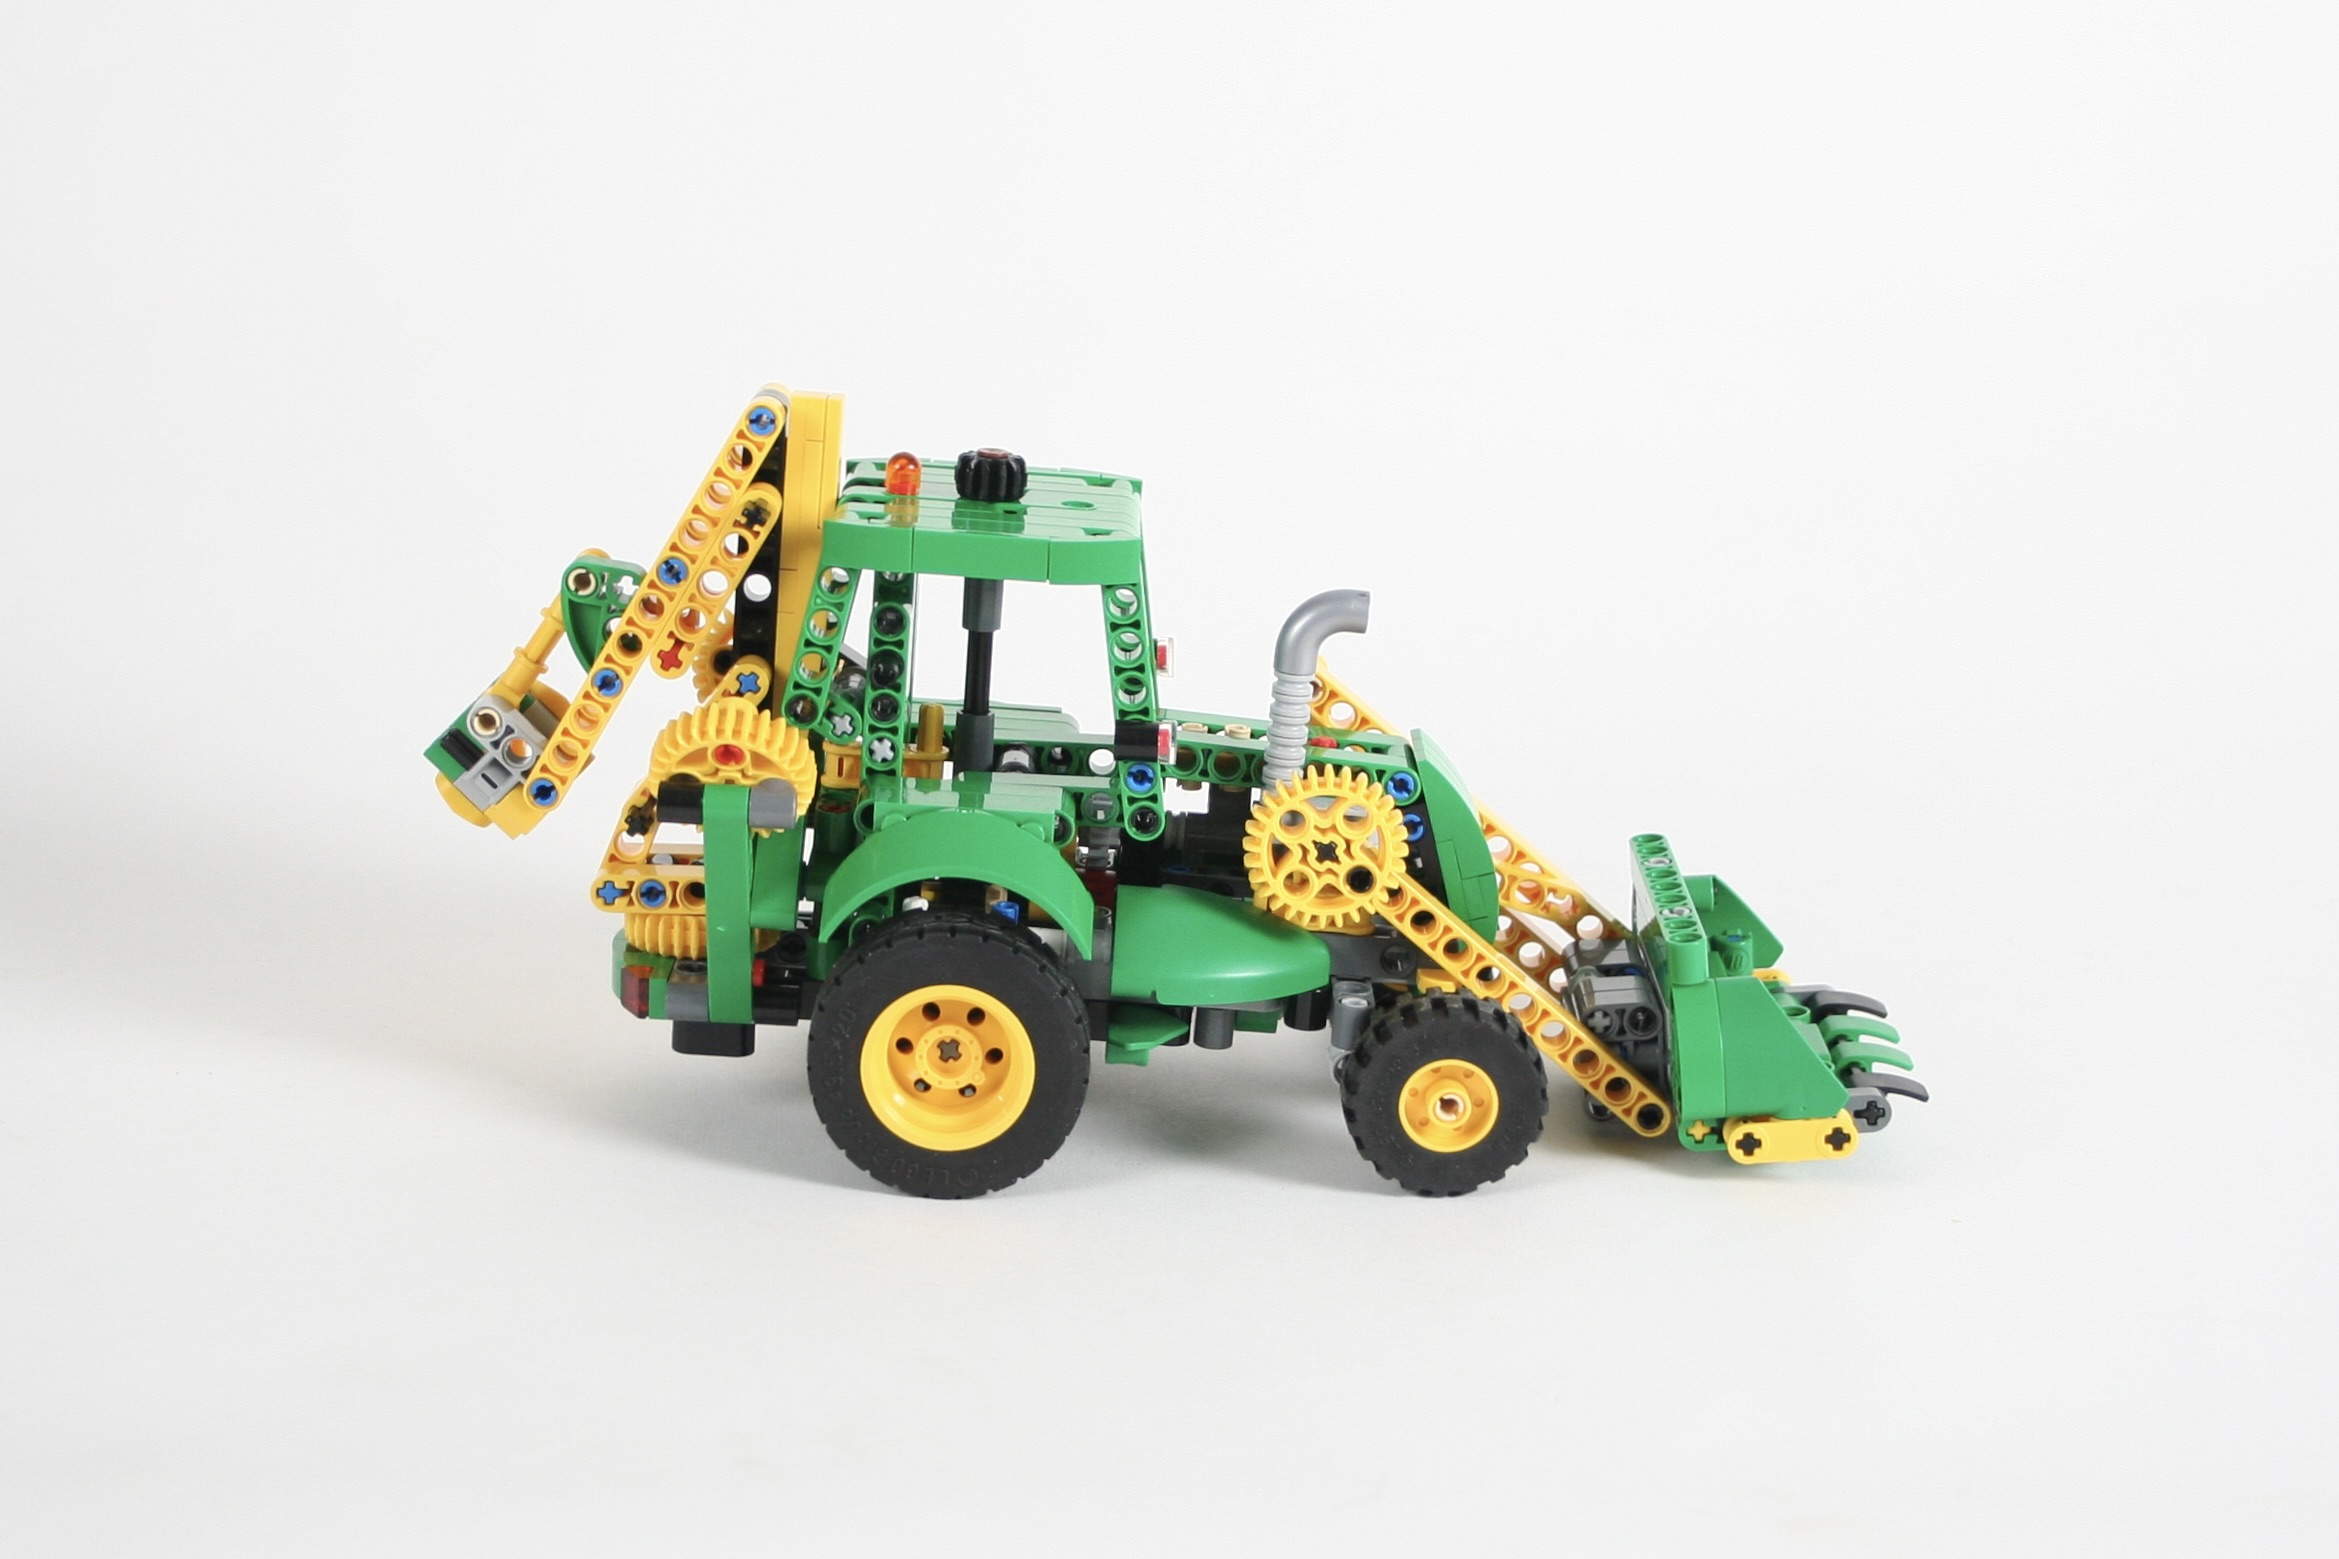
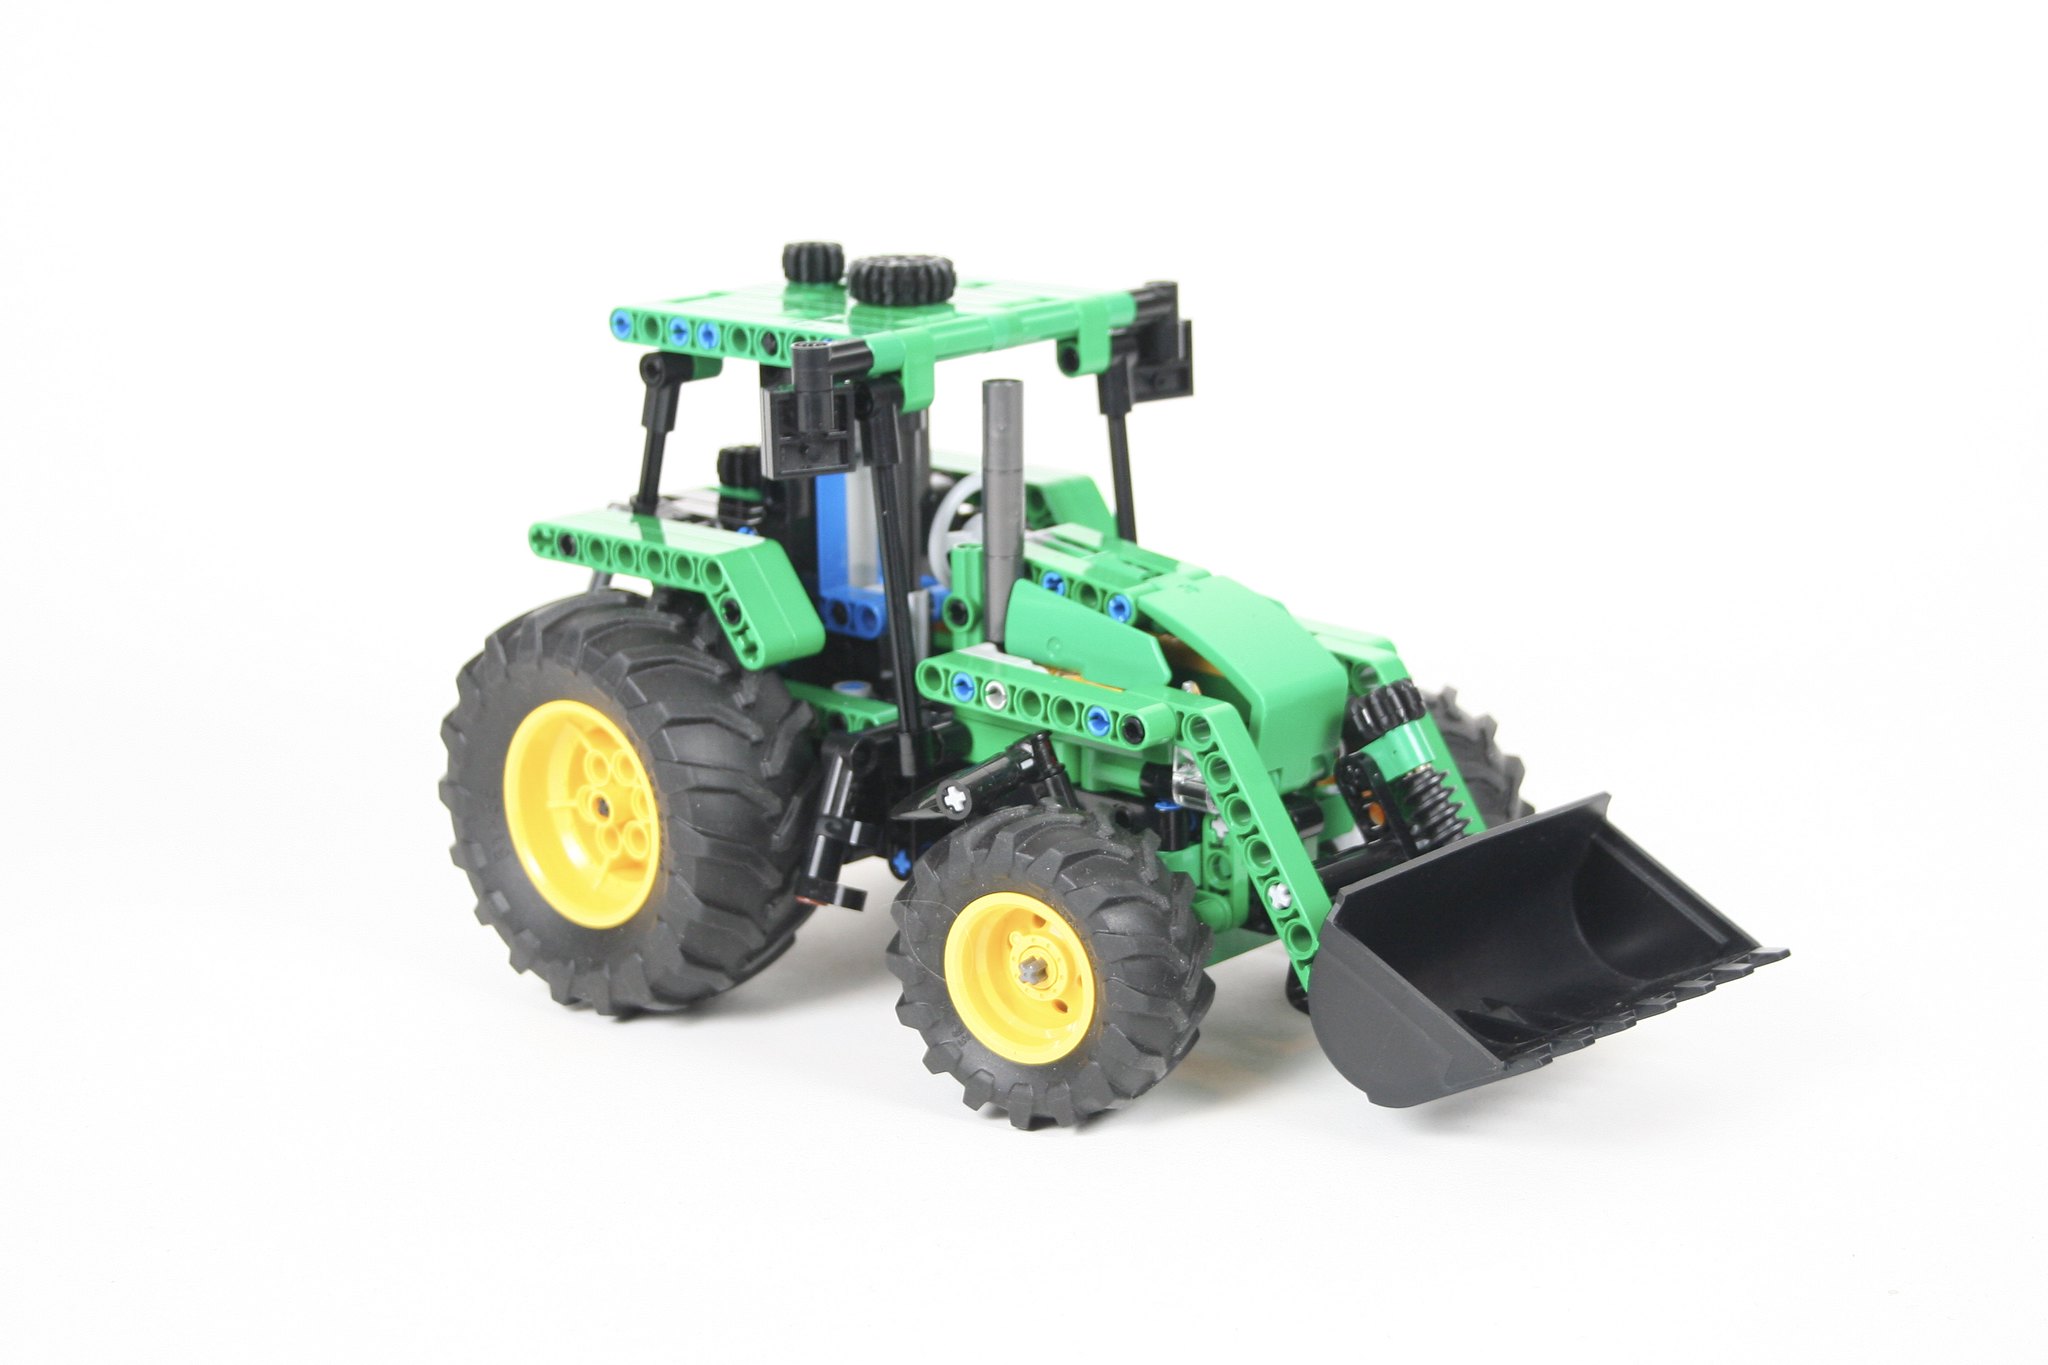
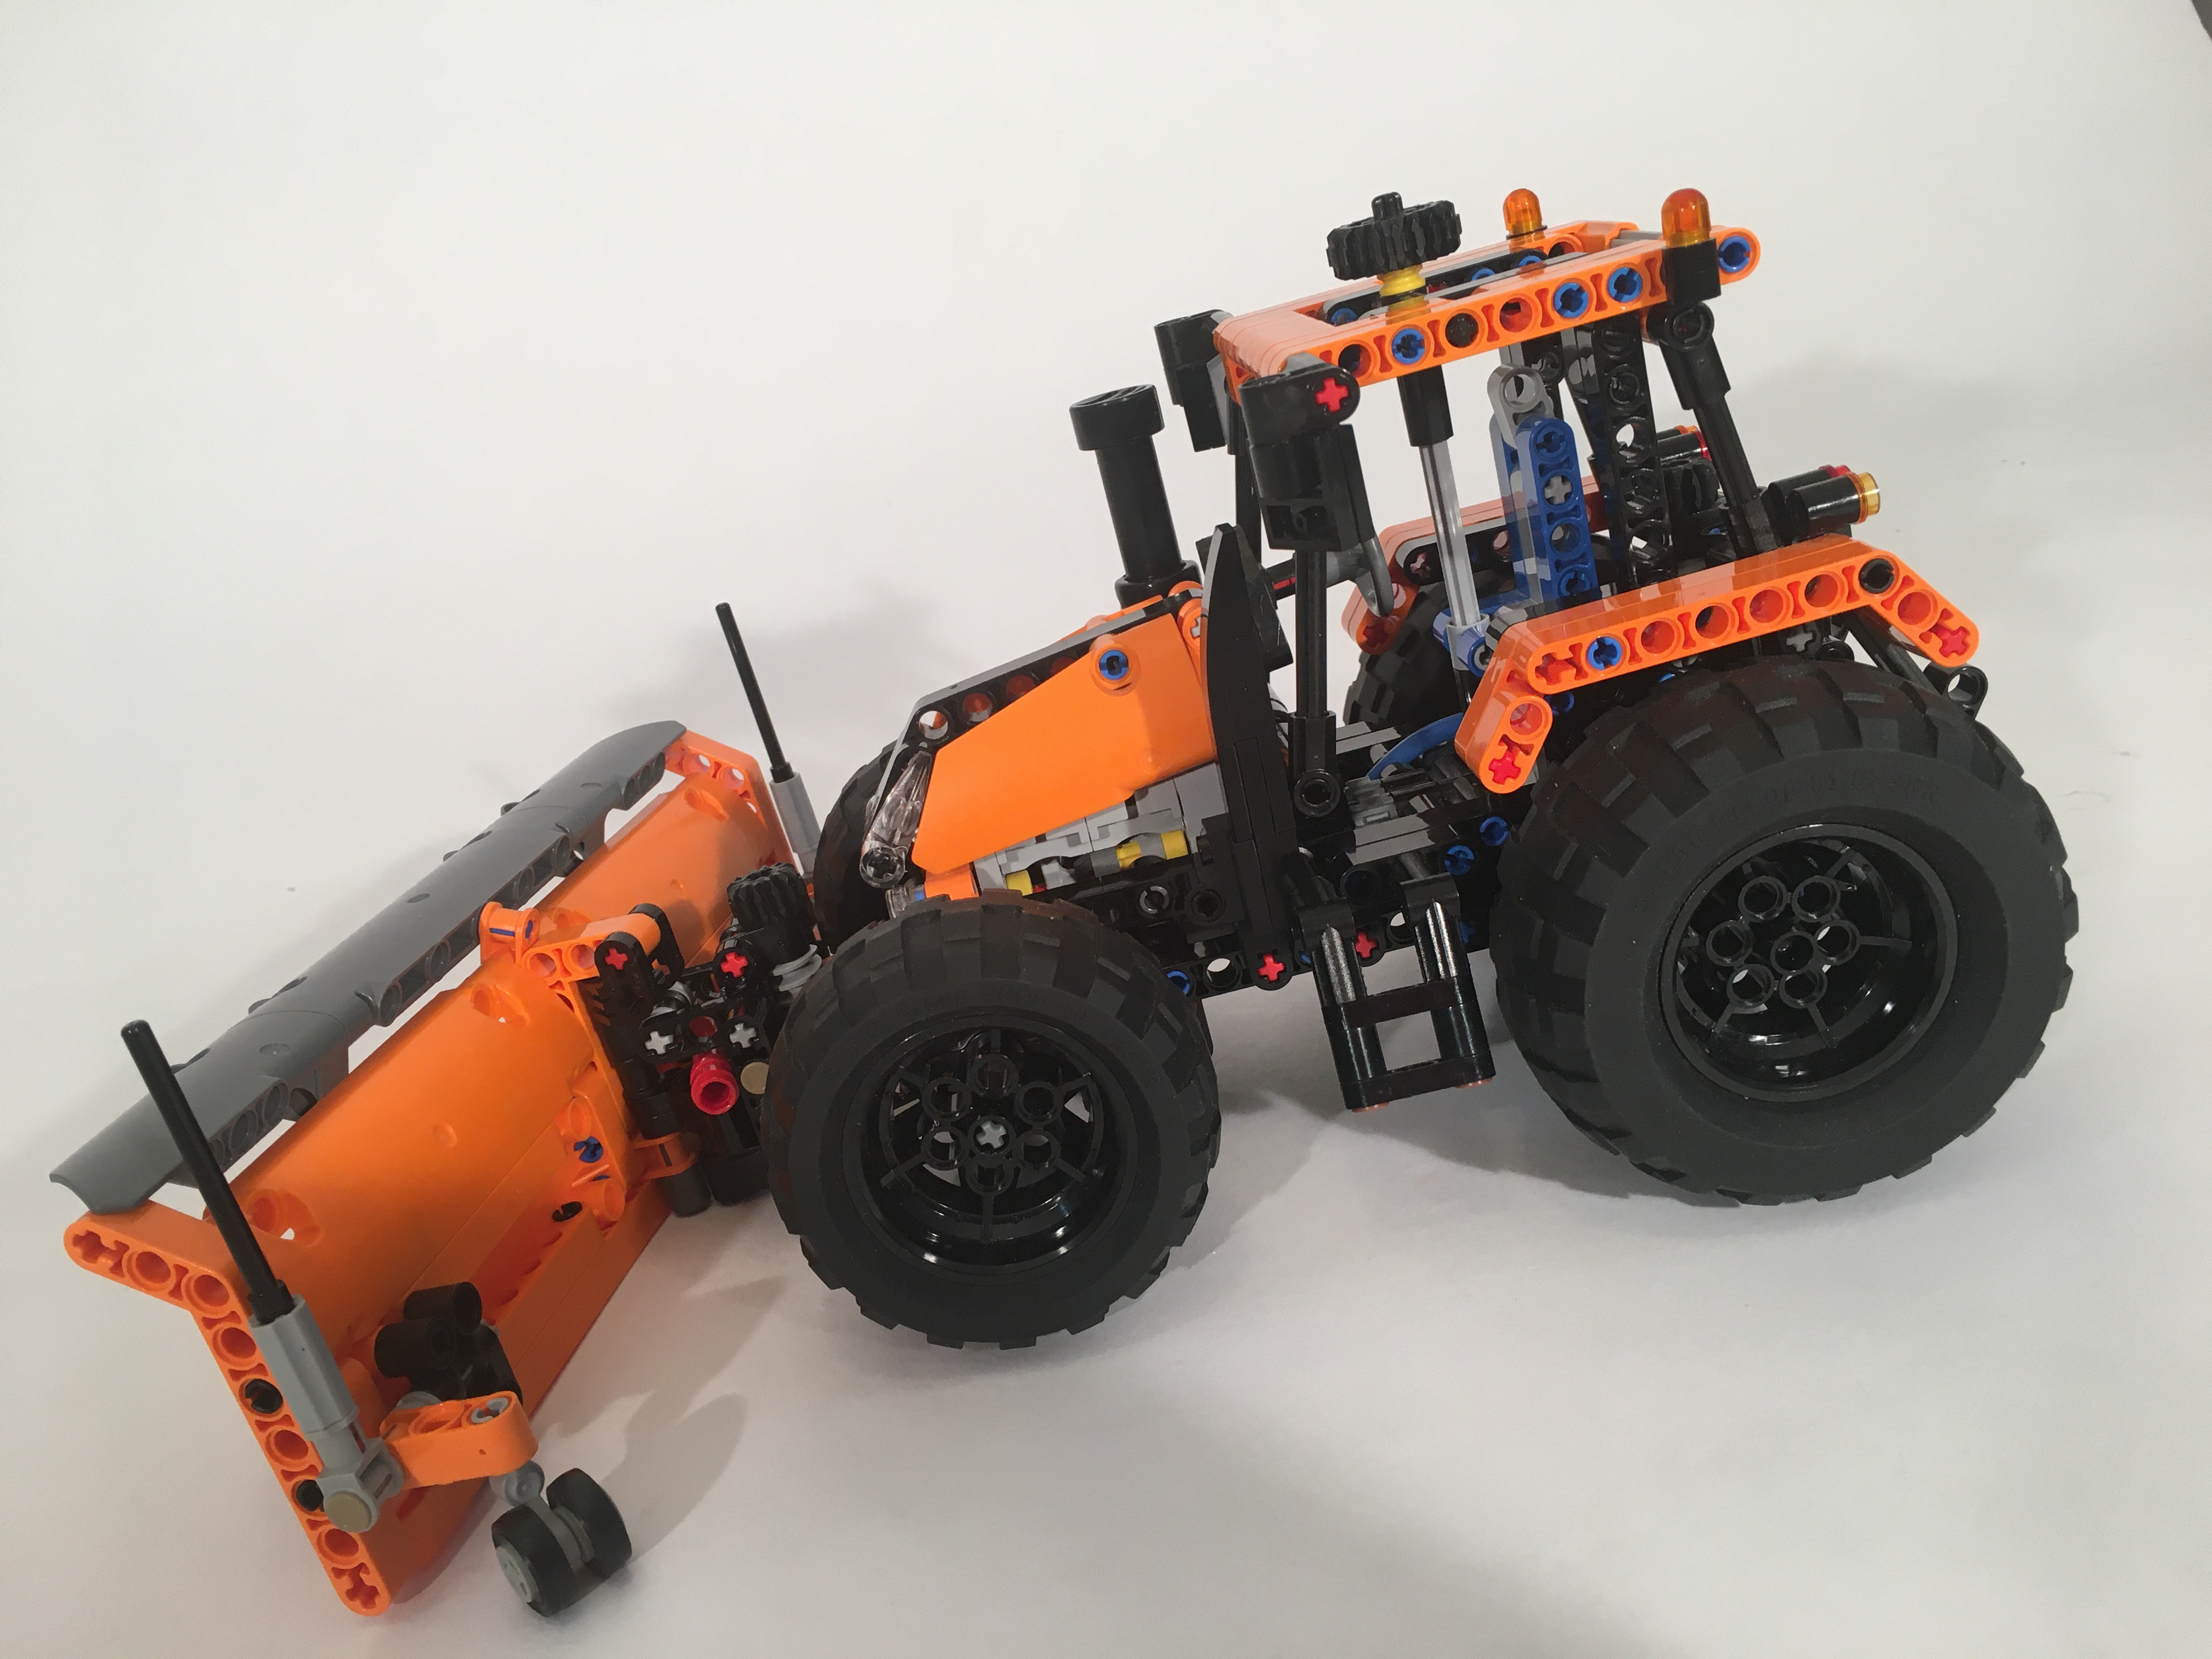
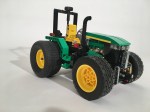
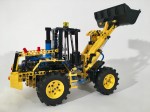
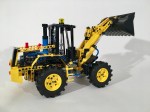
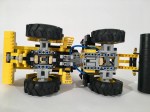
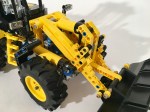
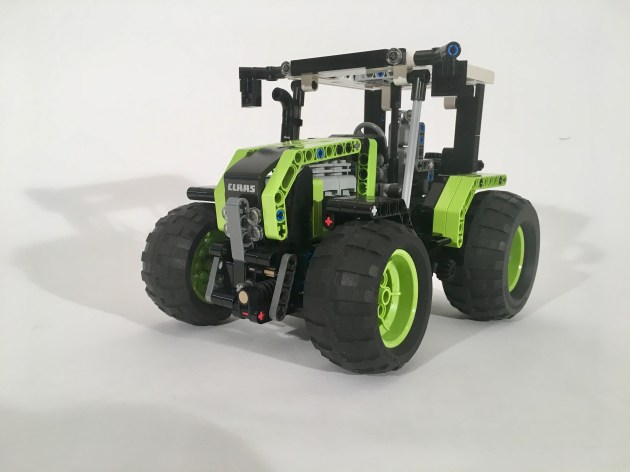
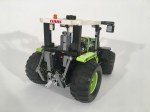
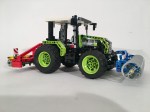
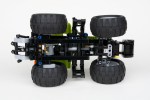
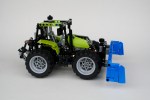
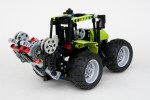
A couple of years ago I decided that it was time to learn how to make an alternative build. I recognize how more people are looking for ideas to turn a set they have purchased into another build. Well, since I enjoy building other design, I am happy to share these with other people. Plus I like the challenge an alternative build poses: a limited amount of parts to make a MOC. LEGO set 42168 is a cute little tractor with some fun features, but what I really like about it is the green. It is a small, accessible set, and has some fun parts, that can be used to build something else.
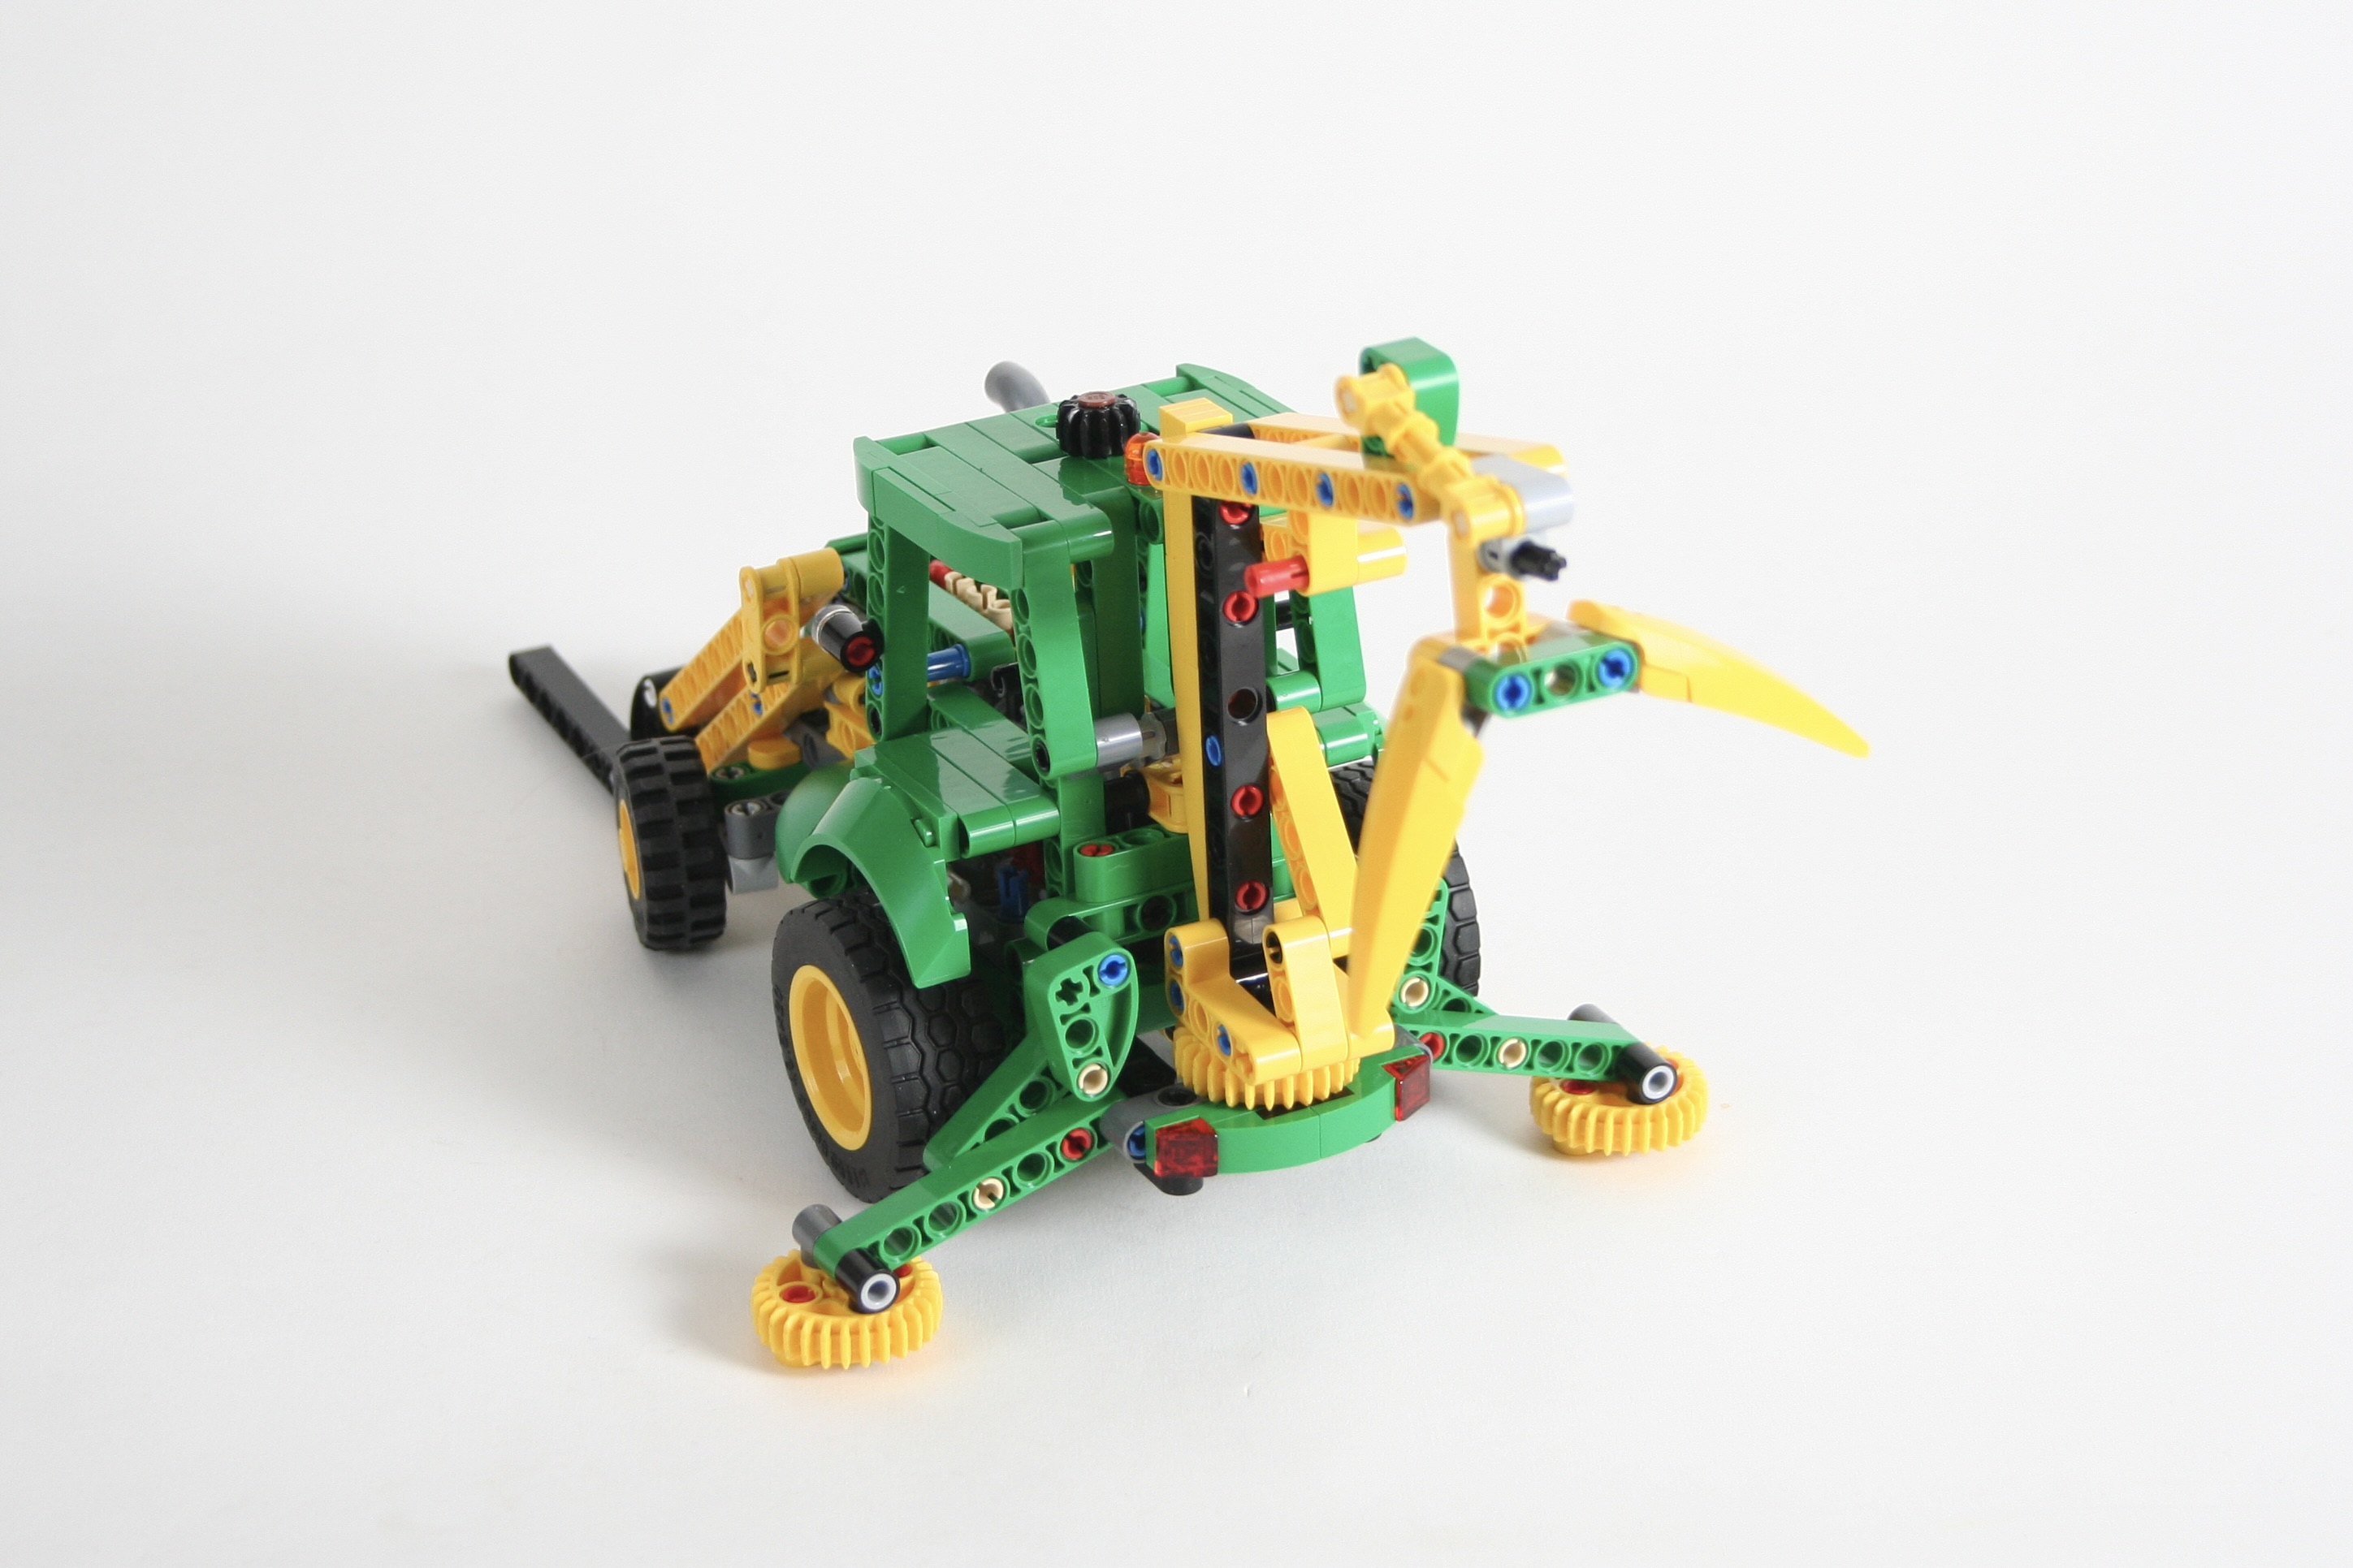
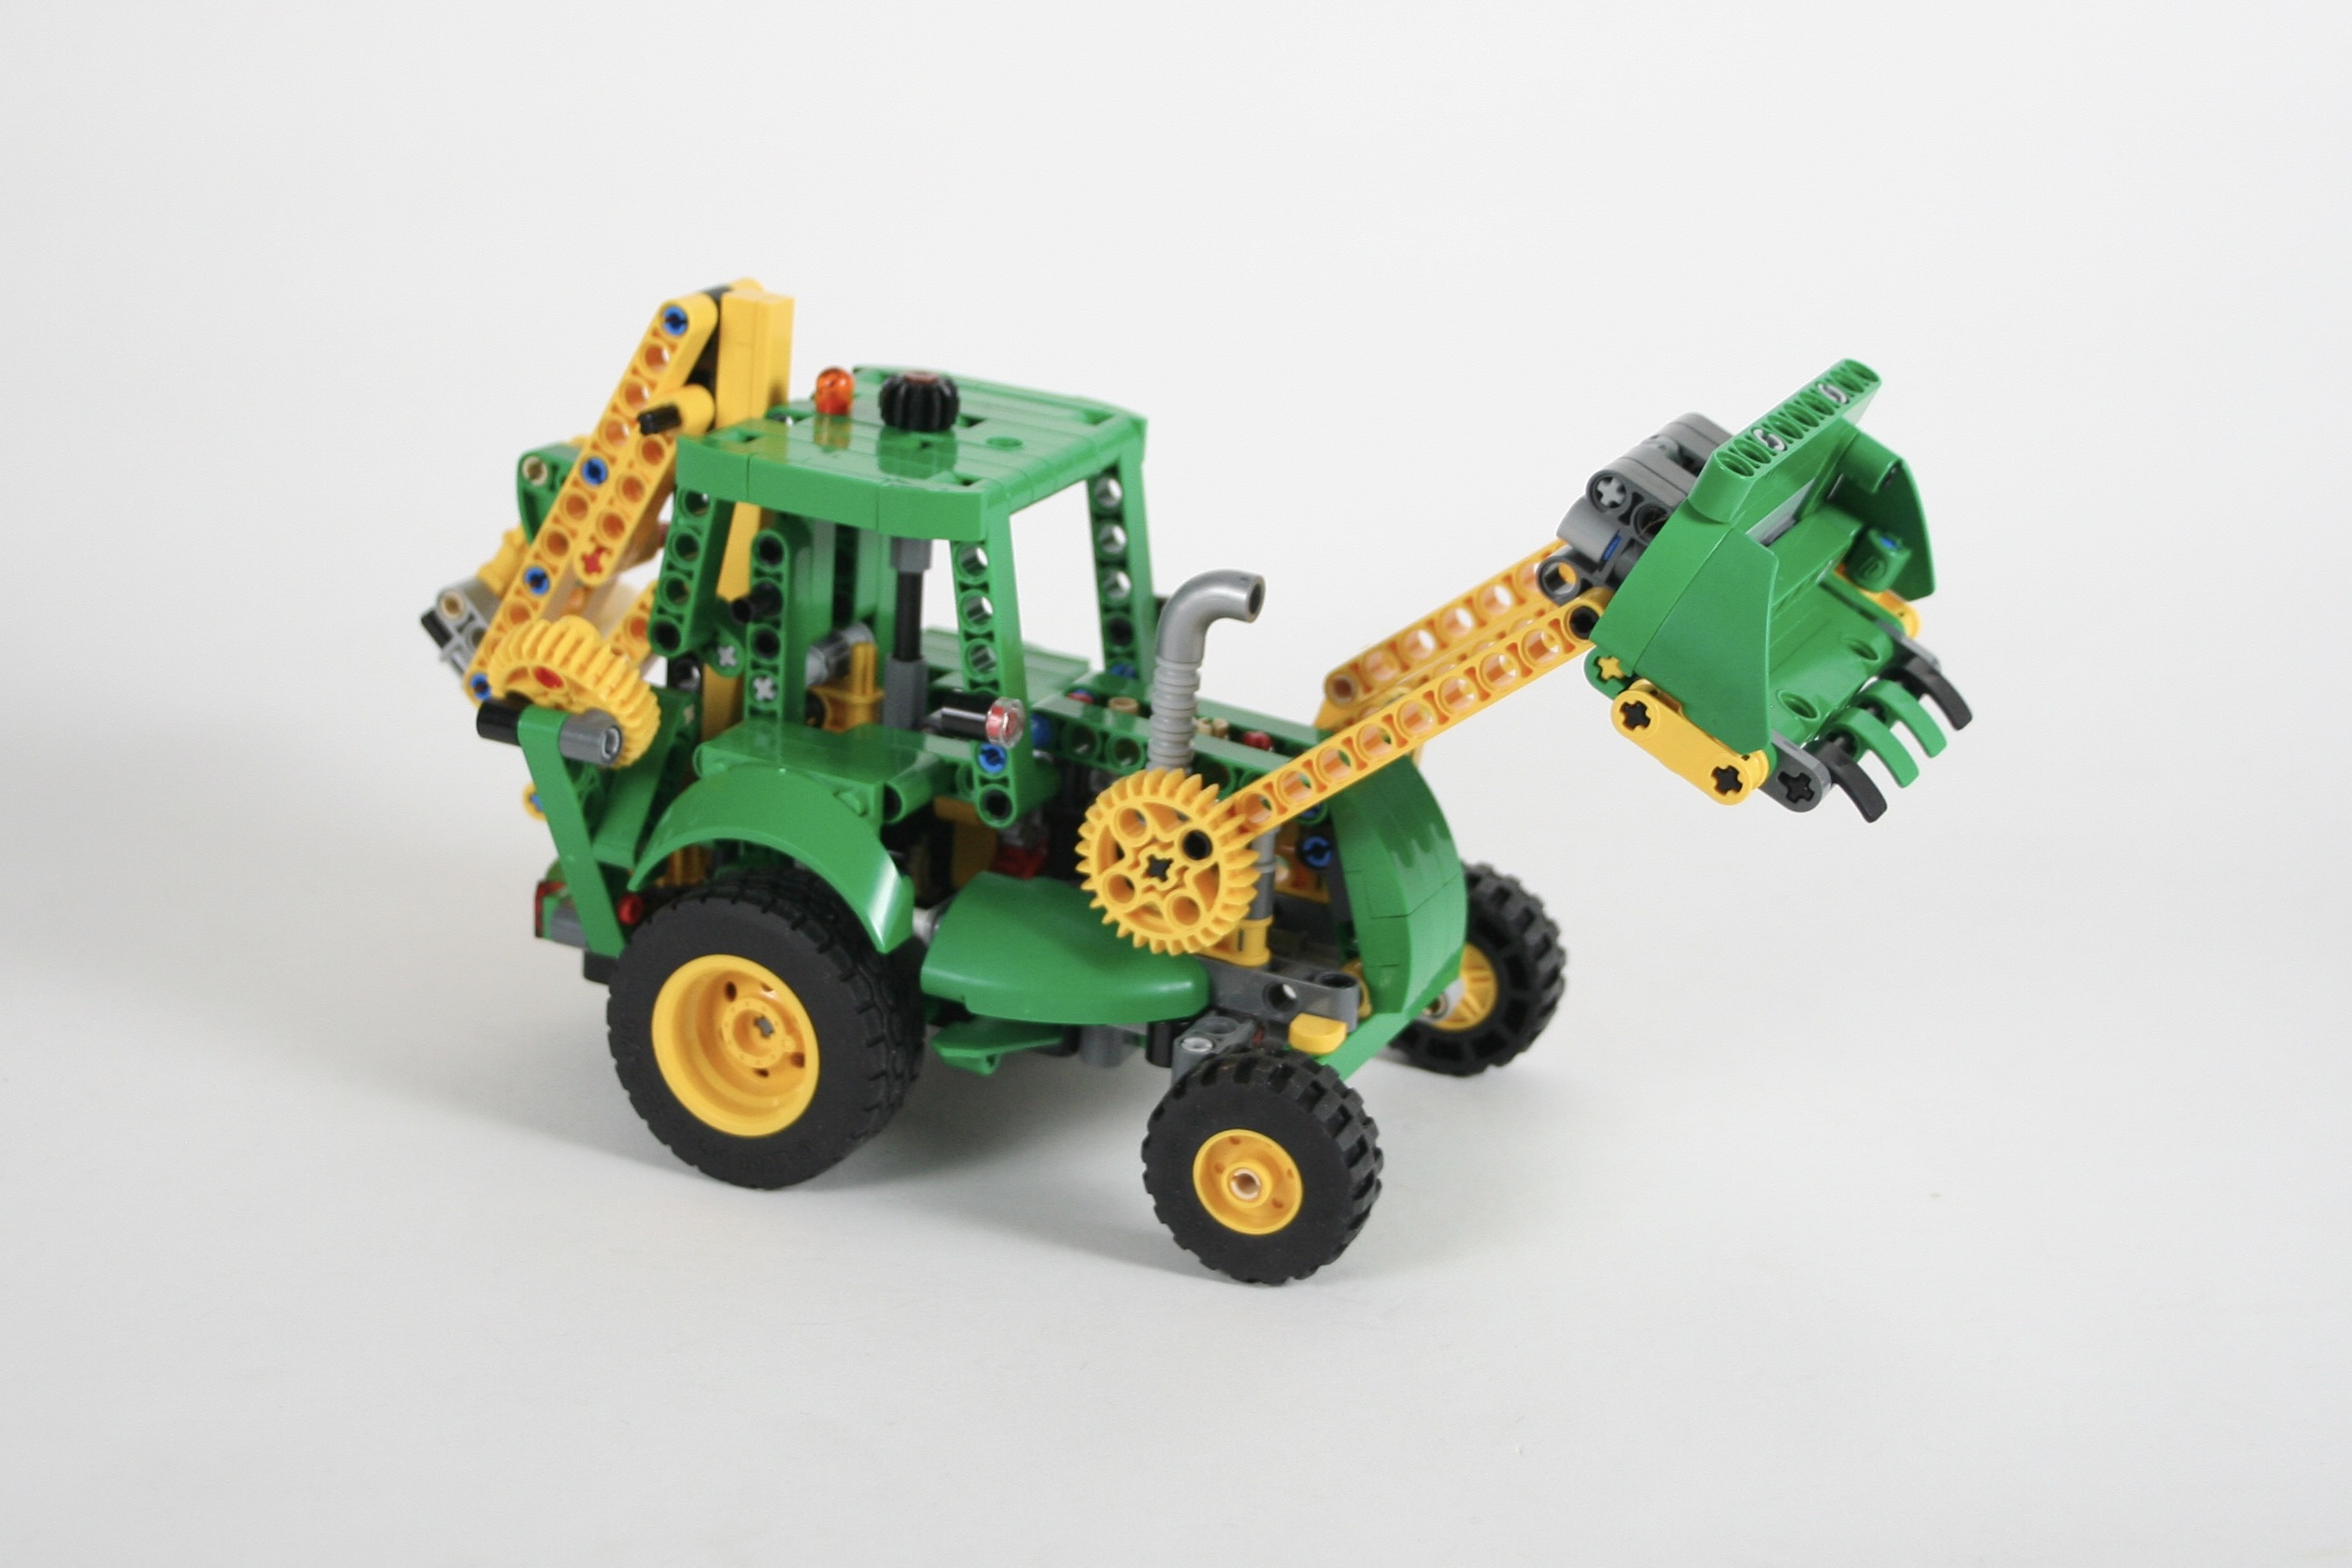
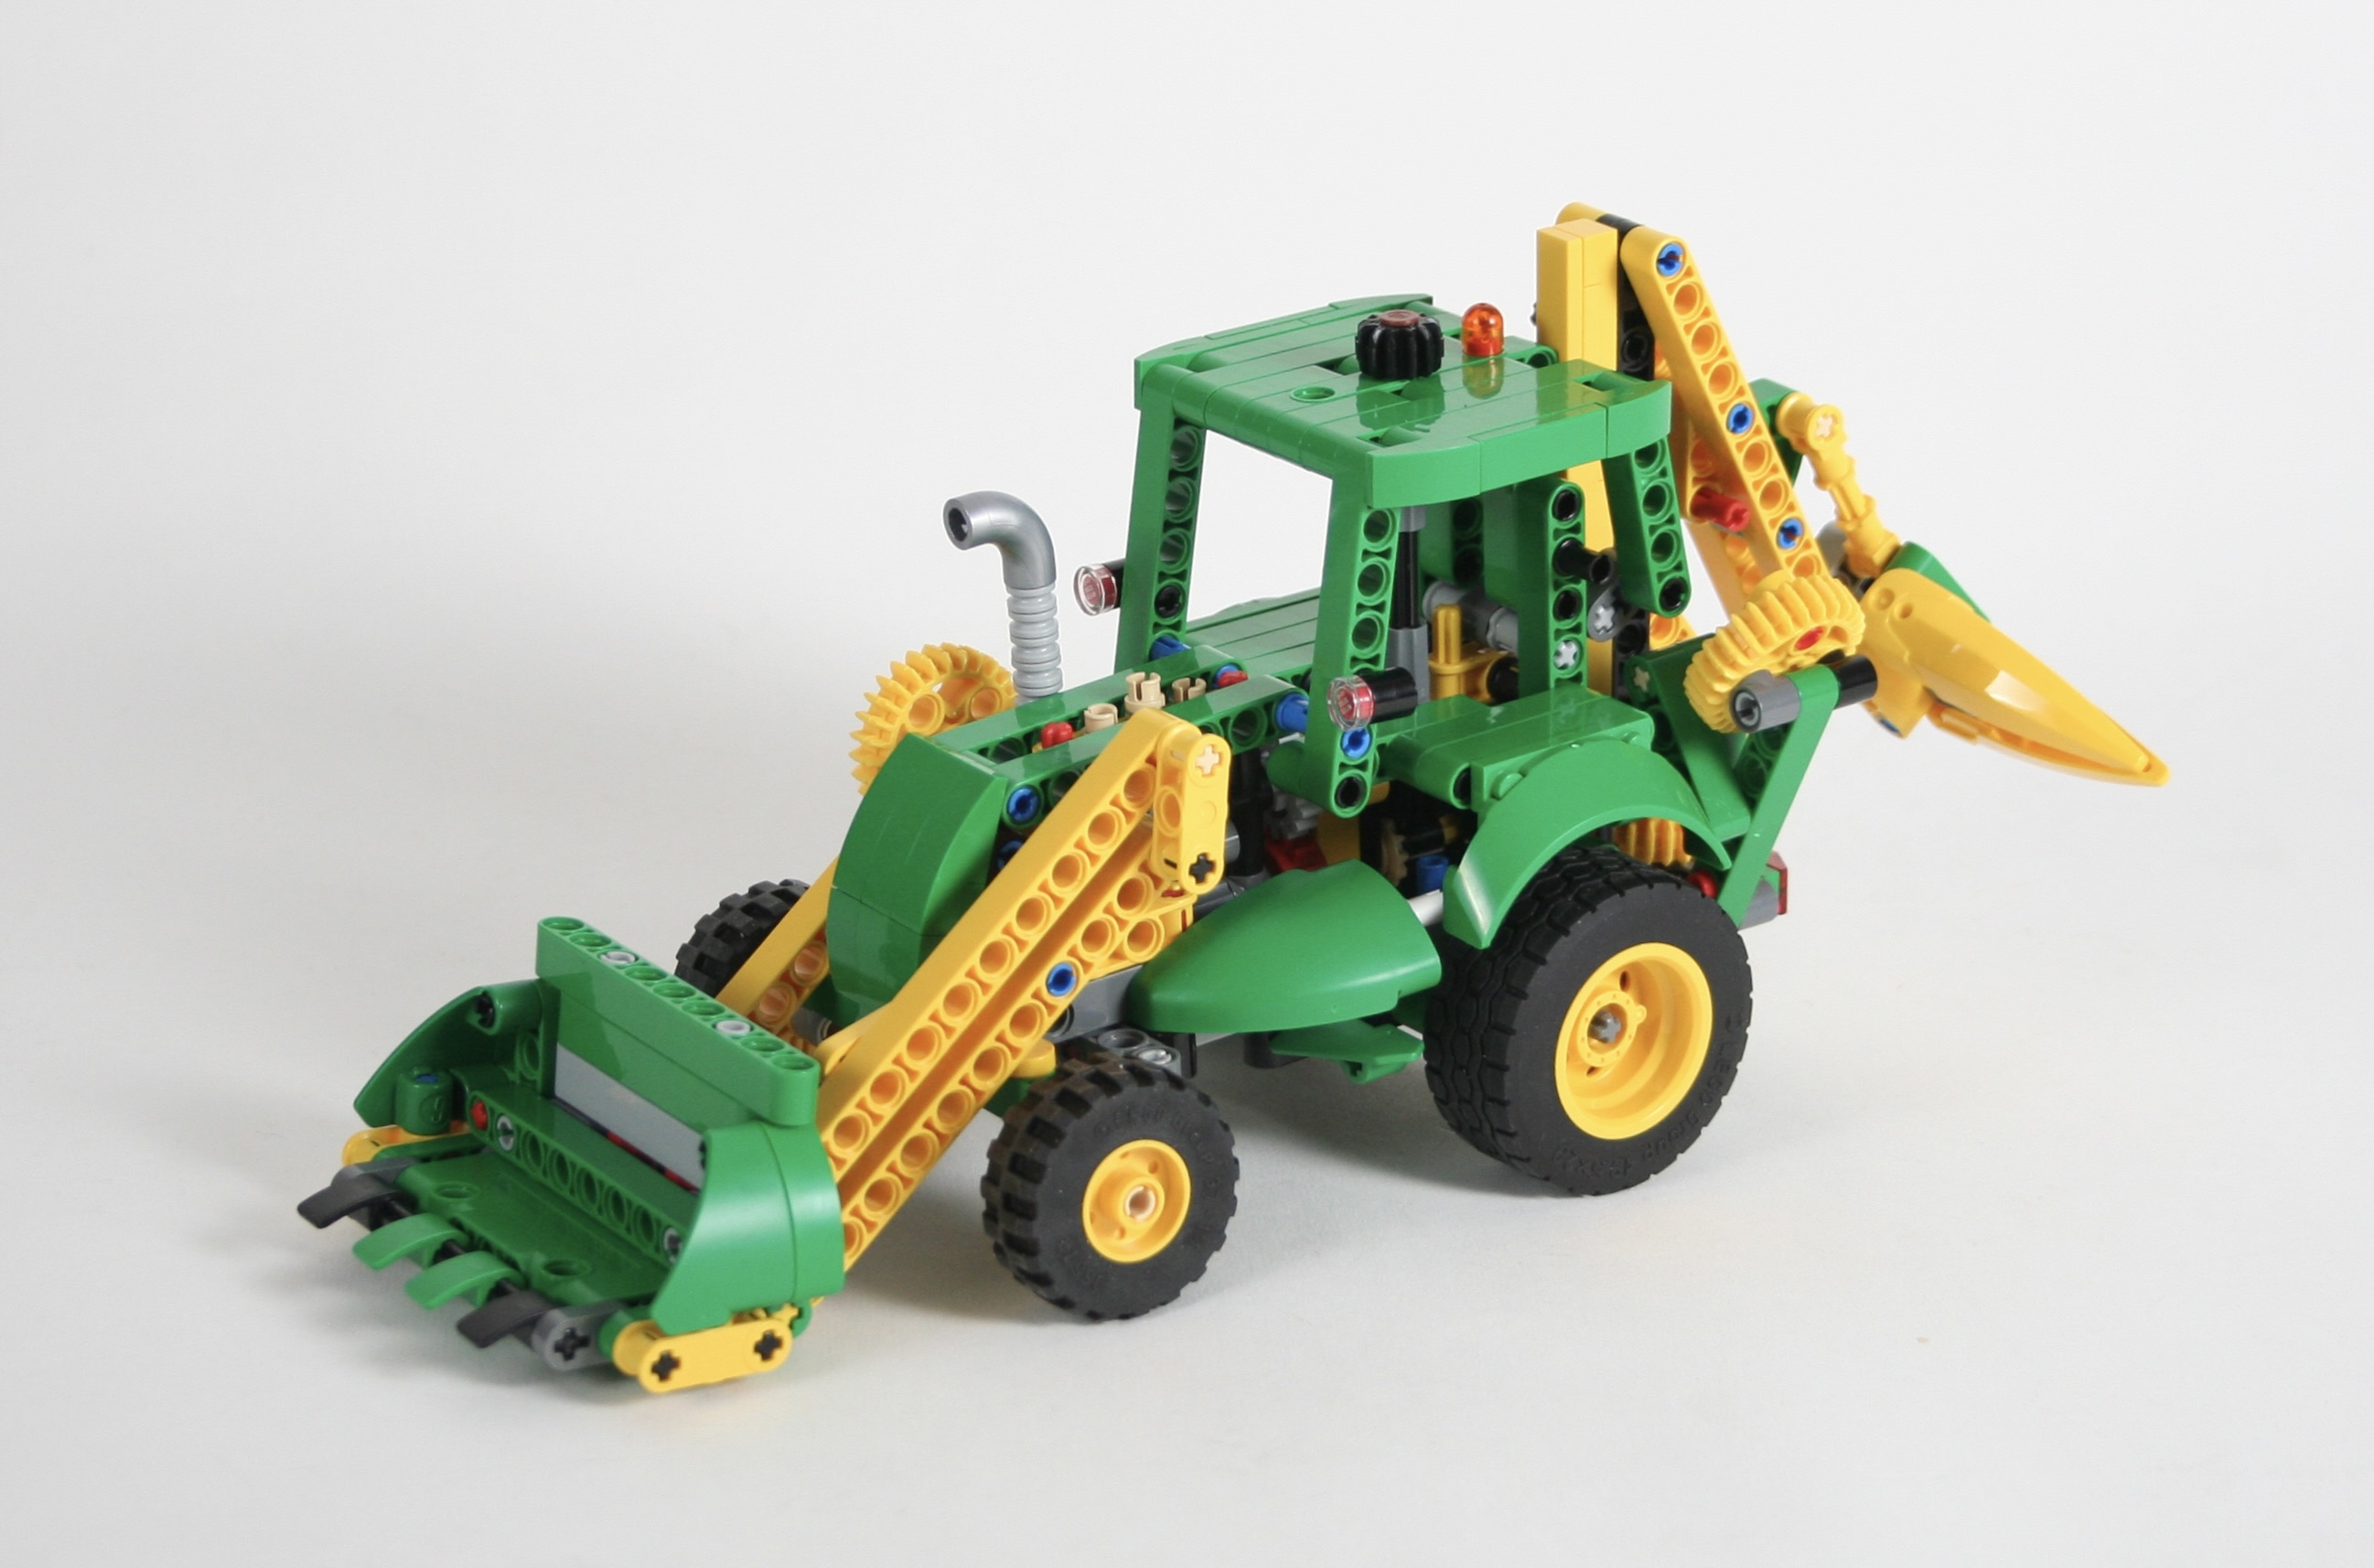
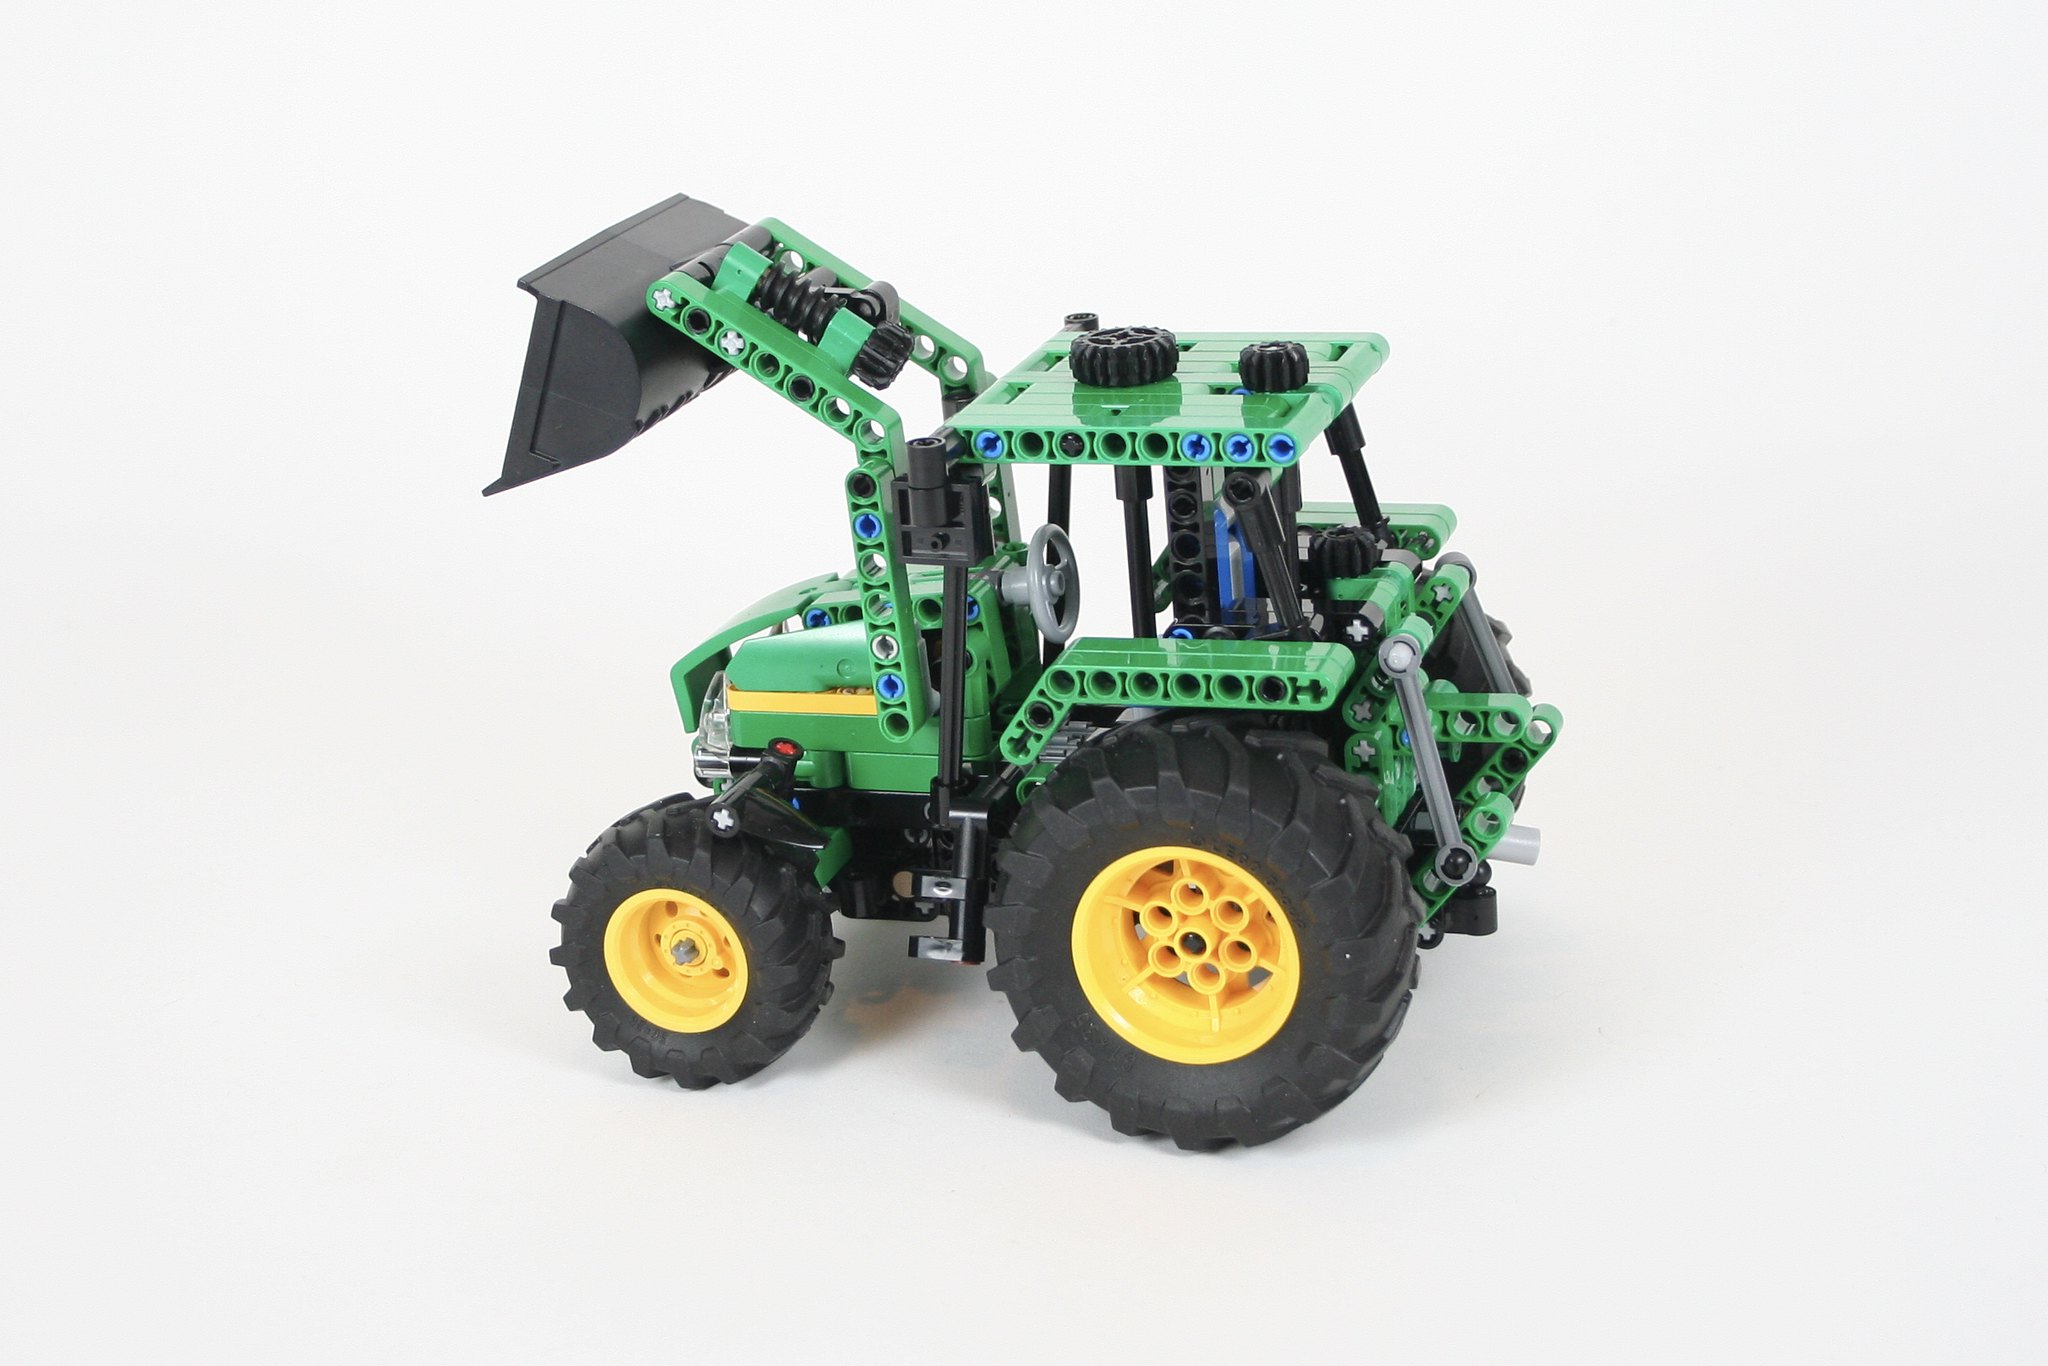
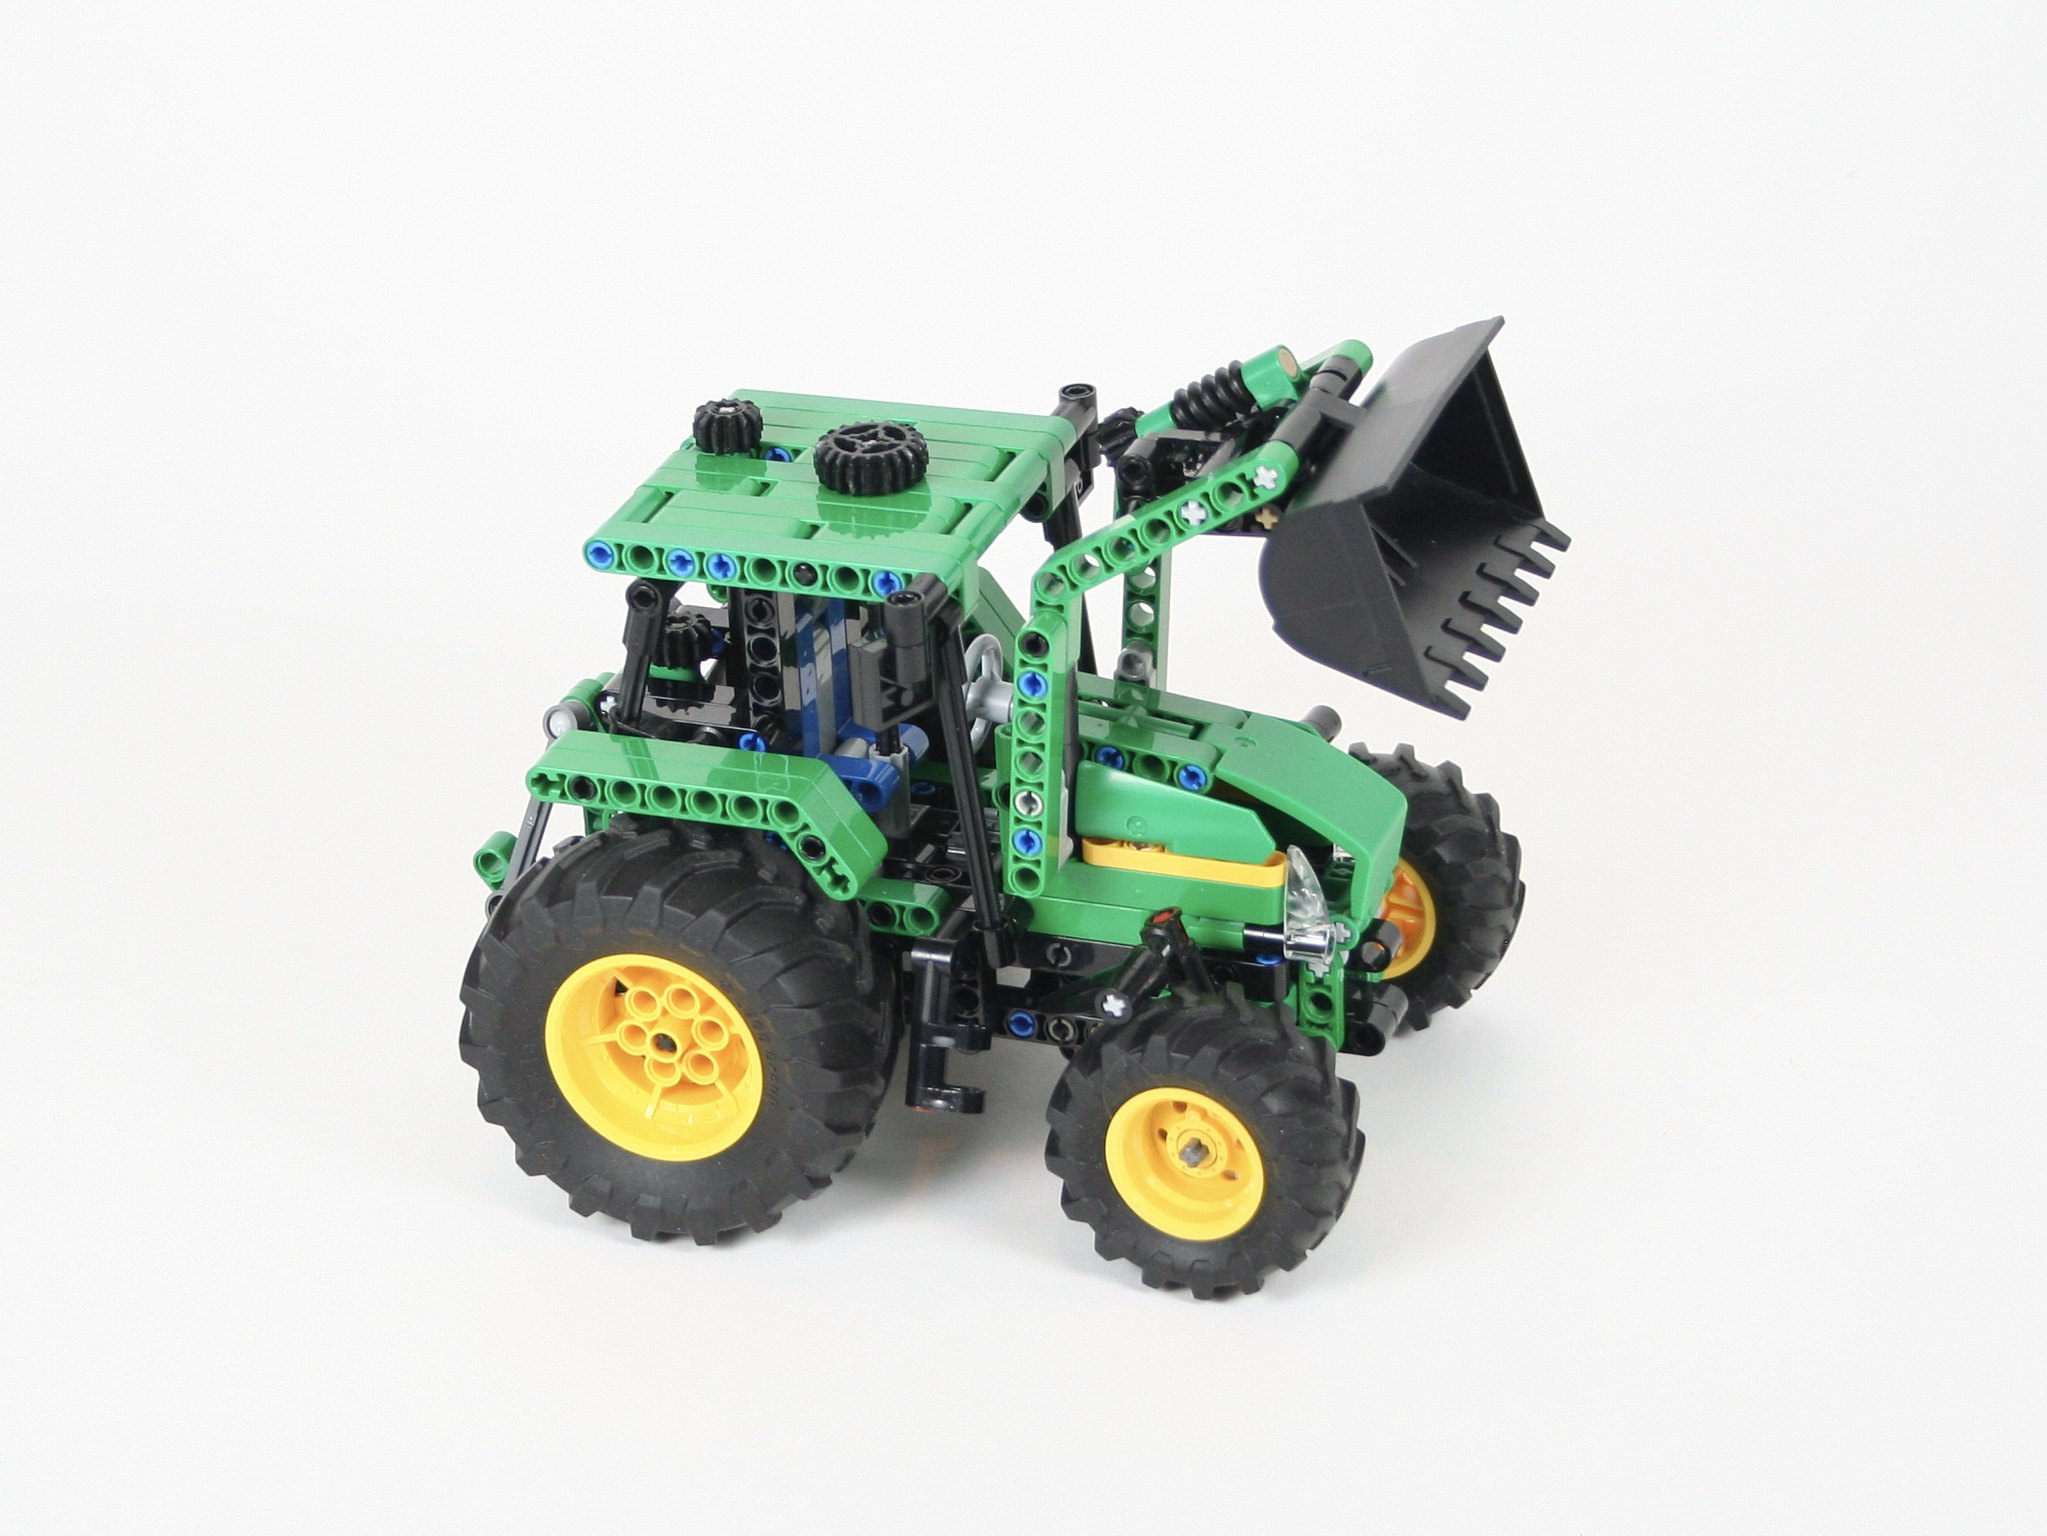
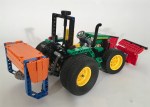
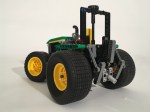
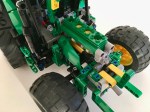
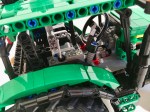
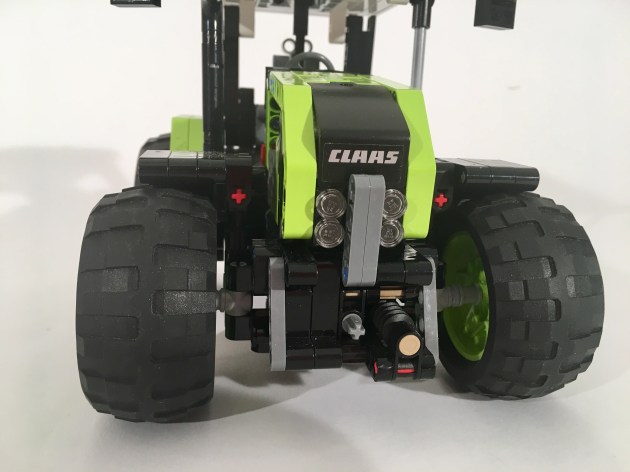
Since the set comes with two different size wheels, I decided a little backhoe would be a good idea. Plus, with the amount of yellow parts, I could use them on the rear arm and front loader. As I do with all of my builds, I started with draft including all the functions I wanted the final build to have. Quickly I had a draft with working steering and a little fake I3 engine. The I worked on how the front loader would work, and the rear arm mechanism.
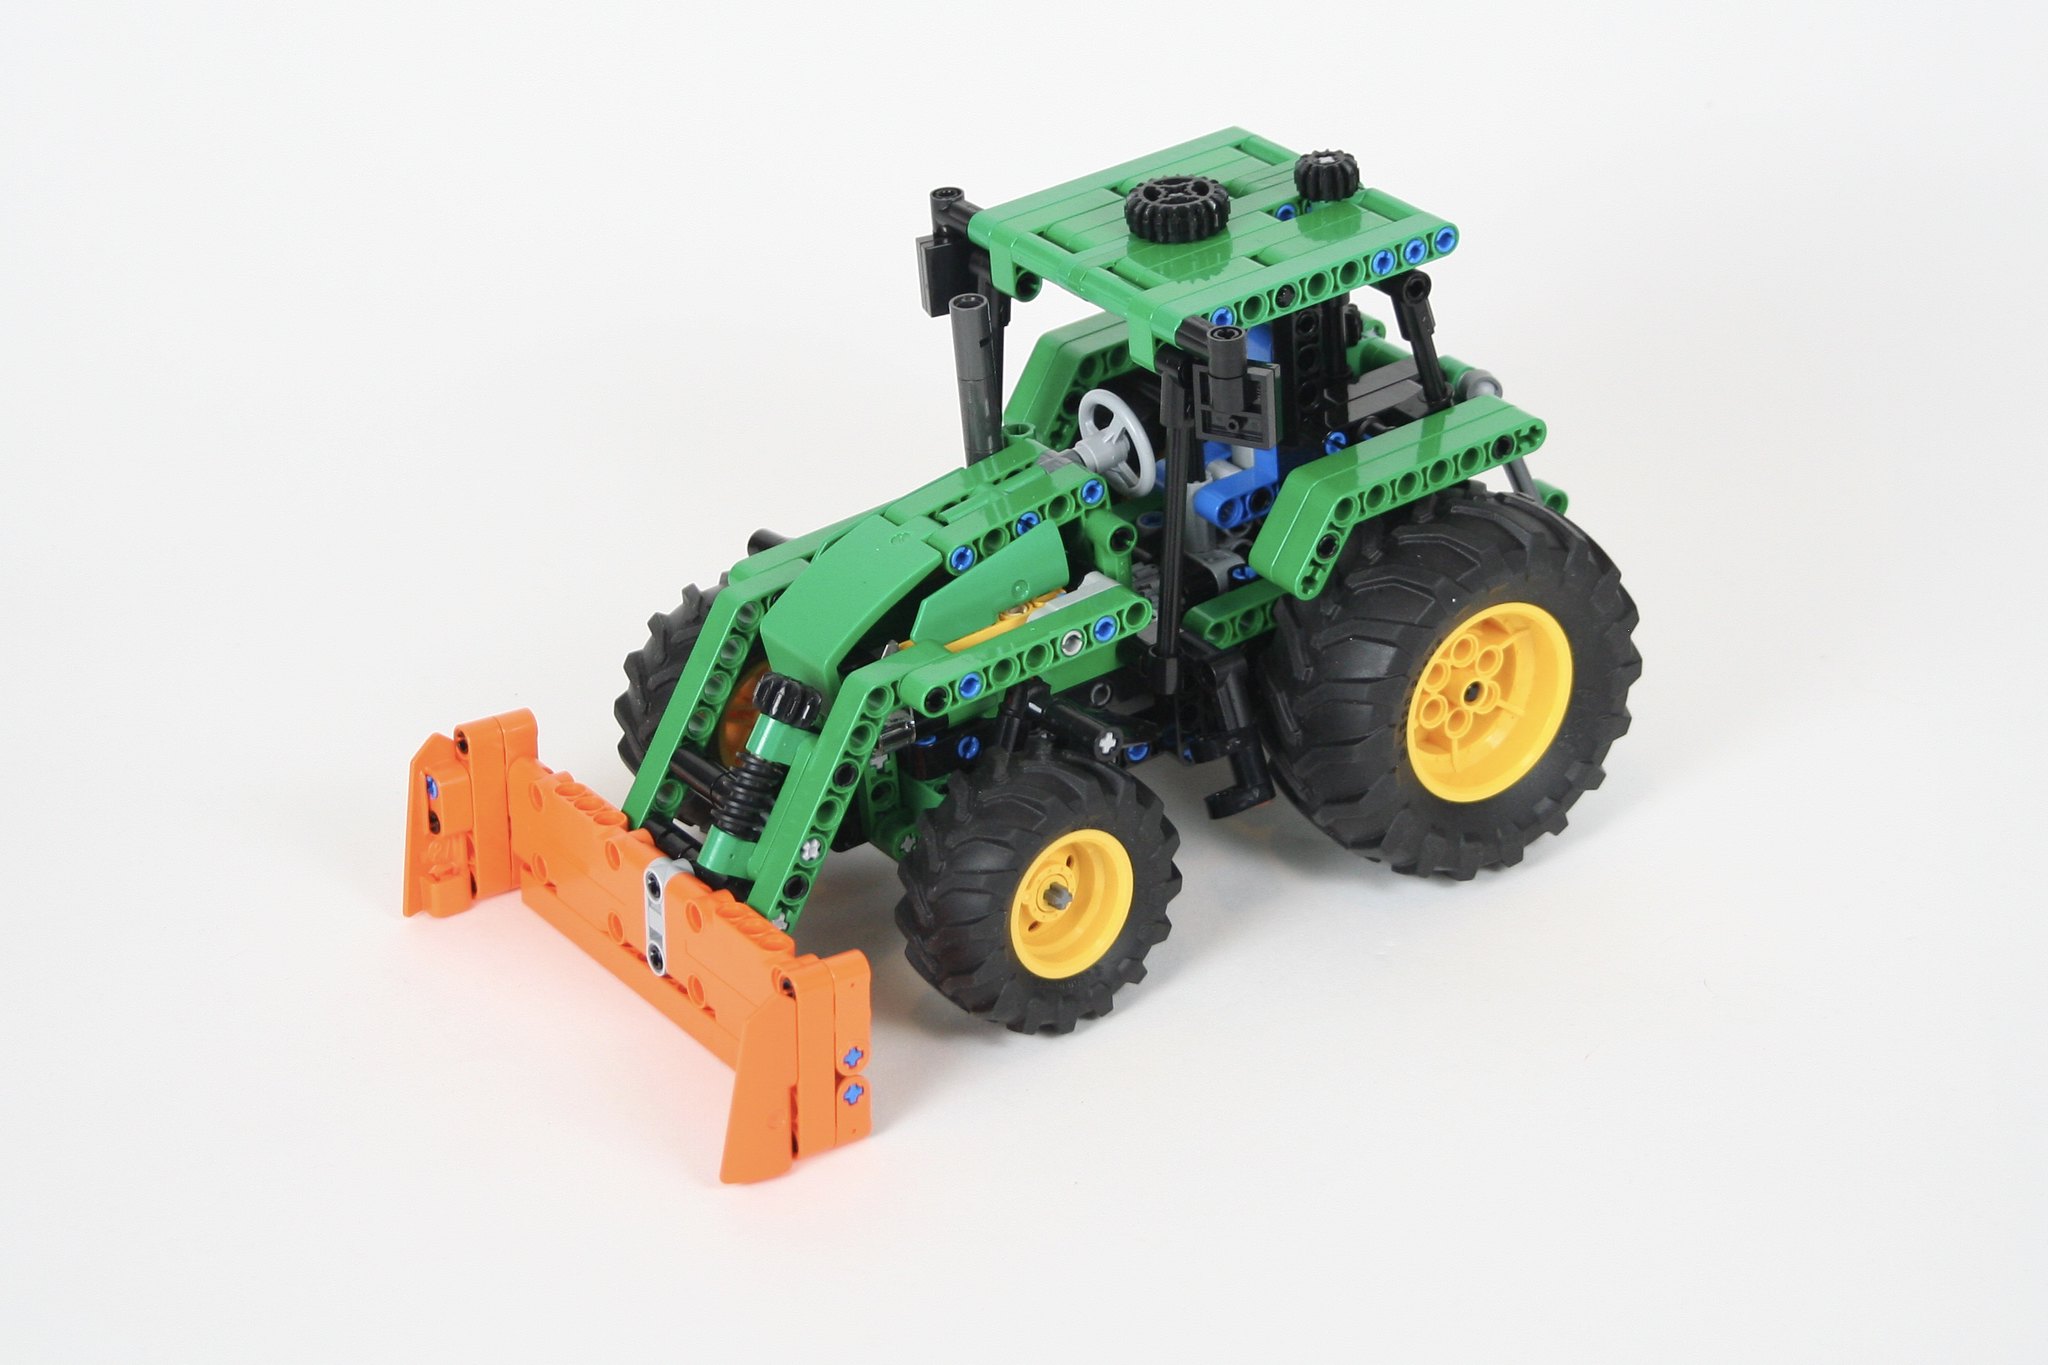
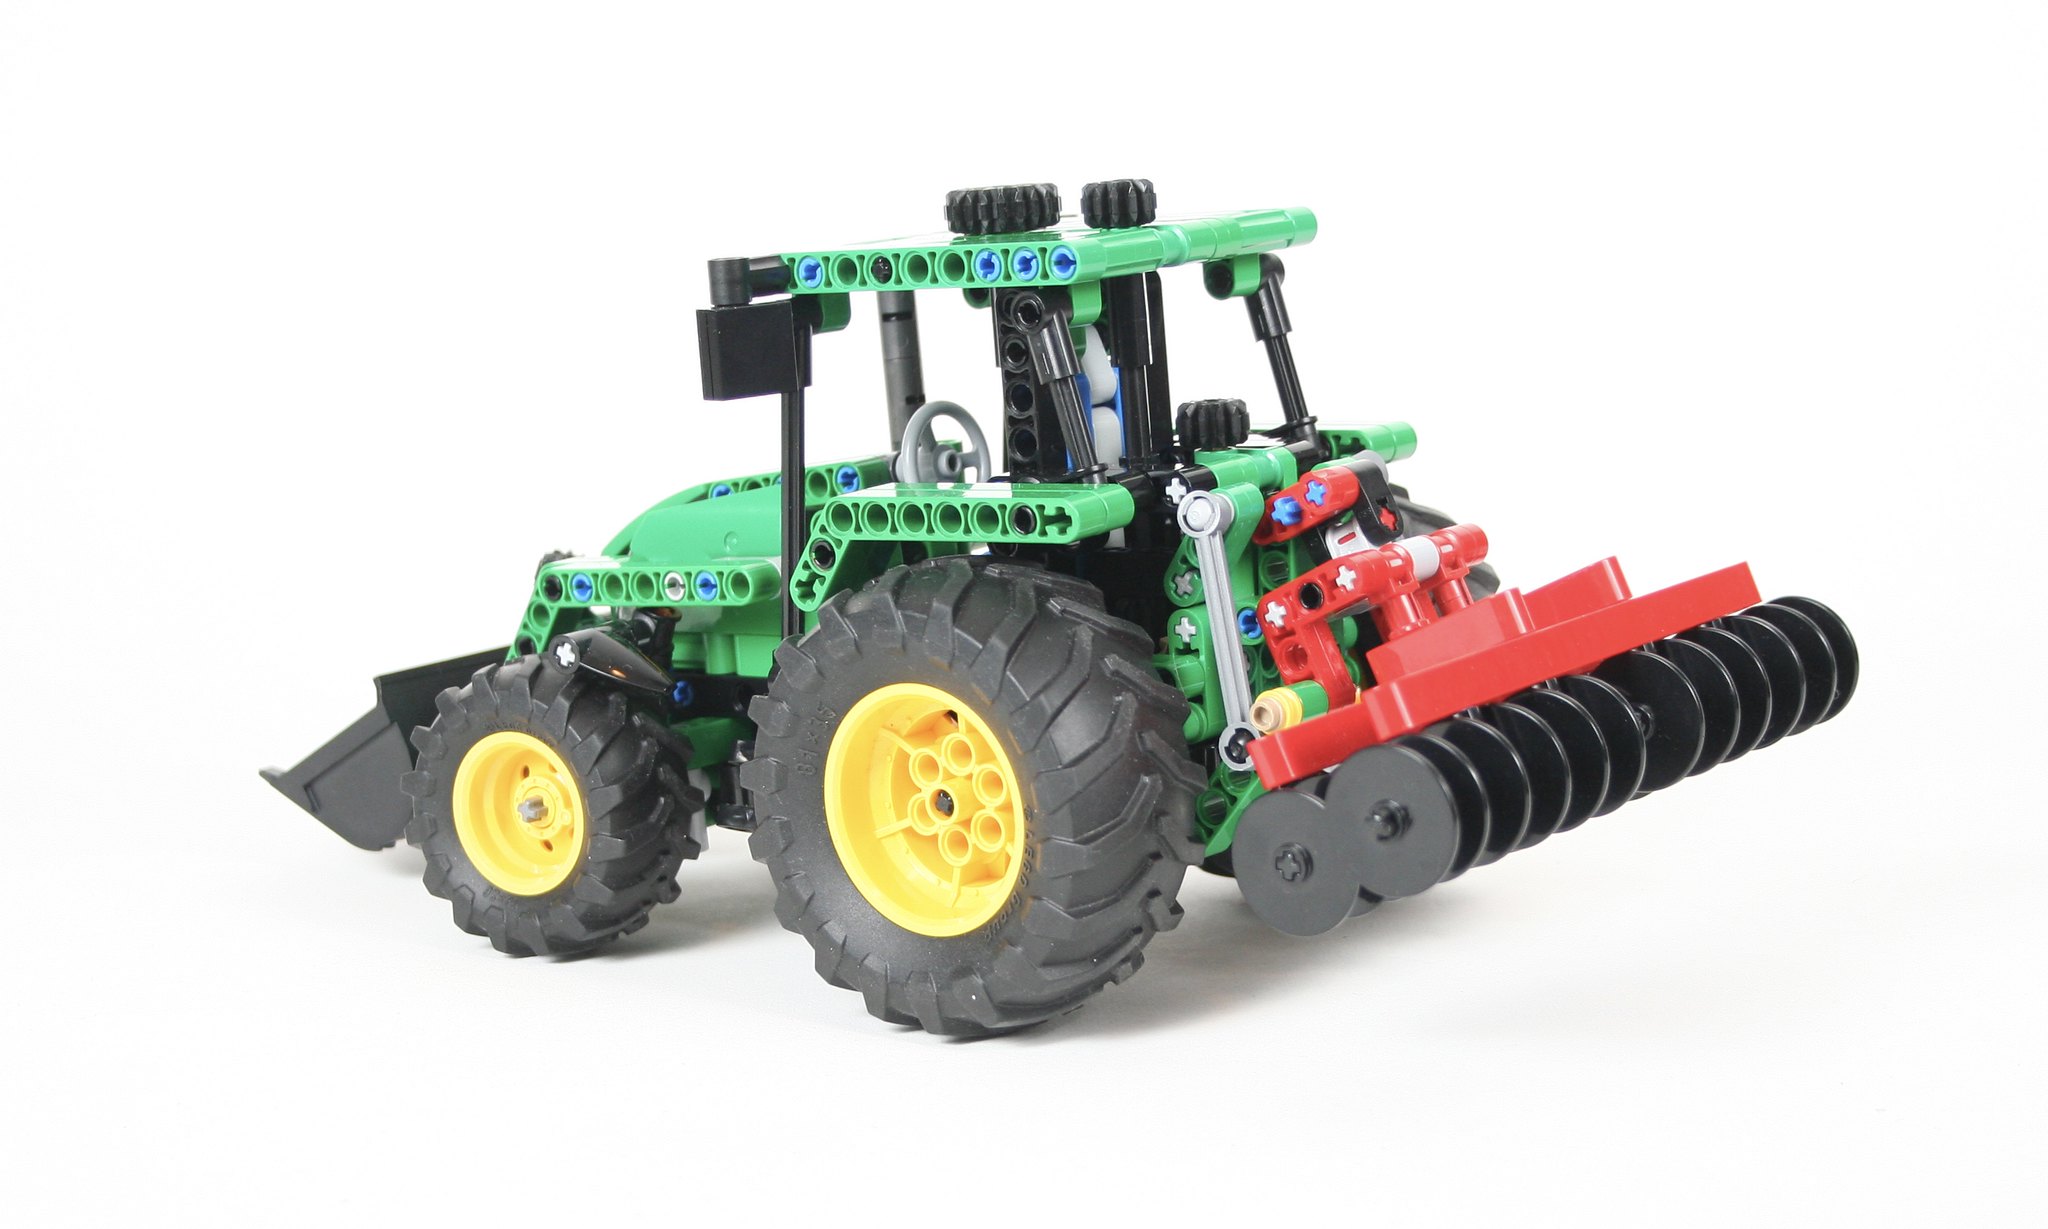
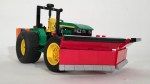
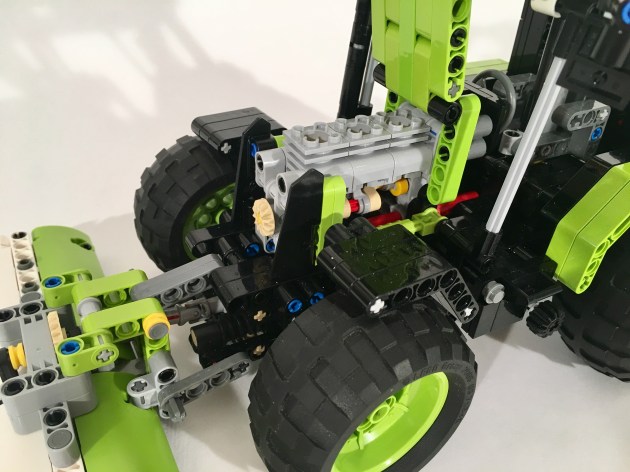
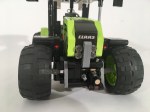
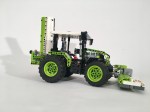
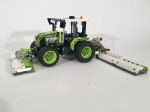
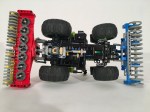
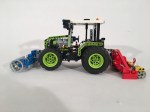
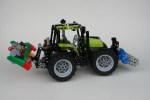
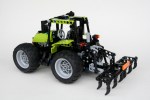
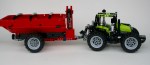
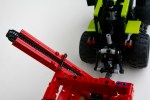
As I worked on the rear arm, I was not pleased with any of the bucket designs I came up with, so I instead designed a couple of attachments that fit the tractor a little better. A little drill and a claw are included in the build. The rear arm moves in a number of ways, and the tractor also has two stabilizing arms to keep the tractor from tipping over. I used a similar approach for the front loader as well. A bucket option is included, but I find the design a little clunky looking. It includes a set of forks as well which I like a little better. A little pallet to load is included. Both the lift and tilt are manually operated, and the lift includes a lockout level so the arm may hold up a heavy load.
I like to think I am getting better at alternative builds, but I do not think this is my best one. I find the design a little rough, even though the functions work well. I hope that some other builders find some enjoyment in this design, and I’ll keep working on more ideas to make available in the future.
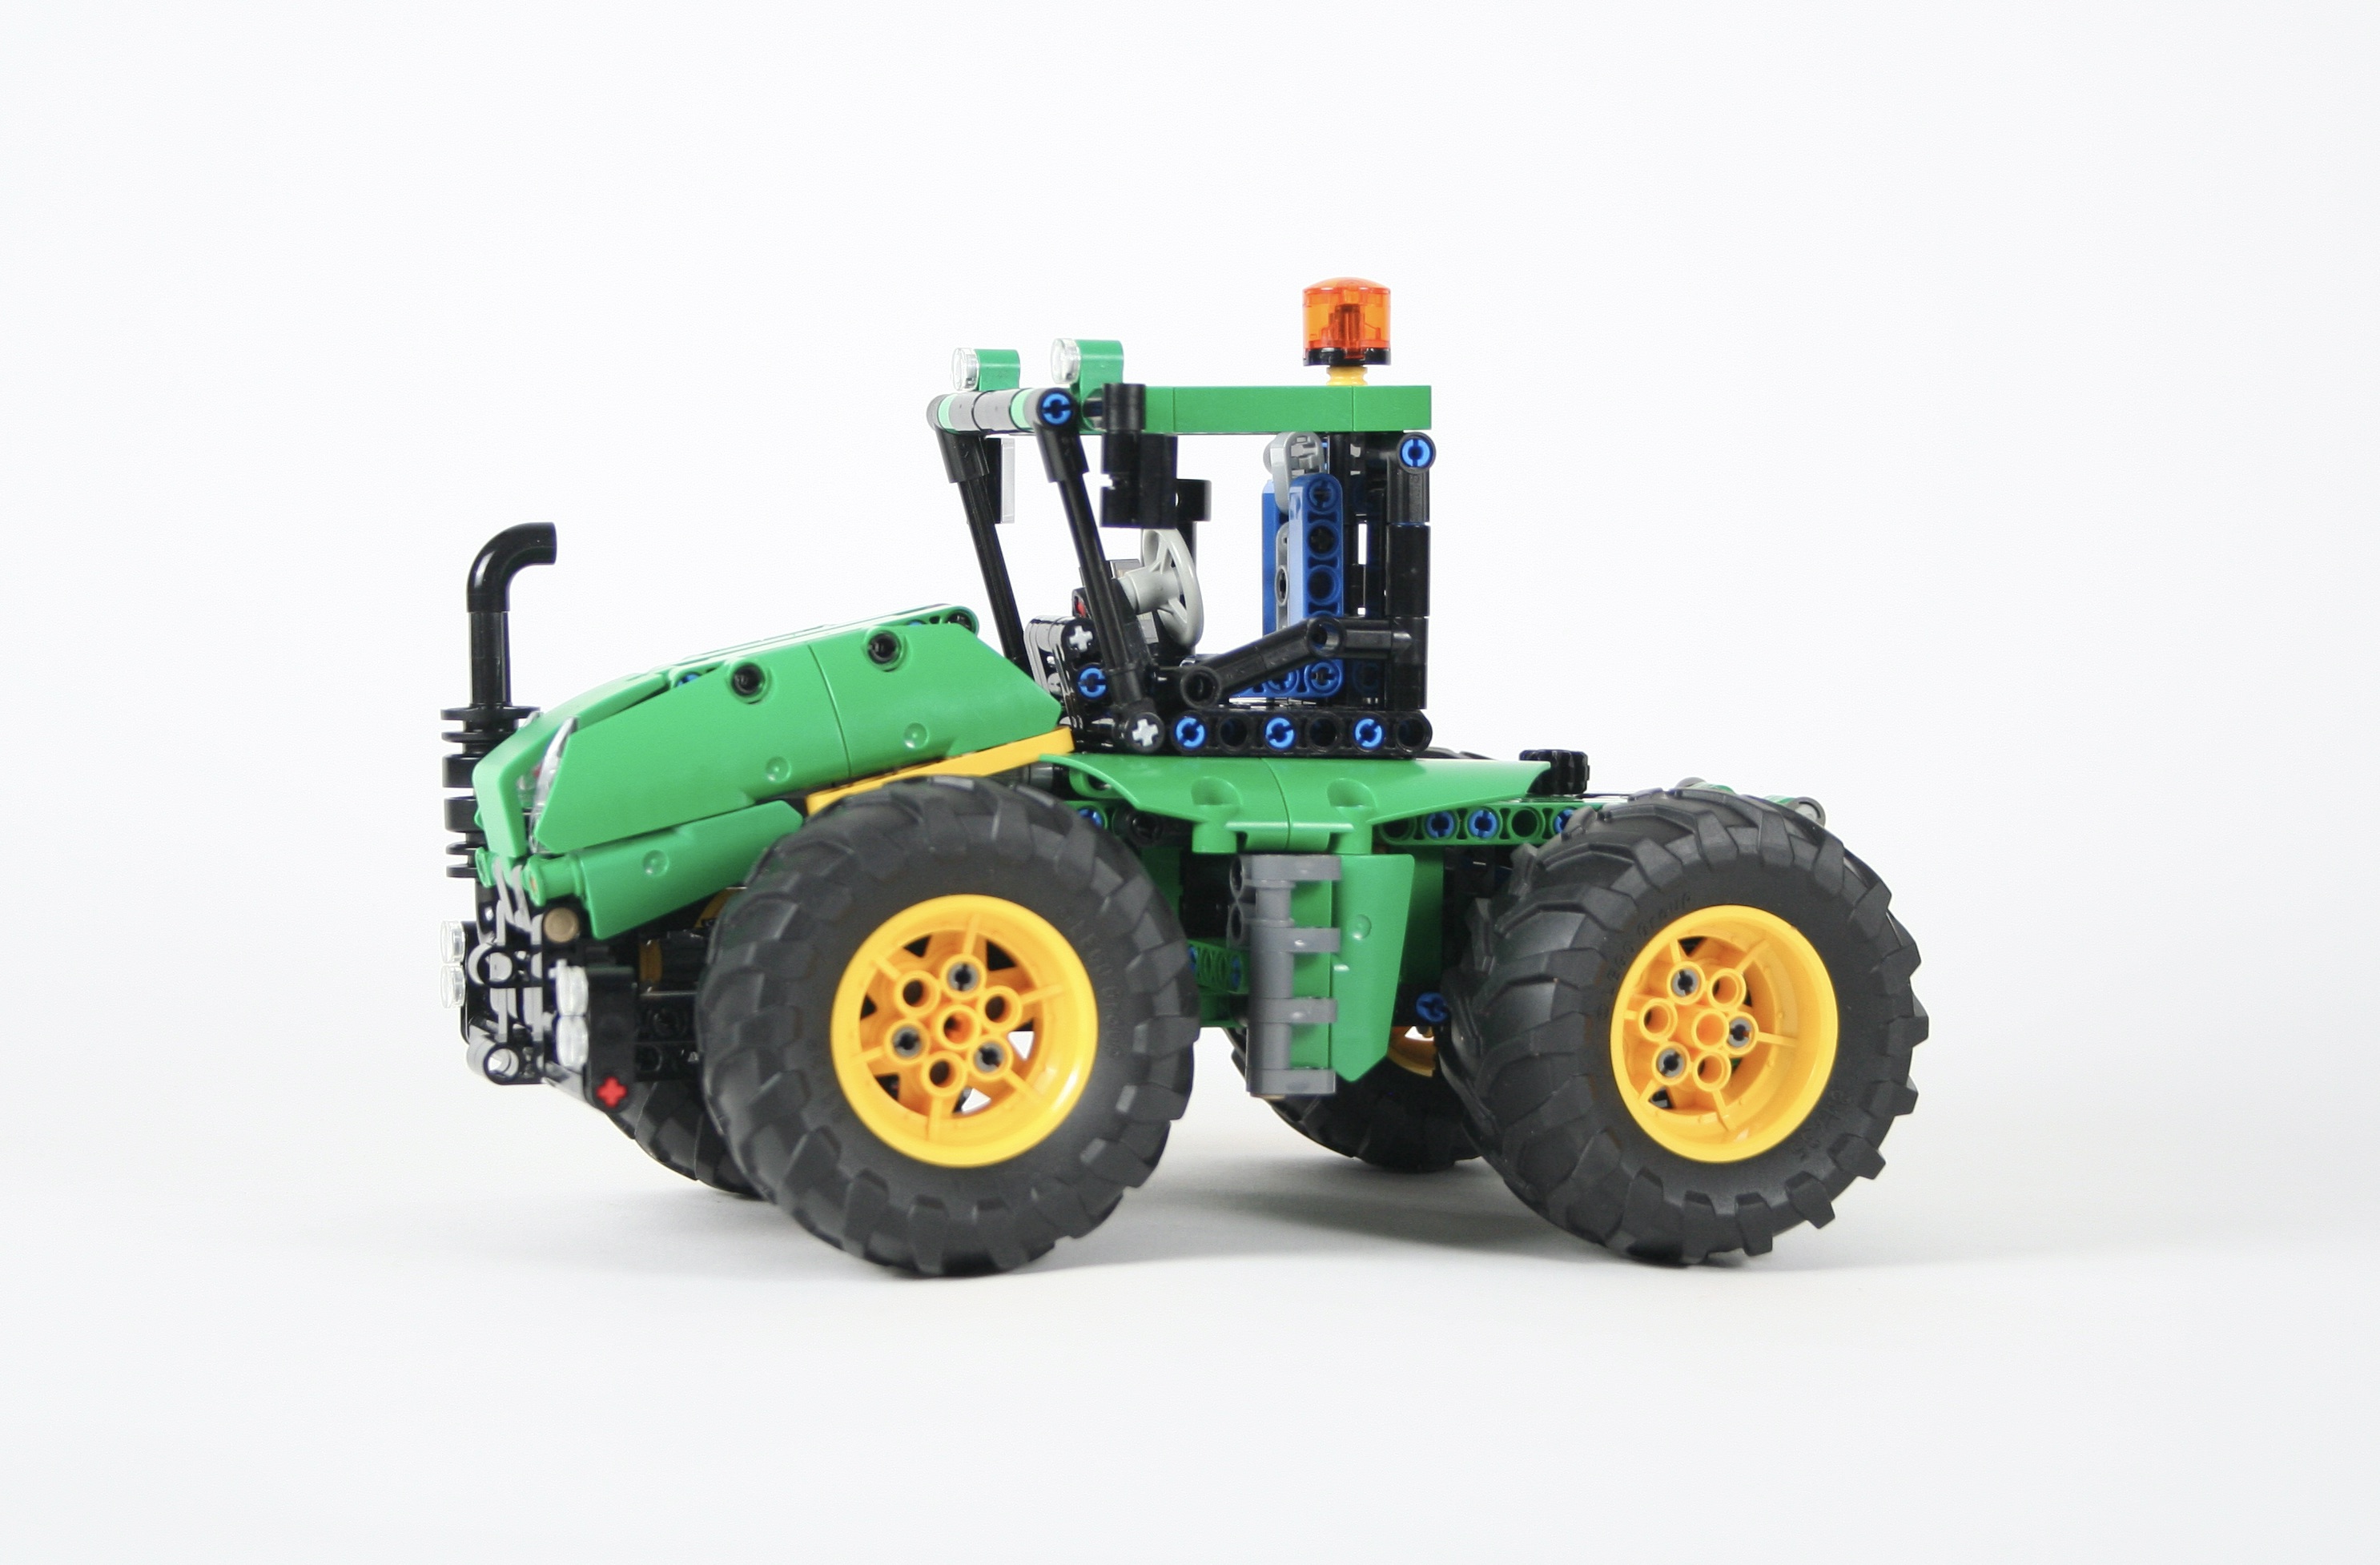
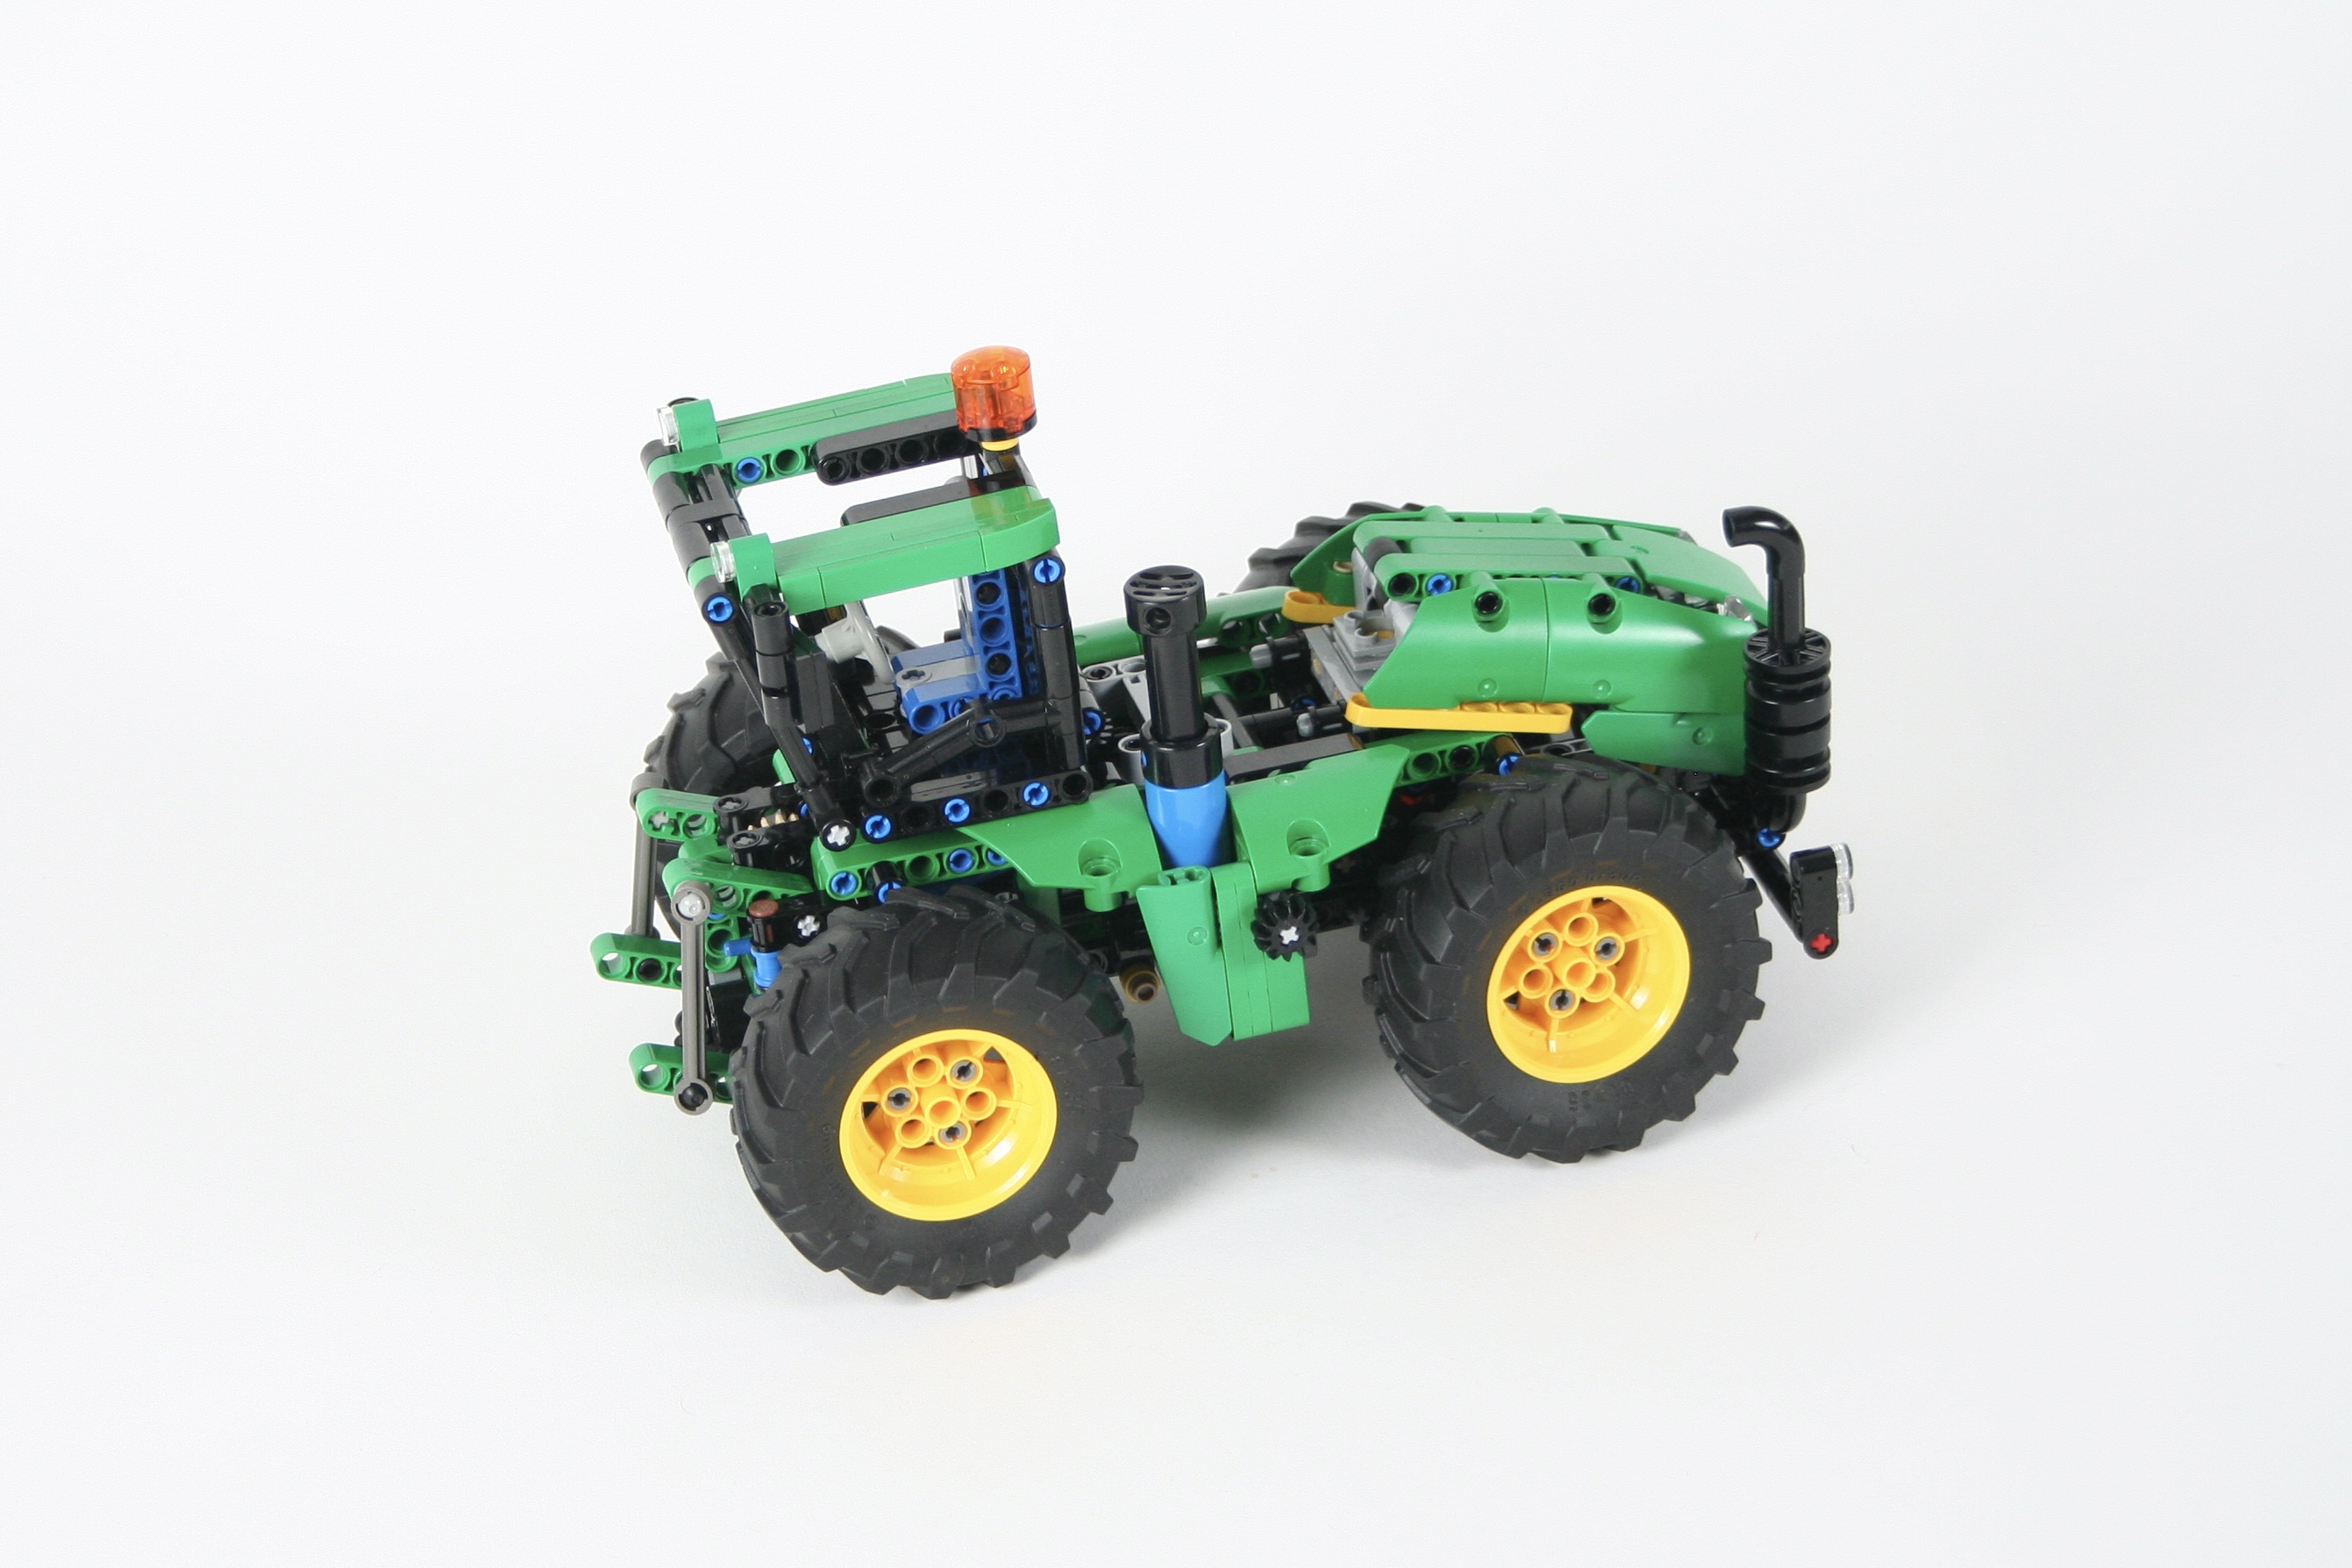
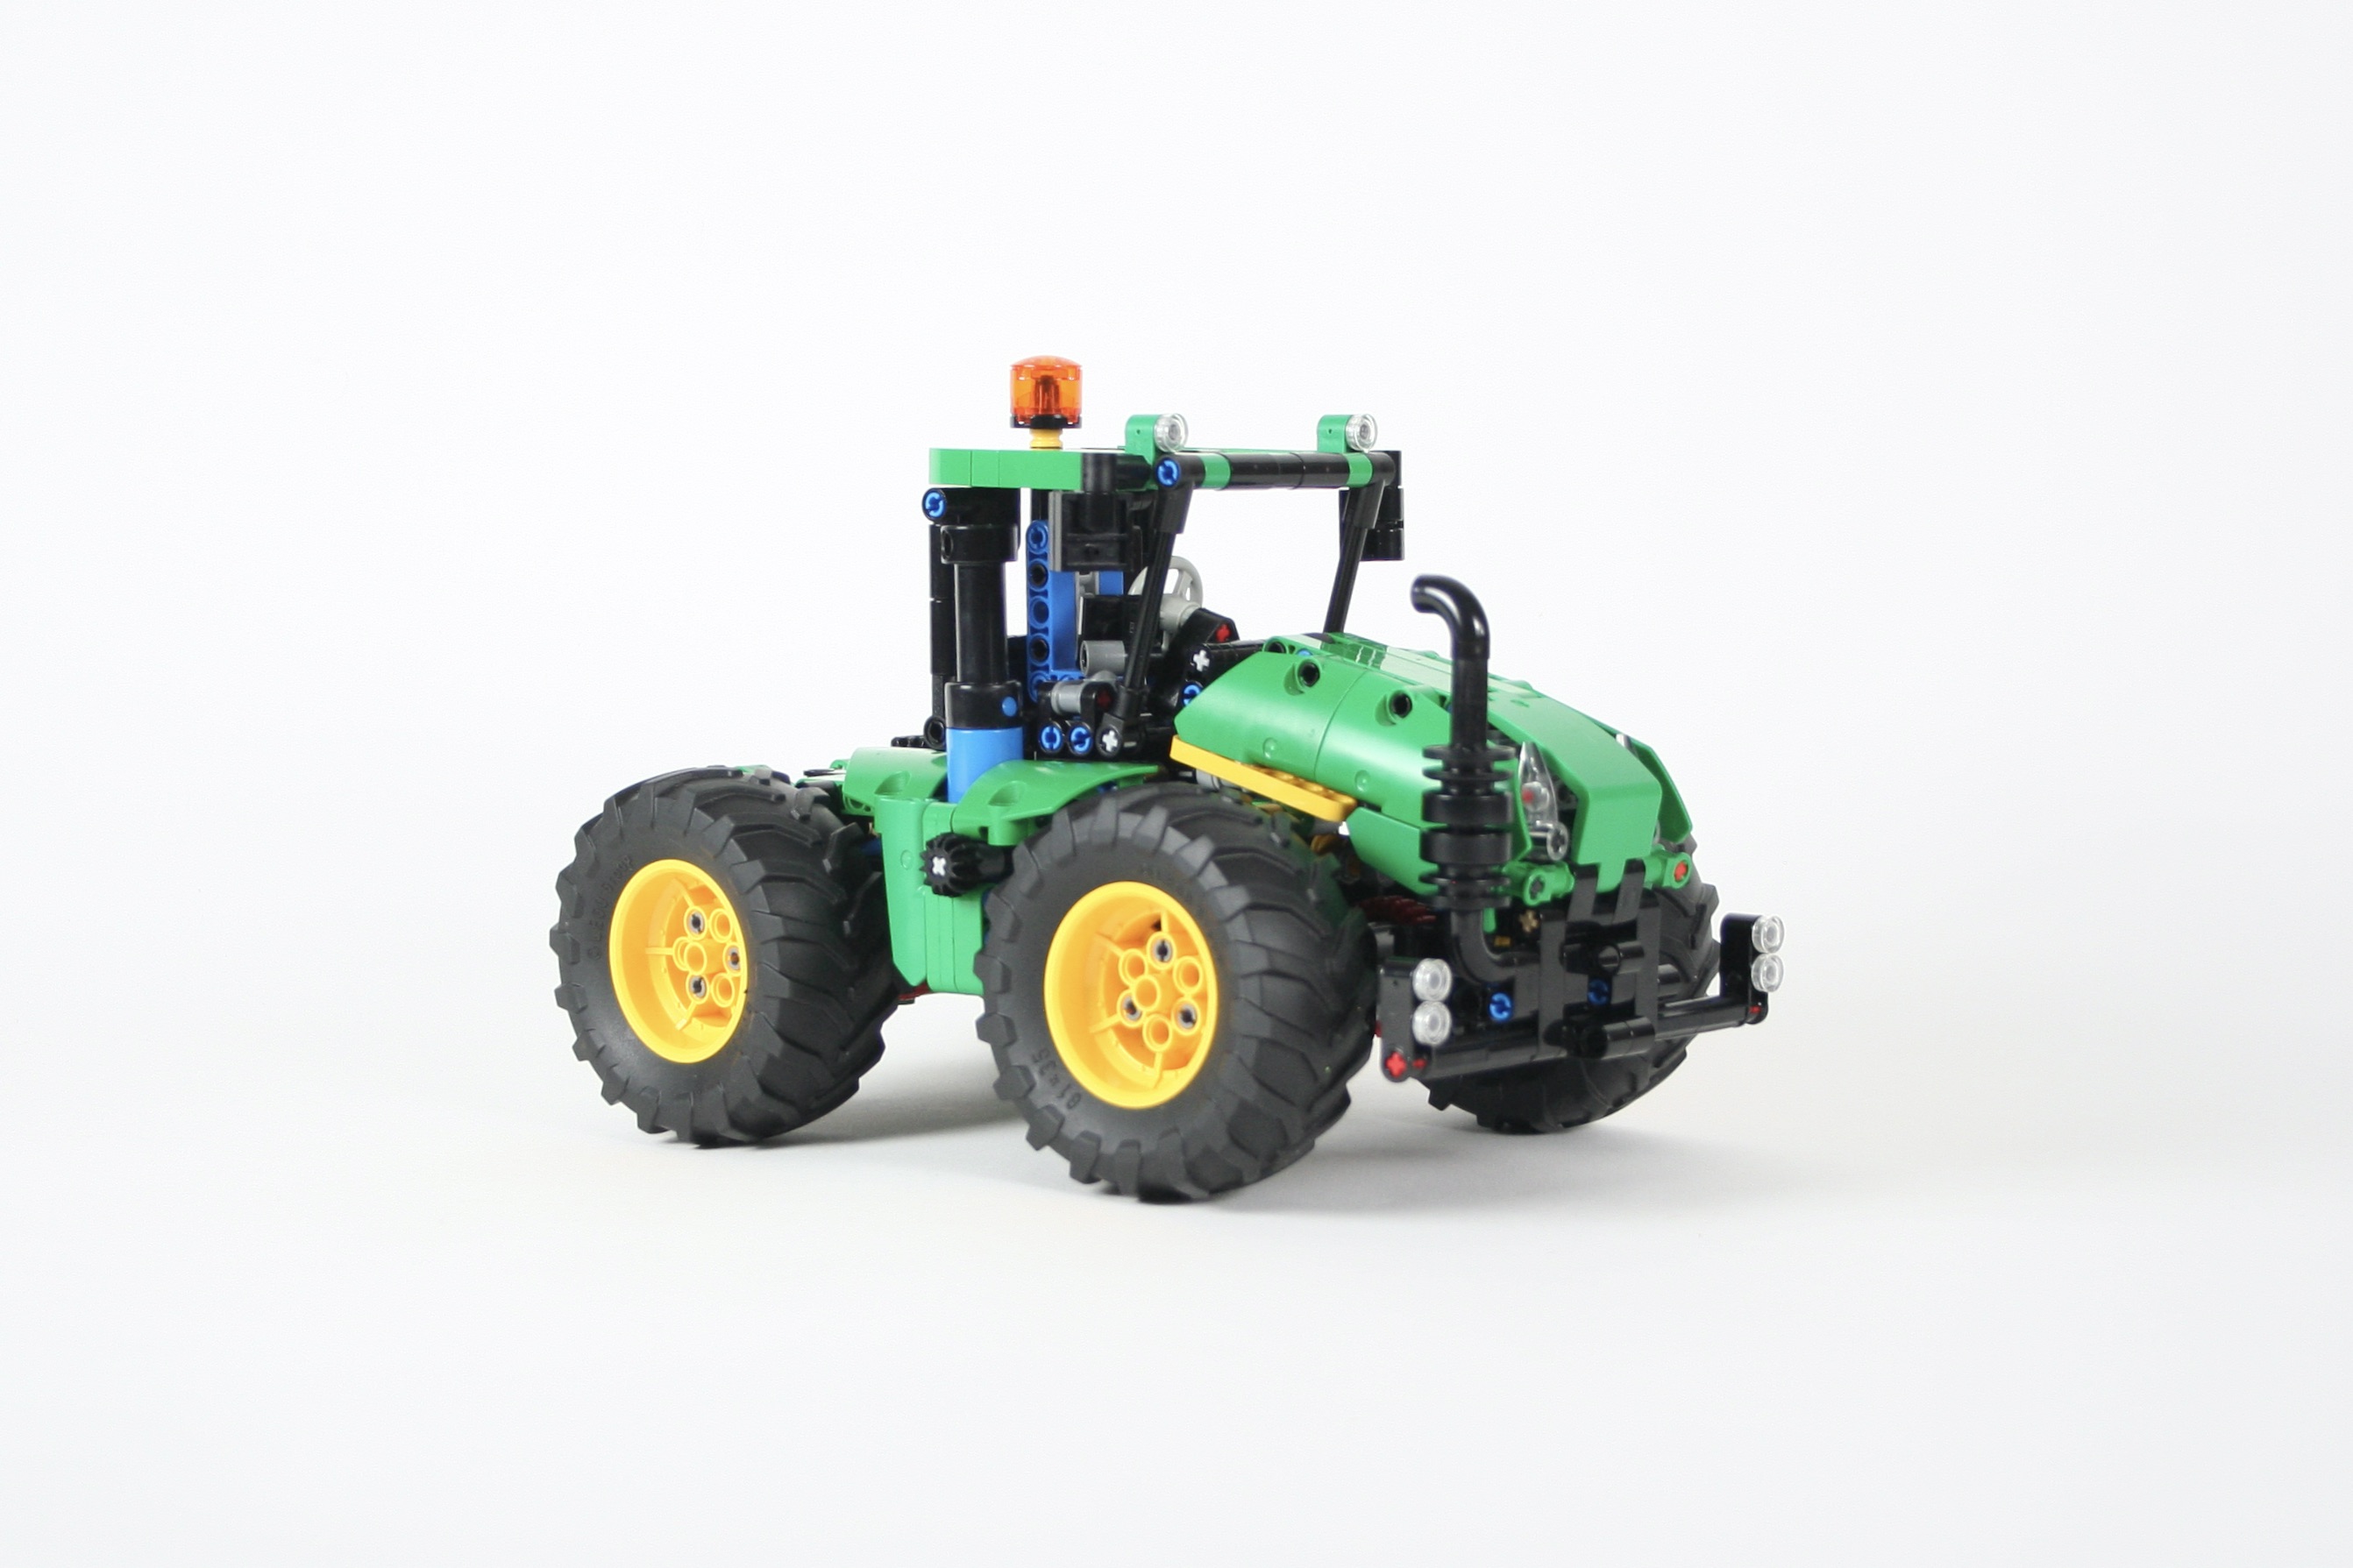
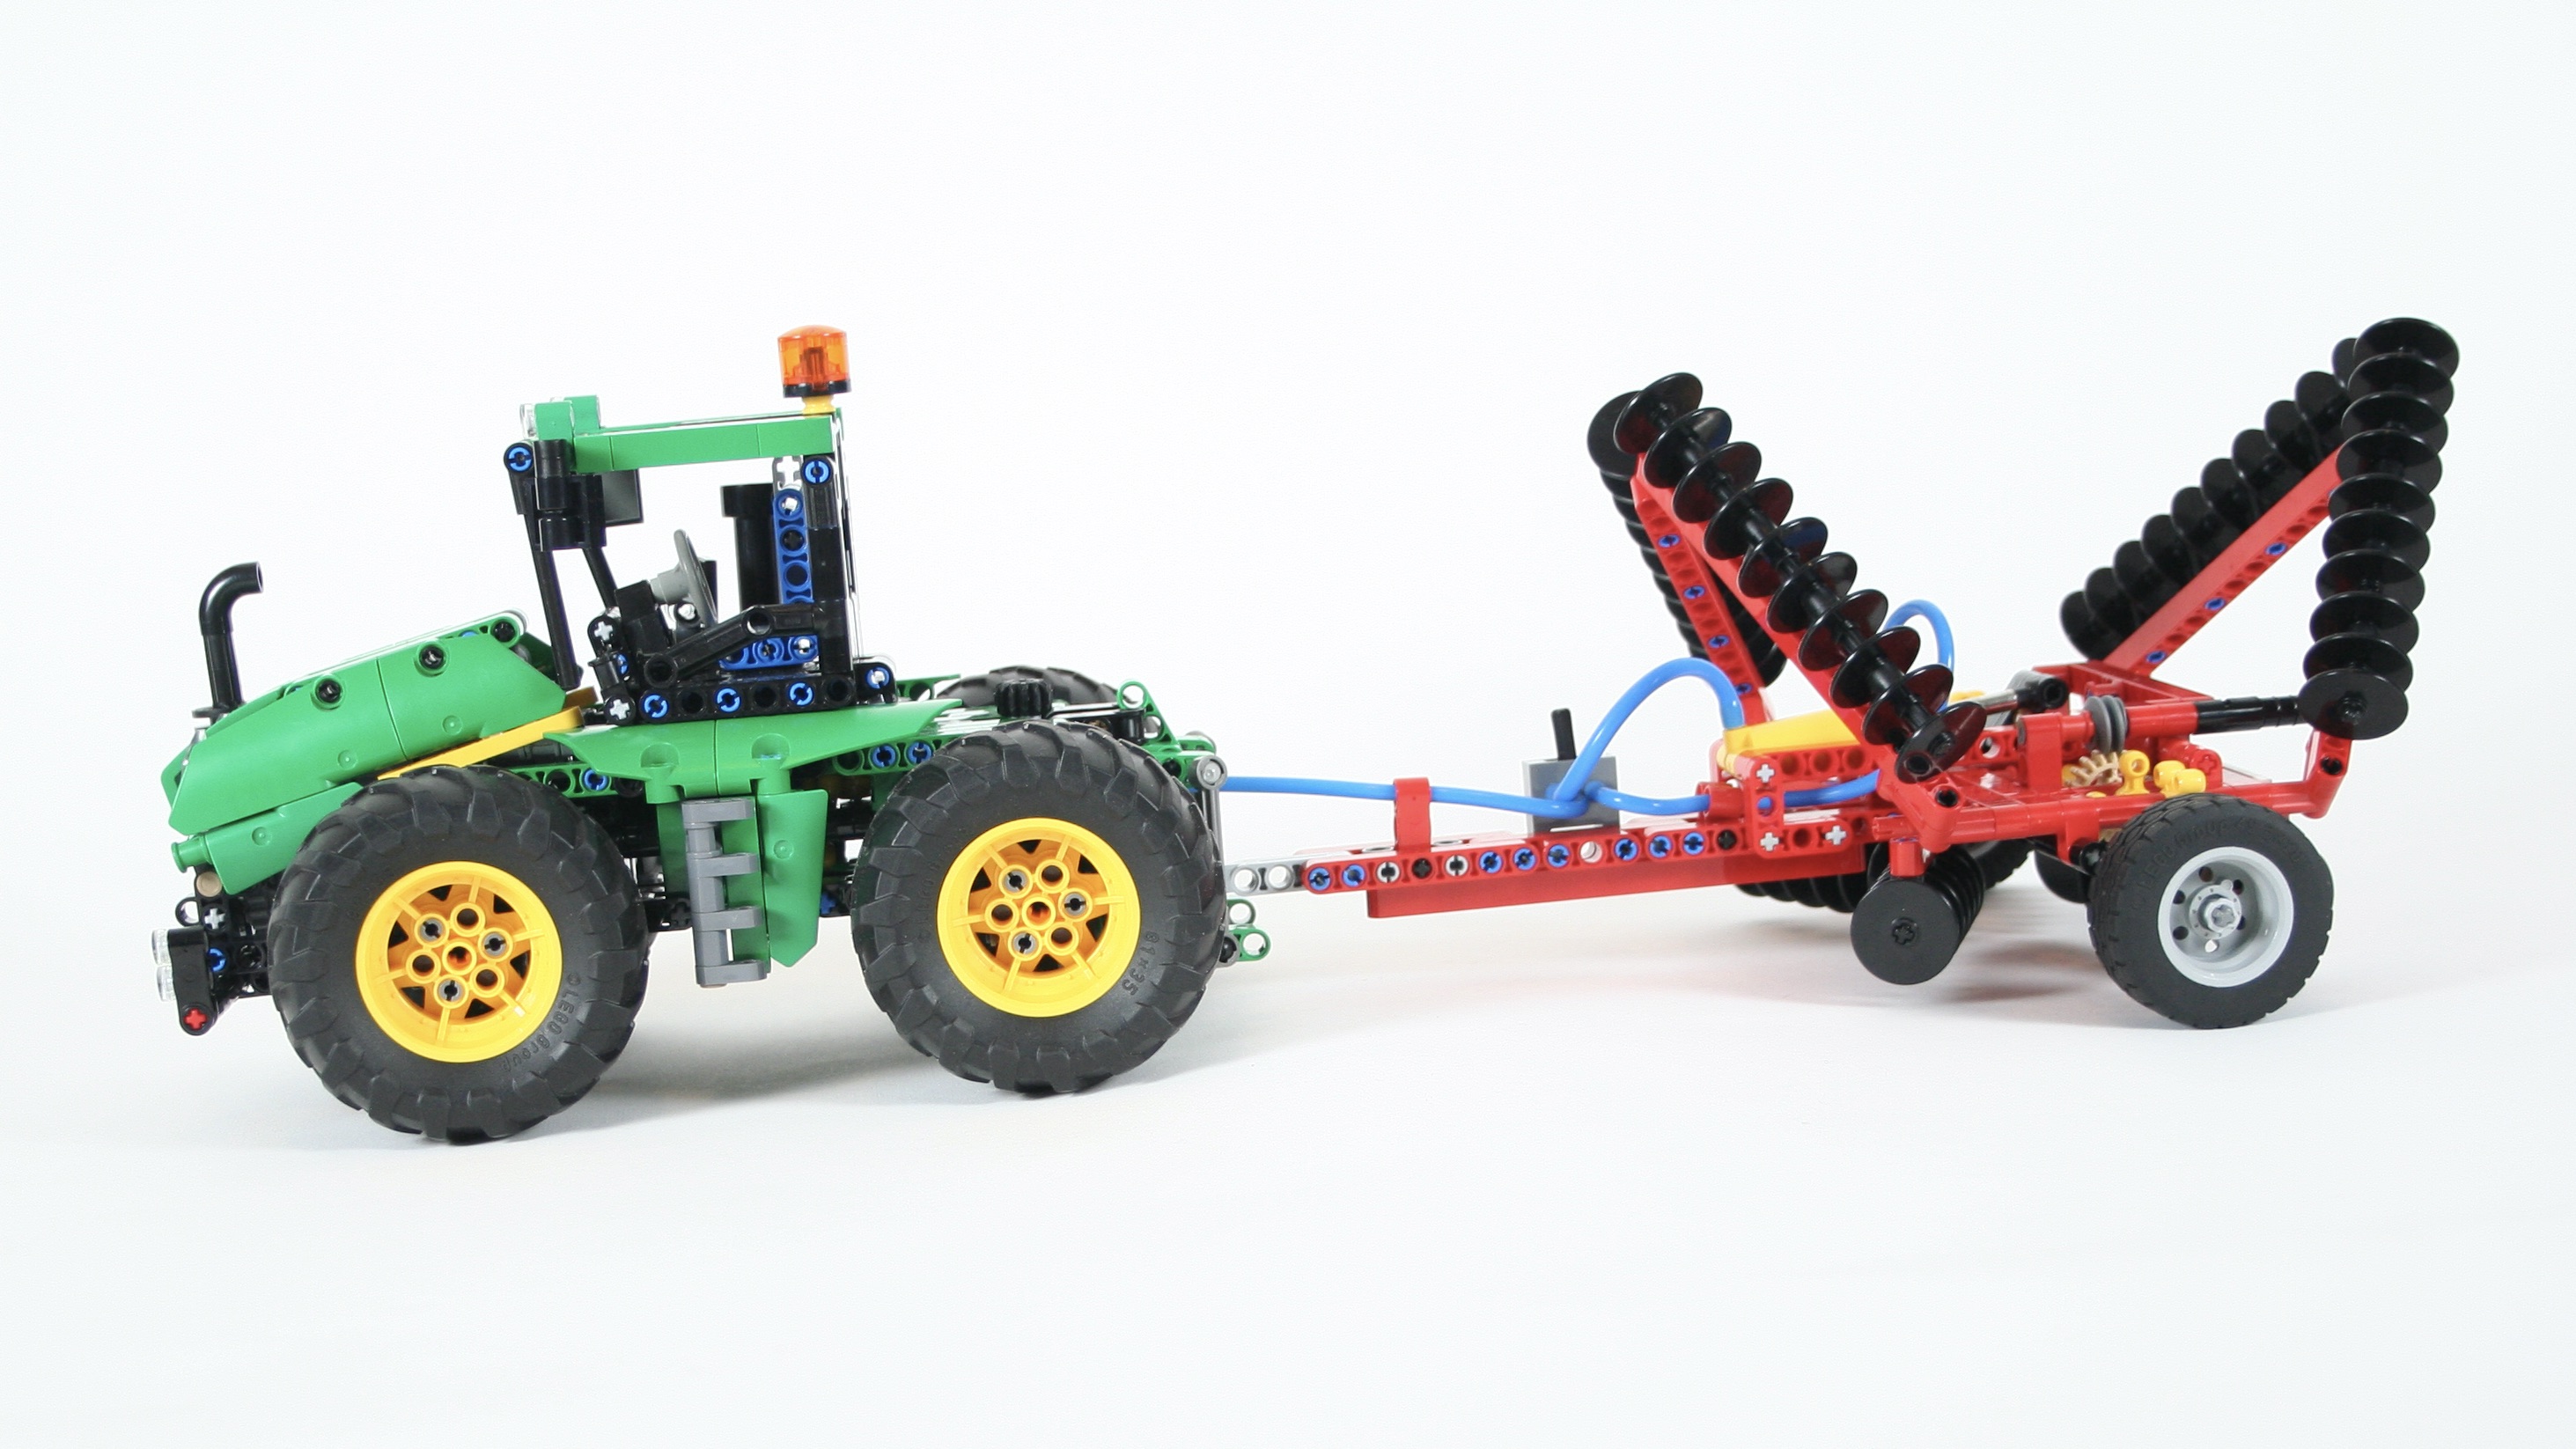
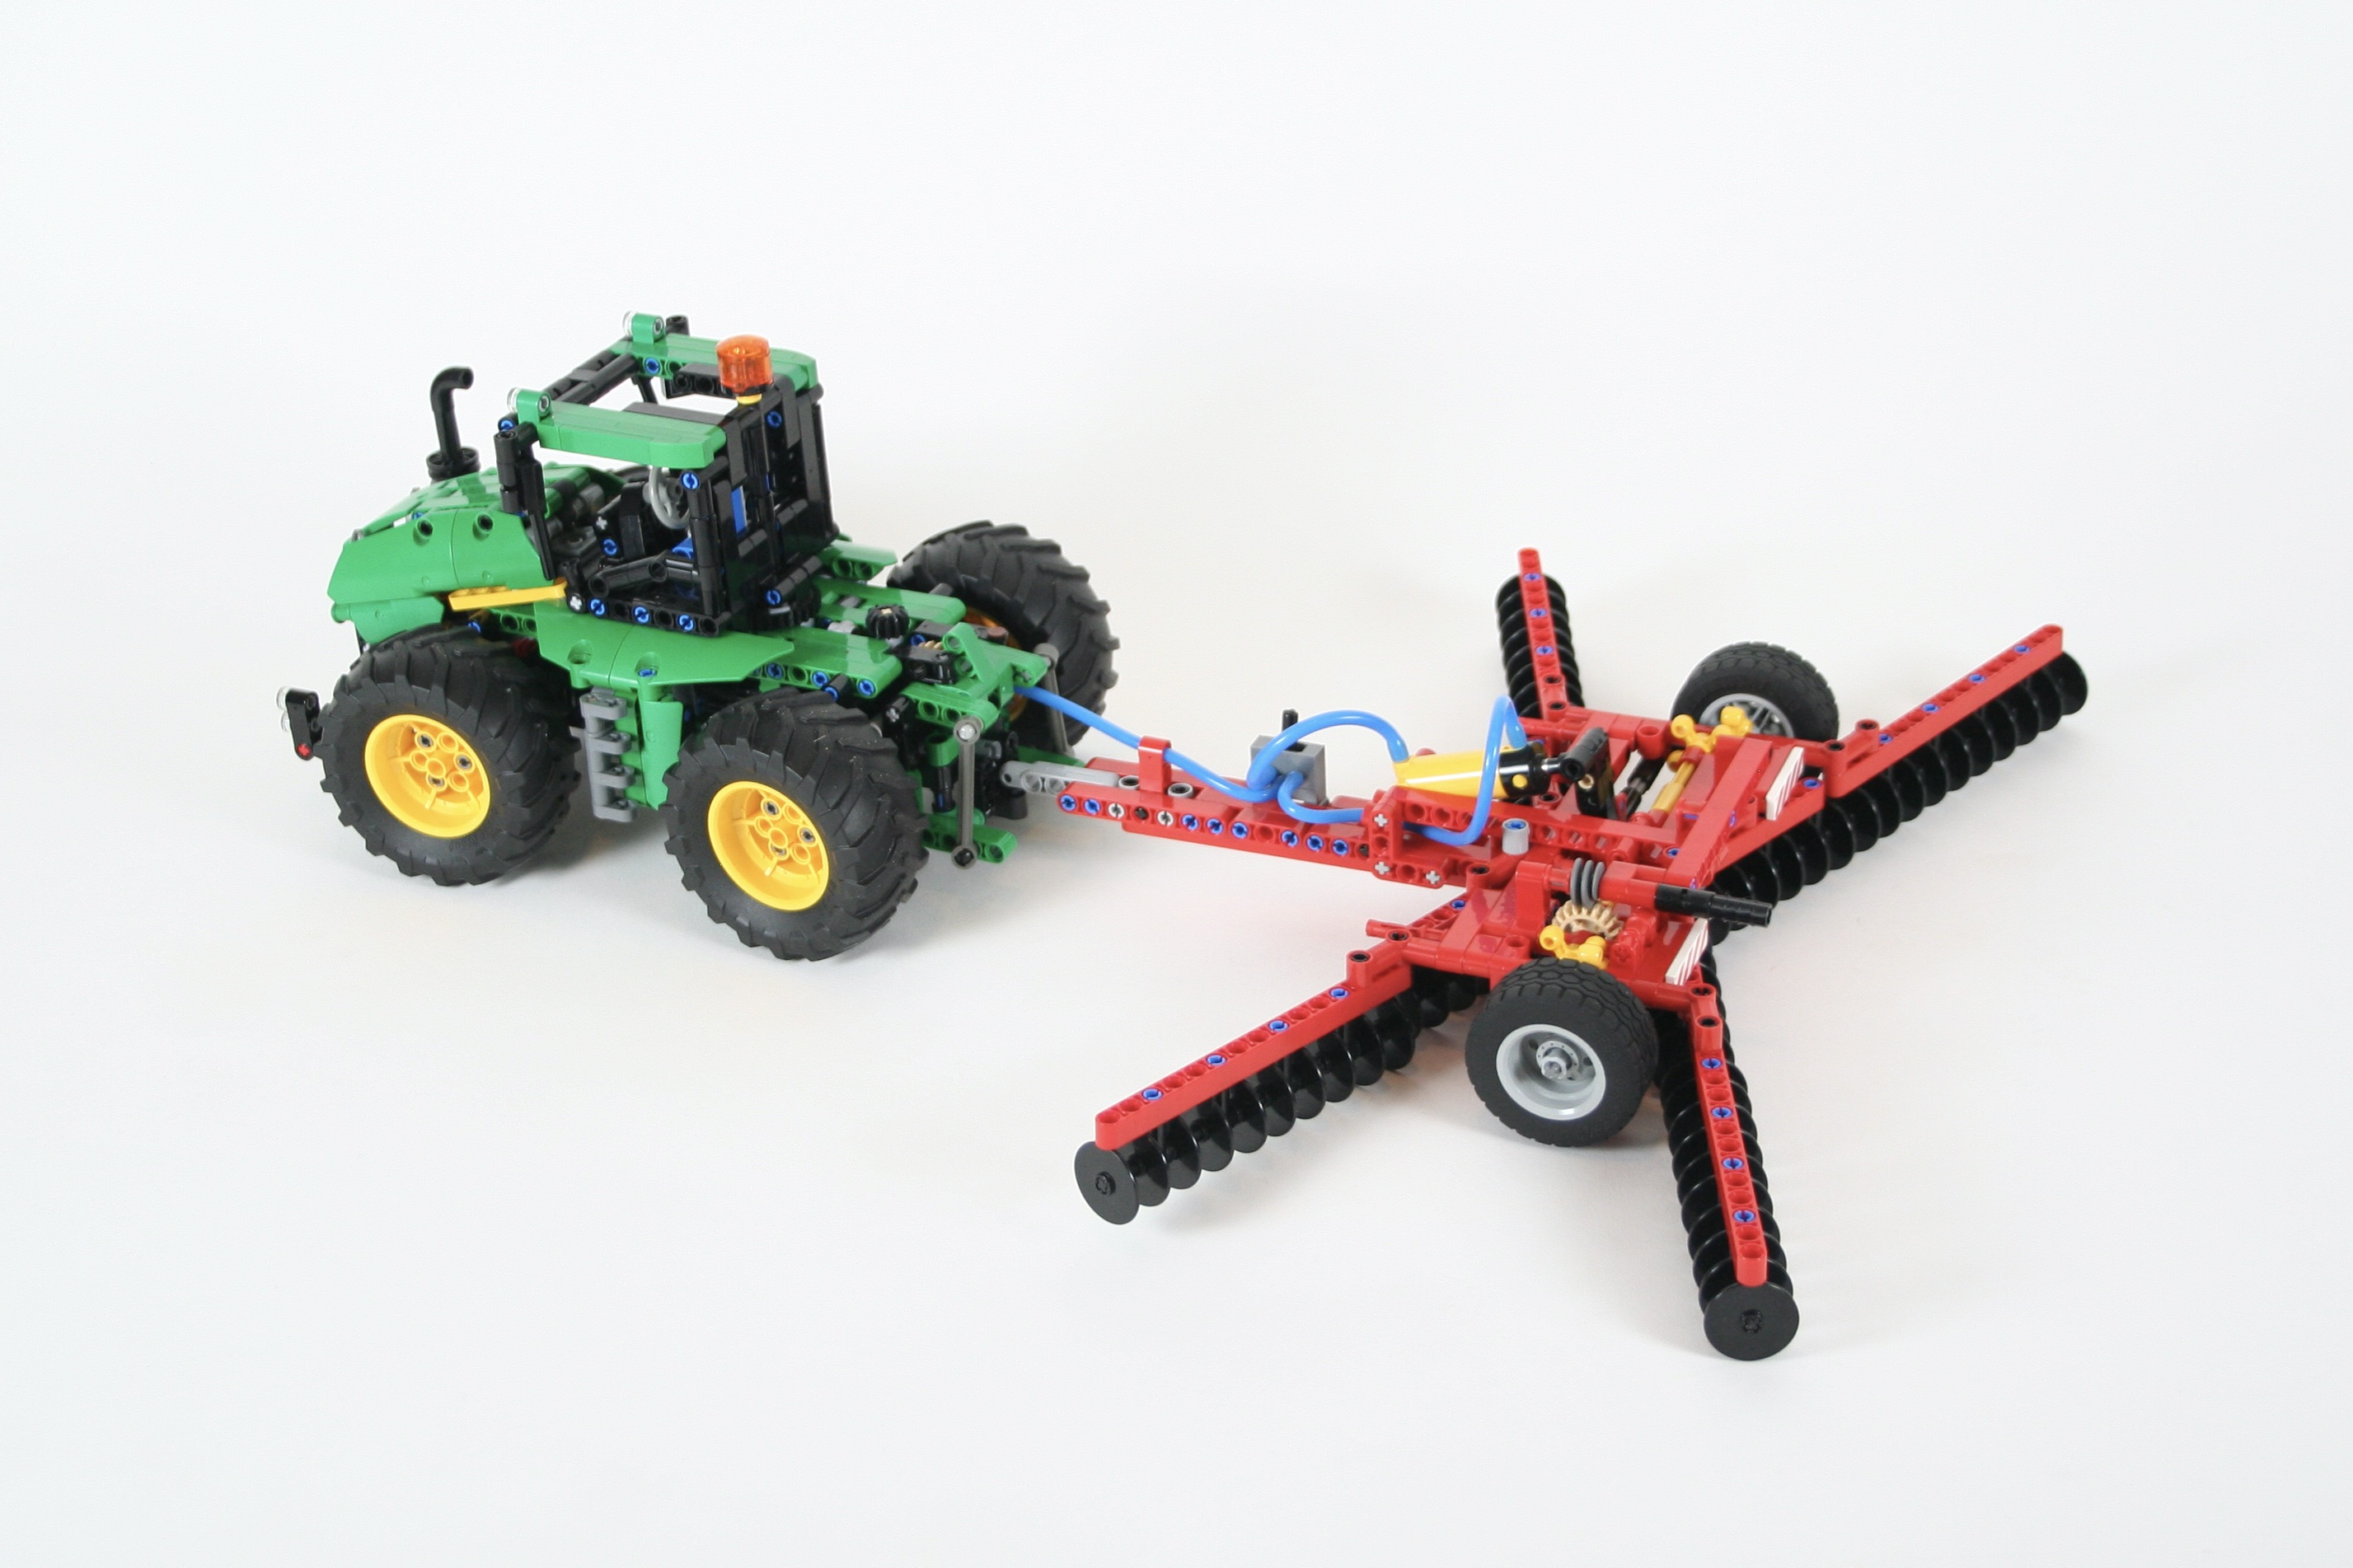
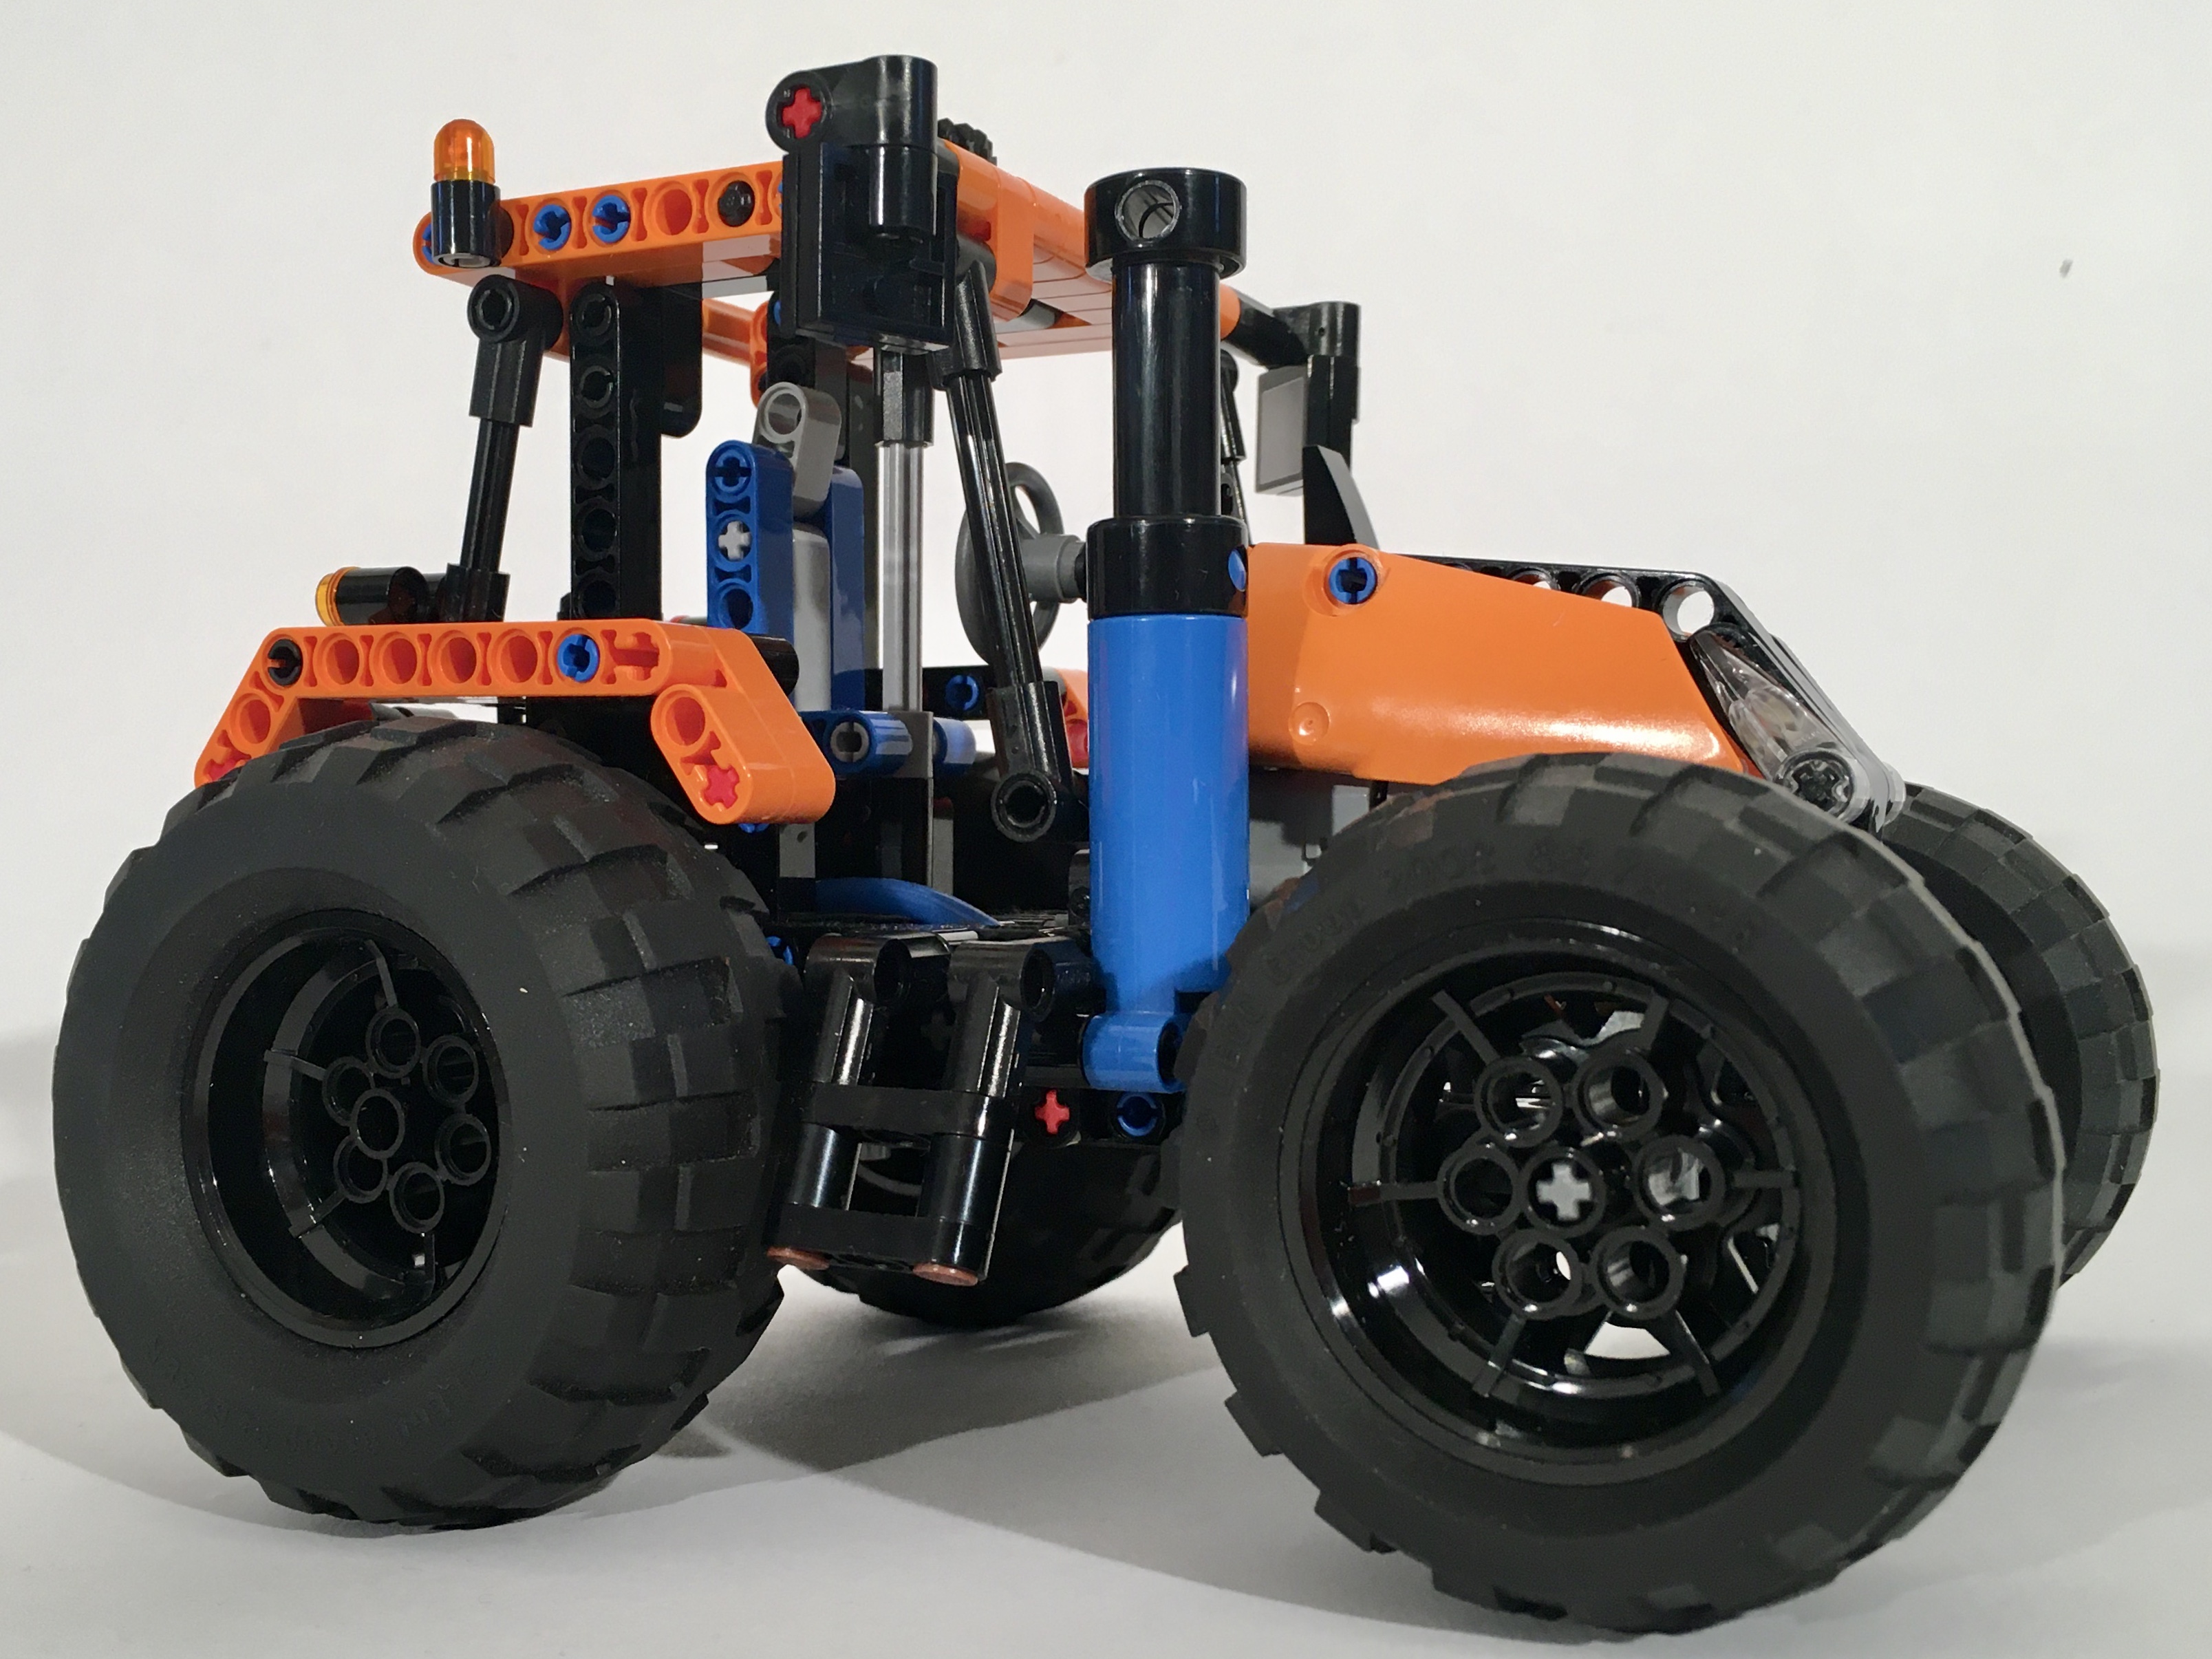
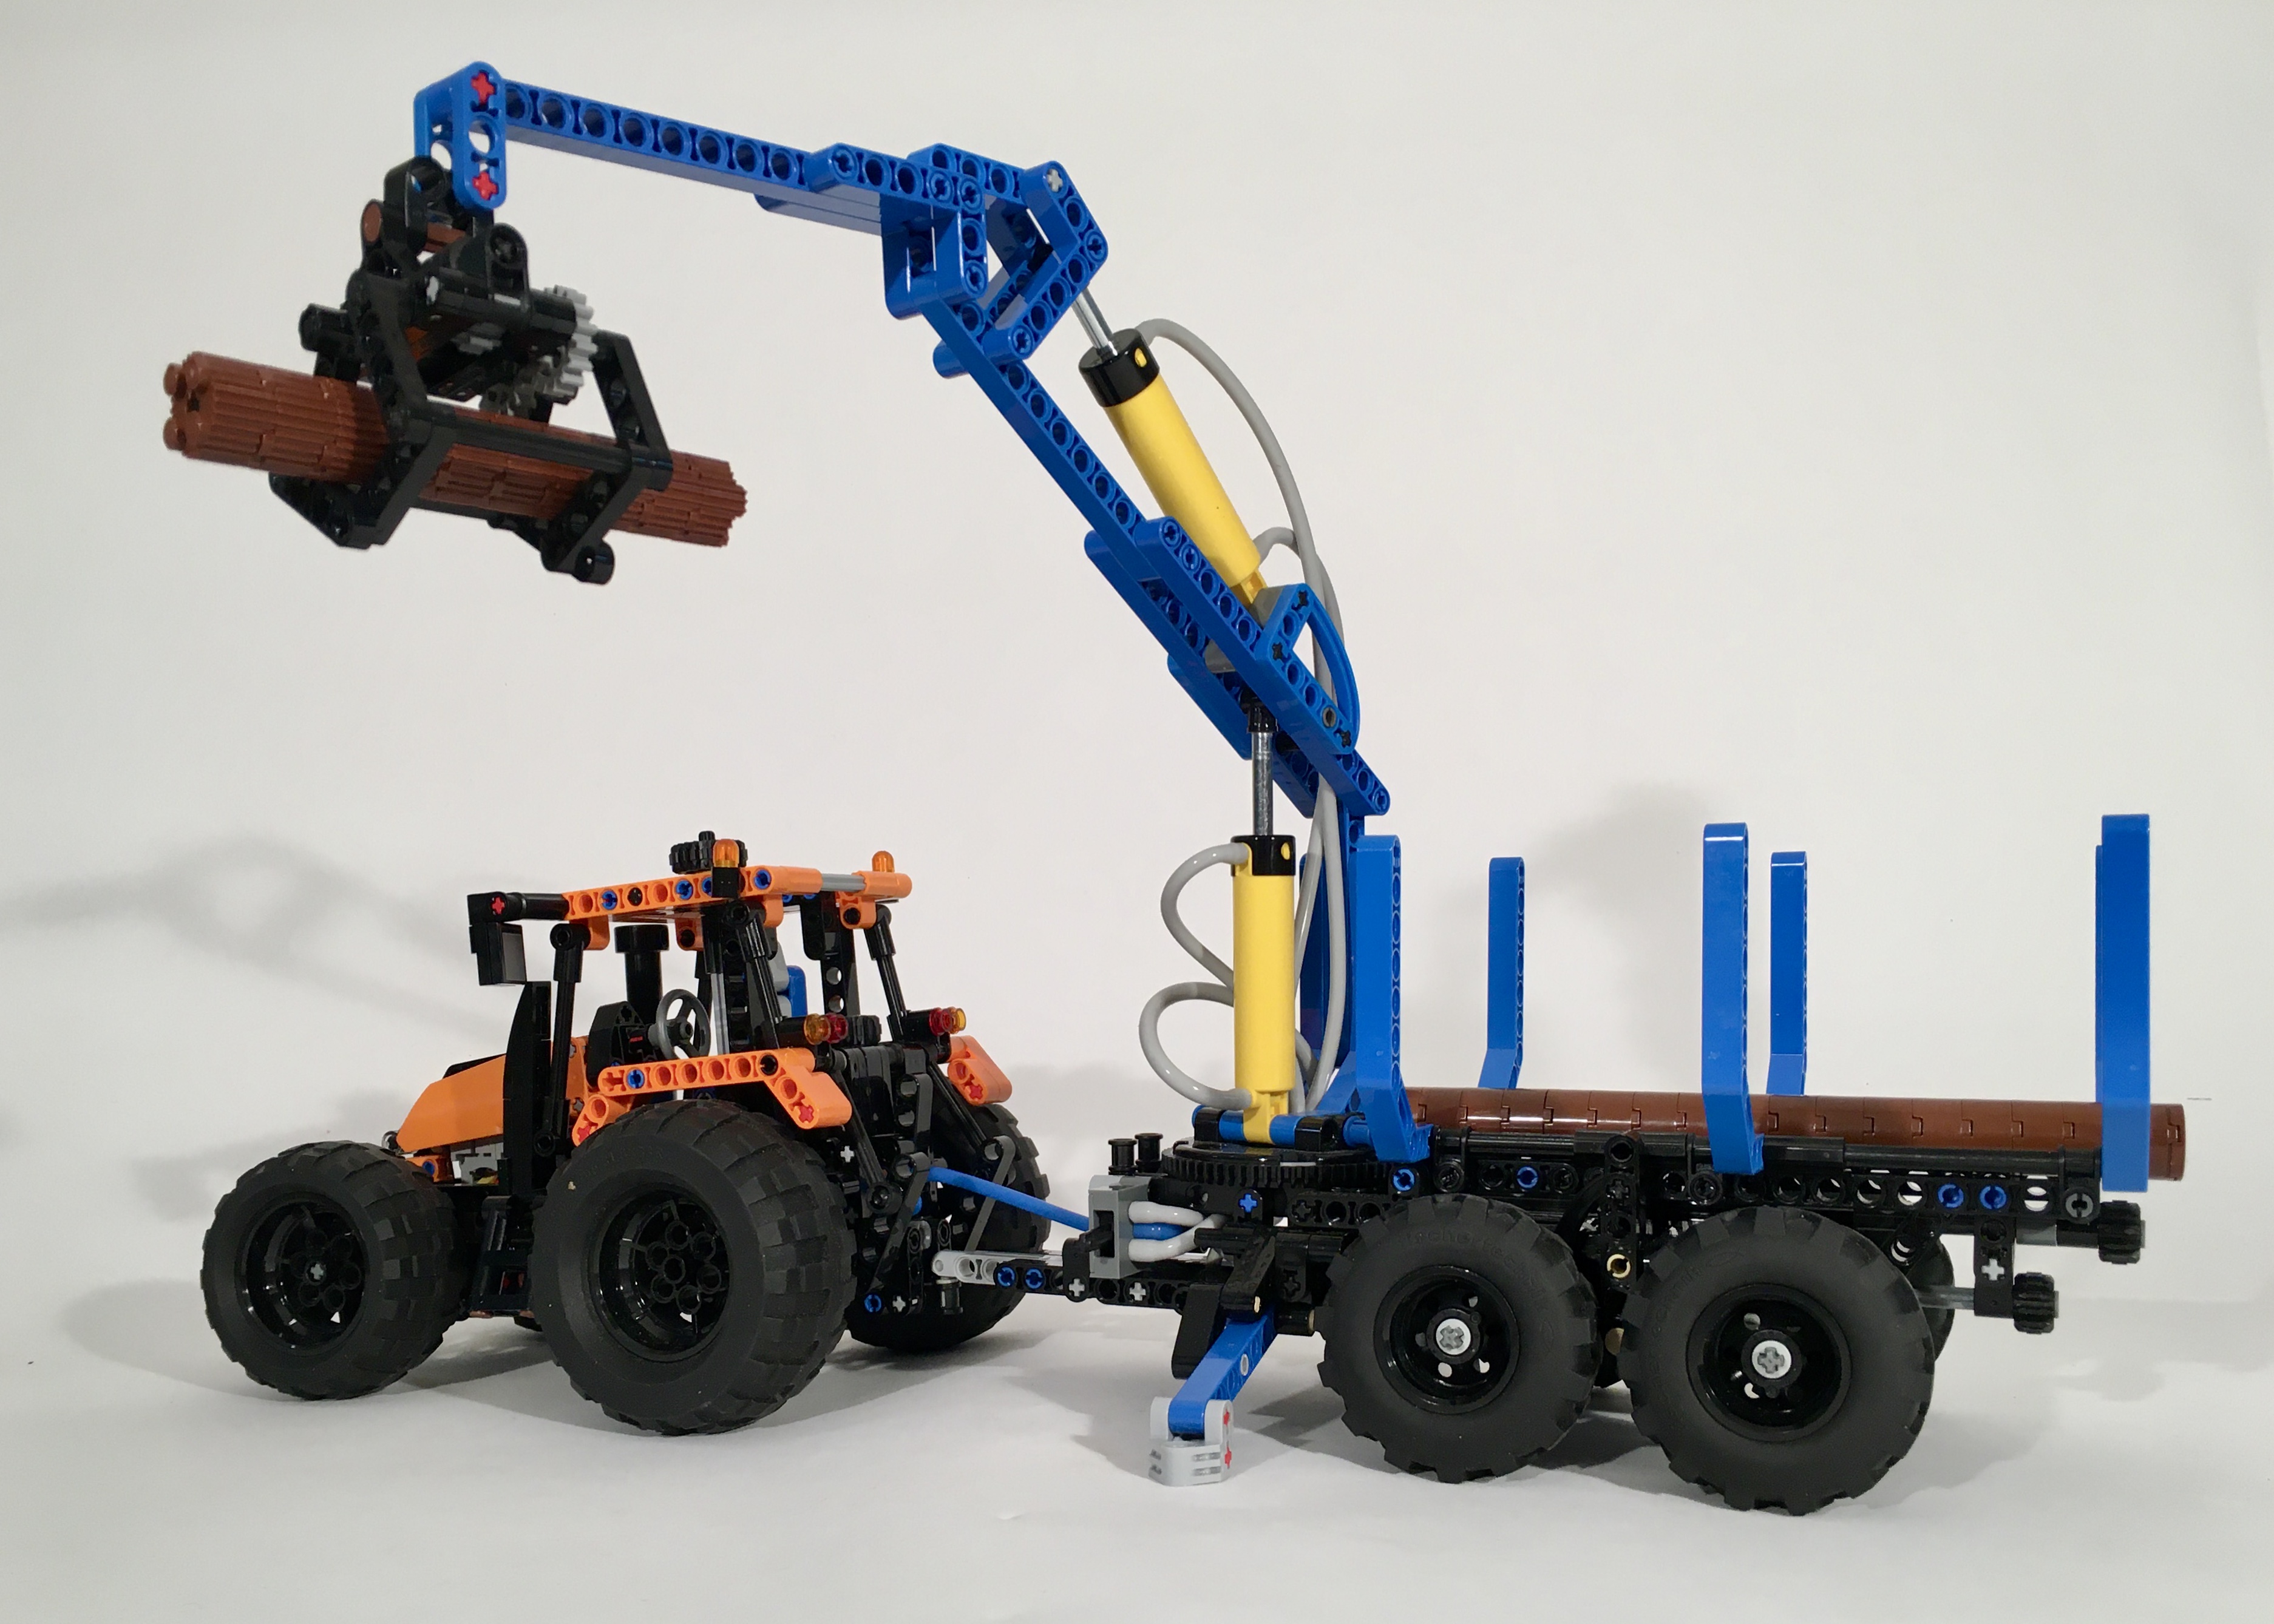
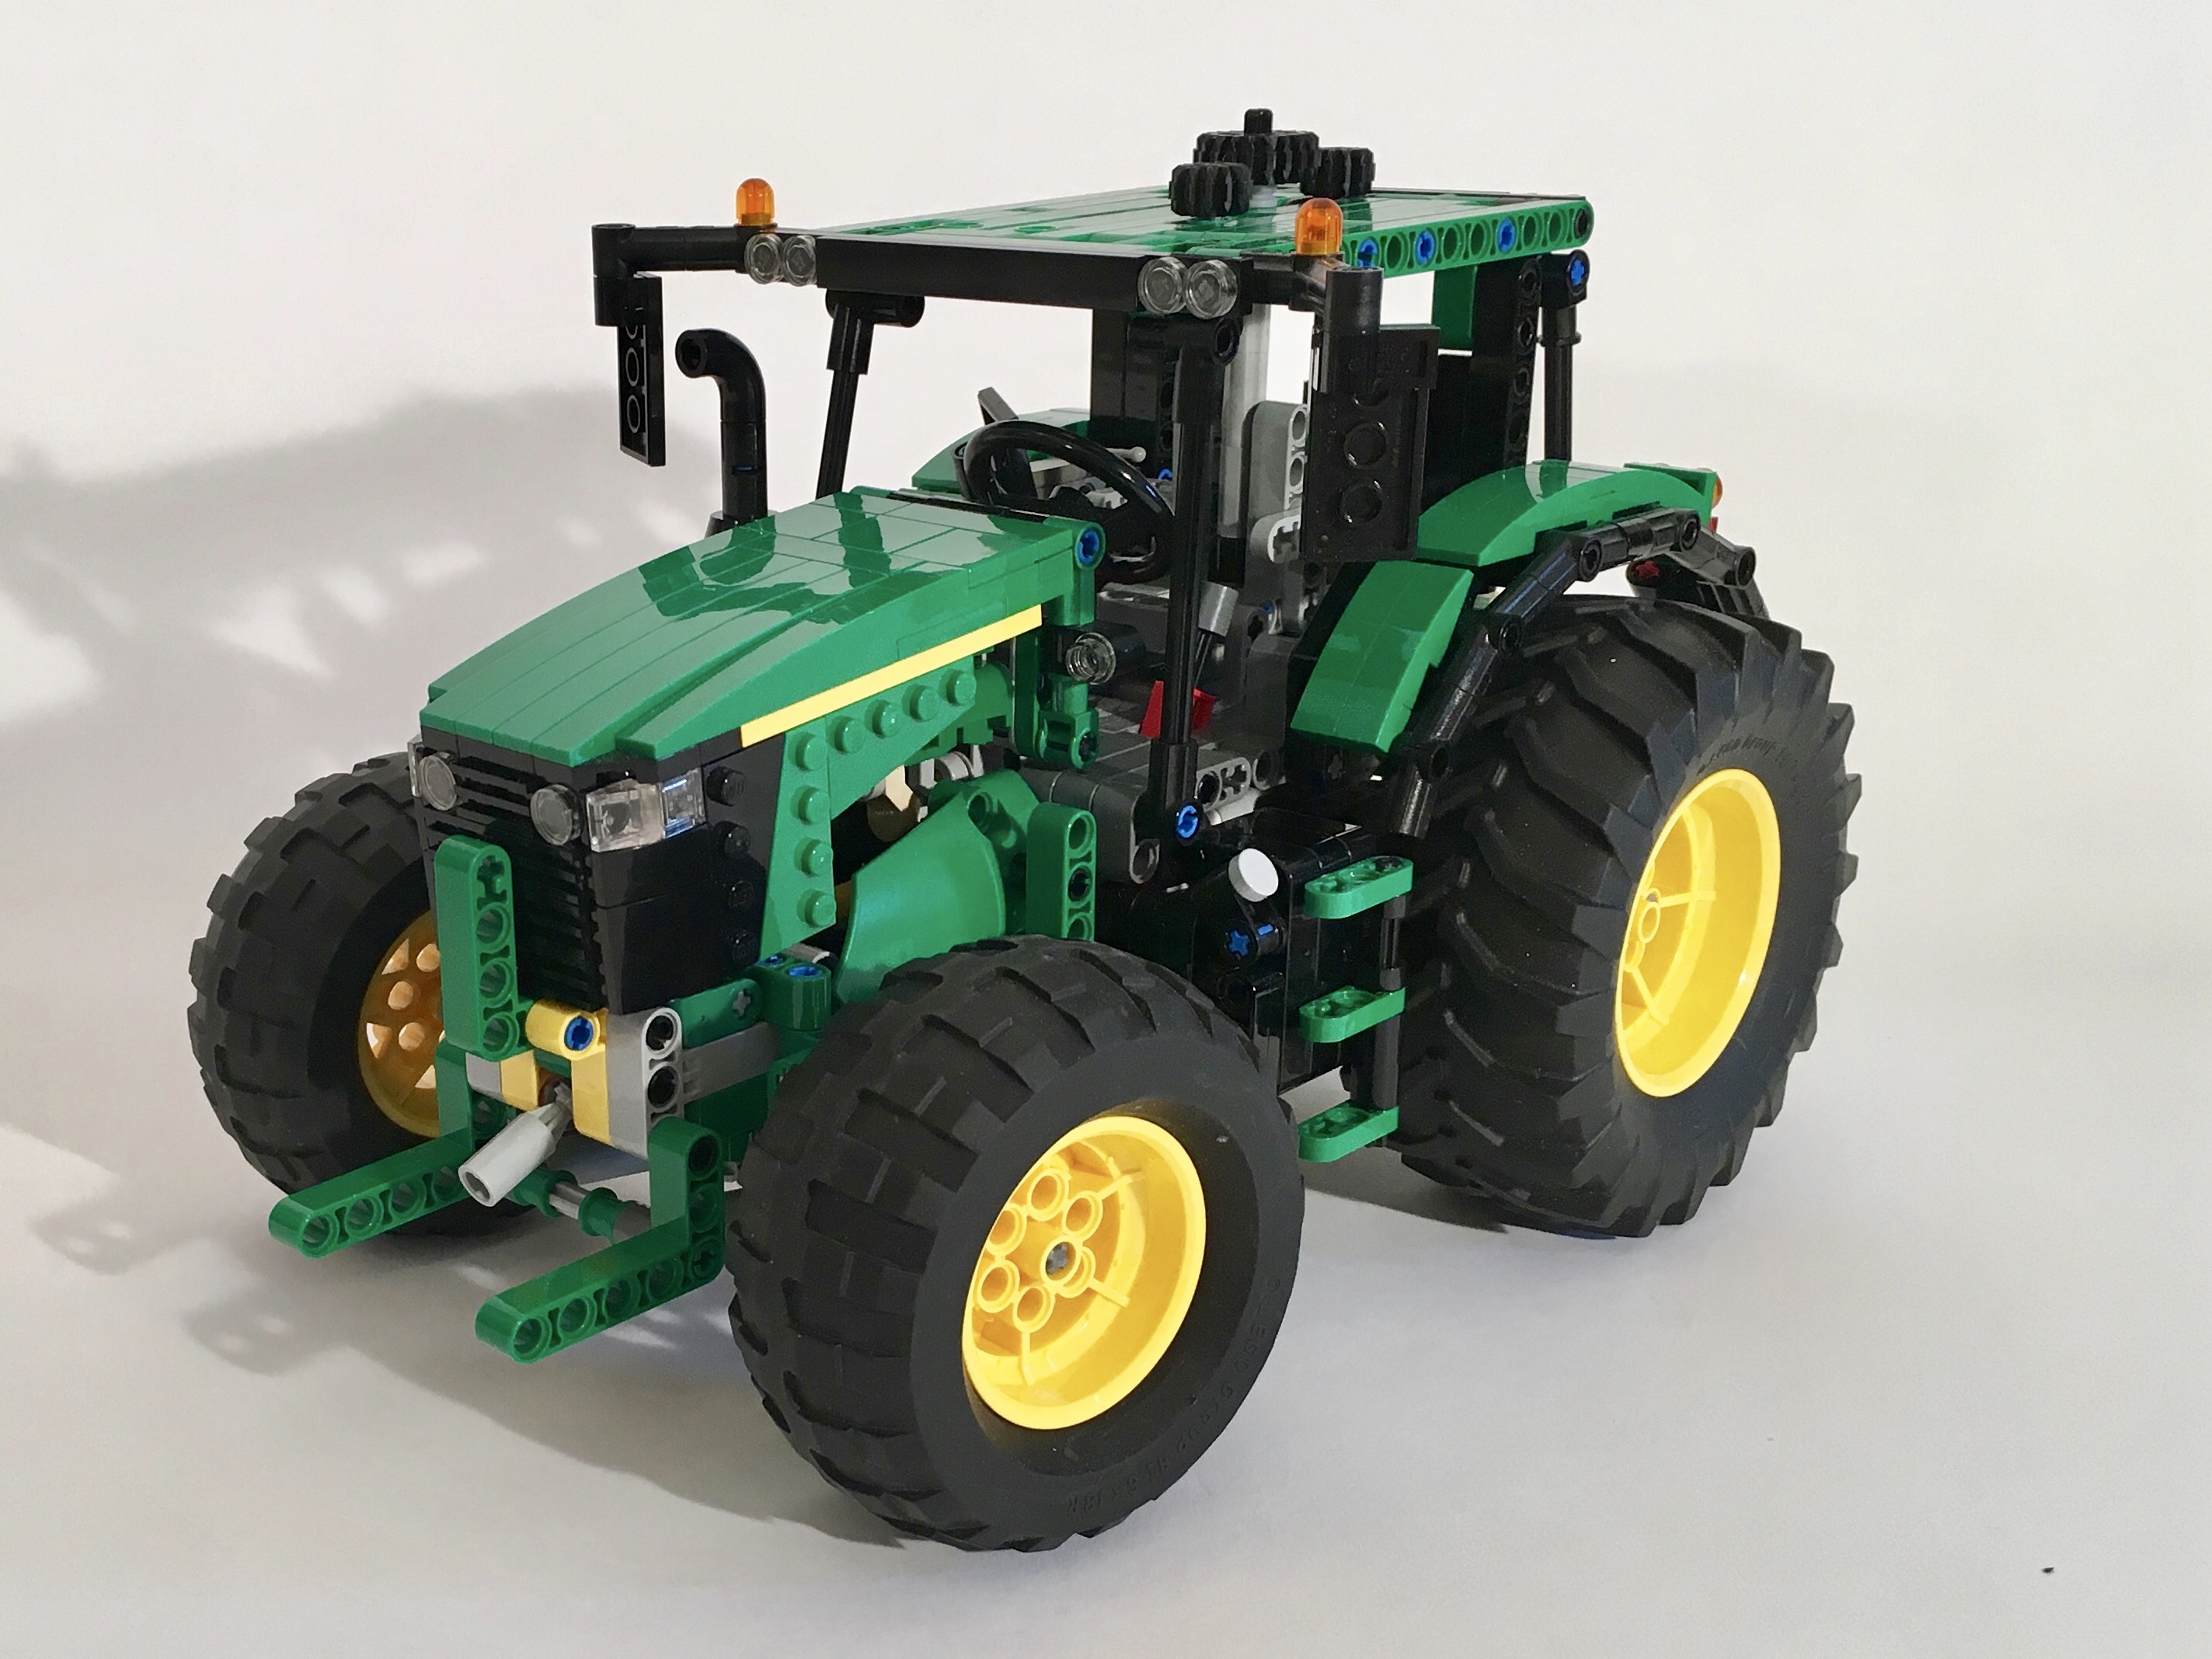
I started with a simple, small, row tractor that I called the Atmos. This tractor was mid scale and in addition to steering and a fake engine like most of my builds, it featured a front implement mount, rear three point hitch, rear PTO, and rear Pneumatic PTO. Little did I know how the tractor would grow into a lot of other tractores, trailers, impliments, and farming support vehicles. At some point, I found myself interested in making a larger tractor, and I have always loved the Claas Xerion. The Claas been done in Lego Technic before, so I went the John Deere styling route for my build.
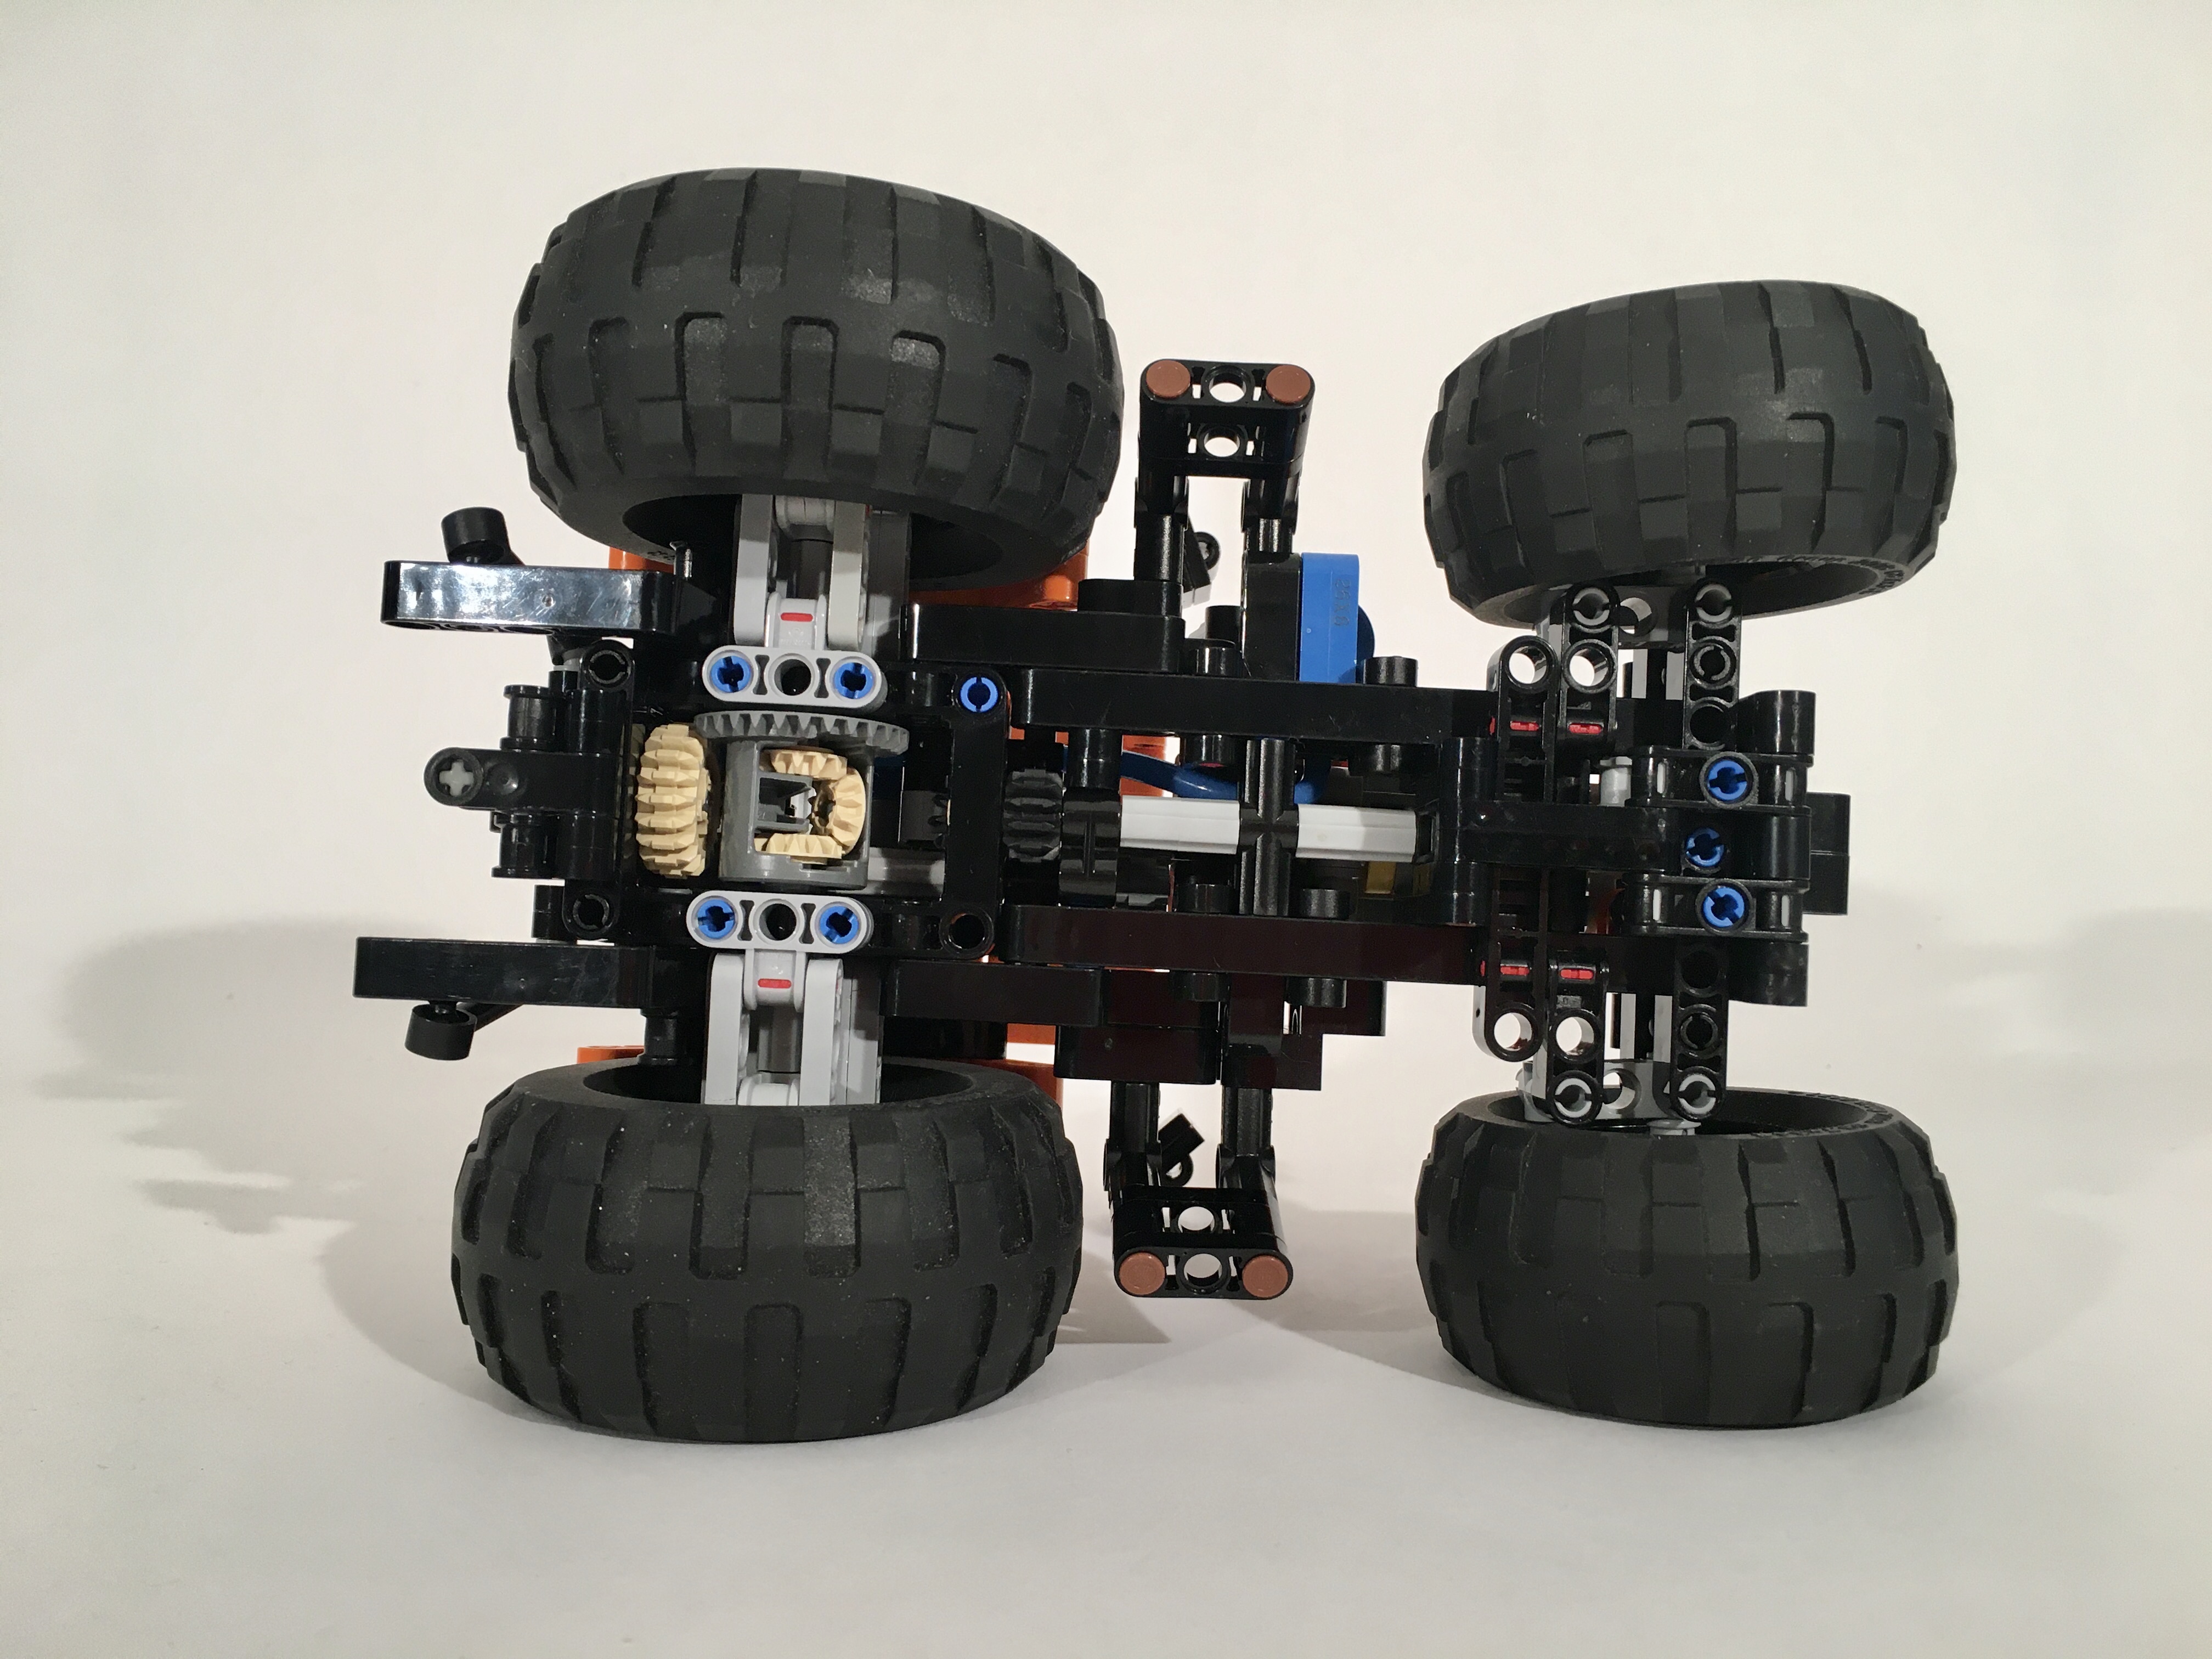
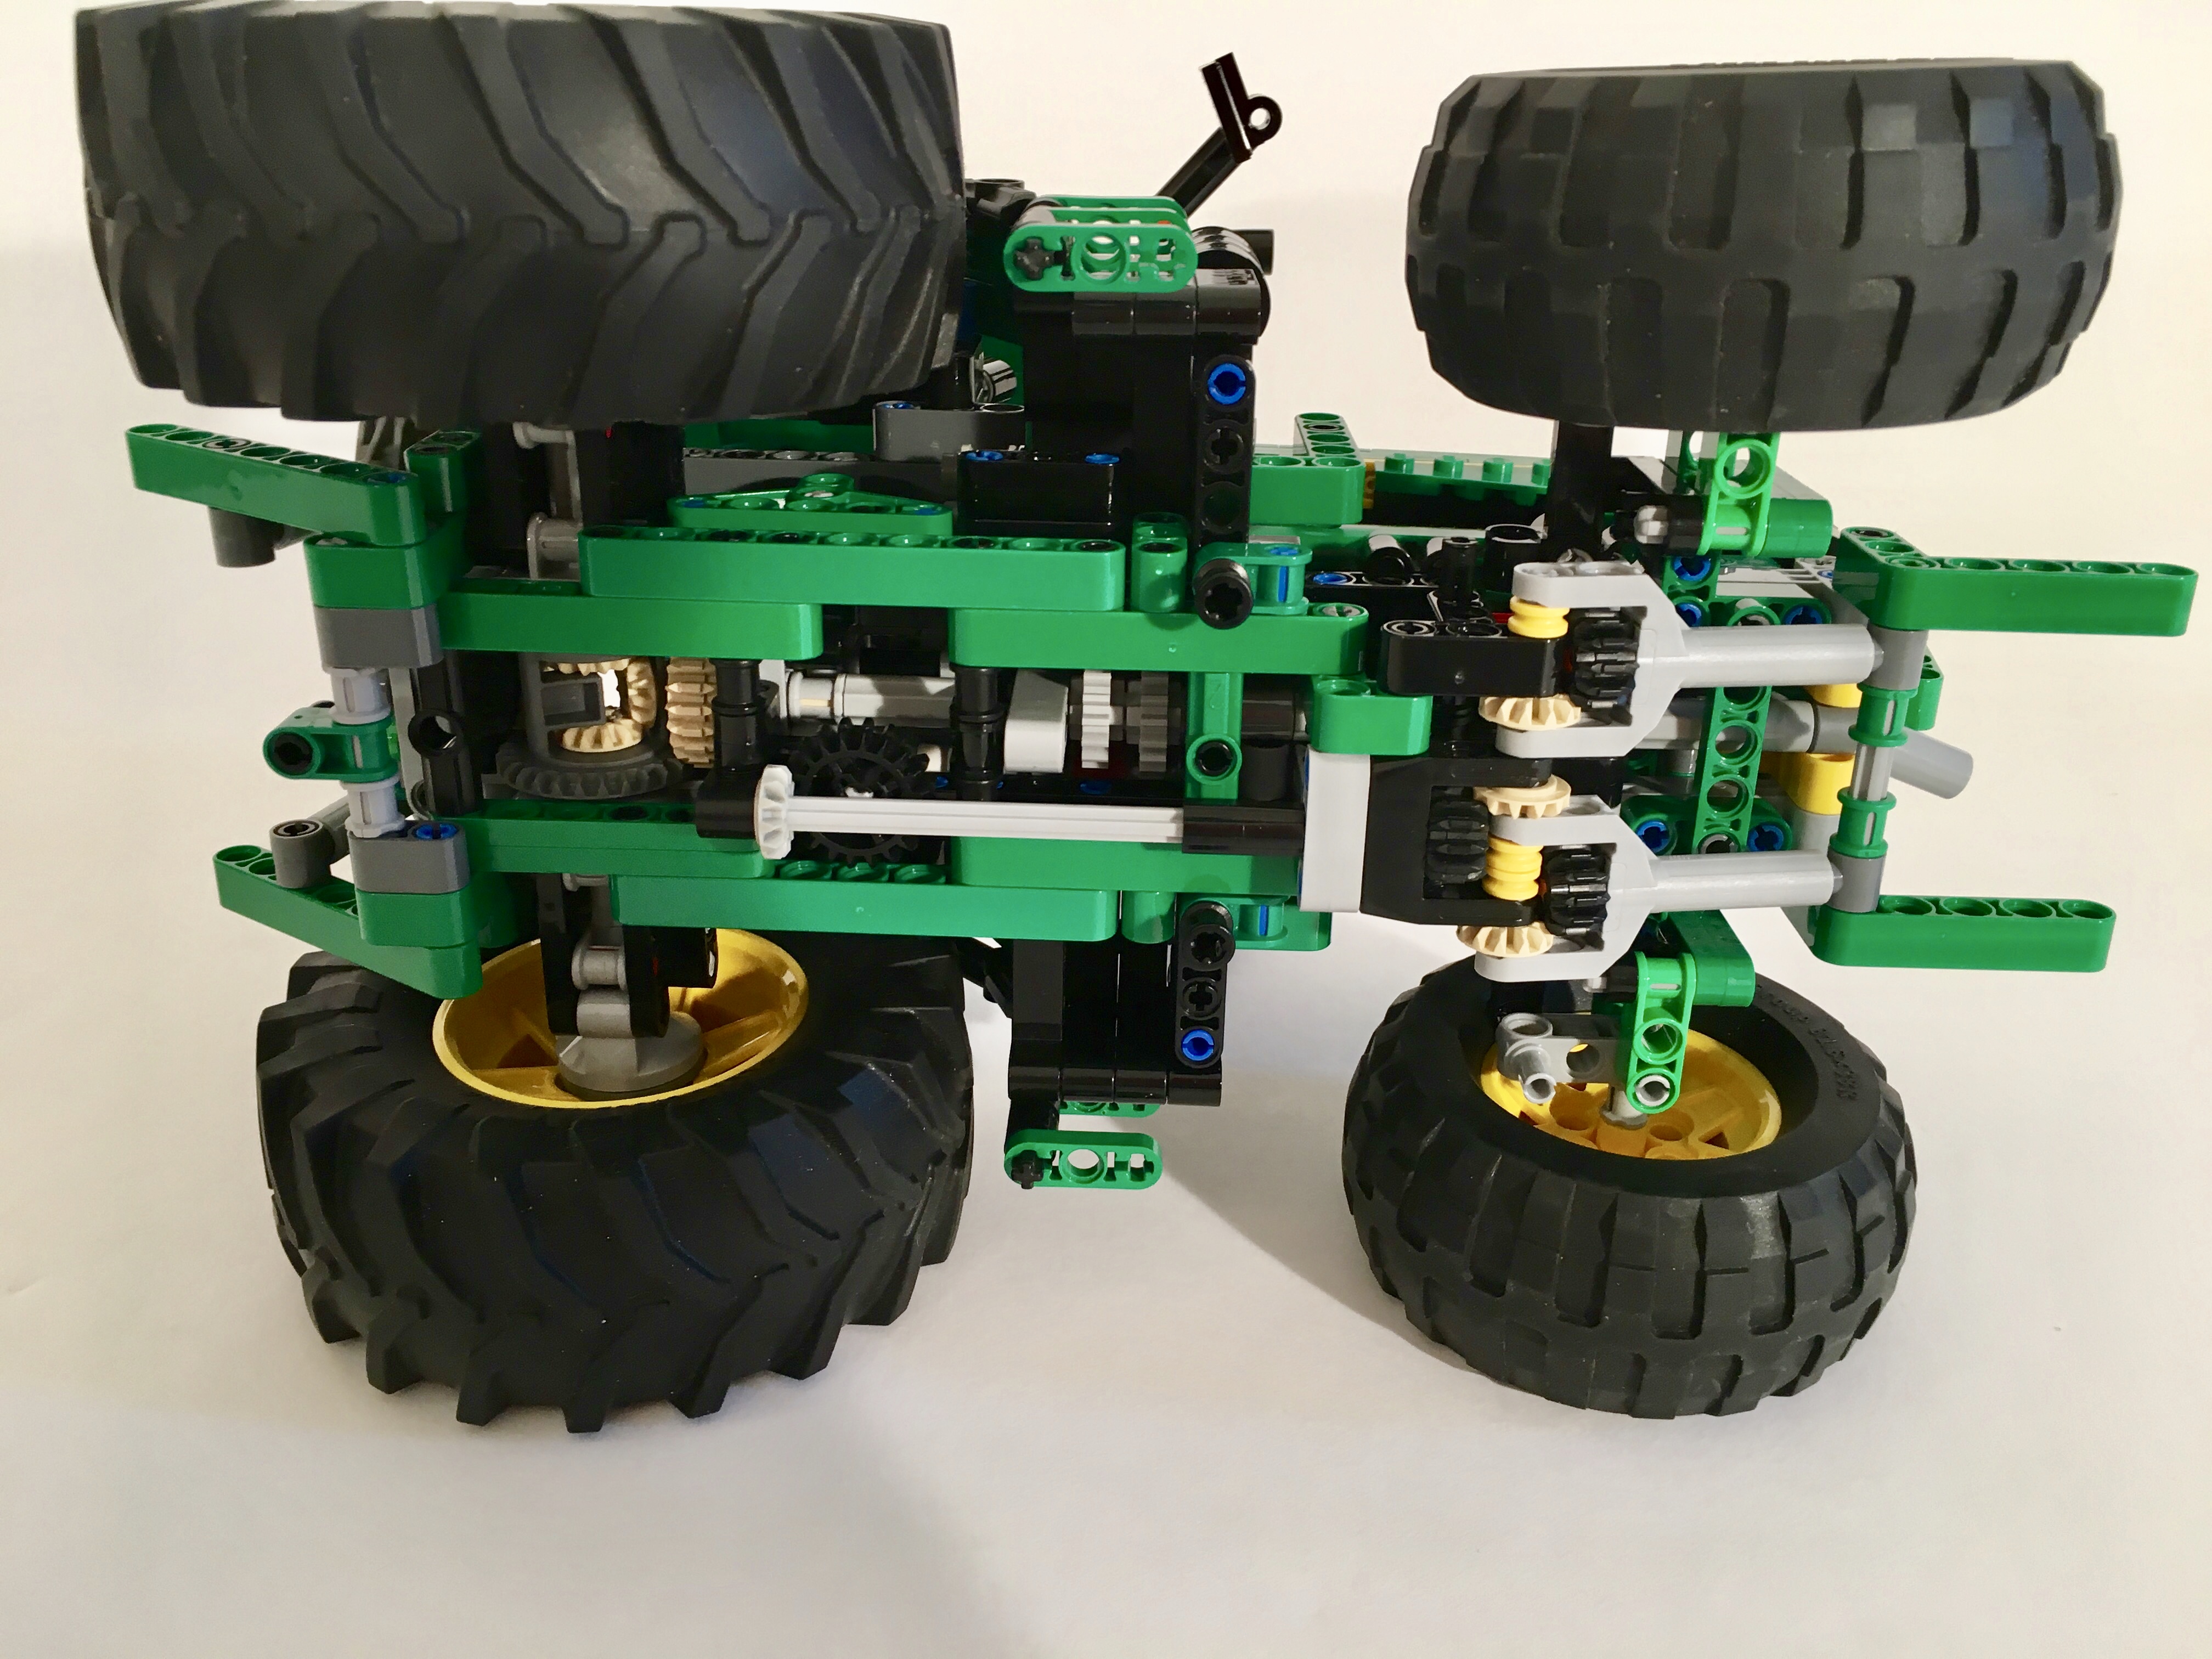
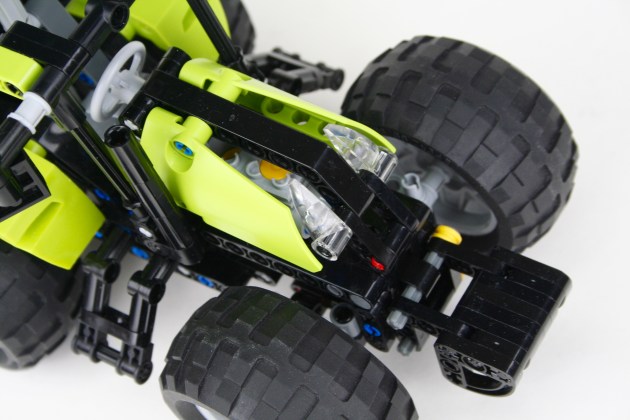
The tractor had to integrate into the other builds, so the front and rear mount and PTO placement dictated a couple of the hard points. I built the tractor with four wheel drive, and four wheel steering. A four cylinder fake engine is placed under the frond hood above the front axle. The rear most cylinder does not move as the crankshaft would have run into the steering unit, and any change I tried to fix it made for an ugly hood. A worm gear actuated rear three point hitch allows for implements to be mounted to the tractor.
The steering is controlled by a HOG light at the top of the cab, which caused some headaches for placement as I wanted the cab to be able to rotate. There is a small gear on the right of the tractor that controls the rotation through and internally mounted worm gear. Getting the cab to rotate in the right spot, without hitting anything, and while still having the pneumatic pump, required endless test rotations.
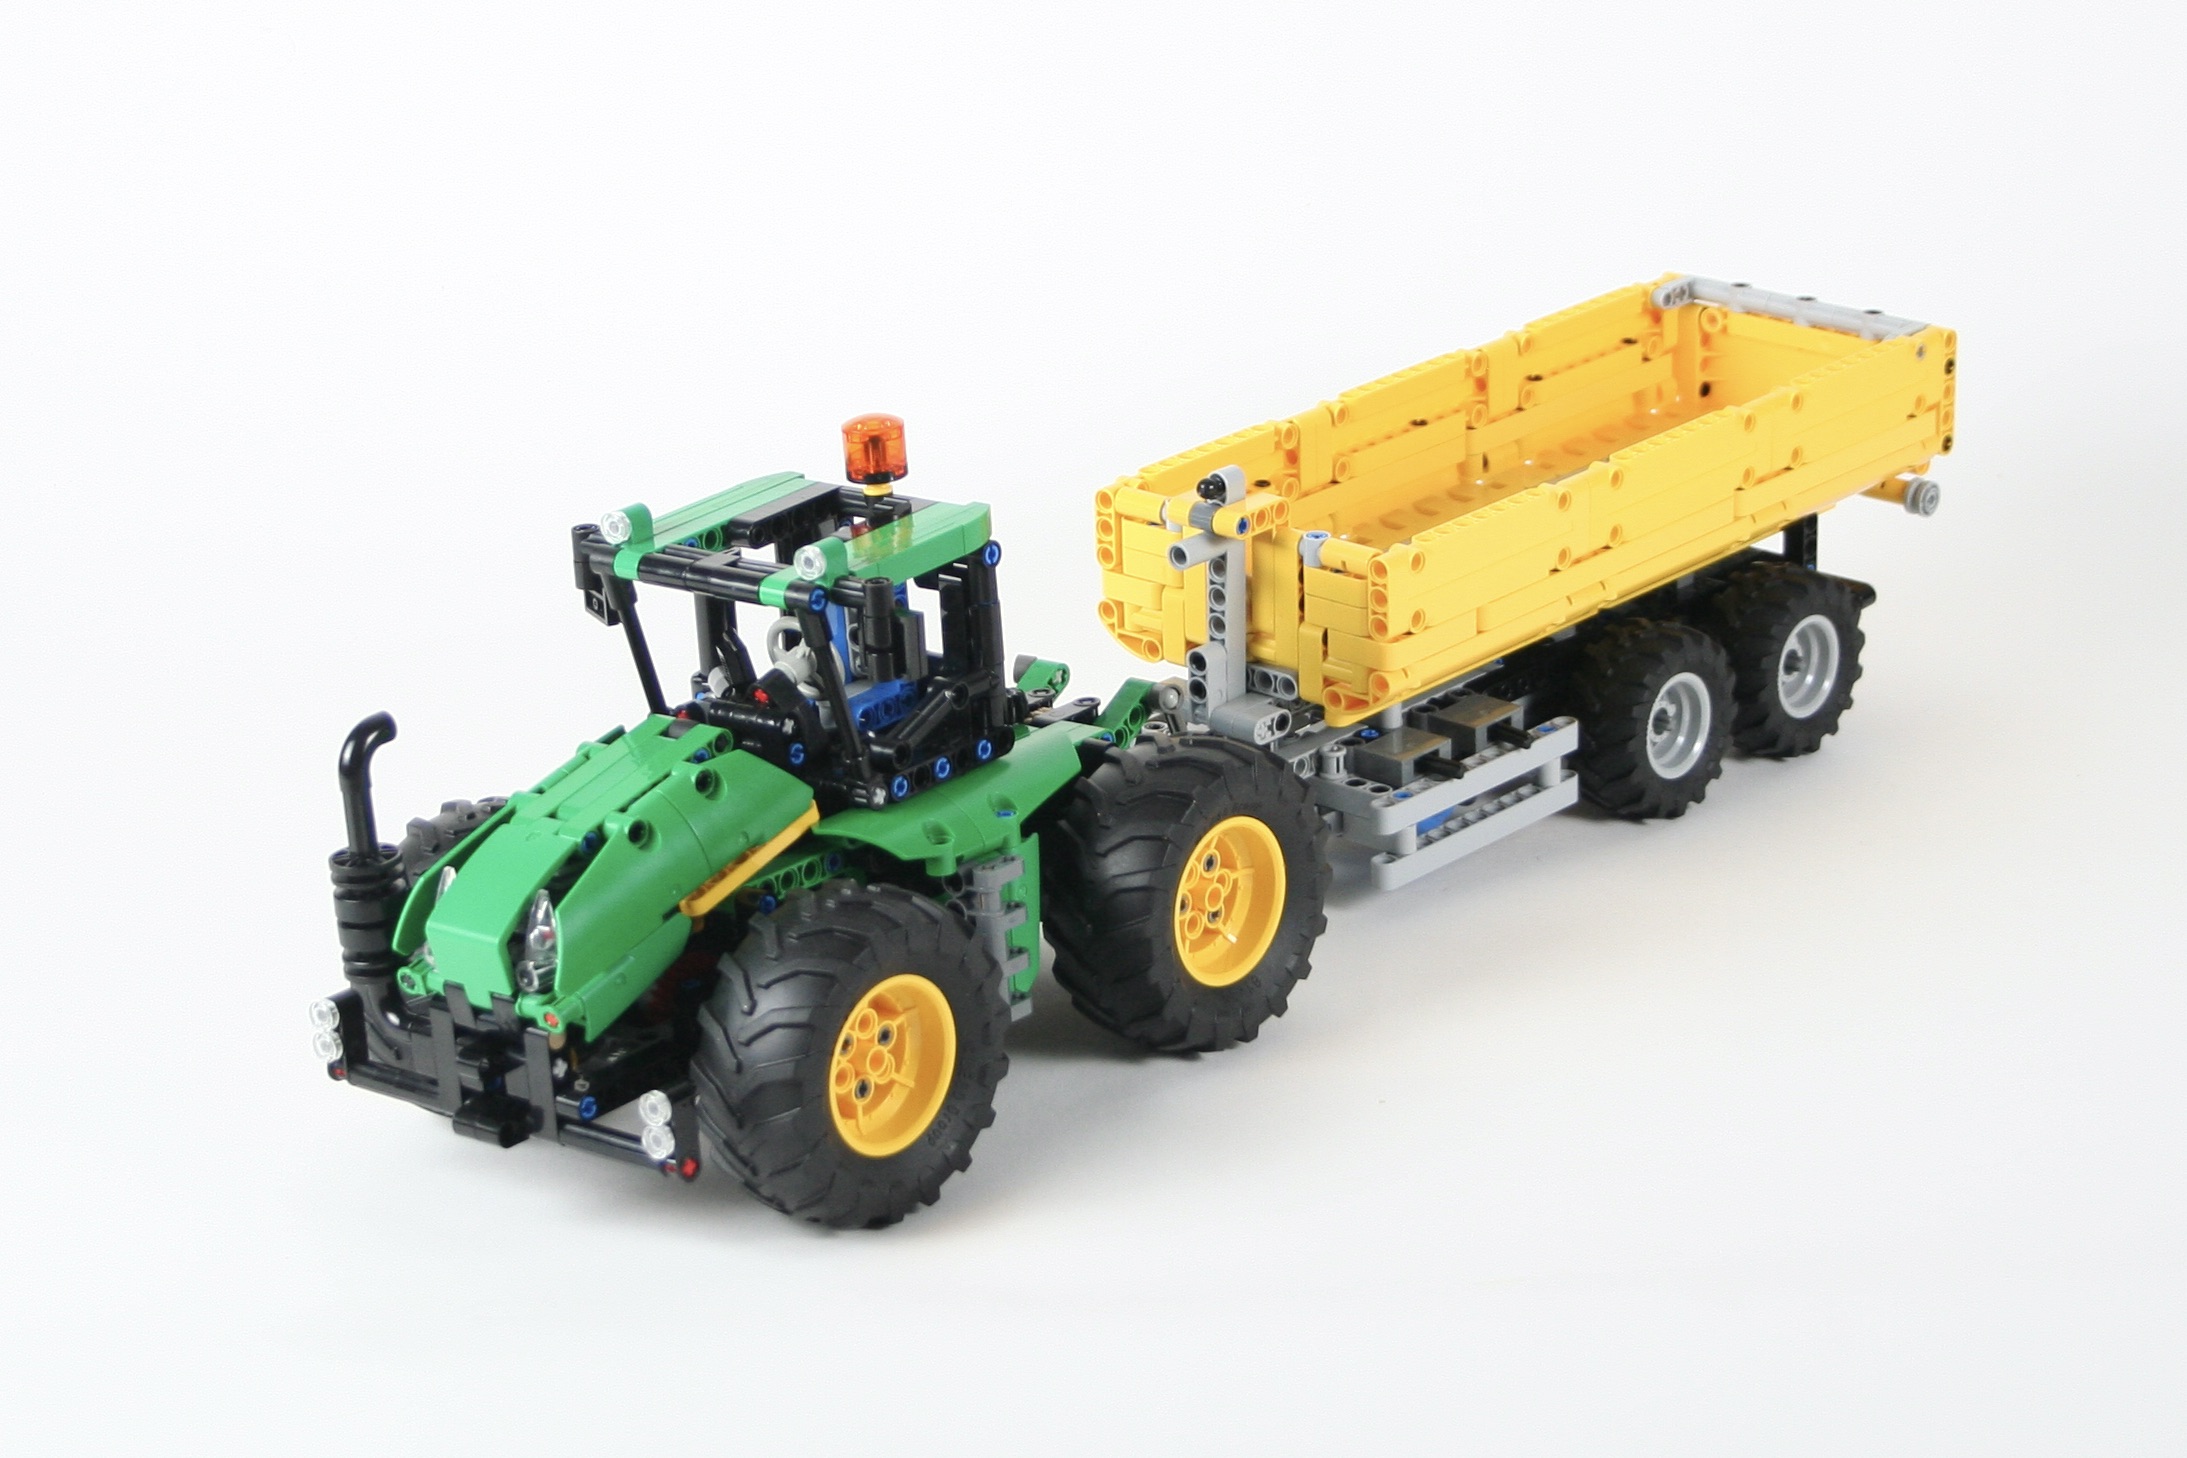
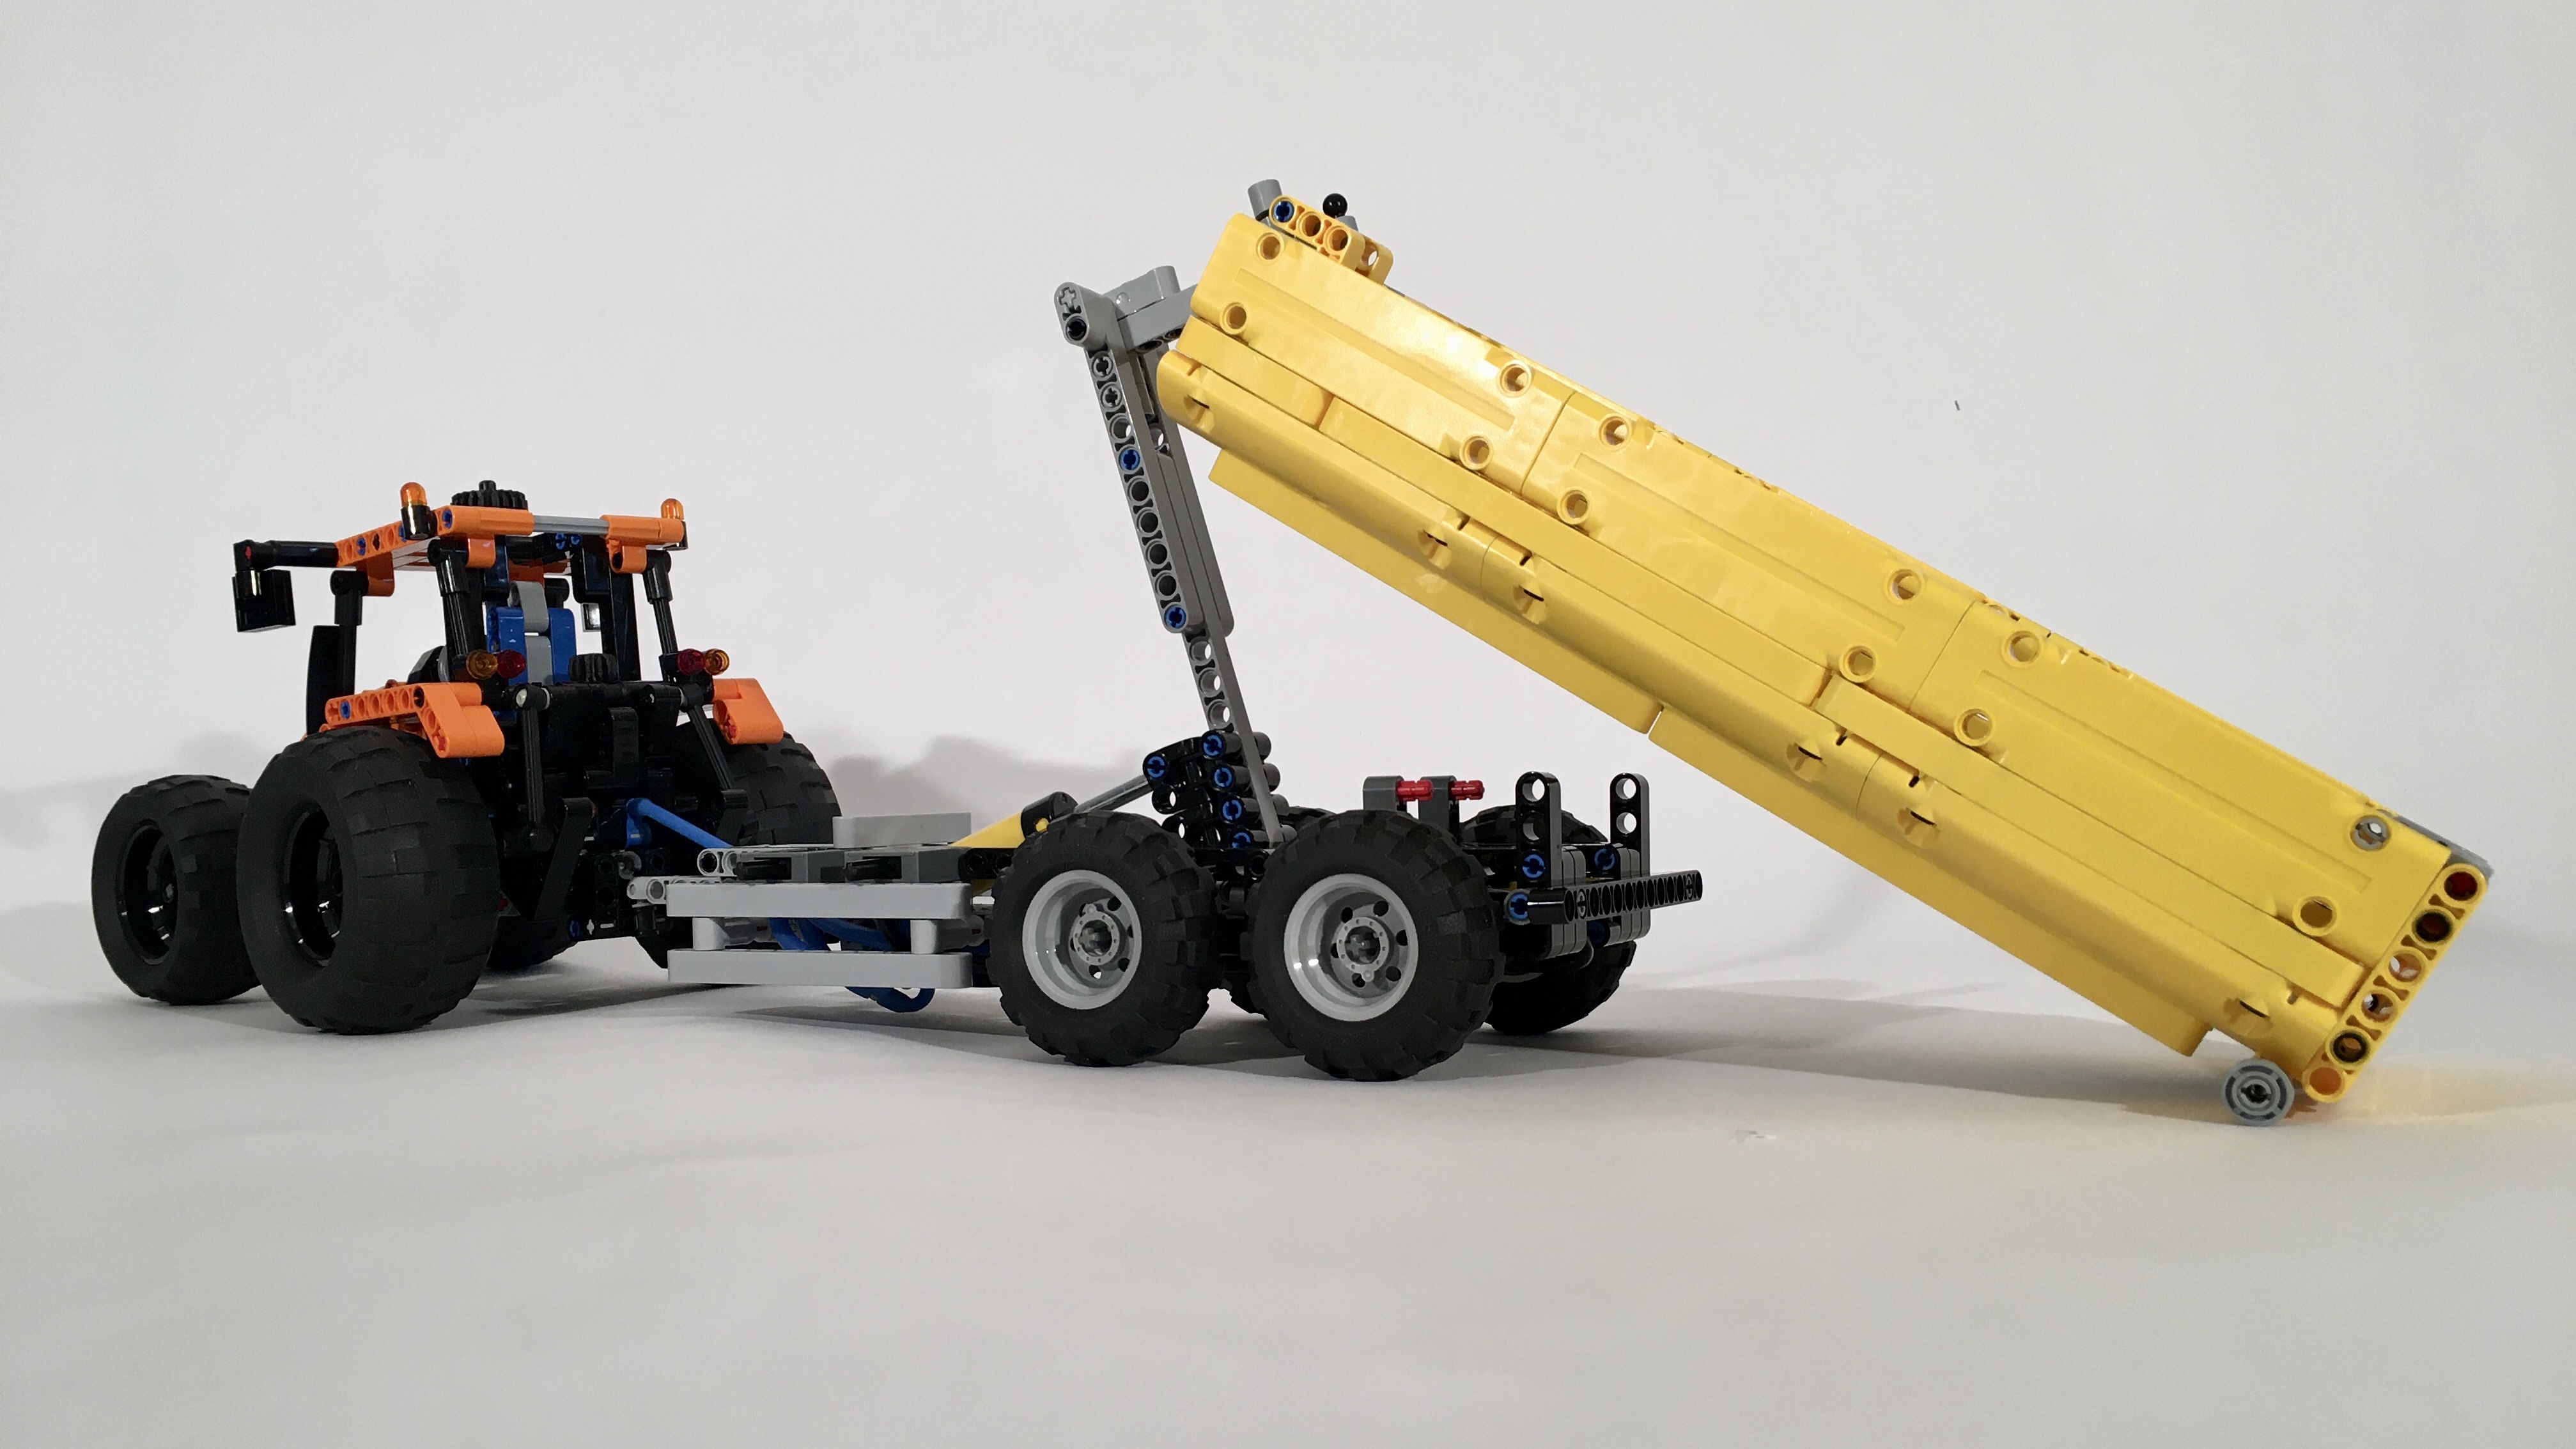
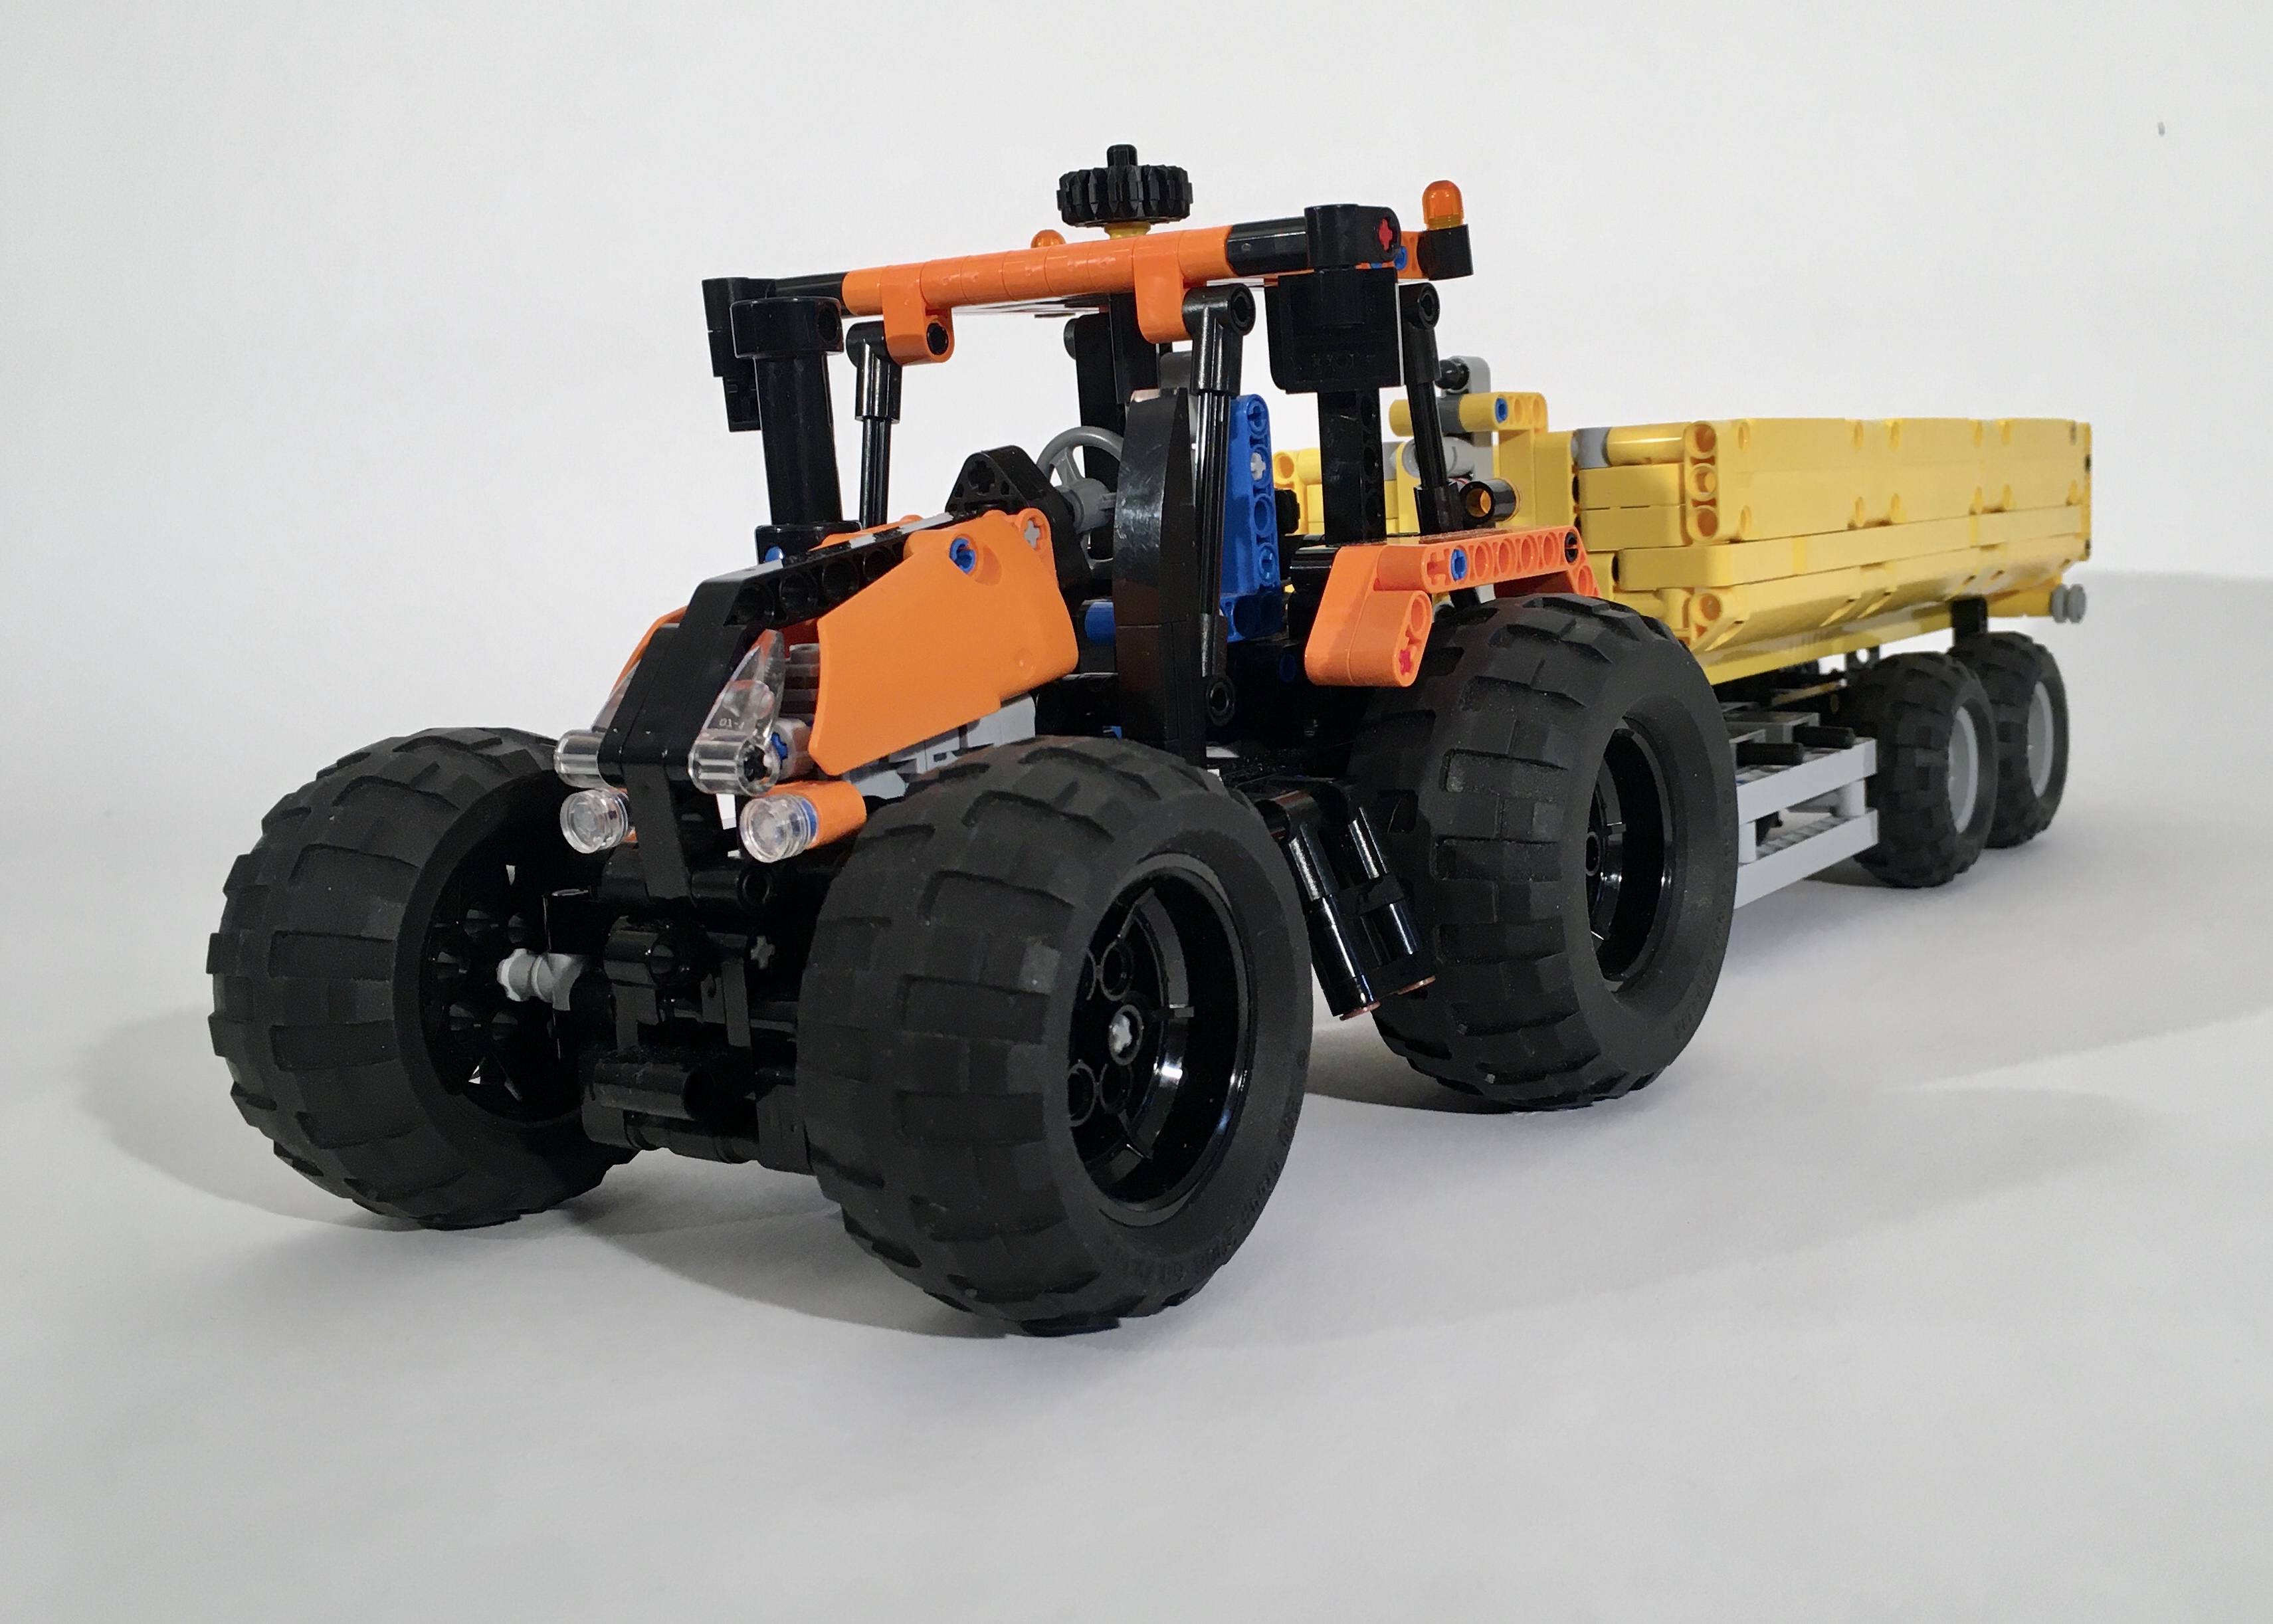
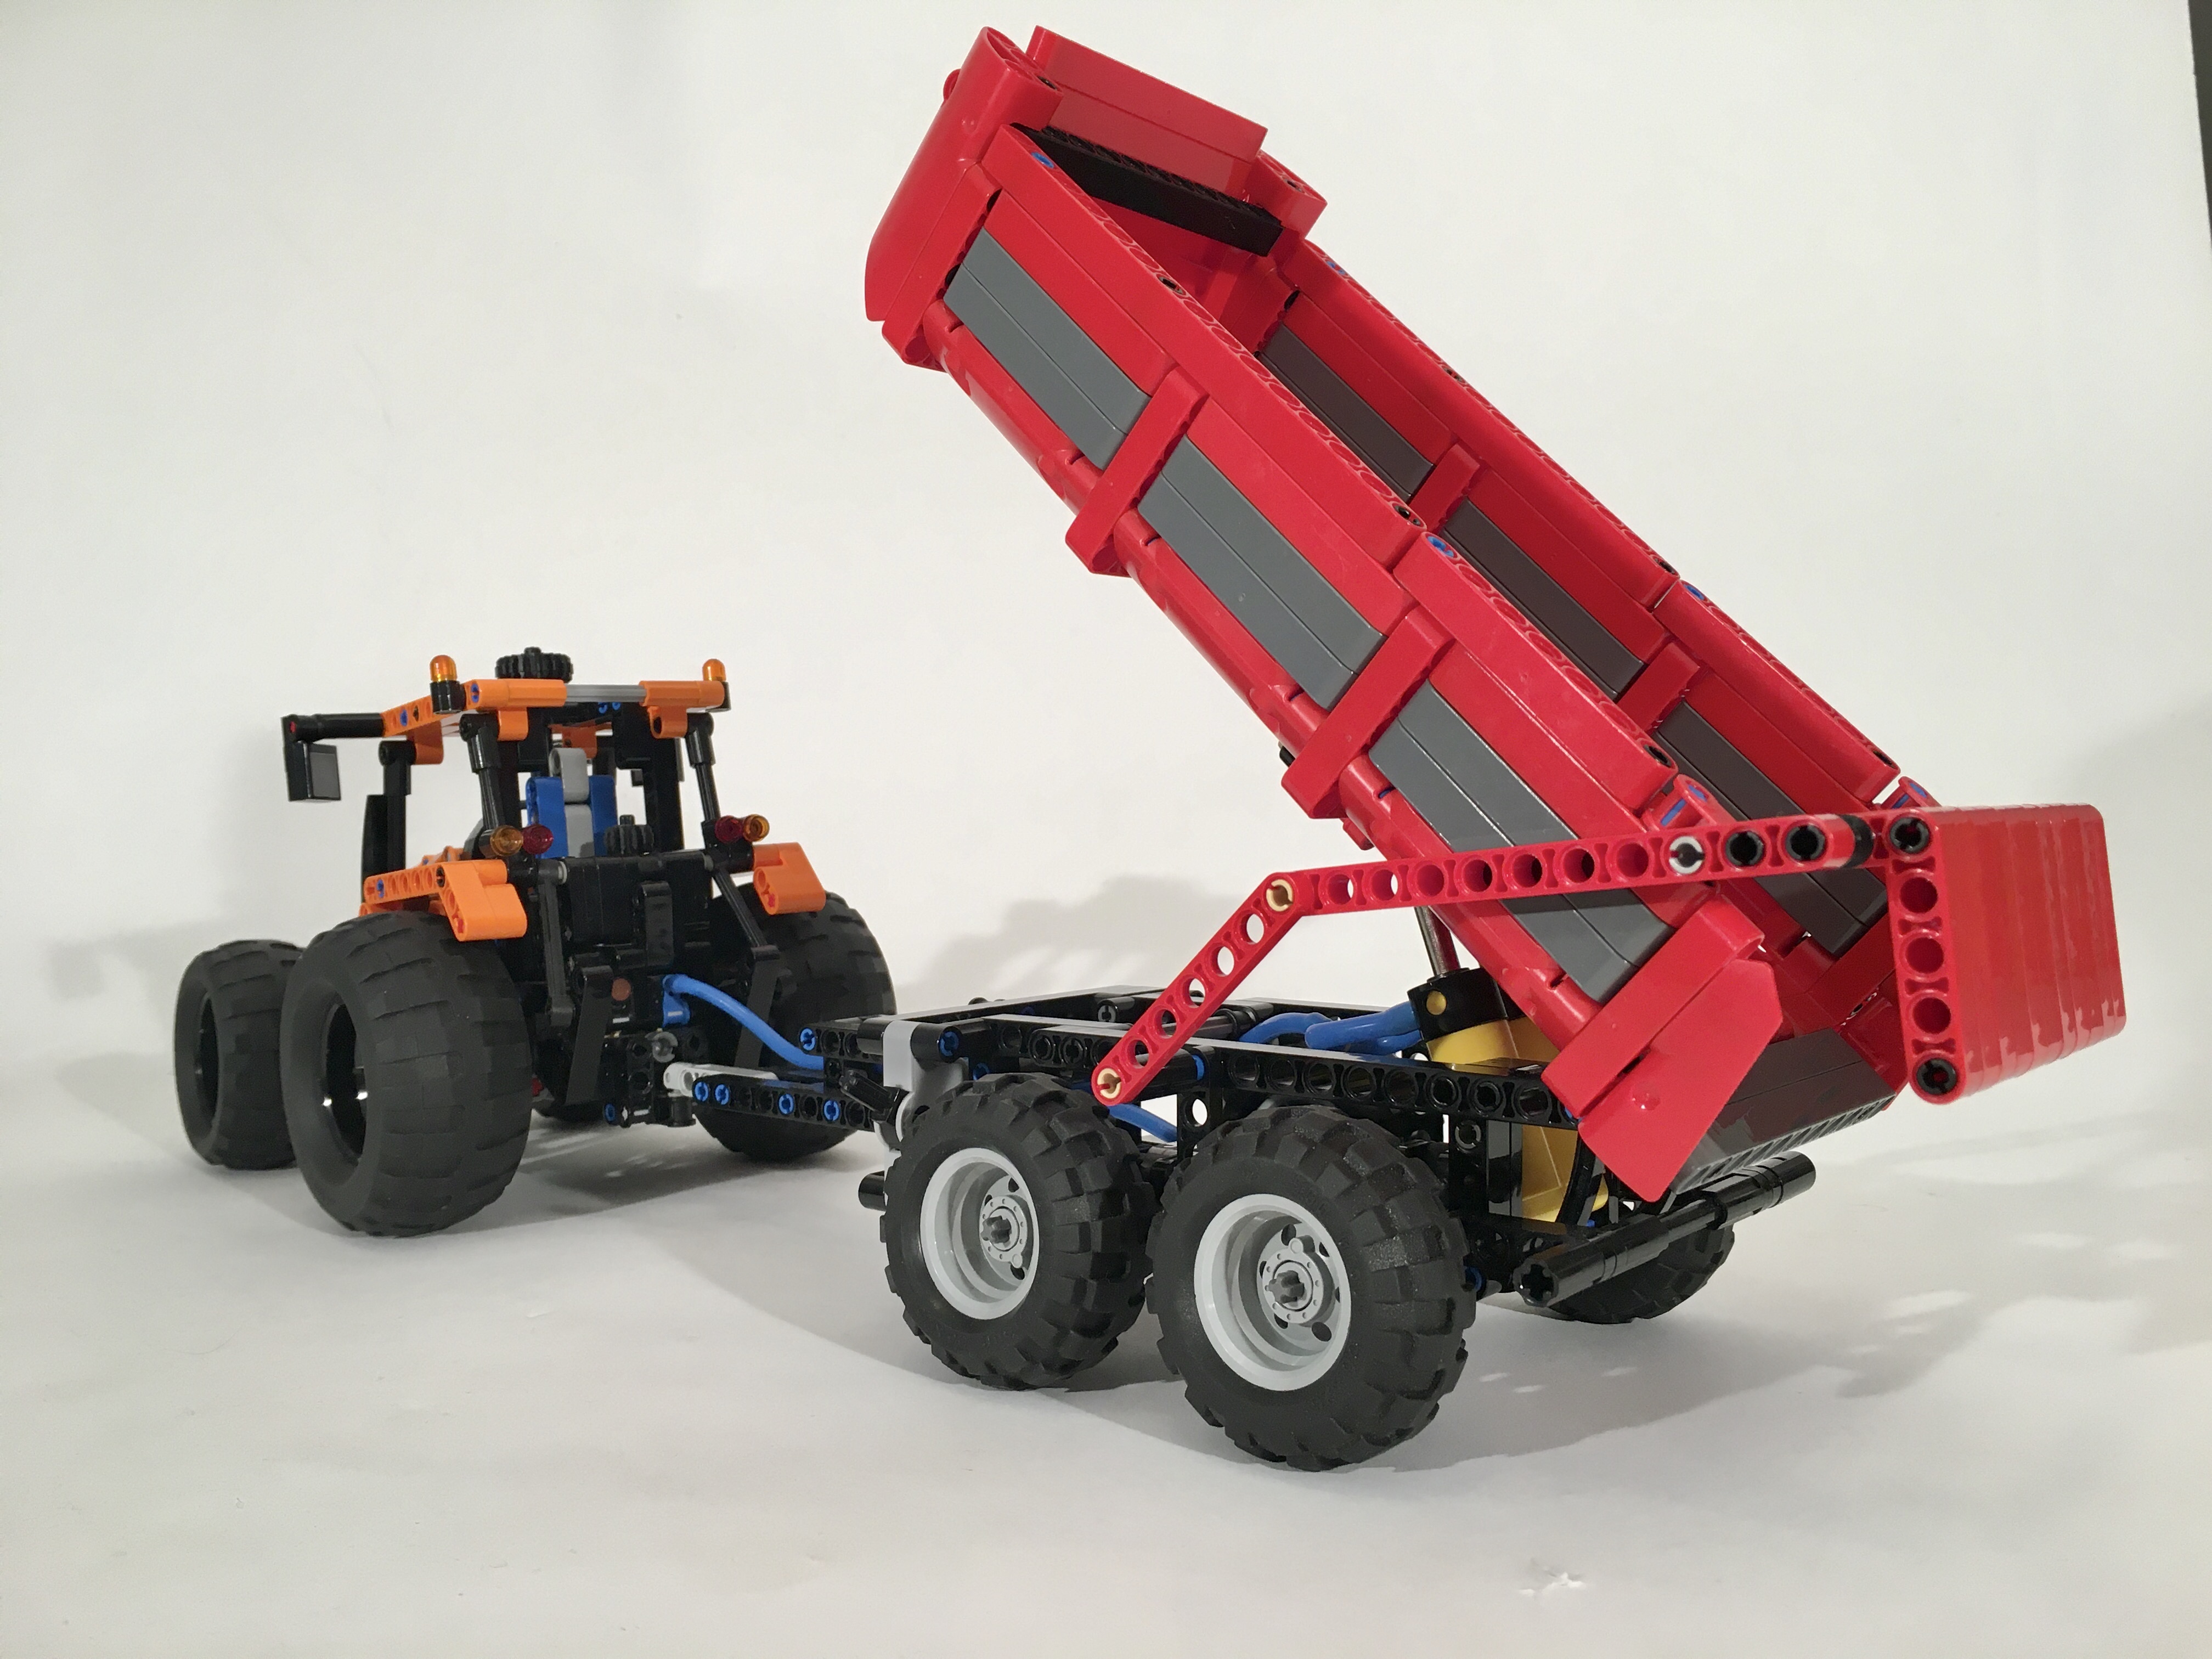
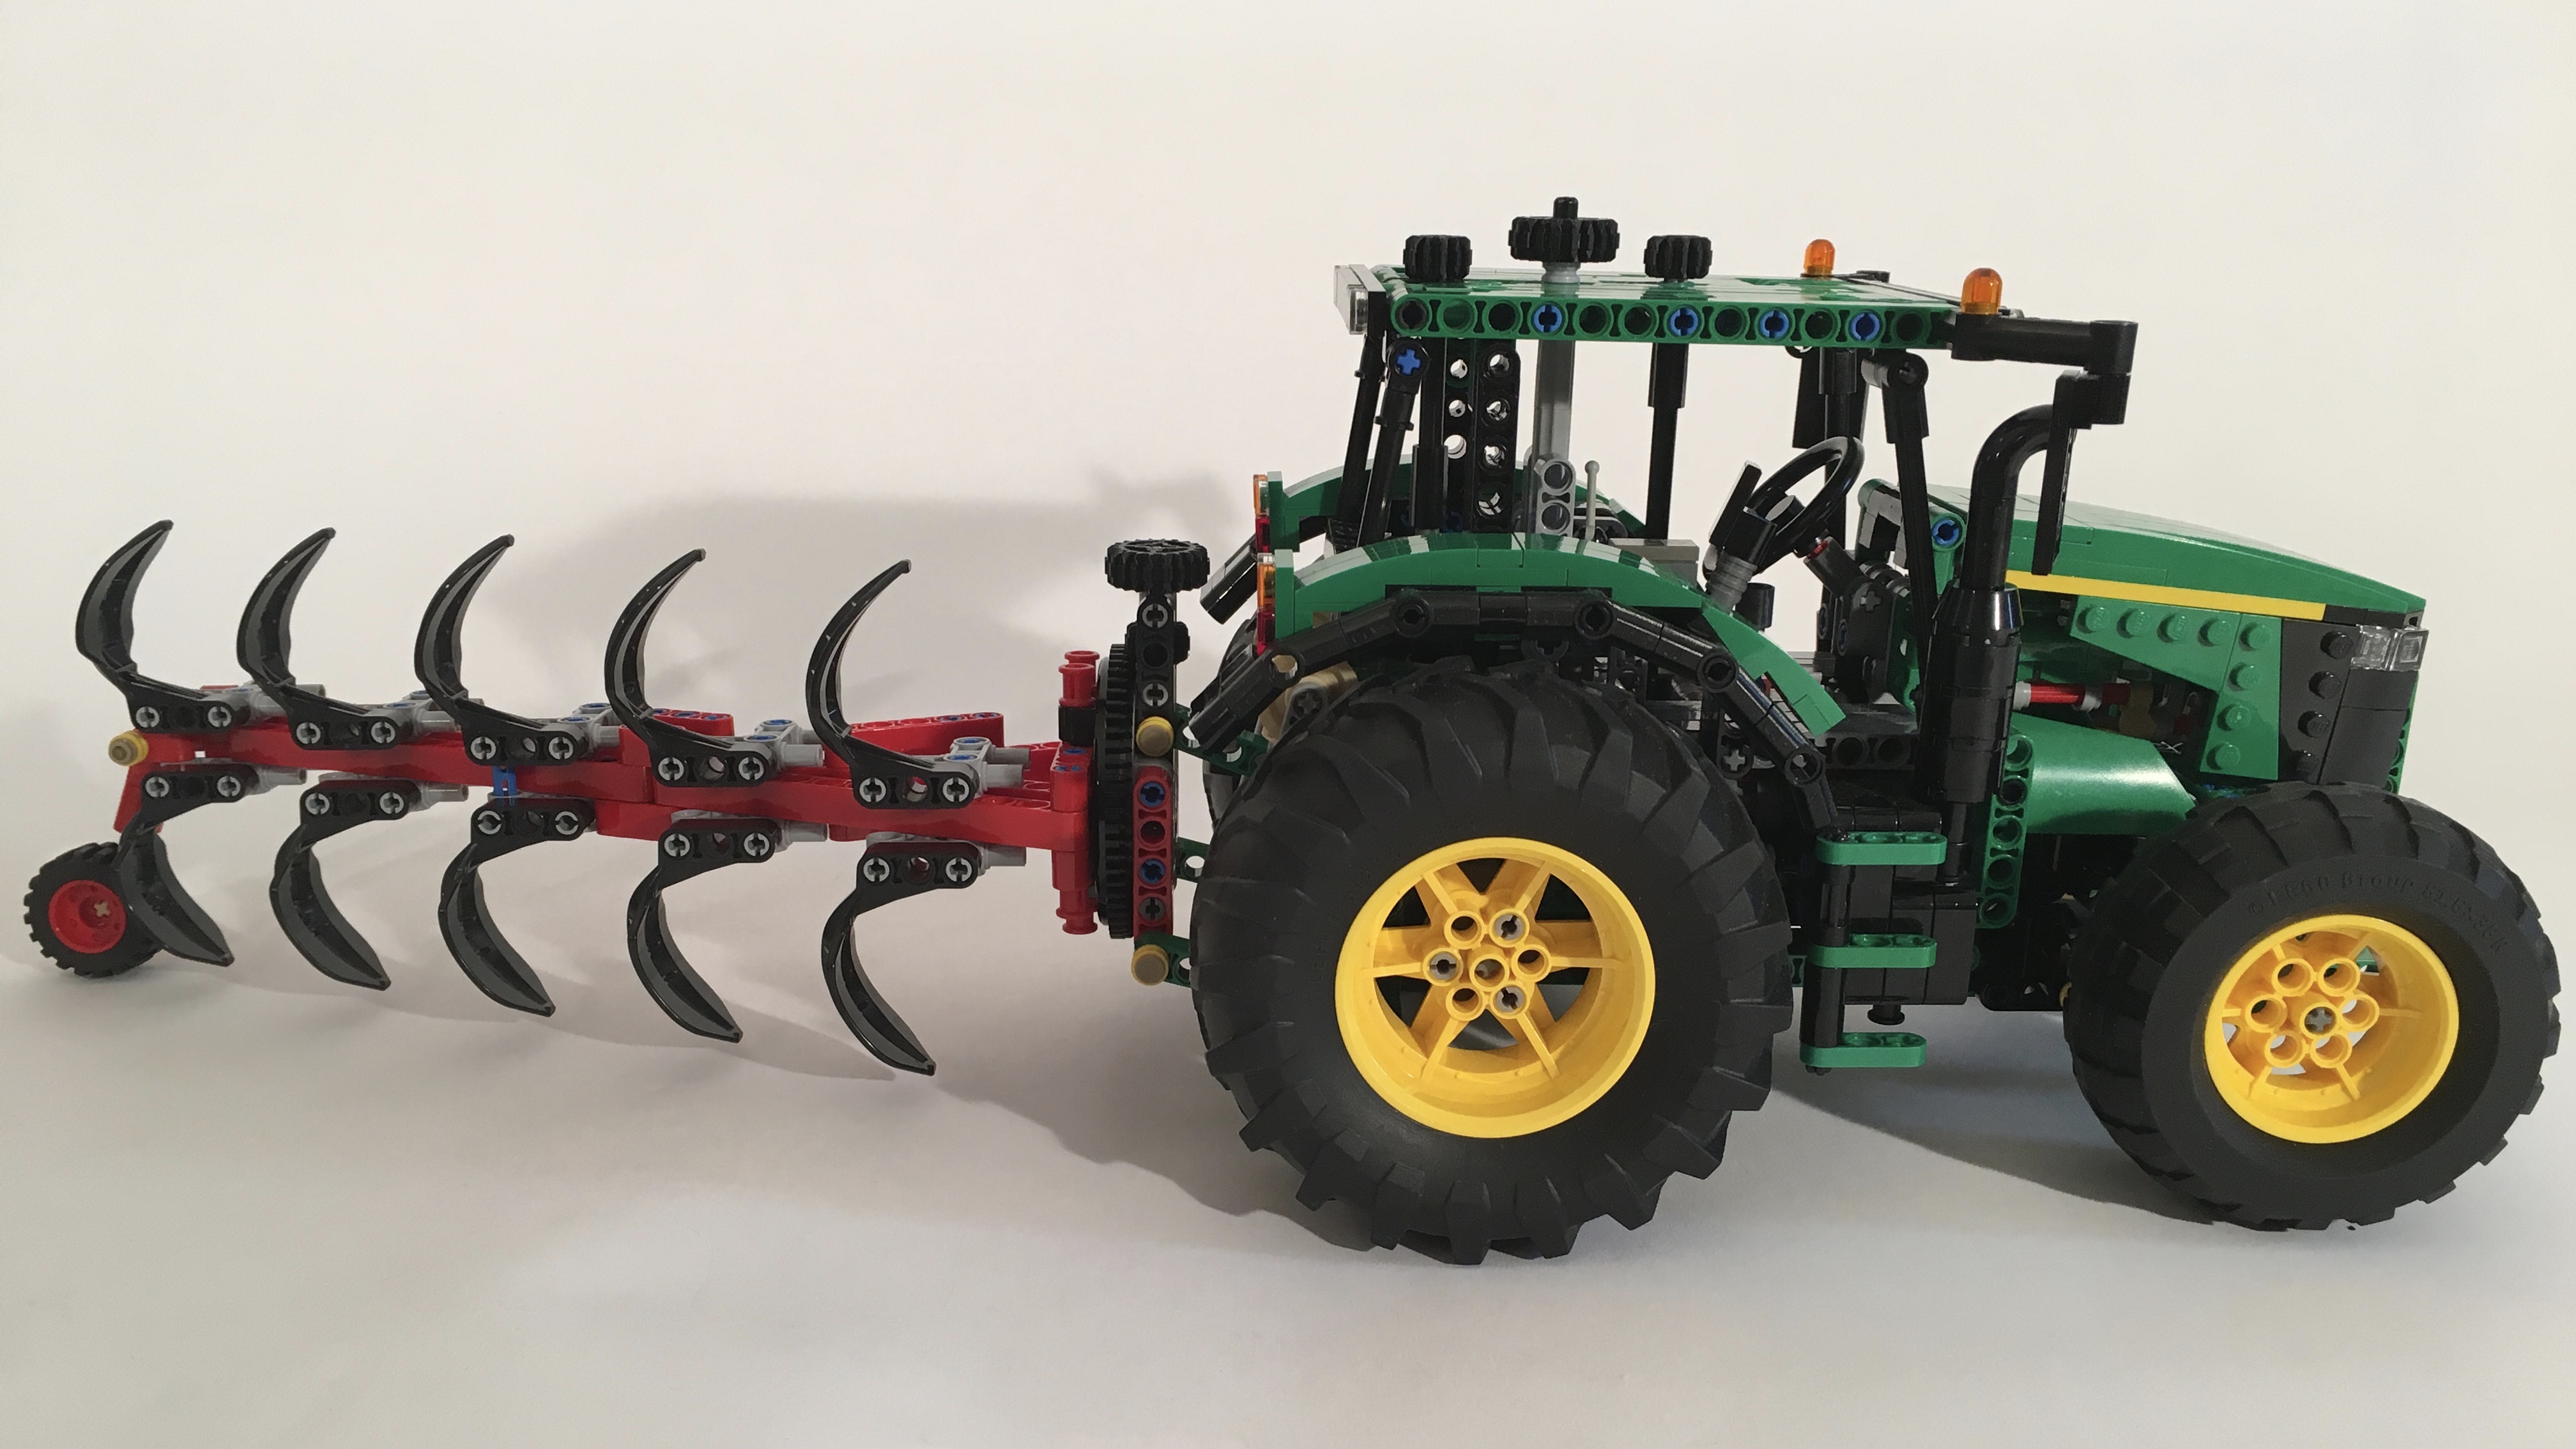
Since this is a Thirdwigg Farm tractor, there are many options to pair with this tractor, all with free instructions. My favorite is the Hookloadr trailer, but the Tandem Disc looks great too. Free instructions are available for all the options, so feel free to make your own farm.
It is always fun to make another tractor and this one was no exception. I wish the drivetrain was a little more smooth, but the rest of the tractor worked flawlessly. And it looks fantastic. Coupled with a trailer, makes it look strong and purposeful. And the rotating cab is so much fun to play with. We’ll see what gets added to the Thirdwigg Farm next!
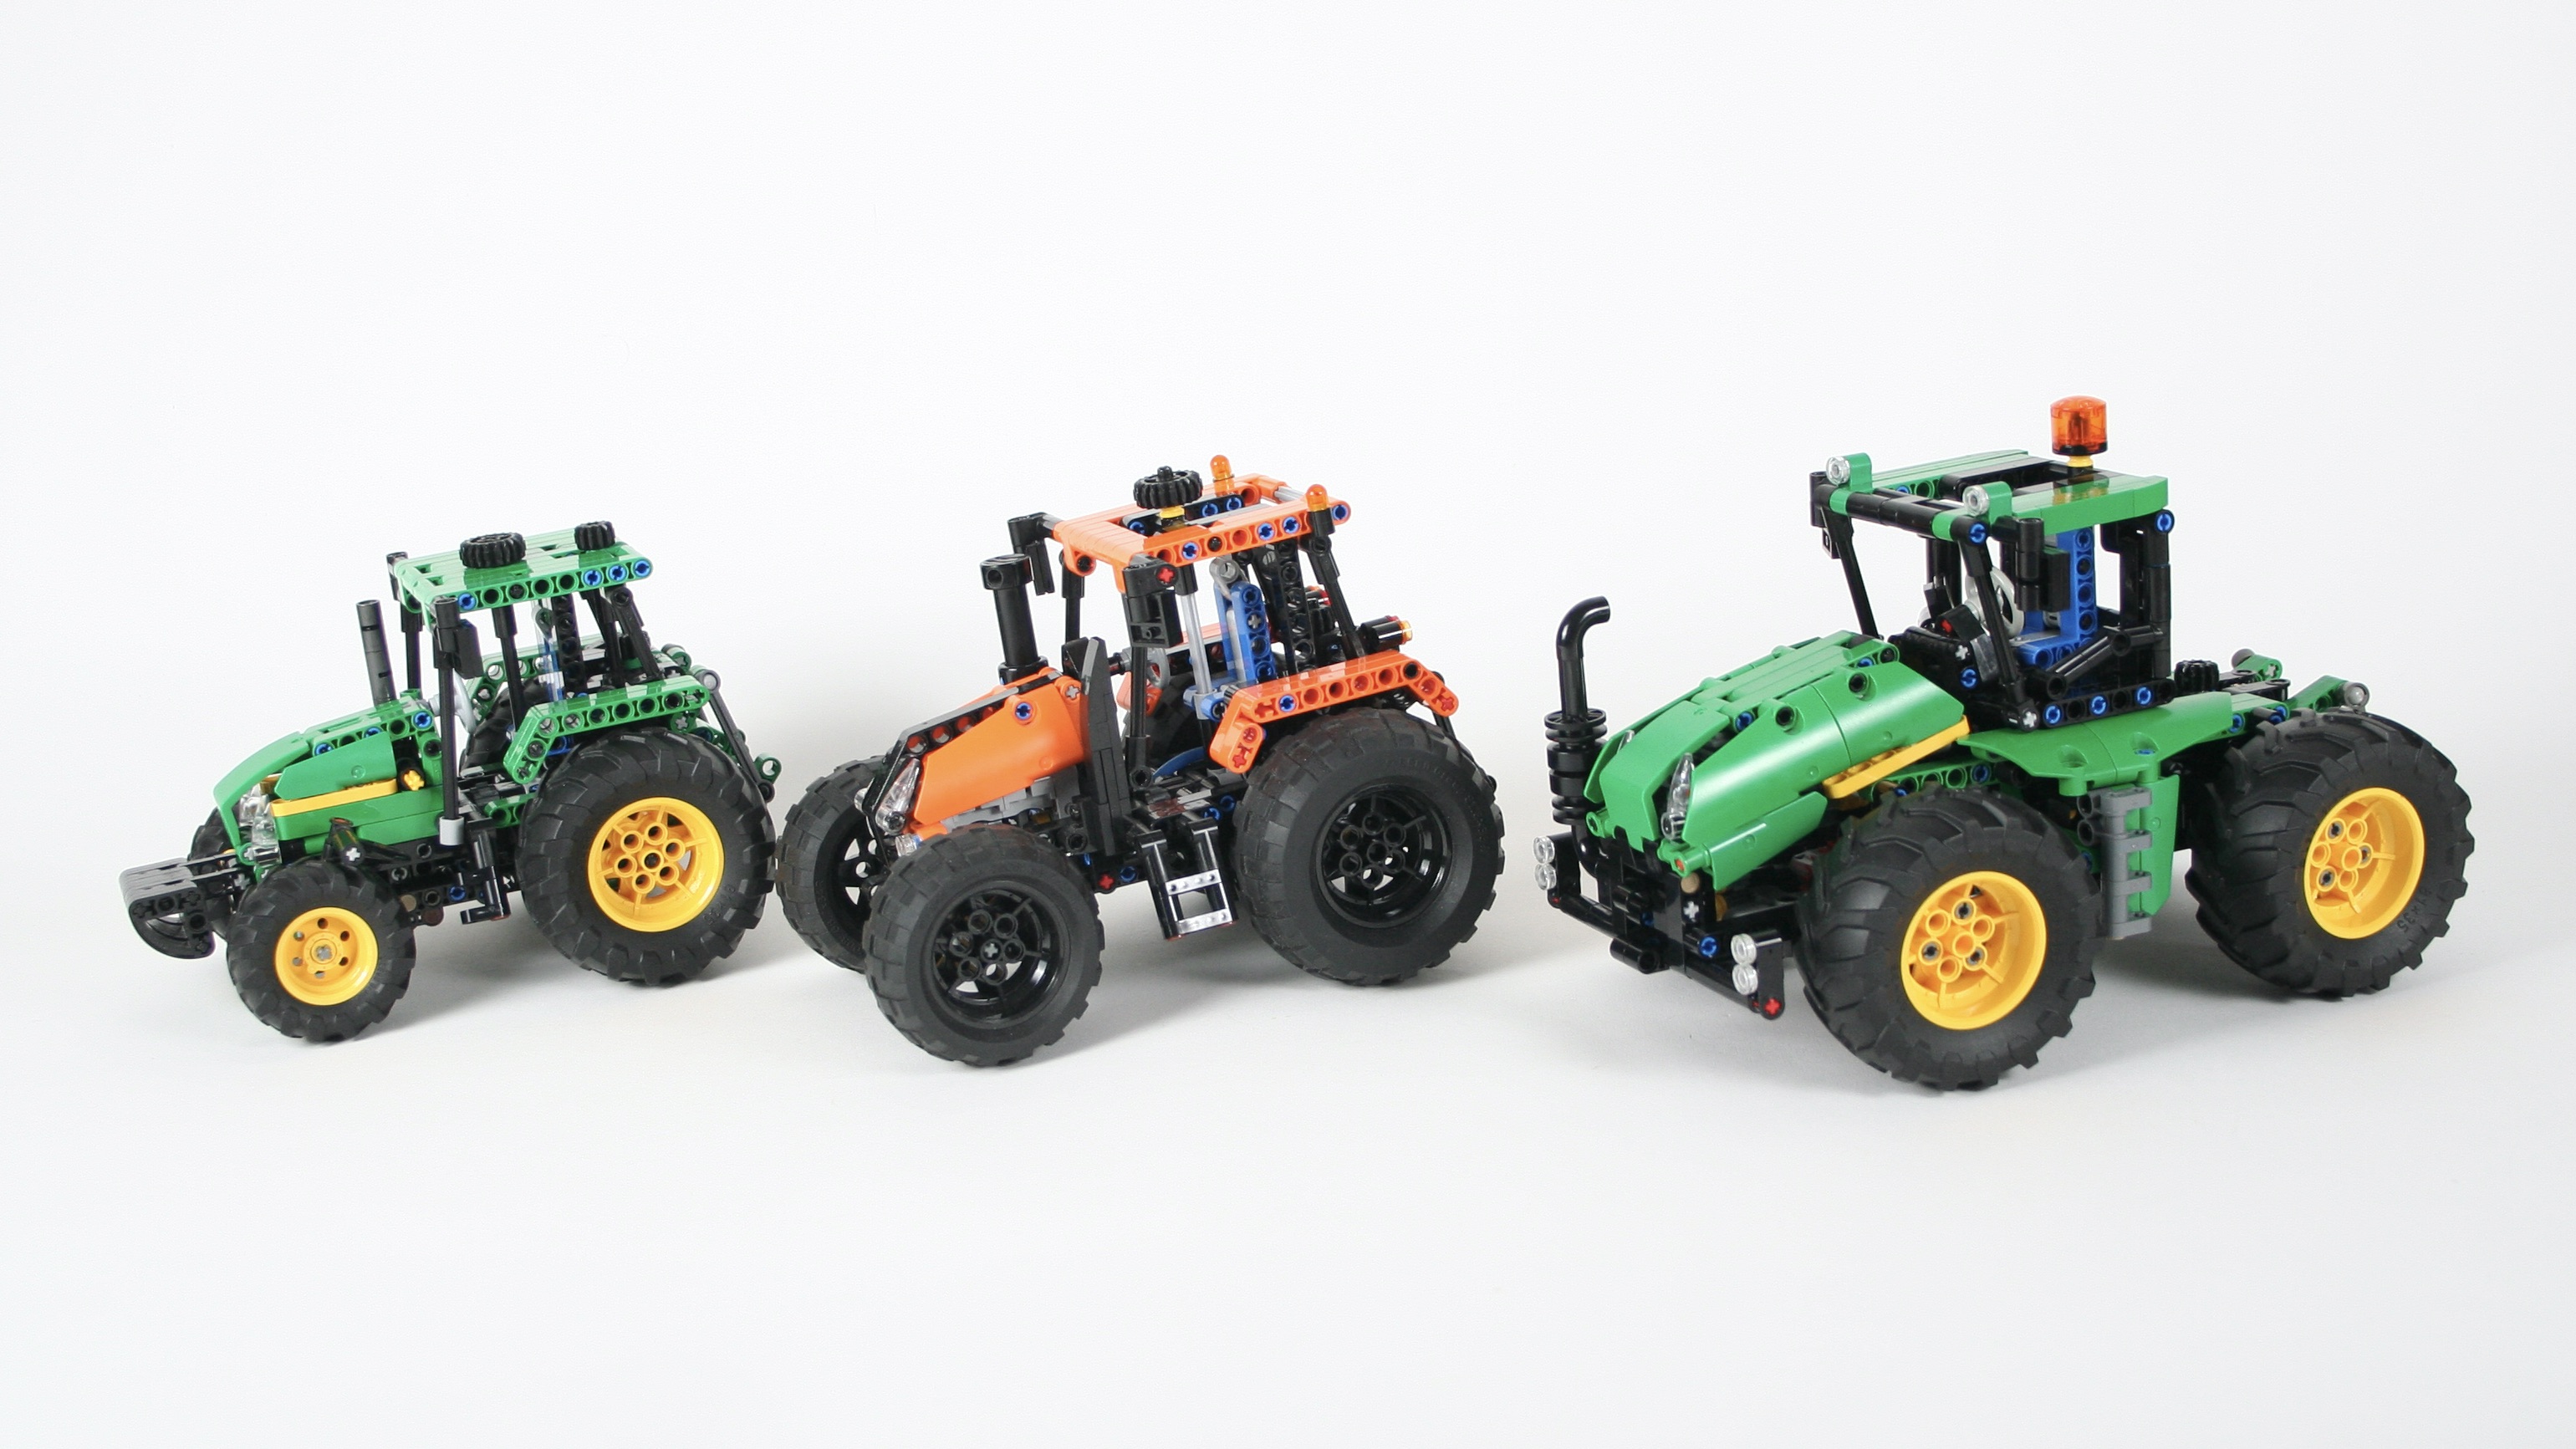
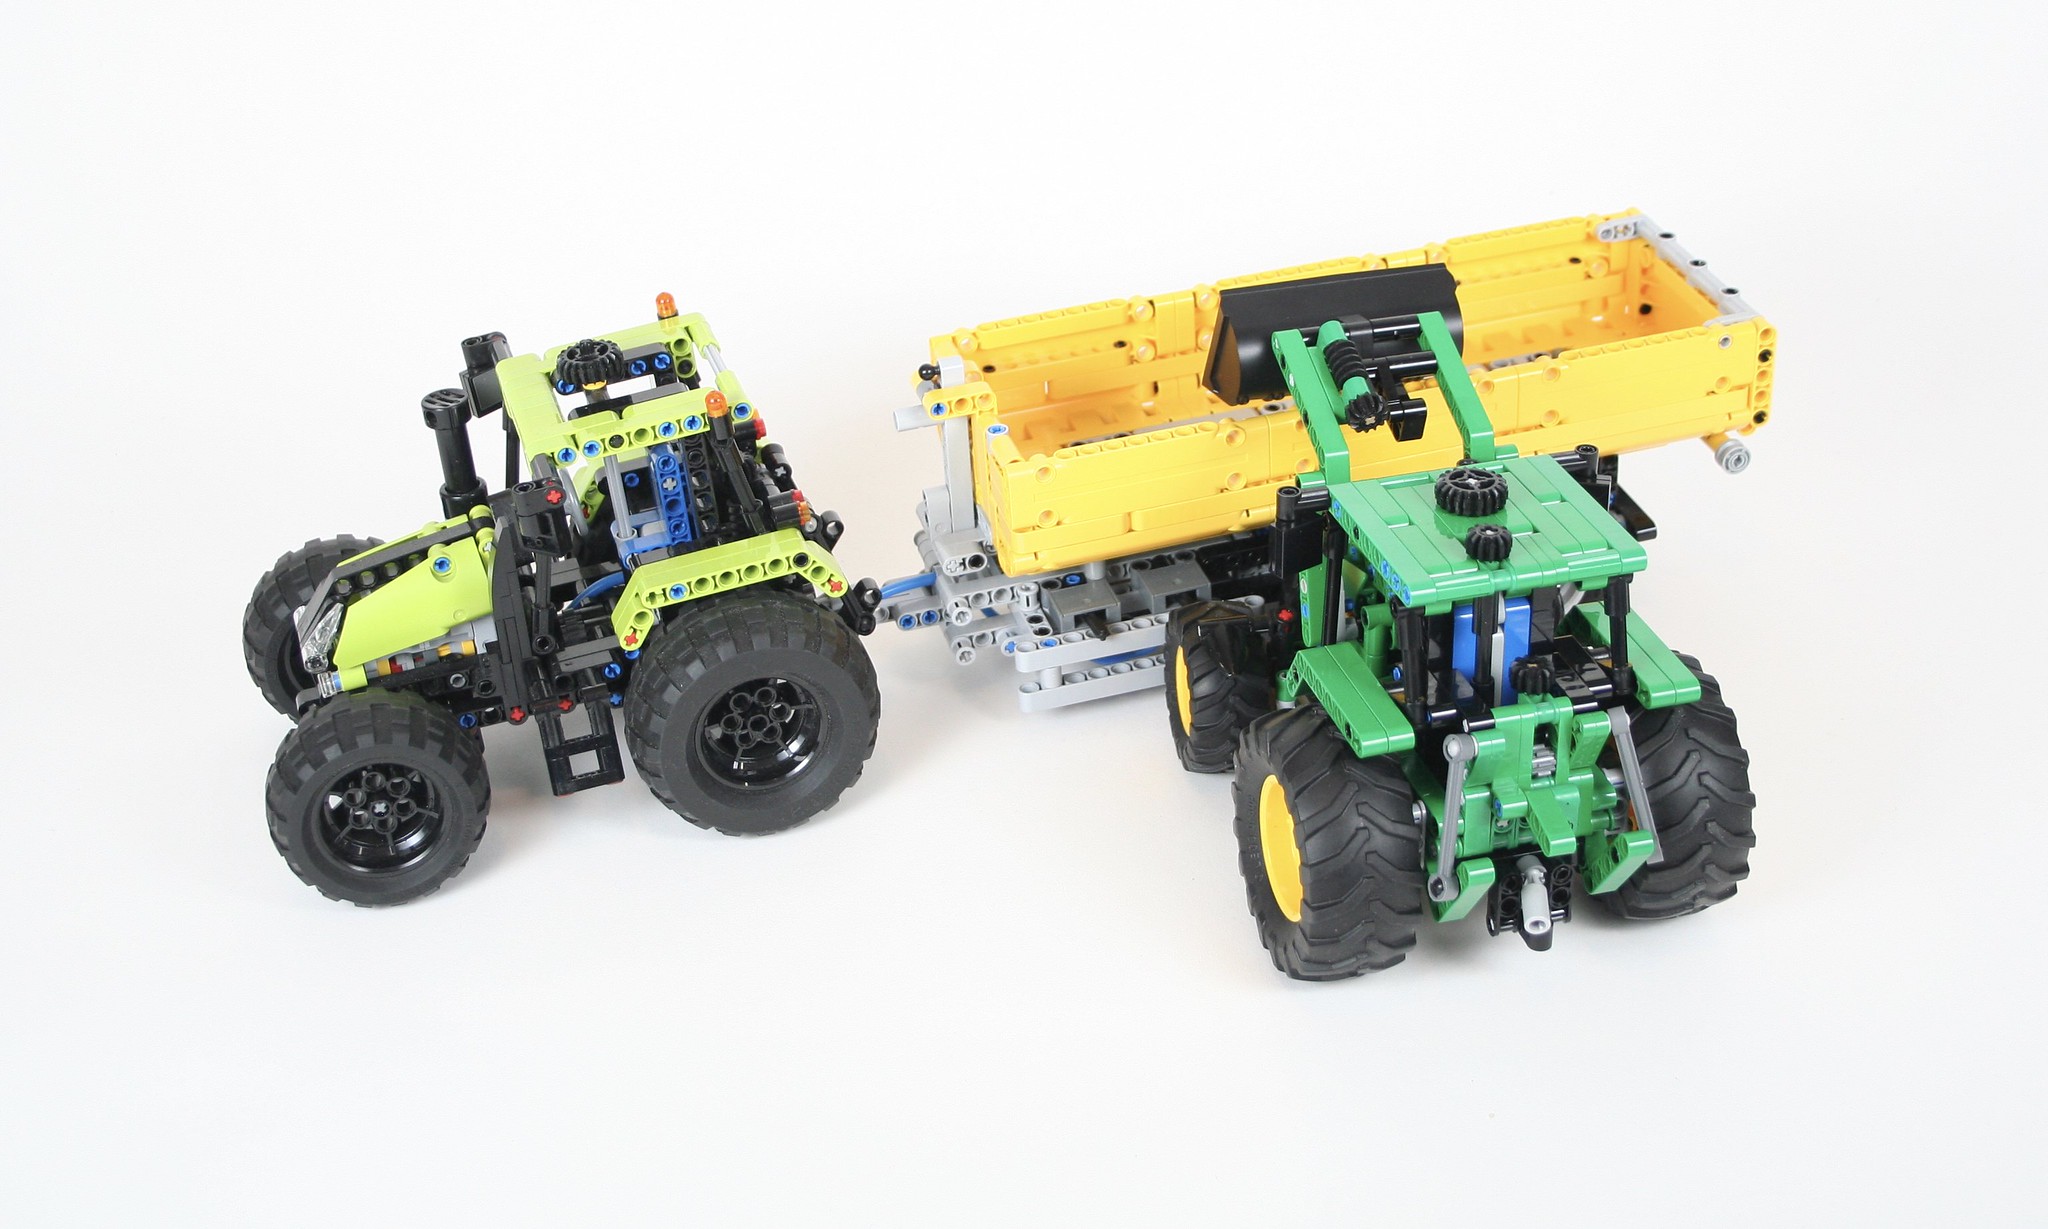
I built the Atmos Tractor a couple of years ago as a small little project. Soon I had created a number of attachments and trailers to work with the tractor, and soon I was more tractors and other machines were added. But the balance needed some additional tractors, so I decided to make a little partner.
The John Deere Scout specifically so I could use the new Tractor tires that came from Lego 42122 and Lego 42129. But I wanted to it to be a smaller tractor with many of the features needed for full Thirdwigg Farm integration. Thus, the tractor had to have the common front and rear attachment points, a rear PTO, and steering because I put that it everything. Soon it was clear that the size of the tractor was going to make a fake engine poorly done, so I left it out. But I wanted some other feature to make this tractor unique.
The front bucket uses a worm gear function to lift the front arms. It is driven by a mechanism that drives rear, and then up to the top of the cab. There is a little gear for the HOG function that is just behind the steering HOG. A small worm gear mechanism is used to tilt the bucket. The arm can be easily removed if the desire is for the tractor to mount something on the front attachment point. The rear PTO is connected directly to the rear differential, and the common three point hitch is installed as well. Finally a trailer hitch is attached.
I also made a couple of attachments specifically for this tractor including a snow plow and scrapper, and a little trailer. Both may be found for free at Rebrickable.
With each additional tractor I add, I think it will be the last, but I keep having more ideas, and each one has been fun to design. I was pleased with how this tractor turned out, and how well it functioned. The tires look great at this scale. Most importantly, it matched well with each of the other tractors. The instructions are freely available at Rebrickable along with all the other Thirdwigg Farm builds, so feel free to make one of your own.
I guess I am on a little bit of a tractor kick lately.
Instructions for the tractor may be found here, which links to instructions for attachments, implements, and trailers.
Atmos Tractor
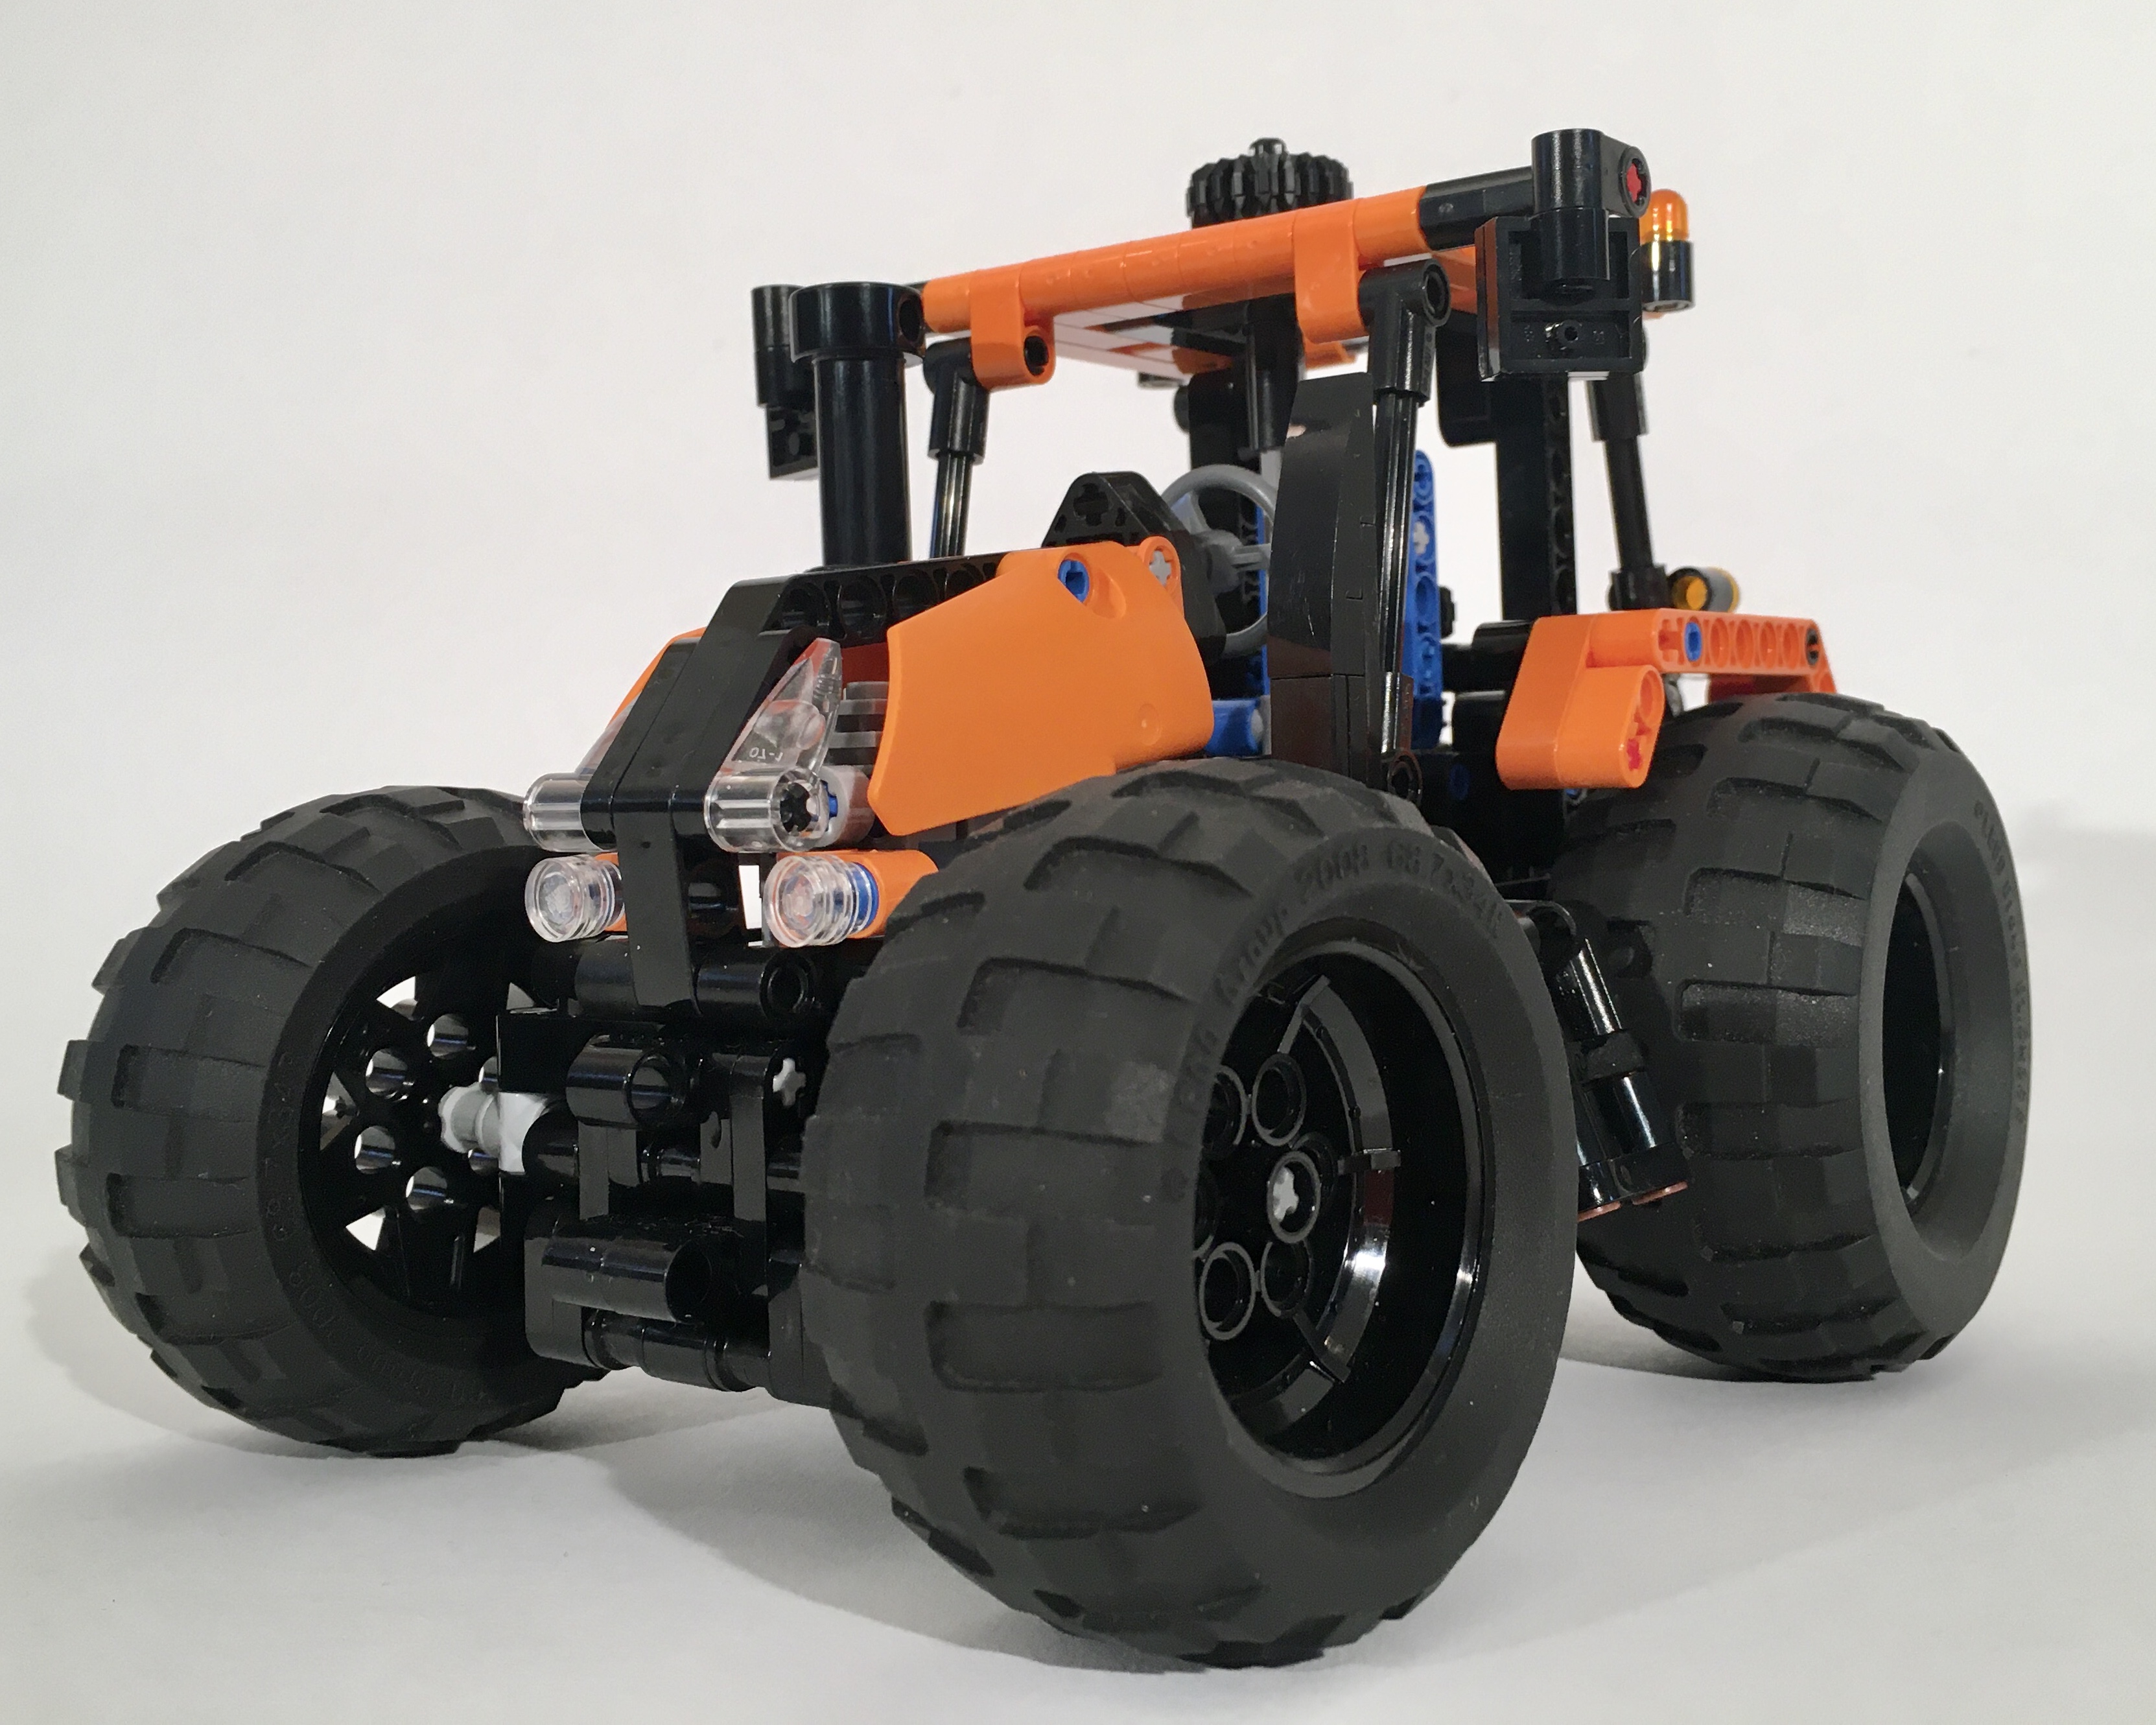
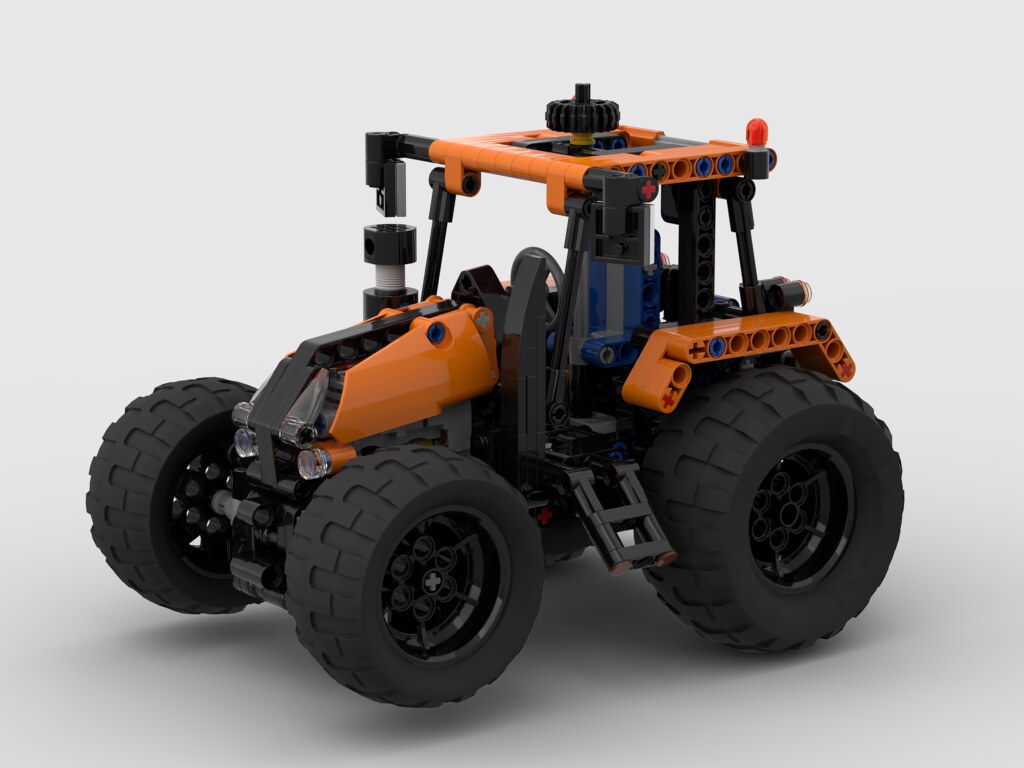
I had recently rebuilt my 9393 MOD, and as I took it apart, I wondered if I could make another tractor with the same implement attachments, improve the esthetics, and use different sized front and rear wheels. Then I thought maybe a pneumatic pump would be fun. My builds as of late have become much more dynamic, in that I like to be able to quickly change them or add a feature. Tractors work great for this, as adding a new trailer or implement can change the build dramatically. Additionally, I enjoy the challenge of making a system that supports lots of additions, while retaining the mechanics that my builds have always had.
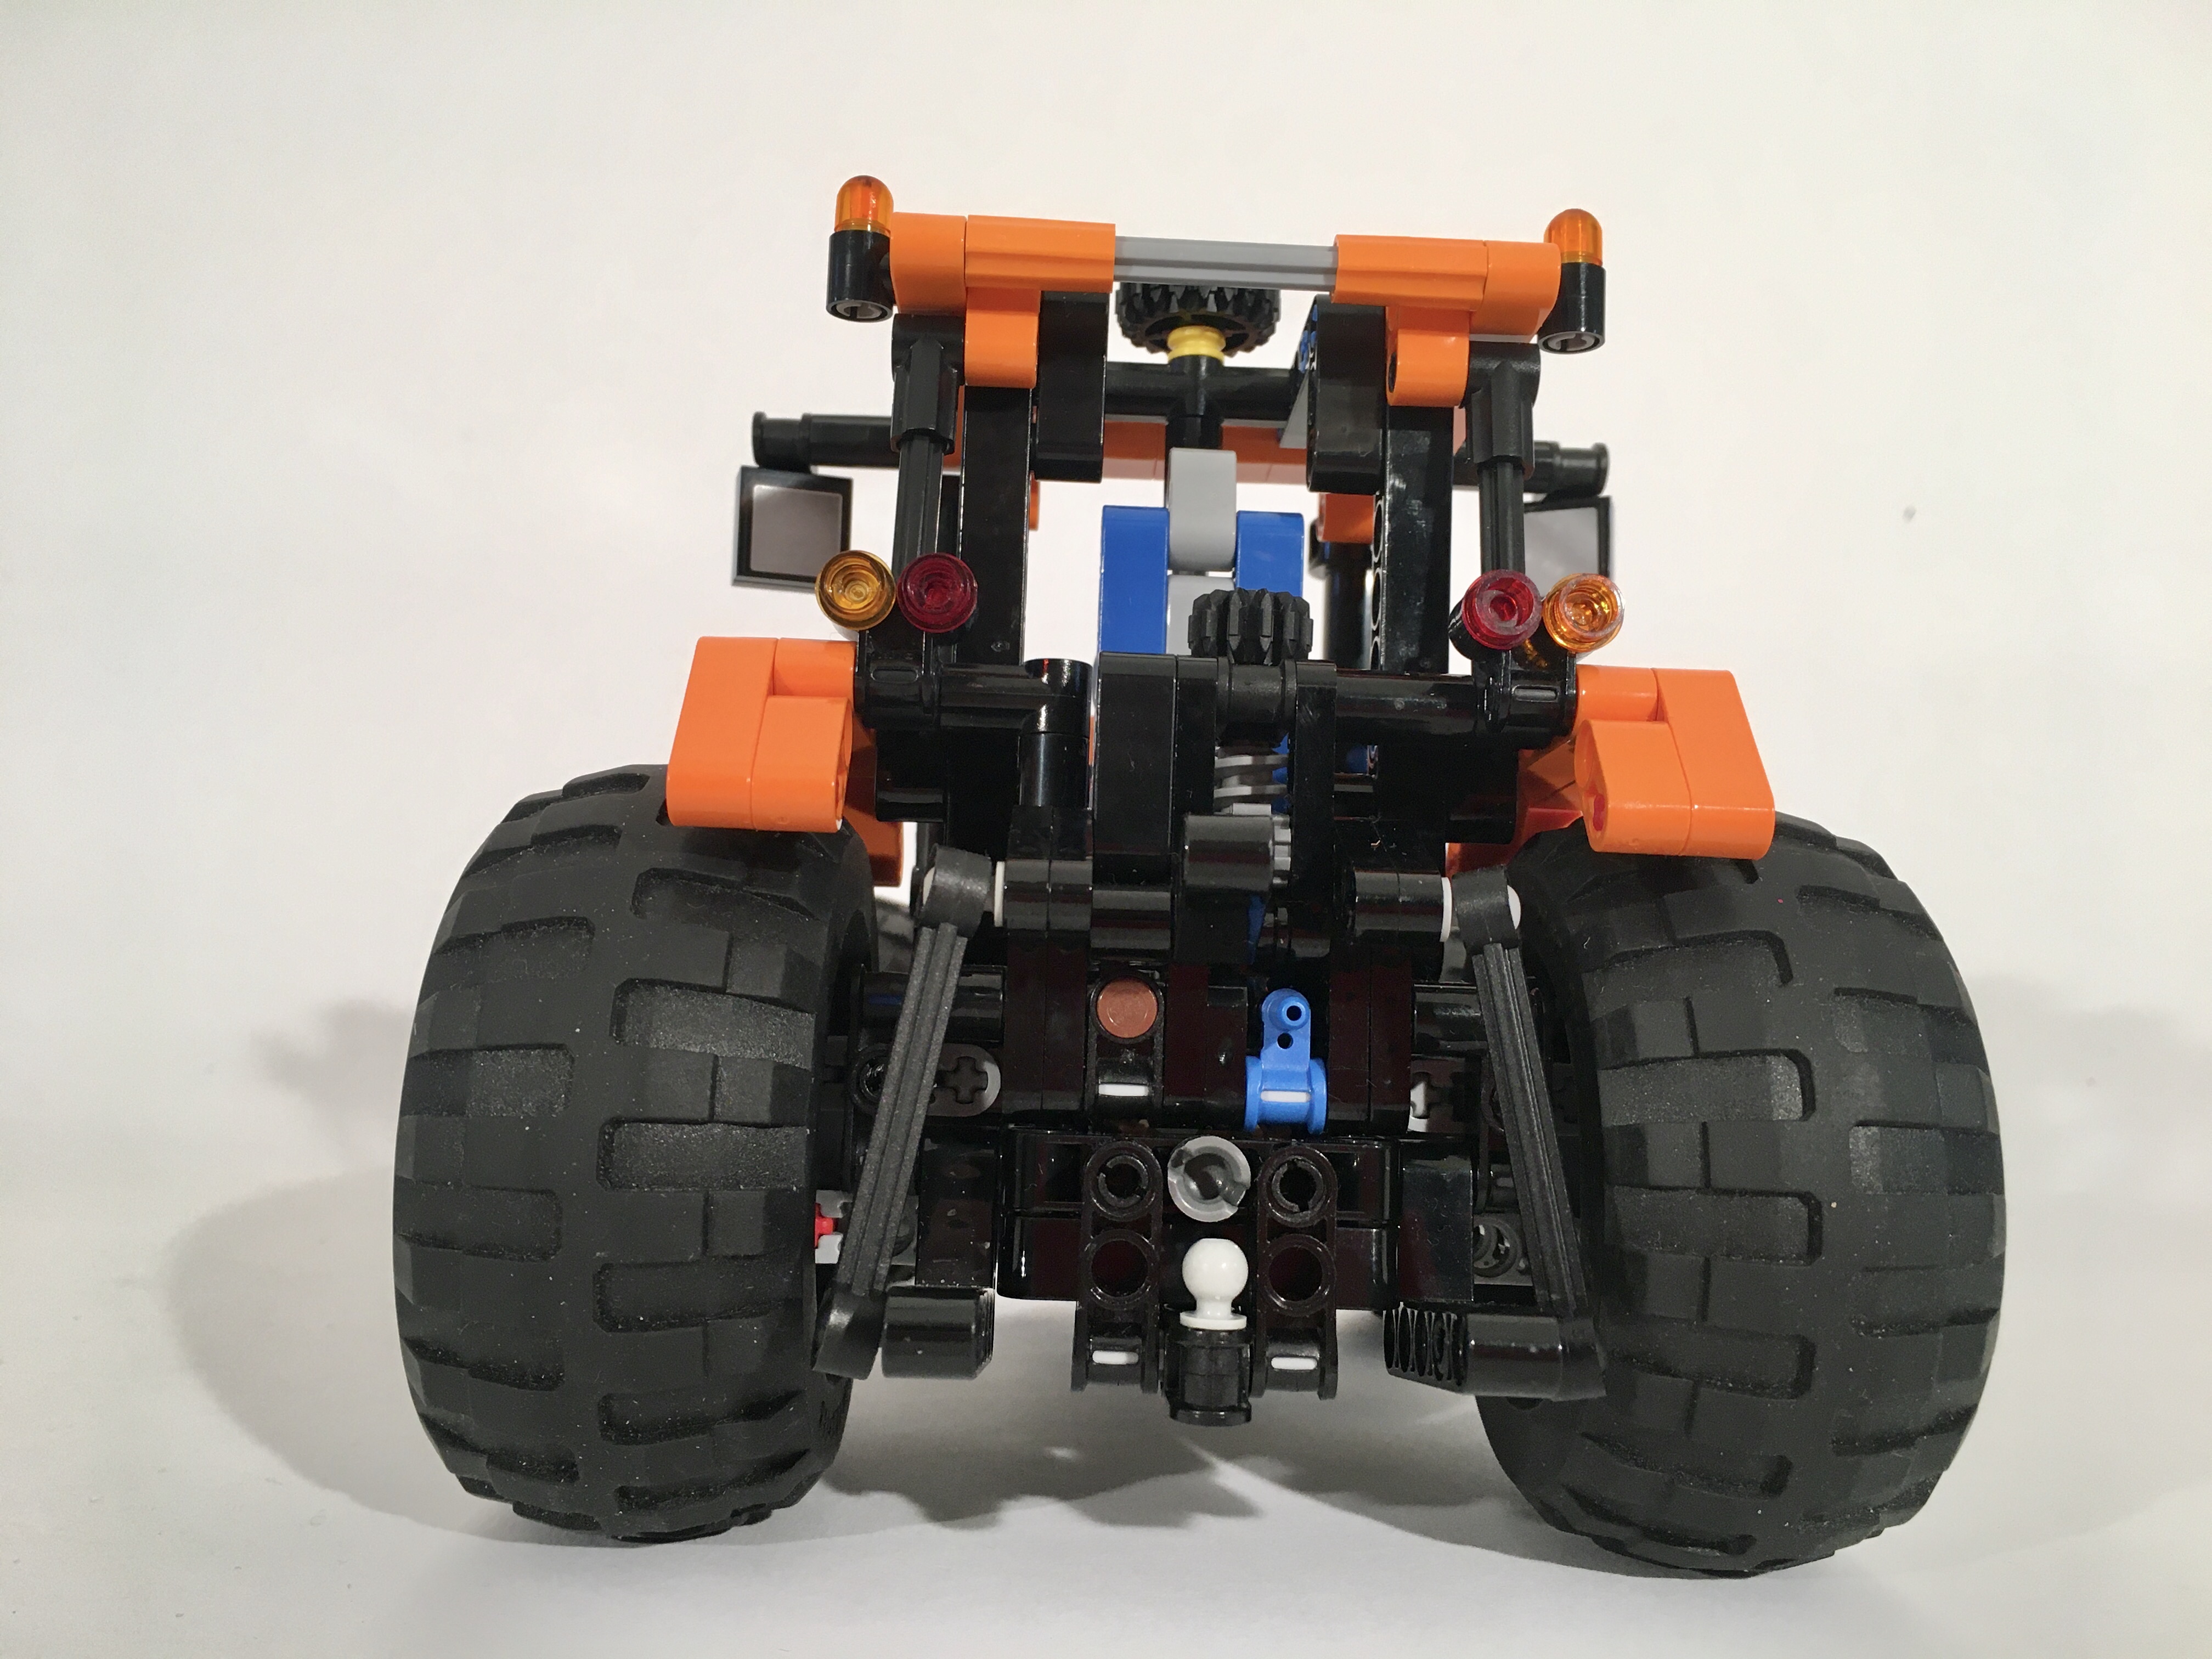
Atmos Rear
The tractor came together very quickly for me. In 10 days I went from having a size draft of the tractor to a final MOC. I used the same driveline, albeit stretched, as the 9393 MOD so the mechanical parts were easy. Direct steering is used, and goes through a rear wheel drive system that connects to a two cylinder engine. A PTO is present at the rear of tractor, but not at the front. Adding a pneumatic pump required a stronger frame which was quickly modified, as well as a hose running to an attachment point at the rear.
The bodywork took the most time; about four days. I wanted to keep a simple hood, so I kept the design of 9393. I added some headlights to dress up the front, and the interior left some room for a steering wheel. Shaping the roof and the cabin was a little tricky due to all the half-stuff offsets of the front windshield. The fenders are simple, but match well. Just like that on day ten, the tractor was done. At the time of writing, the tractor can be built in orange, lime, white, and black.
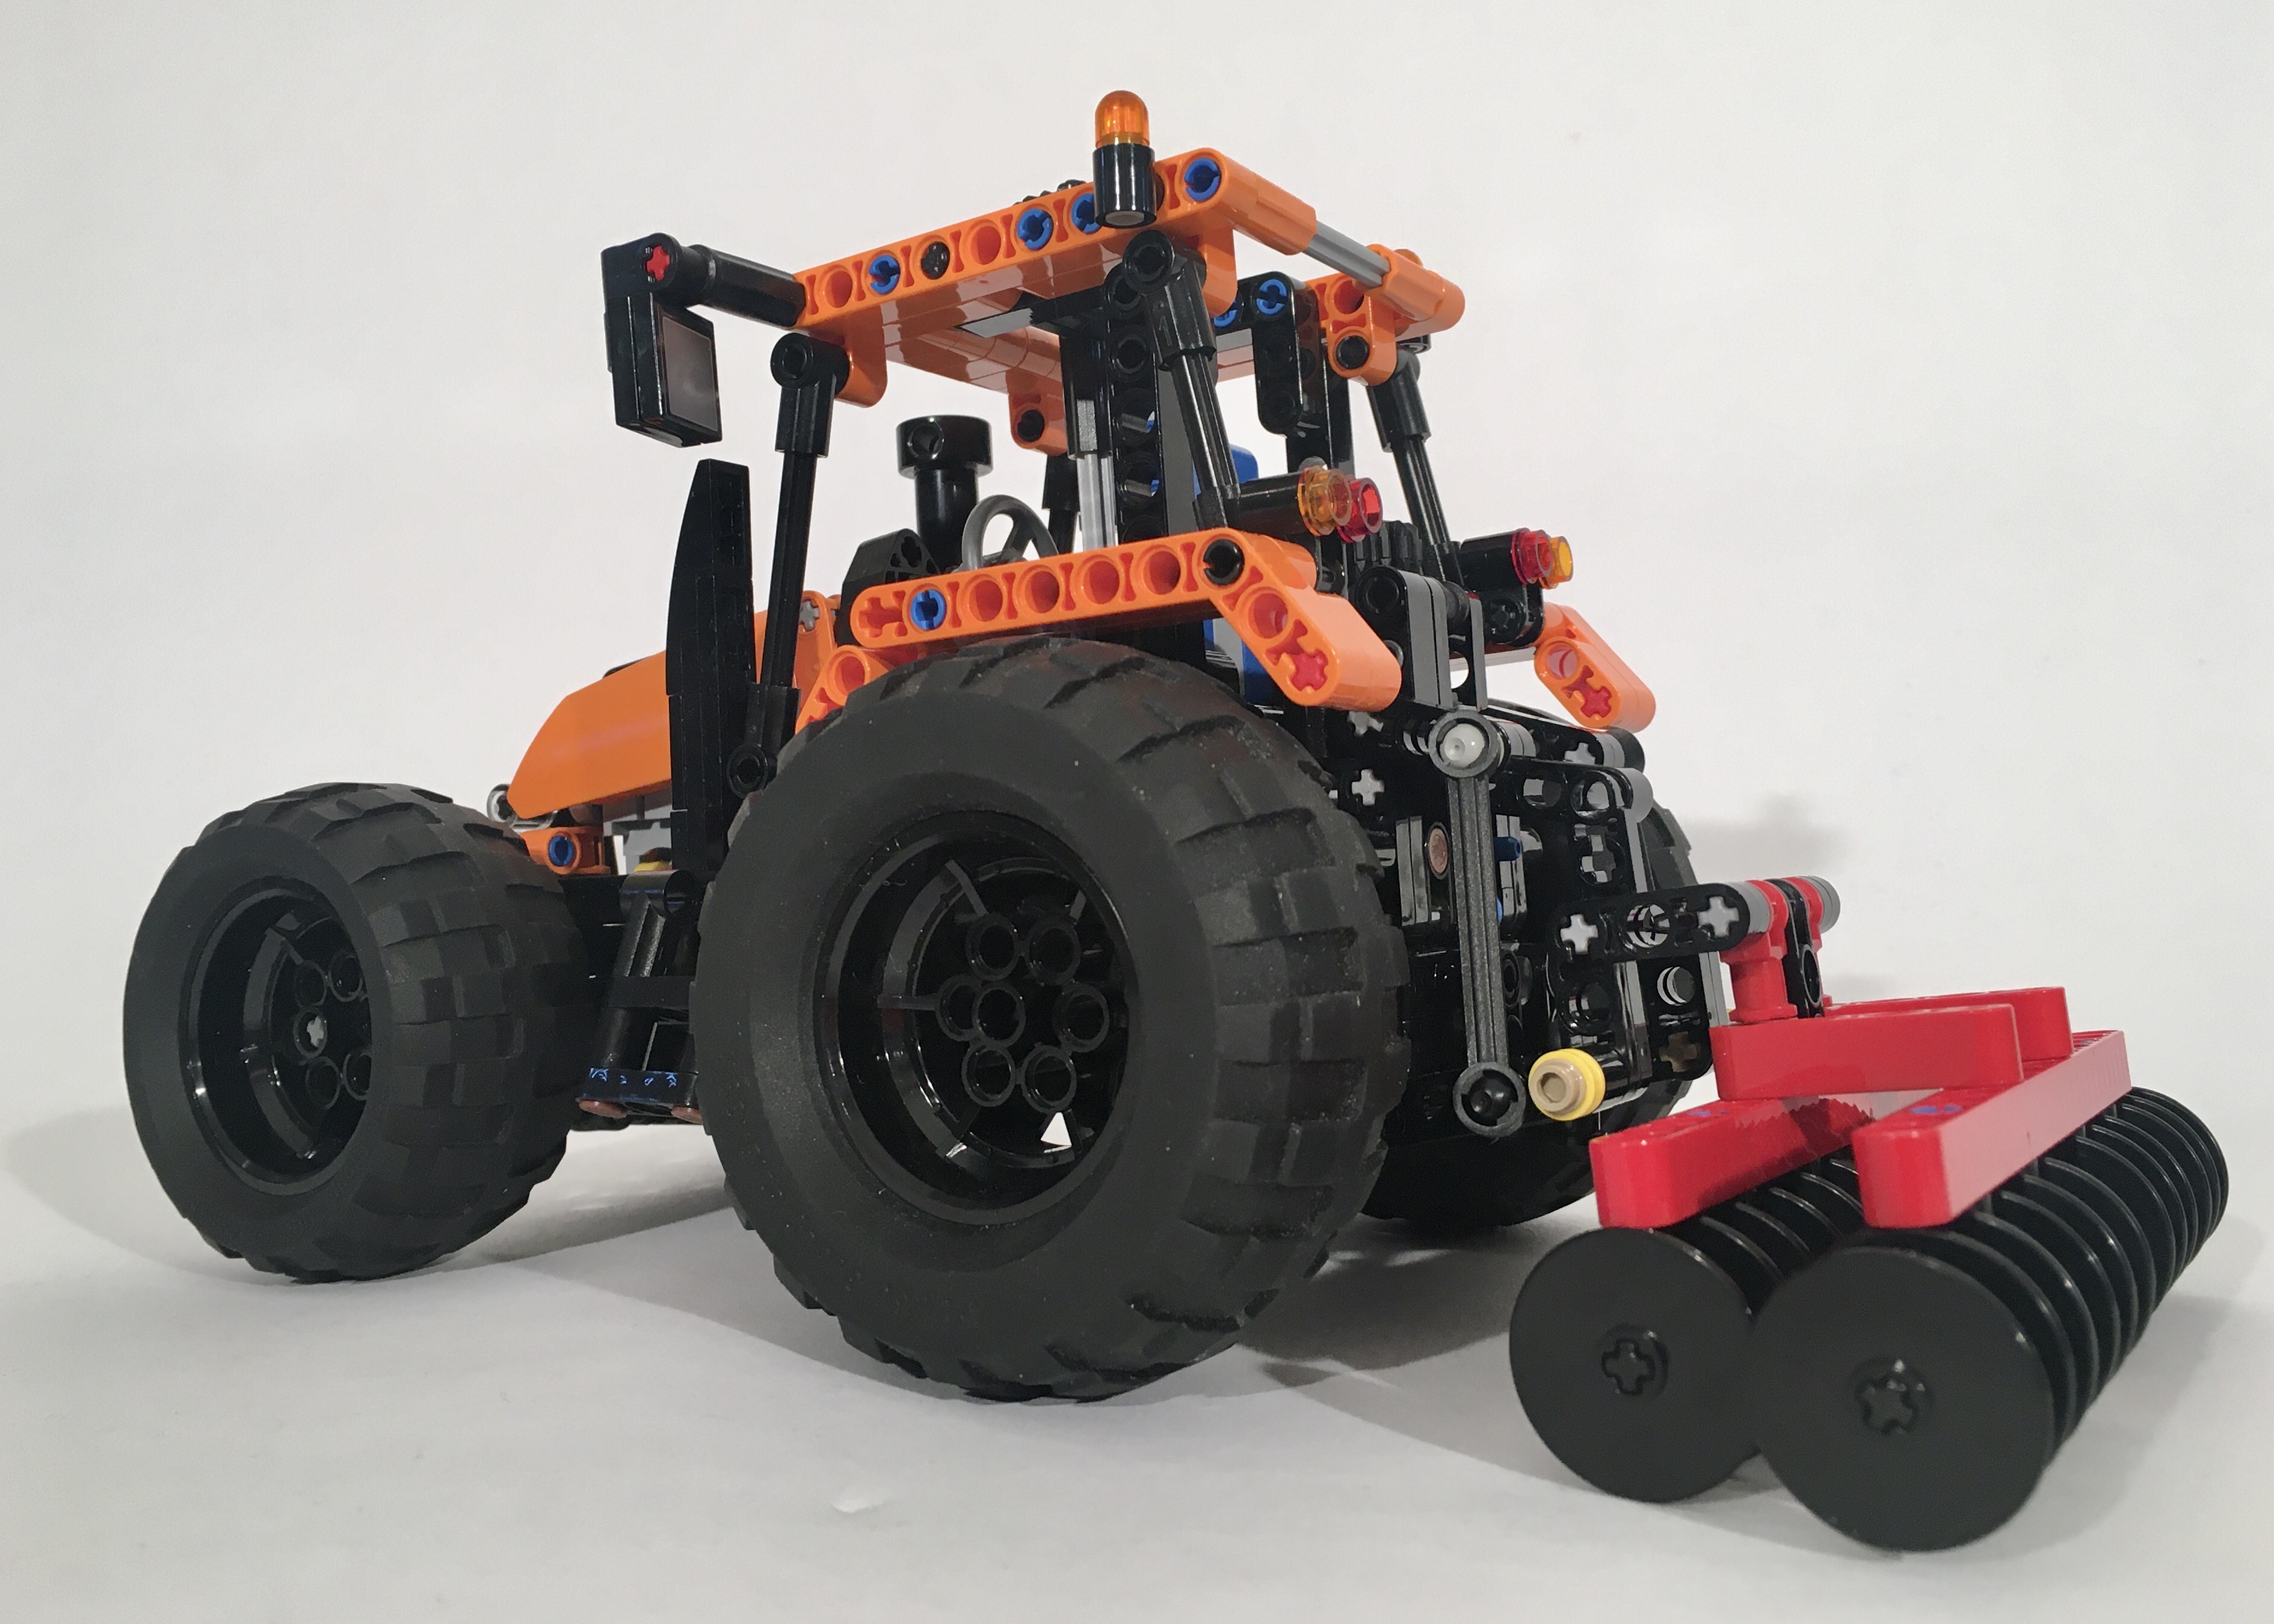
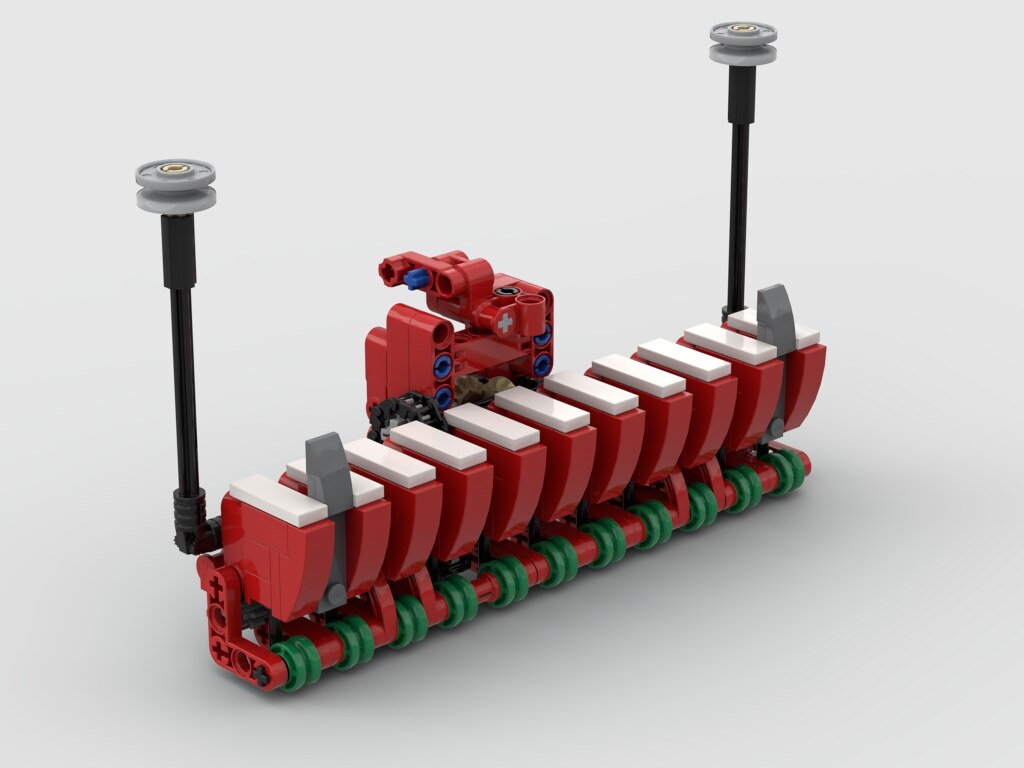
Atmos with Mower
Part of what attracts me to building tractors is all the options one can present with a tractor: implements, trailers, plows, and on and on. The design of the tractor needed to support all of these possibilities. There is a hard point on the front, a hitch on the rear, and a three-point hitch on the rear.
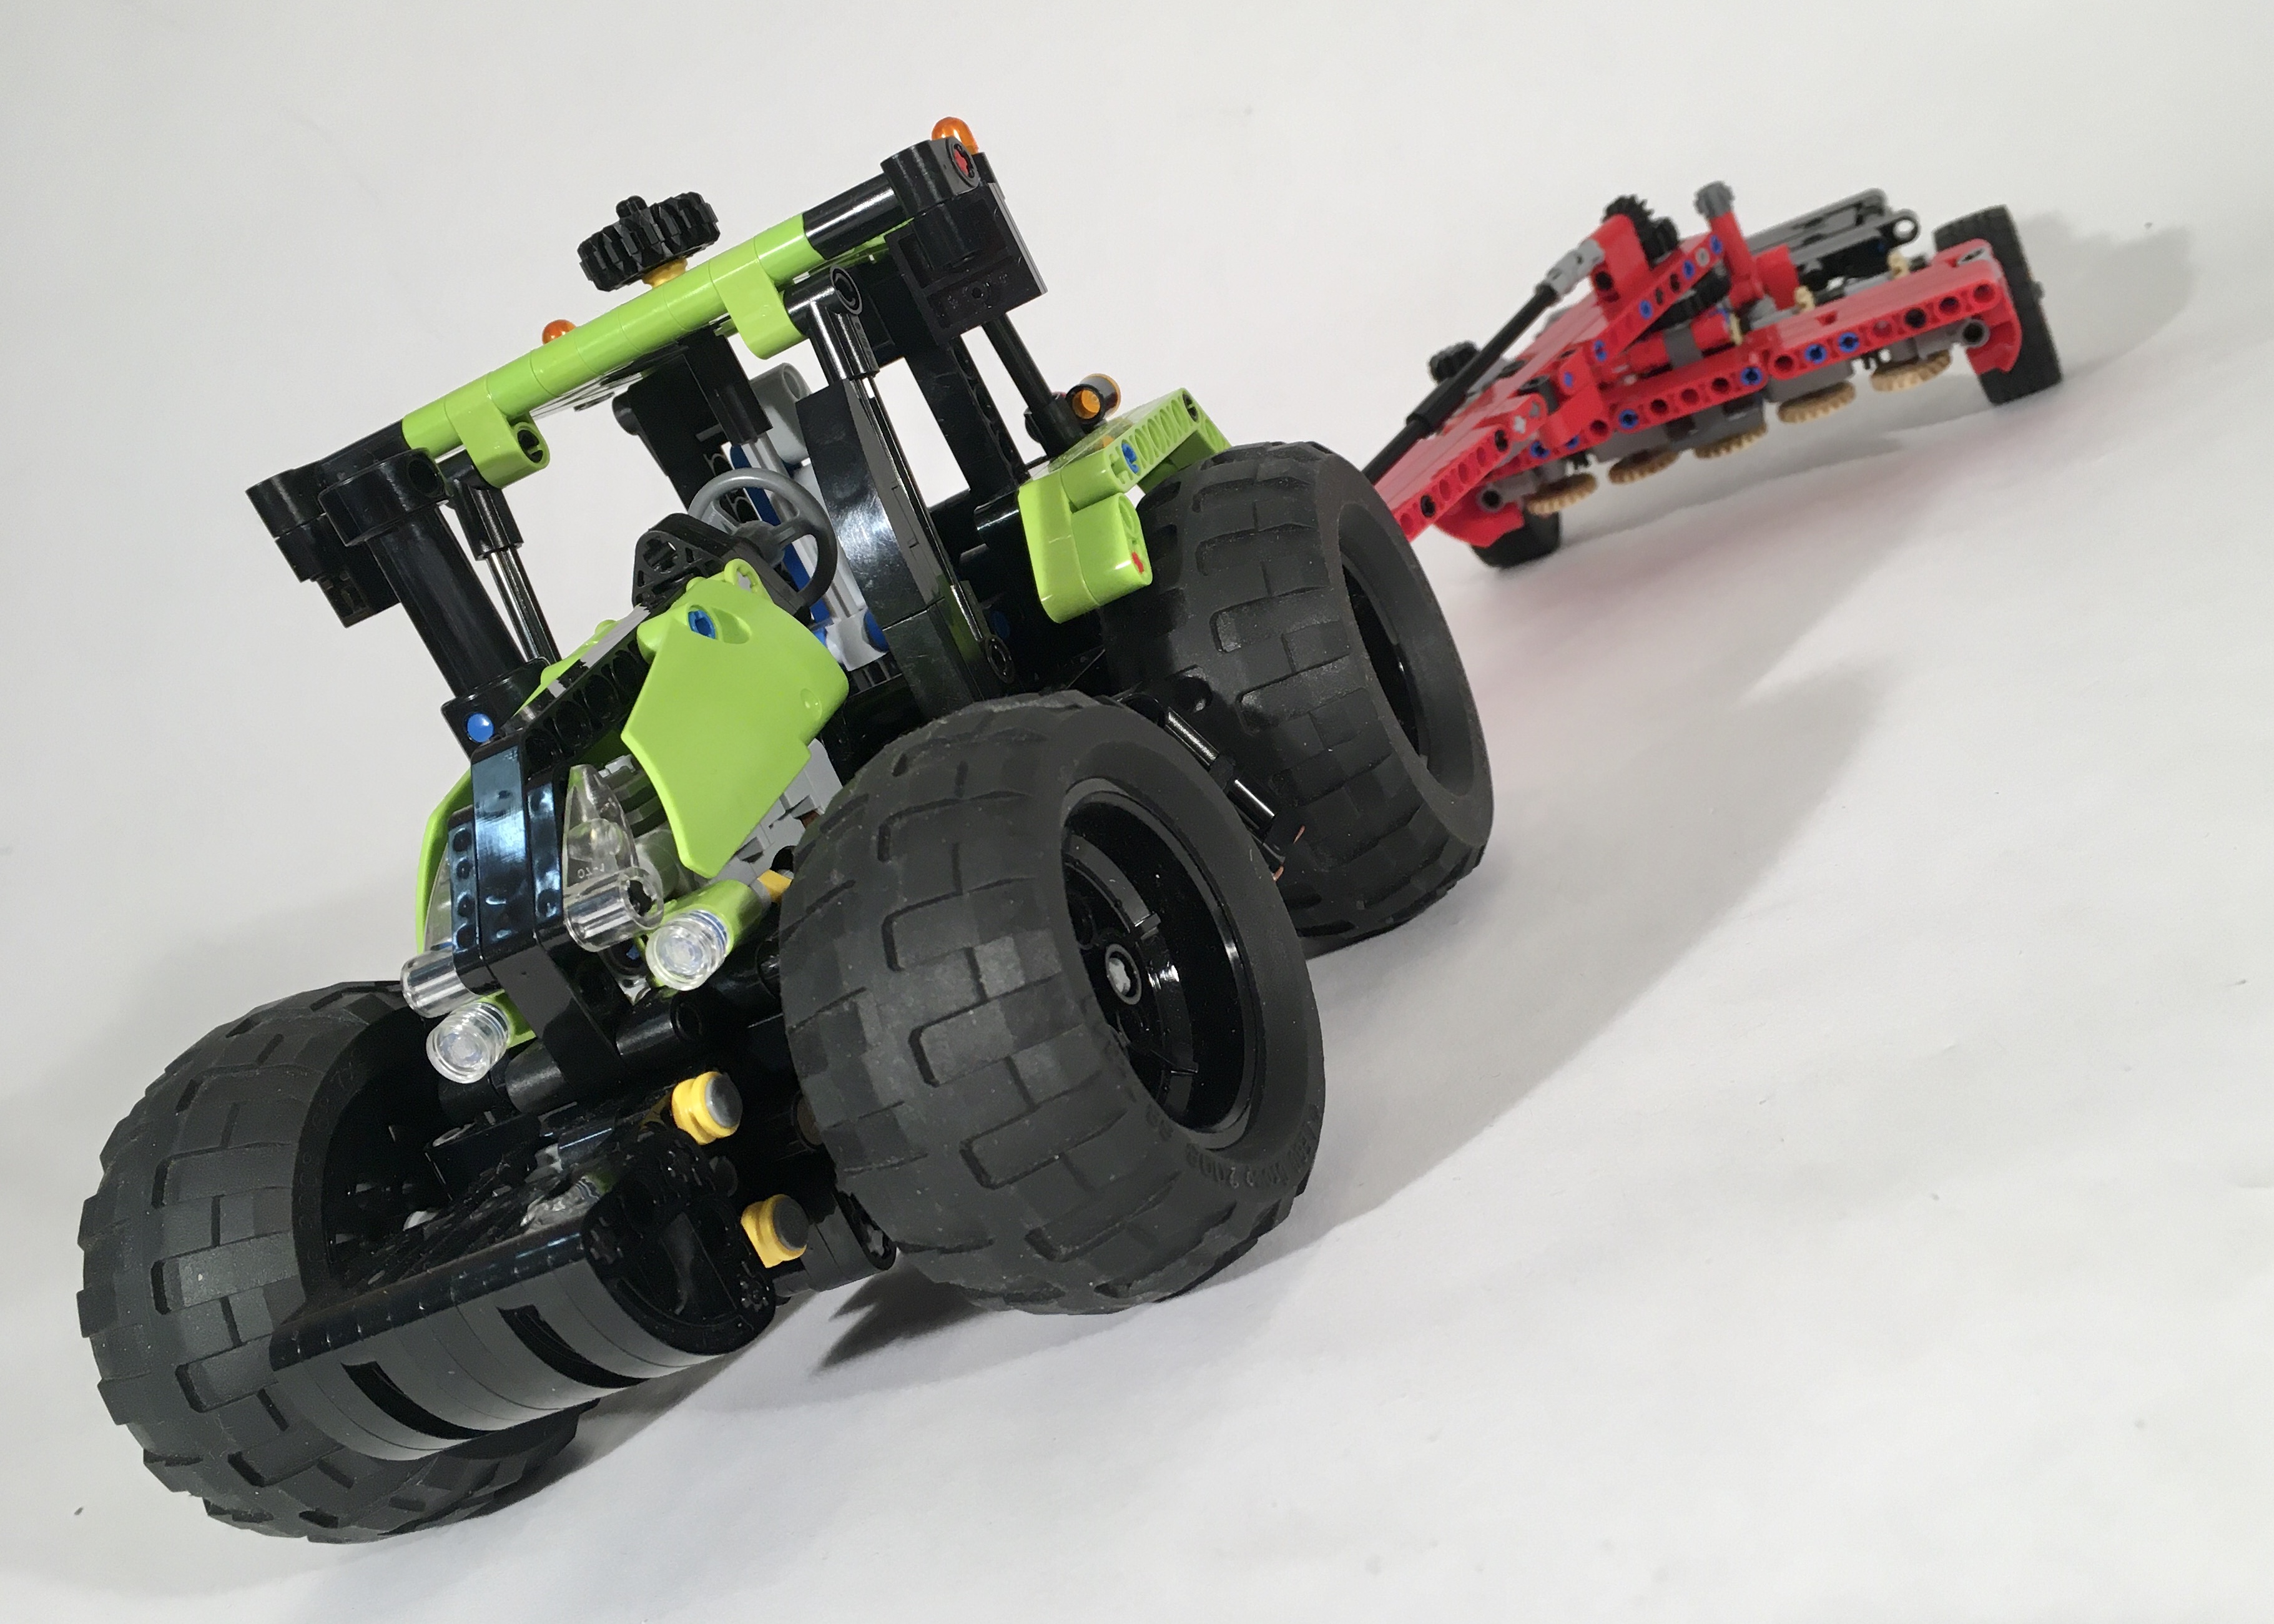
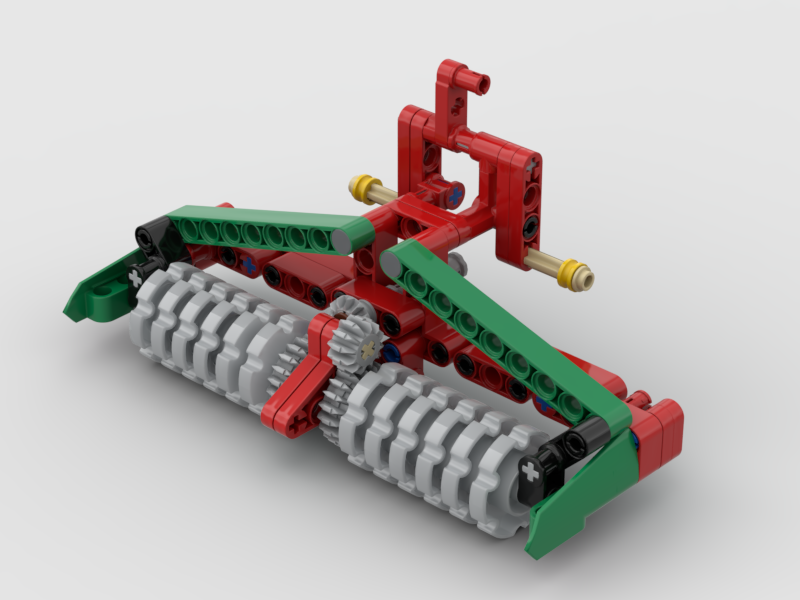
Once these hard points were set, I began to spice it up. It’s no secret that set 8049 is one of my favorites, and since this tractor had a pneumatic pump, I thought a forestry trailer was needed. But then I wanted a snow plow, and a hooklift loader, and a dumper, and some farming equipment. So of course I built them all. You can find links to instructions for the tractor and most of the additions in my instructions tab.
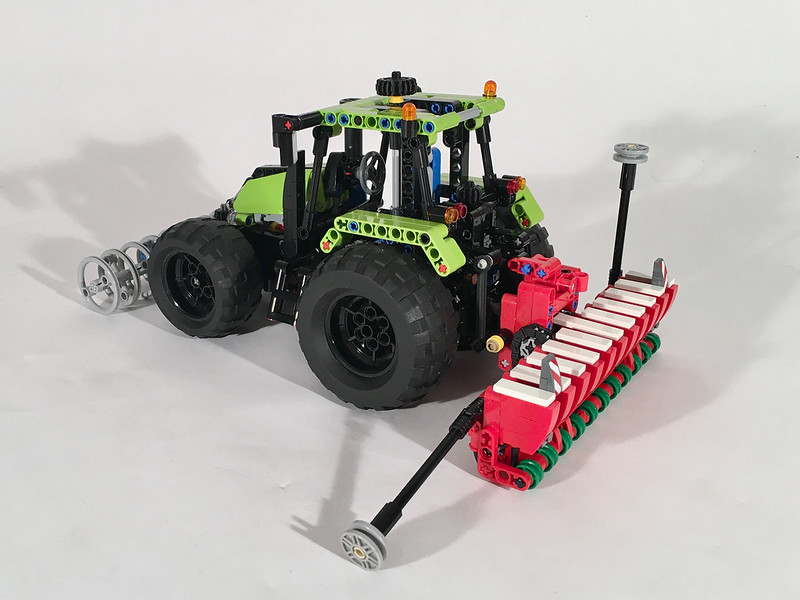
Atmos Tractor with Trailers
The build was great little addition to my portfolio. The system supported a lot of different trailers and implements, some of which are still coming. The design language is consistent with my other builds, and the size is right in my sweet spot. I hope you enjoyed it too. Until the next build, happy building.
I have enjoyed building a number of tractors over the years, and I think it is mostly because I enjoy building all the implements. This little Deere is no exception. When I was making instructions for the Claas Atos, I found some inspiration from this picture. I wondered, “could I turn this into another tractor?” Yes, yes I could. So I was off on another mid-power tractor.
I decided on the John Deere 5115, which is a mid-power, open cab row tractor. I used the chassis of the Atos, so the tractor retained the drive, steering, front and rear PTO, and the front and rear three point hitch. I added a green fake engine, a new hood, and some new wheels and tires (Batmobile!). So it was a simple modification of a simple previous build.
I added a variable V-Plow on the front from M_Longer, and a simple spreader on the rear powered by the PTO.
The MOC worked just as well as the Atos, which it should. But the Deere looked a little better. The hood looked more complete, and the proportions looked a little better. Plus the color of the green and yellow always looks sharp.
I am into a little bit of a tractor phase lately, so here is a model of the John Deere 6130R row tractor.
The full gallery including instructions may be found here.
After the completion of my 9393 MOD, and the Claas Atos, I wanted to expand on what could be done in the tractor theme, and I wanted to use the newish large technic tires that first came from 42054. I set out to set the scale and list some of the features I wanted. I decided on a John Deere tractor, because green looks sharp in LEGO, and the hubs I would need were available in yellow.
I first started with the driveline which is simply a differential between the rear tires, and a couple of gears to the I4 engine (green of course). The steering was the second feature added, and runs from the HOG on the roof, goes through one bevel setup to the rack under the from engine.
The tractor also has a front and rear PTO, with dual on/off switches, and front and rear drawbars. These features were a little tricky to add. The PTO on the rear is connected to the driveline on the right by a changeover catch, and routes rearward over the rear axle. The PTO on the from is connected to the driveline on the left, and routes under the steering axle to the front. Both drawbars can be raised and lowered by a HOG on the roof ahead and behind the steering HOG. Both use two mLAs to raise and lower the drawbar, and both can hold enough weight to tip over the tractor.
Working on the body work took some time. After trying a couple of technic options for the front hood, and rear fenders, I settled on an option that uses mostly system bricks. I was pleased how it turned out as it does not subtract from the look of the tractor too much. The hood can open to see the engine.
The tractor worked well, and all the features functioned as they should. I will continue to design implements, and test them out as long as the tractor stays built.
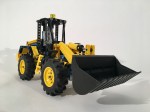
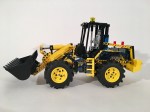
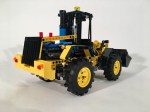
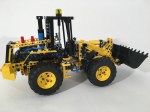
These days, some projects are taking longer than they have in the past. The little Wiggs in my house and a mirad of other reponsibilities are slowing my production. This loader was started a little over a year ago, and it was finally finished last week.
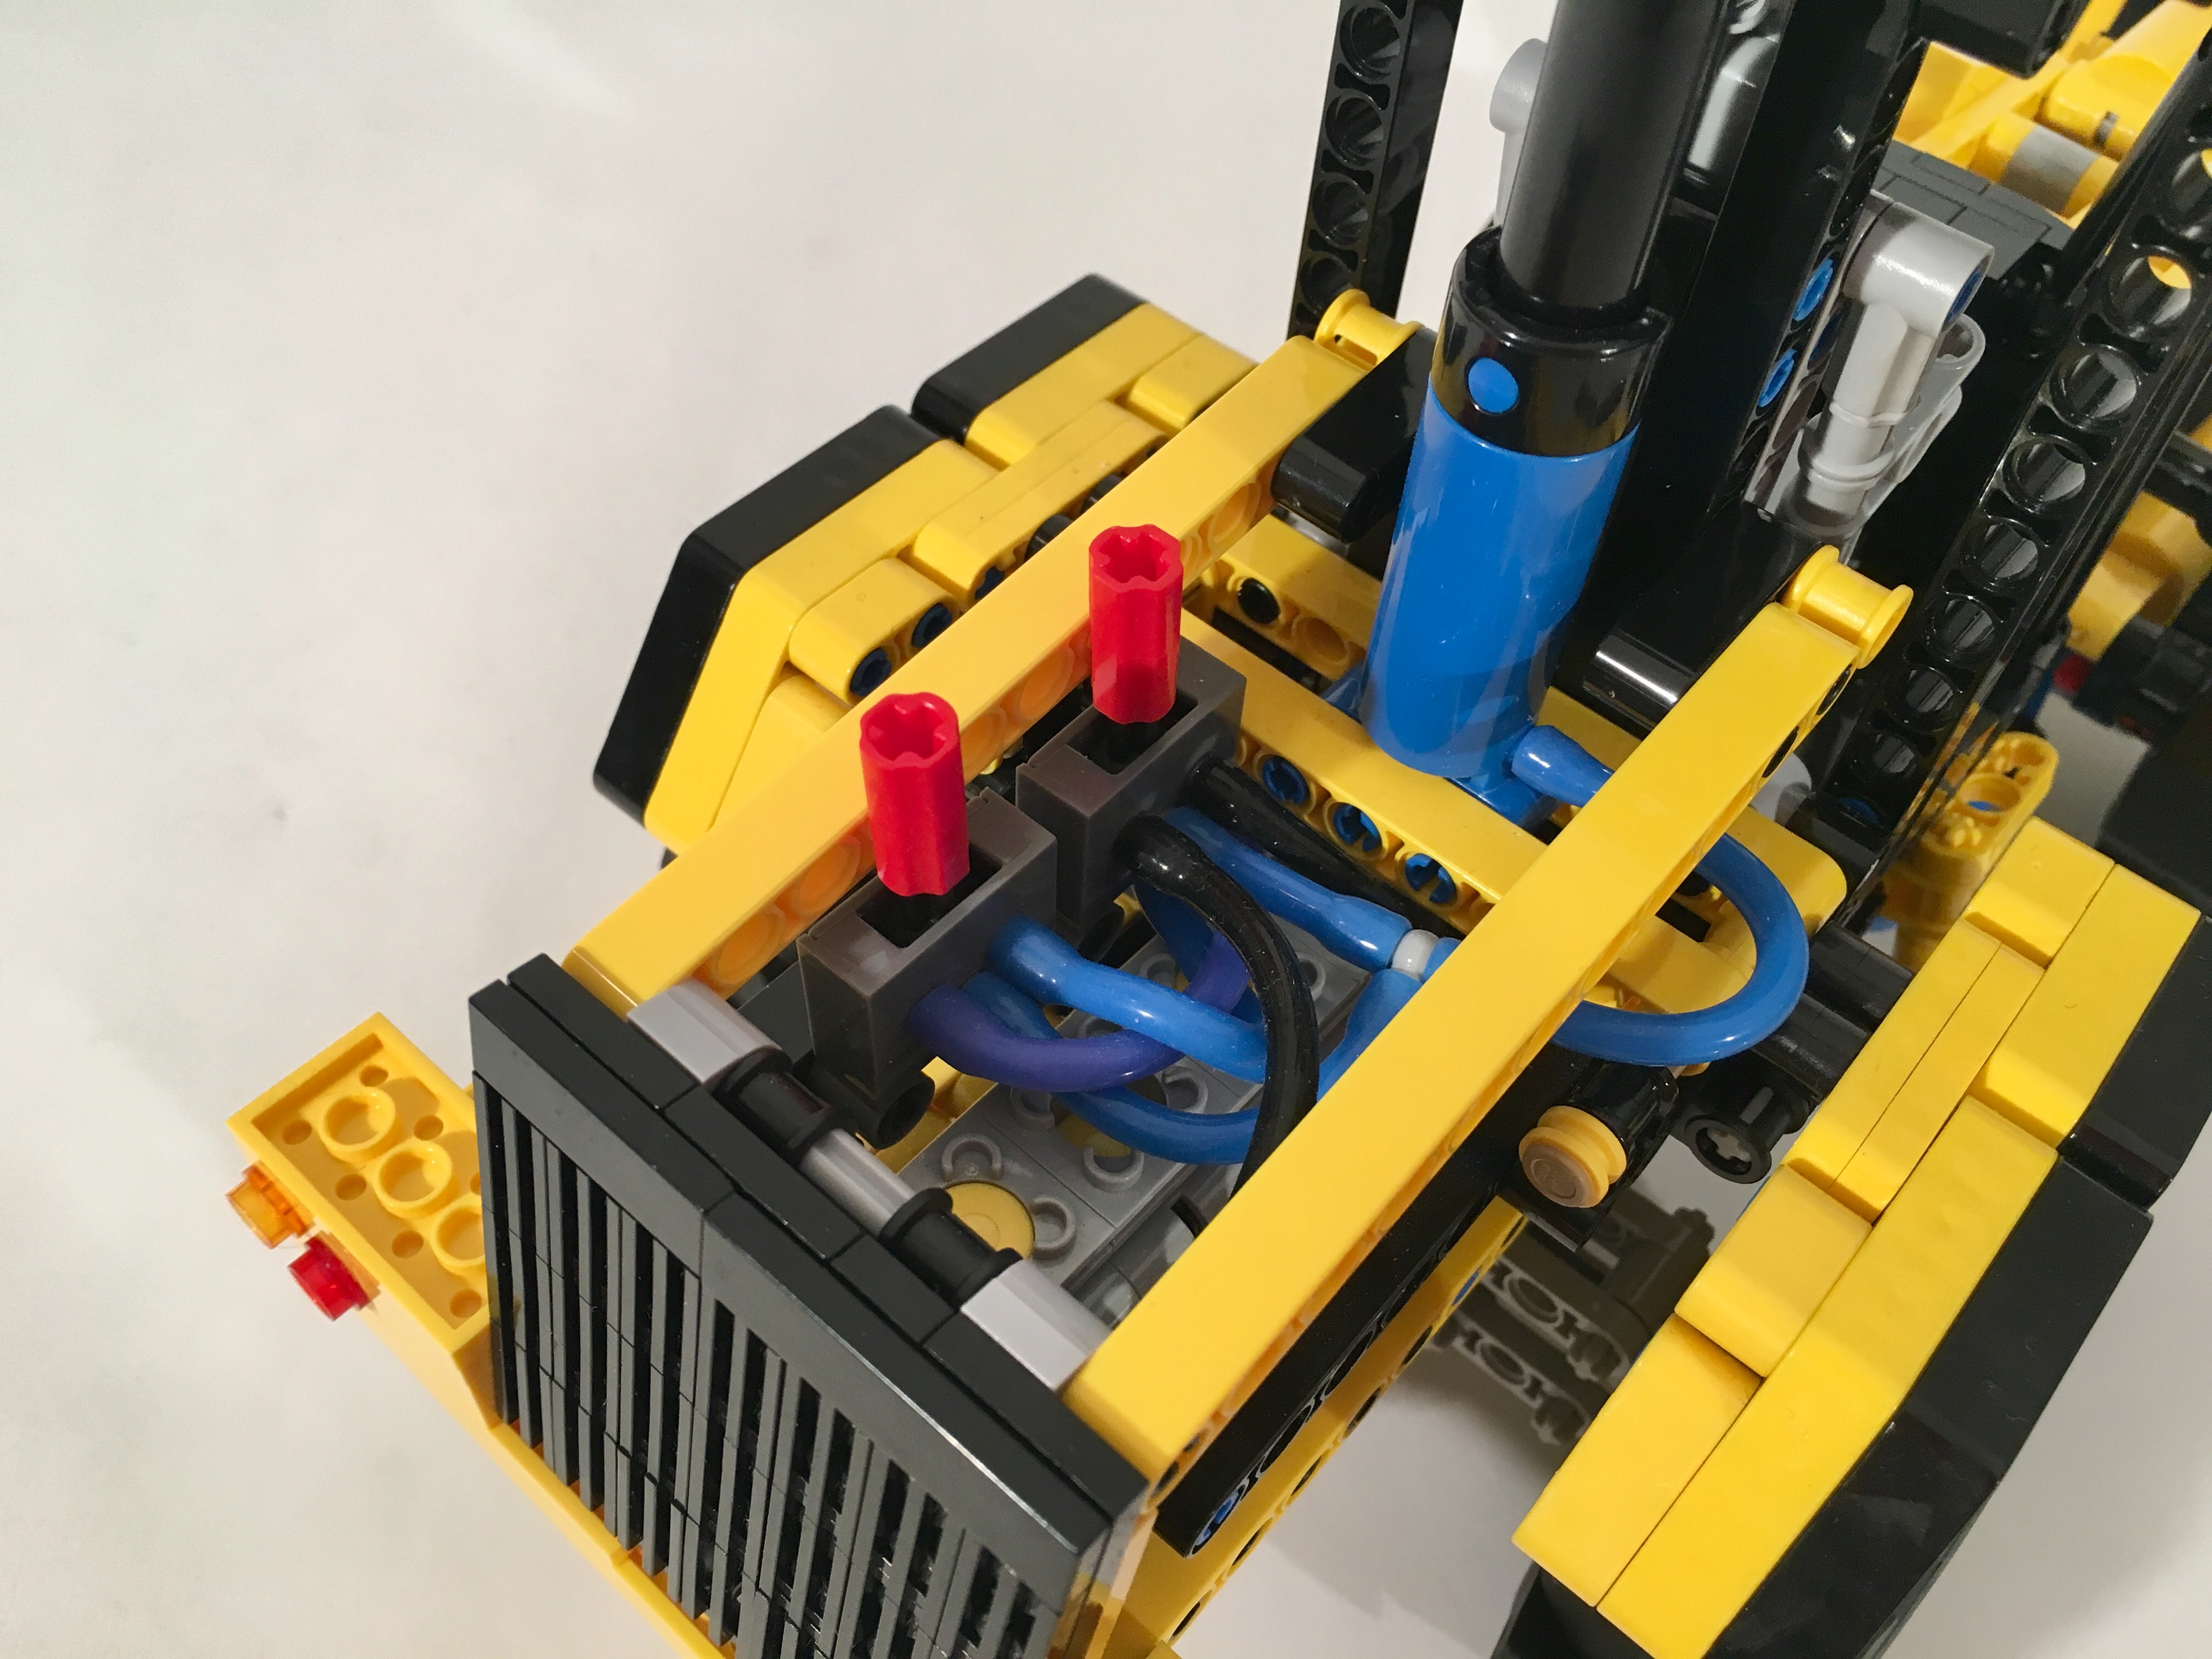
I was sitting on a train in Chicago, and saw a little CAT 914k out the window, and thought, “I should finally make a loader.” I got home and started to work. My collection recently added the Fischertechnik tires and the pneumatic parts from the LEGO 42053 Volvo, so I started calculating the scale. Once the scale was set I worked on the linkage for the bucket. I spent two full nights working on the linkage to take full advantage of the longer pneumatic rams. I used the longer ones on the lift, and a shorter one on the tilt.
After the bucket mechanism was set, I worked on the chassis. The size allowed for four wheel drive. The rear axle was set in a pendular setup, which allowed for some articulation over varied terrain. The rear differential linked to a small I4 motor that was placed in the rear. The pneumatic valves were placed over the motor. The light on the roof operated the steering.
While the project took a little too much time to complete, it was a fun project that turned out well. The linkage and bucket range worked well. It also held a load well. The stability of the loader could have been a little better when pumping the pneumatic pump, as the suspension took a lot of rigidity out of the rear. The design allowed for normal LEGO 81mm tires as well.
Not only are my builds becoming smaller, I am also enjoying builds that offer a little more modularity. Why build one thing, when the one thing can play a number of different tasks?
When I built the Snowblower a couple of years ago, I made a couple parts of the truck removable. So after the build was complete made a couple of other options: different cabs, other beds, a crane. This kind of building continued with the 9393 updated tractor. I was hooked. So, when it came time to make a tractor, I had this feature central to the build.
The Atos started a couple of years ago when I completed the 9393 update. I wanted a front PTO in a small tractor. Lime parts were becoming more prevalent (though we are still missing a red medium wheel), so I figured I could make something work. I started with the front axle, as it would need steering, a PTO shaft, and something to lift an implement. The PTO shaft runs directly forward from the rear differential under the steering rack. Another axle runs a stud and a half to the left, which drives a worm gear to elevate the front drawbar.
The engine is mounted on top of the steering unit, and is connected to the rear differential. Off the right side of the engine is a changeover that controls the raear PTO. This drive moves to the rear, and then powers another PTO for the rear. The changeover lever is in the cabin, to the right of the steering wheel. As in the front, a worm driven drawbar is on the rear to mount an implement. A simple hitch is there for a trailer.
I build a front Lemken furrow, a rear Poettinger power harrow, and a front and rear Claas disco mower. I look forward to making other implements as well. Each attach to the front and rear by removing a 5l and 8l axle with stop. It’s simple, and allows for endless modification.
I am happy with the way the tractor turned out. It was strong enough to handle the play of my young kids, and all the functions worked well. I would have like to have an on/off switch for the front PTO. Other than that it turned out well.
Every once and a while, I find myself building an older set from my collection. I find it relaxing not to think about design and simply follow instructions. Recently, I built LEGO’s 2012 set 9393, and after a couple of days, I thought, it needs something else.
The full gallery may be found on Flickr and Brickshelf. Instructions may be found here.
The LEGO set was simple with steering, lime green color scheme, a mower implement, and a system to raise and lower the implement. I decided it needed a fake motor, front suspension, a drive differential, and some bigger front wheels. I started building. Adding the motor proved to be more difficult than I thought it would be. By adding the larger front wheels, I was able to get the steering axle lower by one stud. This allowed space for the engine to be added, but did not solve the structural problem of how to mount the front suspension. I ended trying a number of solutions, but ended with one with many connectors, axles, and two liftarms running over the front axle beside the fake engine. I would prefer it to be a little more stiff, but it works. As I built the front of the tractor, I found myself adding an implement attachment point. I thought, maybe I should make another implement for the front.
This is where the project grew, and grew….
Now, only the mower implement was not enough. The tractor needed a plow, counterweights, a furrow, a harrow, a tiller, and a grain cart. All of a sudden this project became much bigger. I started with the snow plow. It is a simple design with a little worm gear lift attachment. Using this type of mount, I constructed a simple furrow implement as well. The multiple wheels are meant to smash larger clumps of dirt, and push stones down under the soil. I added a basic group of curved liftarms for front counterweights. All three implements are attached by removing two axles.
Most tractors have a three point attachment on the rear. The base 9393 has a two point attachment, which does not allow for a parallel movement as the impliment is raised. I went back and forth on changing this attachment point. In the end, I decided adding a parallel linkage would require a another PTO universal joint. I was not willing to add this, as it would put the implements too far behind the tractor. As such, I kept the stock 9393 motor implement the same. Using the same attachment point, I build a small harrow. The harrow is driven by the PTO shaft. Finally, I build a tiller with the fun little claw parts. I added a drawbar and a pivot, so this impliment would stay parallel to the ground.
Because I still did not think this was enough, I added a hitch to the tractor, and built a grain cart. It is a simple single axle design, with sloped sides. There is a conveyor on the bottom, and a folding auger for grain extraction. Both are geared together and can be opperated by a rear HOG gear. OK, I realize it is not an auger, but rather a chain. At this scale, I could not figure out a good auger solution that did not look clunky.
Before I could think of more implement, I said “I’m done.” I was please with how it turned out. All the implements were fun, and give the MOD much more playability. The grain cart was fun to build, and made the tractor look grand. I wish the chassis of the tractor was a little stiffer for the front suspension. I had a lot of fun with this build. I am going to build another tractor before this year is done.