Time for another Eurobricks contest! Free Instructions are available at Rebrickable.com.
Another Eurobricks contest was made available, and this one was right up my alley. In fact, I was so excited about the contest, I made two MOCs. The contest was to create a small, less than 10,000 cubic stud, construction vehicle. I figured an end loader is perfect for the contest theme, and it was a while since I created one. I build a quick draft of the shape including where the steering, engine, and bucket would go.
At this scale I decided quickly that adding an engine would be a great feature, but four wheel drive would only distract from the look and the function of the bucket. The engine is a little 3 cylinder unit that is mounted transversally behind, and powered by, the rear axle. This placement allowed for steering and bucket tilting to be placed in a HOG placement.
Drive Mech
I next worked on the linkage for the bucket. It took a couple of tries, but I finally got a linkage with full movement. Two mini linear actuators are placed on the side of the loader for bucket lift, and are linked together. The manual control is a small gear on the left side. The bucket tilt uses a Z-linkage design that allows for the bucket to move correctly through the lift movement and not dump any load. This is controlled by a single mini linear actuator, with a controlling gear on the top of the engine cover. The head of the bucket allows for quick change between a bucket and forks. Finally, steering is controlled by the HOG on the top of the cabin, and keep my high standards for steering feel with low slop.
I was pleased with this little creation, but it was not as interesting as the other MOC that I designed. So while everything worked well, and looked great, I submitted the other MOC for the contest. I hope you enjoy the MOC, and feel free to build one of your own.
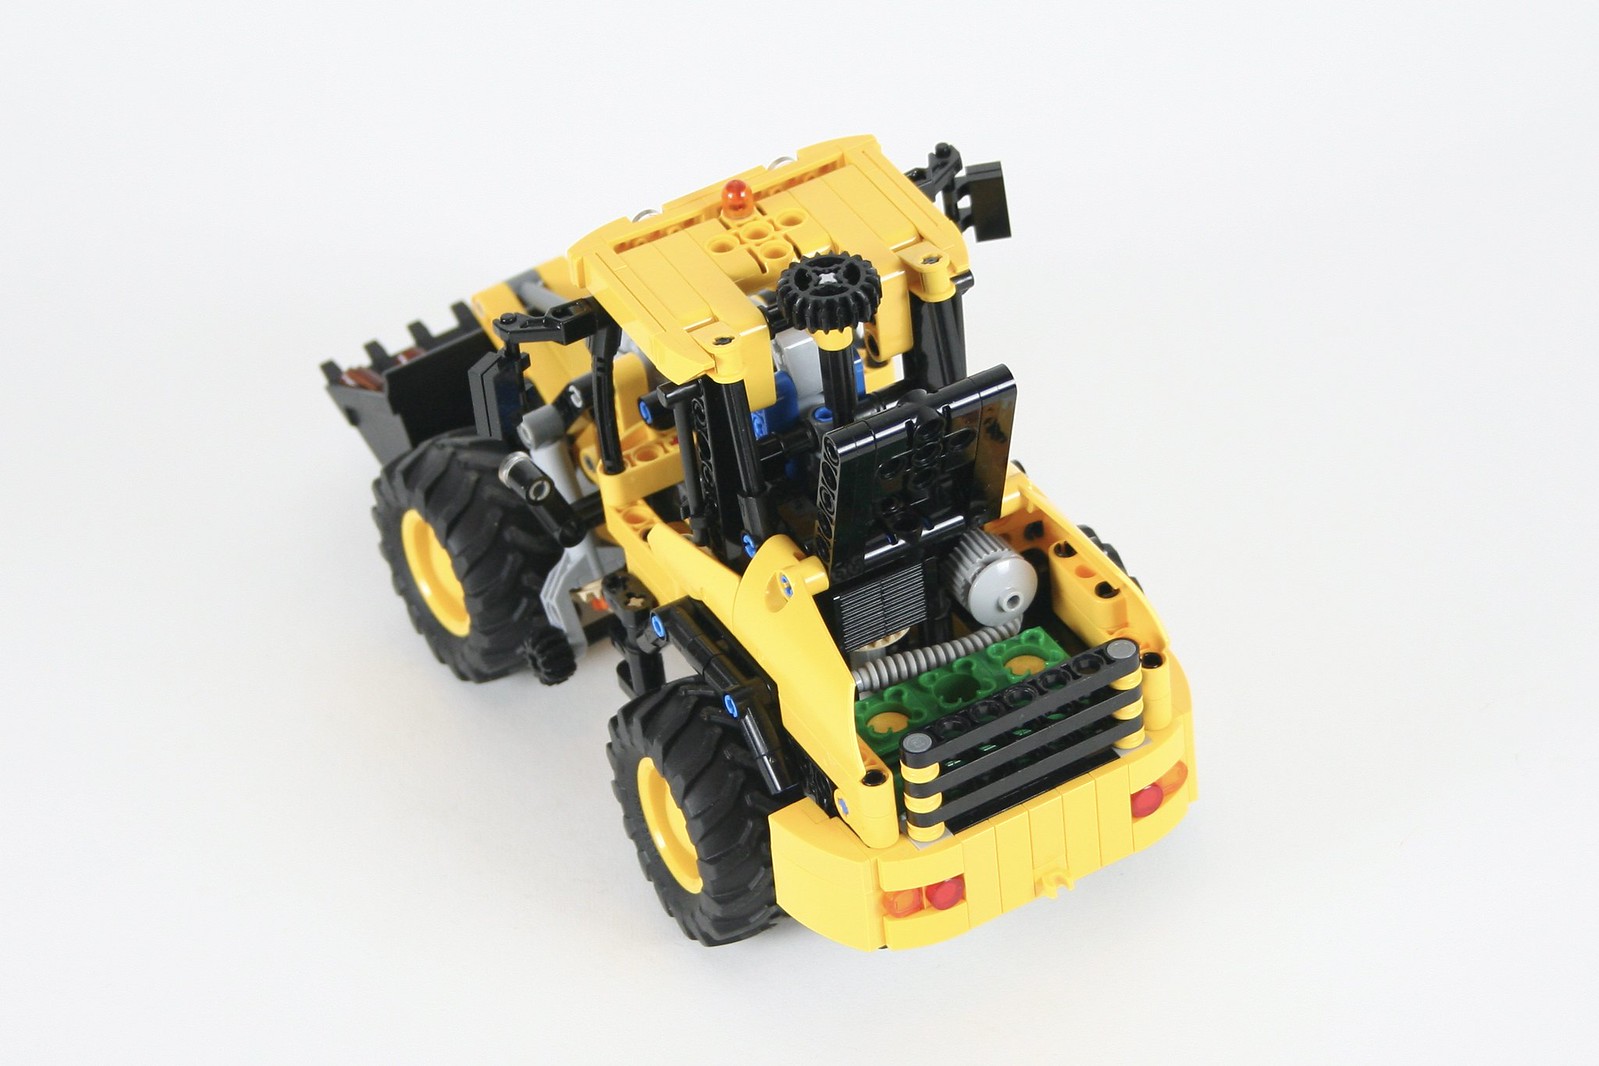
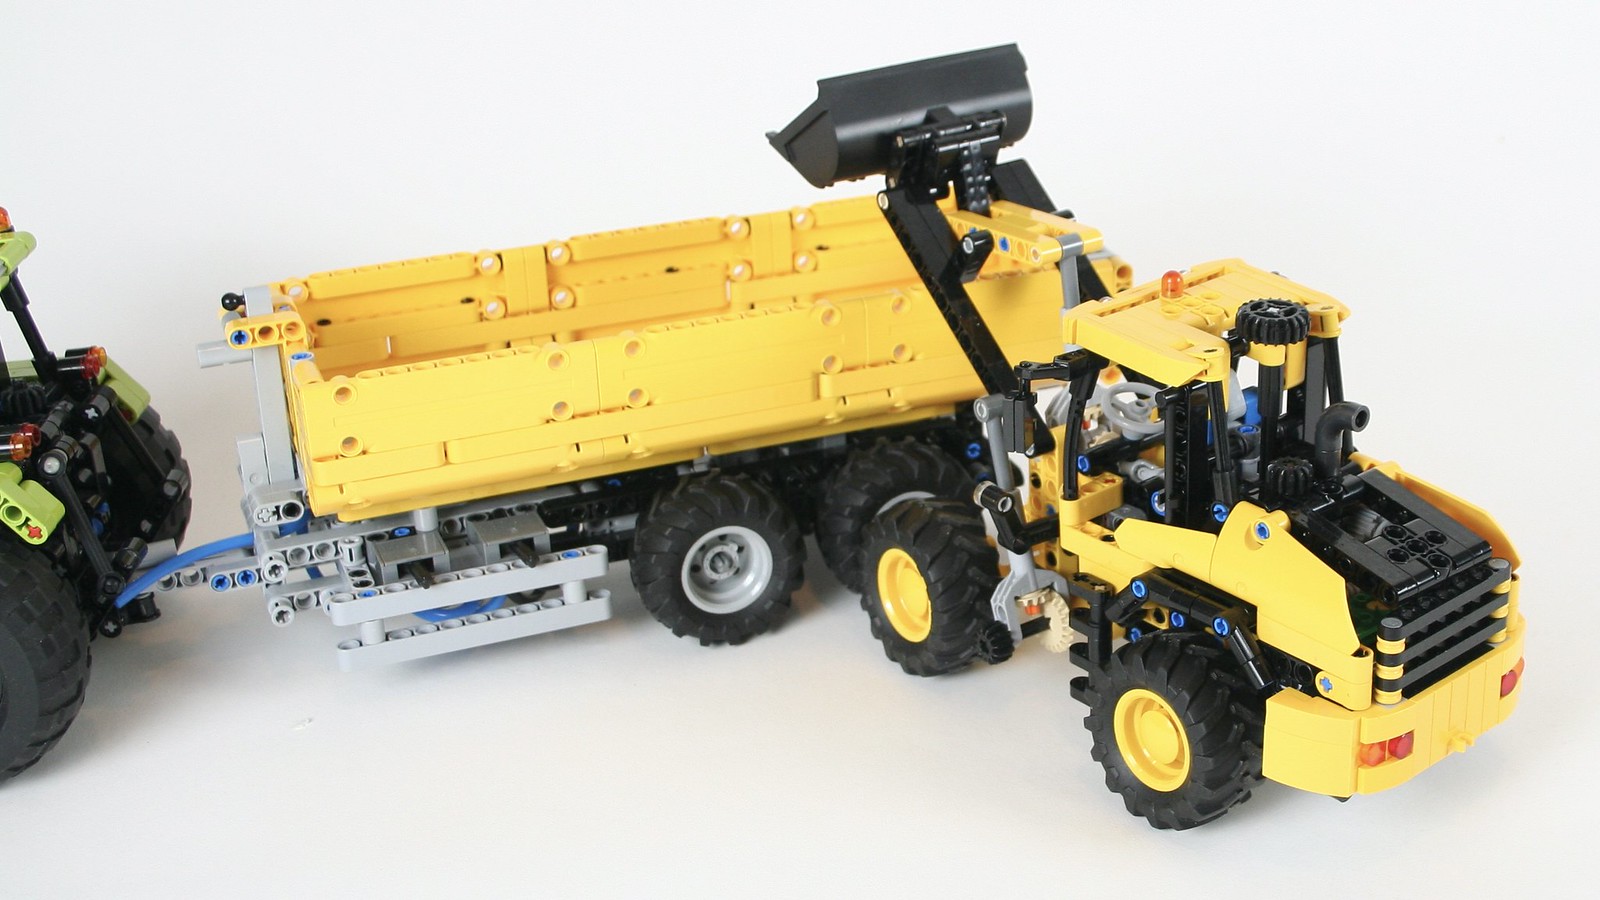
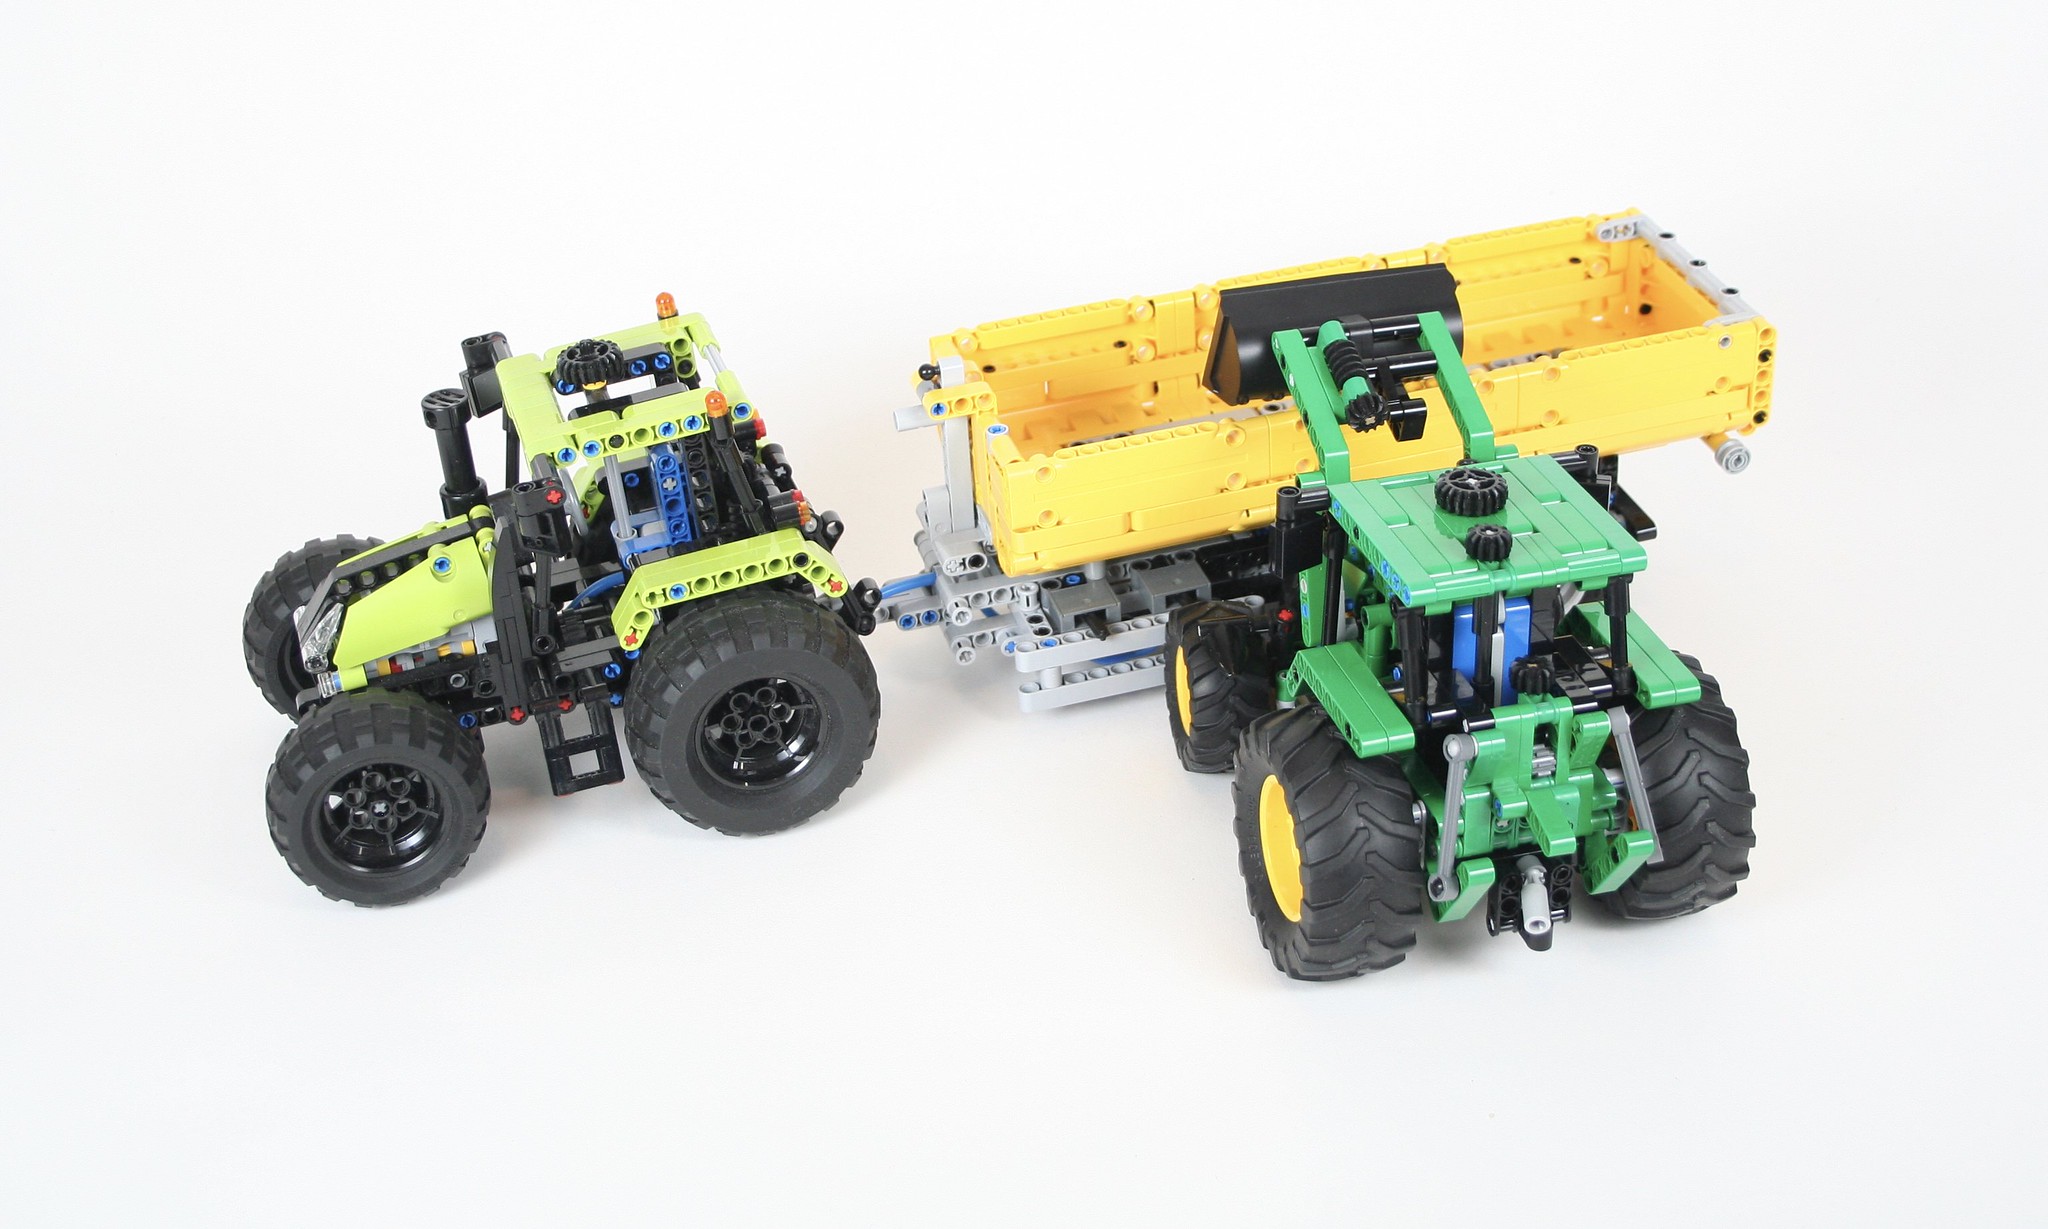
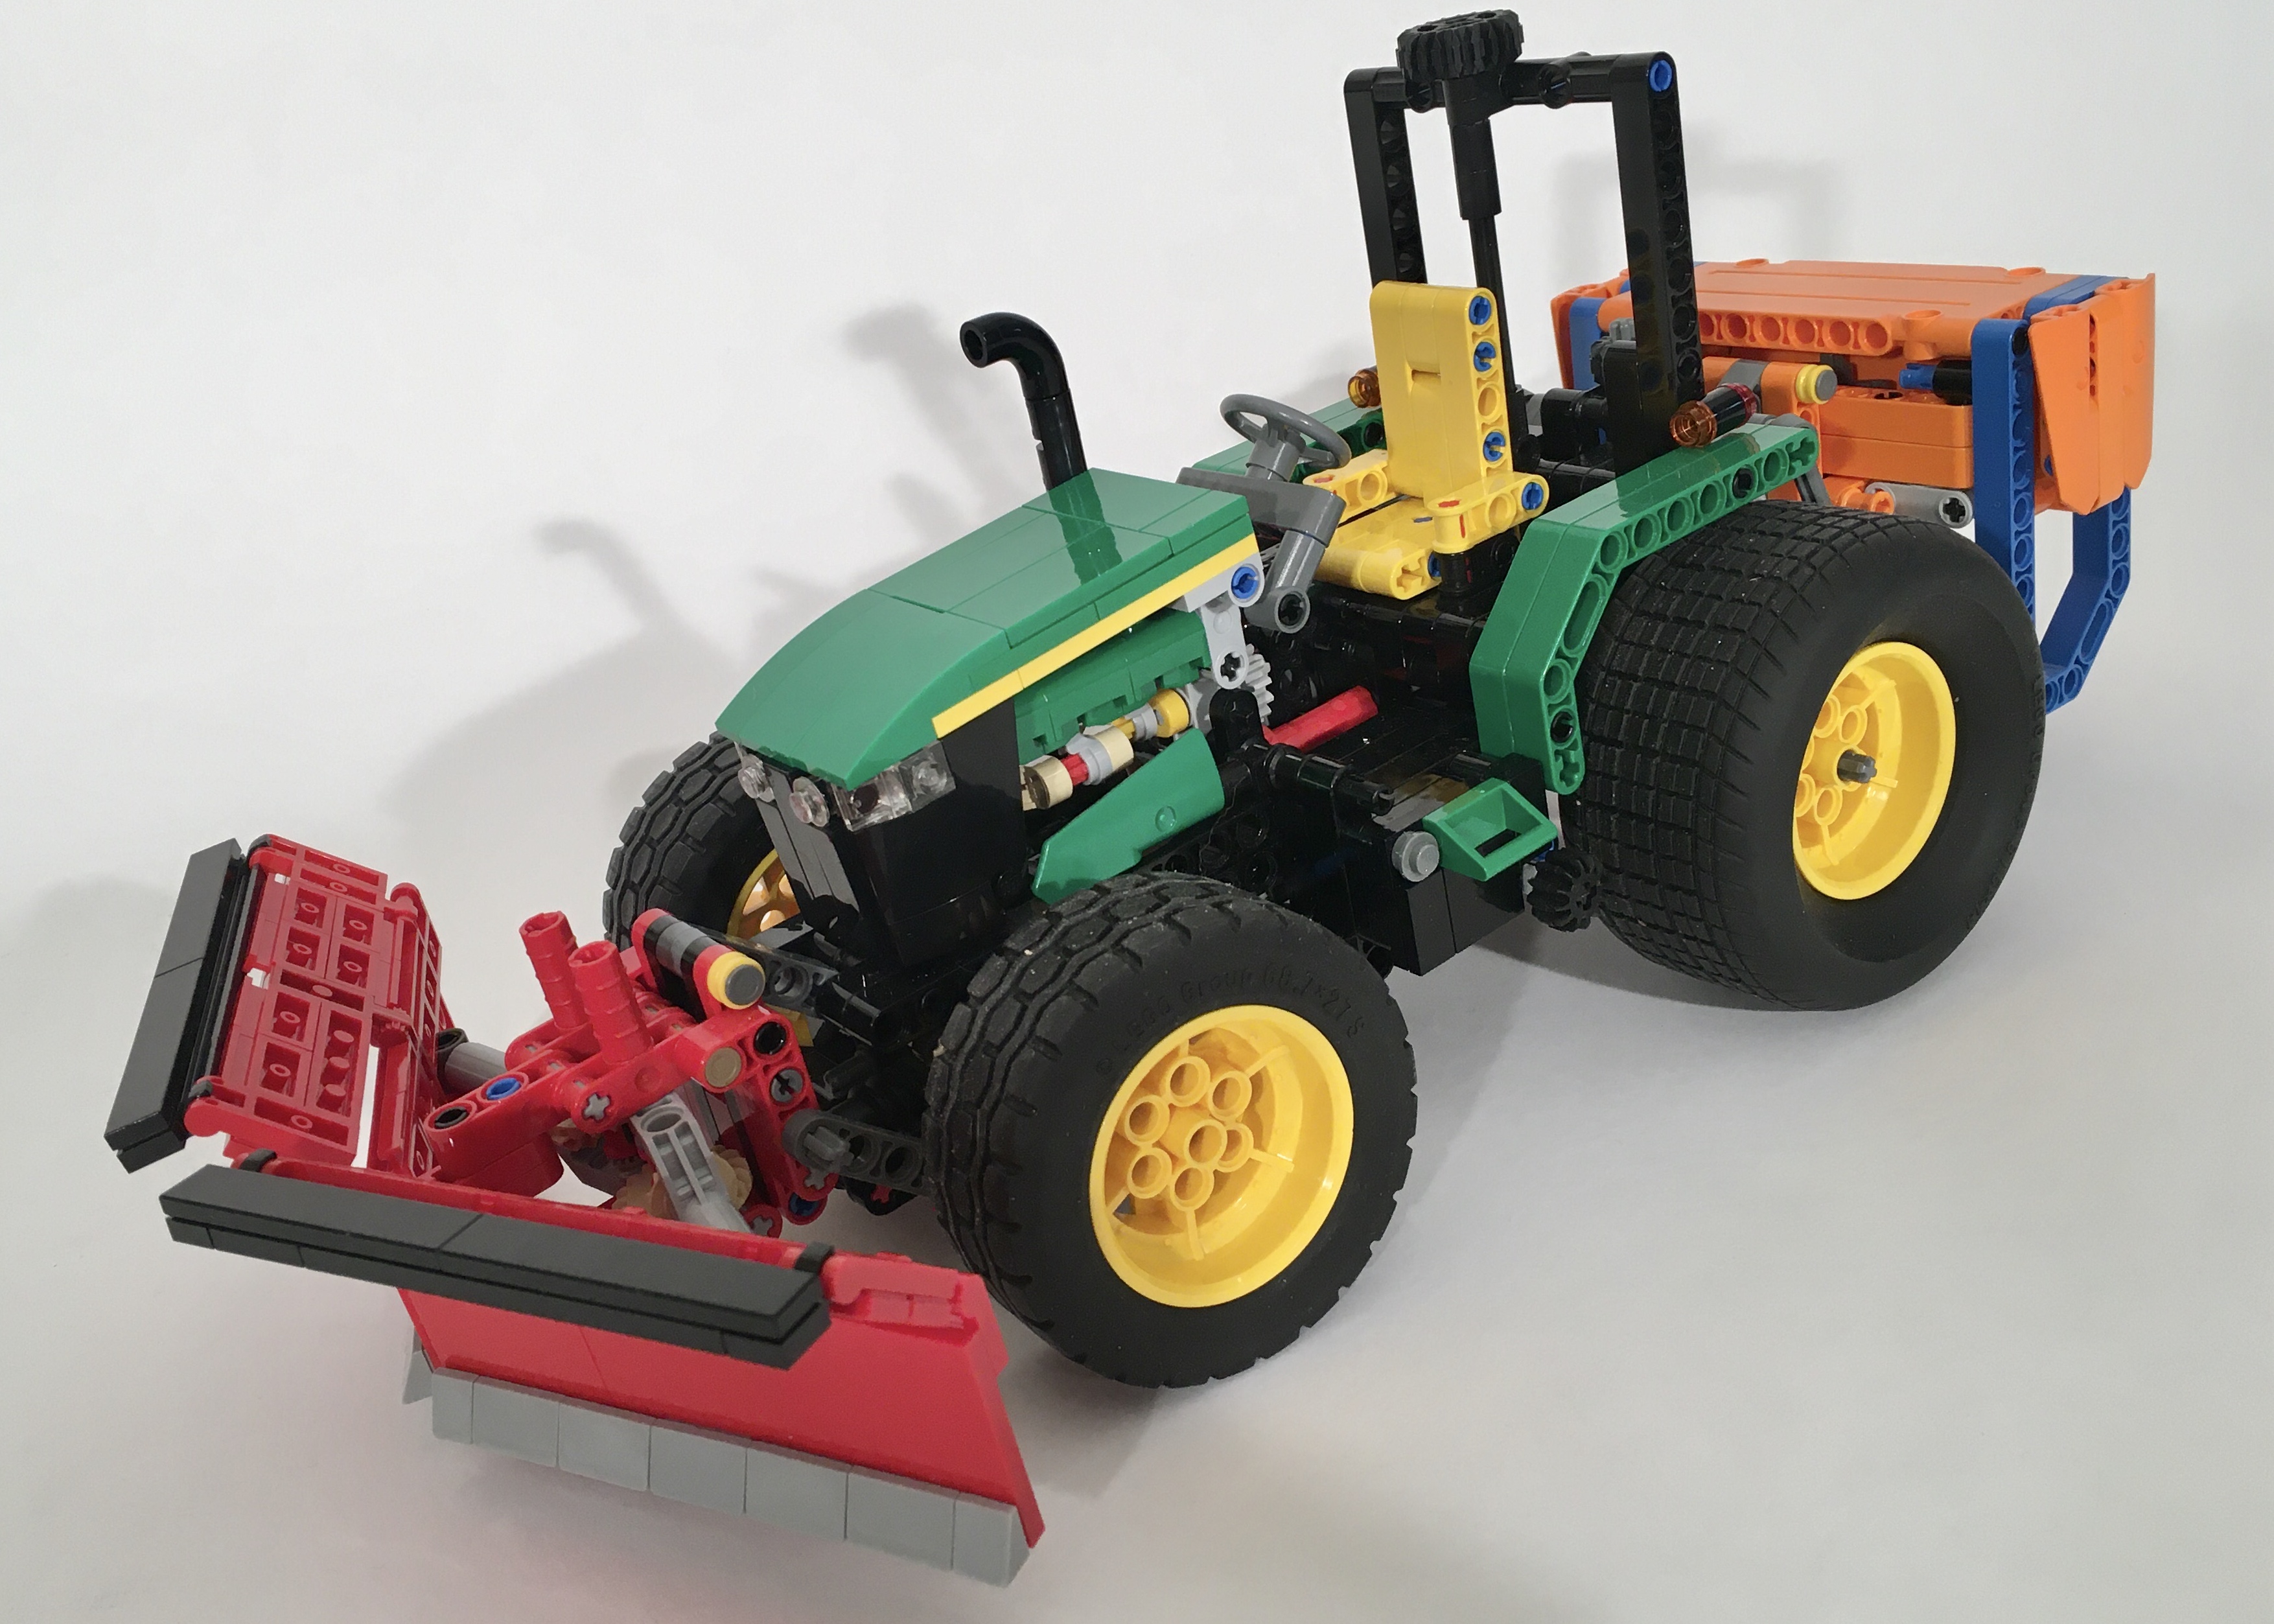
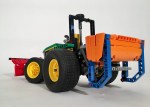
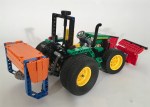
I built the Atmos Tractor a couple of years ago as a small little project. Soon I had created a number of attachments and trailers to work with the tractor, and soon I was more tractors and other machines were added. But the balance needed some additional tractors, so I decided to make a little partner.
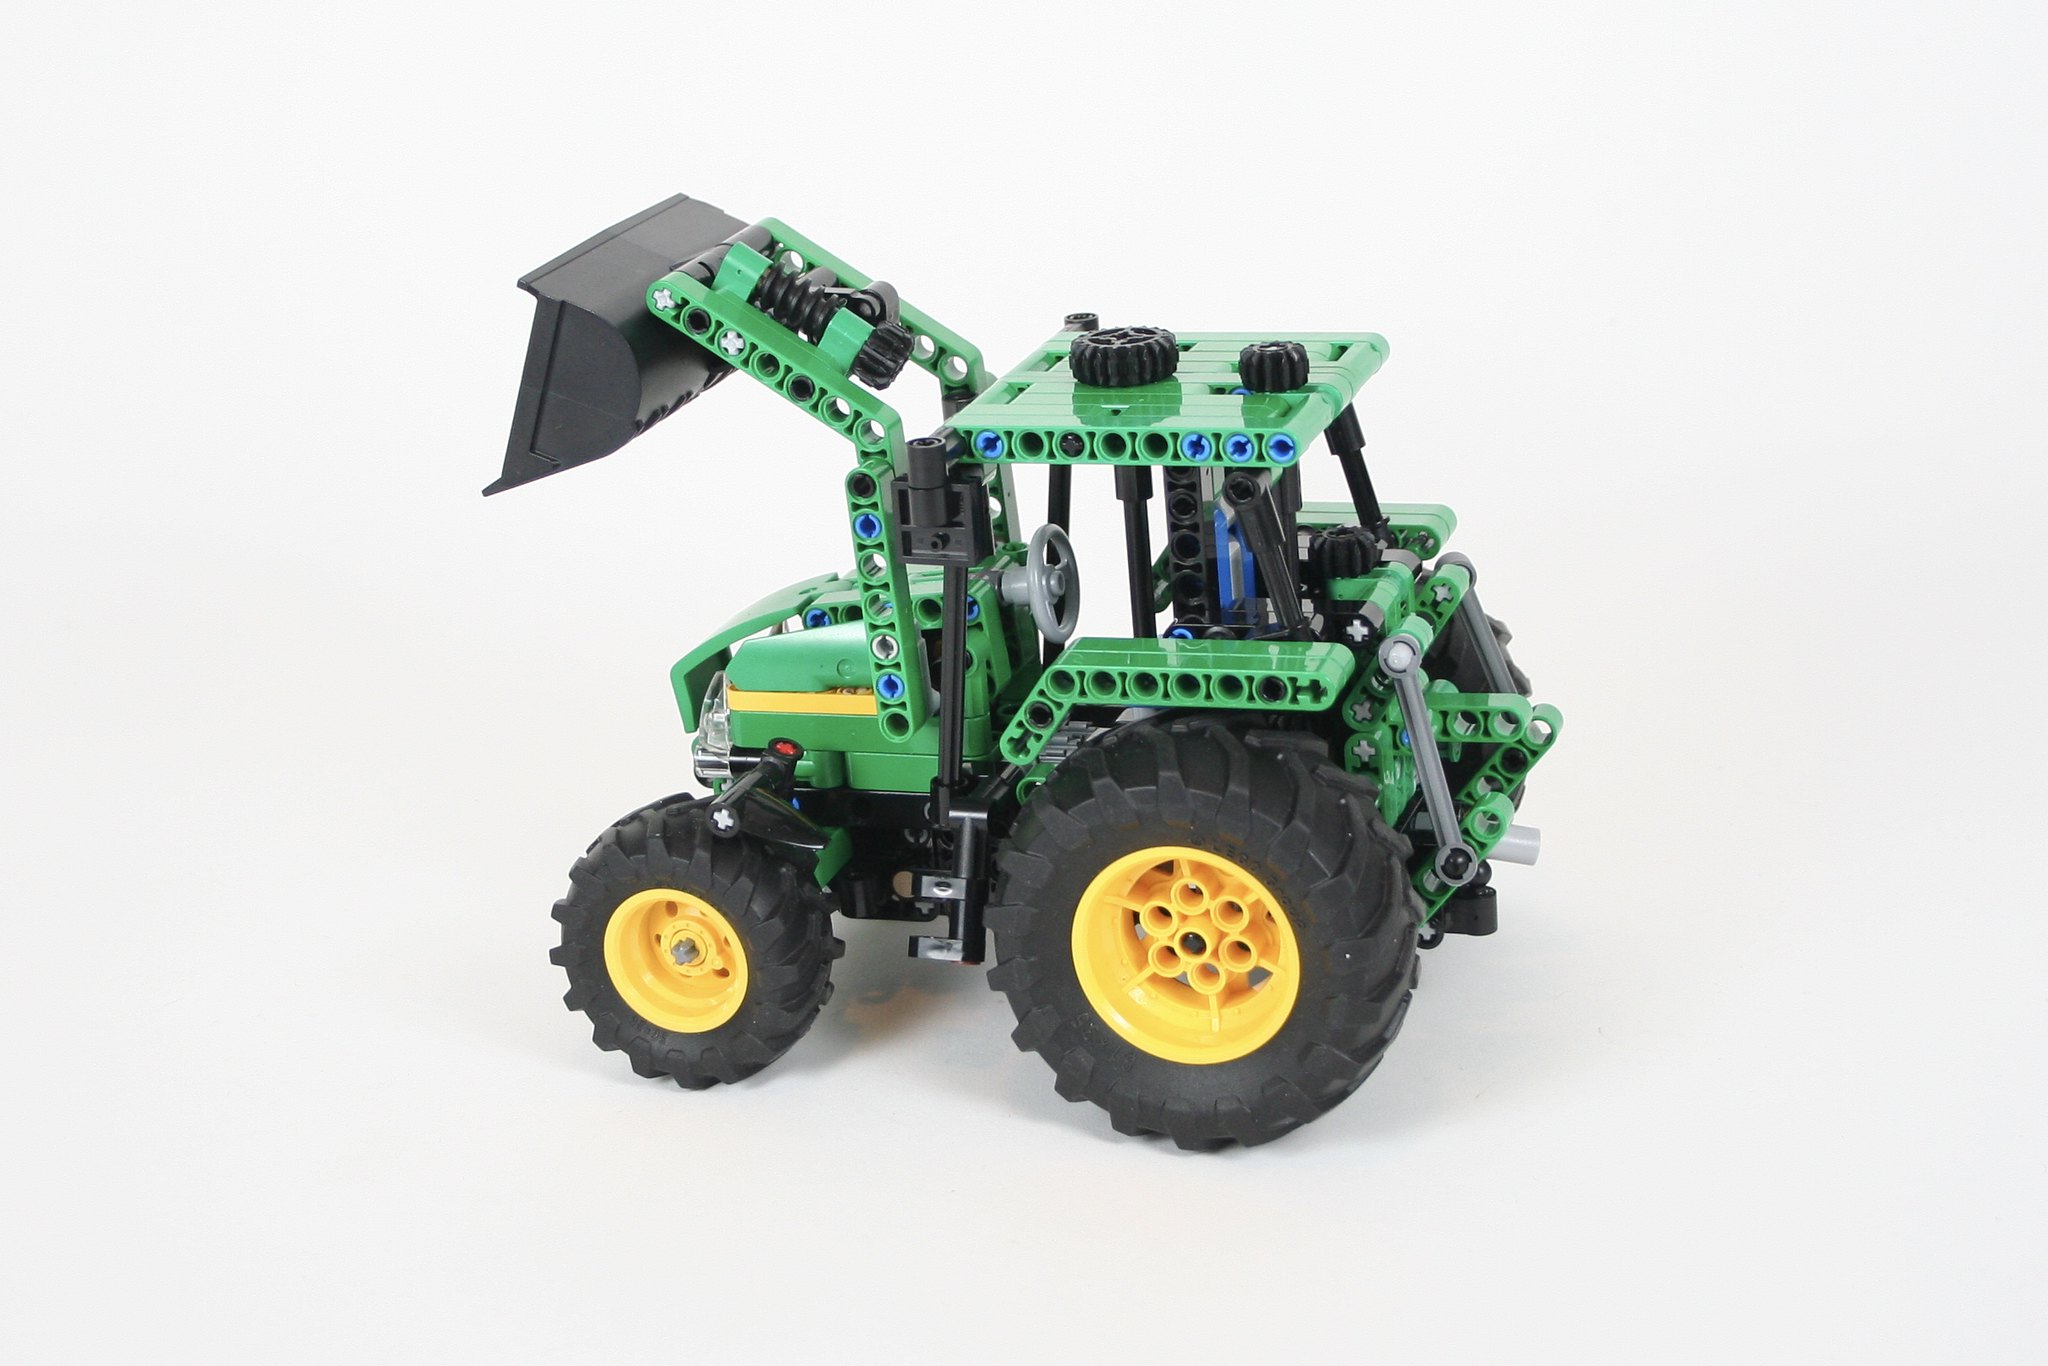
The John Deere Scout specifically so I could use the new Tractor tires that came from Lego 42122 and Lego 42129. But I wanted to it to be a smaller tractor with many of the features needed for full Thirdwigg Farm integration. Thus, the tractor had to have the common front and rear attachment points, a rear PTO, and steering because I put that it everything. Soon it was clear that the size of the tractor was going to make a fake engine poorly done, so I left it out. But I wanted some other feature to make this tractor unique.
The front bucket uses a worm gear function to lift the front arms. It is driven by a mechanism that drives rear, and then up to the top of the cab. There is a little gear for the HOG function that is just behind the steering HOG. A small worm gear mechanism is used to tilt the bucket. The arm can be easily removed if the desire is for the tractor to mount something on the front attachment point. The rear PTO is connected directly to the rear differential, and the common three point hitch is installed as well. Finally a trailer hitch is attached.
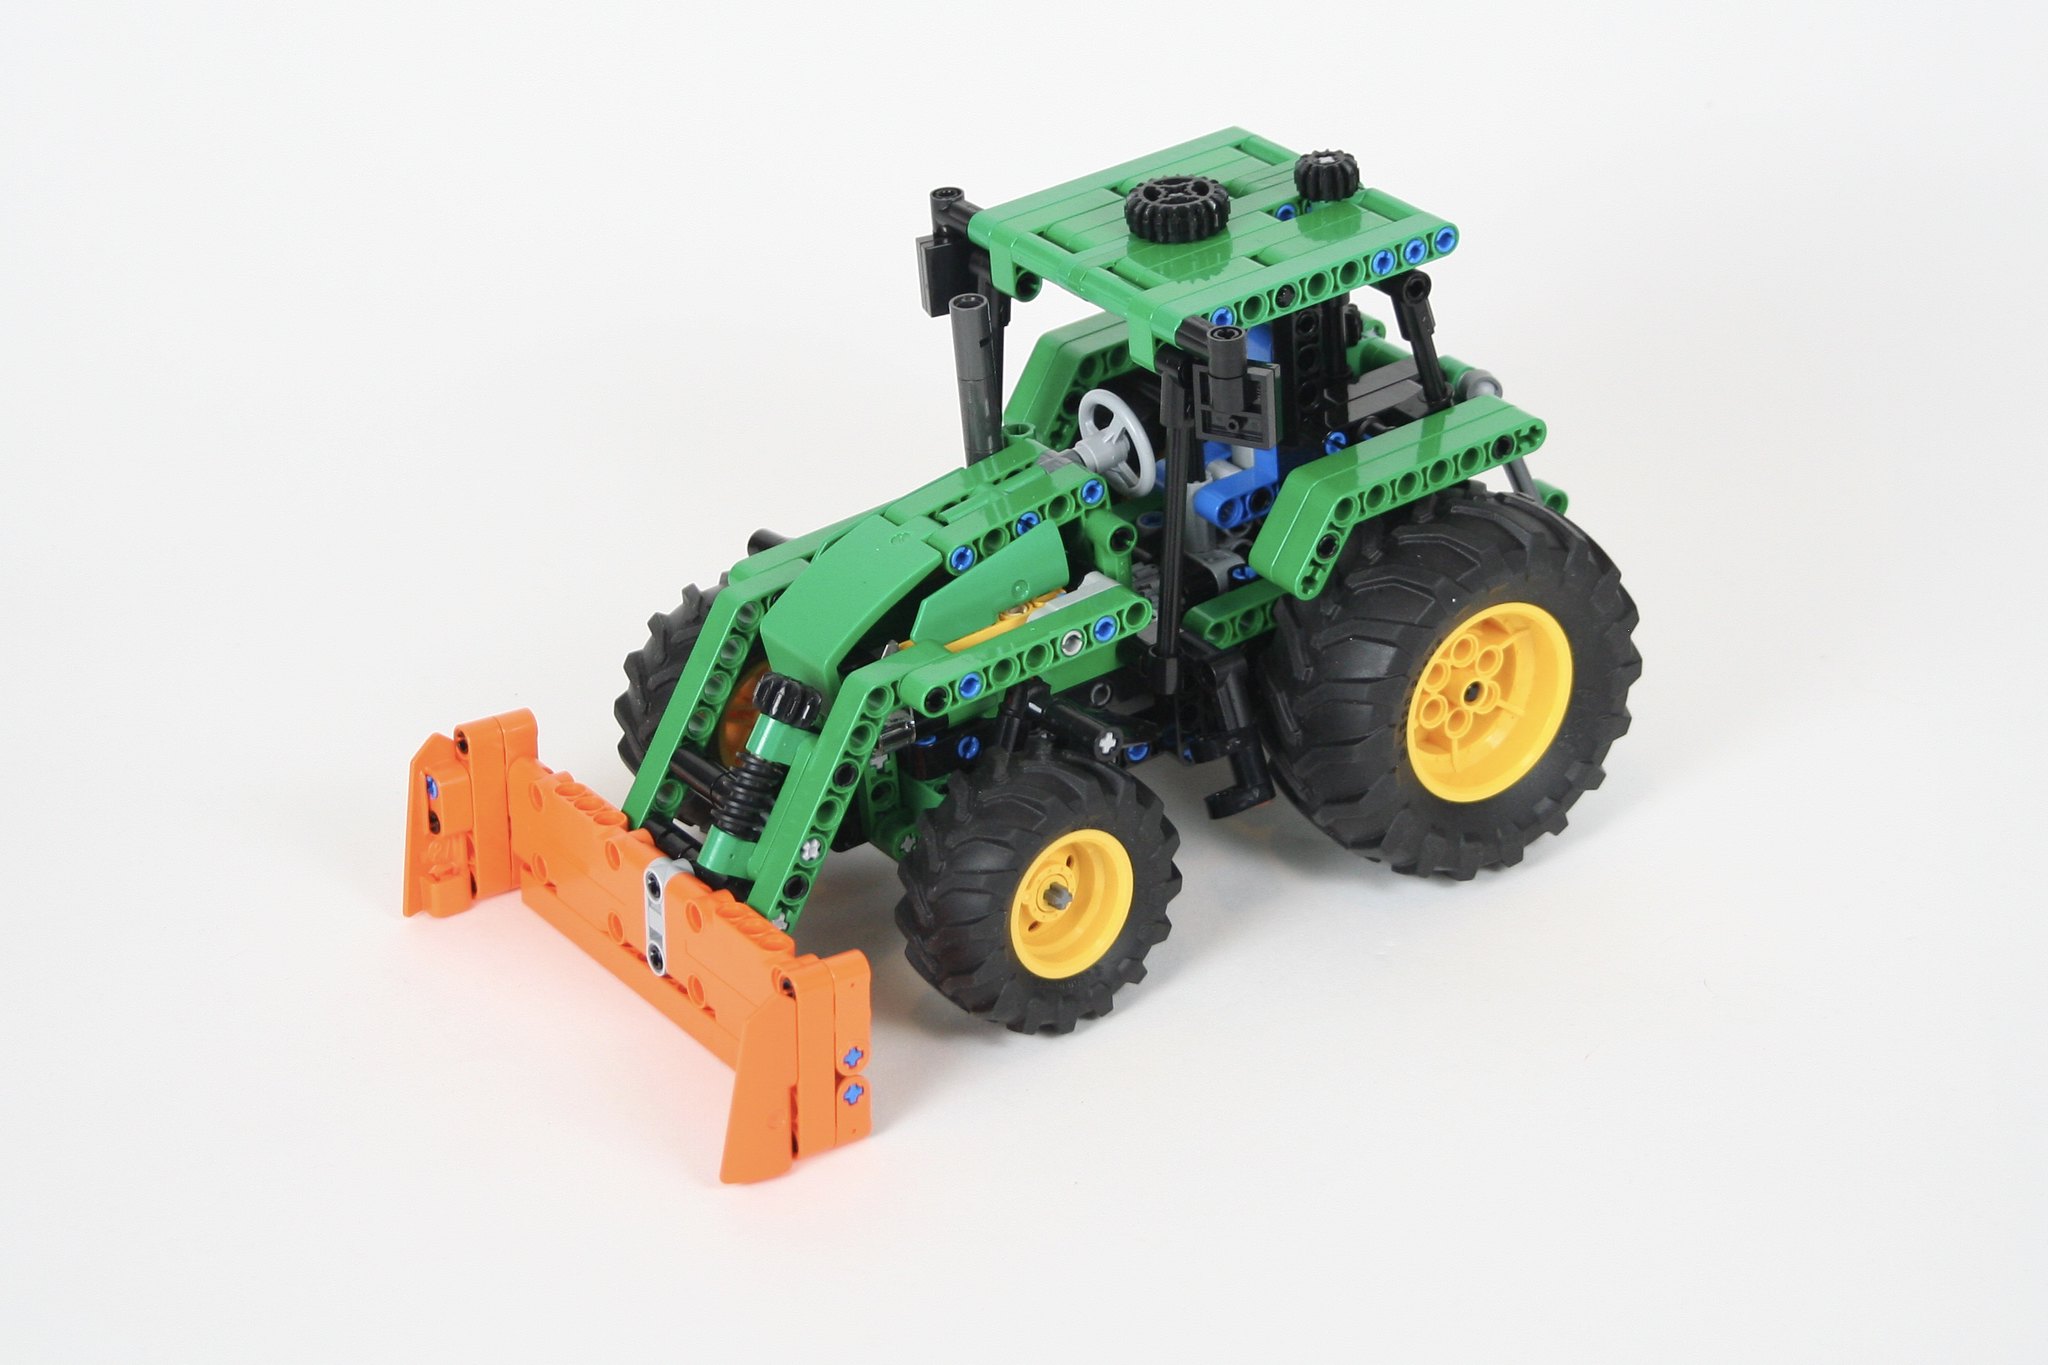
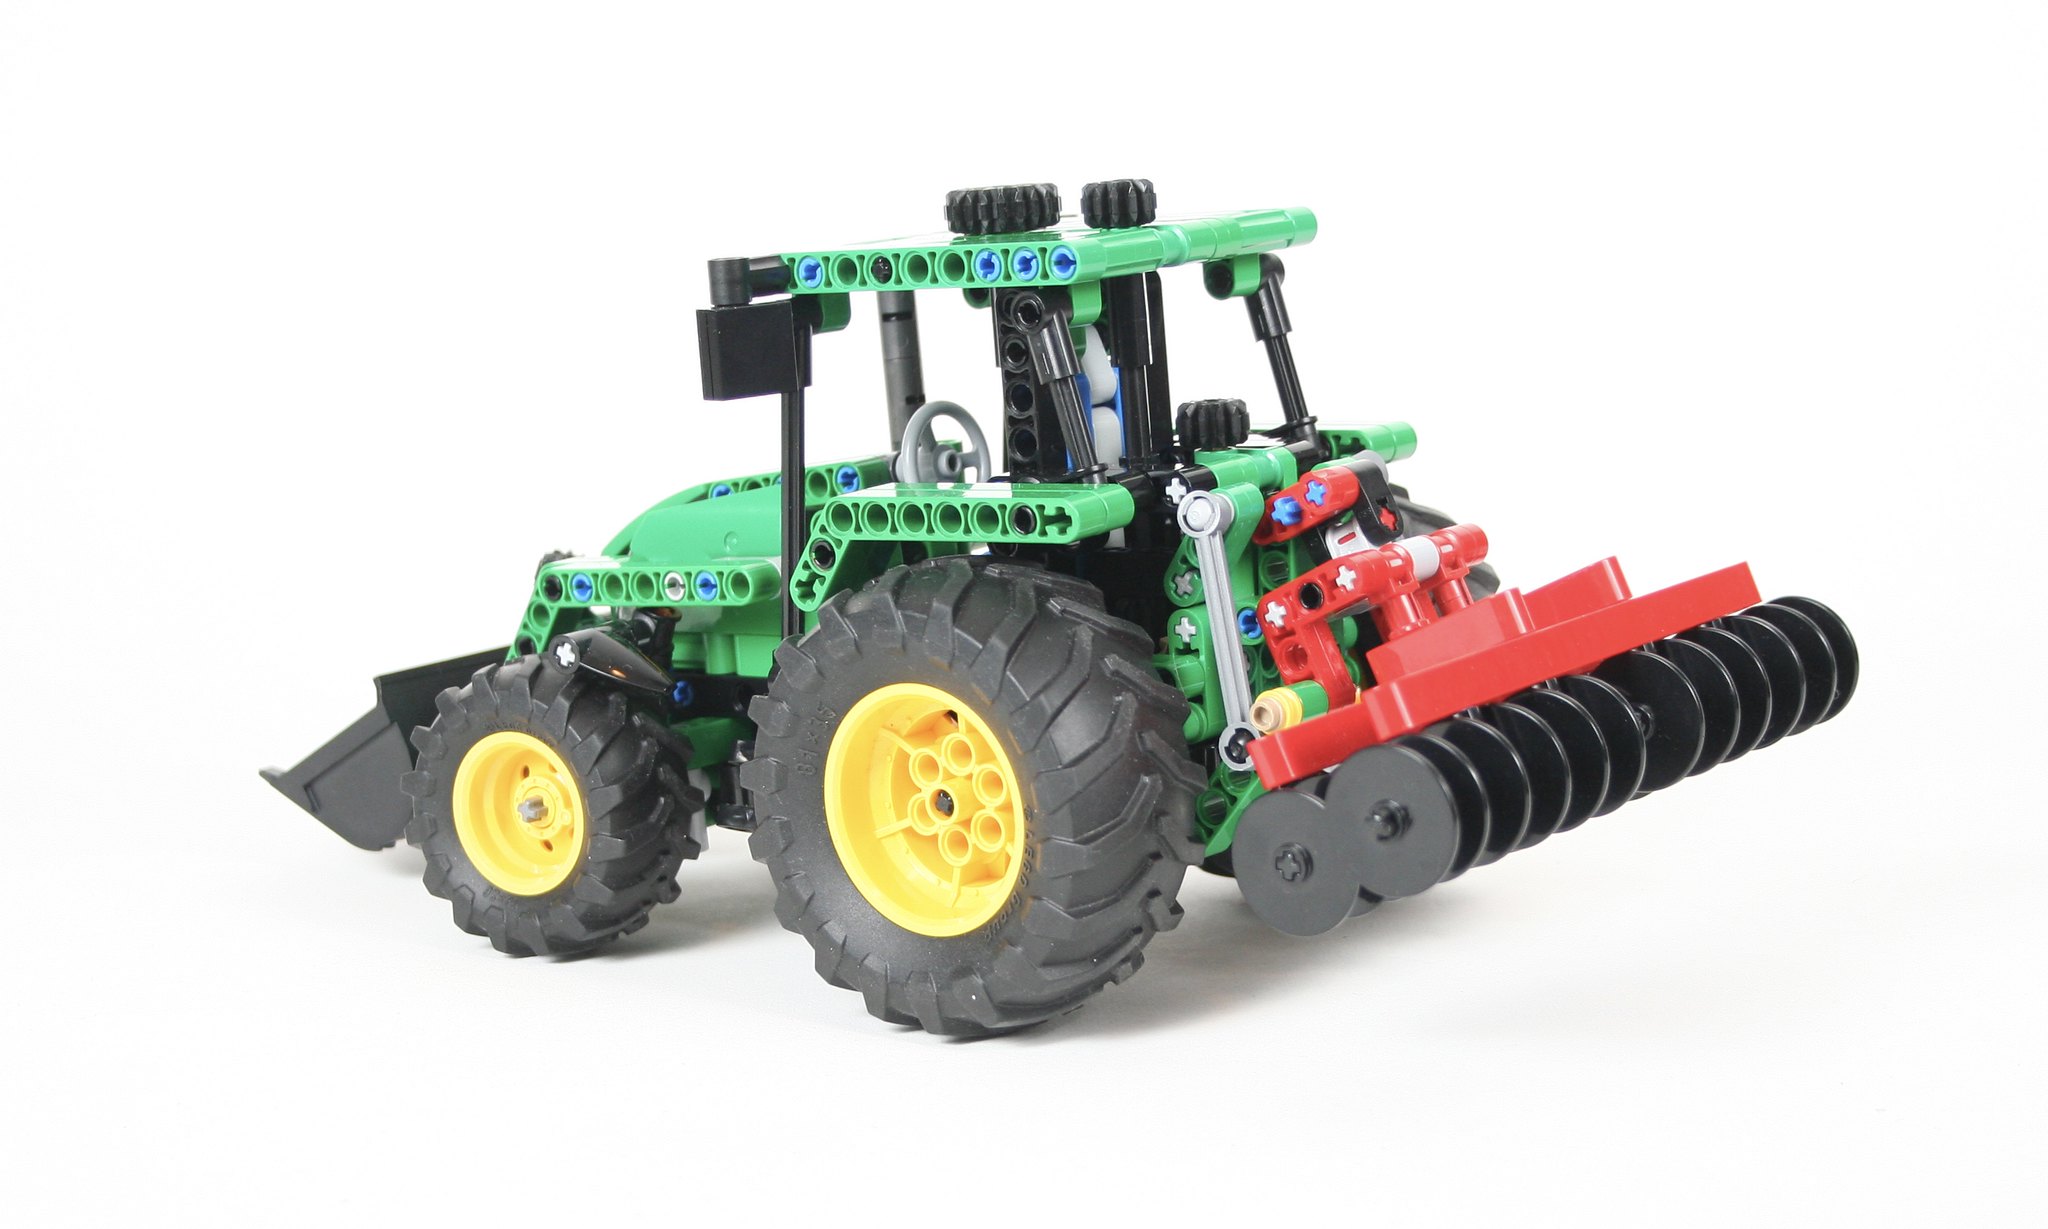
I also made a couple of attachments specifically for this tractor including a snow plow and scrapper, and a little trailer. Both may be found for free at Rebrickable.
With each additional tractor I add, I think it will be the last, but I keep having more ideas, and each one has been fun to design. I was pleased with how this tractor turned out, and how well it functioned. The tires look great at this scale. Most importantly, it matched well with each of the other tractors. The instructions are freely available at Rebrickable along with all the other Thirdwigg Farm builds, so feel free to make one of your own.
Sometimes I cannot make a decision. This is the LEGO result of that problem.
You may find free instructions for the AWD and the RWD (my favorite).
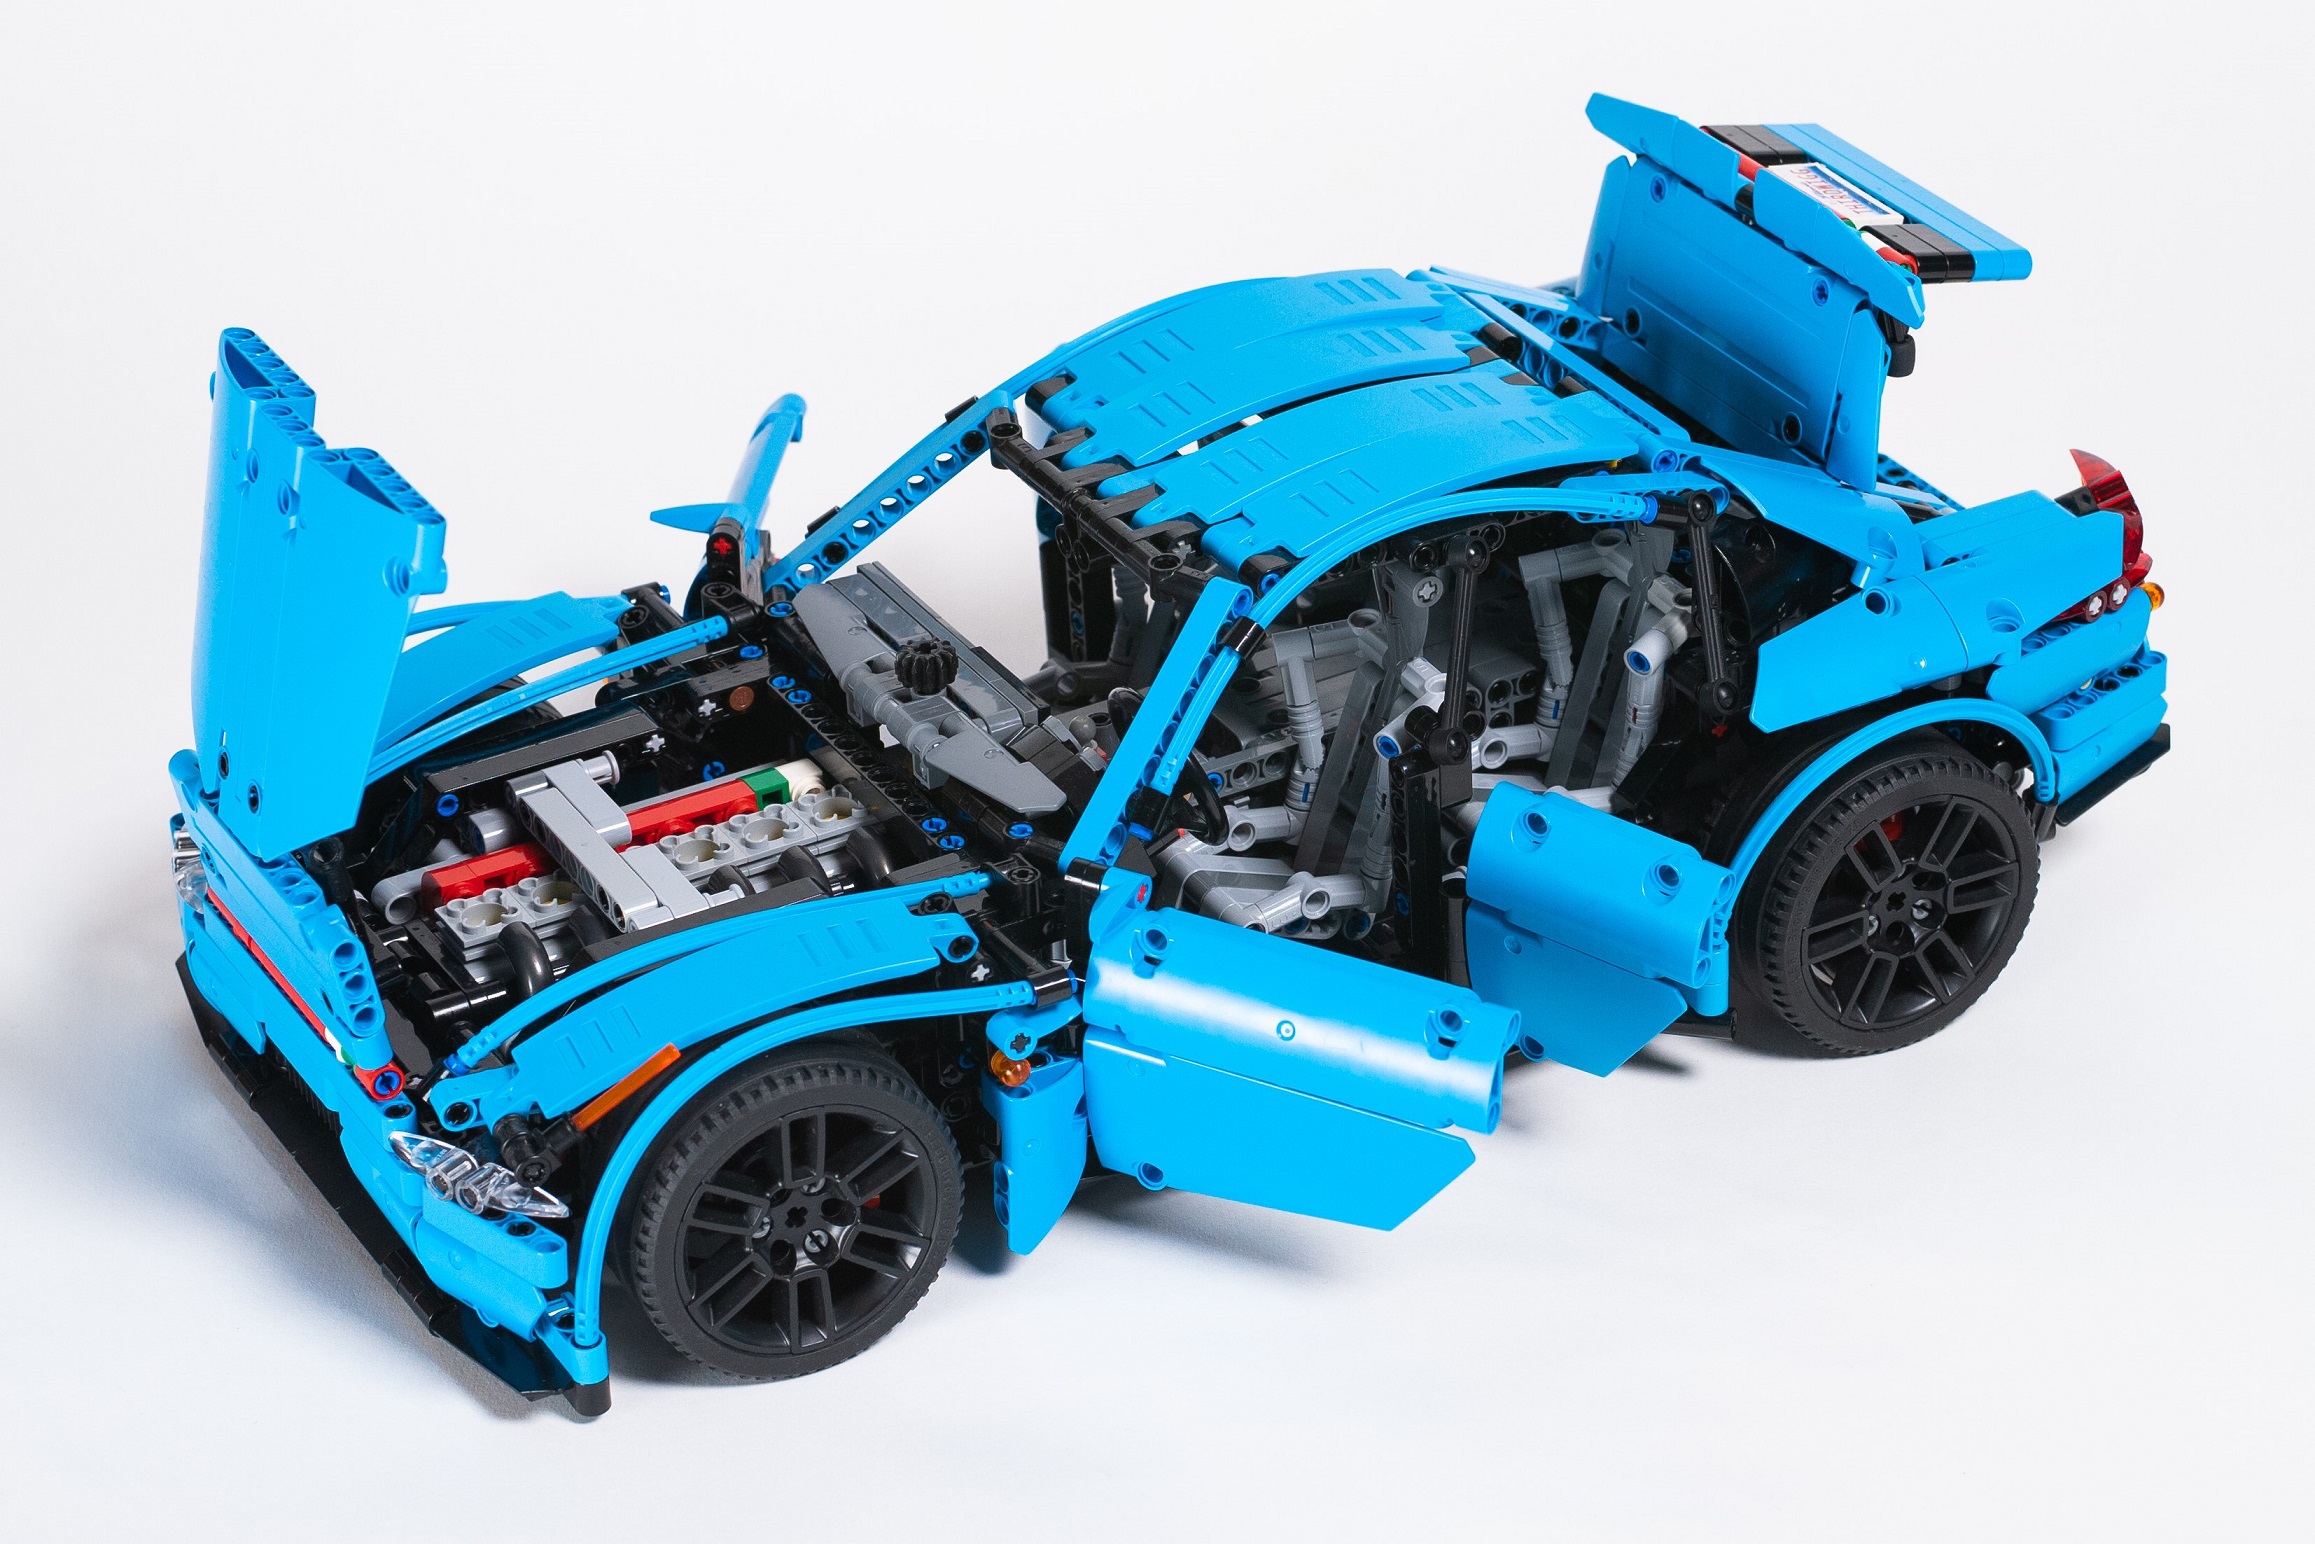
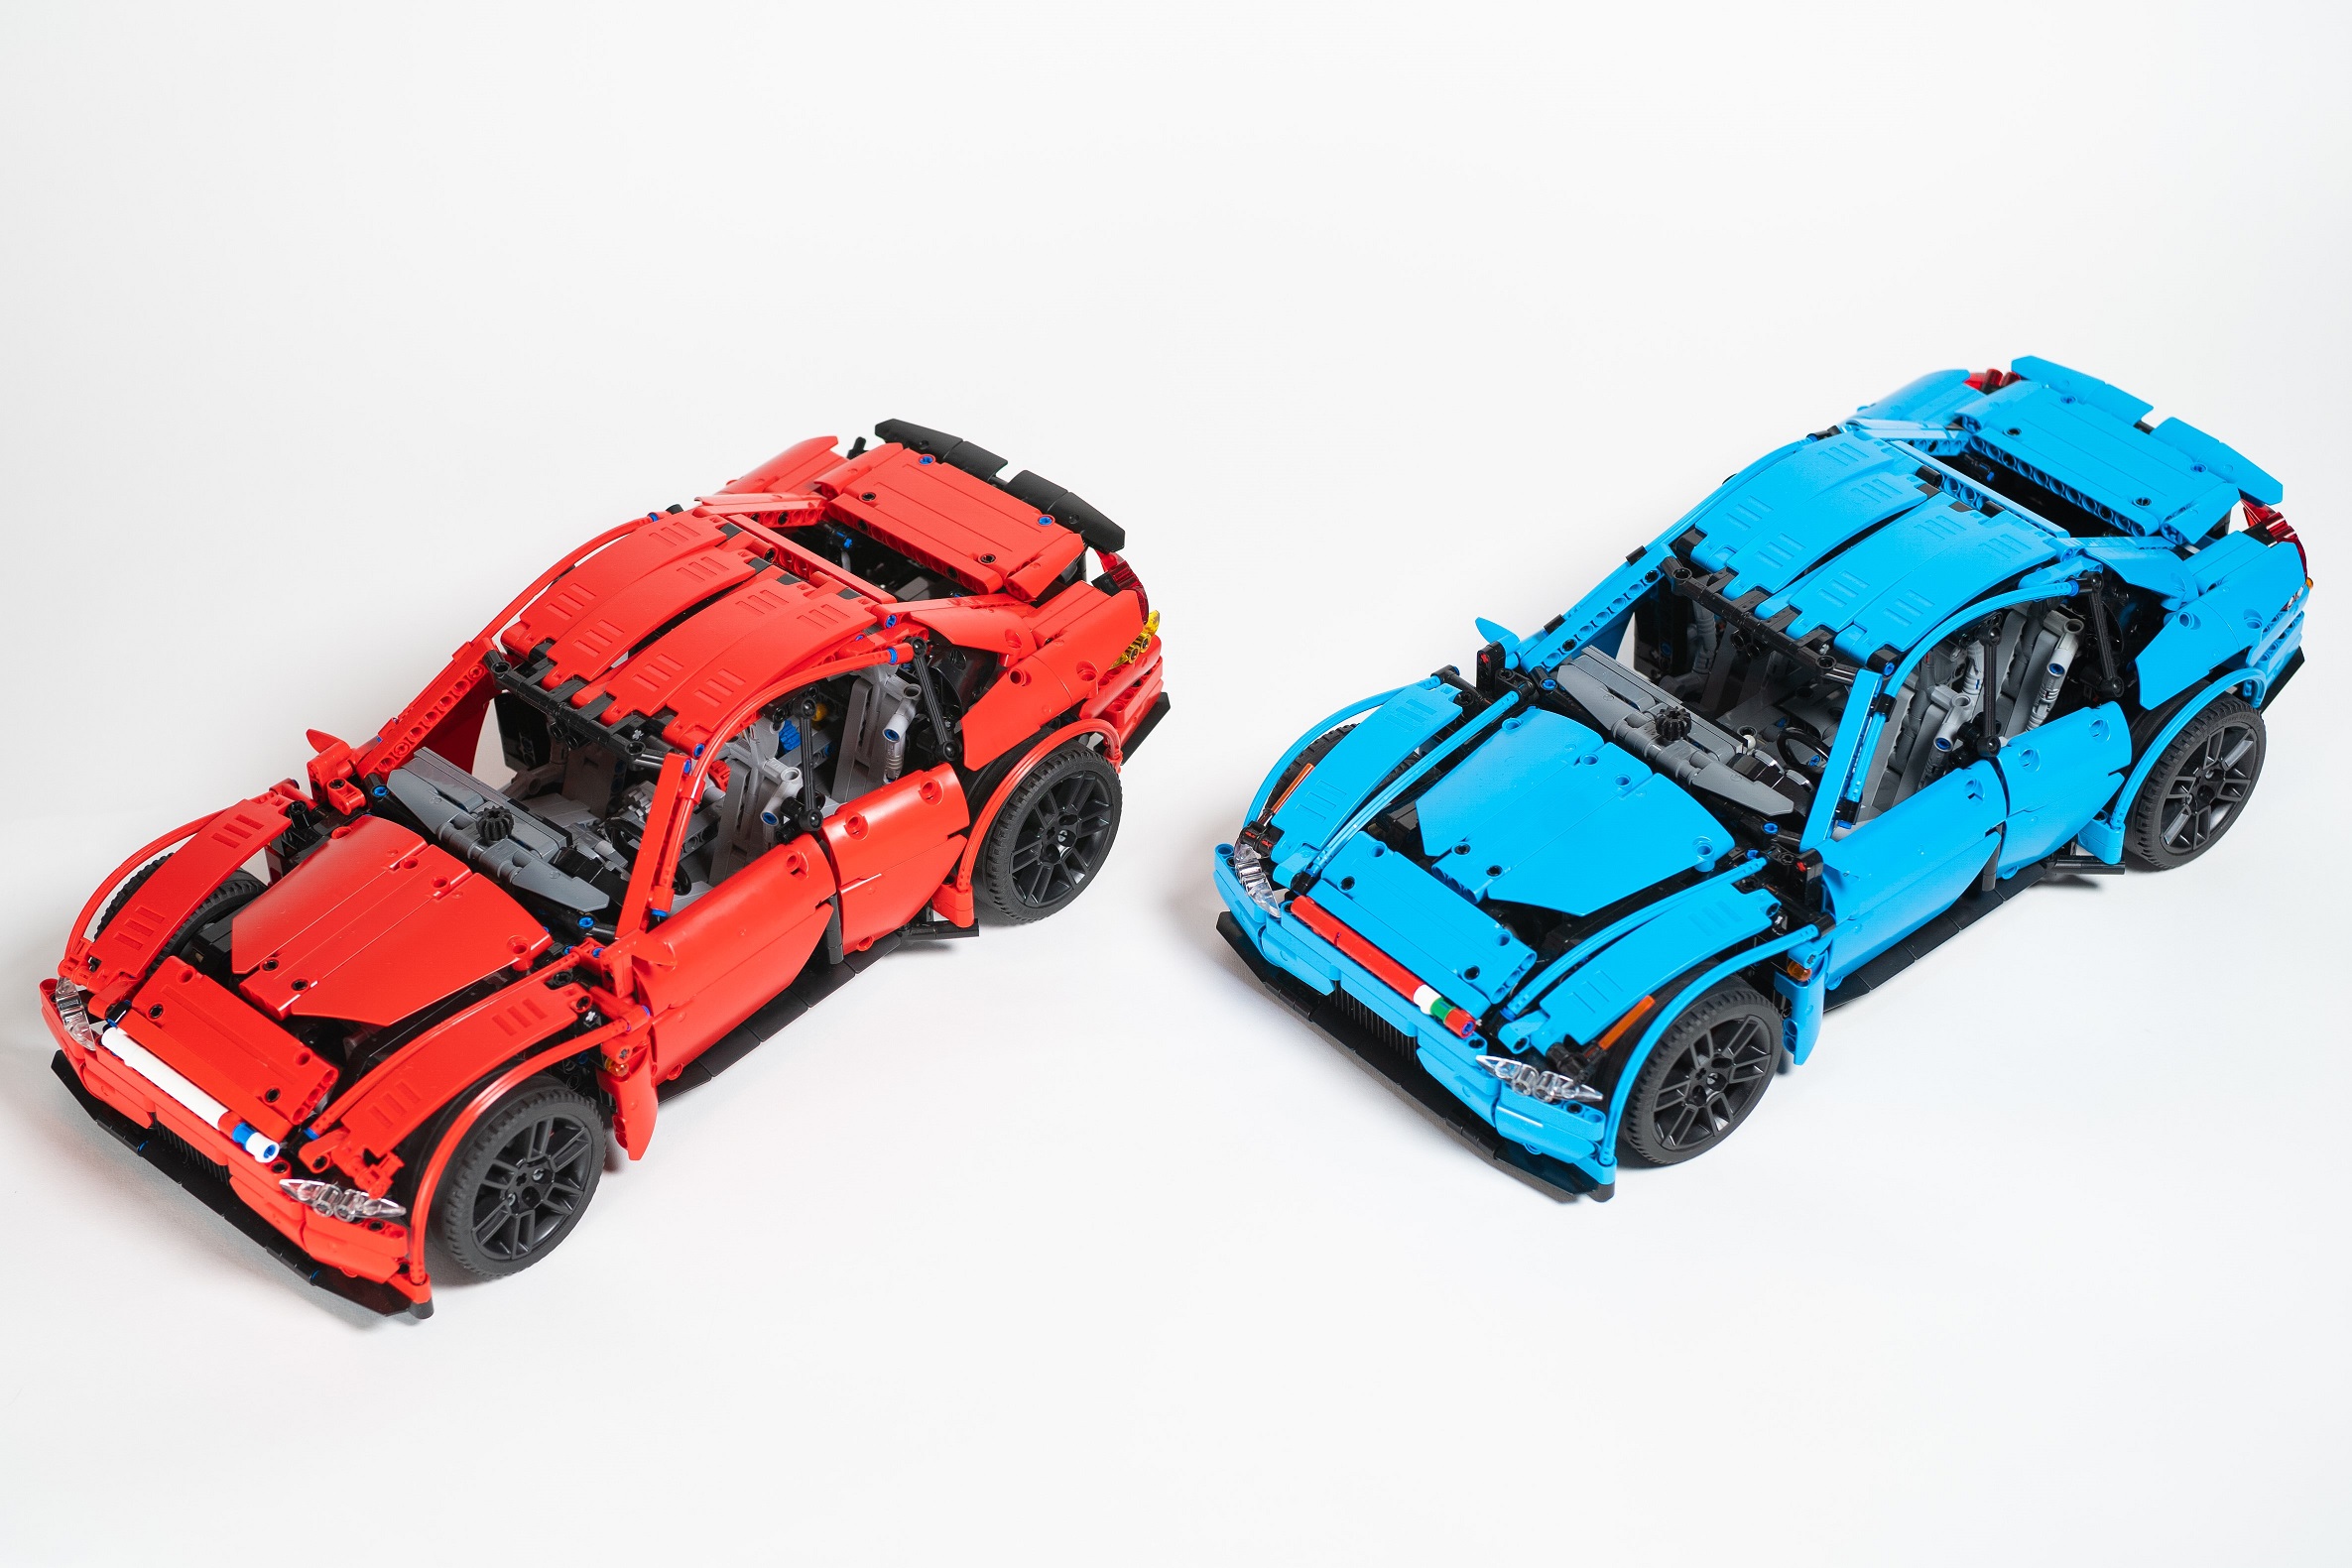
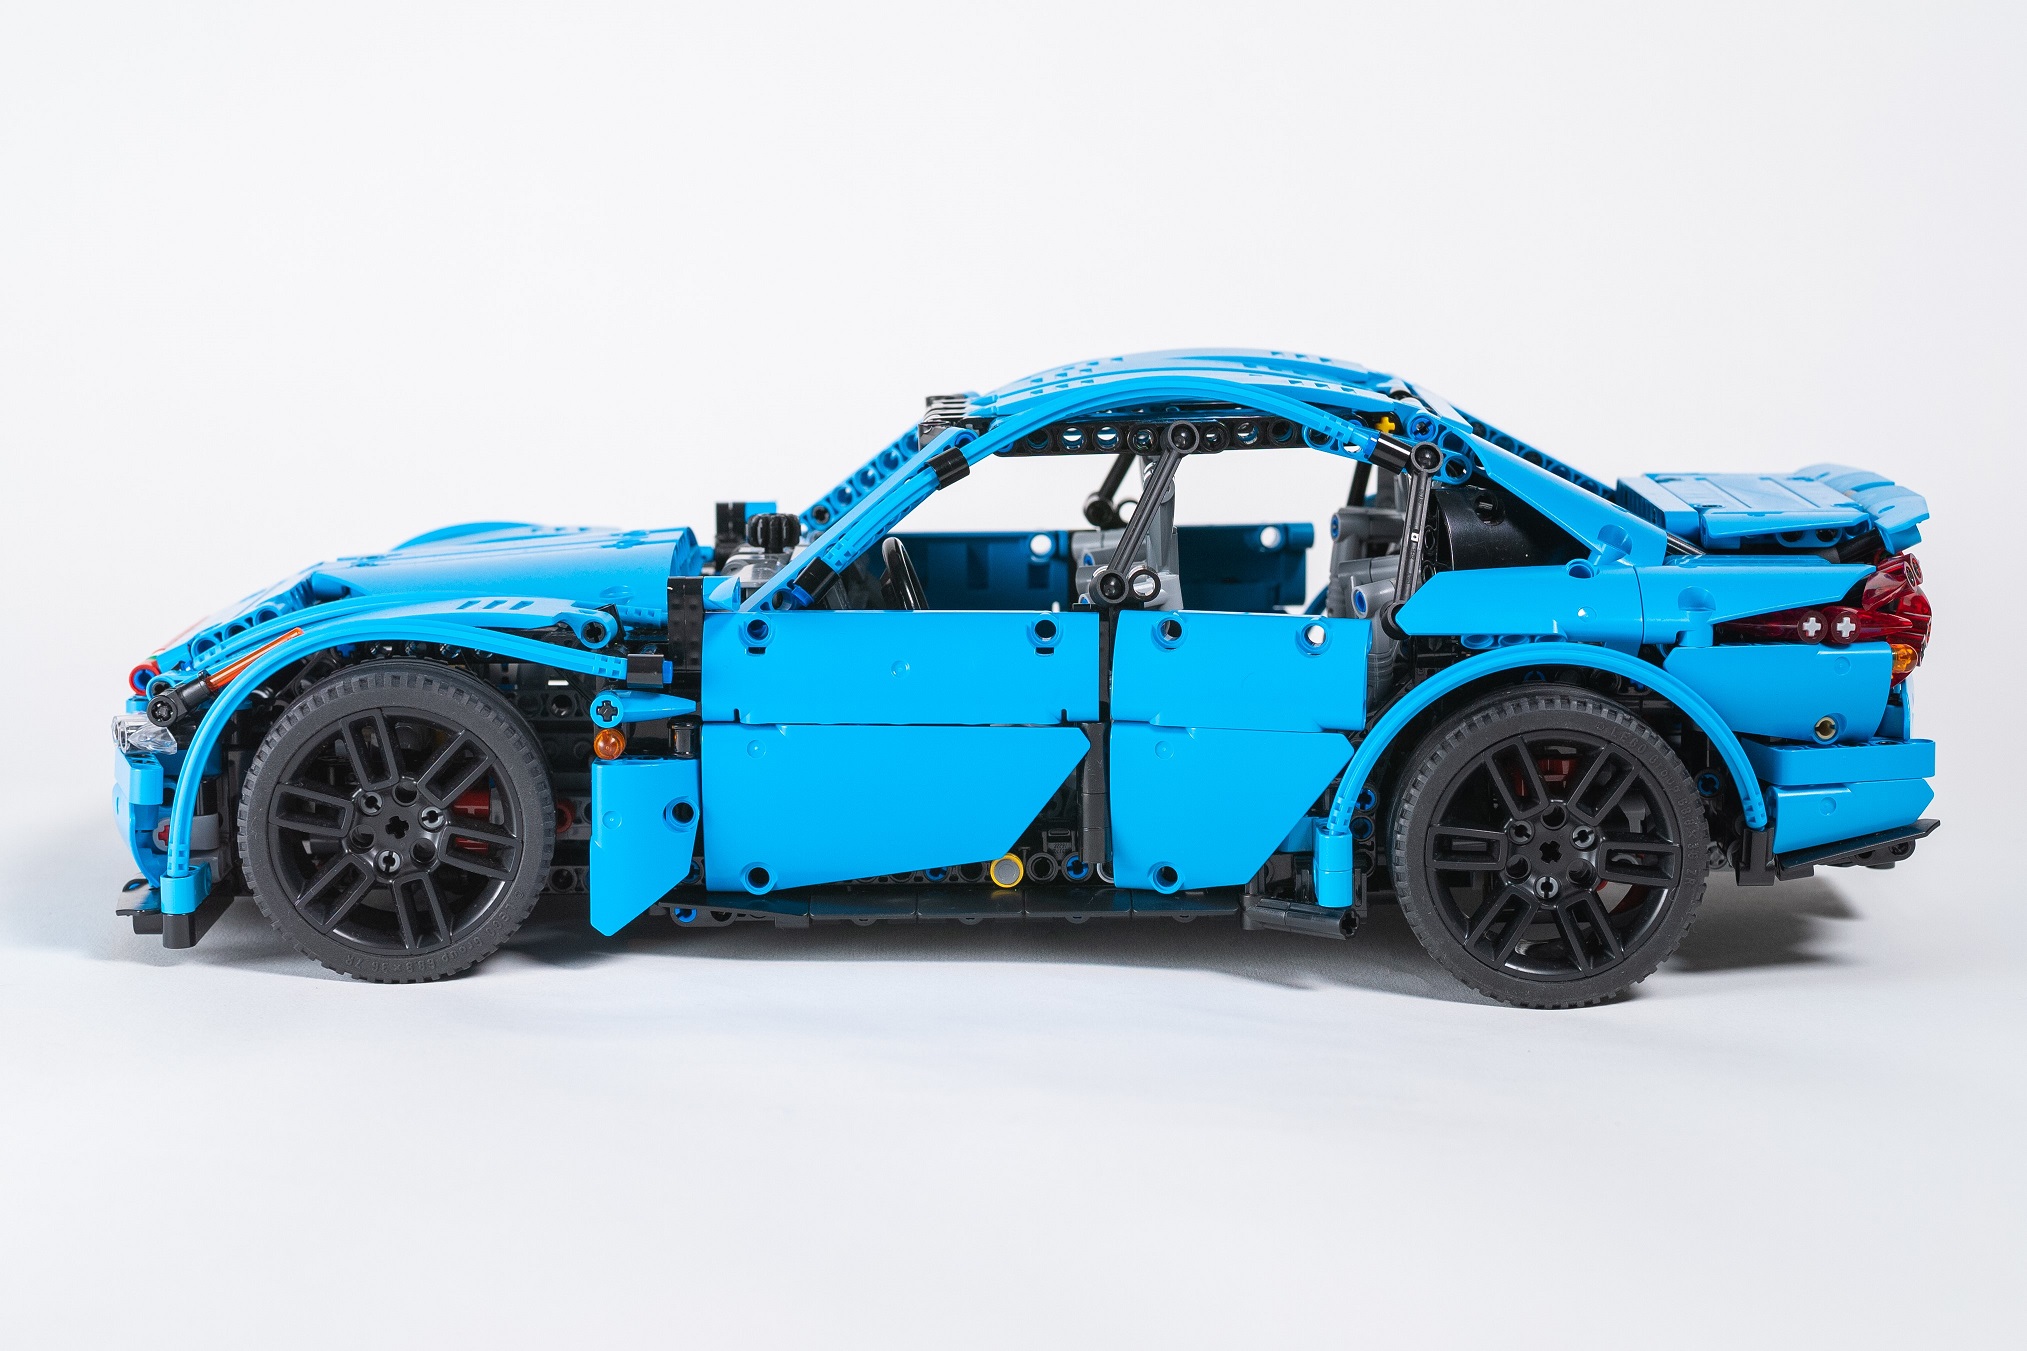
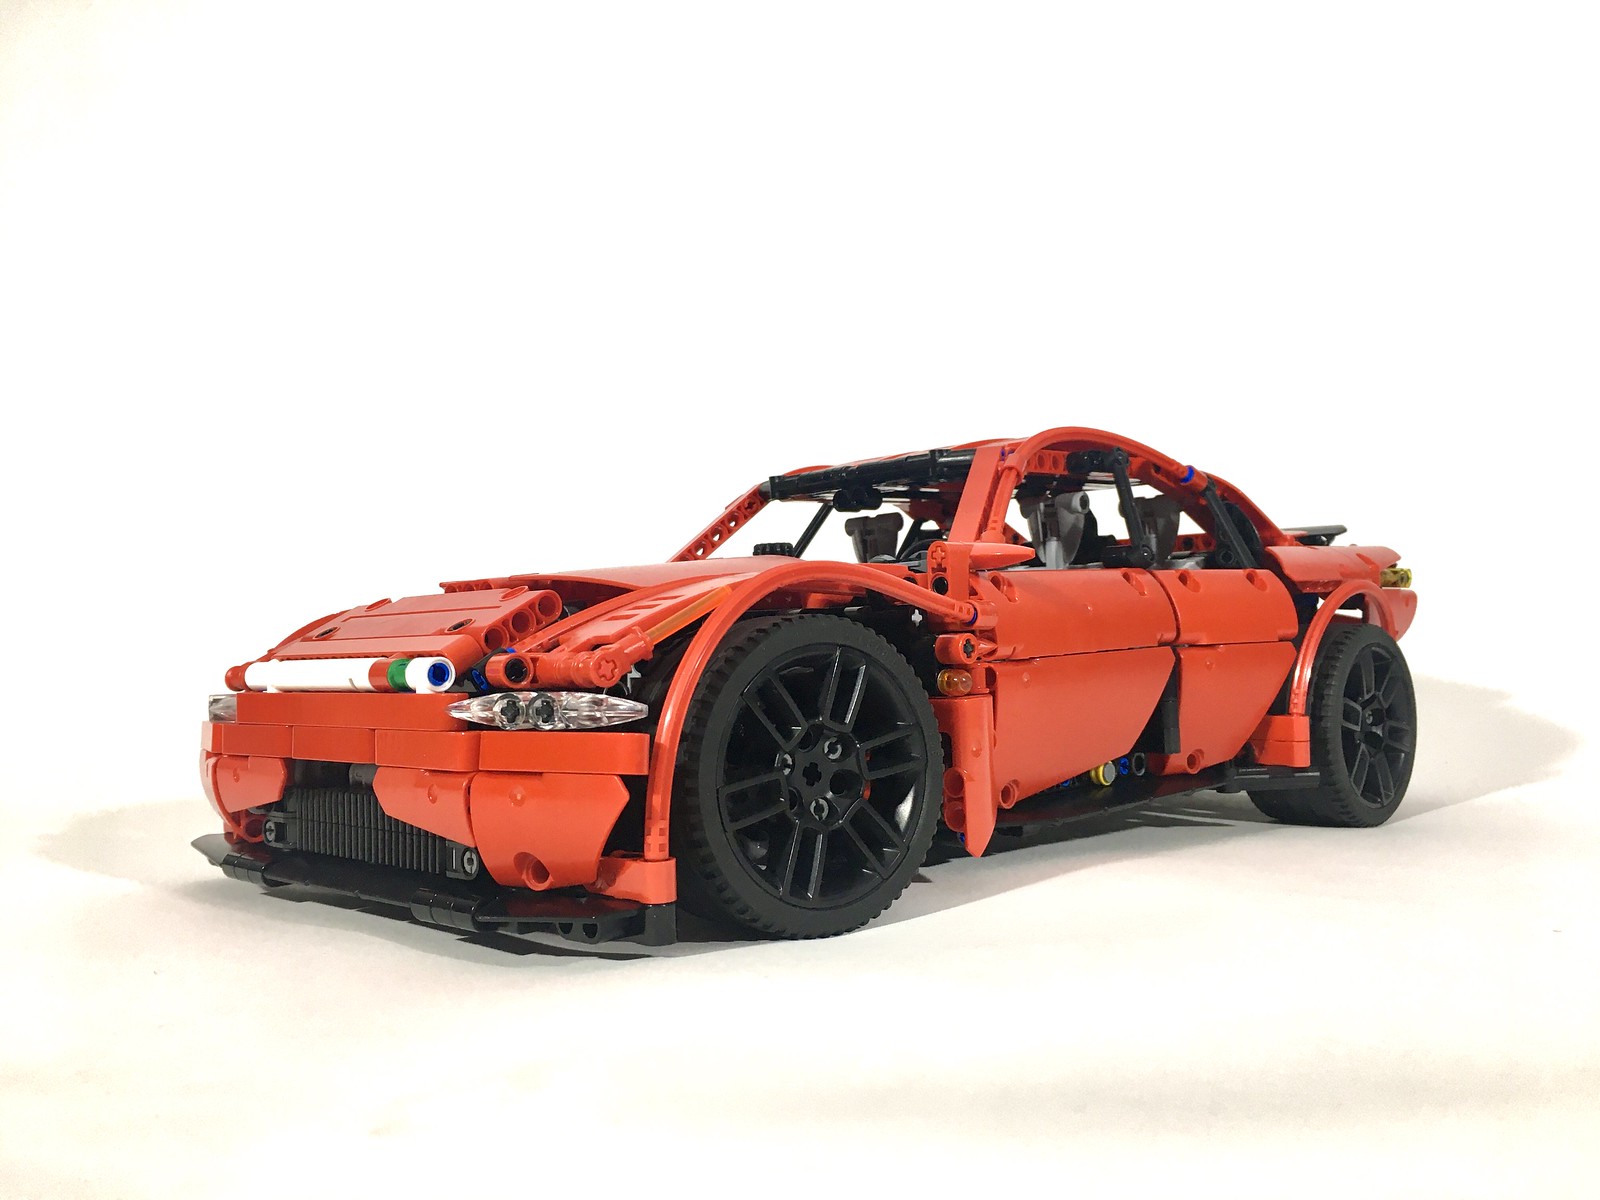
At the end of 2020, I decided to make a sport sedan. I find the sport sedan to be my favorite kind of car (see here and here), and it was time to do another one. I acquired a couple of the Defender wheels, which look more sporty than the other 56mm wheels. These would be the center of the build. The car would be long hood, short deck, with faired fenders. Then more questions happened, and I could not make up my mind.
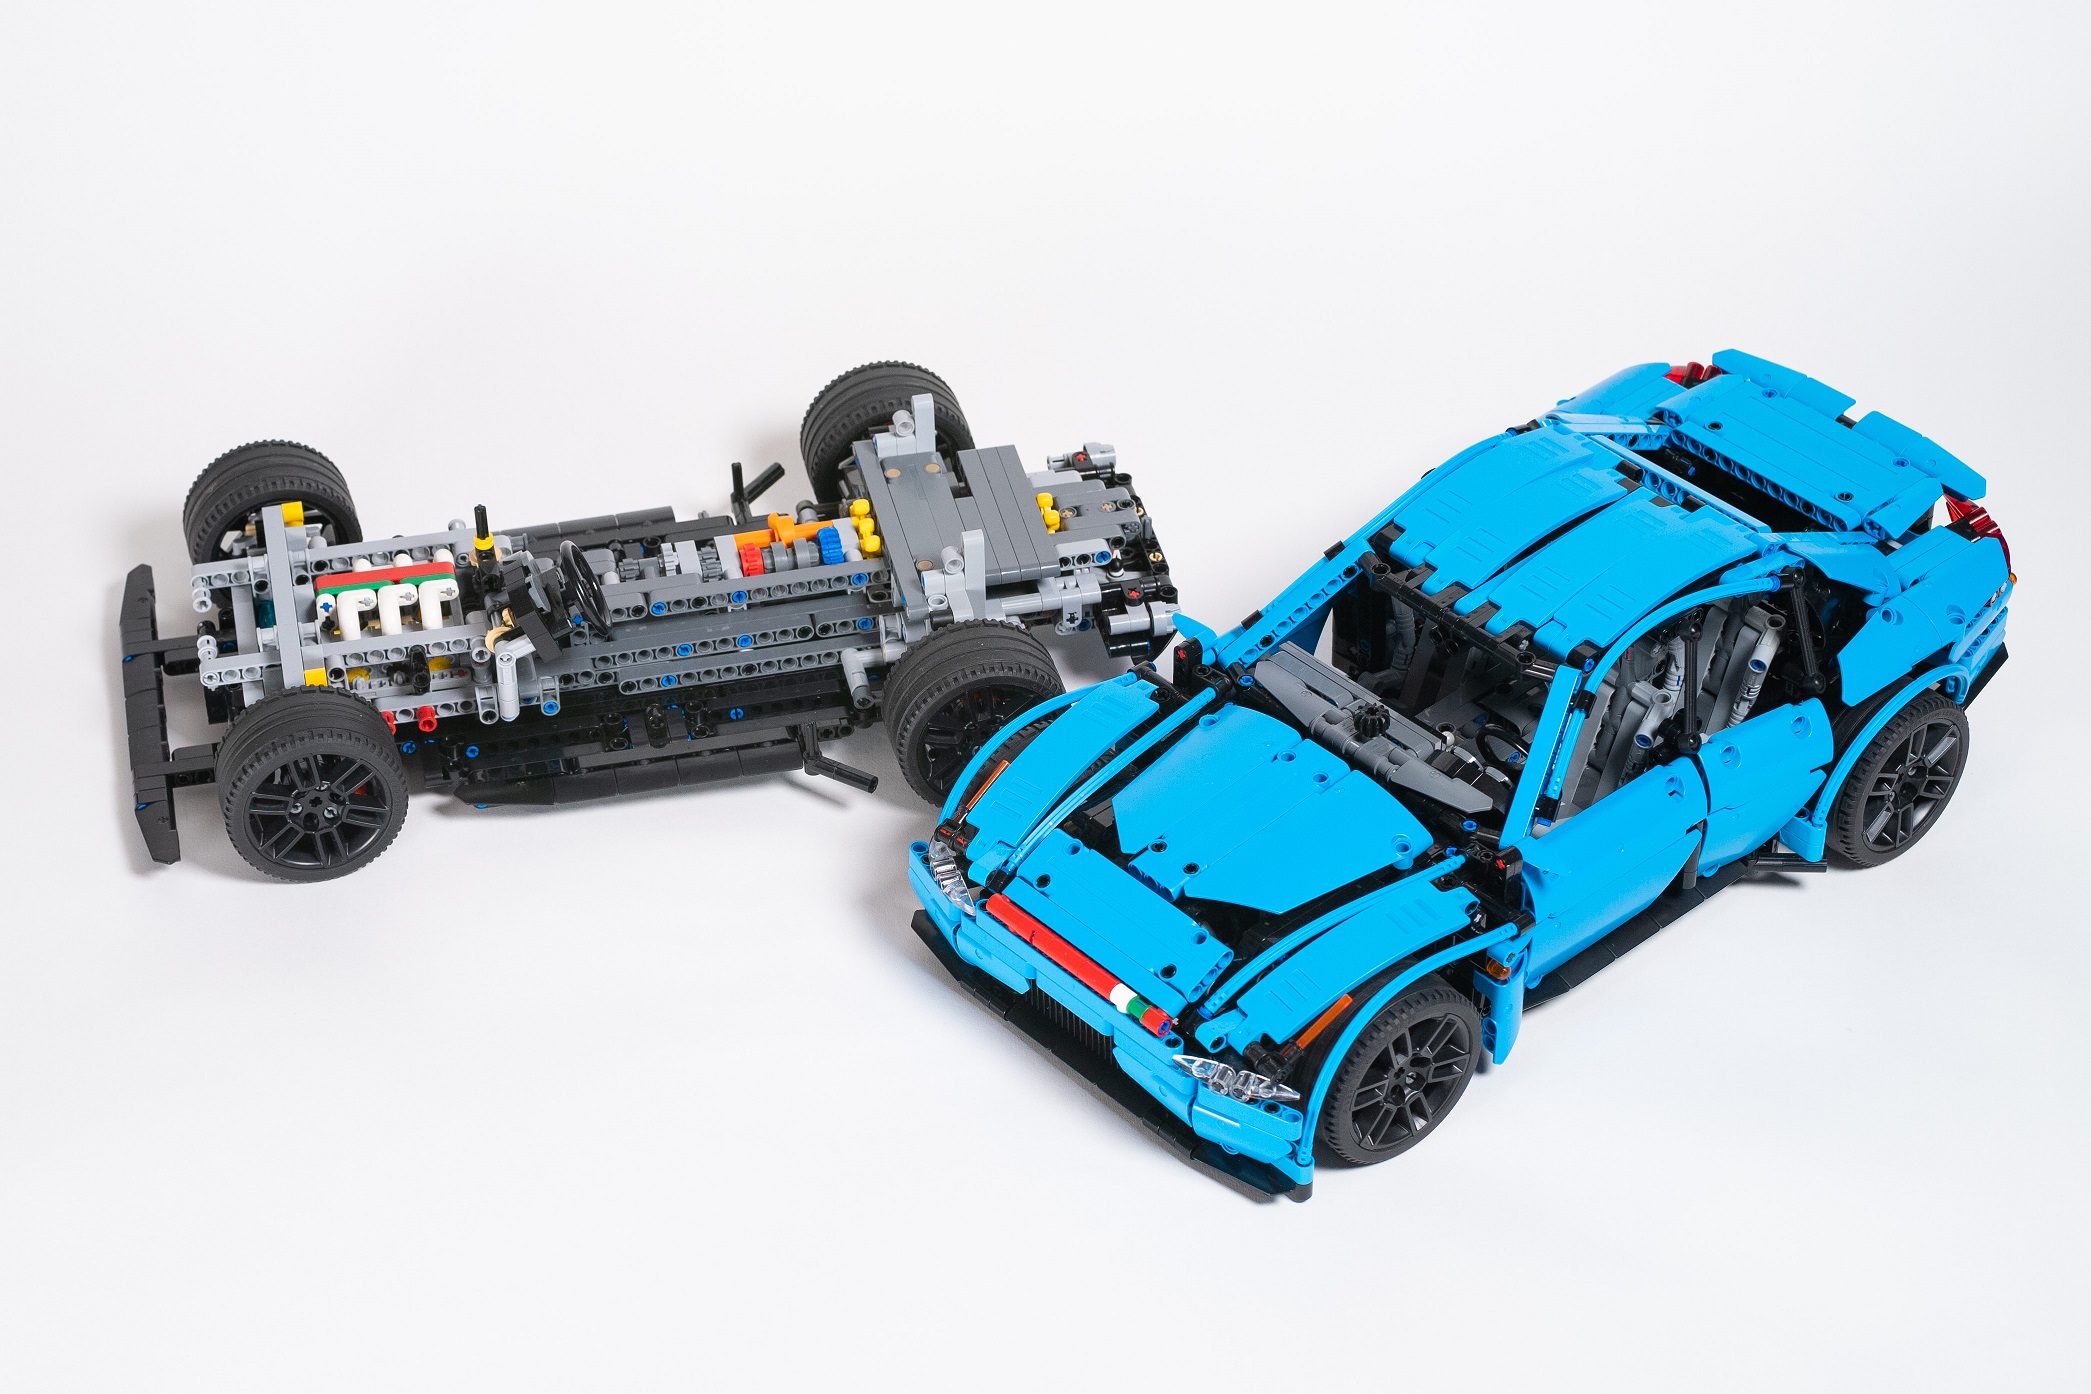
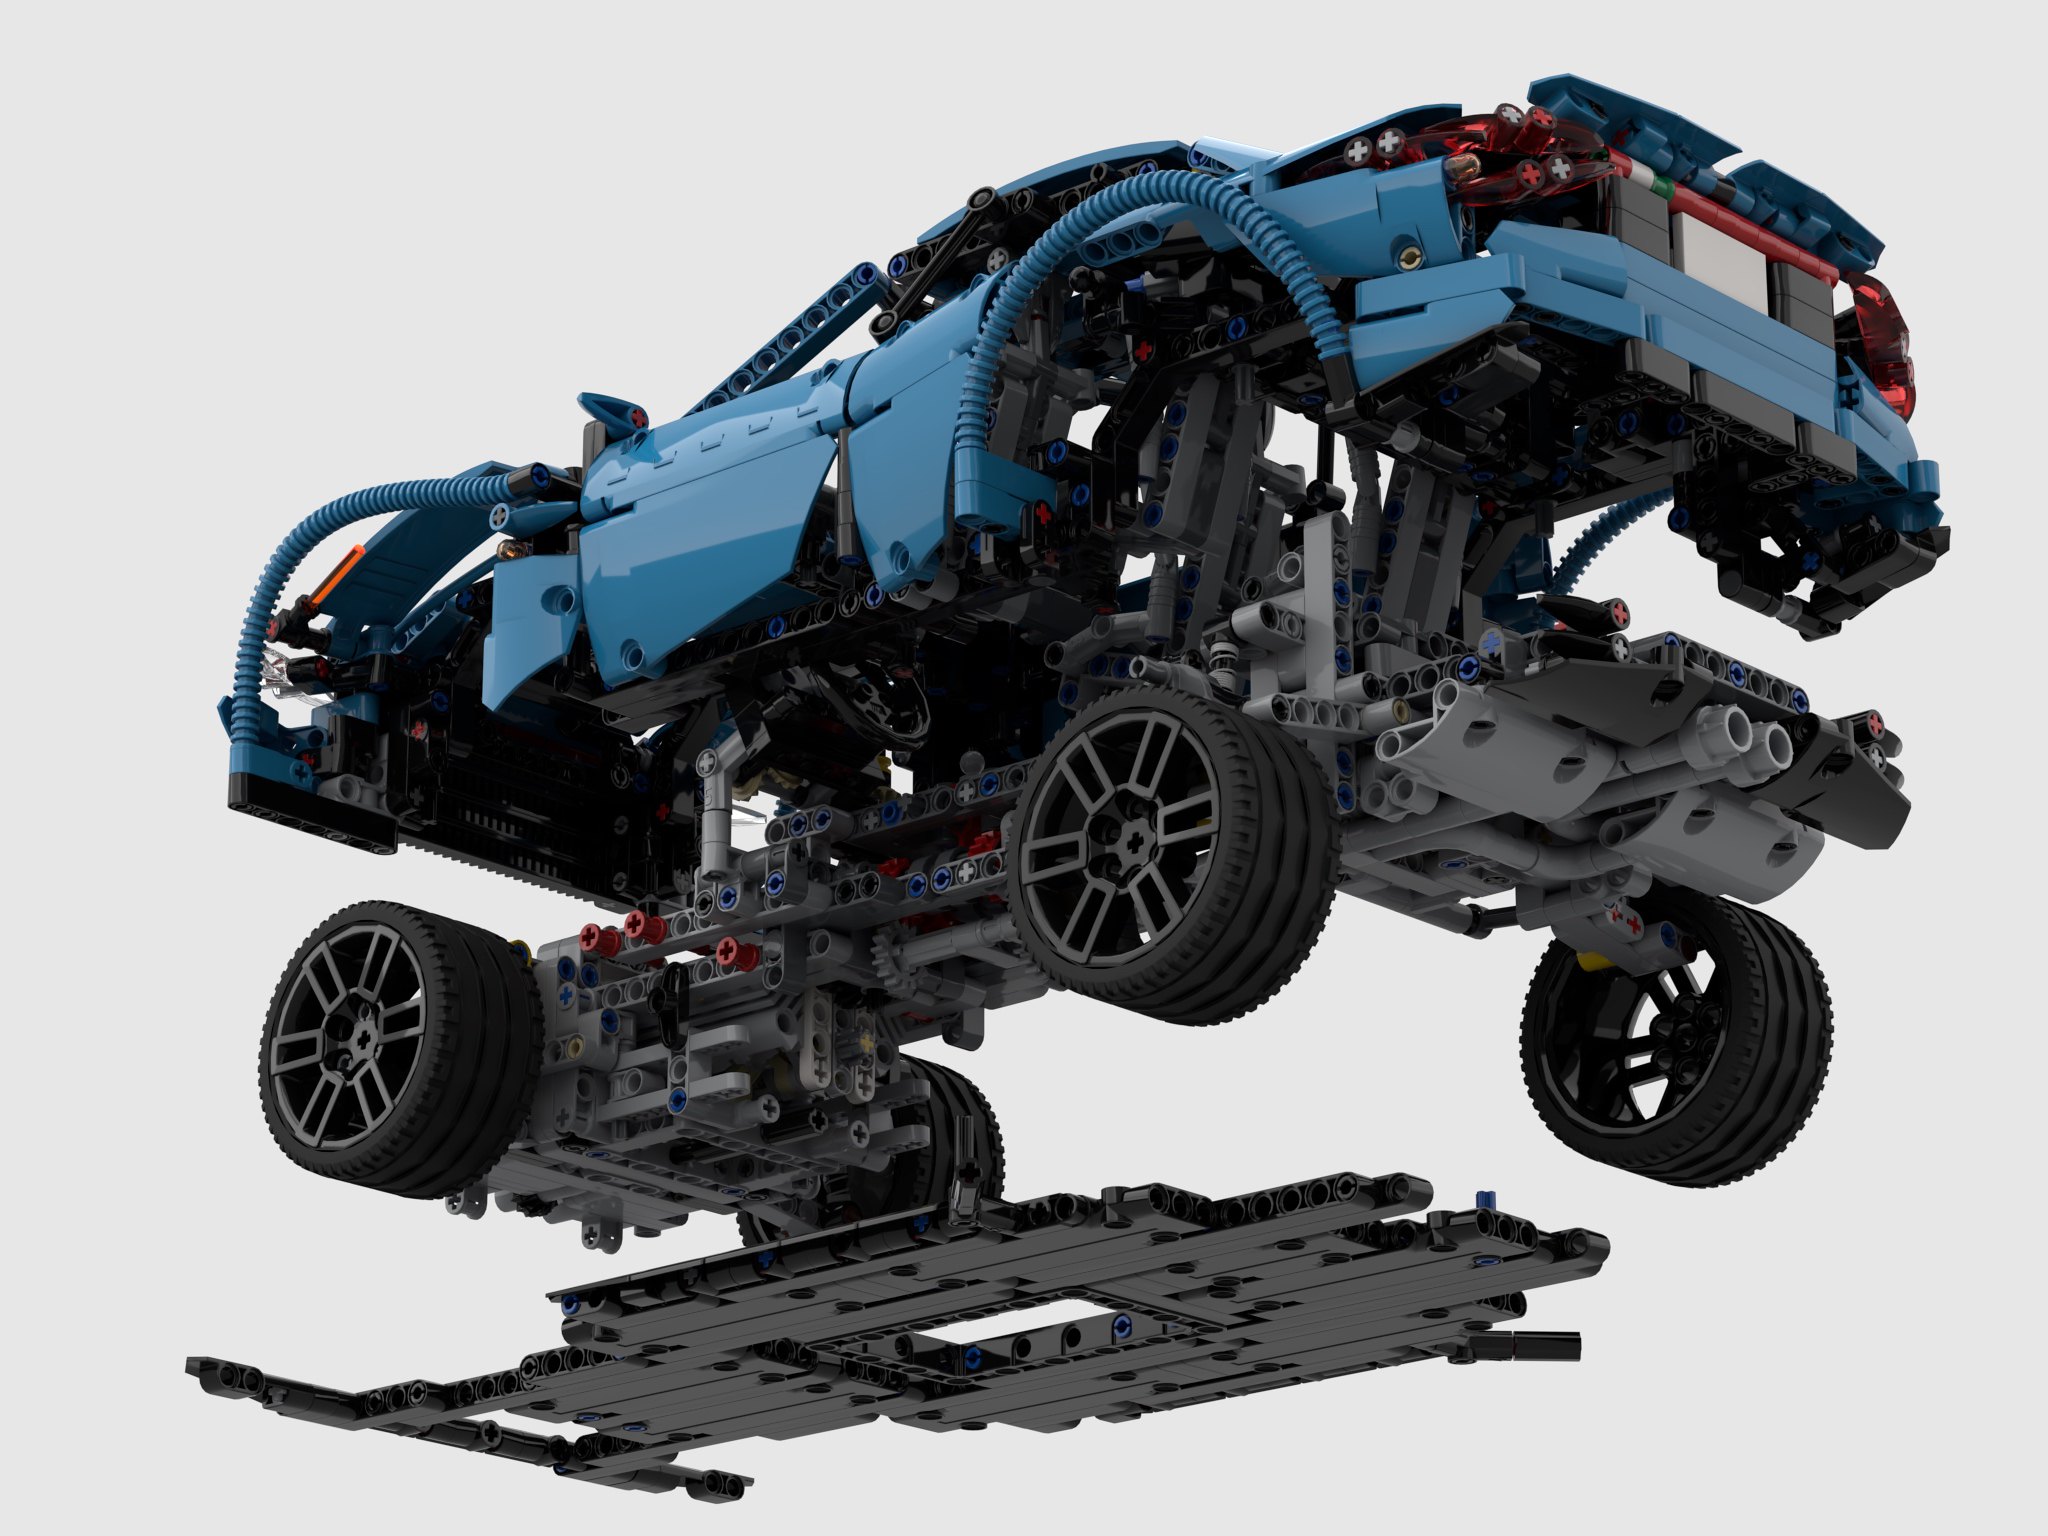
What transmission did I want? What engine would be best? Could I fit all wheel drive? Was that appropriate? As I found myself asking these questions, I began answering “well why not that too?” It was here, the project took a dramatic turn. The car would be fully modular and interchangeable. After playing around with some dimensions and simple structures, I decided on the following setup: Two different transmission and rear suspension modules, one floorplan, one body (in two colors), two engine tubs for all wheel drive and rear wheel drive, and three engines. Demensions were set with a width of 27 studs at the rear tires, and 25 studs at the front tires, and a wheelbase of 33 studs.
Each of the 9 modules were build in constant flux with each other as I managed attachment points, size, and interchangeability. I settled on a 4 speed manual transmission module, and a 4 speed sequential transmission module. The manual is shifted in the cabin, and the sequential has a shift lever on the rear bumper. While four speeds is basic for a LEGO car these days, it kept space inside for four seats. Once the transmission modules were basically set, I was off to another module.
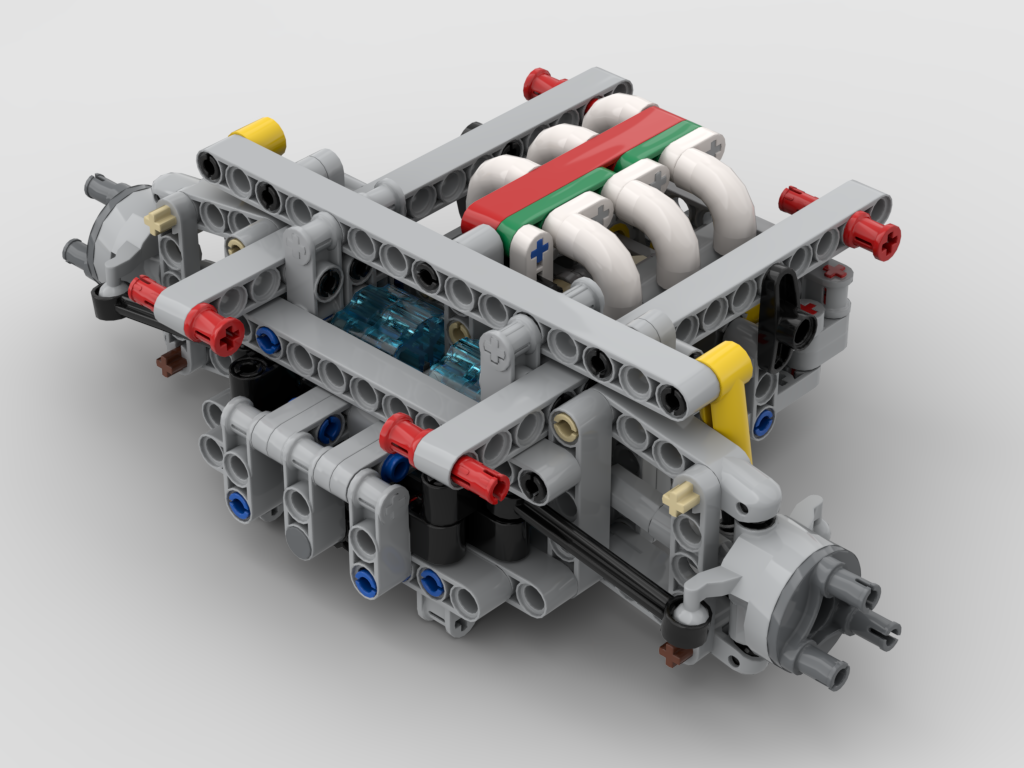
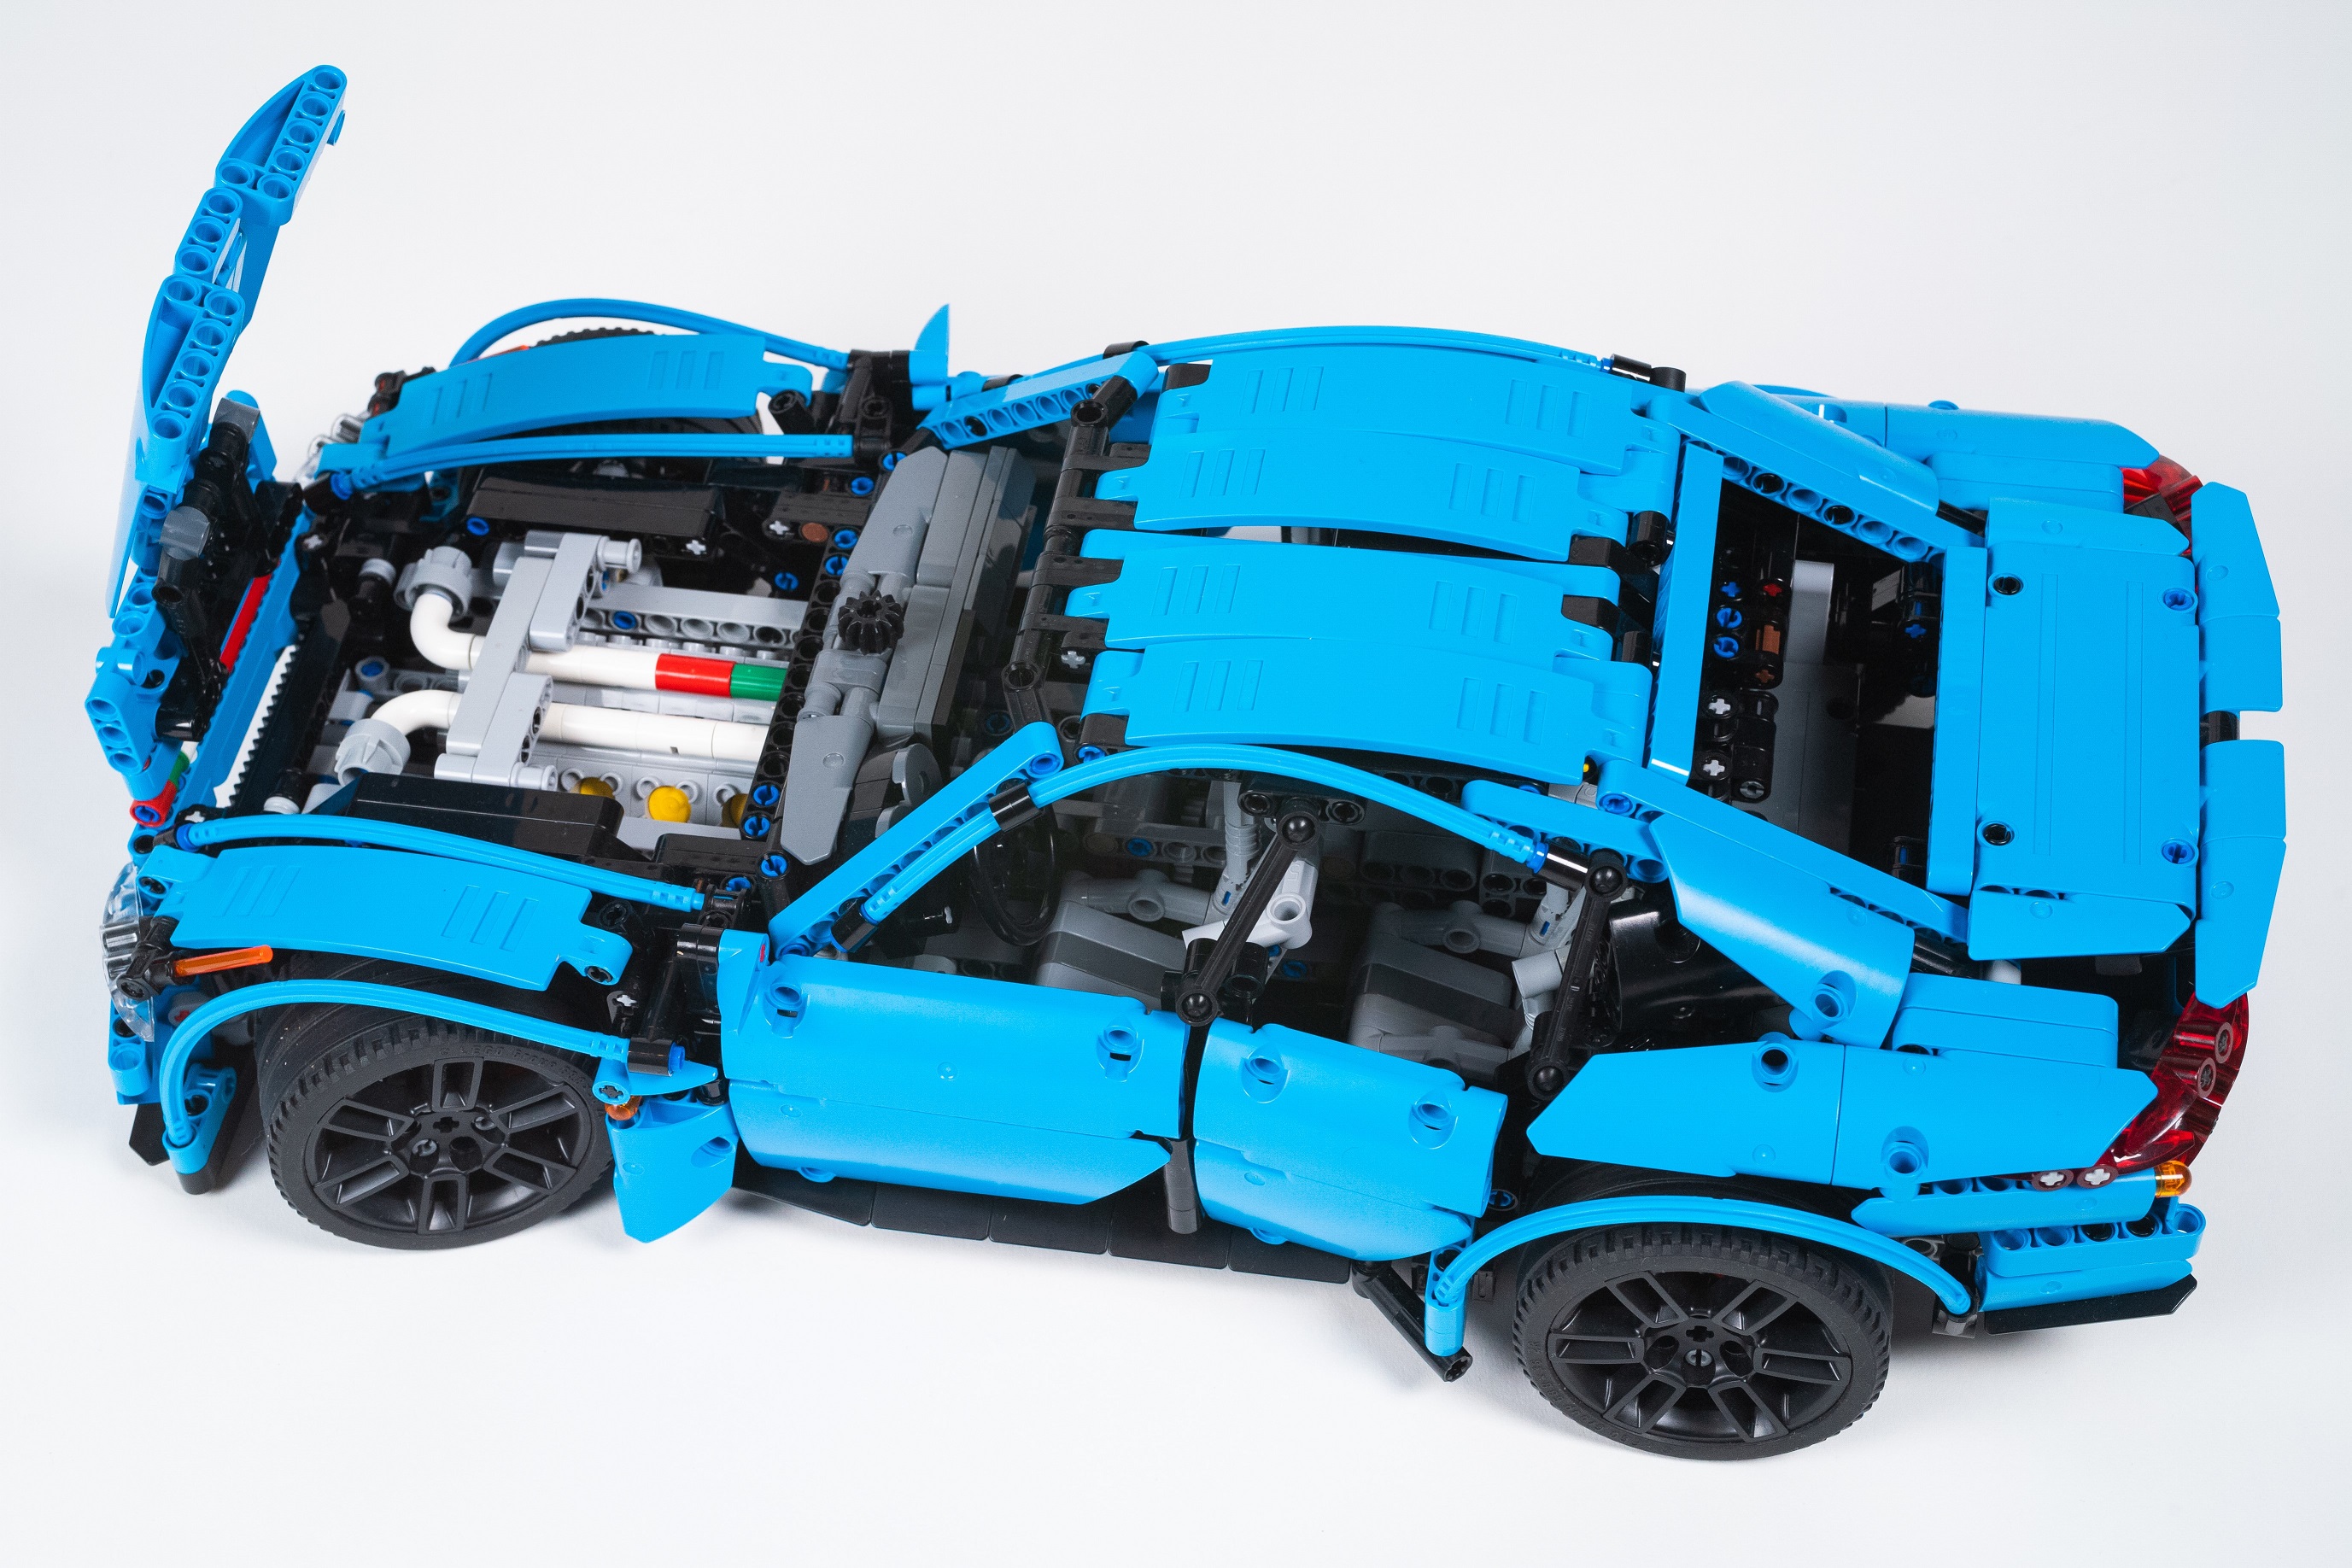
The engine tubs were a lot of fun and took less time than I thought they would. There are two tubs. The first, is built to support the front independent suspension and two different engine designs. The Straight Six is my favorite engine, so I wanted to make this options possible. The steering race for this module is placed far forward to allow for the I-6 to fit. In fact, the front of the engine is two studs from the front of the car. The V-8 fits well, and is placed behind the front axle centerline. The second engine tub features a fixed Flat 6 engine, and two fake electric motors; one for each side of the front axle. This unit is the hybrid and All Wheel Drive engine tub. Each tub attaches to either transmission module with six pins and one axle for steering. Drive connects by a 8 tooth gear off the engine.
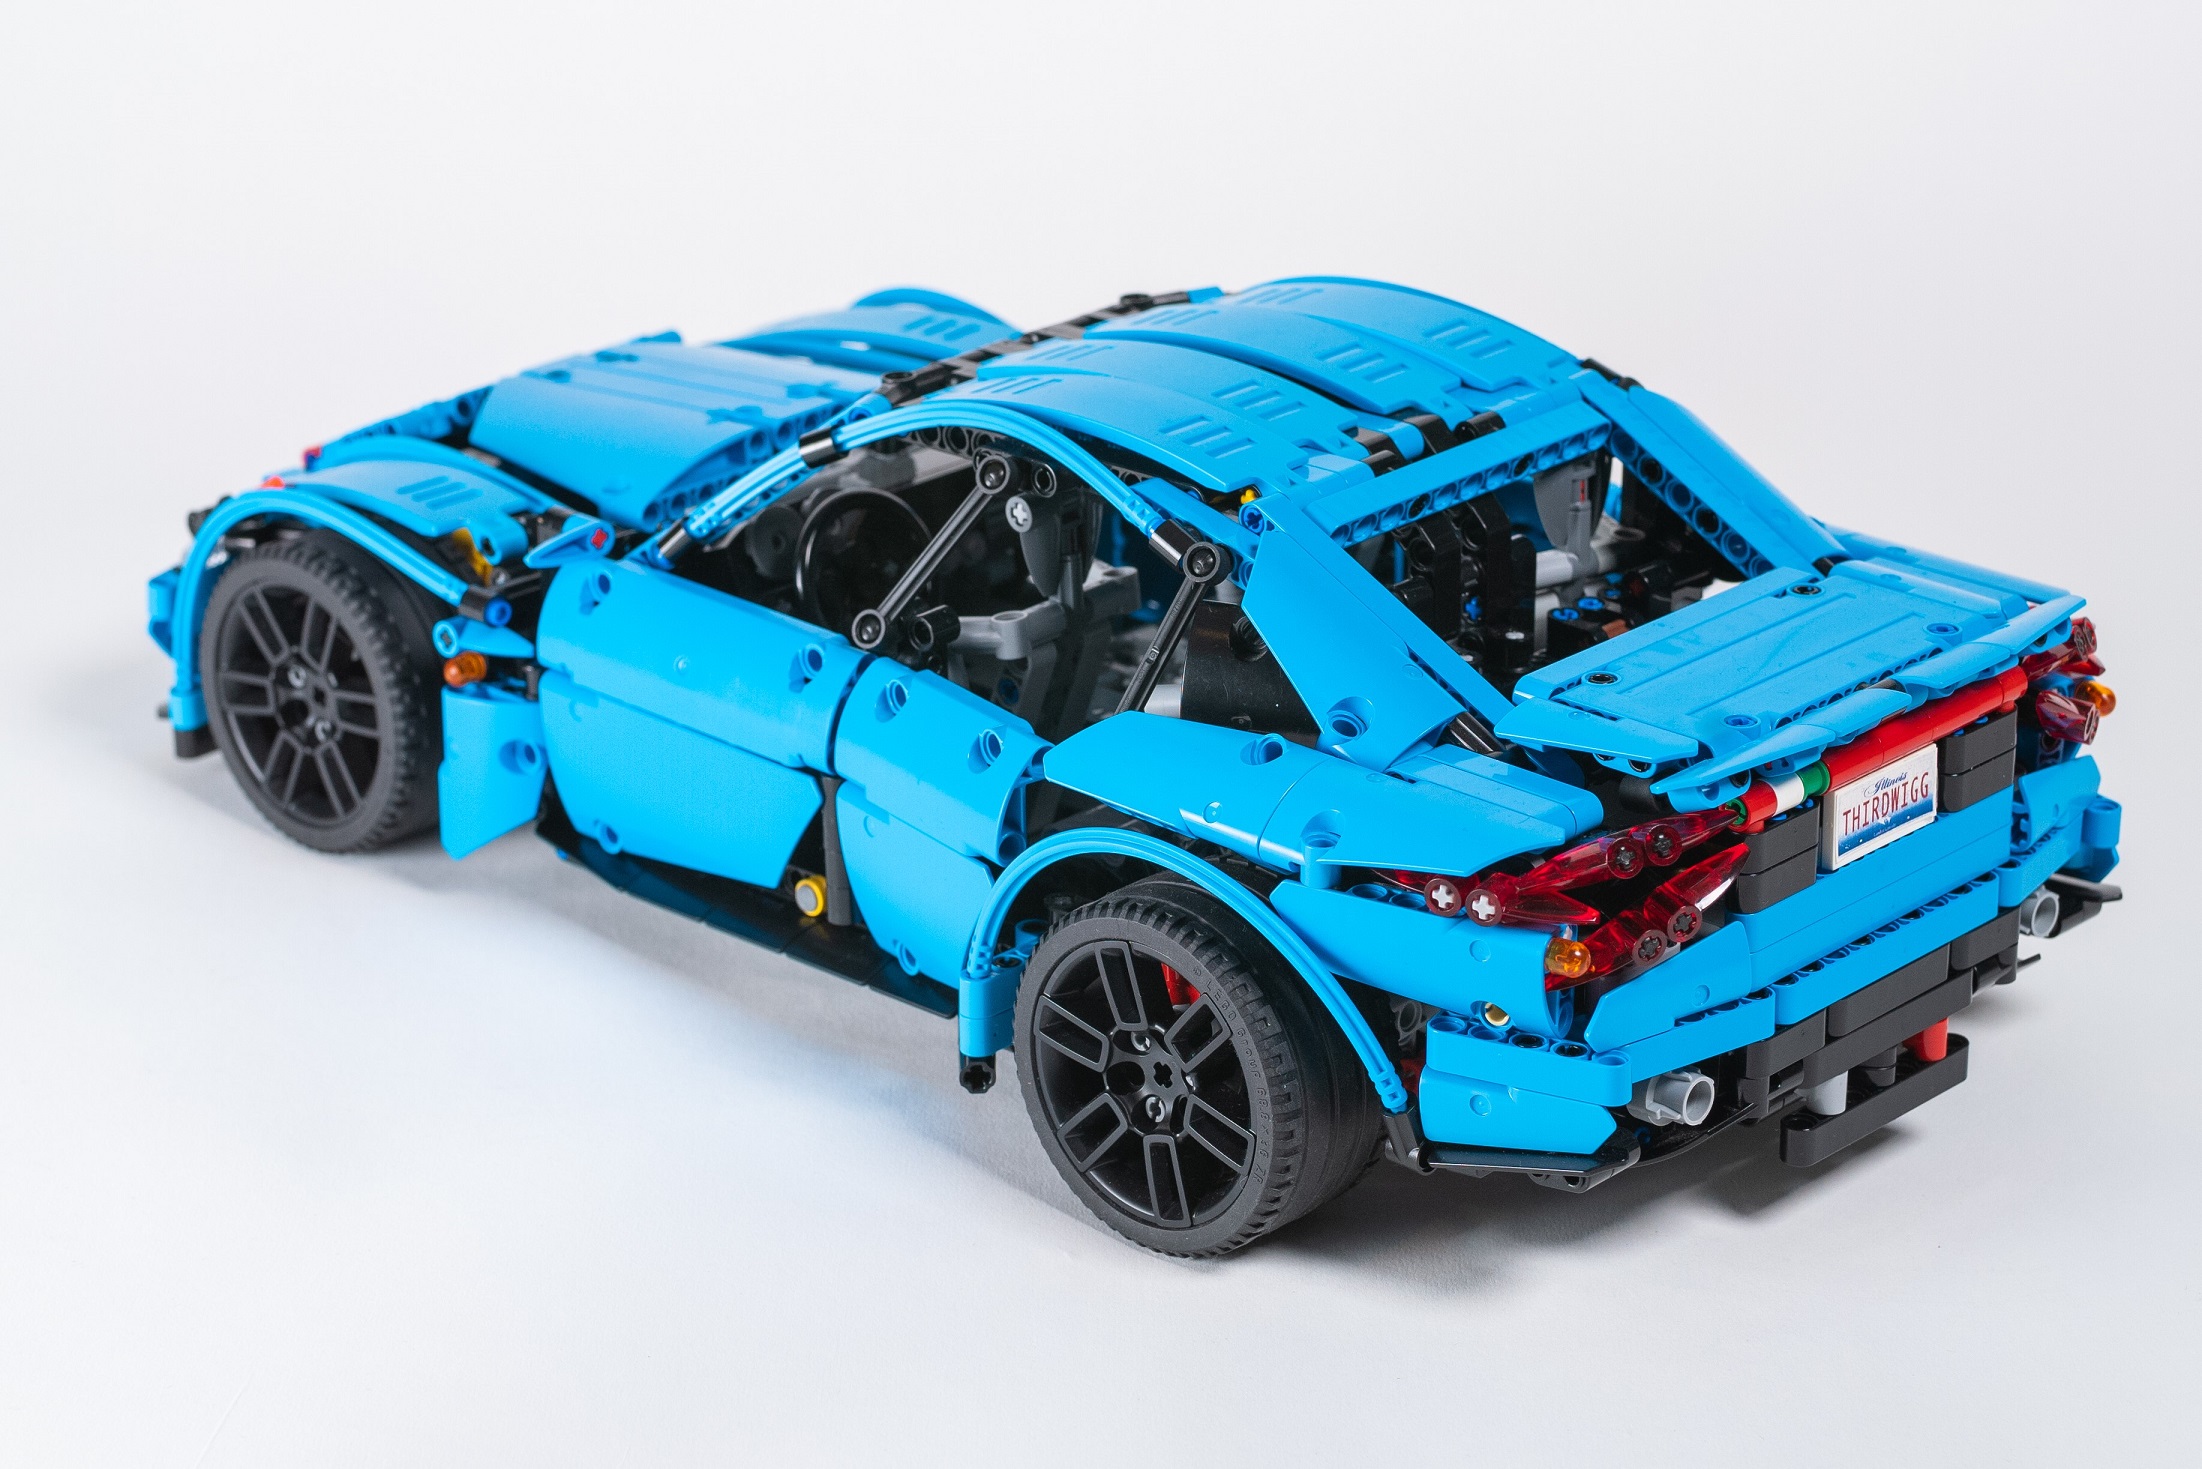
Then I built the floorpan. This simple build provides the floor to both the cabin and the underside of the car. It is connected at six points, four to the chassis, and two to the center of the body. These points stiffen the car, and connect it all together. The body took the most time as this is what most people would see. Early, I committed to the sides panels including the doors and the part just behind the front wheels, and the roofline. Otherwise everything else was fair game. The front bumper took some time in order of the two studs of space, but I was pleased with the design. Next I managed to get the A, B, and C pillars to look the way I wanted. The C pillar took some trial and error but finally got a shape that was fast looking without the coupelike lines that seems to be permitting sedan design these days.
The rear took the longest. It was at this point where my focus on the MOC was starting to wain. Over months I tinkered with different trunks, different lights, and different rear bumpers. Eventually, I got to where I am now which could be improved, but I was pleased enough to call it complete. I added a little spoiler, and the body was done.
Ionos Sequential Rear
After everthing was built set, I rebuilt the whole car. As I did, I checked fit and built a Bricklink Studio file. With each step I found improvements along the way, and learned how to make better instructions. The result was a car system that fit together well, and gave for an interesting build. Again, if you are interested in the detail, or building your own you may find the instructions here and here.
This was my most favorite build in a long time. If you are interested, the Dark Azure, Manual, AWD version is my preference. The integration of all the parts was fun to do, and the build, test, rebuild process that went through every stage was a case study in continuous improvement. Both transmission work flawlessly. The suspension is stiff and functions as they should for a car of roughly 2500 parts. The varied engines were a fun inclusion. The design of the car is sporty and keeps the lines and proportions of a traditional Rear Wheel Drive Executive Sedan: long hood, short deck, short front overhang. I hope you enjoyed the car, and if you build it, I hope you enjoy the build. I definitely did, and will do something similar in the future.
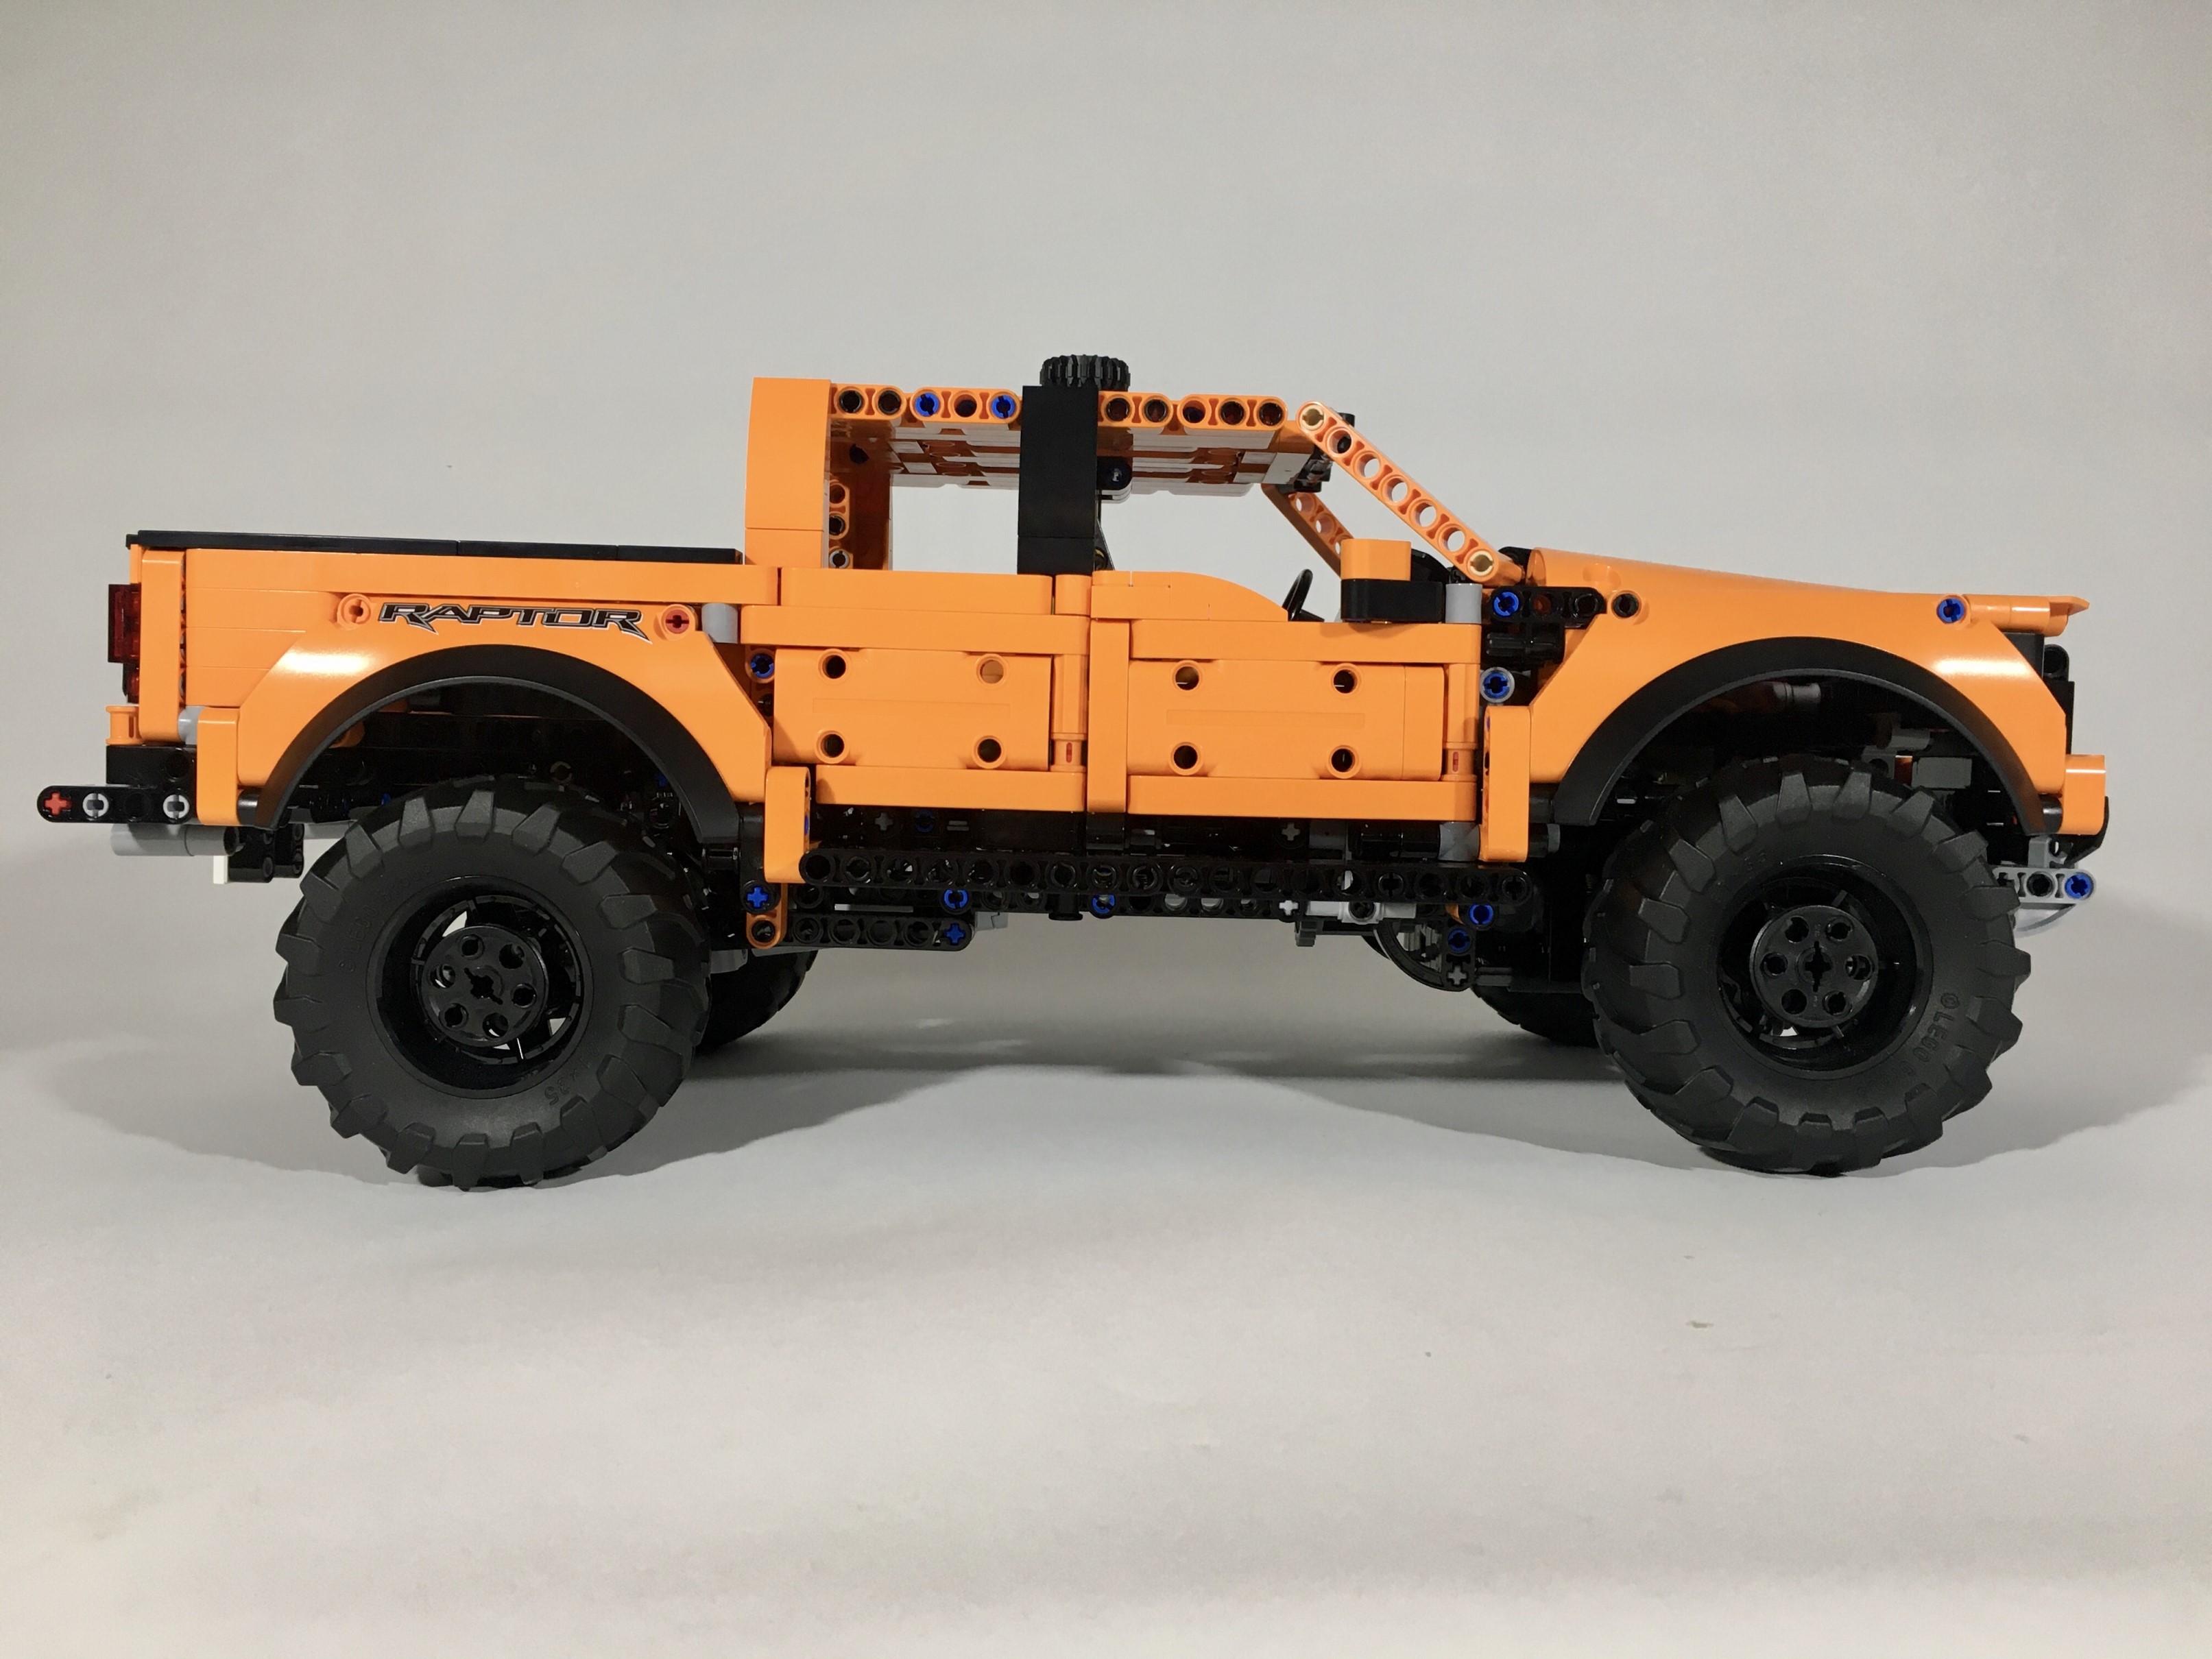
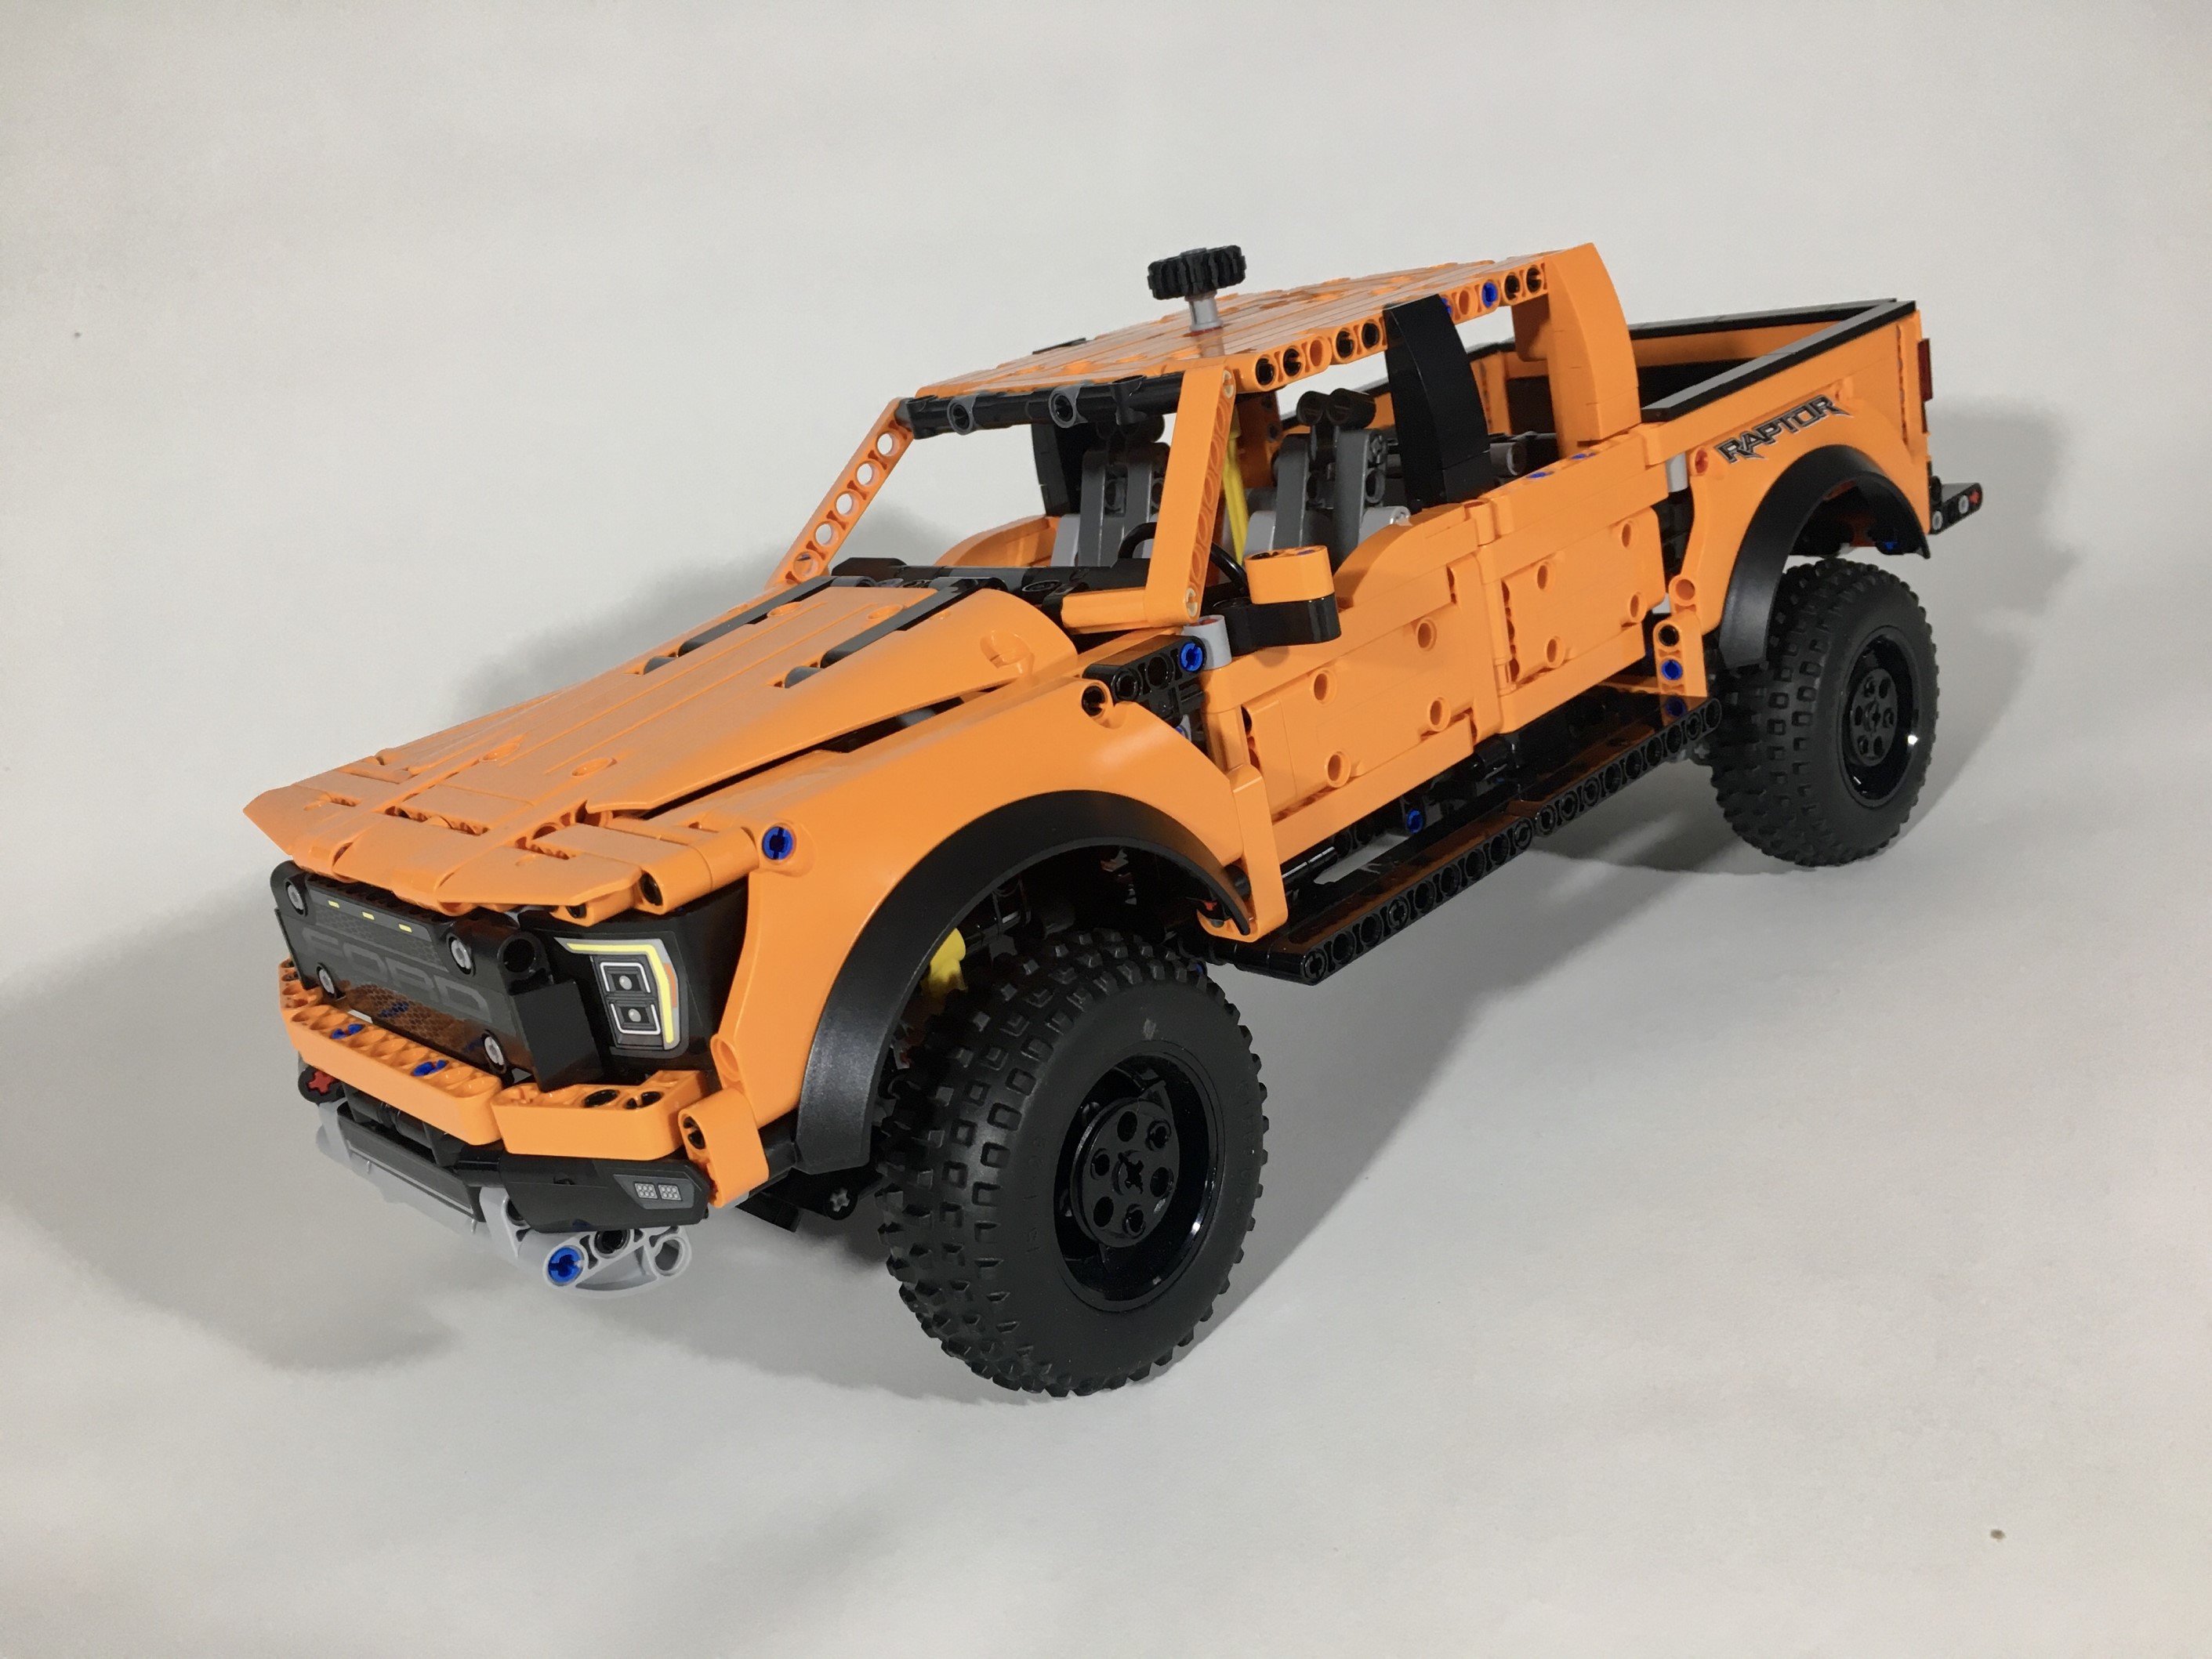
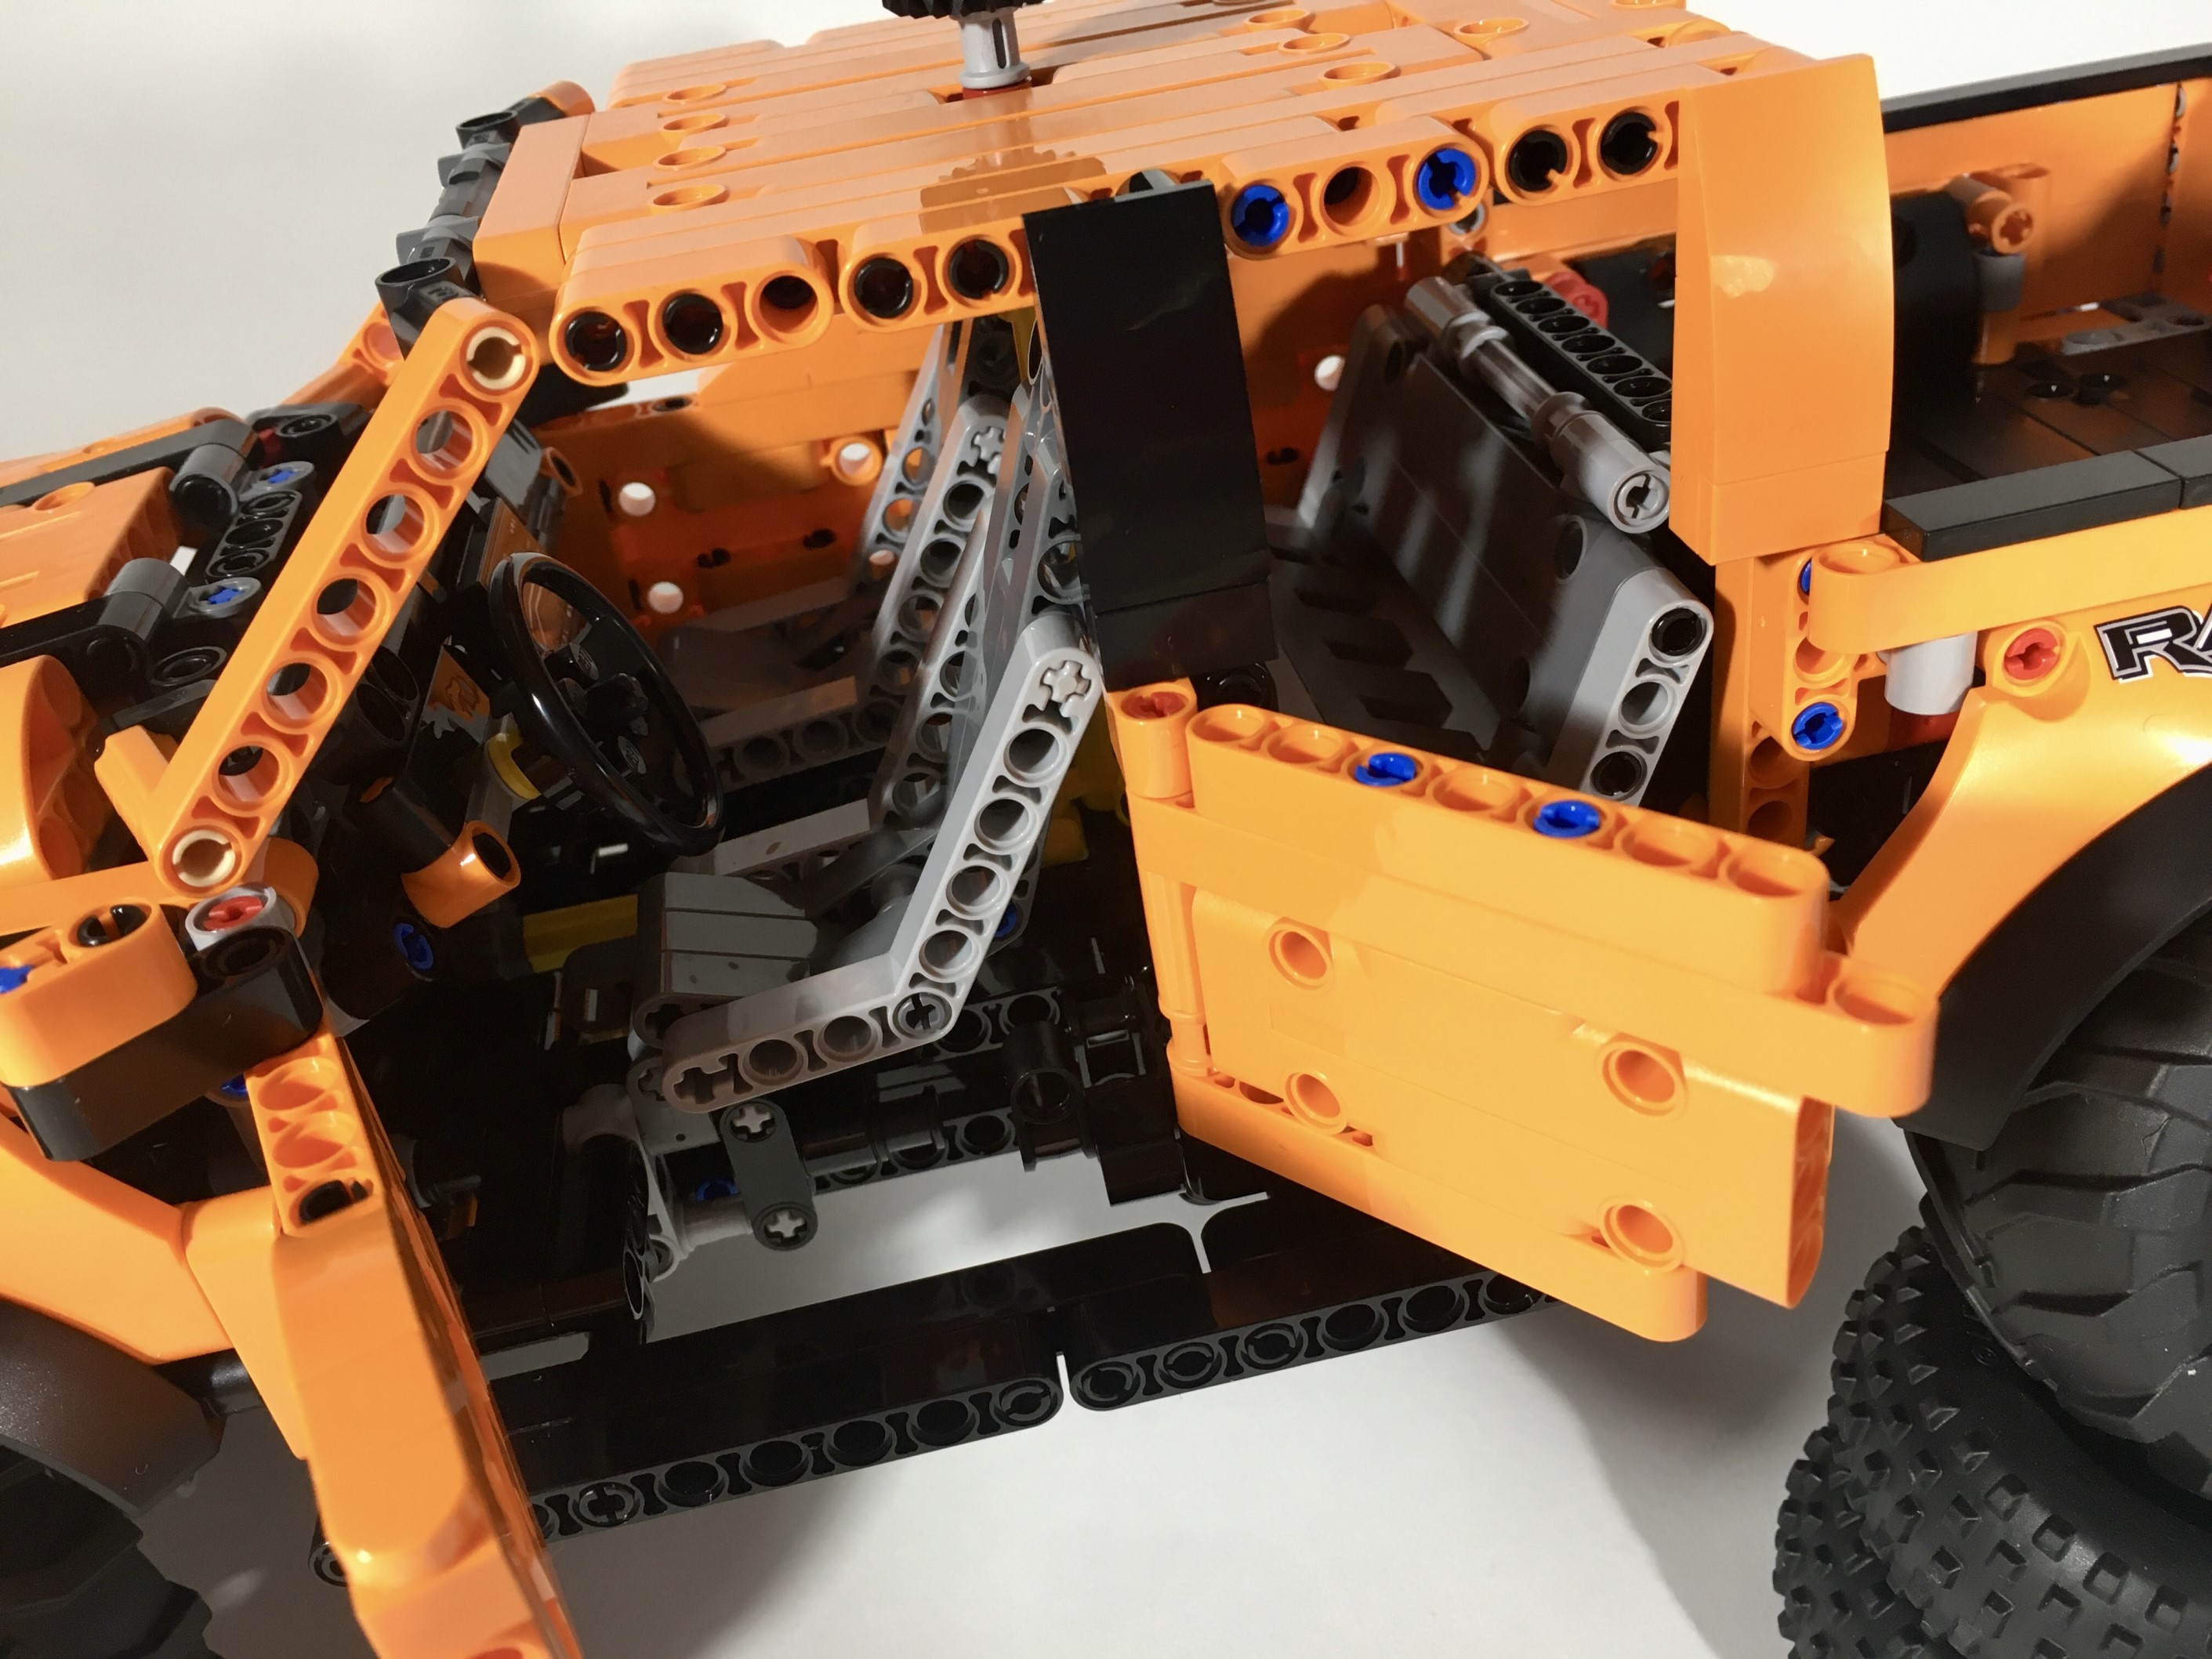
LEGO 42126 was introduced in the Summer of 2021, and I was immediately drawn to the pickup as it included some features I like, such as steering, suspension, a decent (at least in the USA) price, and it’s Orange! But there were serious features lacking such as four wheel drive, a V-8 (I know, I know, a Raptor, and many of Ford’s F-150s use a turbo V-6), and the rear suspension geometry was weird. I agree with others, that some parts of the design like the rear taillights and the front headlights are a little off. But, like 8081, I saw some potential here, and I ordered the set.
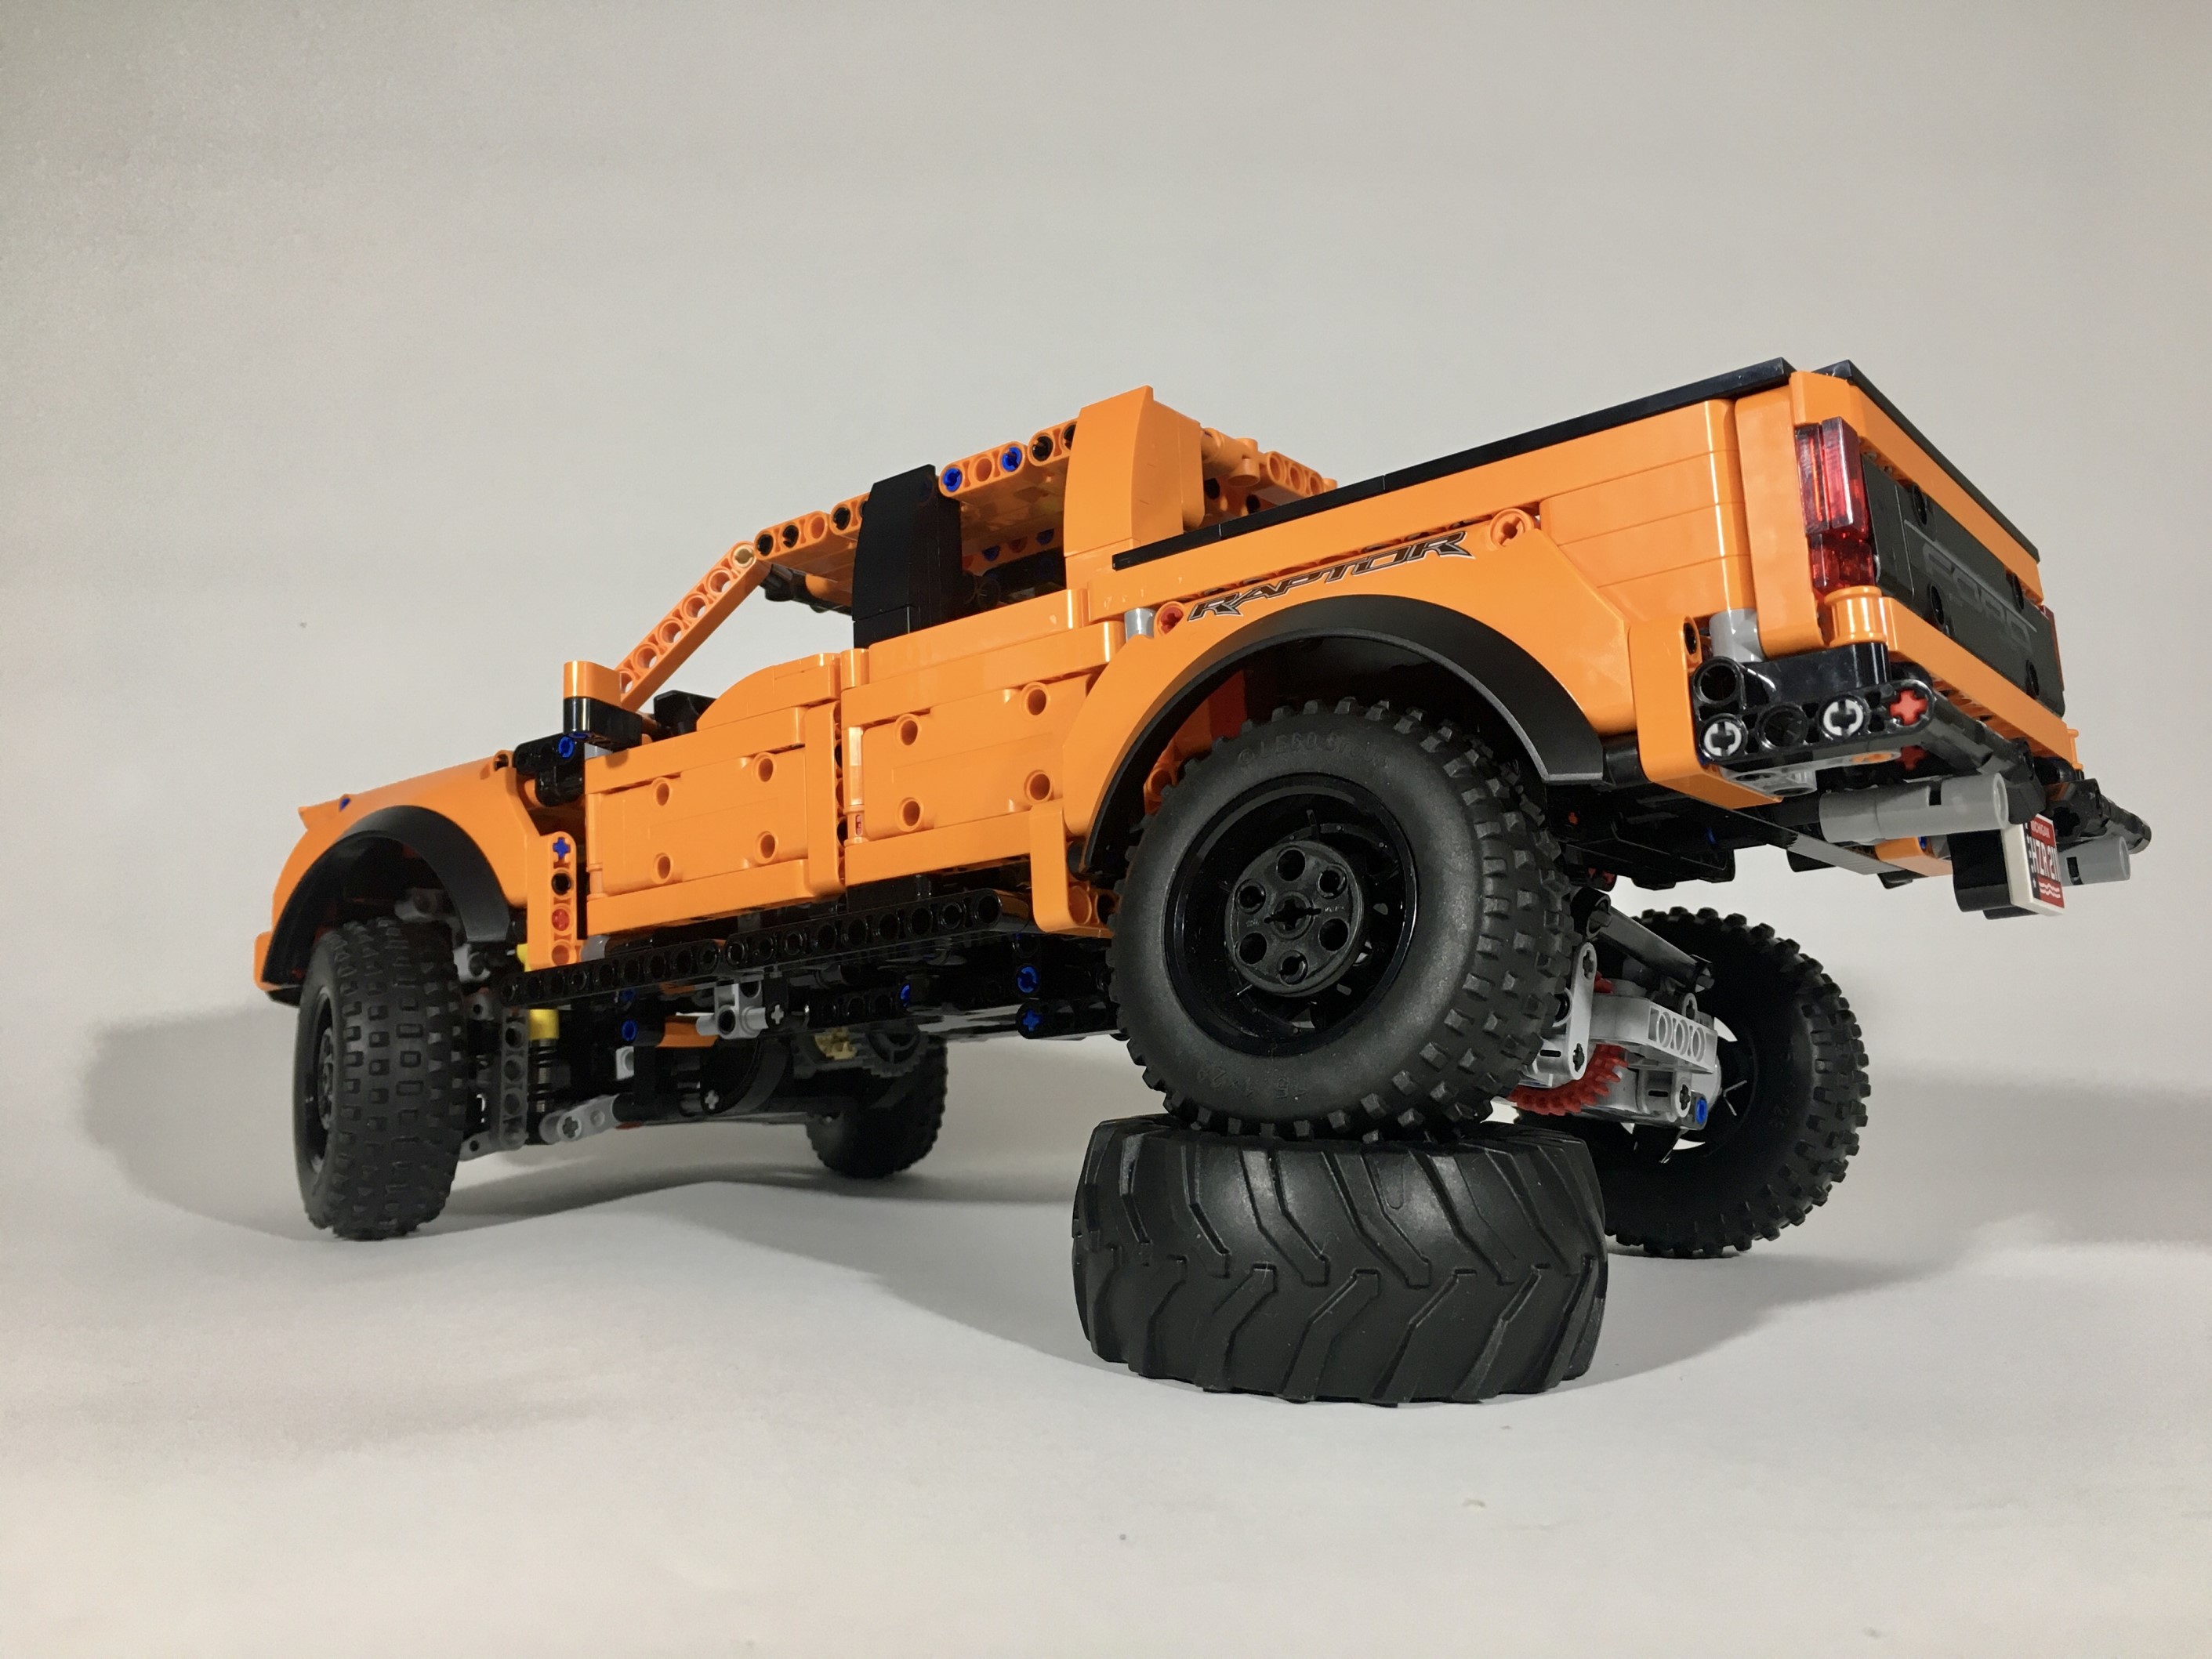
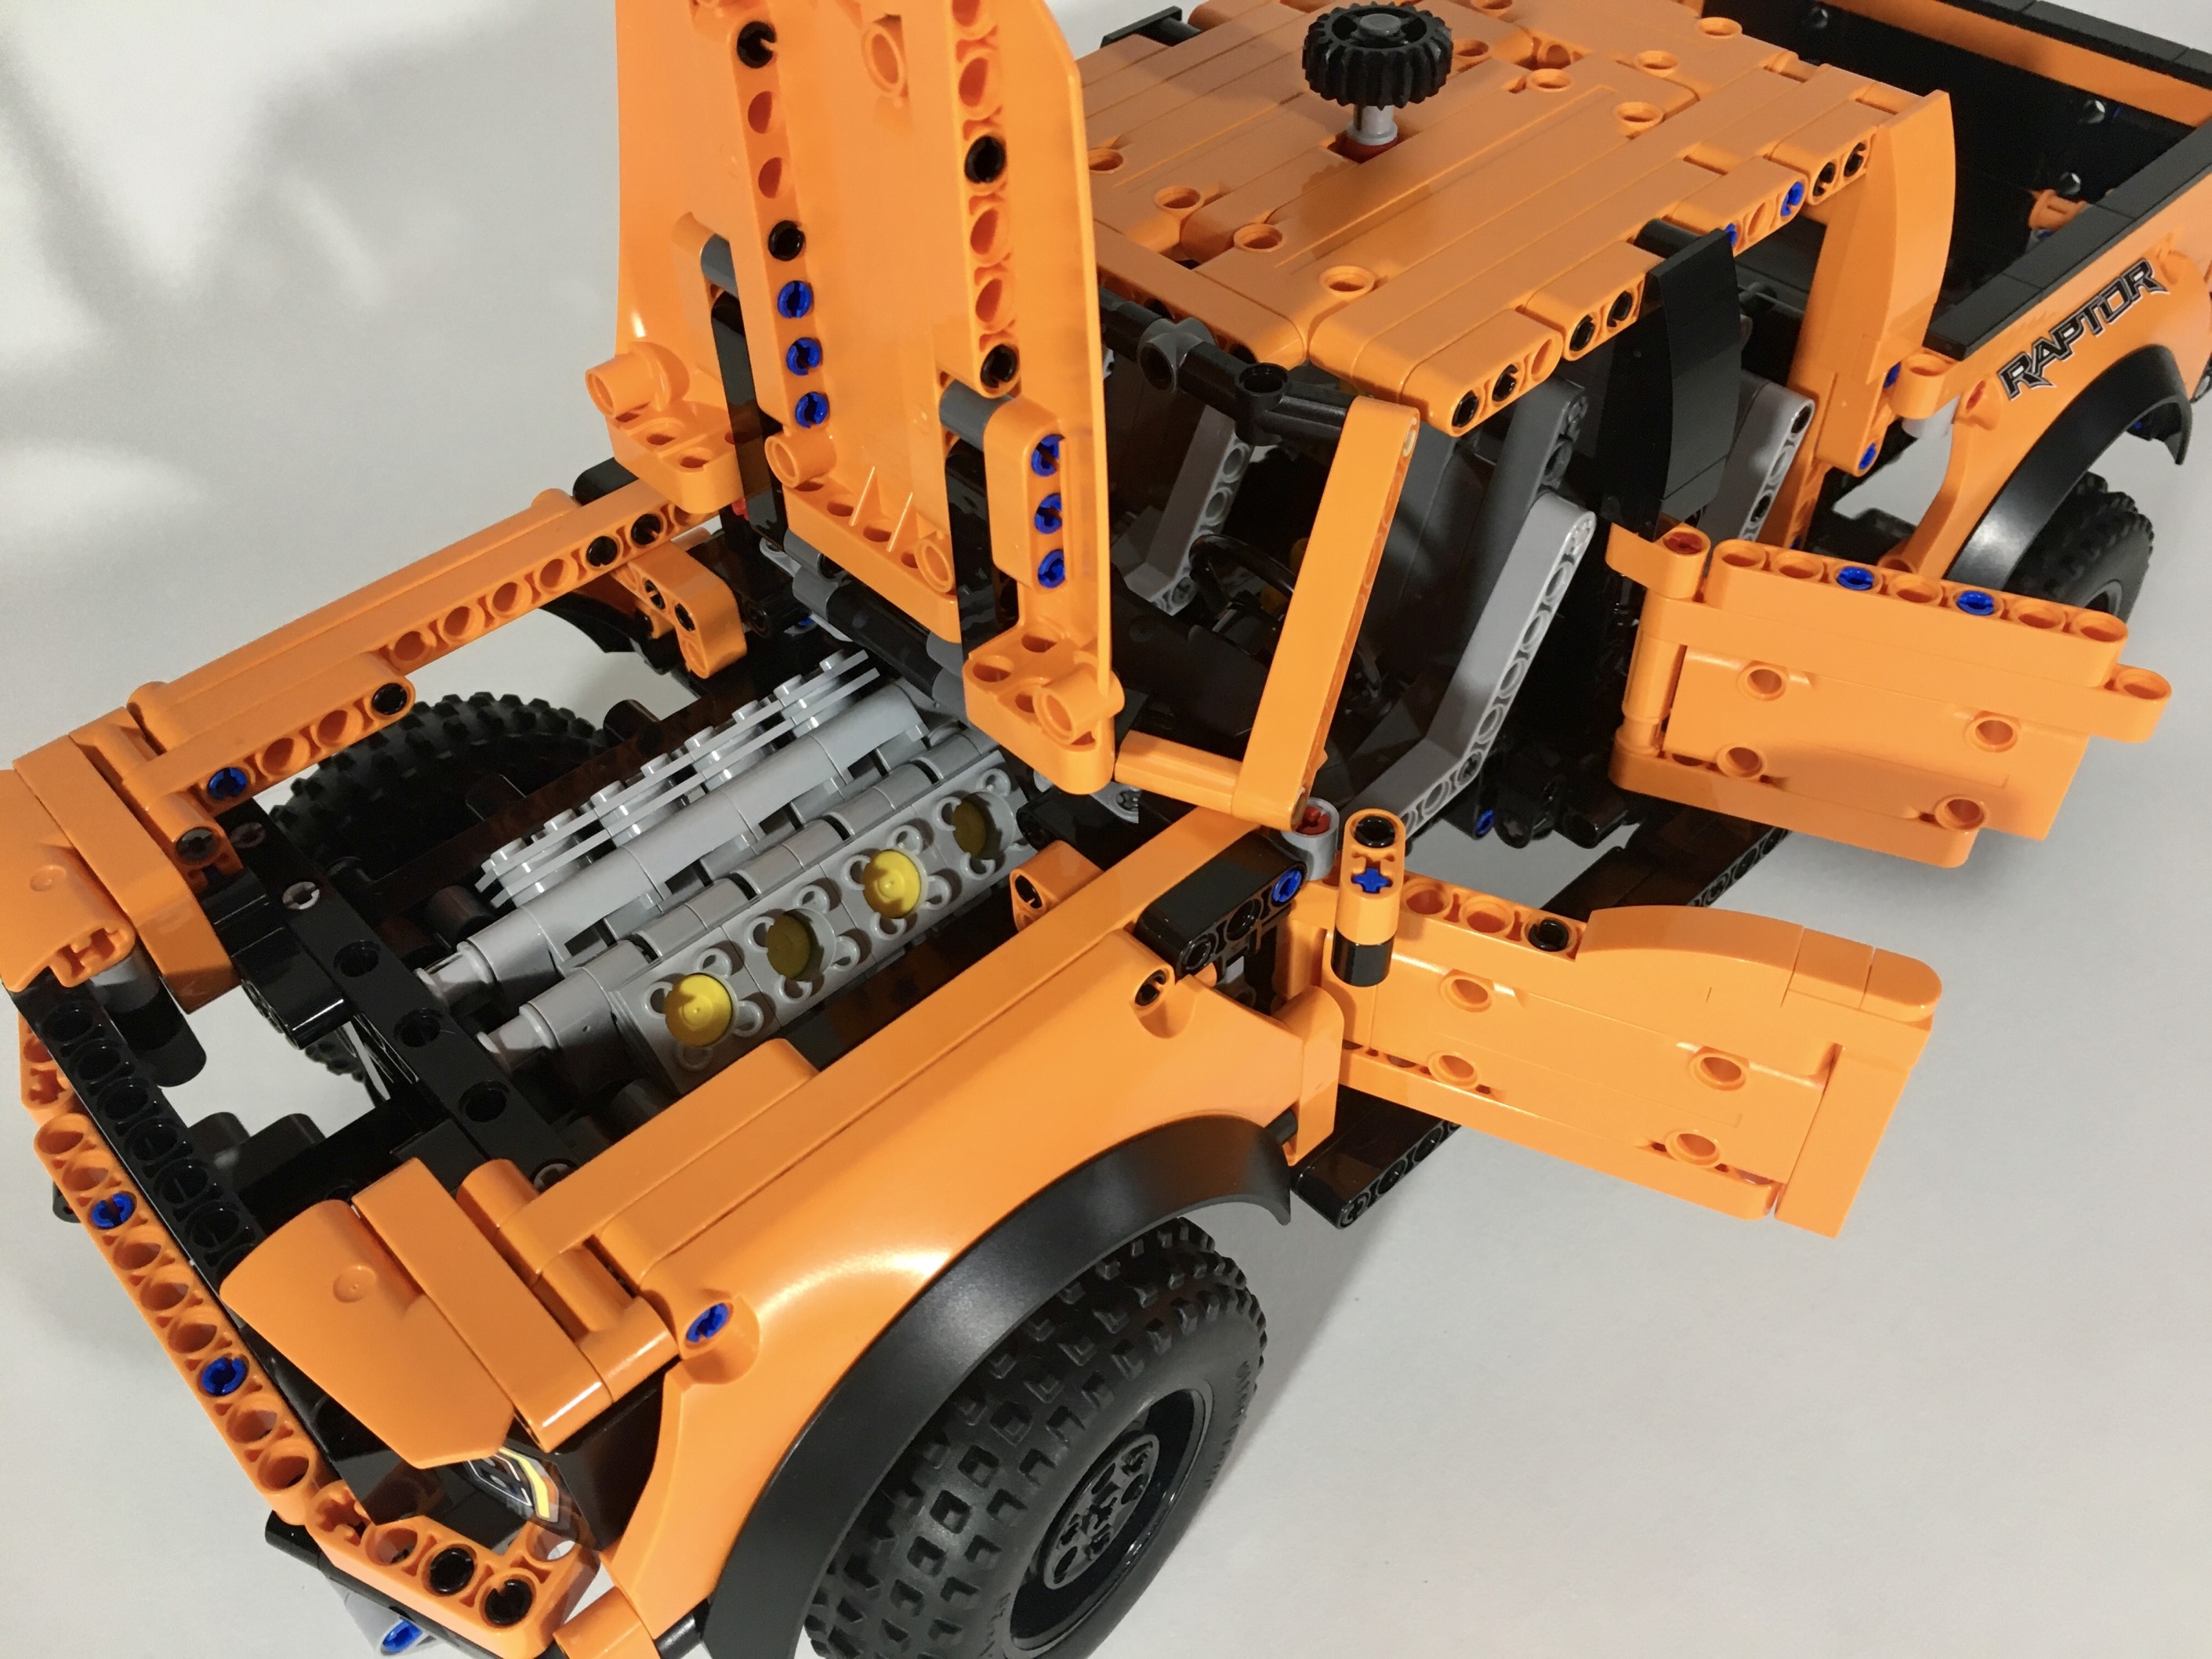
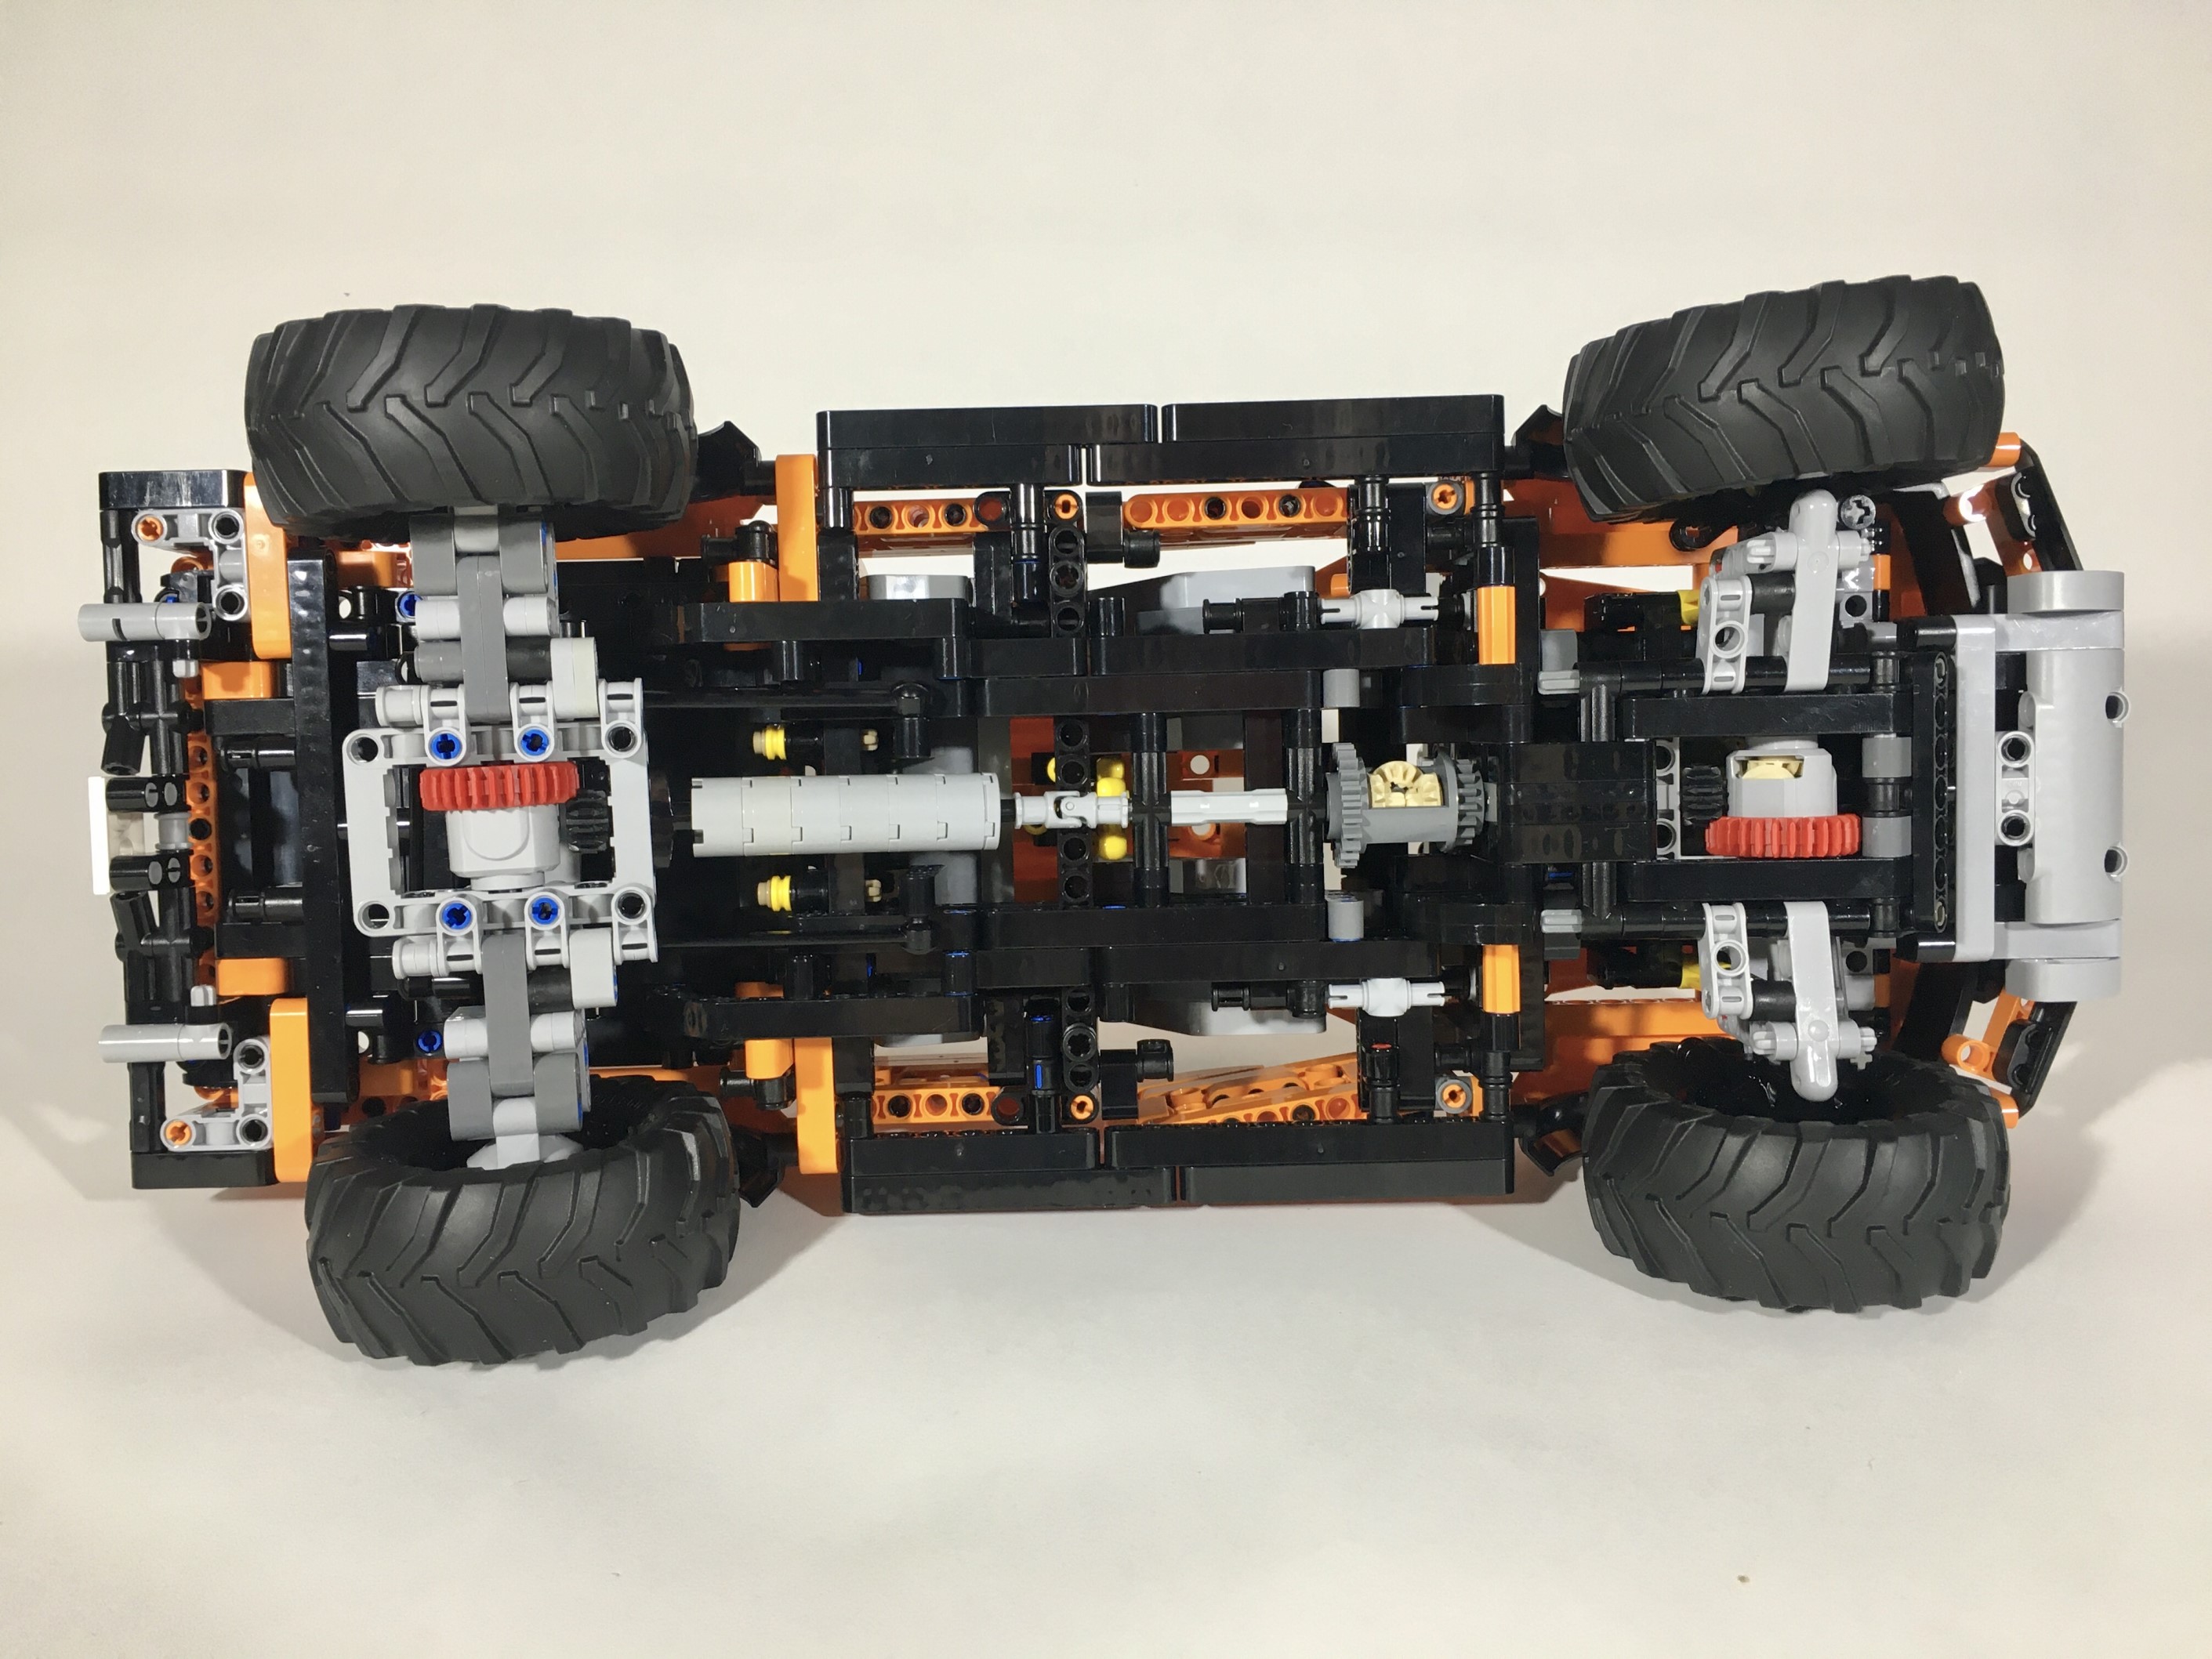
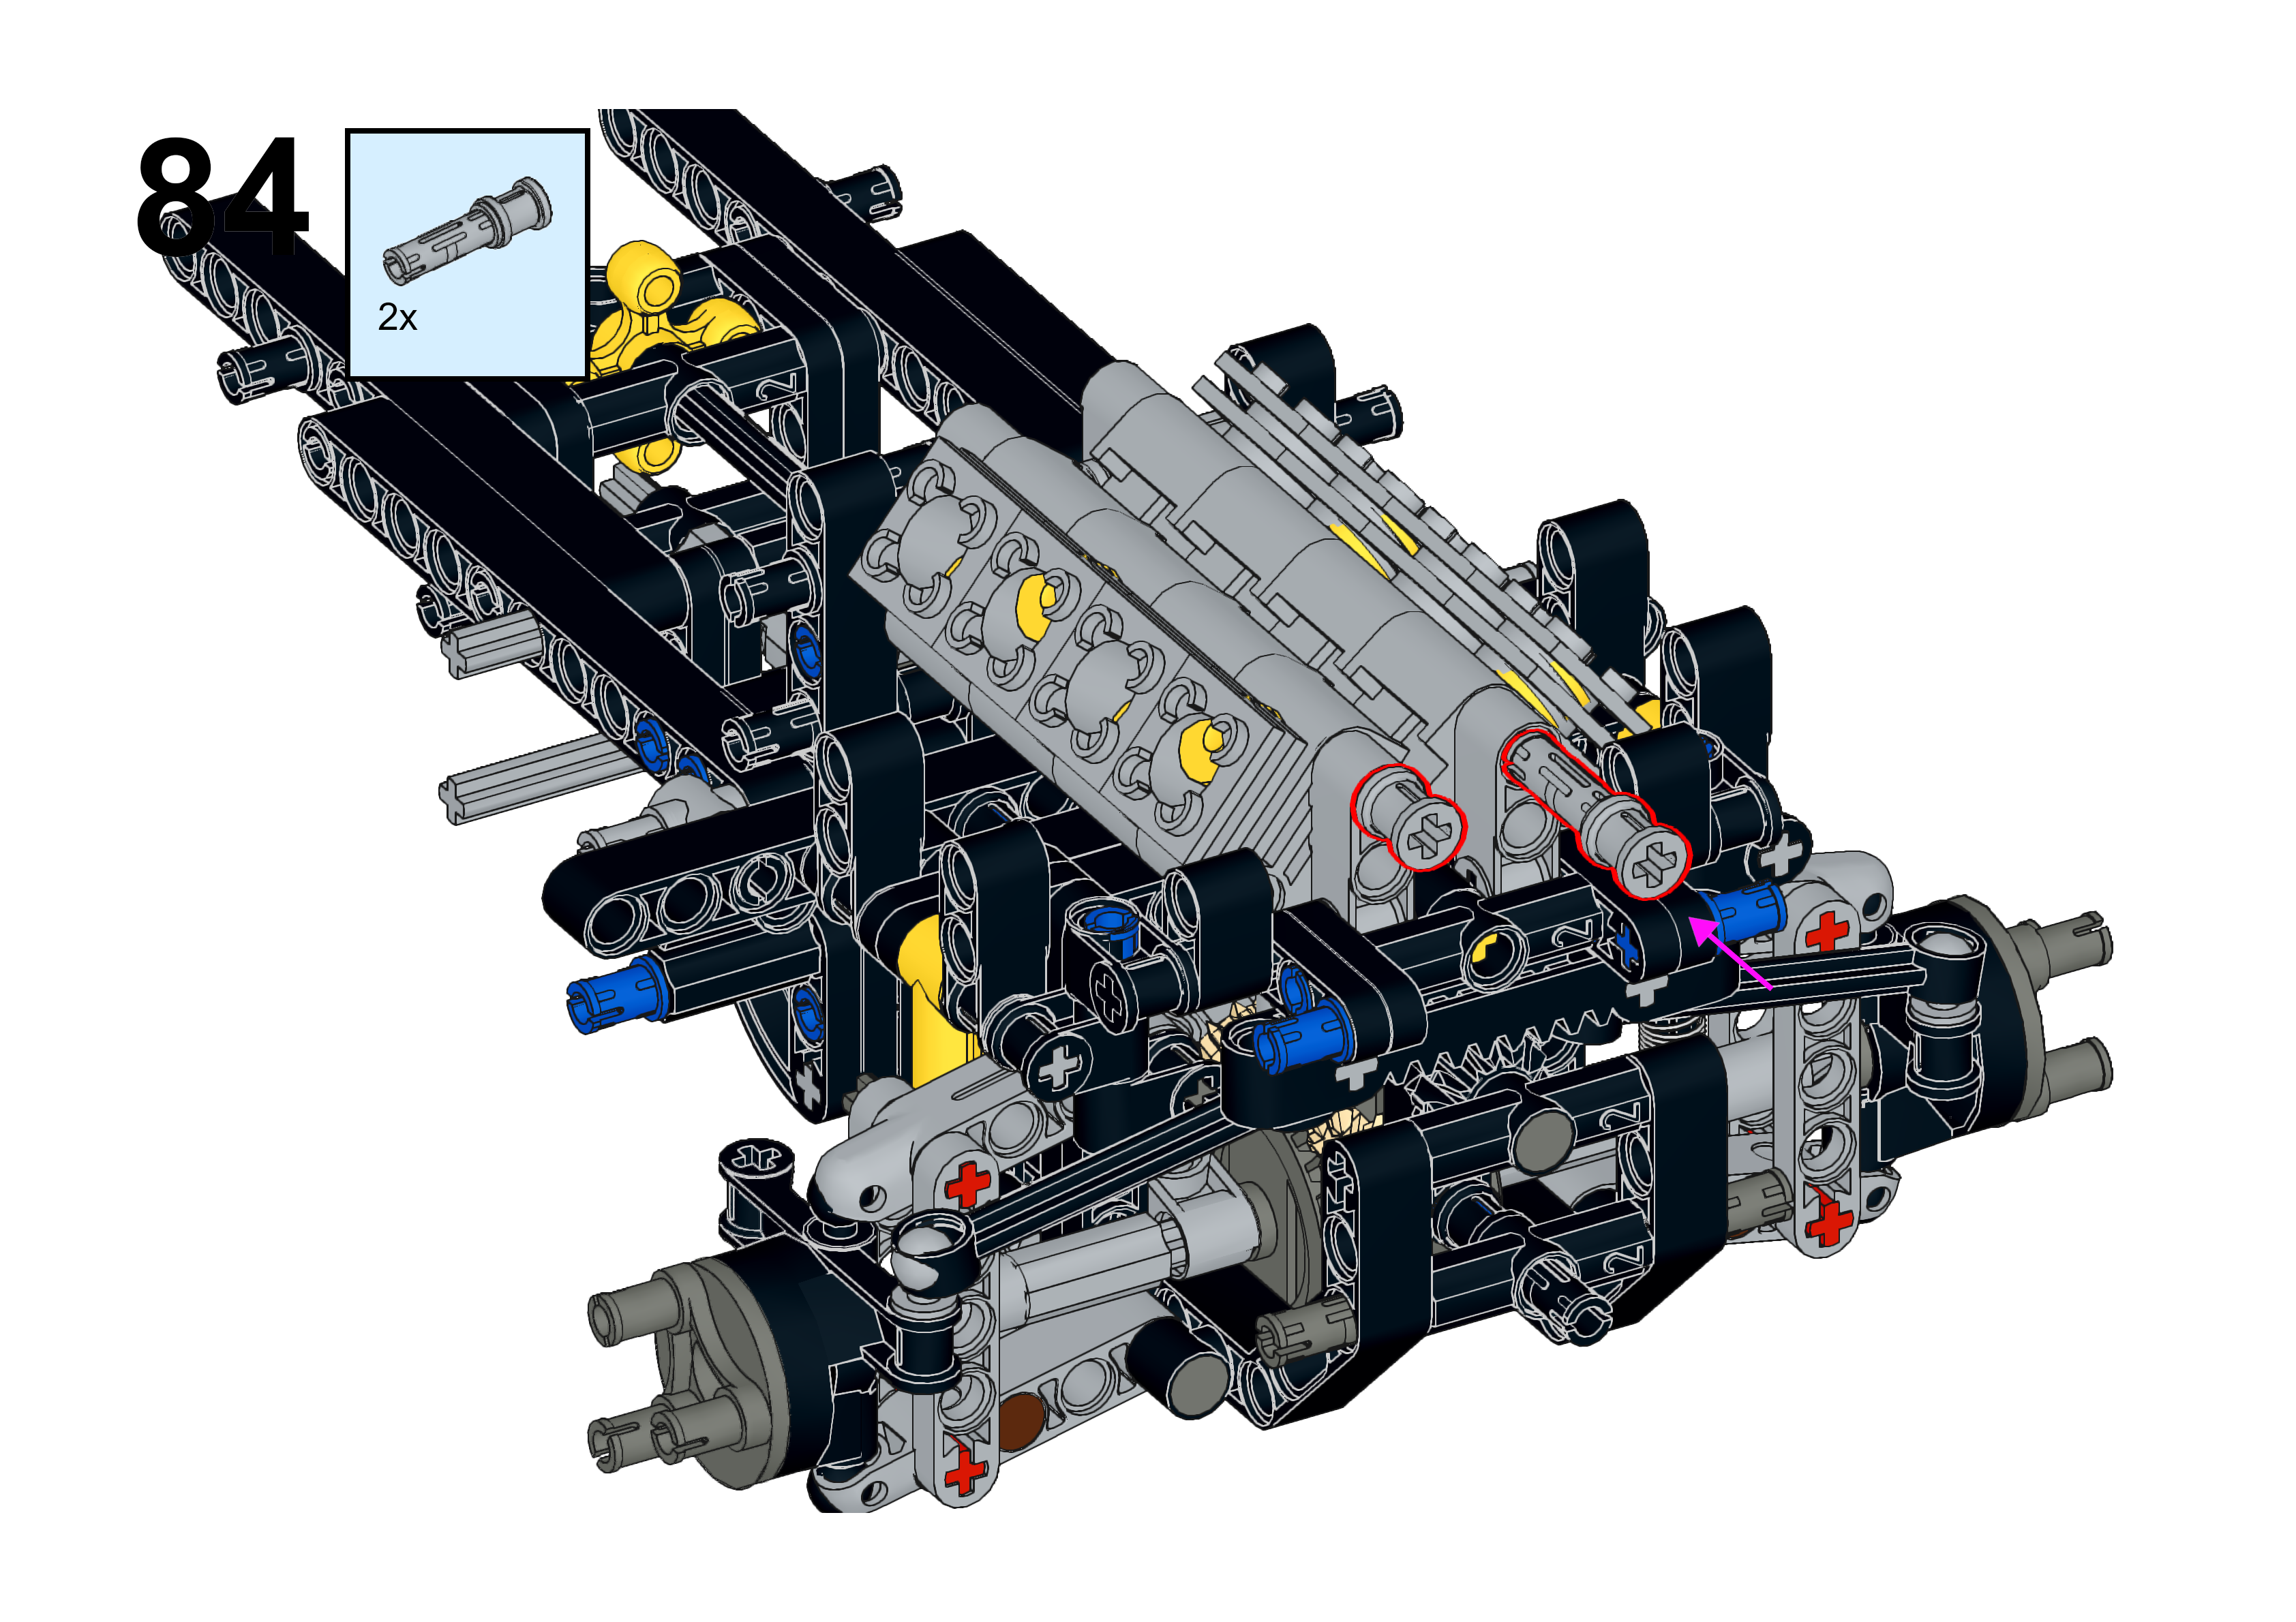
In fact, before I even received my copy of 42126, I was designing and a building a new chassis. The V-8 was easy enough to add, as the space under the hood is extensive. Adding in a front drive axle was a little more complicated. To keep the width, steering geometry, and suspension travel the same as 42126, adding a front drive axle would take a little work. I used a floating differential design, which allows the differential to move freely as the suspension travels through its movement. The steering link was flipped upside down, and relocated in front of the drive axle. The suspension swingarm and shock absorber mounds did not change.
42126 V-8 4×4 Chassis
Immediately behind the engine firewall a differential that connects to the V-8, and the rear axle. The rear axle is changed to replicate a better movement of the rear Raptor. LEGO noted how the half module offset of 42126 was a feature they had to work on to get the placement of the axle correct. However, this feature was only needed as the pivot point of the rear axle was so to the rear of the pickup. By moving the pivot point of the rear axle farther forward, the travel pivots less, and creates a better axle movement of more up and down. This also helps place the axle better when one side is up, and the other down.
While I made no changes to the exterior, I made minor changes to the interor. The colors of the seats have been changed so they match one another a little better. Finally, with a little bit of cross frame bracing, the pickup was done. When 42126 finally arrived, I removed the bed, the doors, the hood, and the roof from 42126, and my F-150 was done.
I like making modifications of sets more than I like making B or C models of them. As such, this project was an enjoyable one for me. I worked fast, and I liked the improvements I was able to make to the original. I like the look of 42126, so keeping this consistent was fine for me, and the additions of the V-8 and the four wheel drive was a fun challenge to pursue. Now to see if I can do a Sport Truck version of 42126. Stay tuned….
I have done a lot of difficult LEGO projects over the years, but this project was the hardest in a while.
You may find free instructions for this MOC at Rebrickable.com.
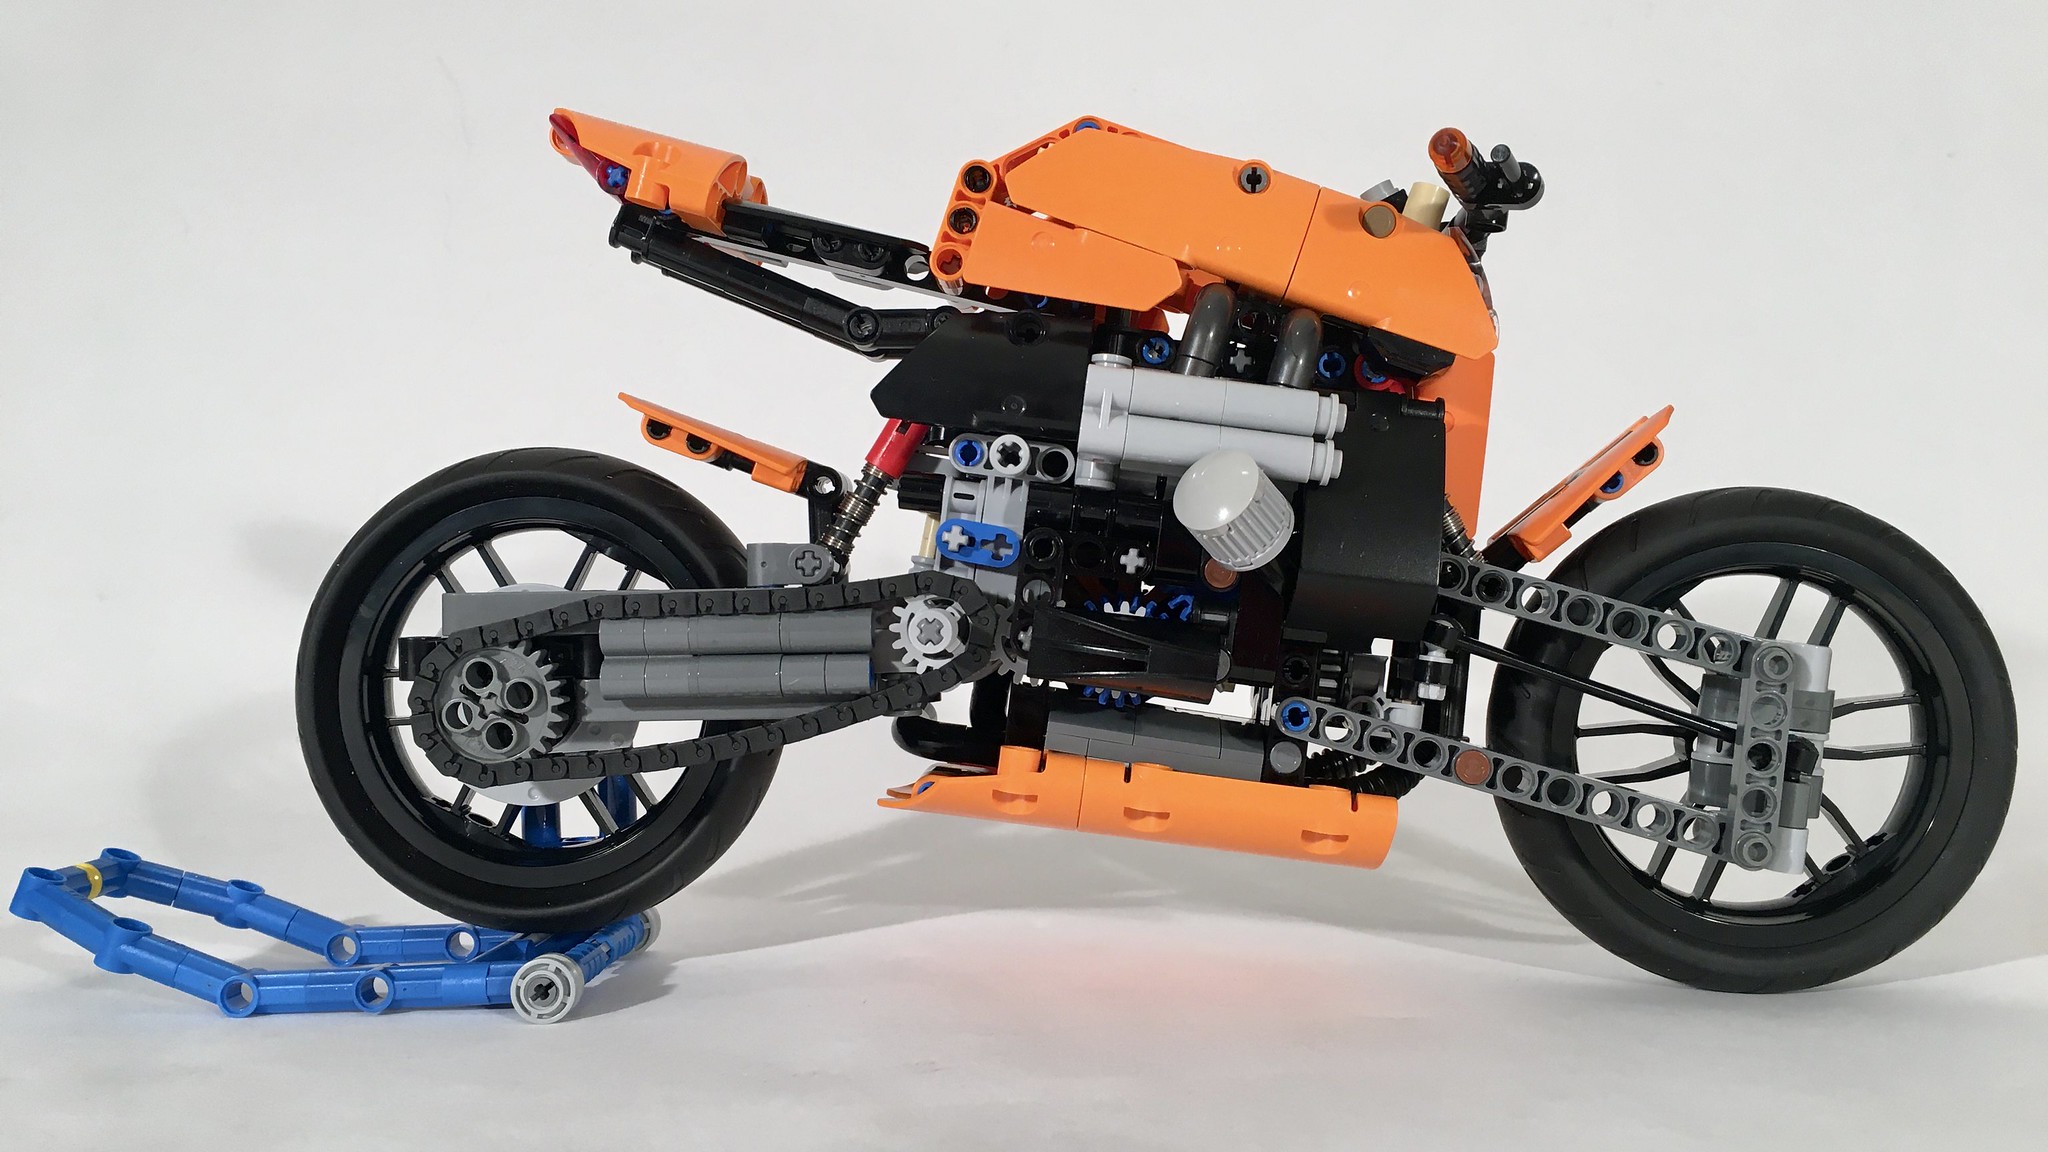
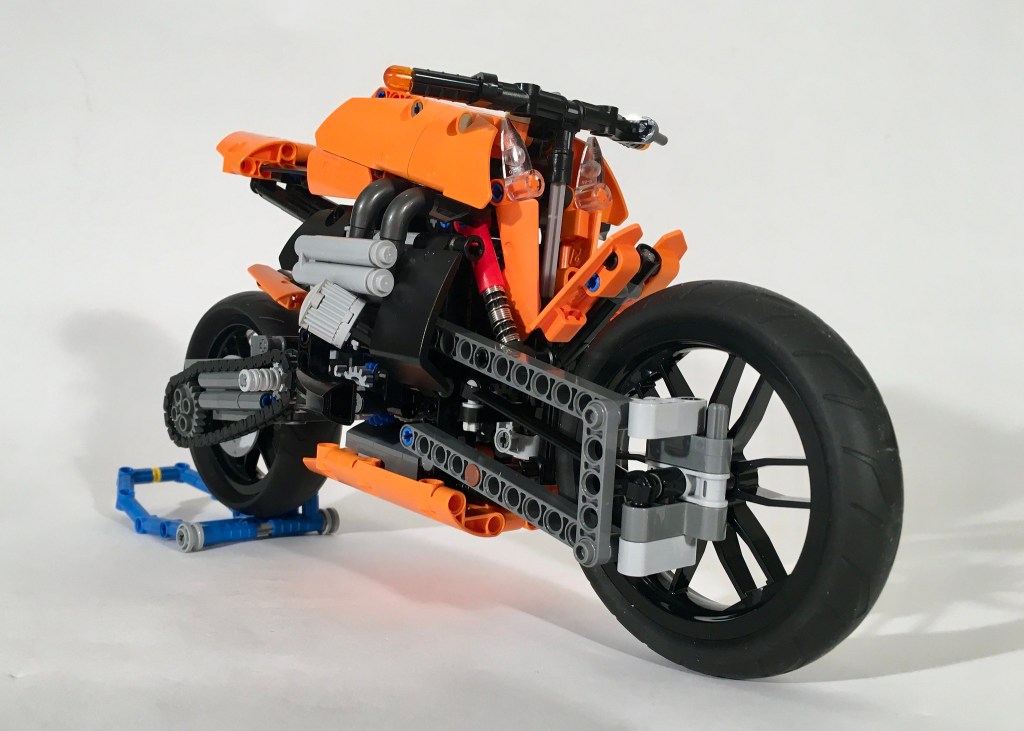
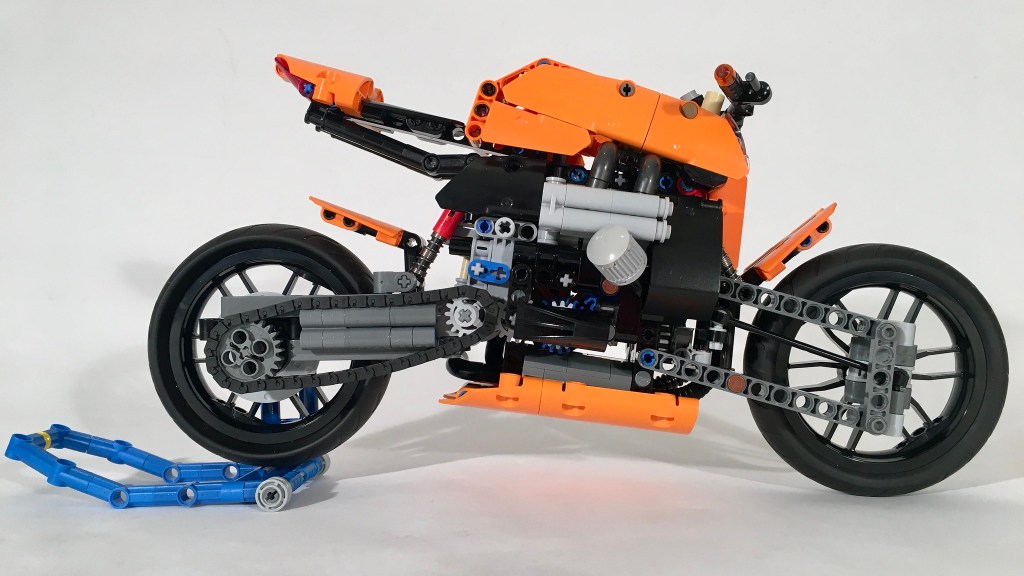
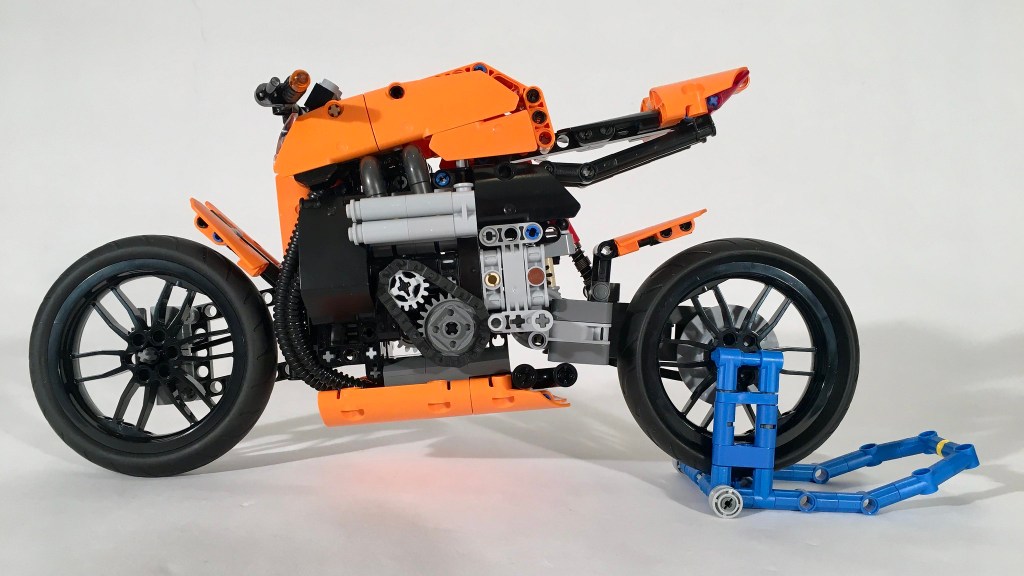
I often participate in Eurobricks Technic contests, and this last winter, I chose to participate in TC19 Technic Motorbike Contest as I enjoy Motorcycles, and I have built only one. This was an oportunity for me to develop some skills in a MOC that I have not done in the past. I had no idea, how much it would stretch me. From the start I committed to the following features: steering , suspension, an engine, and a transmission.
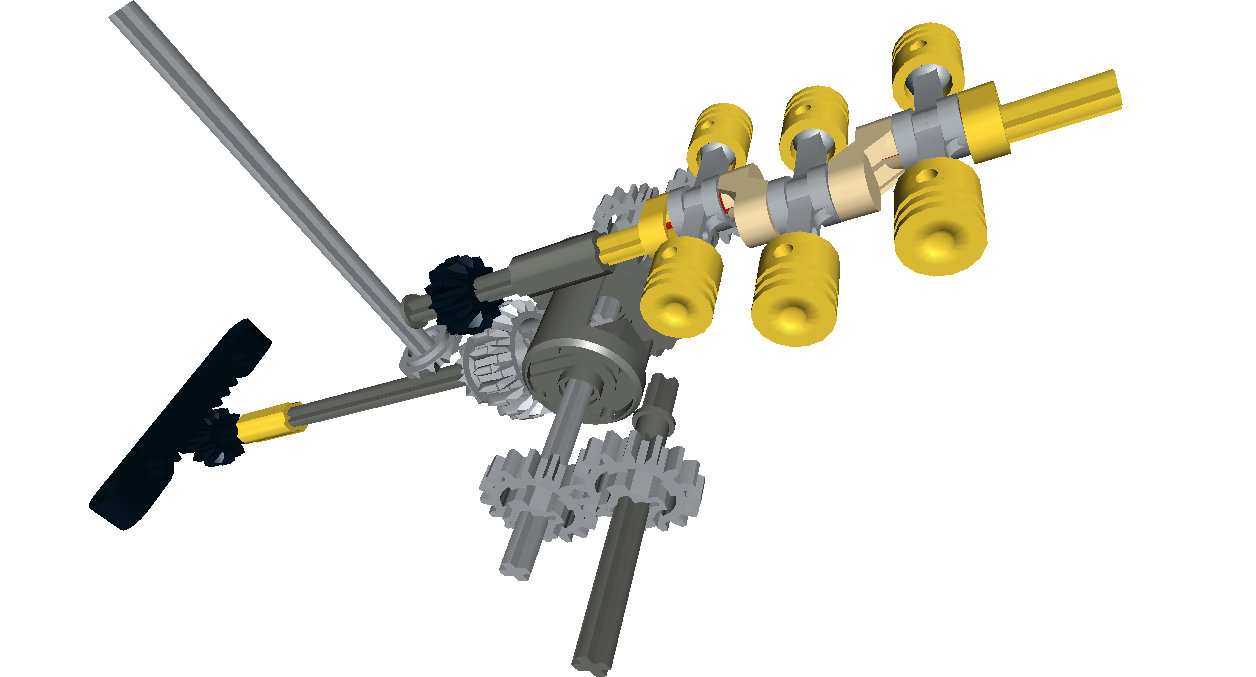
I quickly picked a motorcycle to replicate, the fantastic Kickboxer, and got to work. First I set the scale and did a rough draft of the suspension. I built a little flat 4 engine.
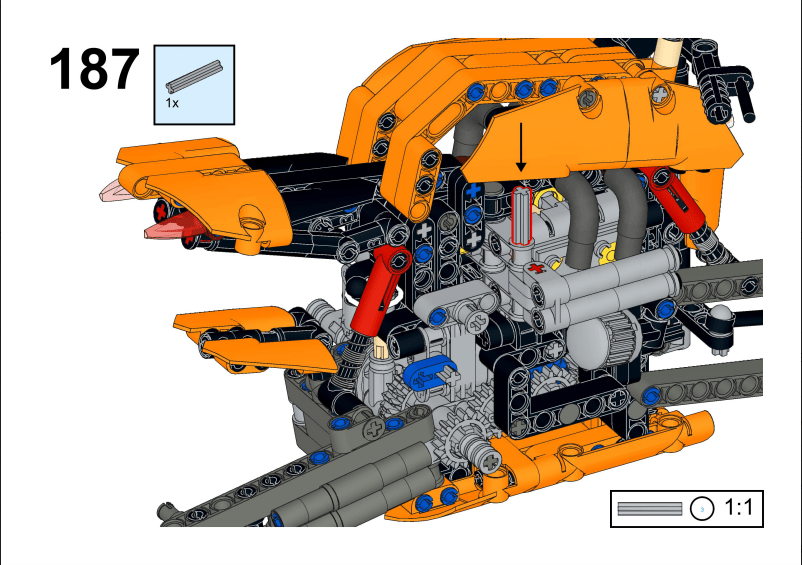
Then I started on the transmission. The transmission is a four speed sequential transmission that is shifted on the left of the motorcycle. I took a while to get the design to work, and then took a lot of time to get it to fit into the motorcycle. Finally, I was able to get the final solution to work. It’s dense and complicated. I encourage you to take a look at the instructions to explore it a little more.
The suspension worked until I finished much of the bike. Then it sagged, and required a complete rebuild. I was able to retain much of what I wanted even after the redesign.
The motorcycle was a build I was very happy to finish. I was frustrated multiple times in this build, so I had a high sense of accomplishment when it was done. The transmission works flawlessly. The suspension is sufficient, and the steering is a little gummy. But all in all, it’s a build I am proud of. I hope you enjoy it too.
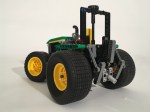
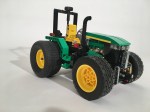
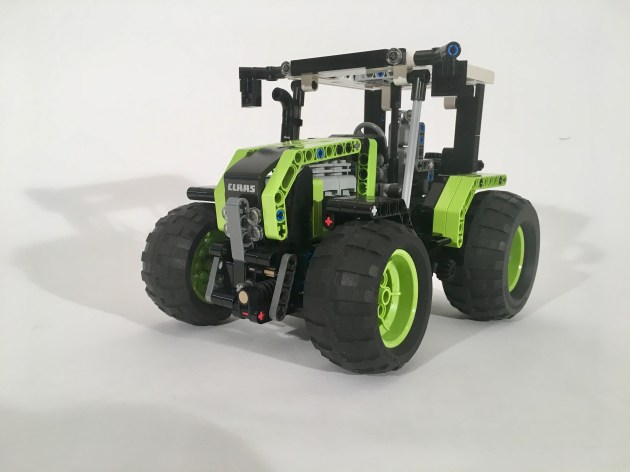
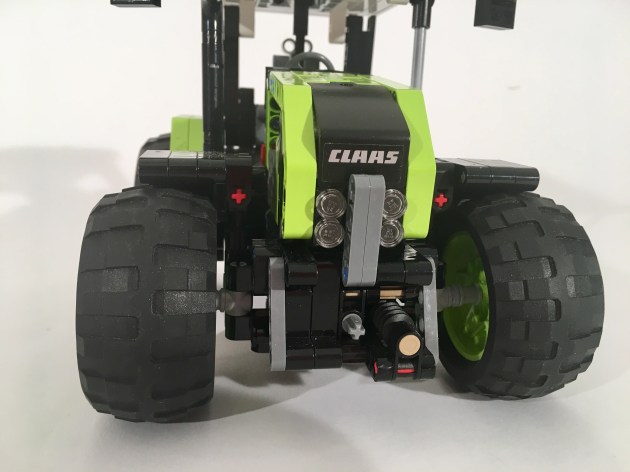
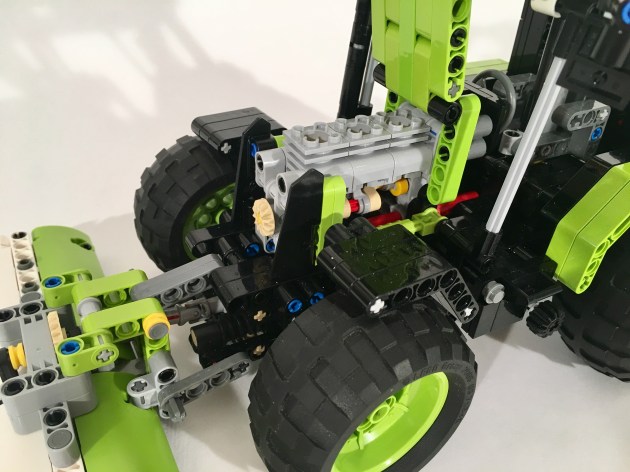
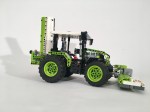
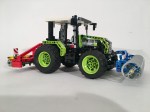
I have enjoyed building a number of tractors over the years, and I think it is mostly because I enjoy building all the implements. This little Deere is no exception. When I was making instructions for the Claas Atos, I found some inspiration from this picture. I wondered, “could I turn this into another tractor?” Yes, yes I could. So I was off on another mid-power tractor.
I decided on the John Deere 5115, which is a mid-power, open cab row tractor. I used the chassis of the Atos, so the tractor retained the drive, steering, front and rear PTO, and the front and rear three point hitch. I added a green fake engine, a new hood, and some new wheels and tires (Batmobile!). So it was a simple modification of a simple previous build.
I added a variable V-Plow on the front from M_Longer, and a simple spreader on the rear powered by the PTO.
The MOC worked just as well as the Atos, which it should. But the Deere looked a little better. The hood looked more complete, and the proportions looked a little better. Plus the color of the green and yellow always looks sharp.
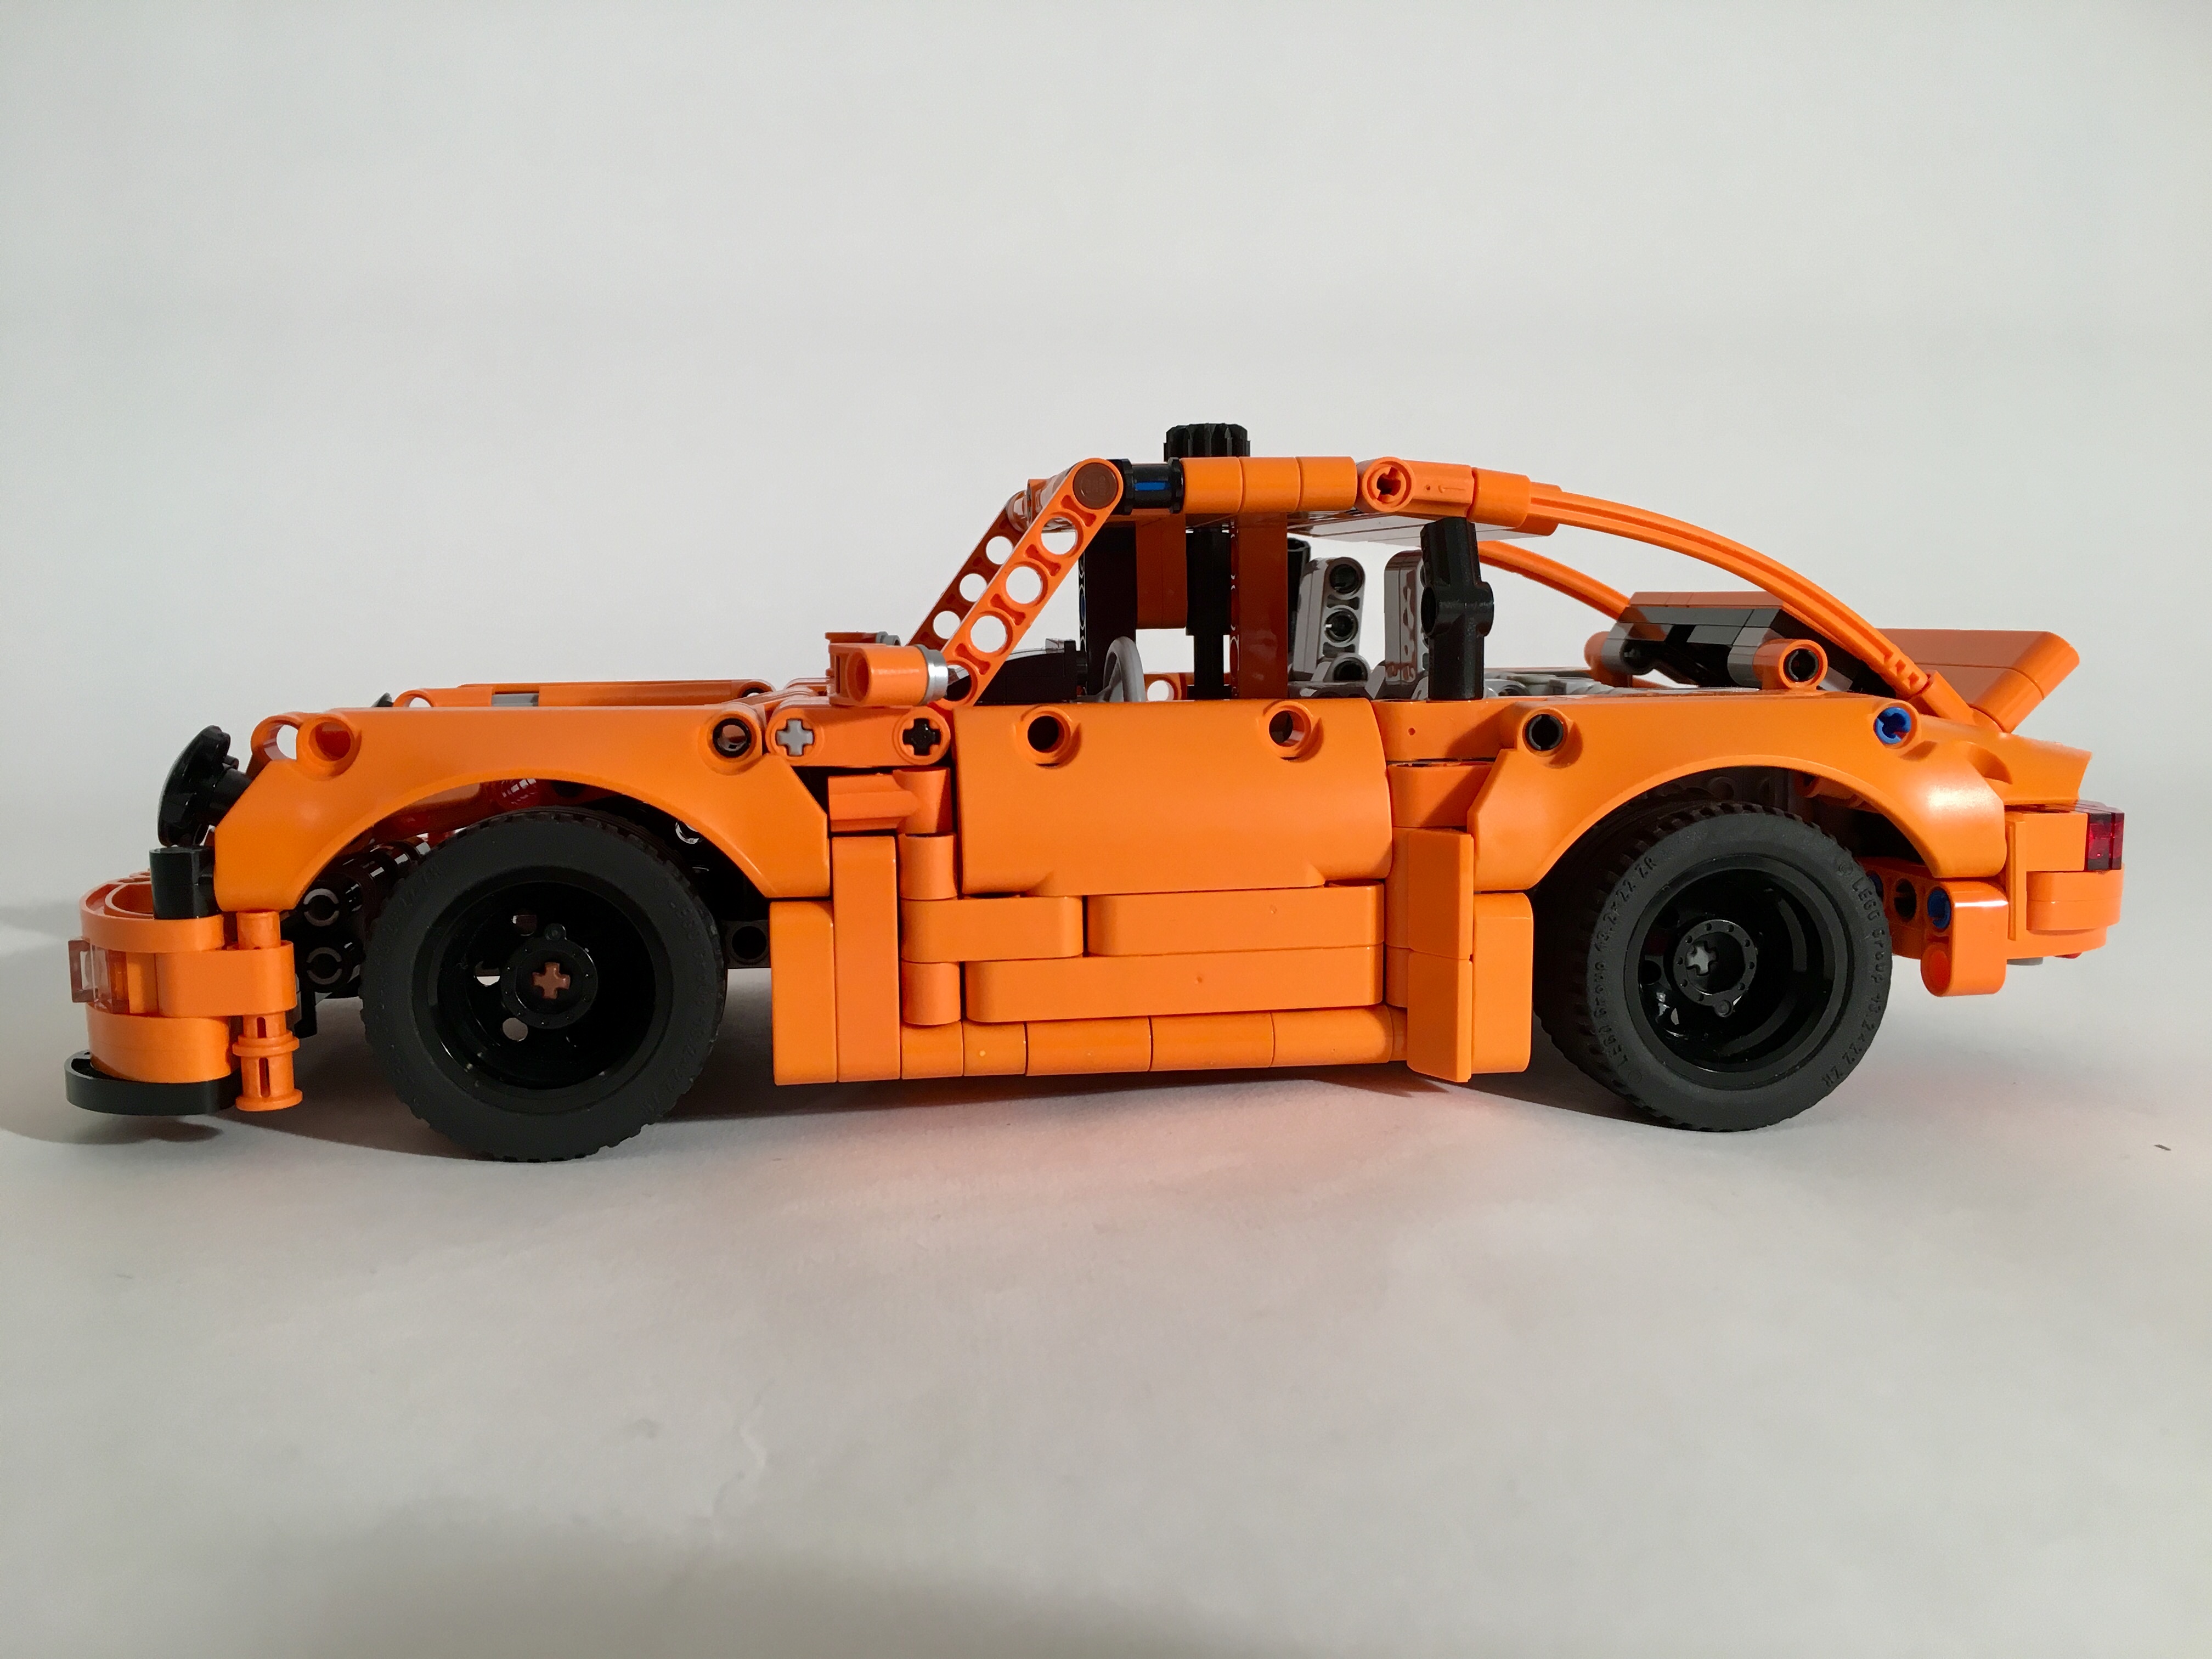
There is a part of me that finds LEGO 42098 a little gimmicky: buy this truck that fits 5 cars but comes with 1 so you you build or buy more to fill the truck. But, these wheel arches are so awesome that I am going to do just that.
Full gallery including instructions may found here.
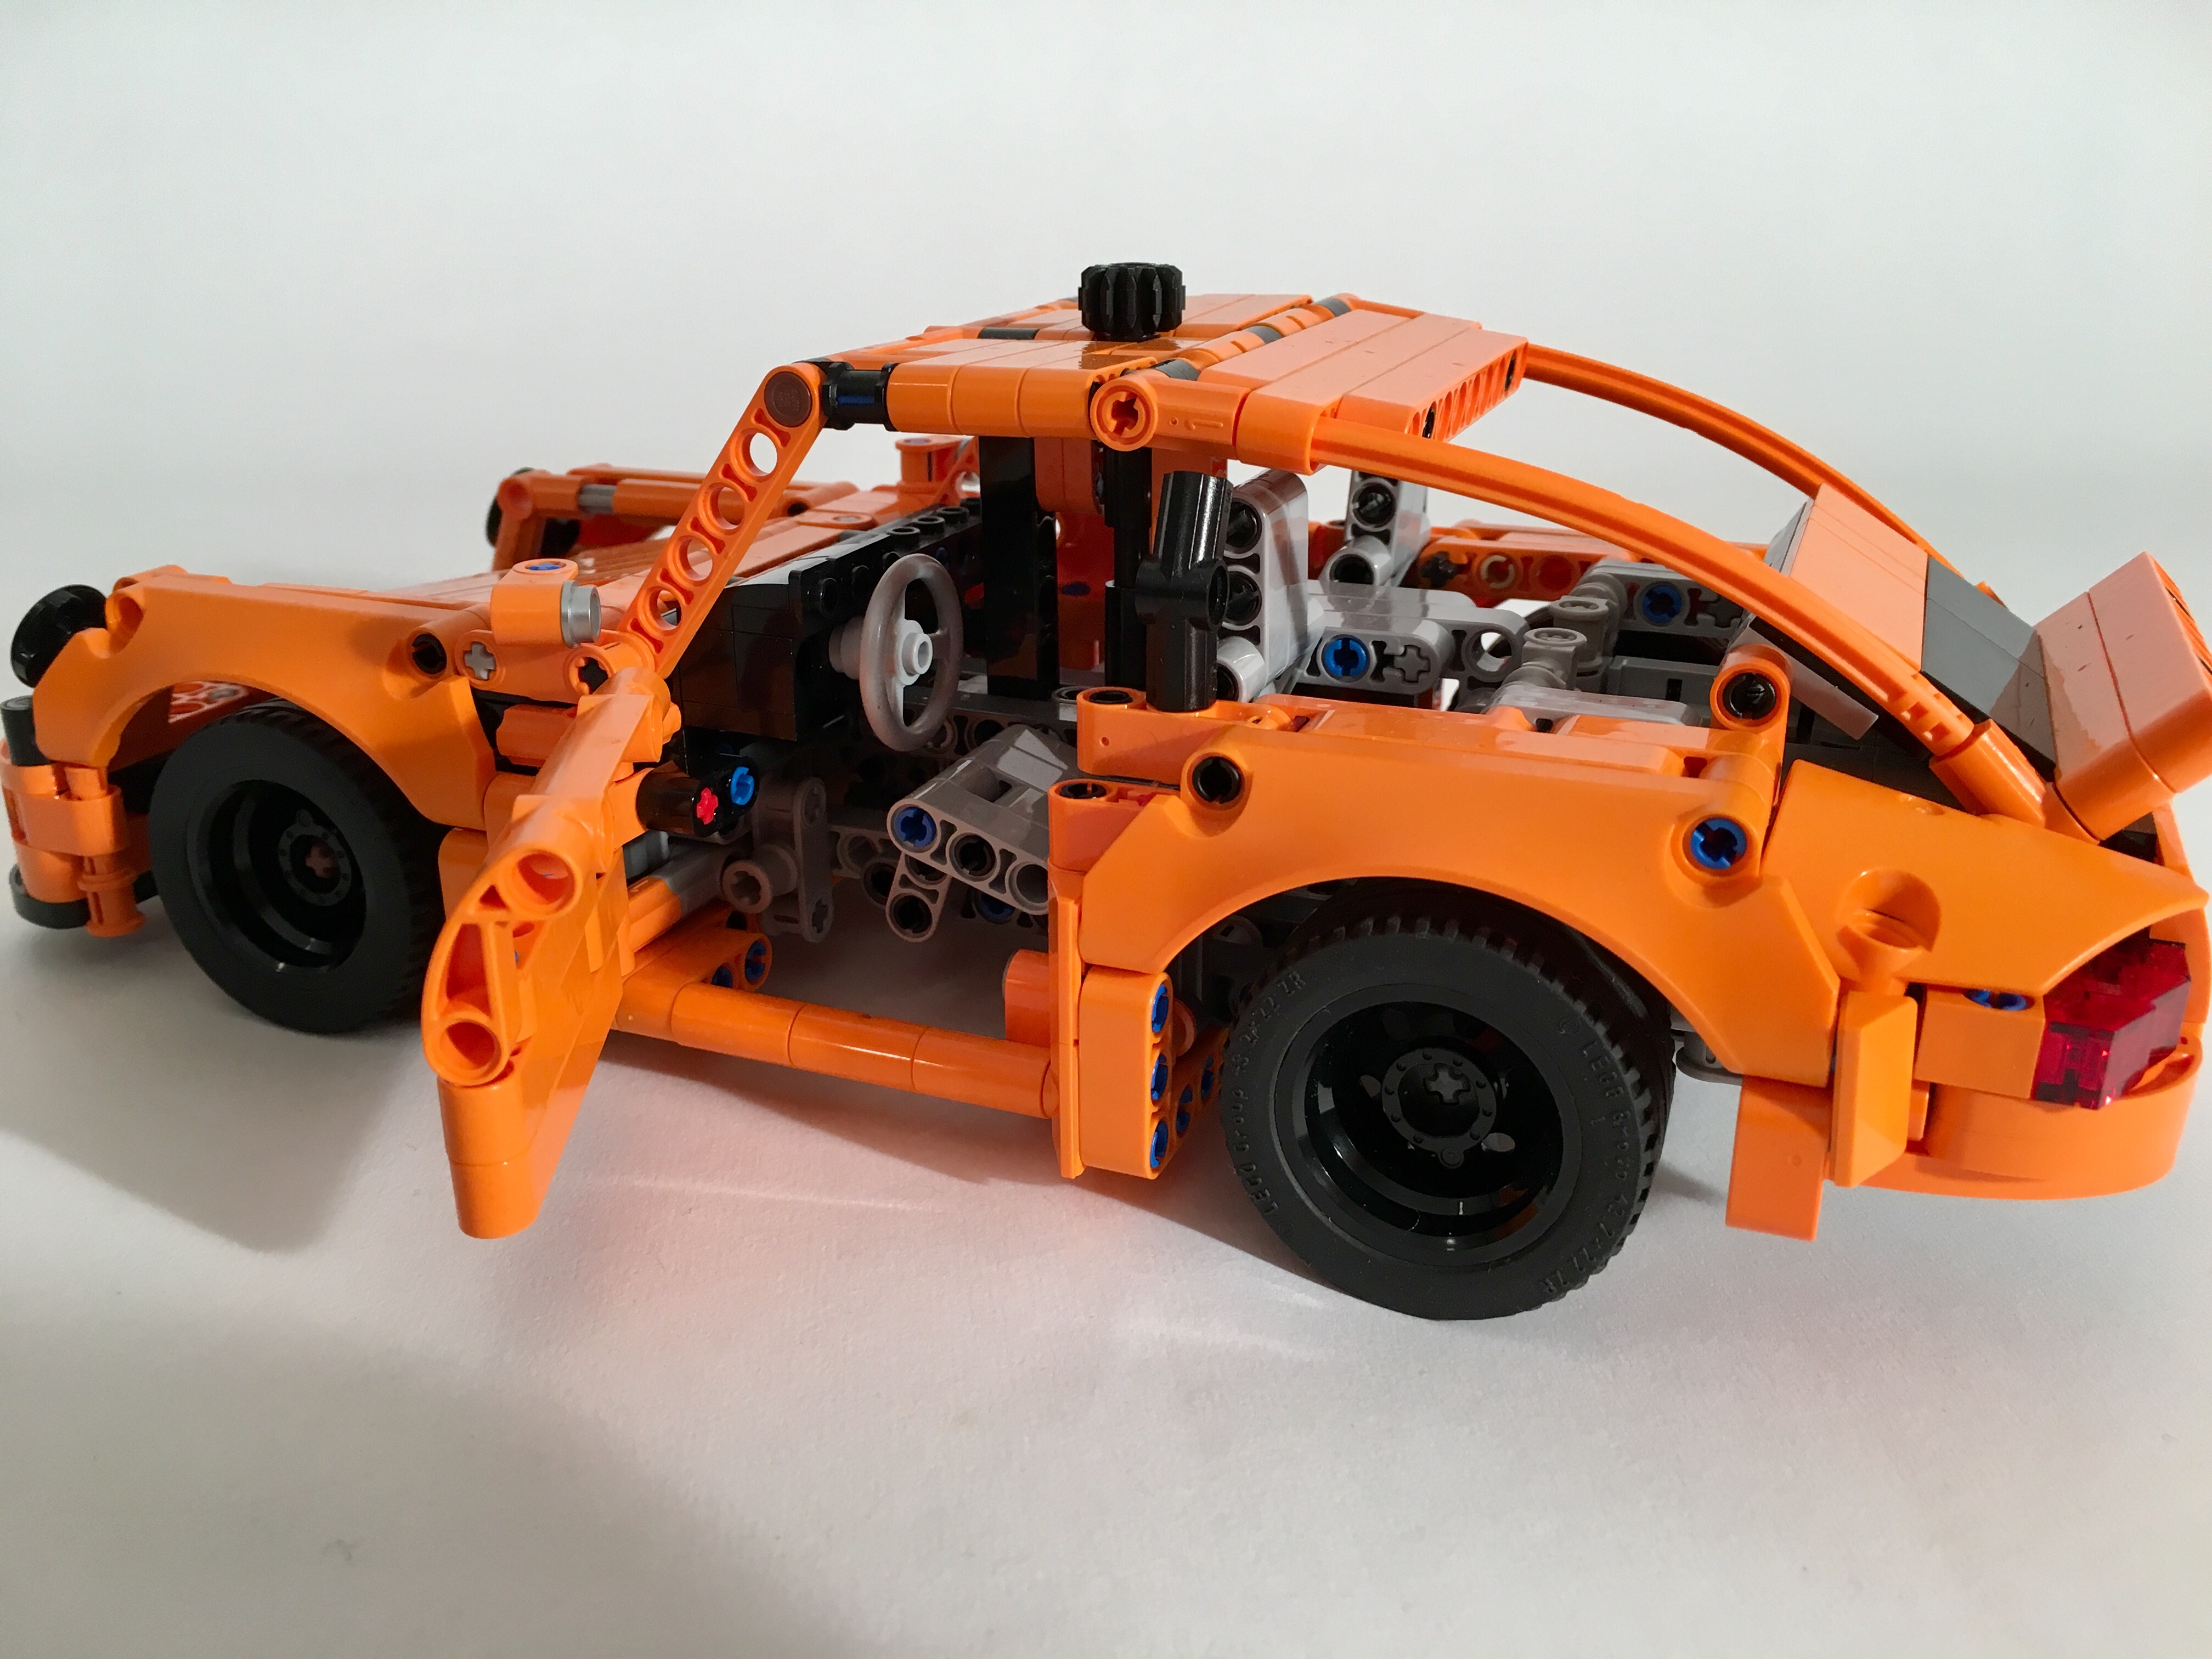
After a rough first draft it was clear I was going to be able to steering and a Flat 6 into the car at a scale that would work for 42098, so most of the early work was on figuring out the shape of the car. I knew the car was going to be orange, and I wanted the little ducktail spoiler, so I modeled the car after the 964 version of the Porsche 911. The rear differential is placed two studs in front of the rear axle to allow for more room for the rear engine. I kept the normal LEGO engine parts rather than an axle engine like in 42098. The steering is simple in all in front of the driveline.
The body work continued to take the most time. I used a great 911 MOC from Paave for many ideas including the seats and the front hood. Eventually, it all came together, after a lot of work on the doors, the roof, and the rear deck. The 911 is a beautiful car and getting all the details is so tricky. I almost feel bad for how critical I was of LEGO 42056. Almost…
One thing you will notice is my use of both the 43mm and the 49mm tires for the rear of the car. I go back and forth on which ones I like best. Also, there was no way is was going to use the skinny 43mm tires for the front. They look silly.
This little car worked great, and functioned as intended. The shaping was off a little particularly with the rear quarter panels, the roofline, and the front headlights. But the shape of the 911 is so iconic that get all the details that have been refine over 50ish years is tricky. Either way if fits on the back of 42098.
If my previous builds are any indication, I am a big fan of Unimogs. So it was just a matter of time before I built another one. Rather than building one this time, I built a modular system that allows for a number of different versions.
This build started with a desired to make another small build with the great Fischertechnik tires I acquired. I wanted to build something small and playful like RM8s FJ or Sheepo’s Defender. As has been happening with many of my recent builds, I wanted to give the MOC some playable options and easy modifications. A Unimog was a perfect option, and who am I to turn down a Unimog? So I gave myself the following constraints: 4×4, I4 fake engine, steering, manual and PF drive options, removable cabs, removable bed, and two chassis. I set off to work.
The axles came together fairly quickly. I decided quickly not to do portal axles, because I wanted the complexity of the MOC to be elsewhere. Both axles have a differential, two soft springs, and are stabilized longitudinally via steering links and laterally via panhard links. All for shocks are mounted on crankshaft parts to get the ride height of the Unimog just right. There is about 1.5 studs of travel for each wheel, which provides adequate articulation.
The axles are connected to a fixed axle that powers a I4 fake motor. Since I wanted the MOC to be easily switched between manual control and PF, the driveline got a little over-complicated quickly. The steering axle and drive axles cross each other twice. This allows for the steering to go to the top for a HOG, and backwards so a PF servo motor can be added. A 16t gear is available at the top of the chassis to power a PTO, or add a PF XL motor to give the Unimog propulsion. The long Chassis can fit a full a full Power Functions pack. When the power pack is not installed lots of open space is available for other additions. I added a three way tipper lift mechanism for both the long and short wheelbase chassis.
Attachment points were added for the rear bed and for the cab. I created three cabs, and each can be added to both chassis (though the Doka looks best on the LWB). Two axles with stop can be pulled to free the cab. I created three beds and a power pack. Four axles with stop are required at each corner to secure the bed. A camper and a crane bed are not far behind on my building queue.
The Unimog turned out exactly as I wanted. The suspension and steering are light and smooth under manual operation, and work great with PF. I am excited about the ability to offer and develop multiple beds and cabs. Instructions are posted, so I look forward to seeing other options people develop to make their own Unimog.
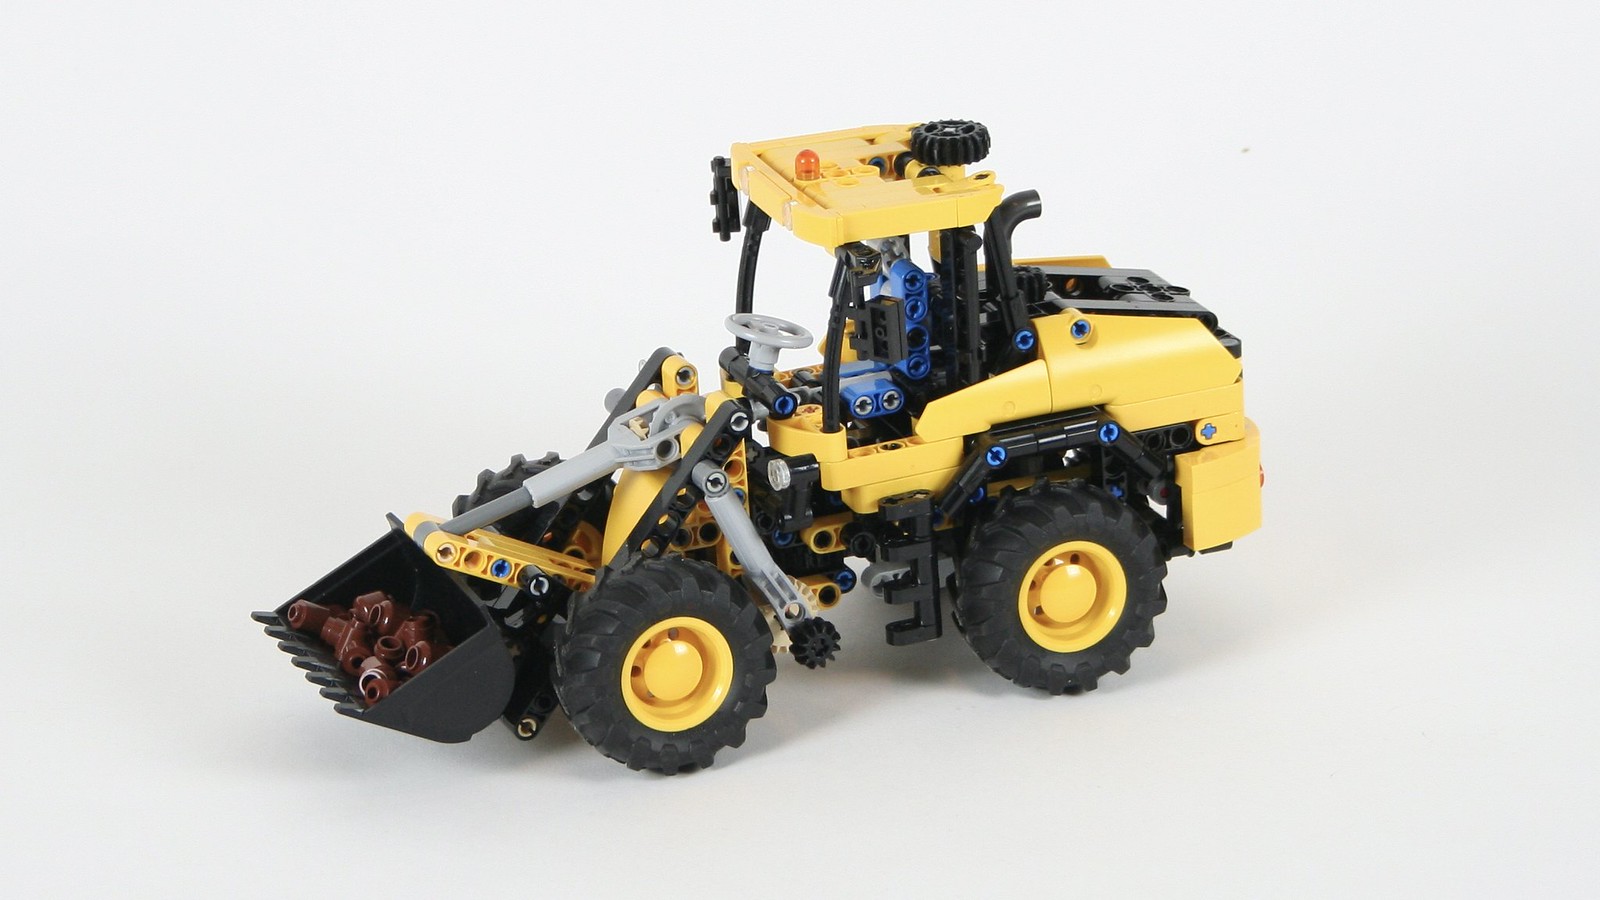
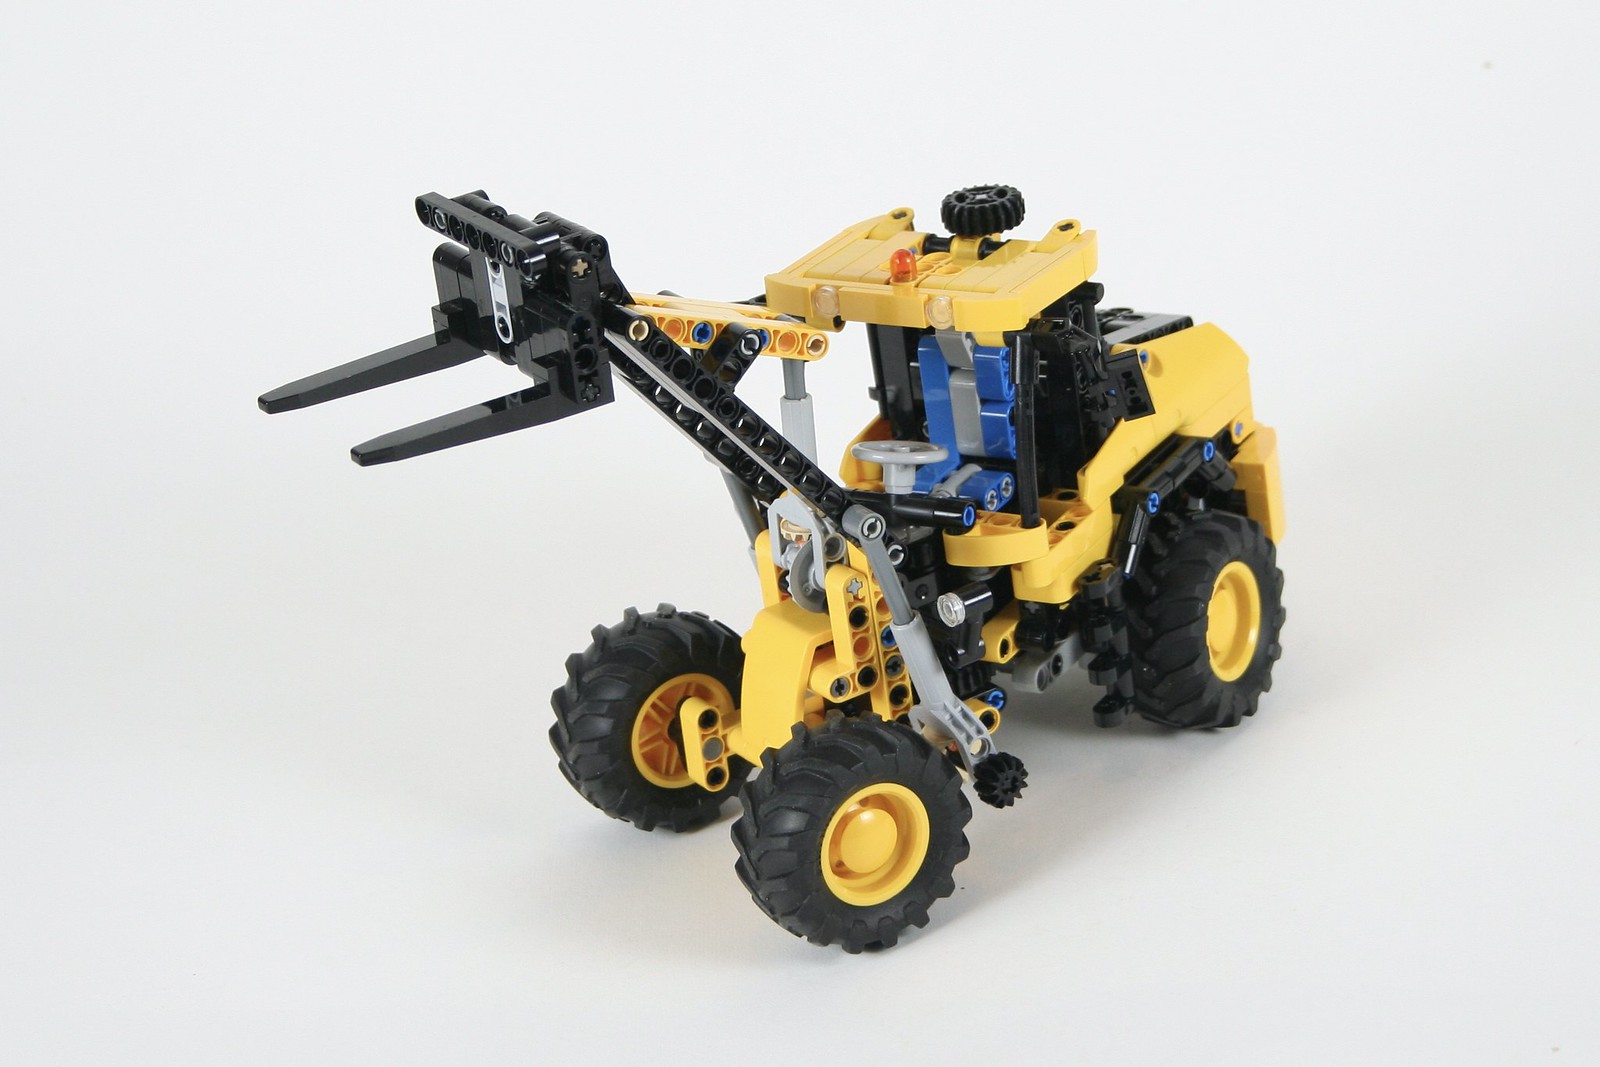
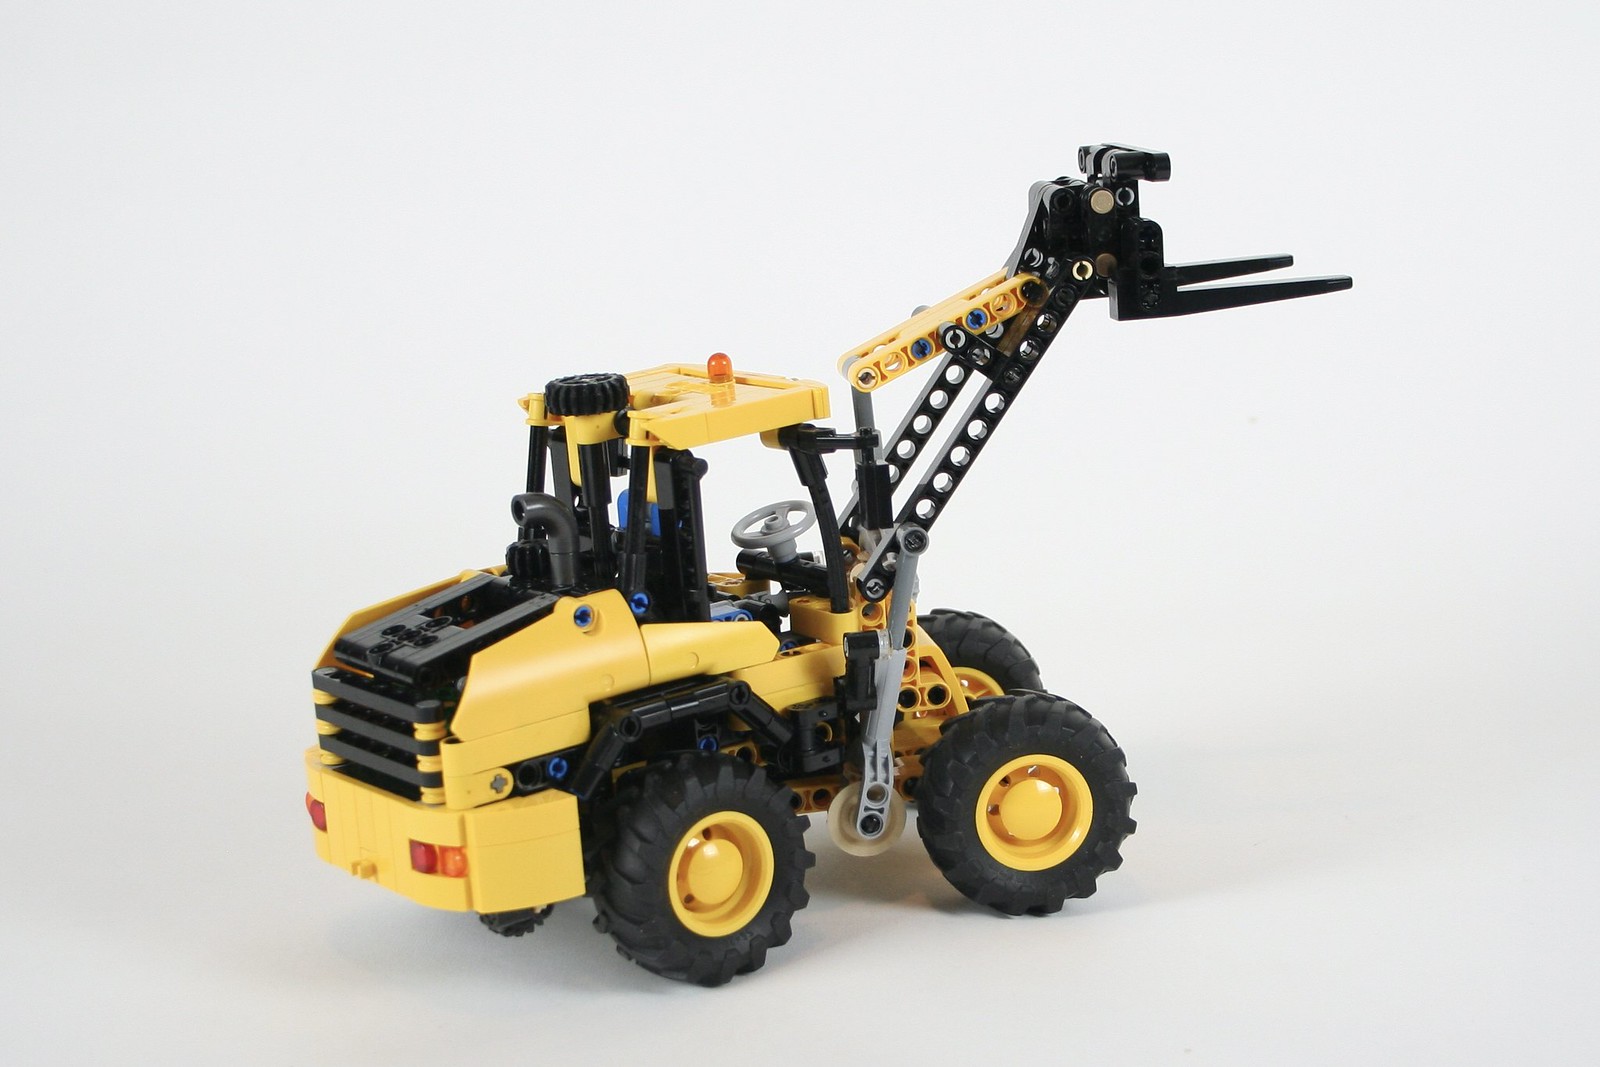
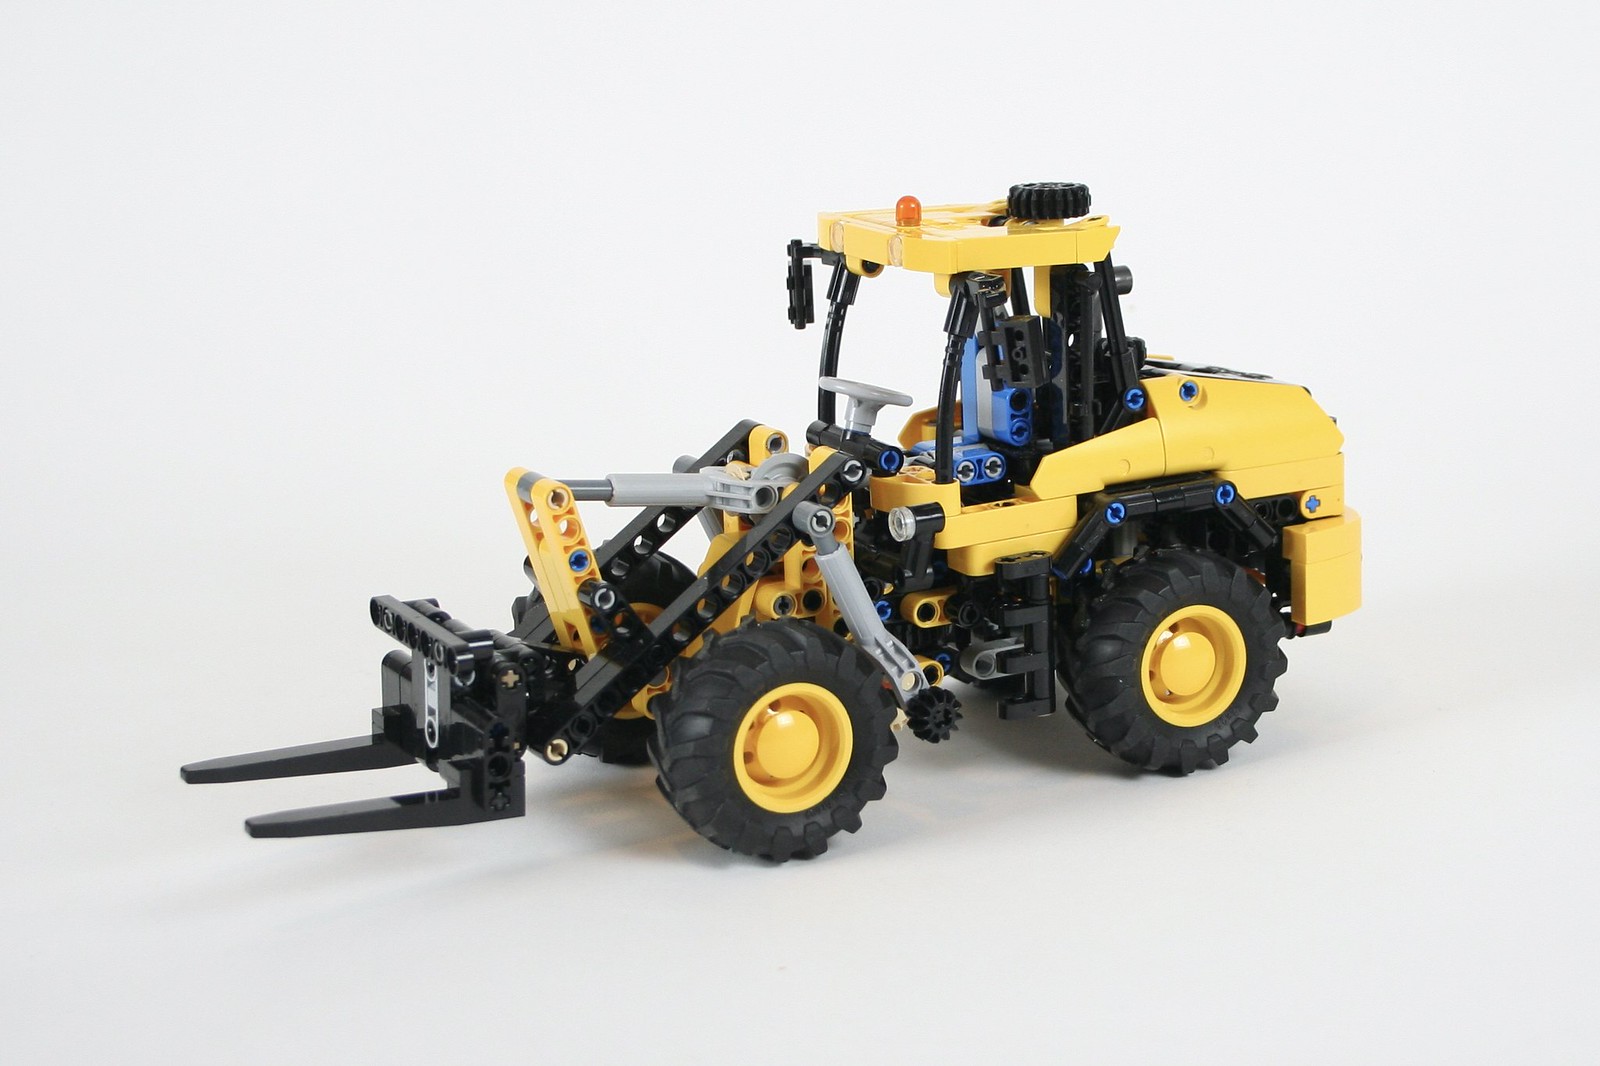
These days, some projects are taking longer than they have in the past. The little Wiggs in my house and a mirad of other reponsibilities are slowing my production. This loader was started a little over a year ago, and it was finally finished last week.
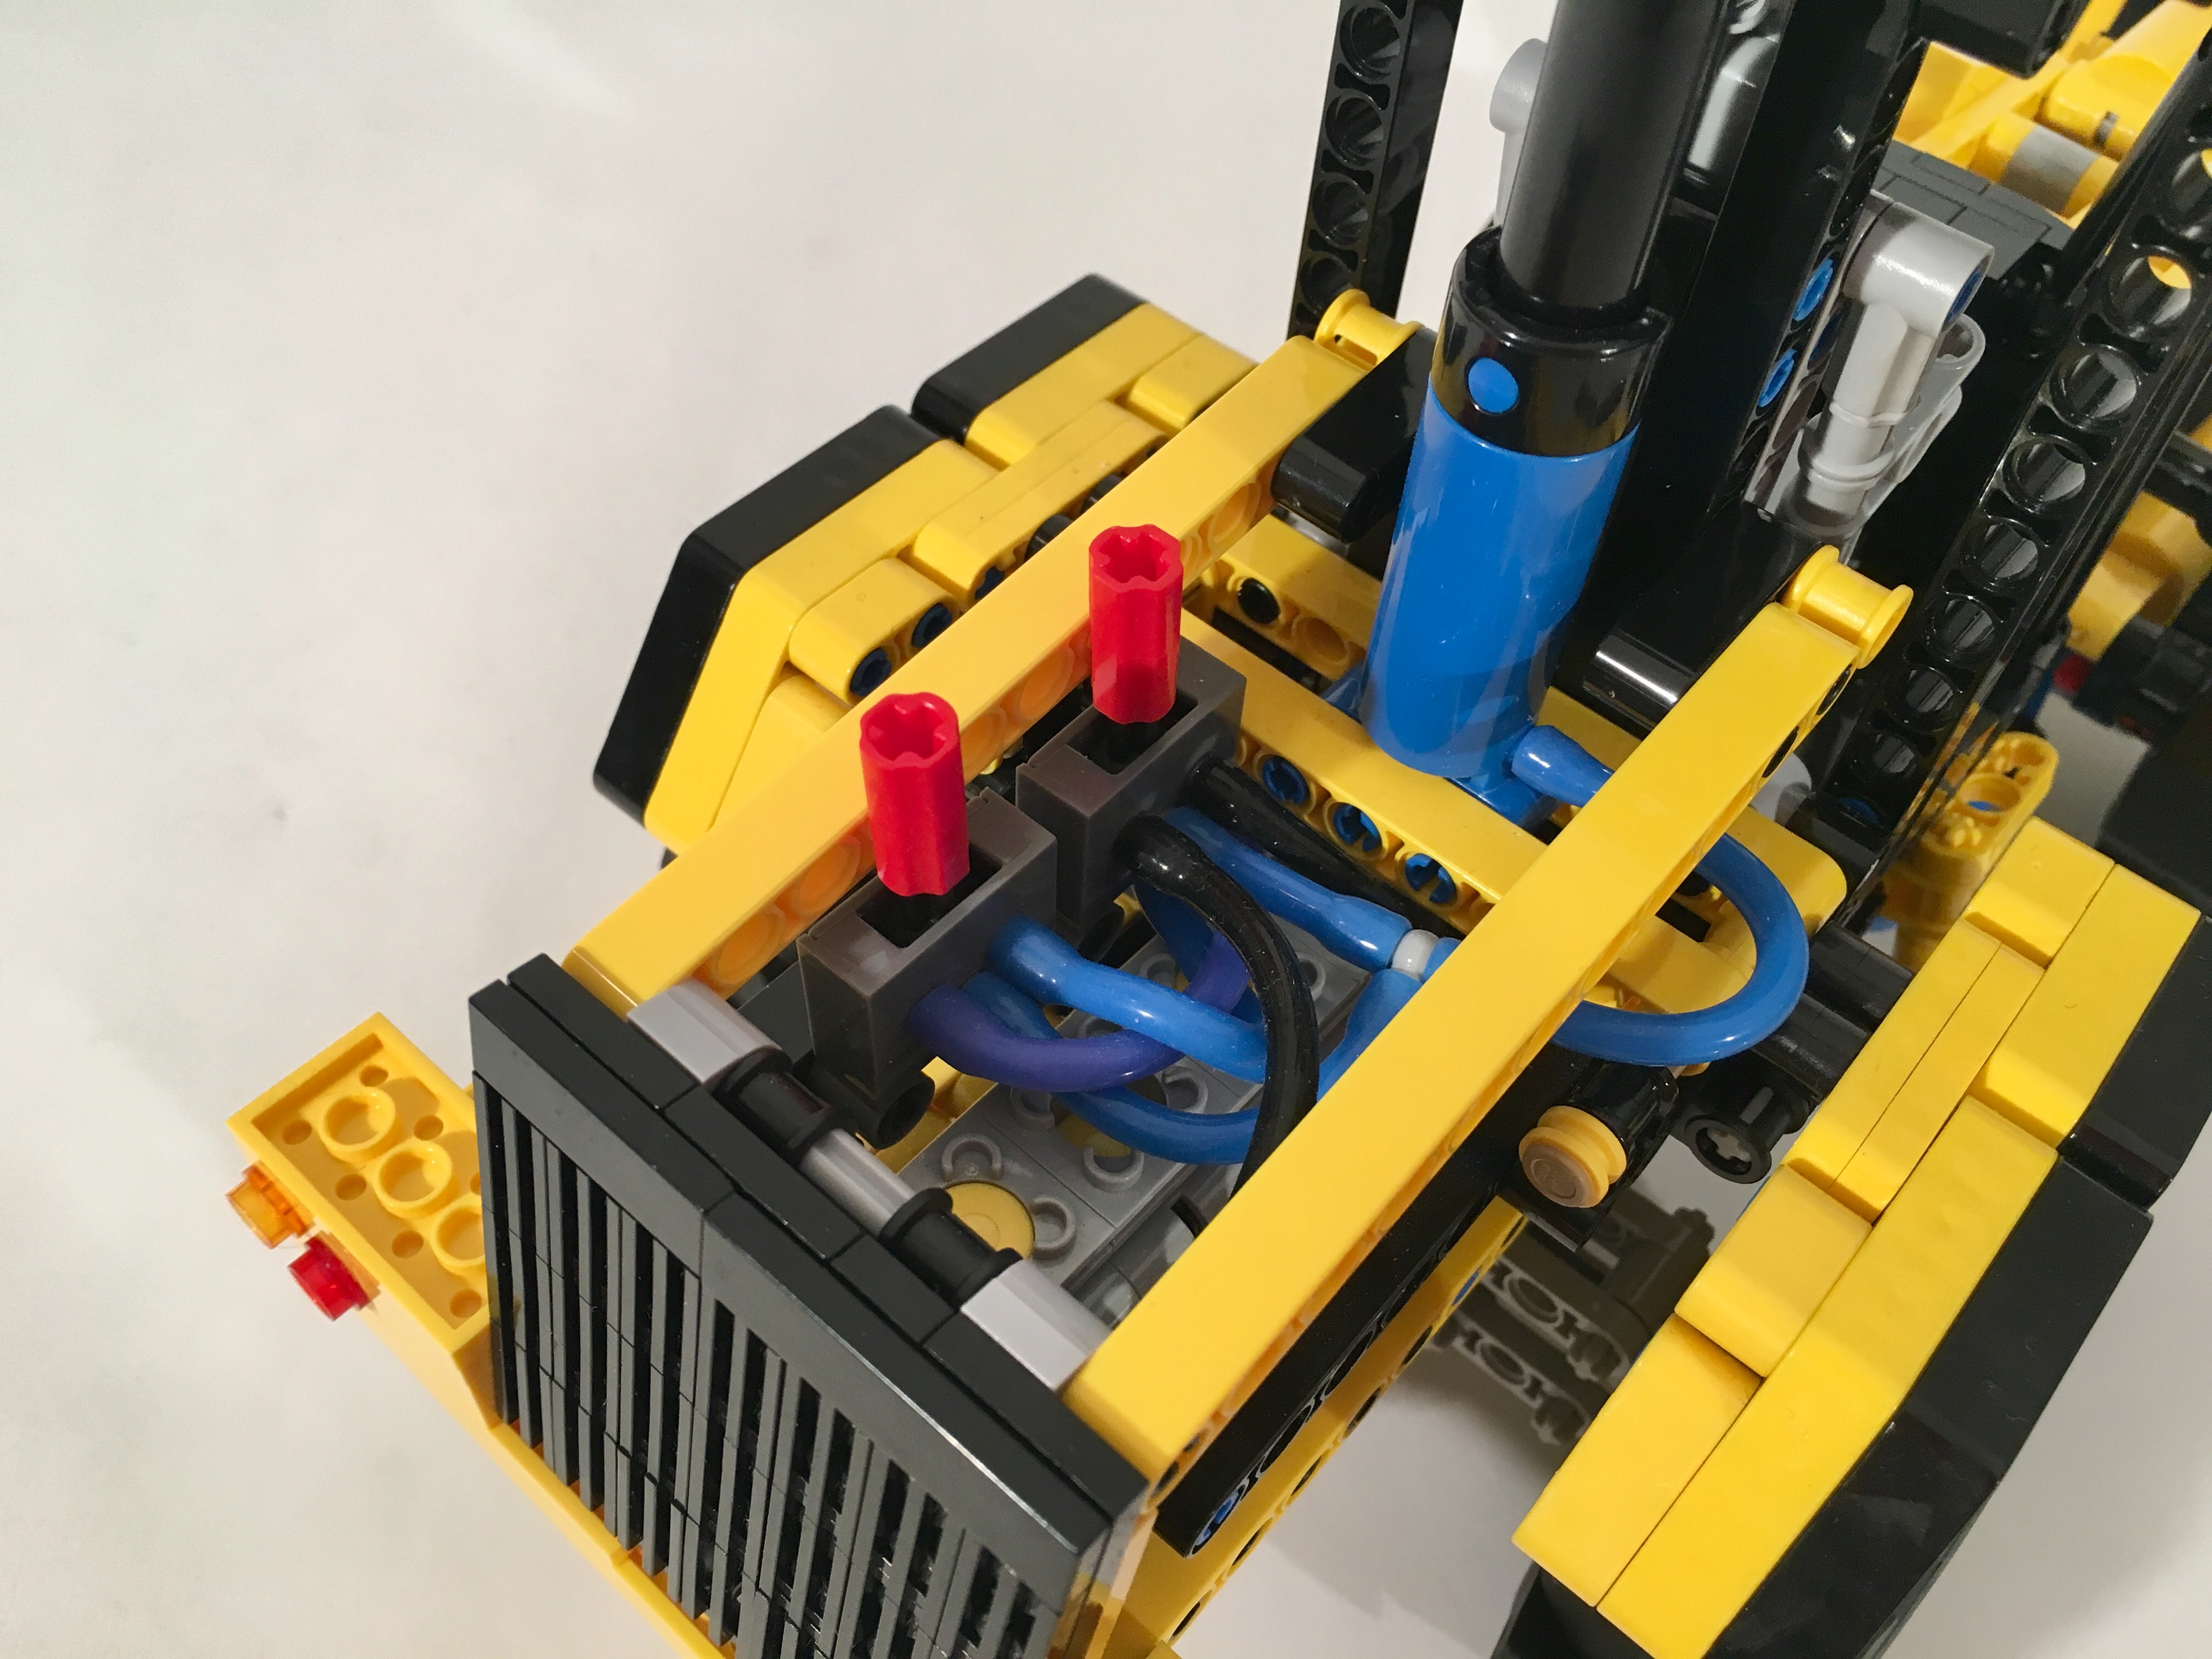
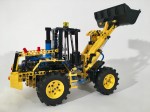
I was sitting on a train in Chicago, and saw a little CAT 914k out the window, and thought, “I should finally make a loader.” I got home and started to work. My collection recently added the Fischertechnik tires and the pneumatic parts from the LEGO 42053 Volvo, so I started calculating the scale. Once the scale was set I worked on the linkage for the bucket. I spent two full nights working on the linkage to take full advantage of the longer pneumatic rams. I used the longer ones on the lift, and a shorter one on the tilt.
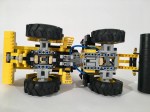
After the bucket mechanism was set, I worked on the chassis. The size allowed for four wheel drive. The rear axle was set in a pendular setup, which allowed for some articulation over varied terrain. The rear differential linked to a small I4 motor that was placed in the rear. The pneumatic valves were placed over the motor. The light on the roof operated the steering.
While the project took a little too much time to complete, it was a fun project that turned out well. The linkage and bucket range worked well. It also held a load well. The stability of the loader could have been a little better when pumping the pneumatic pump, as the suspension took a lot of rigidity out of the rear. The design allowed for normal LEGO 81mm tires as well.
Not only are my builds becoming smaller, I am also enjoying builds that offer a little more modularity. Why build one thing, when the one thing can play a number of different tasks?
When I built the Snowblower a couple of years ago, I made a couple parts of the truck removable. So after the build was complete made a couple of other options: different cabs, other beds, a crane. This kind of building continued with the 9393 updated tractor. I was hooked. So, when it came time to make a tractor, I had this feature central to the build.
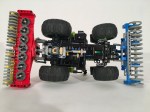
The Atos started a couple of years ago when I completed the 9393 update. I wanted a front PTO in a small tractor. Lime parts were becoming more prevalent (though we are still missing a red medium wheel), so I figured I could make something work. I started with the front axle, as it would need steering, a PTO shaft, and something to lift an implement. The PTO shaft runs directly forward from the rear differential under the steering rack. Another axle runs a stud and a half to the left, which drives a worm gear to elevate the front drawbar.
The engine is mounted on top of the steering unit, and is connected to the rear differential. Off the right side of the engine is a changeover that controls the raear PTO. This drive moves to the rear, and then powers another PTO for the rear. The changeover lever is in the cabin, to the right of the steering wheel. As in the front, a worm driven drawbar is on the rear to mount an implement. A simple hitch is there for a trailer.
I build a front Lemken furrow, a rear Poettinger power harrow, and a front and rear Claas disco mower. I look forward to making other implements as well. Each attach to the front and rear by removing a 5l and 8l axle with stop. It’s simple, and allows for endless modification.
I am happy with the way the tractor turned out. It was strong enough to handle the play of my young kids, and all the functions worked well. I would have like to have an on/off switch for the front PTO. Other than that it turned out well.